


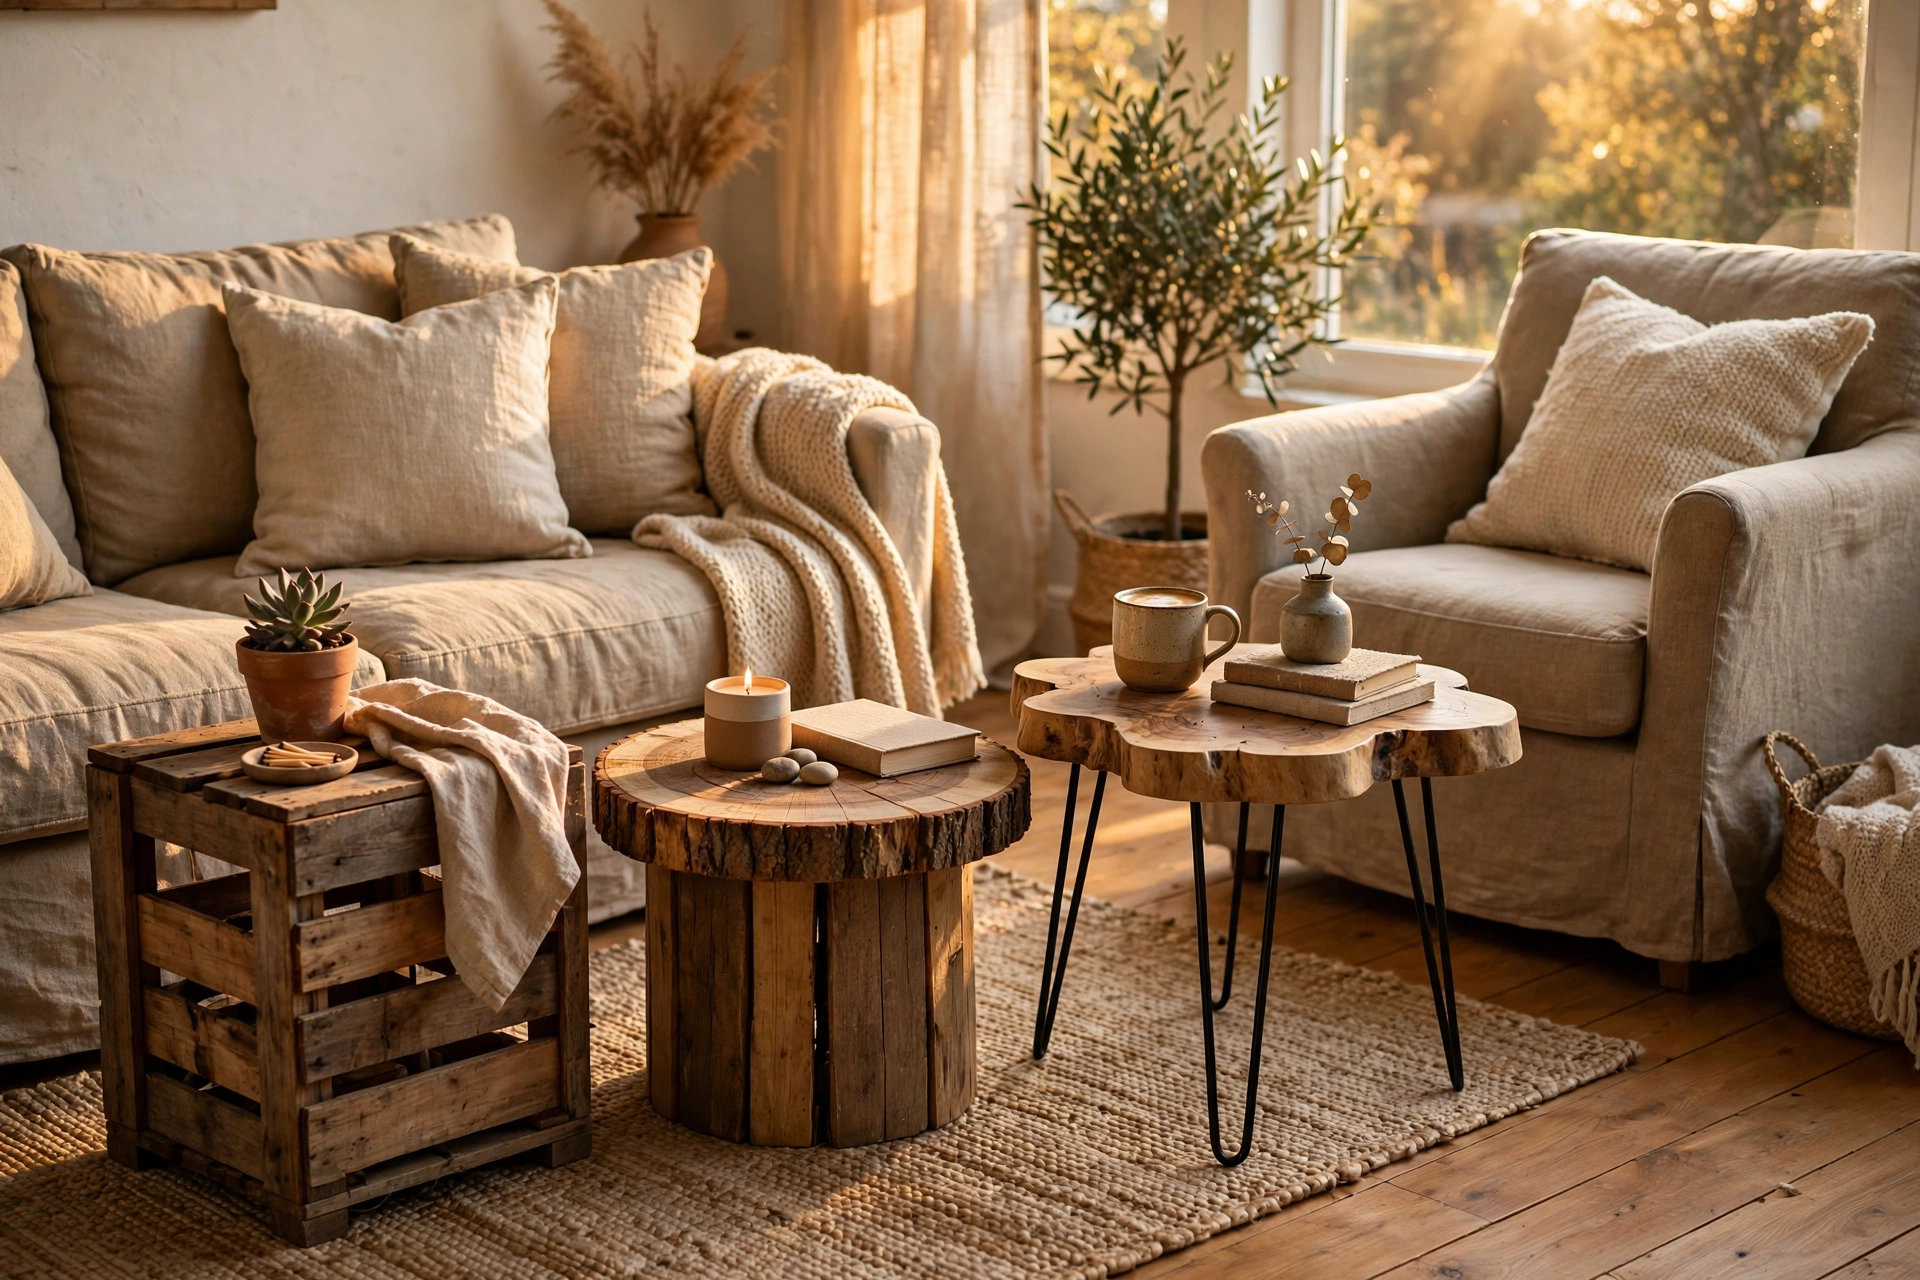
Every sofa needs a sidekick. That little surface next to your favorite chair — the one that holds your coffee, your book, your phone, and the remote that always goes missing — does more quiet work than almost any other piece of furniture in the room. And yet most of us buy the cheapest particleboard square at the store and call it a day.
I built my first wooden side table because I could not find one I liked. It was two wooden crates screwed together, and honestly? It looked better than anything at the furniture store. That one weekend project taught me the truth about side tables: they are the perfect beginner woodworking project. Small enough to finish in a day, cheap enough to experiment on, and forgiving enough that a slightly crooked leg just adds character.
Below are 25 creative DIY wooden side table ideas I have researched, priced, and in a few cases built myself. They range from zero-saw projects (hello, tree stump) to satisfying weekend builds (hairpin-leg slabs, farmhouse X-frames), in every style from rustic to mid-century to coastal. Each idea includes a practical tip so you can build with confidence.
- Aim for 22–26 inches tall — roughly level with your sofa or chair arm.
- Construction lumber (pine 2x4s and 1x6s) is the cheapest real wood to build with.
- Sand to 150–180 grit and seal with poly or wax, or your table will stain the first week.
- No saw? Tree stumps, cable spools, and stacked crates need almost no cutting.
- Level the legs and add felt pads — wobble is the difference between “handmade” and “broken.”
1. Stacked Wooden Crate Side Table
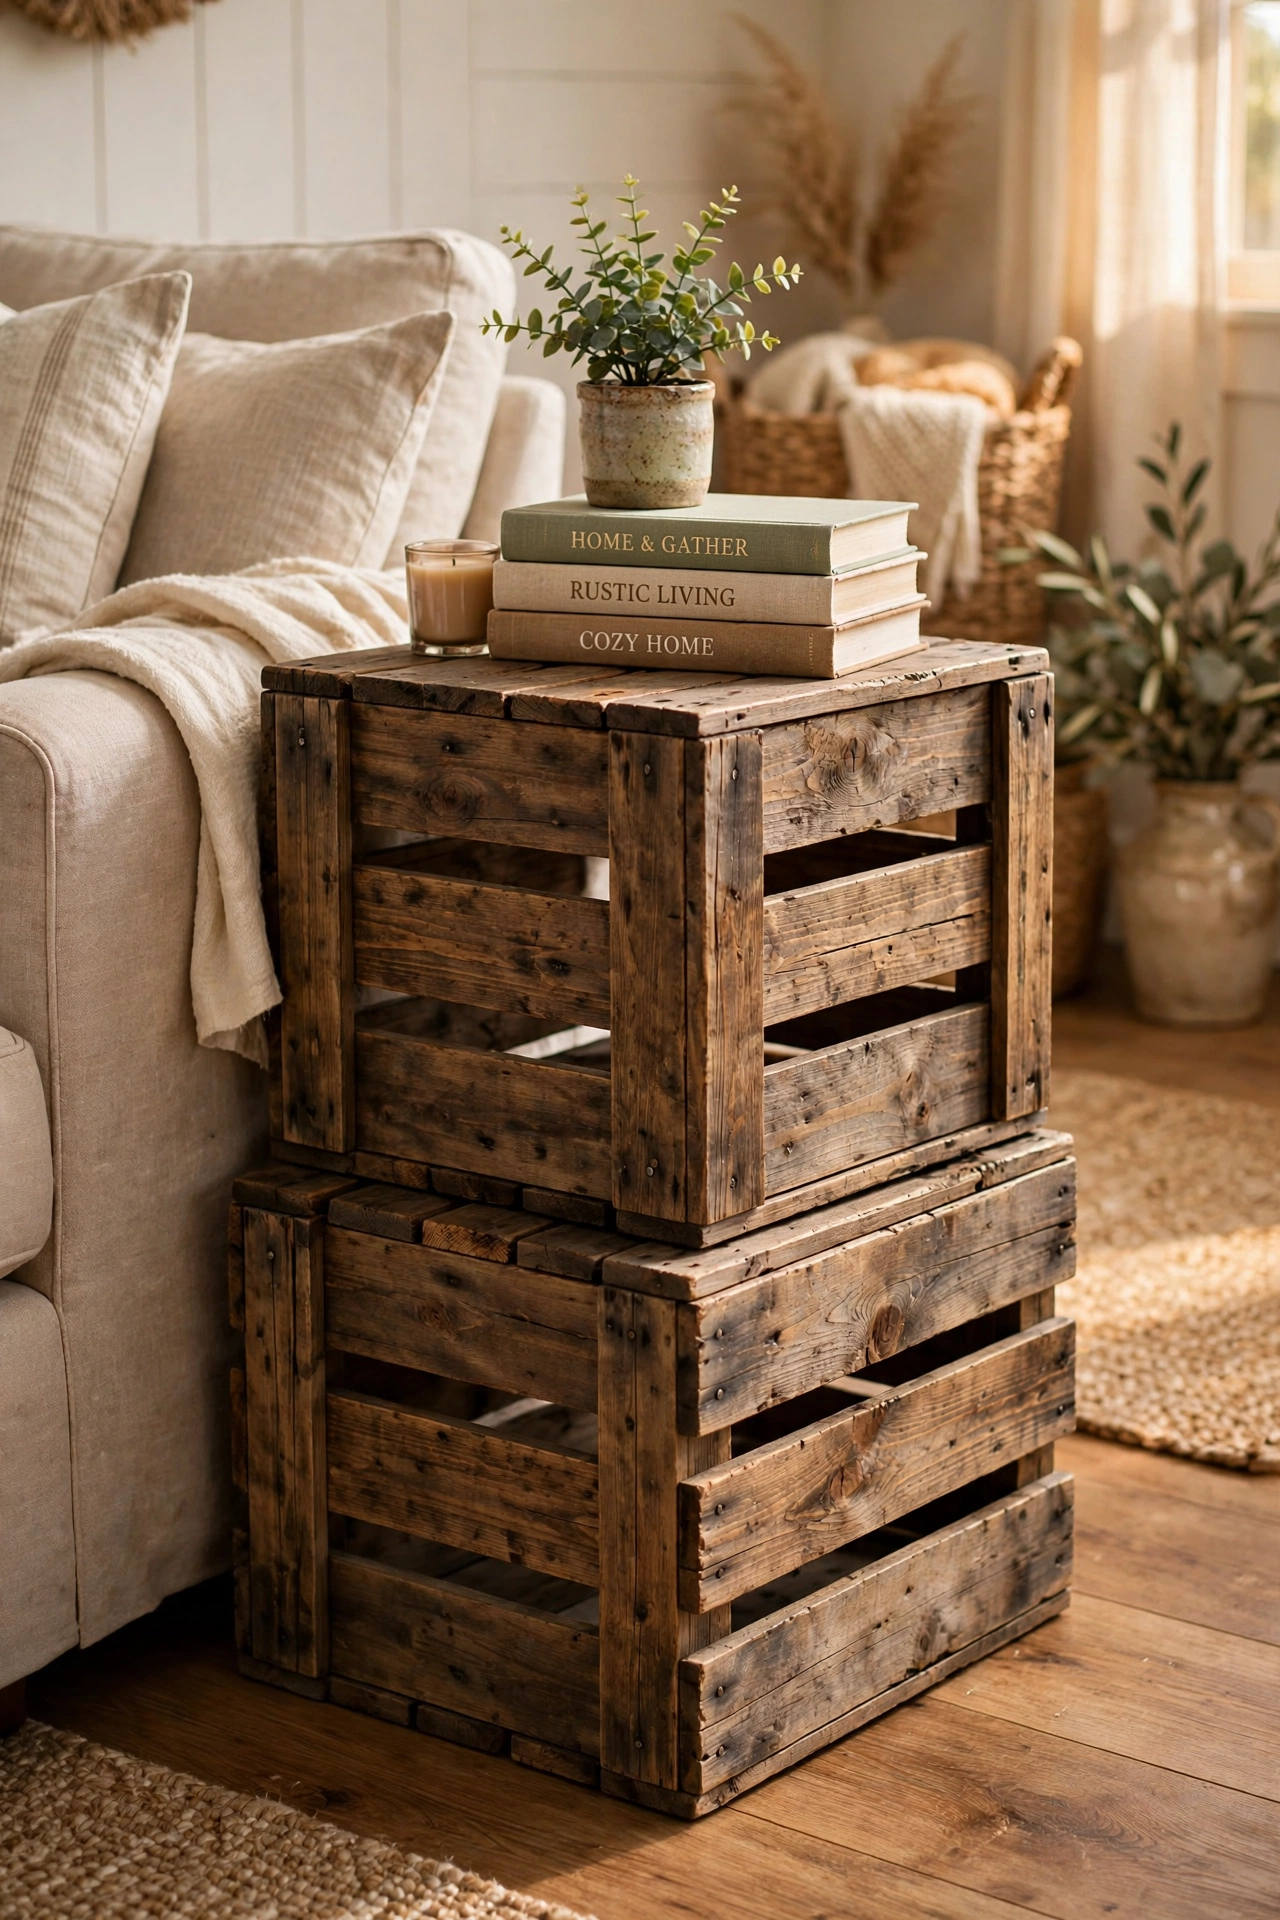
The fastest side table you will ever build: stack two wooden crates on their sides, screw them together from the inside, and stain. You get a table with built-in cubbies for books and remotes, and the whole thing costs less than a pizza. Look for solid wood crates (not the flimsy craft-store kind) at flea markets, garden centers, or farm supply stores.
Try this: sand the crates thoroughly and line the inner shelves with felt or contact paper — raw crate interiors are splinter factories for paperback spines.
2. Rustic Tree Stump Side Table
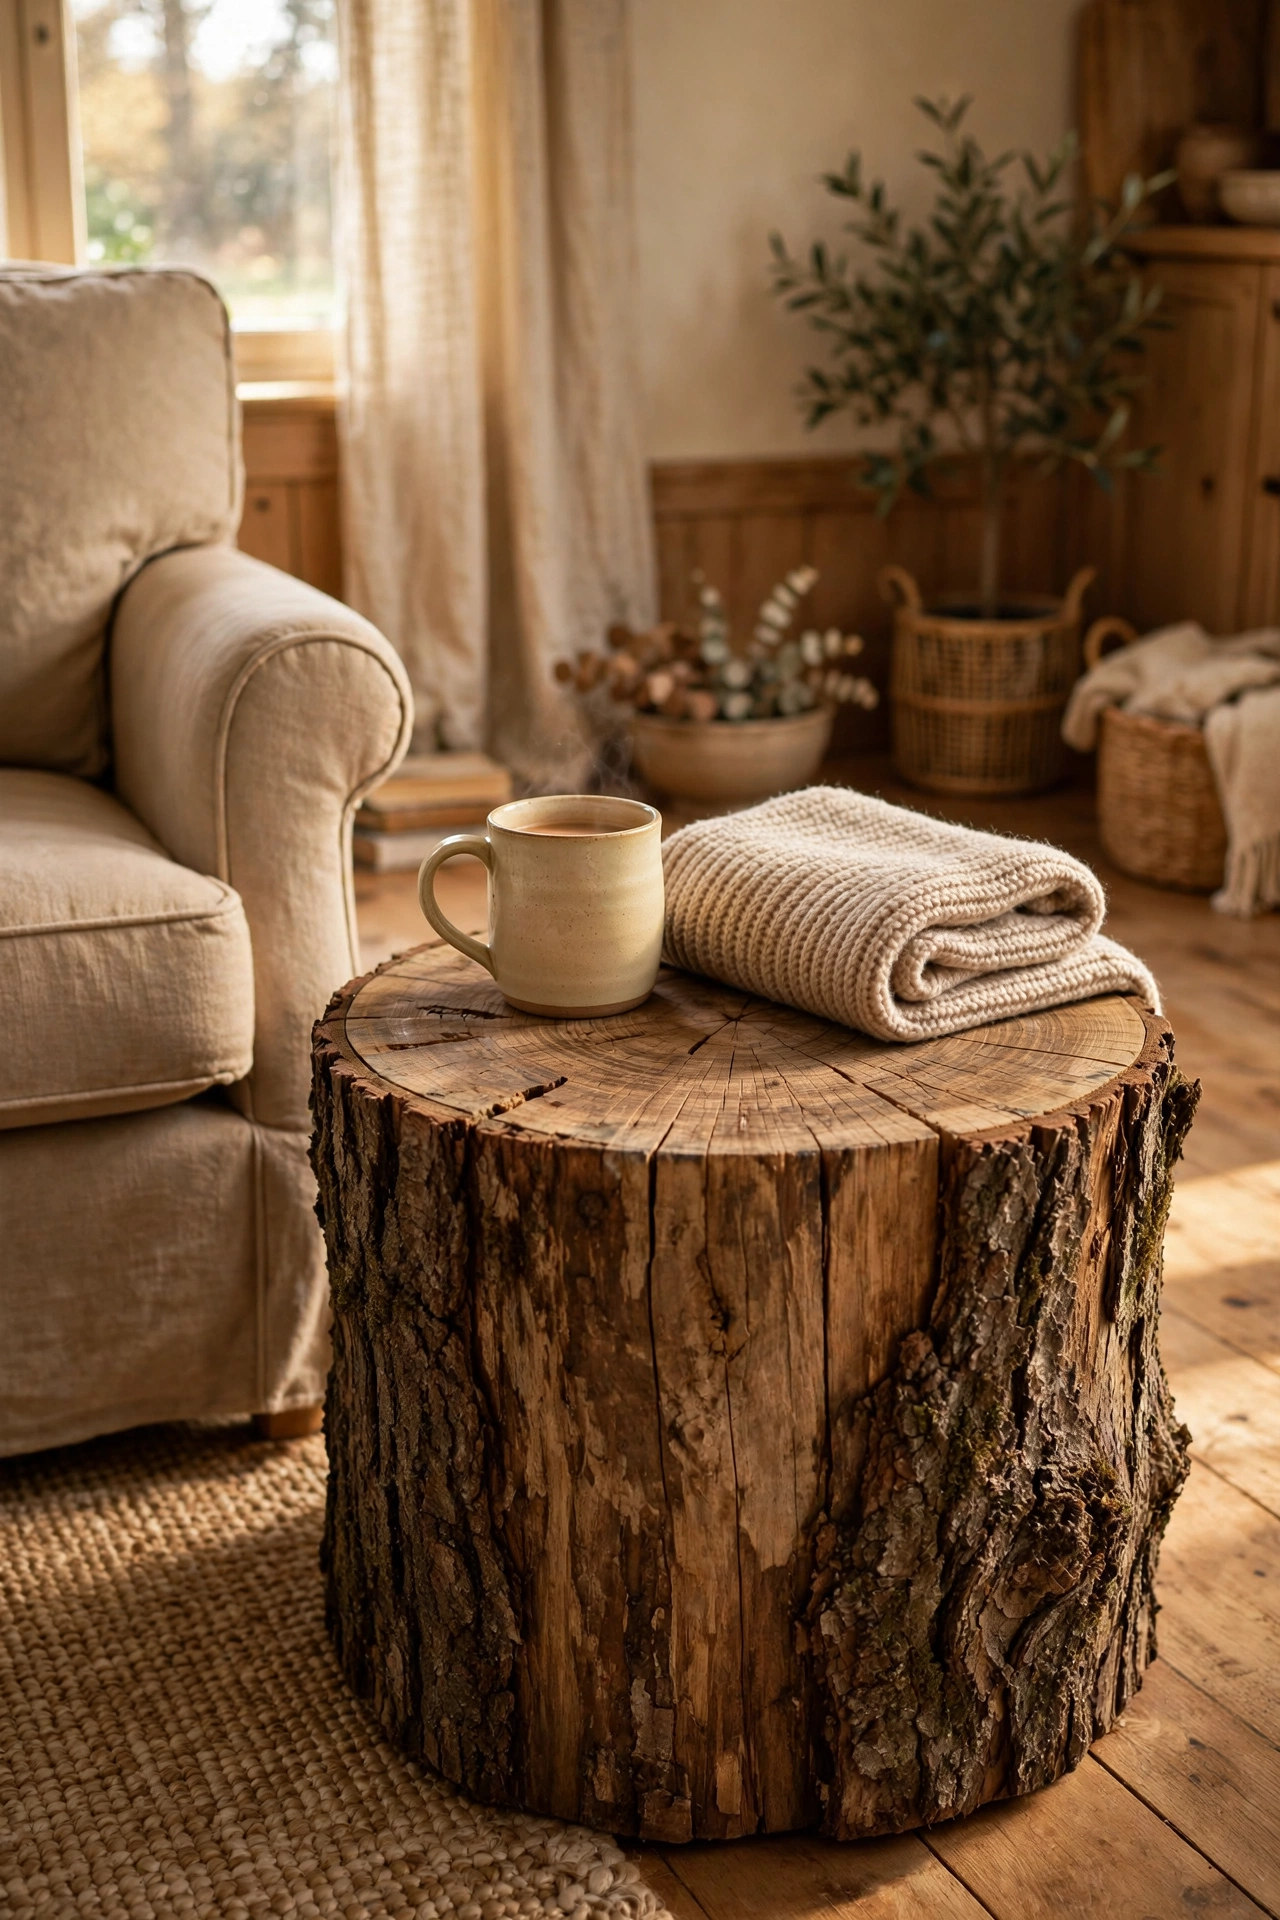
Zero woodworking required. A cross-cut tree stump — bark on, growth rings showing — is nature’s ready-made side table. Let it dry for several months so it does not crack or weep sap, seal the top with a couple of coats of poly, and set it beside your chair. Every one is completely unique, and guests will absolutely ask about it.
A stump this charming can easily do nightstand duty too, and these black romantic bedroom ideas show how a raw wood piece balances beautifully against dark, moody bedding.
Try this: check the bottom is flat before you commit — rock the stump on the driveway and mark the high spots, then sand or chisel them down until it sits dead level.
3. Hairpin Leg Slab Table
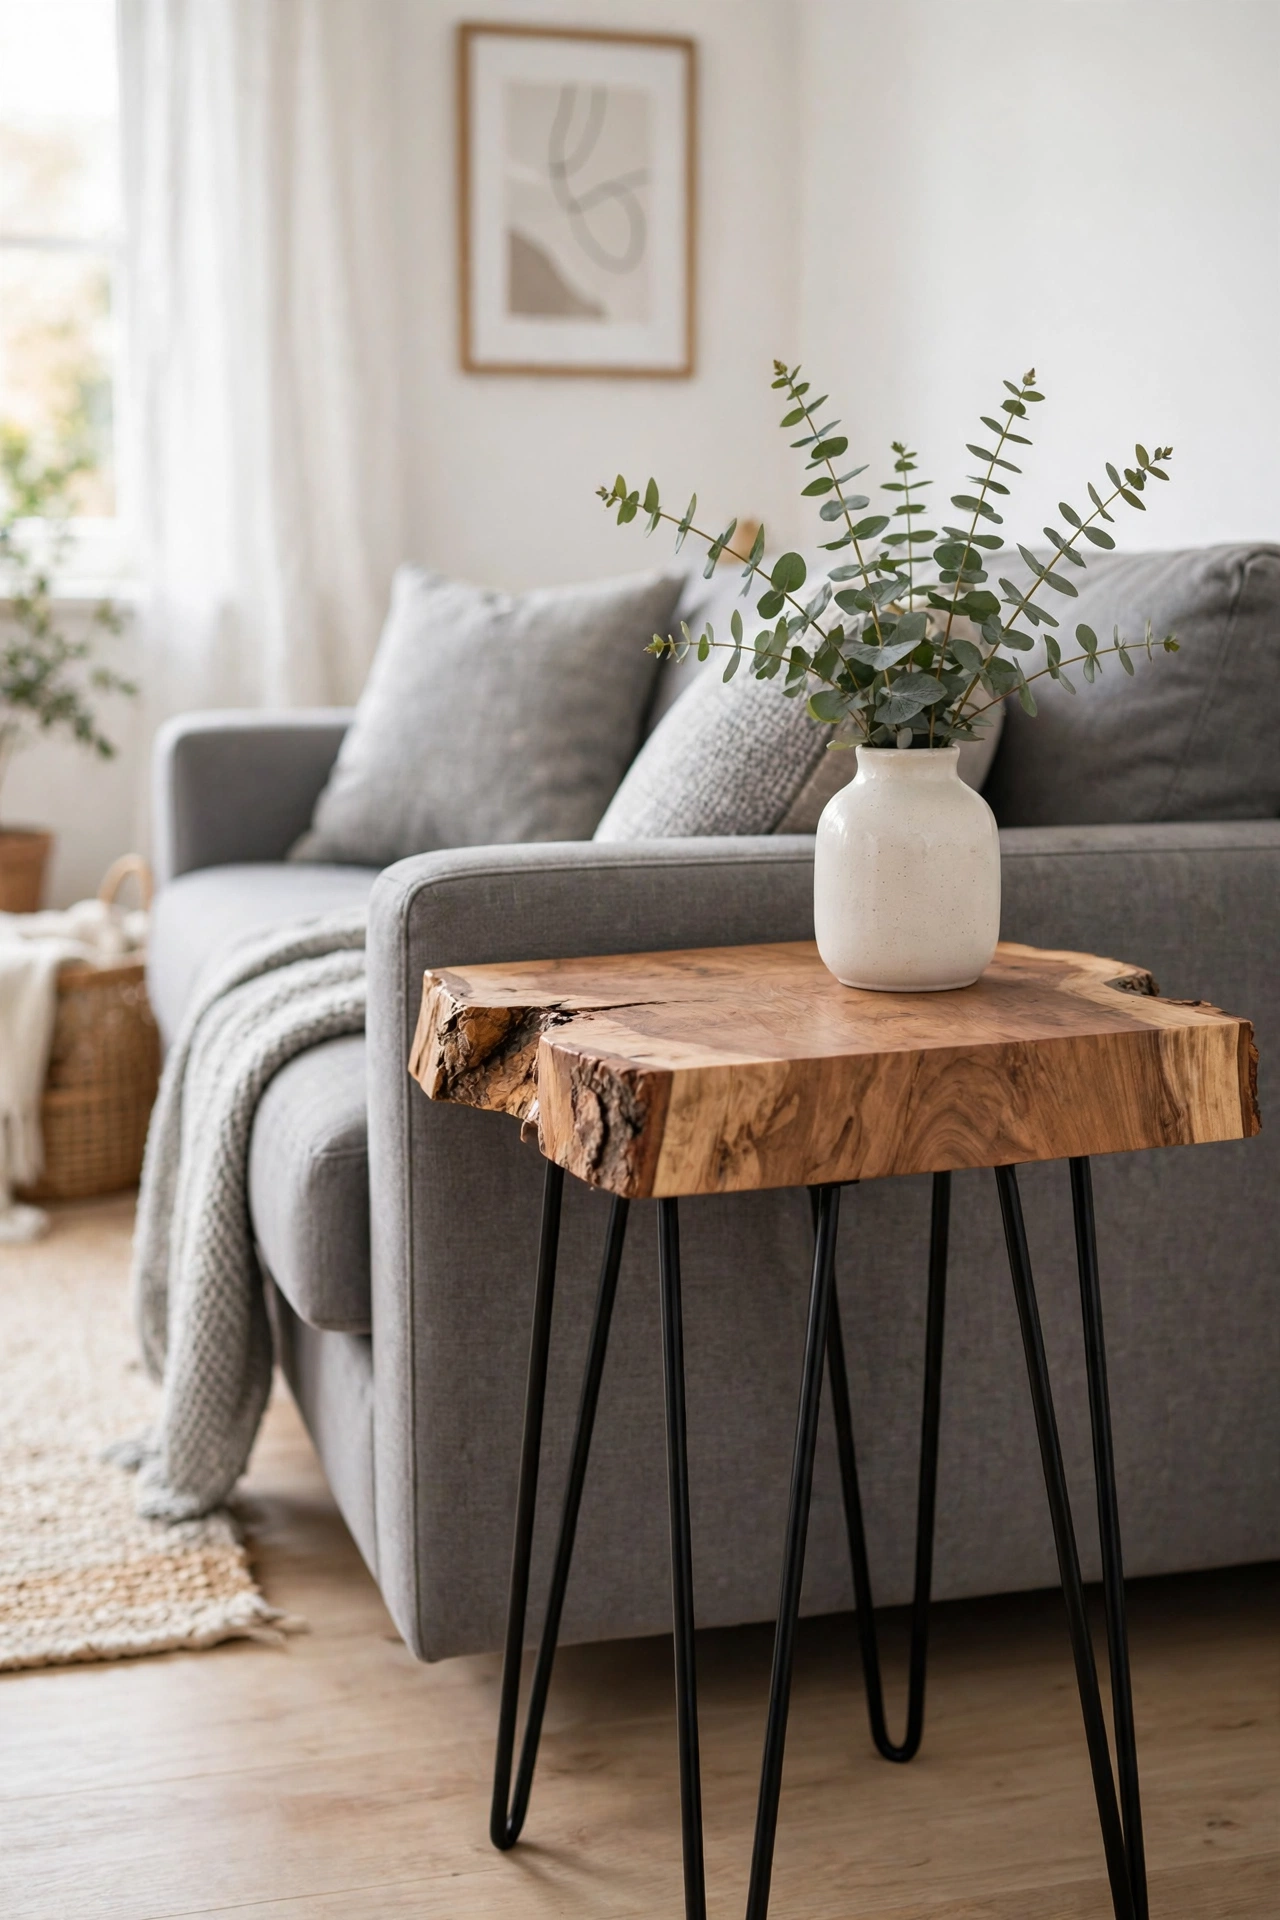
One slab of wood plus four screw-on hairpin legs equals a designer-looking table in under an hour. Hairpin legs cost about $10–$15 per set and attach with simple screws — no joinery, no apron, no math. Buy a live-edge slab for character or a plain pine round from the home center for a clean look; either way, the legs do the styling work for you.
Try this: always drill pilot holes before driving the leg screws. A split slab at the mounting plate is the one way to ruin this otherwise foolproof project.
4. Pallet Wood Cube Table
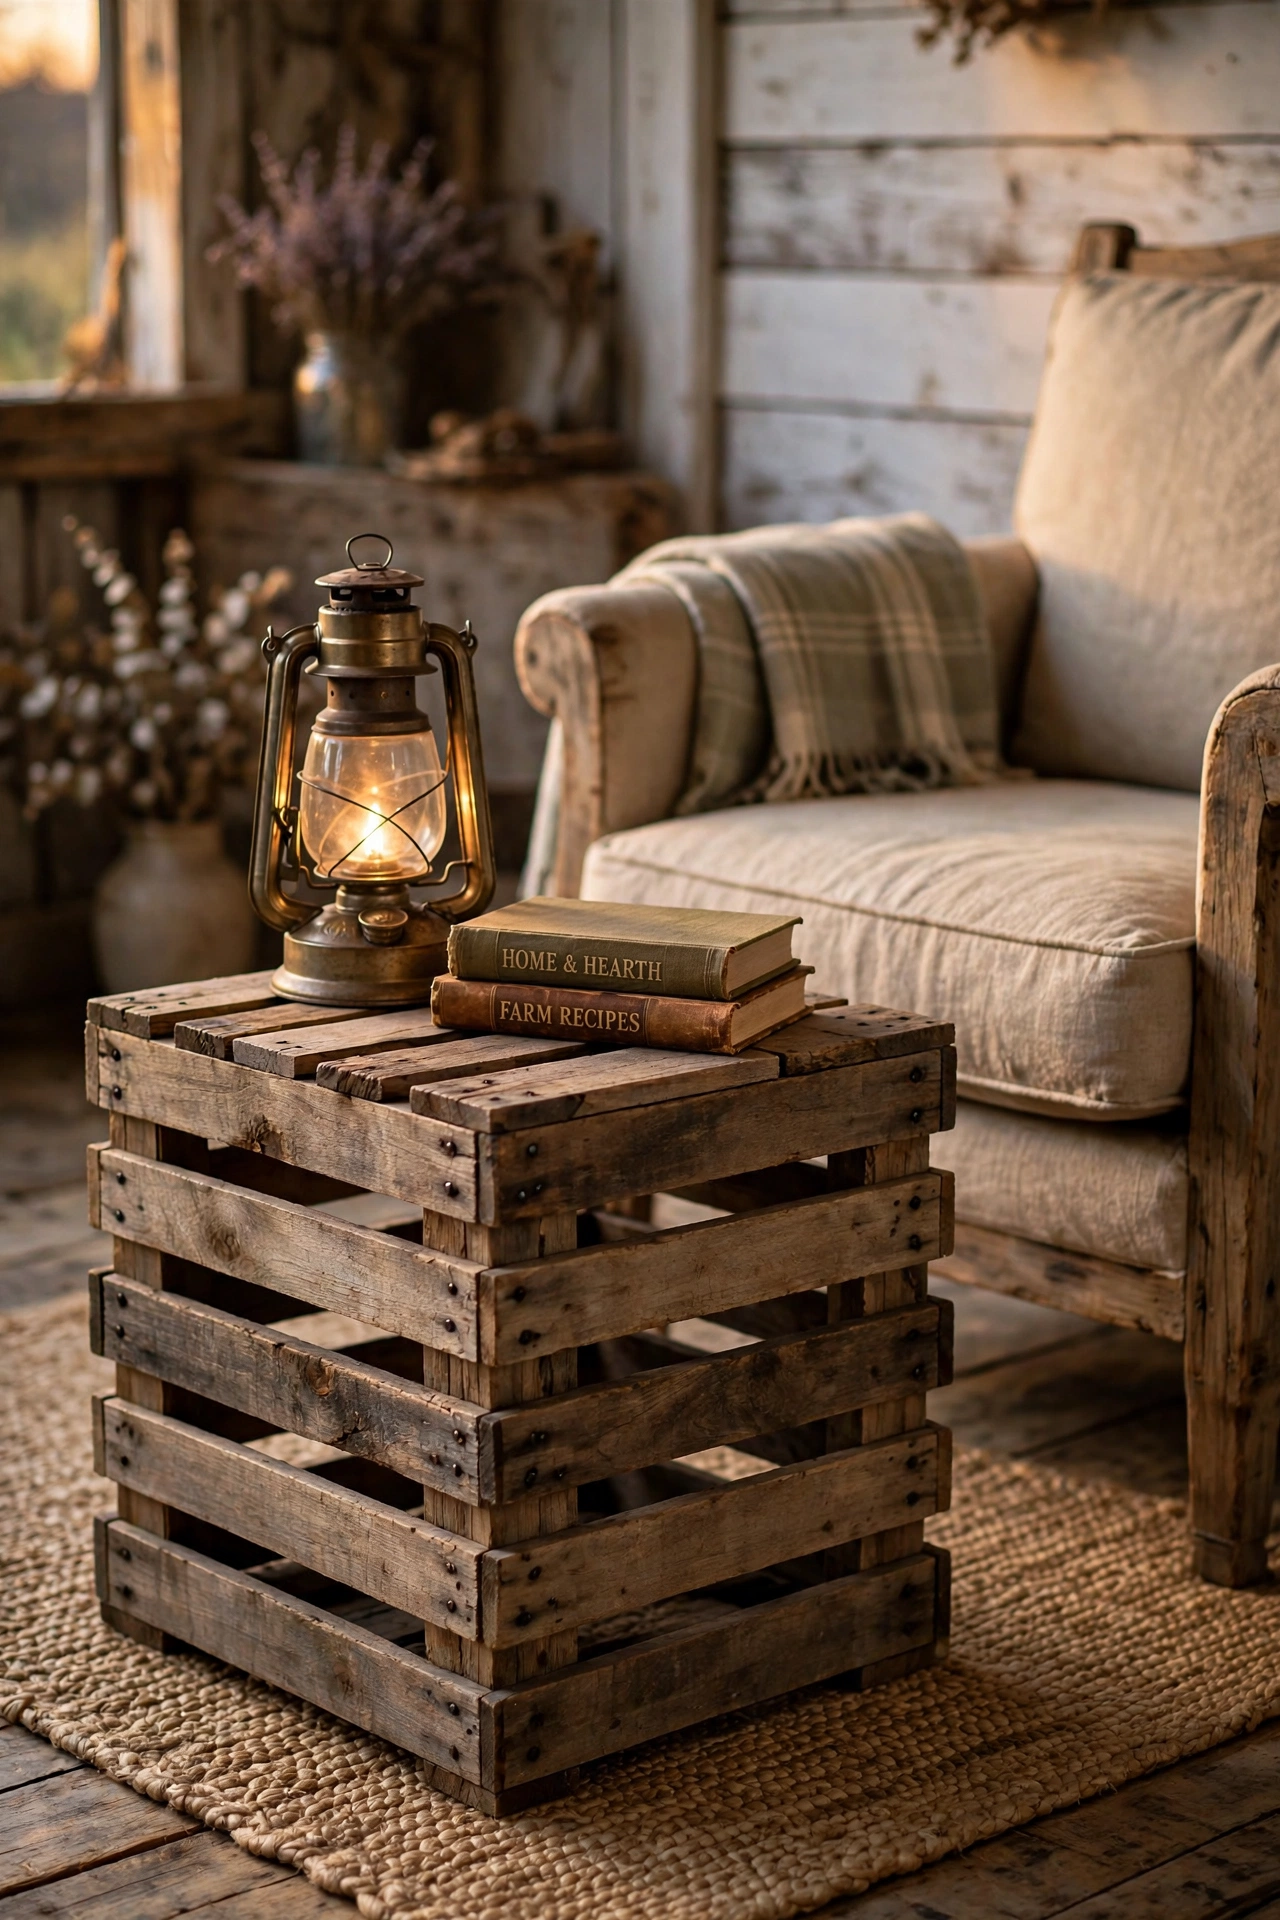
Pallets are free wood with a rustic attitude, and a simple cube is the perfect first pallet project. Break down a heat-treated pallet (look for the HT stamp — never use chemically treated MB pallets indoors), cut the slats to equal lengths, and box them into a cube with screws. The nail holes and weathering become the decoration.
Try this: run a metal detector or strong magnet over every board before cutting. Pallet nails hide, and one will destroy a saw blade or a planer in a heartbeat.
5. Live-Edge Slab Table
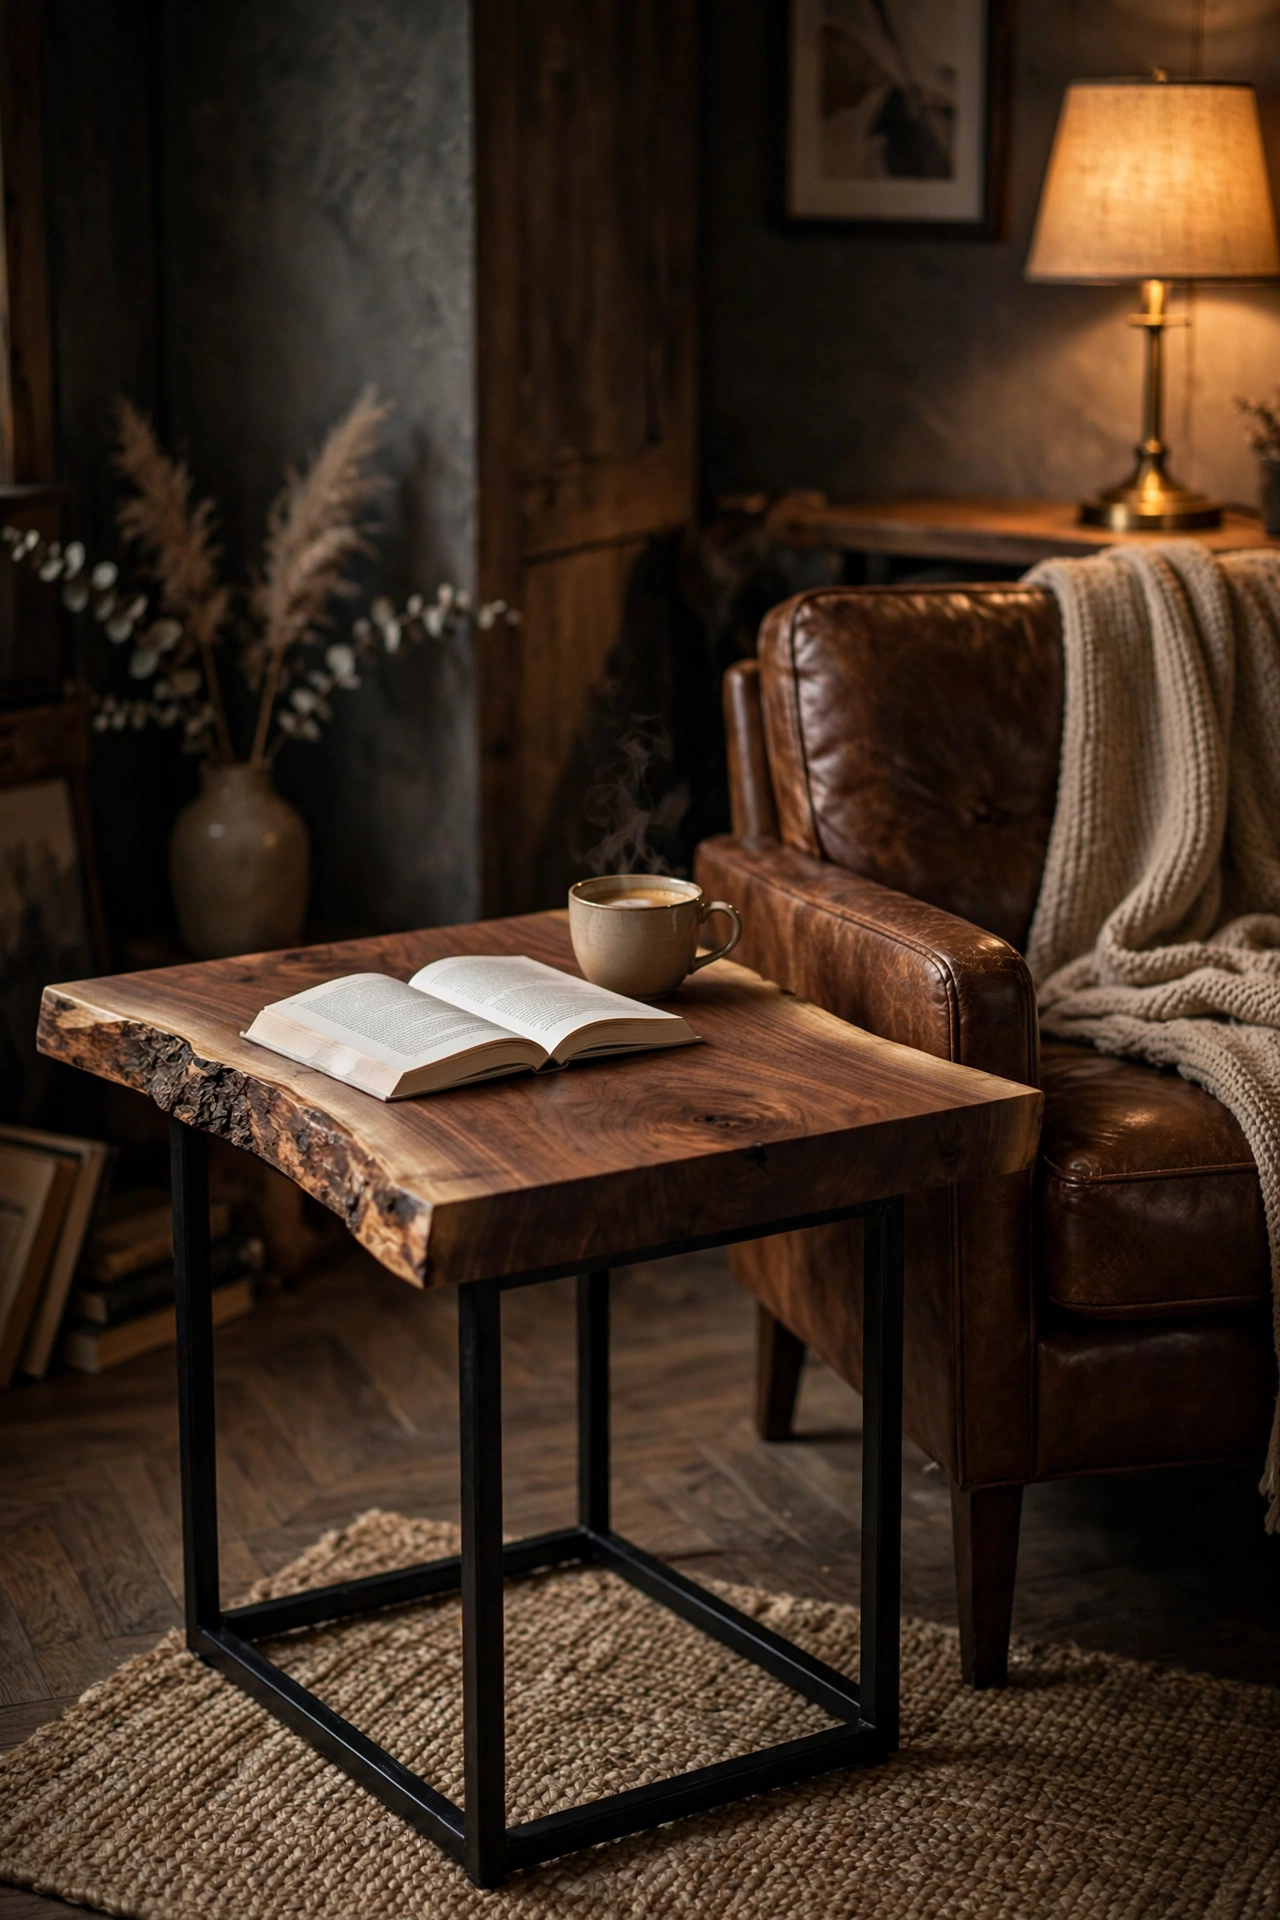
A live-edge slab — one natural, wavy edge left untouched — turns a side table into a sculpture. Small “cookie” slabs and offcuts are cheap at local sawmills; sand the top smooth through the grits, flood the bark edge with poly so it does not shed, and mount it on simple steel or wood legs. Walnut and maple are the classics, but oak and cherry work beautifully too.
If you want to try the more advanced waterfall version of this look, Family Handyman’s waterfall side table build walks through the 45-degree miter cuts, slab prep, and a no-weld metal frame step by step.
Try this: fill cracks and voids with tinted epoxy before your final sanding. It stabilizes the slab and looks like a deliberate design feature.
6. Farmhouse X-Frame Side Table
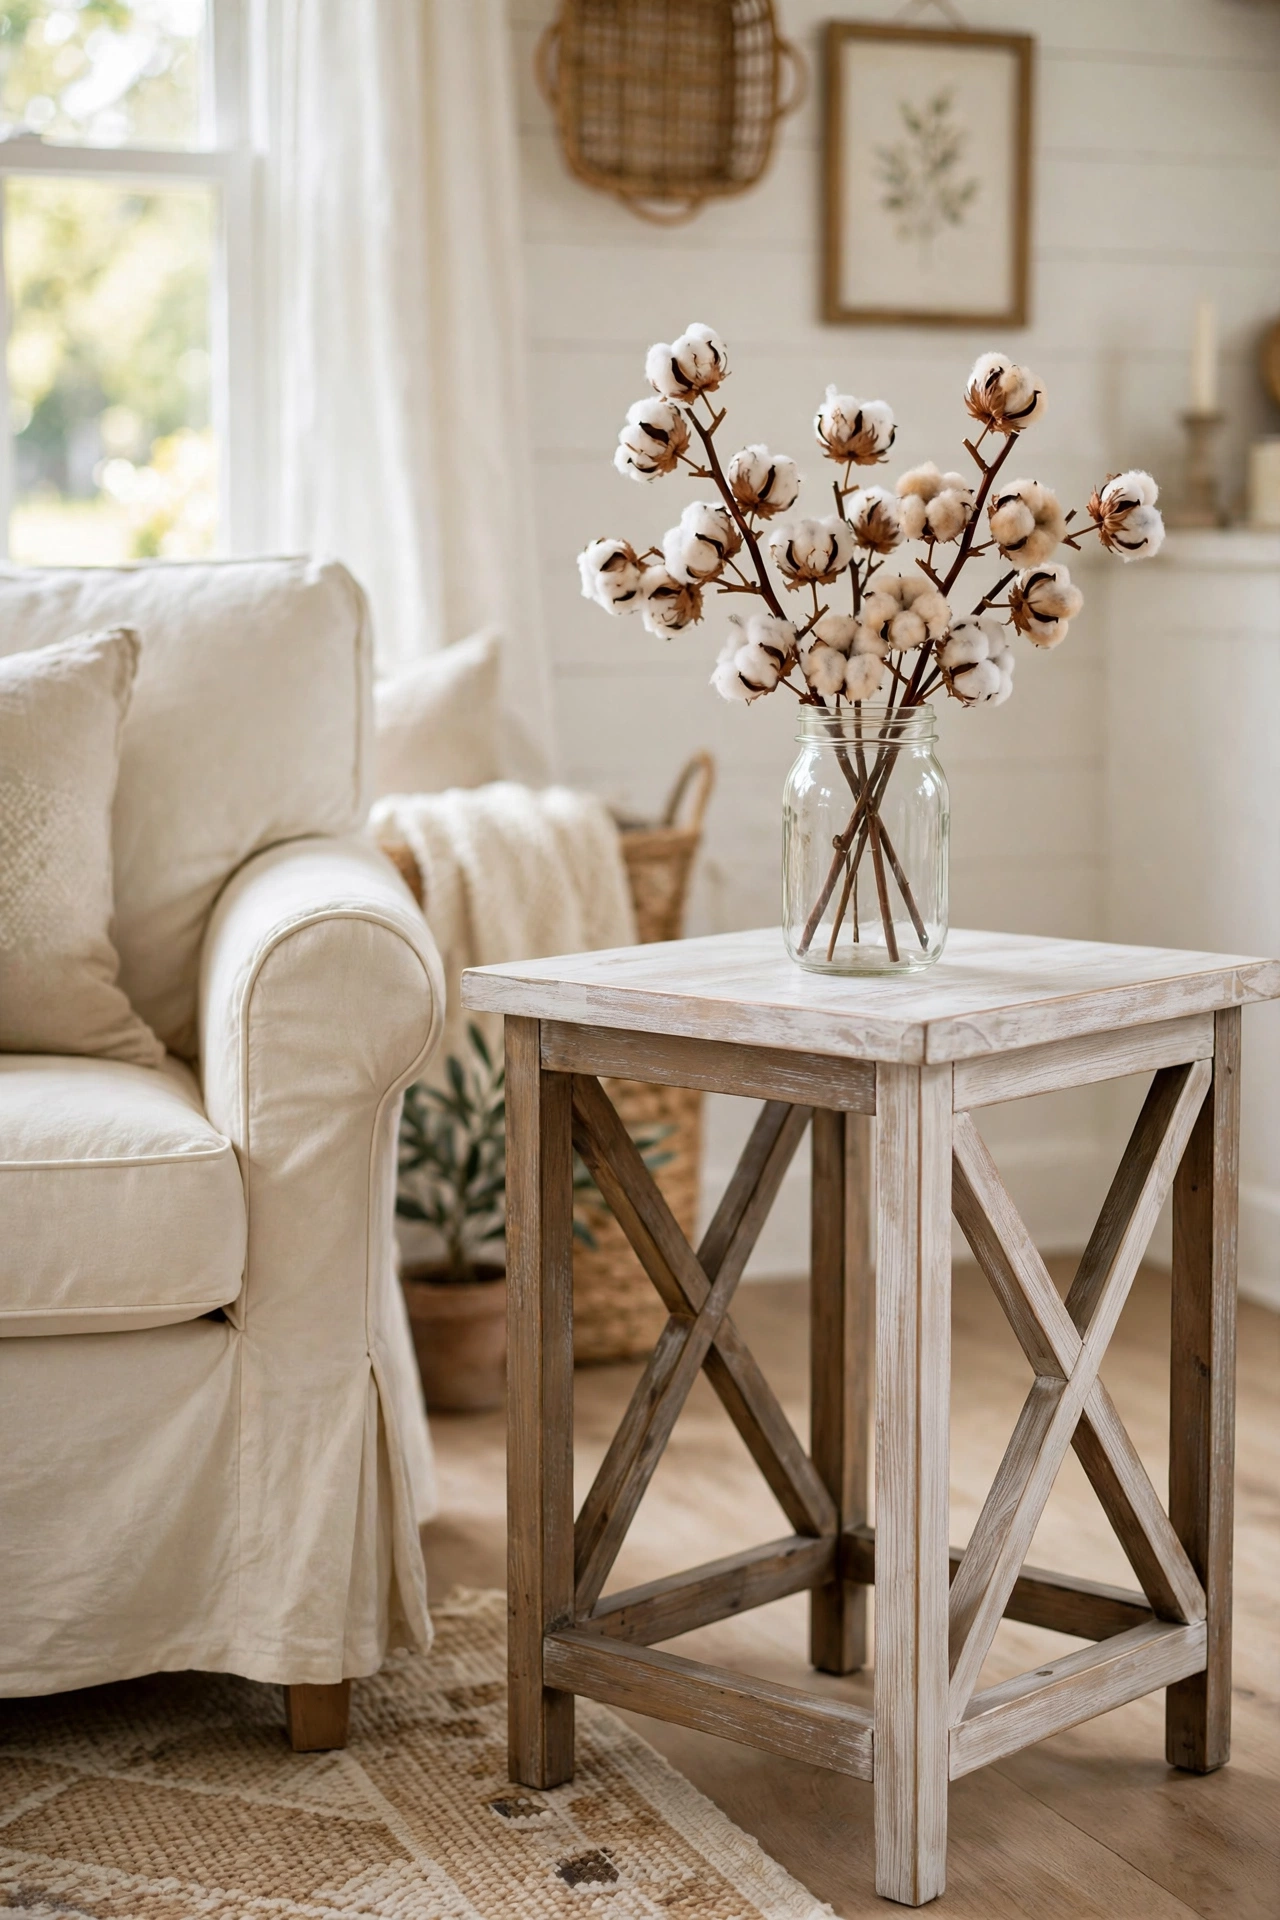
The X-frame is the signature farmhouse detail, and it is easier than it looks. Two boards crossed in an X on each side, a planked top, four legs — the whole thing goes together with pocket holes or simple screws and costs under $30 in pine. Whitewash it for a modern farmhouse feel or stain it dark for a more traditional look.
Want exact cut lists before you touch a saw? Ana White’s free farmhouse side table plans include a full shopping list, cut list, and step-by-step photos for this exact style of beginner build.
Try this: cut your X pieces slightly long, dry-fit, and sneak up on the final length. X-braces forgive nothing, and a sixteenth of an inch is the difference between snug and gappy.
7. Mid-Century Tapered Leg Table
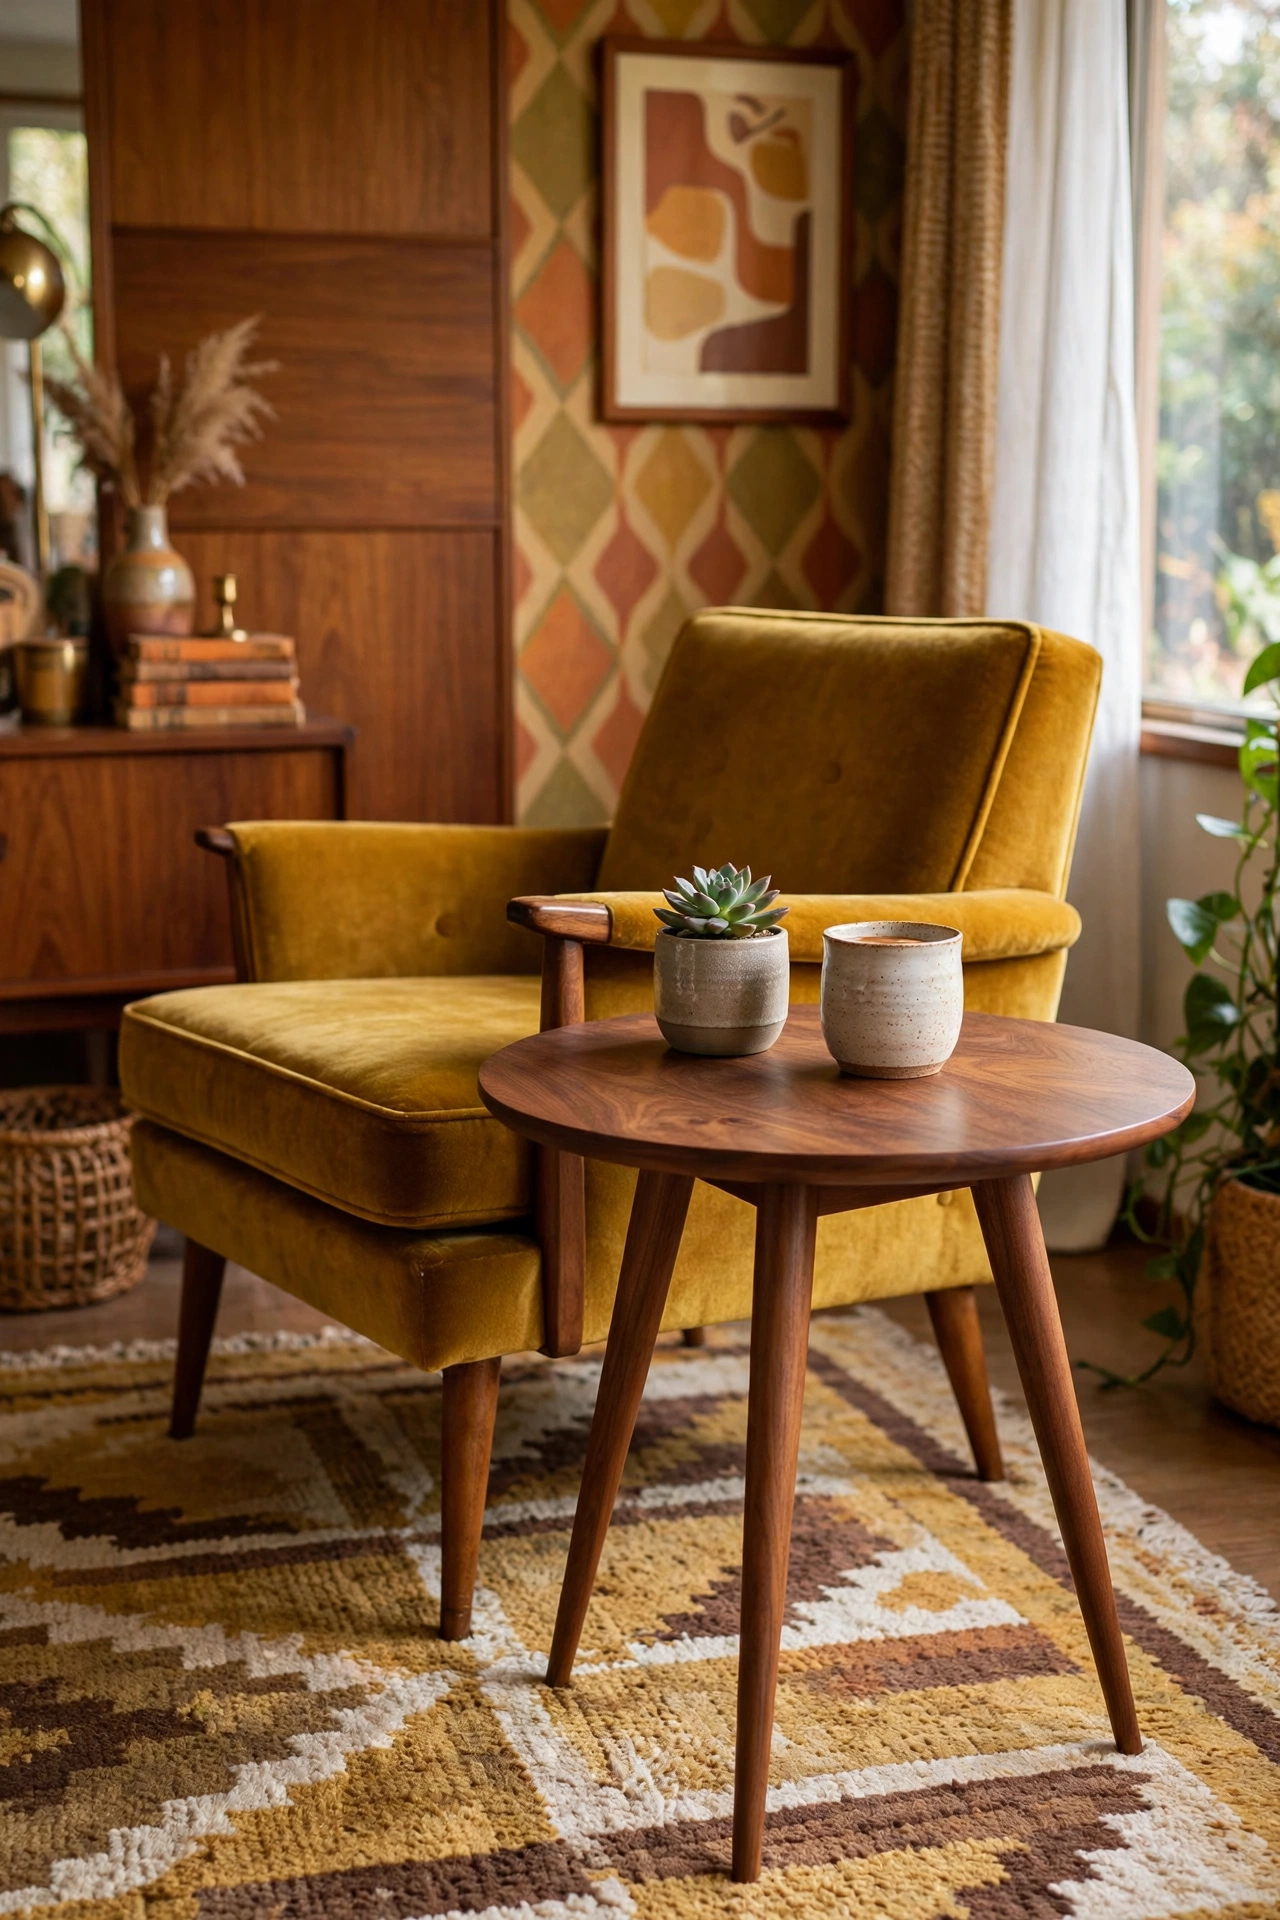
Mid-century style in its purest form: a round top, three or four tapered legs splayed at a slight angle. You can buy pre-made tapered legs online for a few dollars each, which means the “woodworking” is just cutting a circle and drilling angled holes. Stain it walnut, add a brass foot cap if you are feeling fancy, and it reads like a vintage find.
Try this: use a simple angled drilling jig (a scrap block cut at 10 degrees) so all your leg holes splay evenly. Eyeballing the angle is how you get a wobbly retro table.
8. Wooden Cable Spool Table
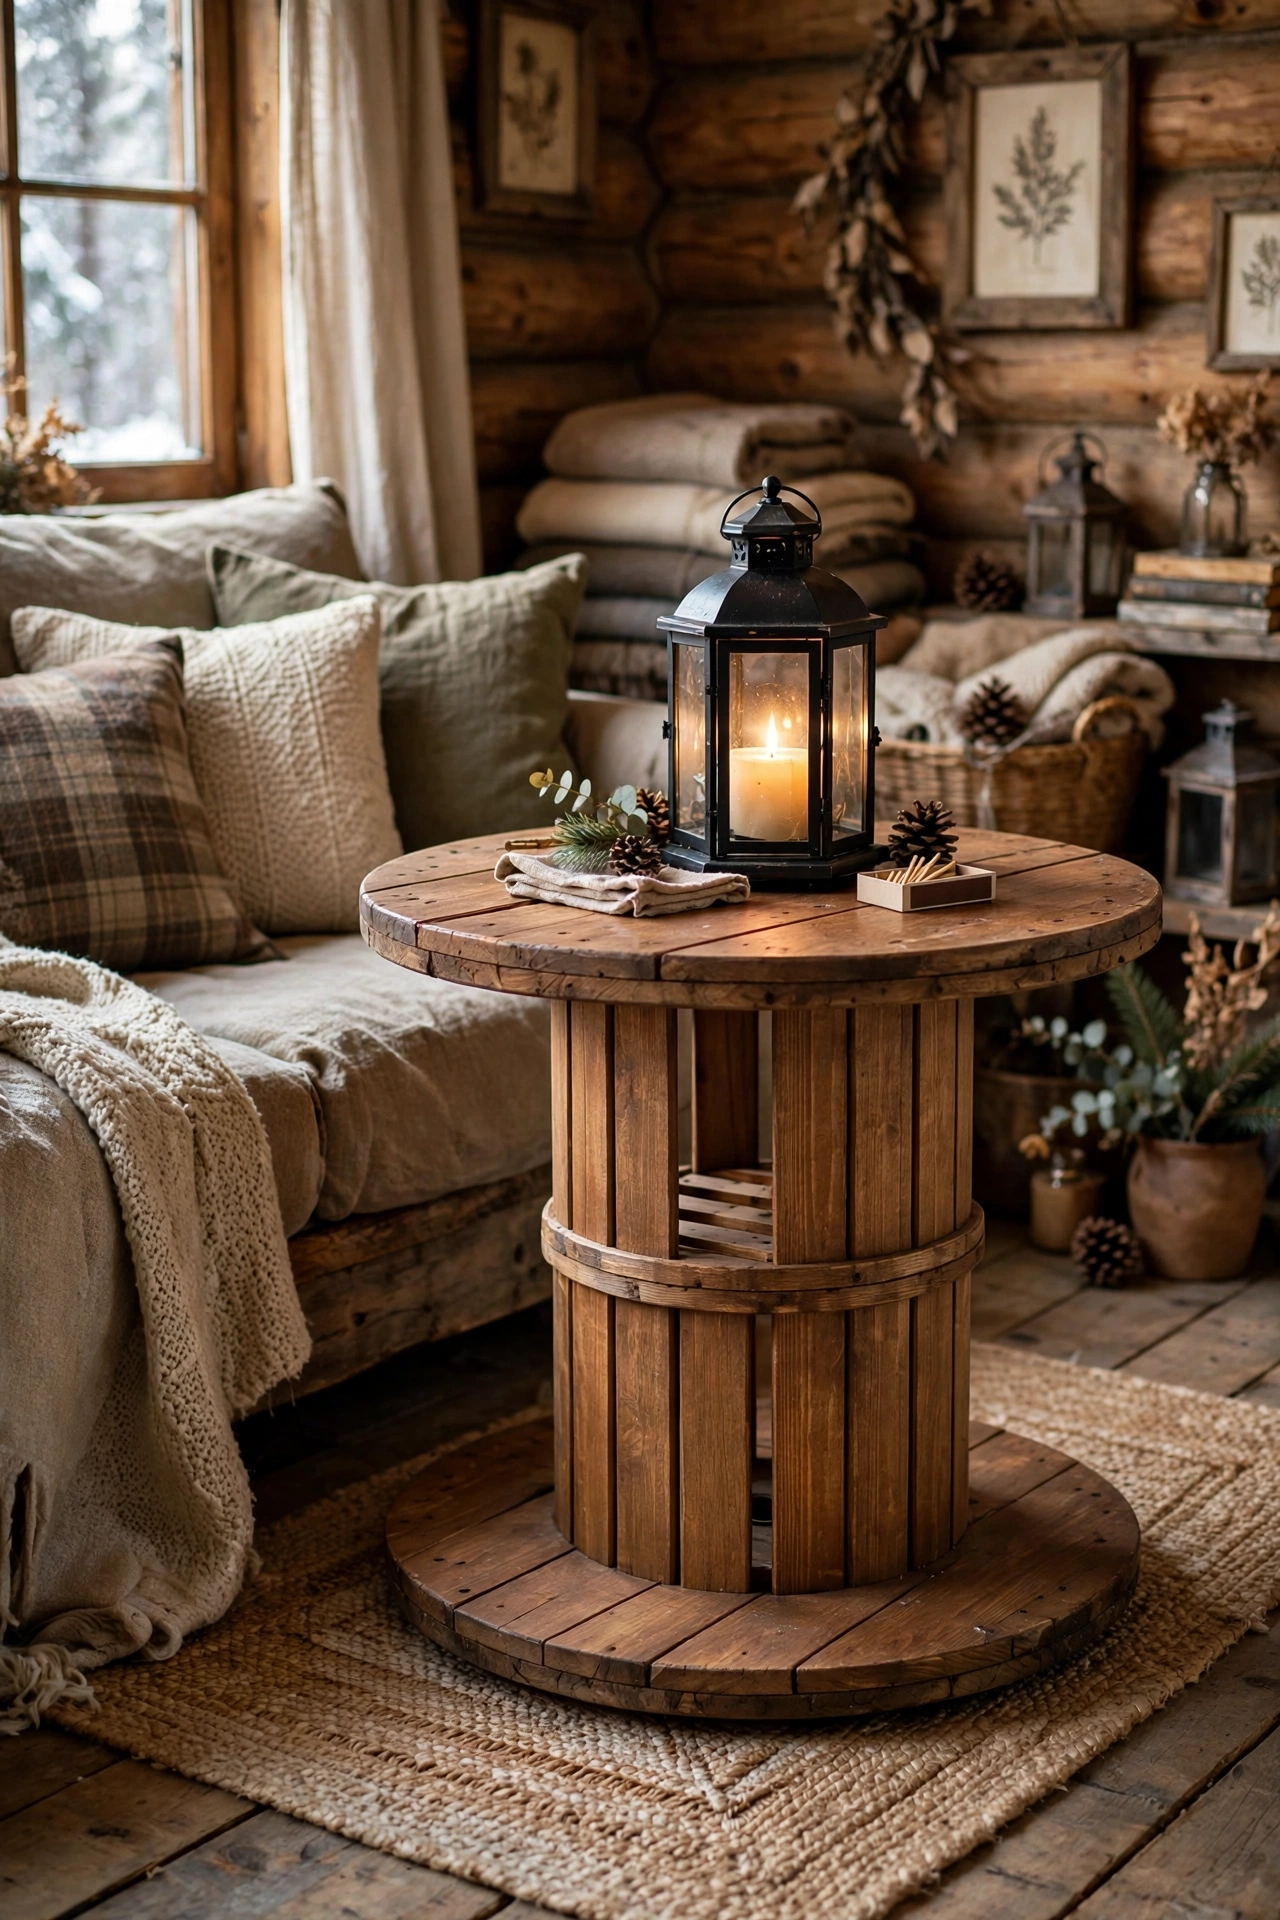
Electrical cable spools are the junkyard treasure of side tables. Call your local electrician or check marketplace listings — small spools are often free for the taking. Sand off the rough spots, stain or paint, and you have a sturdy round table with a built-in lower shelf. The center hole is perfect for running a lamp cord through.
Try this: seal the end grain on the top disc extra well — it drinks finish and will look thirsty next to the smooth sides if you skip it.
9. Tree Slice Round Table
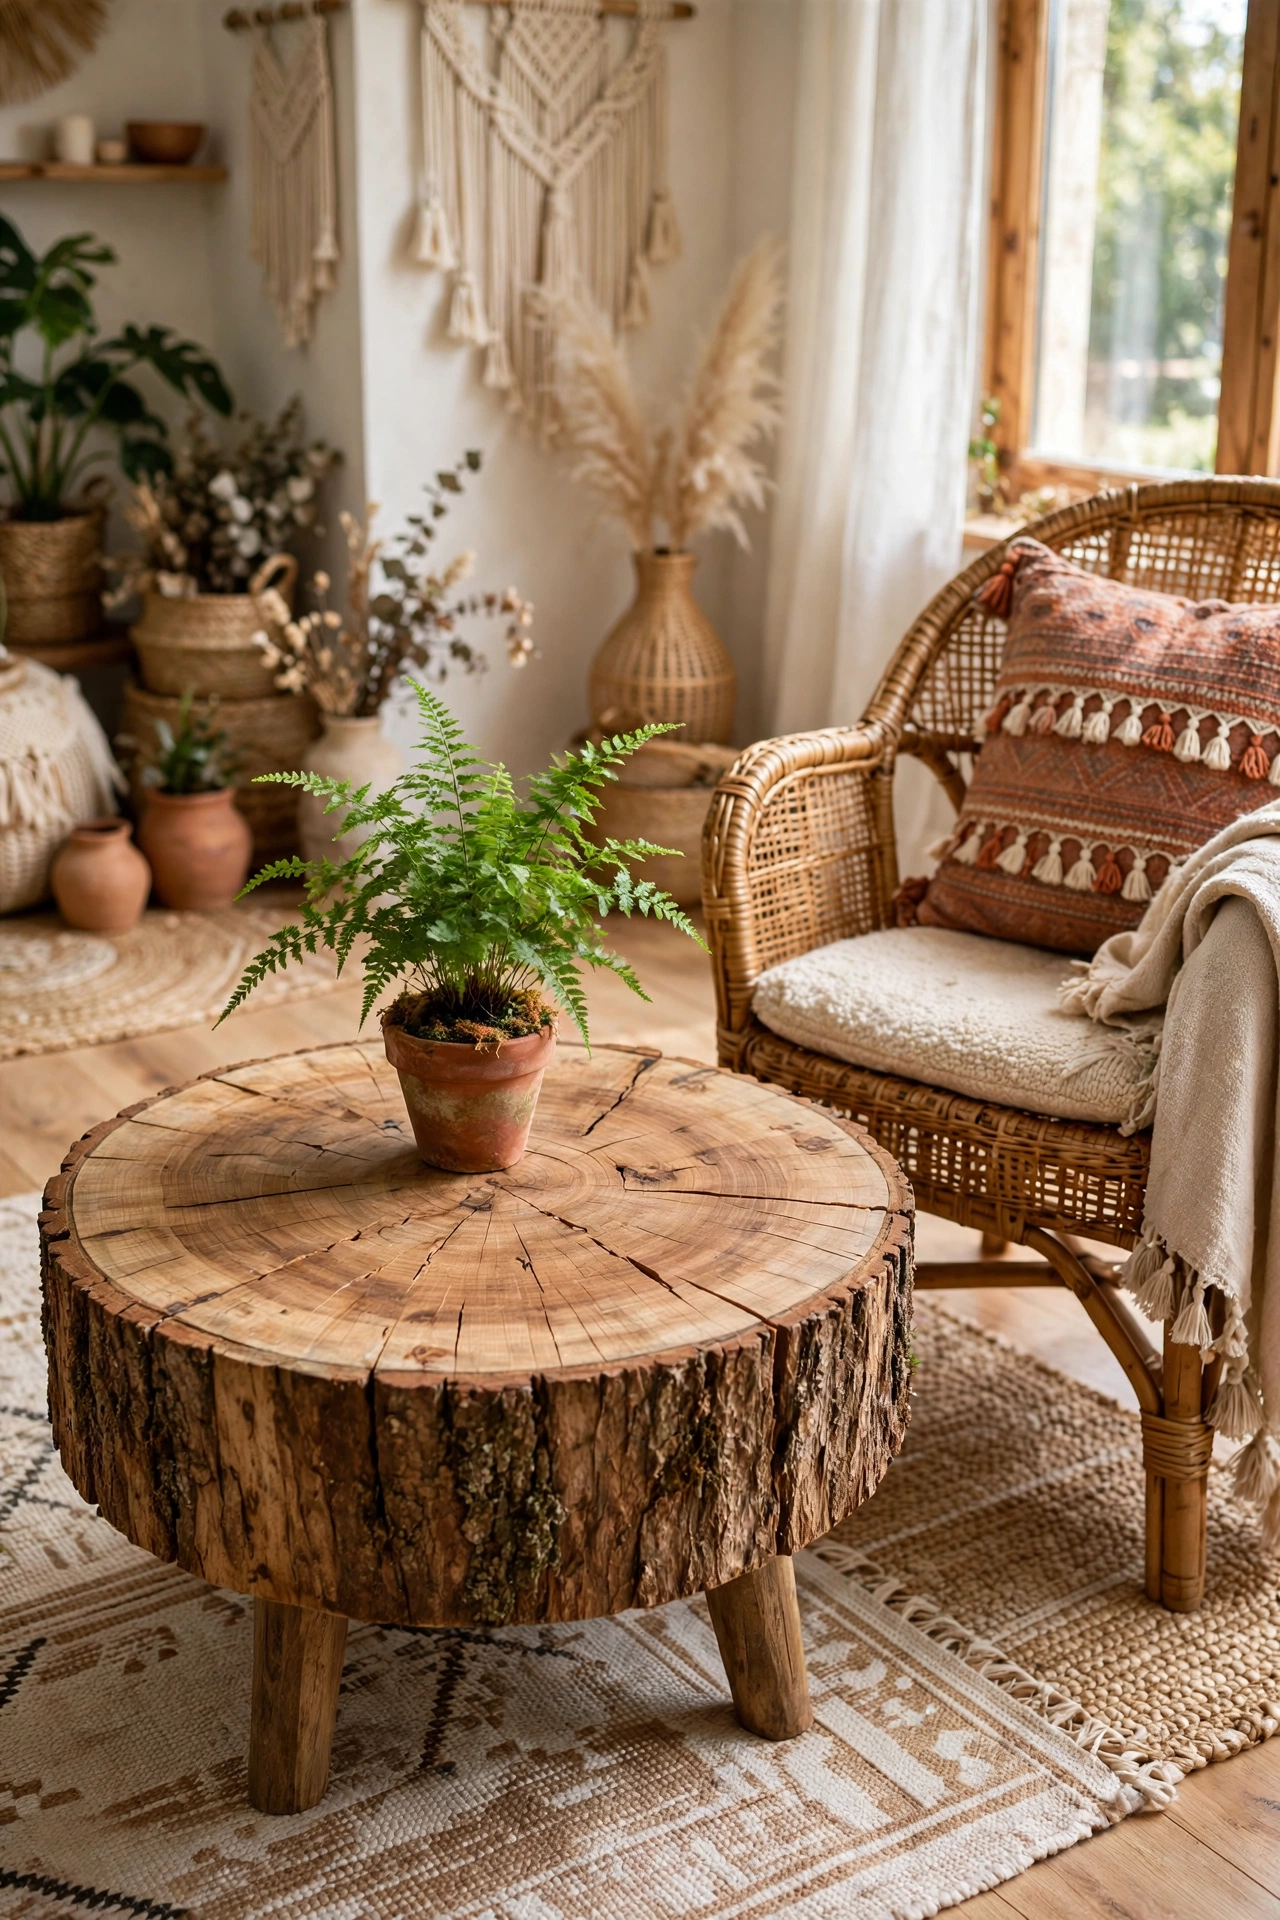
A thick cross-section “cookie” of a log, dried and sealed, mounted on short legs — it is the tree stump’s more polished cousin. Cookies under 18 inches across dry faster and crack less. Sand the top to 220 grit so it feels like glass, leave the bark on for texture, and finish with a hard-wearing poly since this top will see daily use.
Try this: to slow cracking while it dries, paint the end grain with a log sealer or even old latex paint. It forces moisture out slowly through the bark instead of splitting the face.
10. Rolling Wine Crate Table
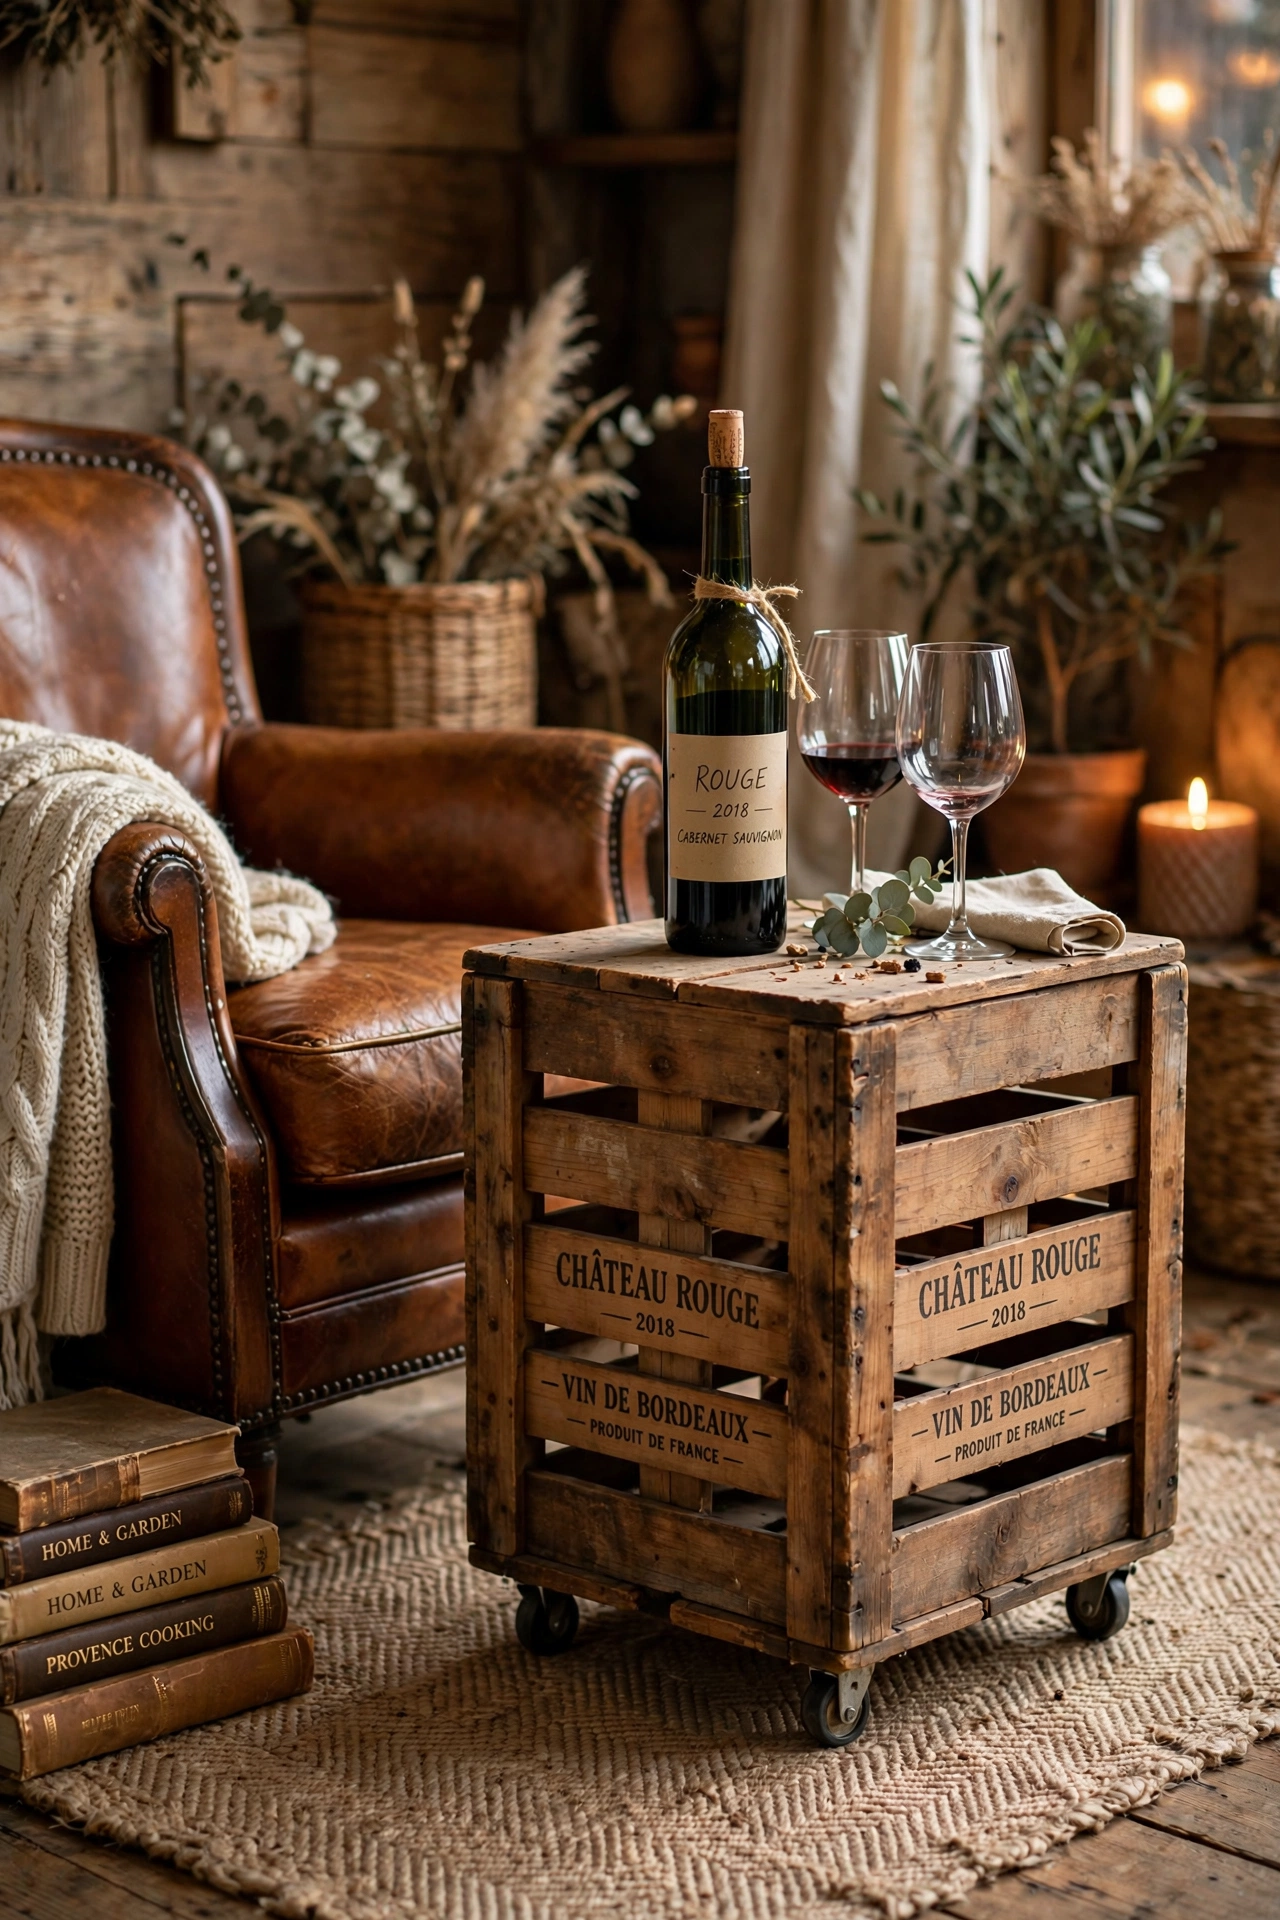
A vintage wine crate on four caster wheels is a side table that doubles as a bar cart. The crates are sturdier than standard wood crates (they were built to ship glass), and the stenciled labels are instant decor. Add a piece of glass or plywood on top for a flat serving surface, screw on the casters, and roll it wherever the party is.
Try this: use locking casters on at least two wheels. A rolling table is delightful until it rolls away from your wine glass.
11. Tree Branch Leg Table
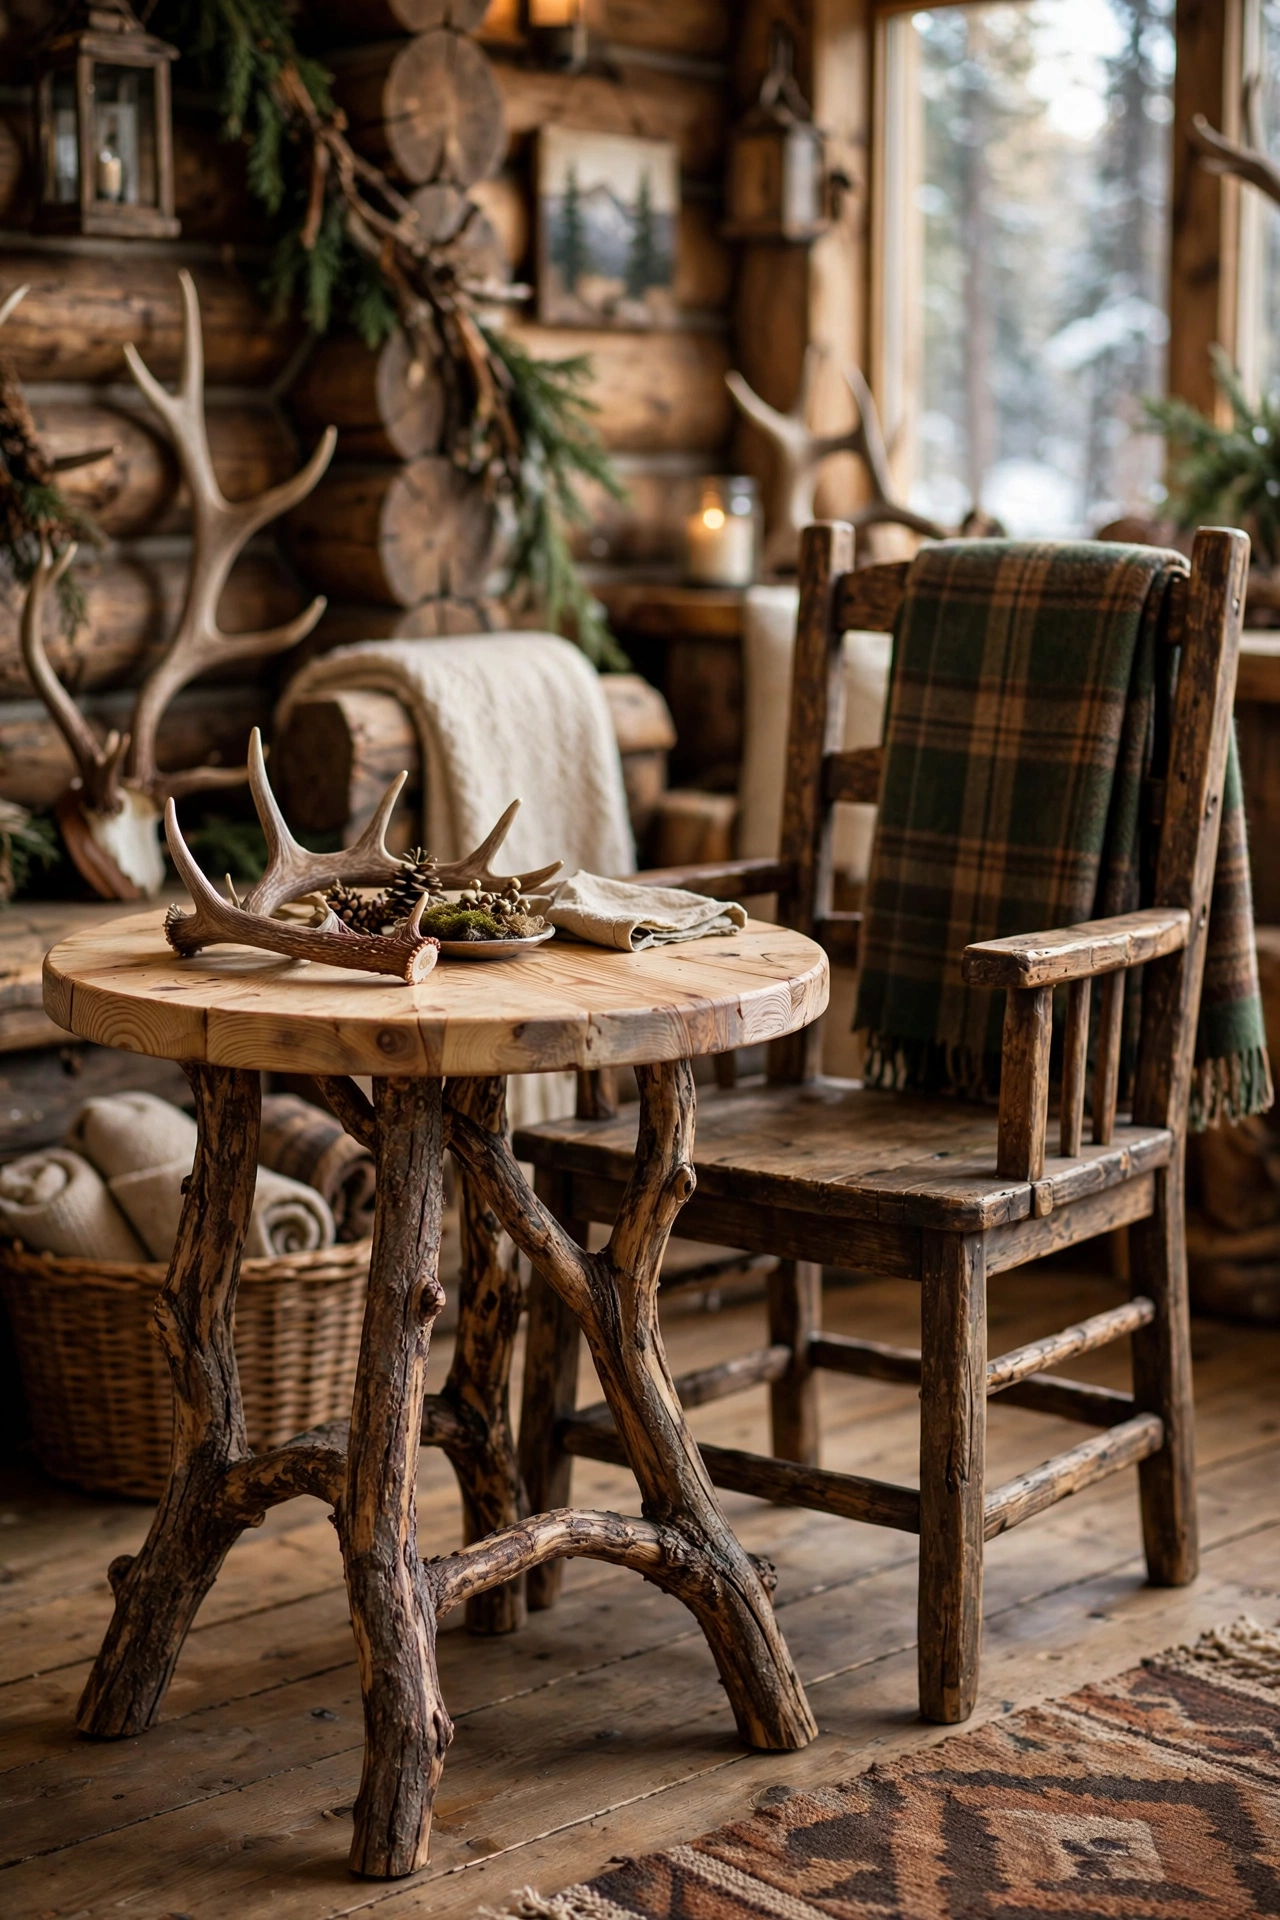
For a true lodge look, top a round pine top with four gnarled branch legs. Gather fallen branches of similar thickness (never cut live trees), strip the bark, dry them indoors for a month, and attach them to a simple apron frame. No two tables will ever match, which is exactly the point.
Rustic wood furniture like this feels most at home in a rustic room, and these trendy modern pine cabin interior ideas show how warm wood pieces anchor a cabin-style space from floor to ceiling.
Try this: bore the leg holes into the apron with a Forstner bit matched to each branch’s diameter — branches are irregular, so fit each leg to its own hole rather than forcing uniformity.
12. Hexagon Plywood Table
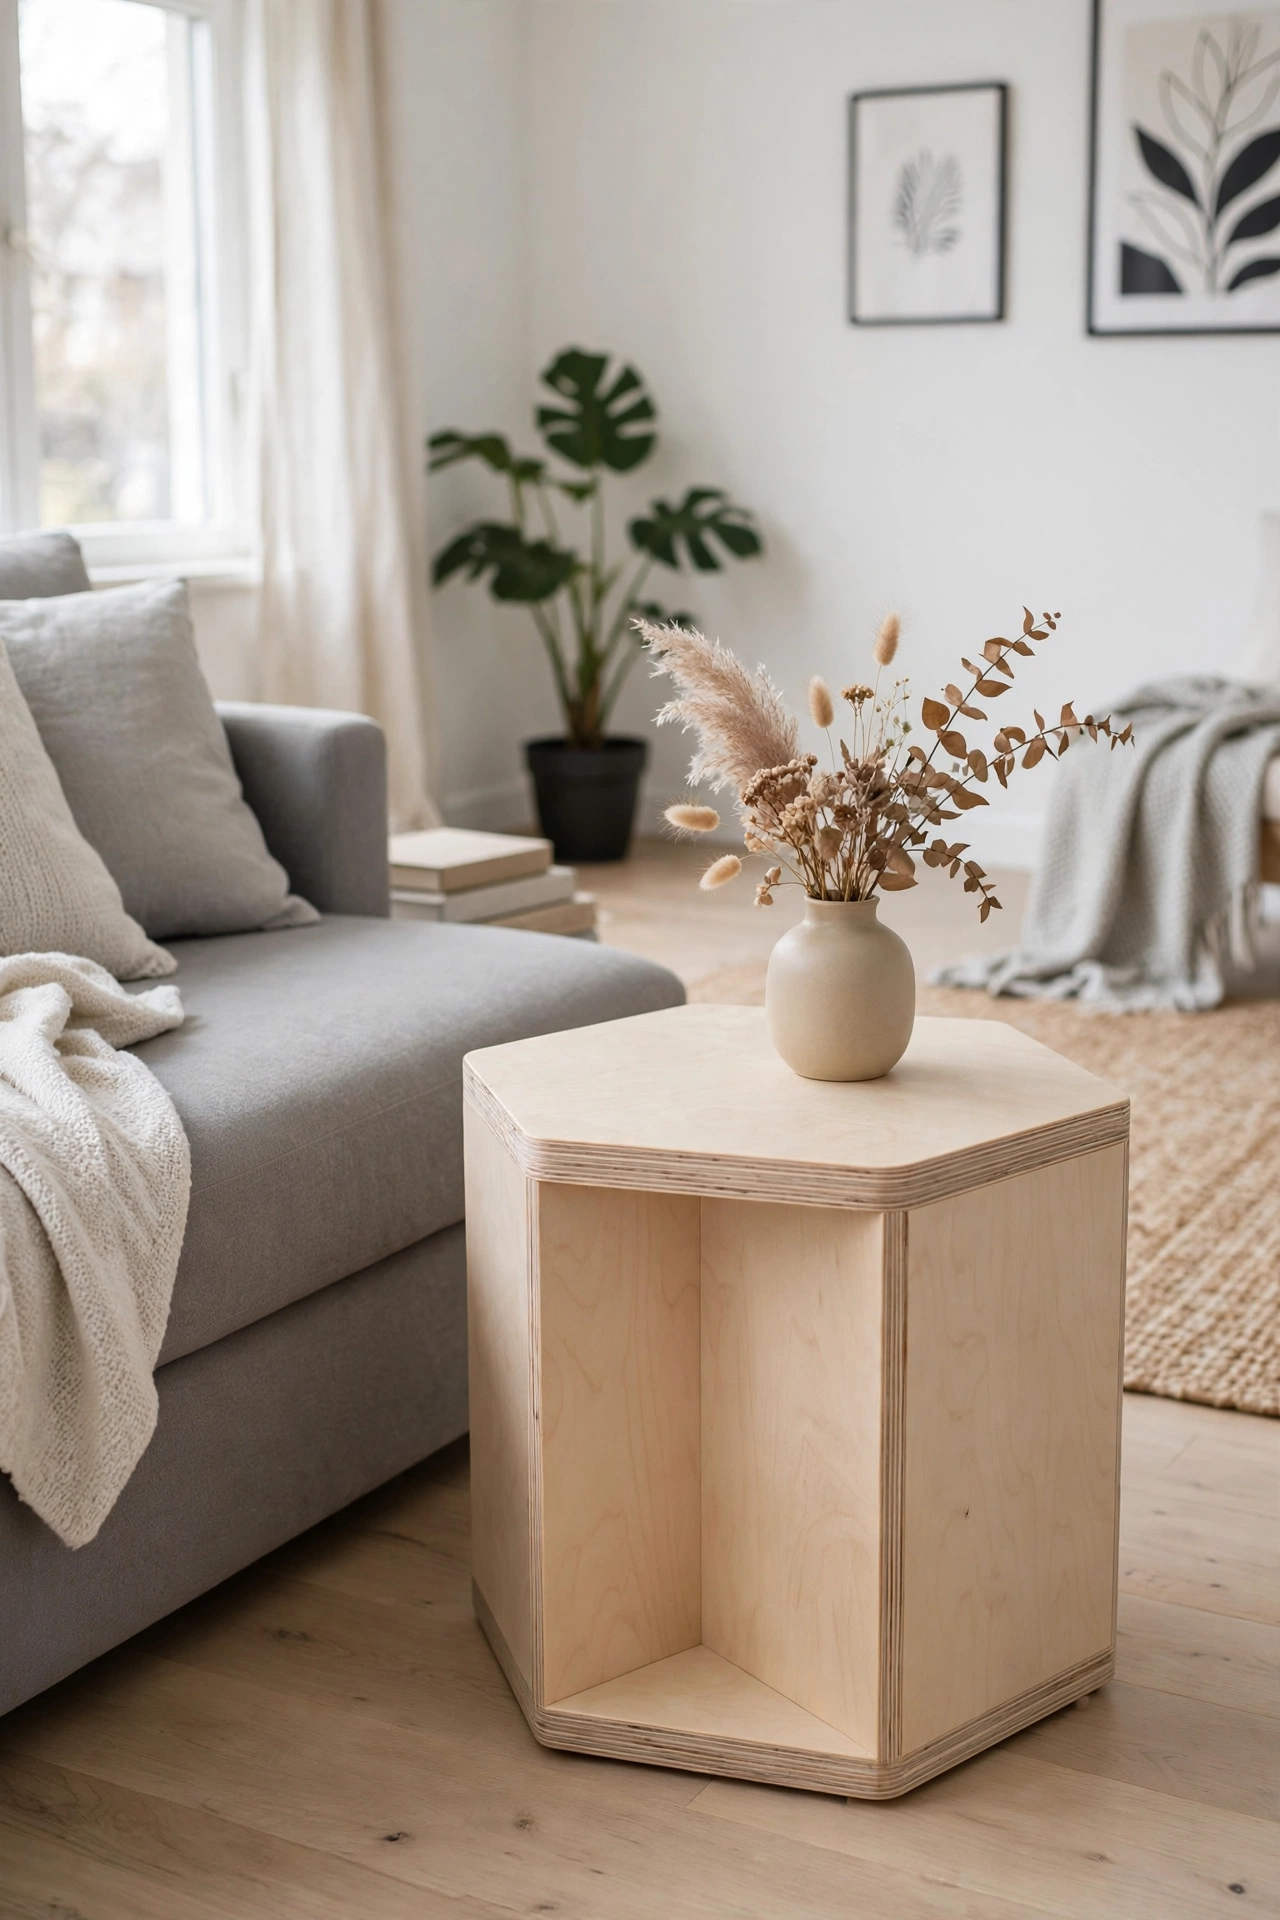
Six sides of birch plywood make a modern geometric table that looks far harder than it is. Cut six identical trapezoid panels, join them with pocket screws or a simple spline, and the layered plywood edge becomes a design detail. It is a great scrap-buster if you have half a sheet of nice plywood left from another project.
Try this: seal the plywood edges with a coat of thinned wood glue before finishing. Raw plywood edges soak up stain unevenly and go dark and blotchy.
13. Upcycled Chair Seat Table
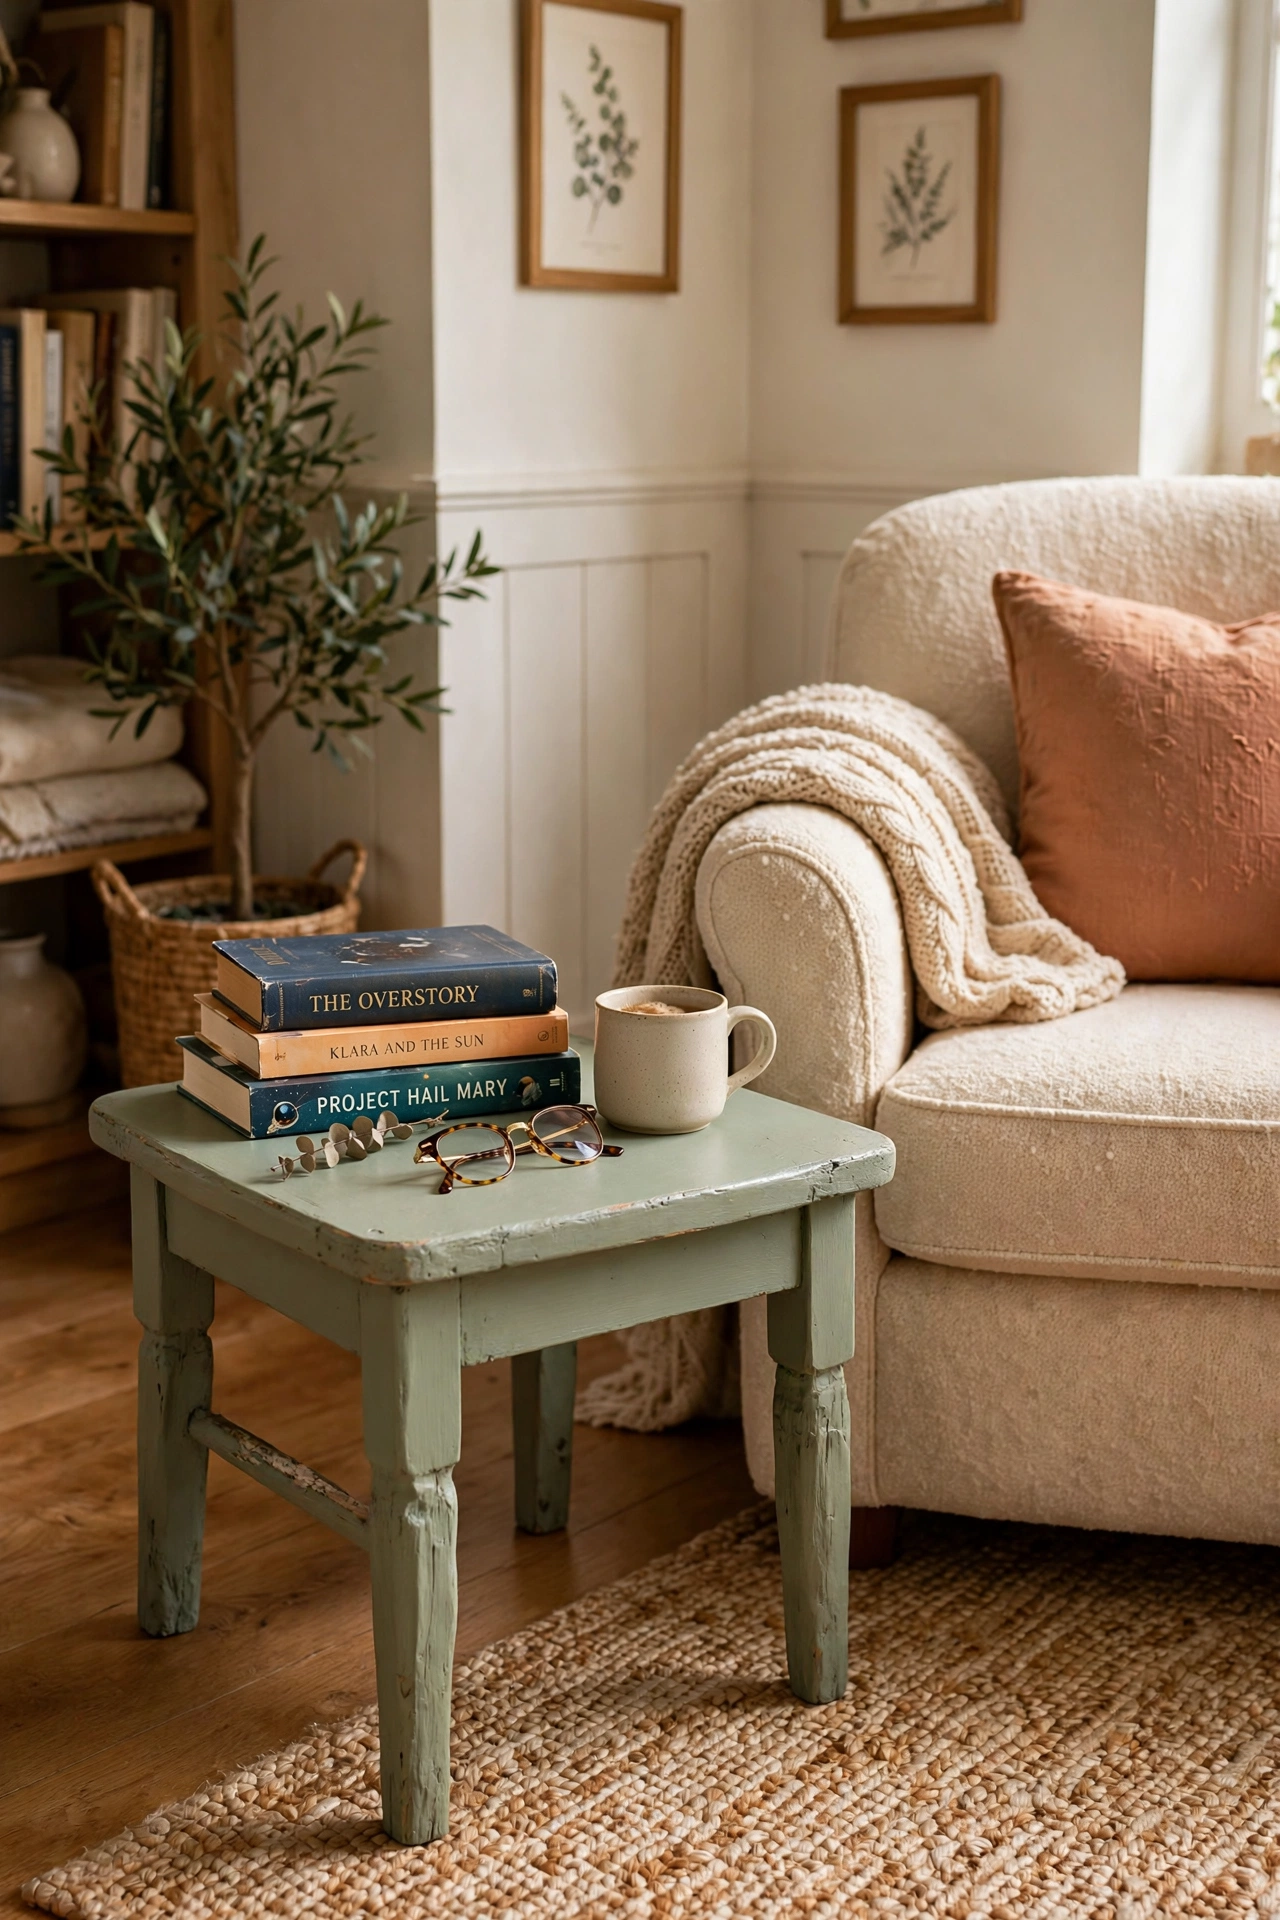
That broken chair in the garage is a side table waiting to happen. Cut the legs down to side-table height (or cut the back off entirely), refinish the seat, and you have a piece with instant vintage bones. Paint it a soft color like sage or dusty blue for a cottage feel, or stain it to show off the old wood.
Try this: reinforce the seat-to-leg joints with fresh glue and screws before you cut. Old chair joints are usually loose, and a side table should never wobble.
14. Driftwood Side Table
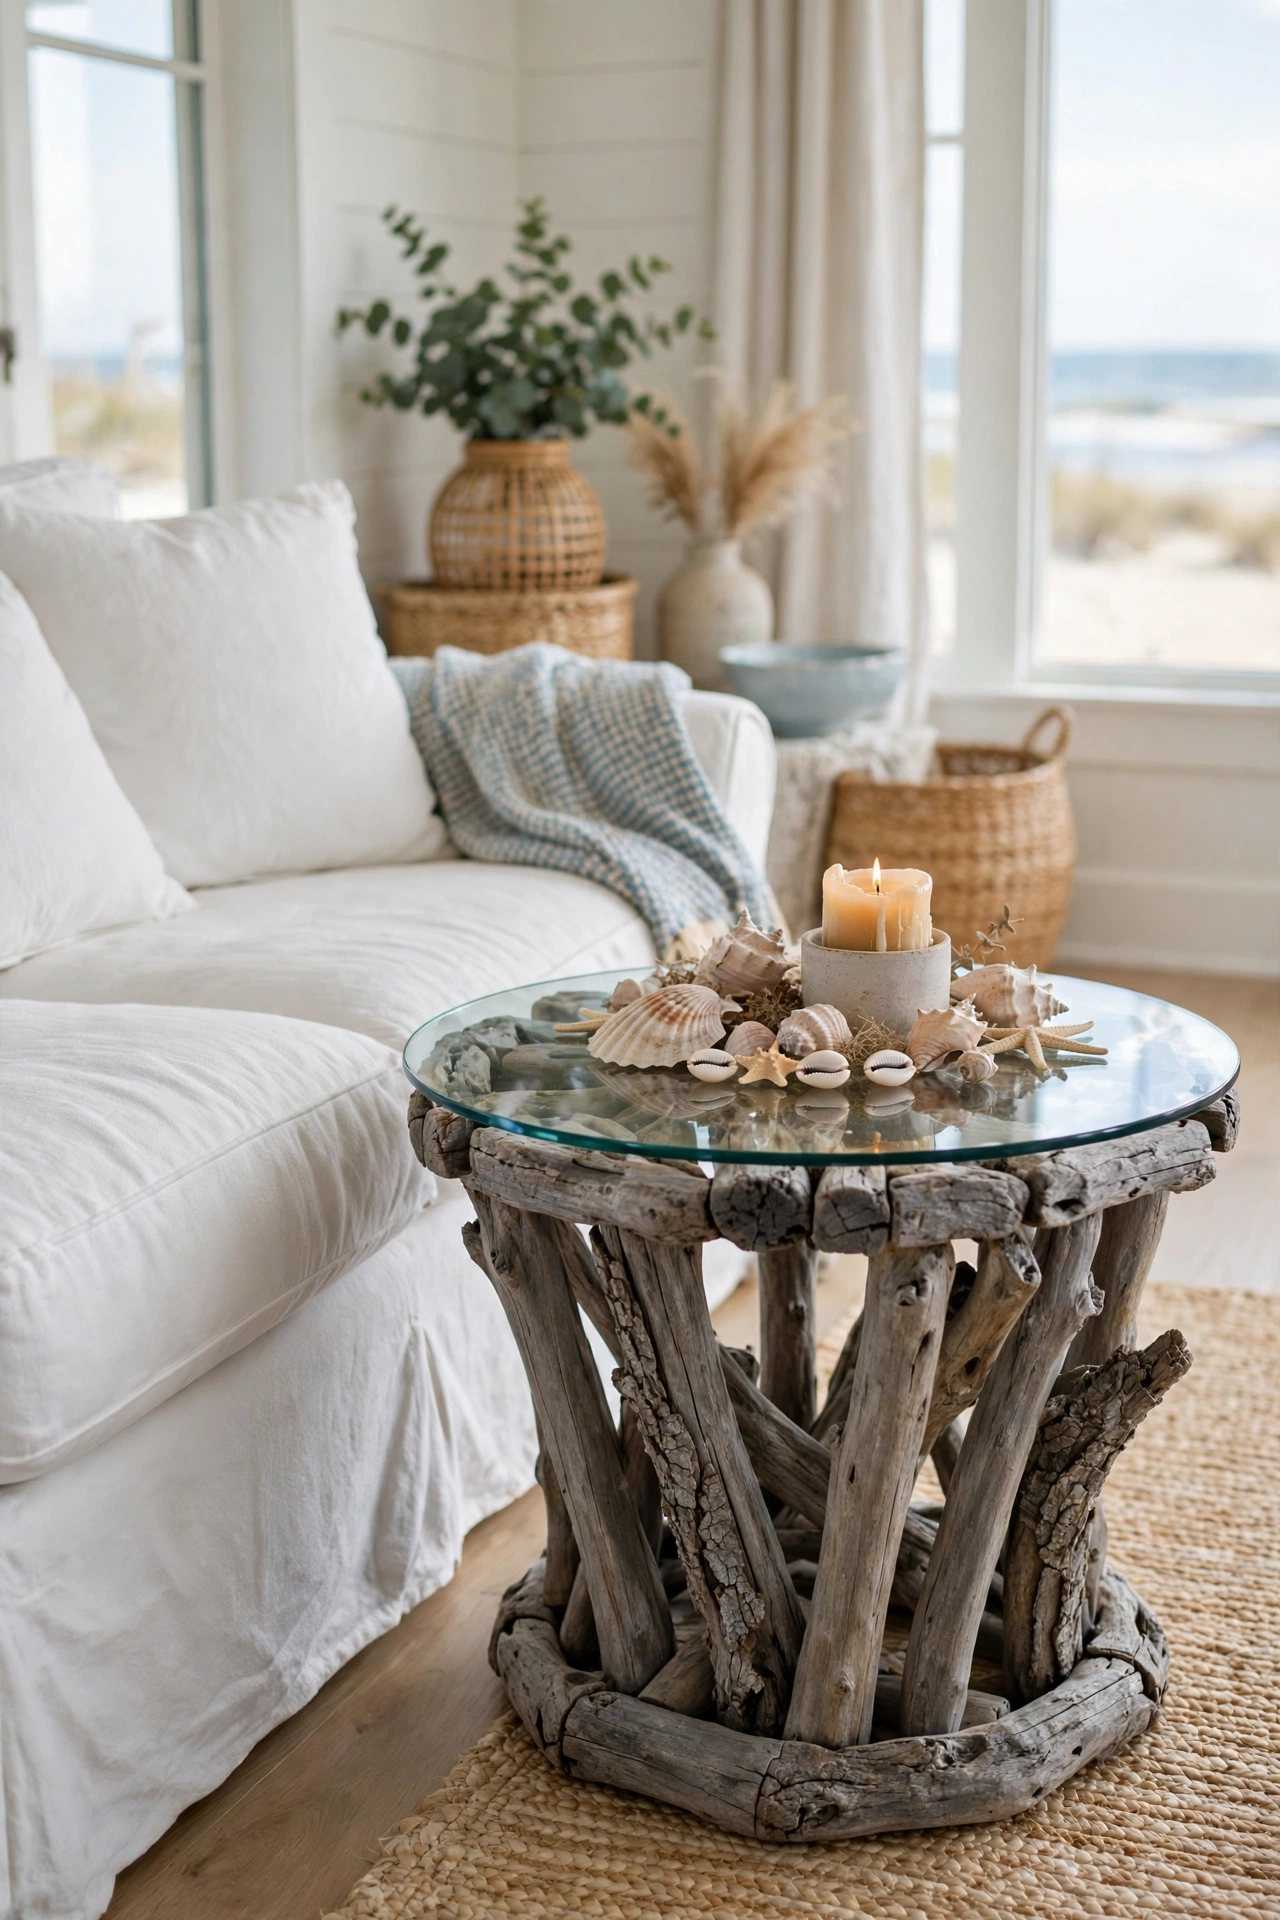
Driftwood brings the beach indoors. Collect sturdy weathered pieces (or buy bundles from craft suppliers), build a tripod or bundled-leg base, and top it with a round of tempered glass so the sculpture underneath stays visible. Each piece of driftwood is already finished by salt and sun — just scrub, dry, and seal lightly.
Try this: bake or soak found driftwood and let it dry fully to kill any hitchhiking insects or salt residue before it comes inside. A week in the sun does the job.
15. Nested Tripod Table Set
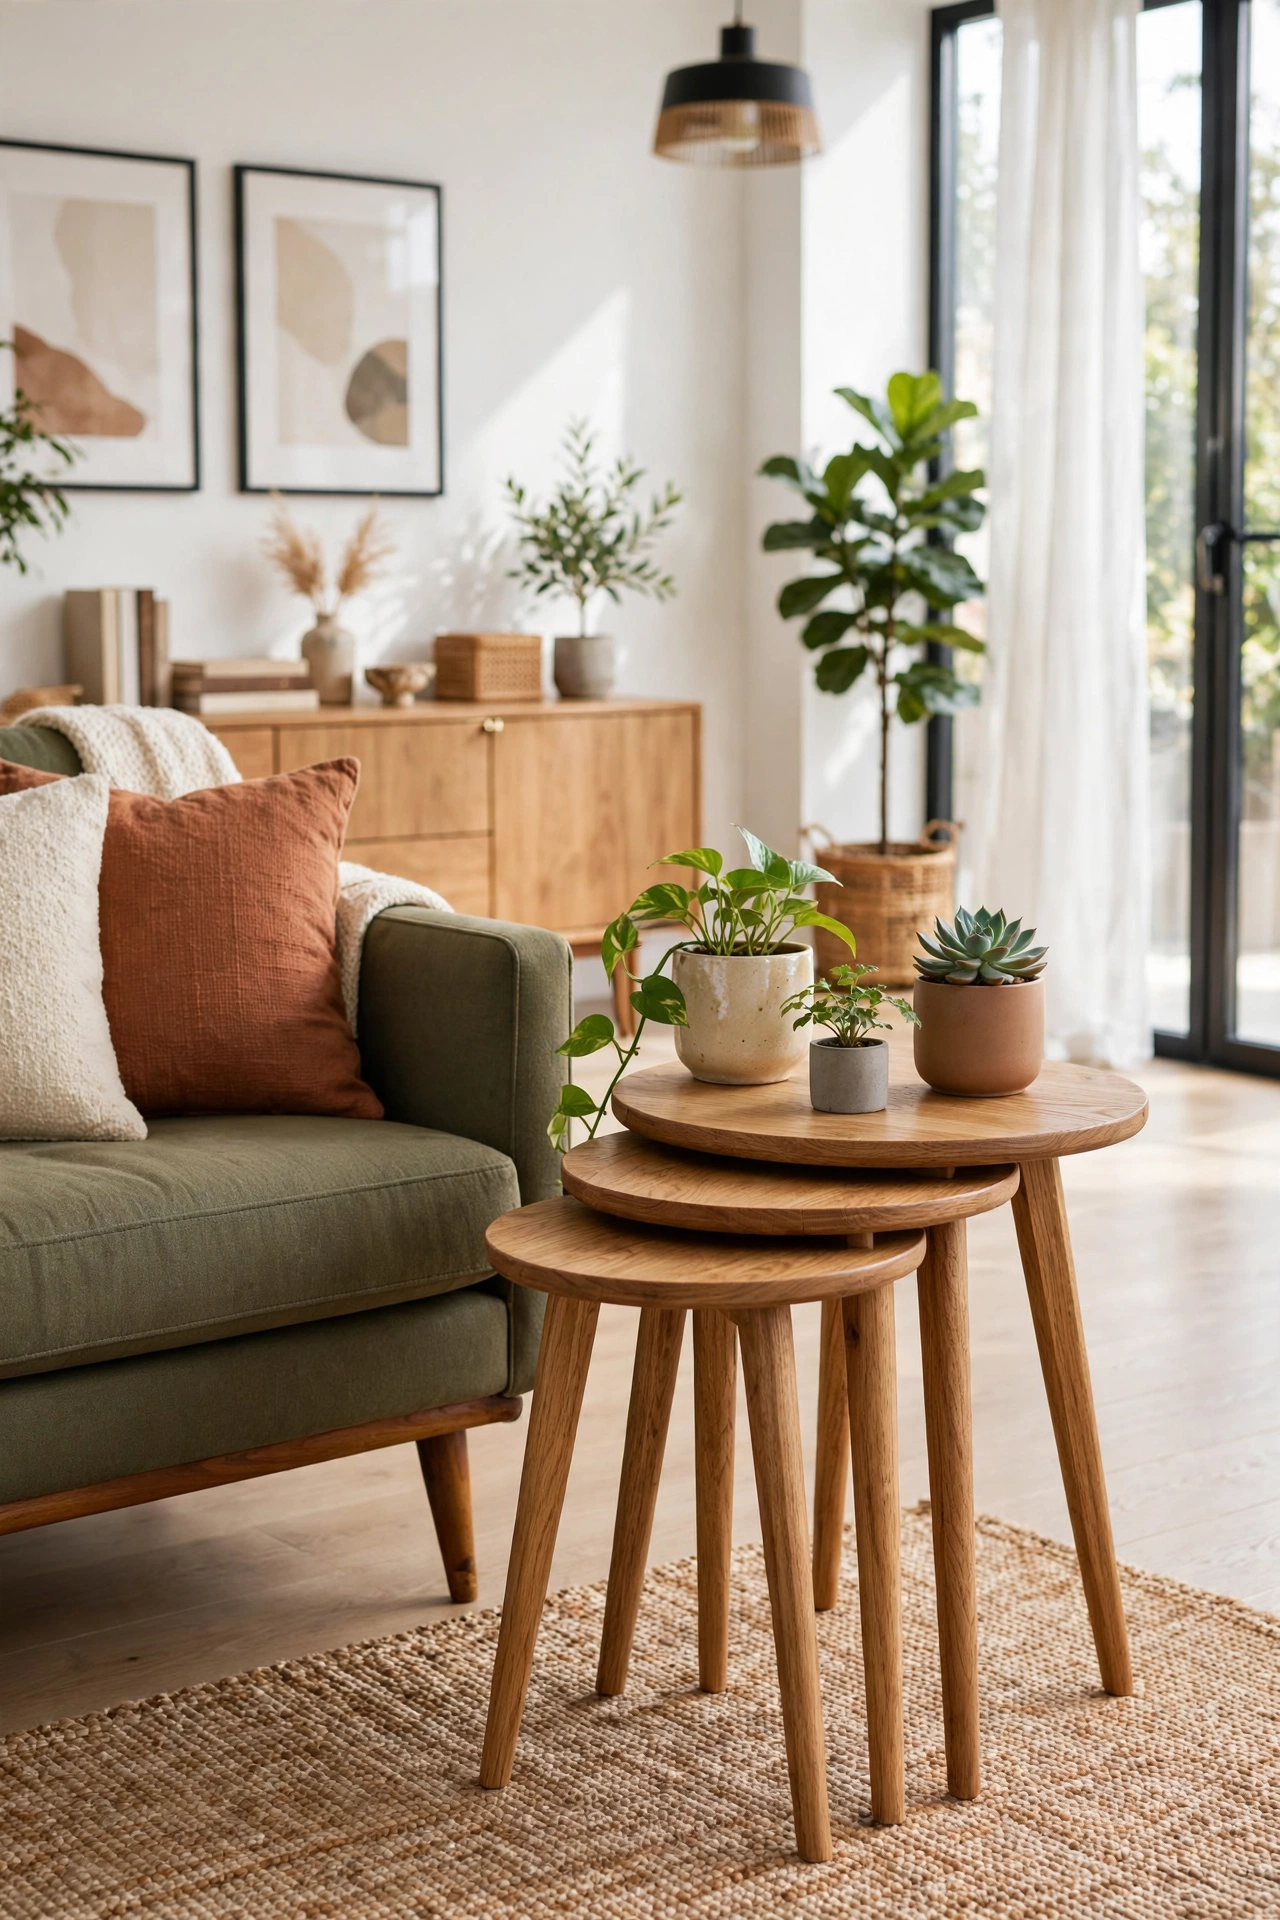
Why build one table when you can build three? A nested set of tripod tables — tall, medium, small — tucks together when you do not need them and fans out when guests arrive. Each one is just a round top and three dowel legs drilled at an angle. Build them in graduated heights (say 24, 20, and 16 inches) so they nest cleanly.
Try this: cut all nine legs in one batch from the same dowel, and number them. Consistency across the set is what makes nested tables look professional.
16. Bookshelf Column Table
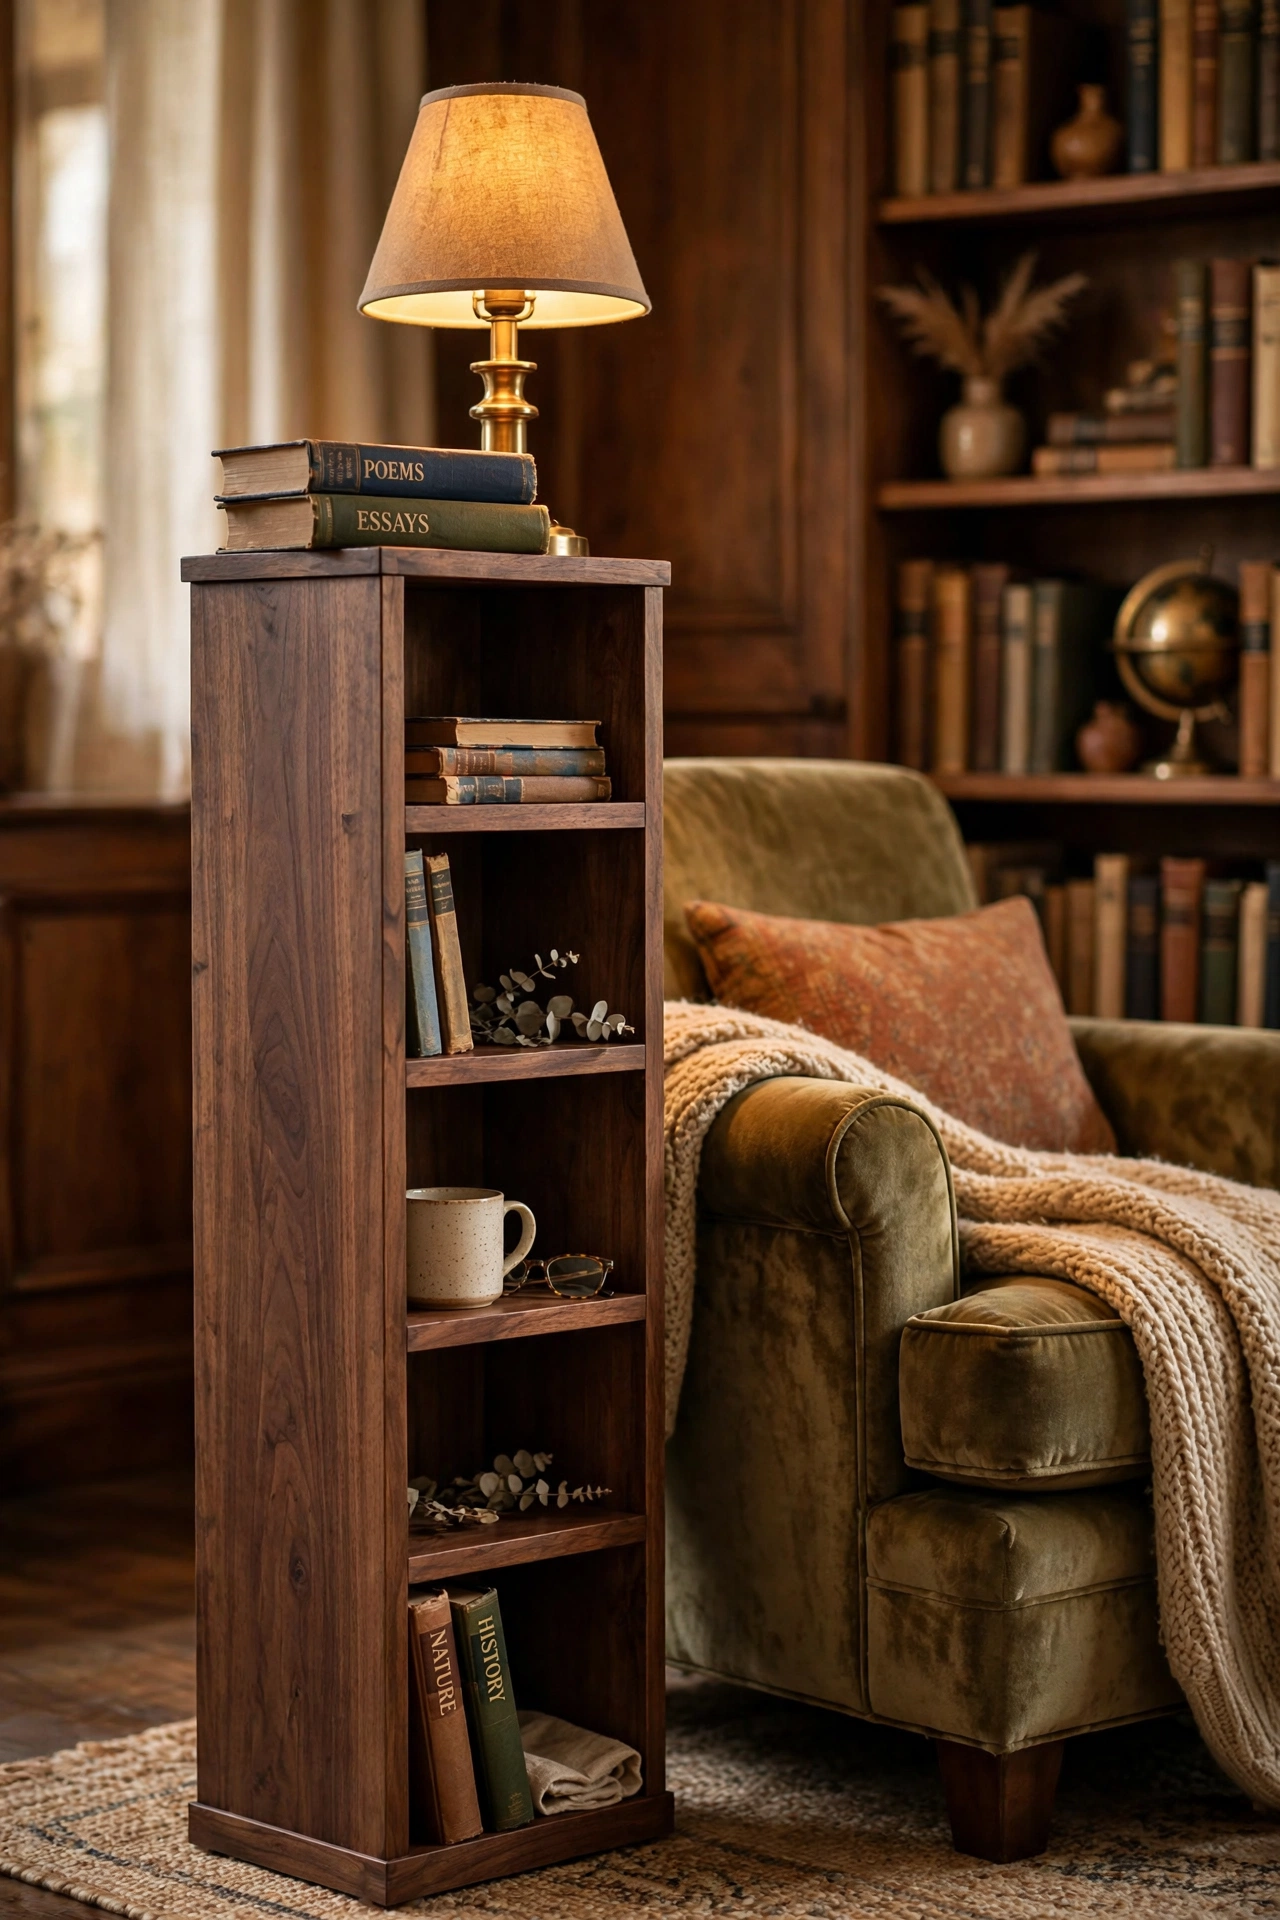
A tall, narrow column with two or three open cubbies is a side table and a mini bookshelf in one. Build it from 1×12 pine boards with simple butt joints and screws — the whole thing is four sides, two shelves, a top, and a base. It is perfect for small rooms where a table needs to earn its footprint twice over.
Tables like this were made for reading corners, and these cozy library room with plants ideas show how to style a bookish nook around one, greenery included.
Try this: anchor a tall narrow column to the wall with a small L-bracket. A top-heavy table next to a well-loved reading chair is a tipping accident waiting to happen.
17. Hidden Storage Stump Table
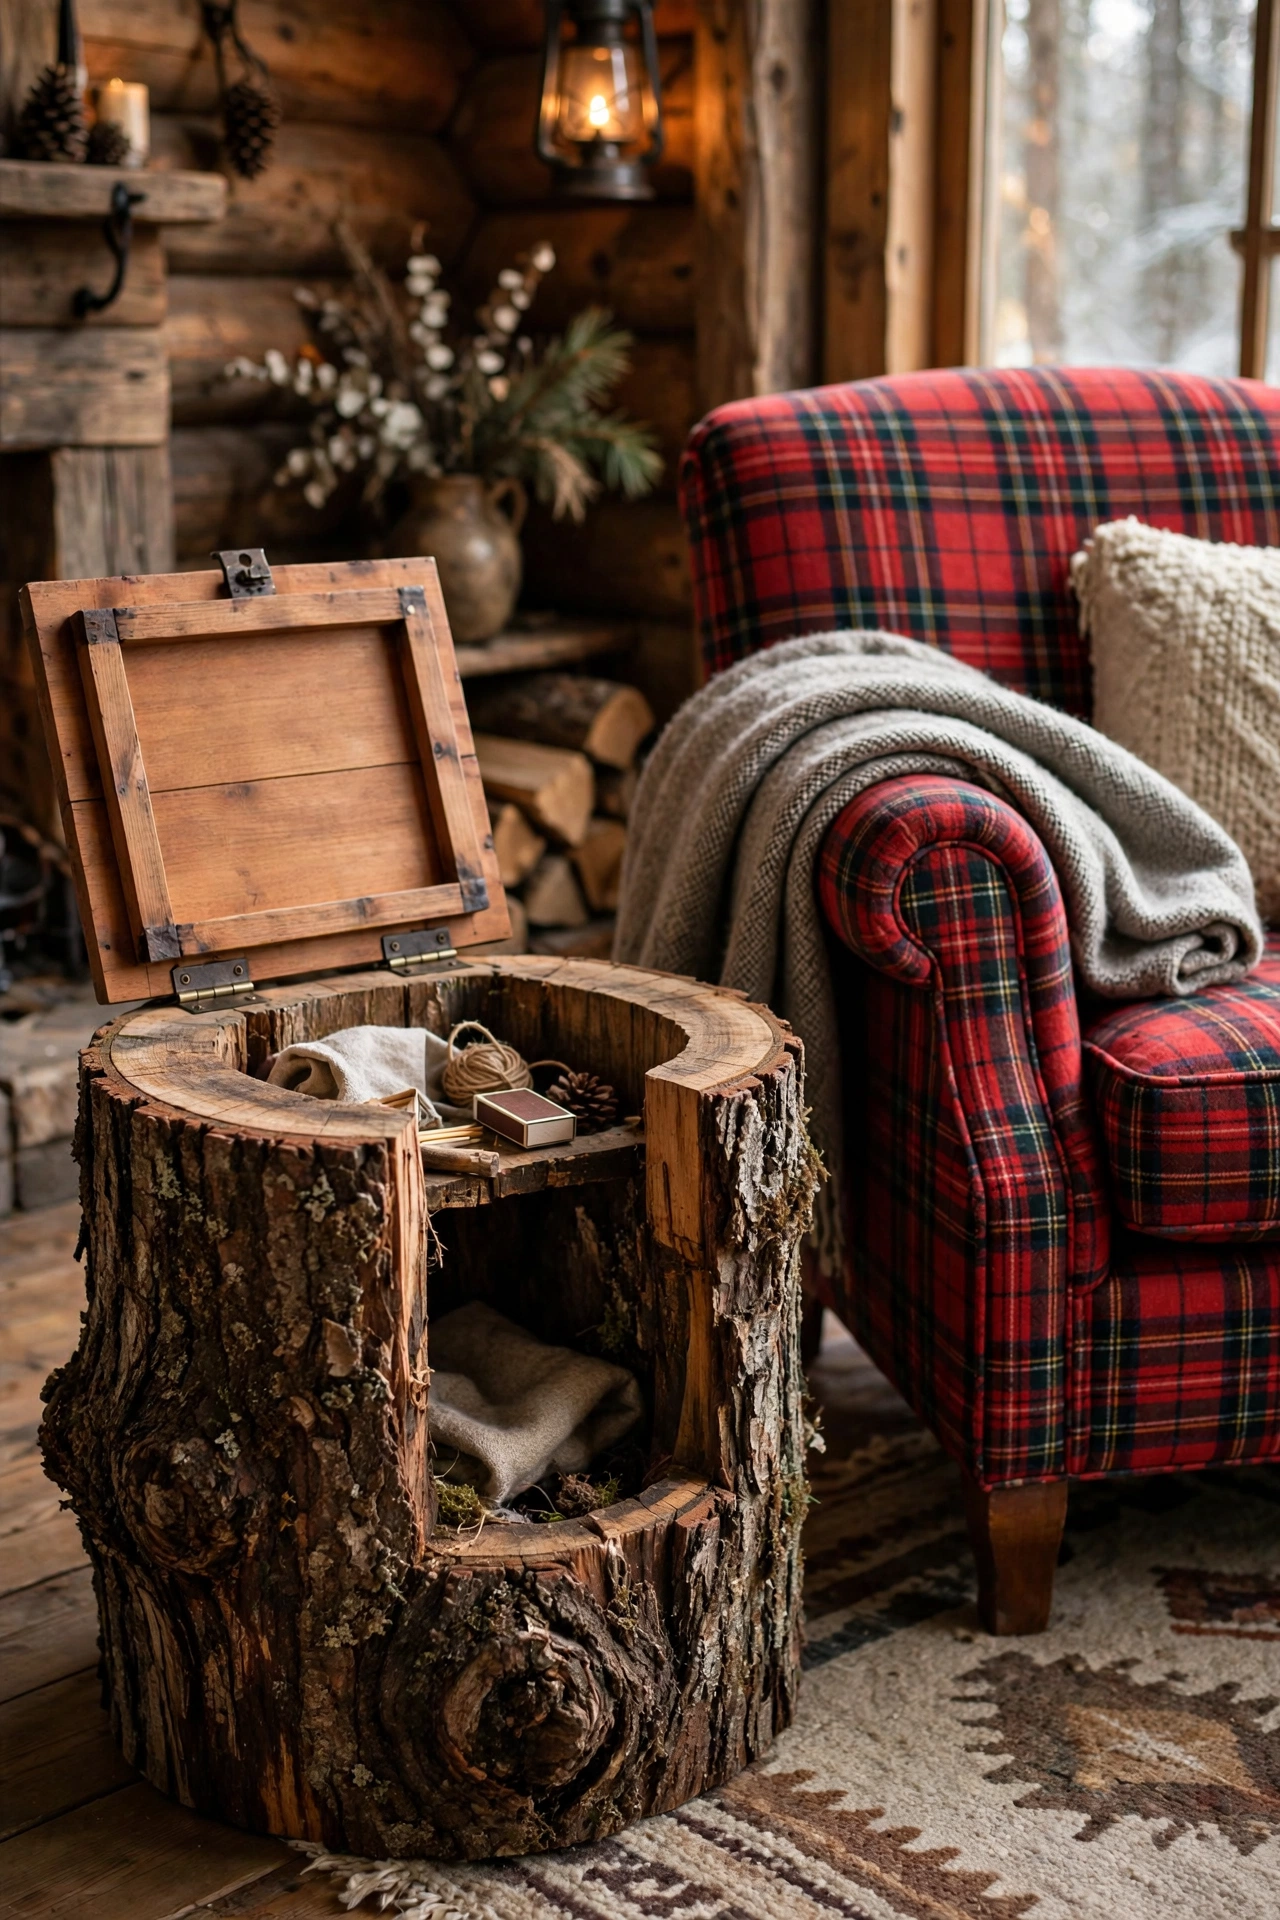
Take the tree stump idea one step further: hollow out the center and add a hinged lid, and your rustic side table becomes secret storage for remotes, chargers, and the clutter you want gone in ten seconds. Use a Forstner bit or a router to excavate the center, leaving thick walls, and mount the lid on small hidden hinges.
Try this: drill a small finger hole or add a discreet pull to the lid. A perfectly flush wooden lid with no handle is beautiful and completely infuriating to open.
18. Herringbone Top Table
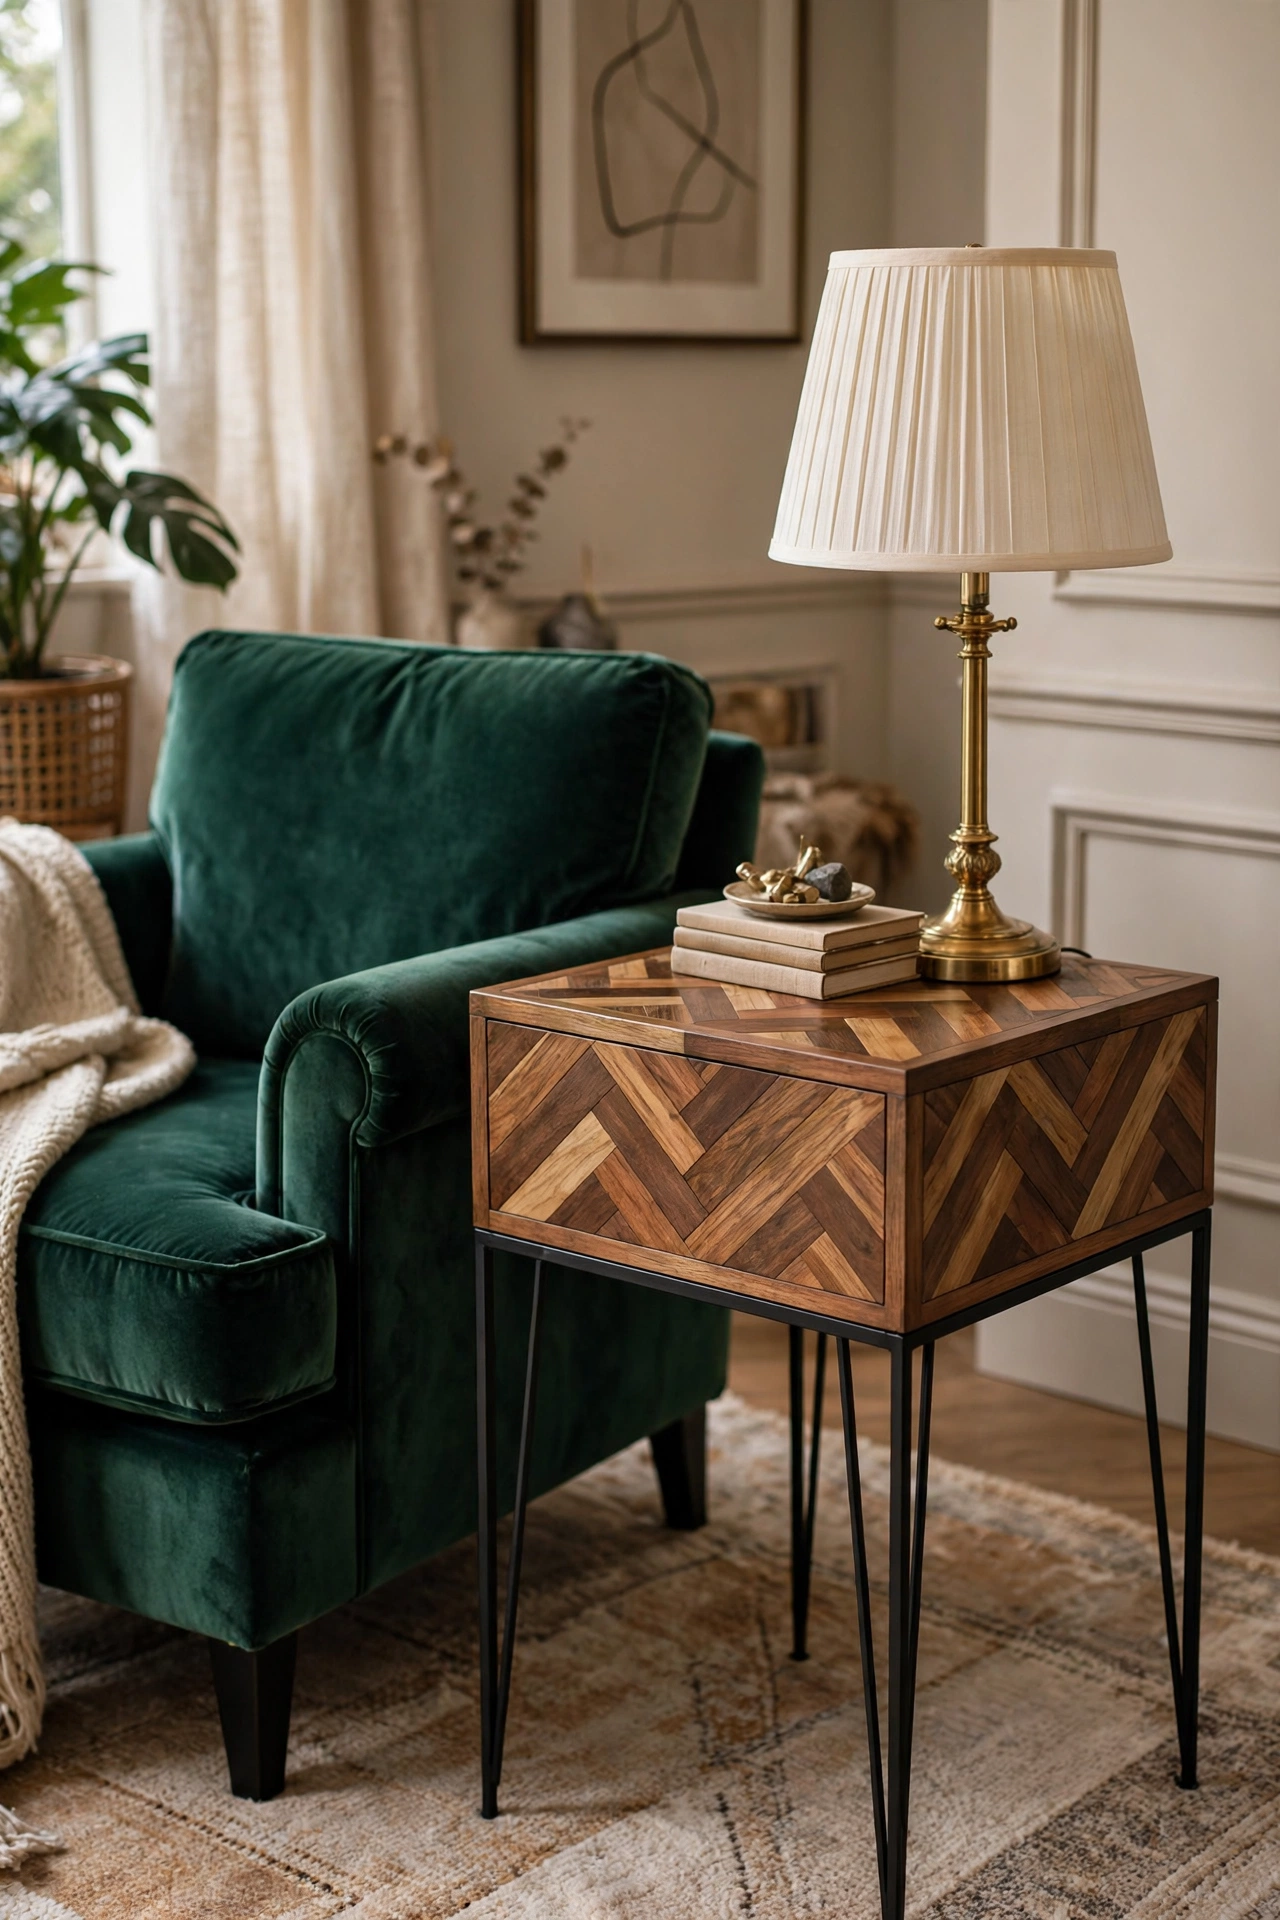
A herringbone top turns scrap strips into a showpiece. Glue short boards in the classic zigzag onto a plywood base, trim the edges, and mount it on store-bought metal legs. Mix two or three stain tones for the patchwork look, or keep it uniform for a quieter elegance. It is fiddly but deeply satisfying — the kind of top people touch when they walk past.
Try this: build the herringbone panel slightly oversized on a backer board, then trim all four edges on the table saw after the glue cures. Trying to cut every piece to exact final size will drive you mad.
19. Scandinavian Birch Plywood Table
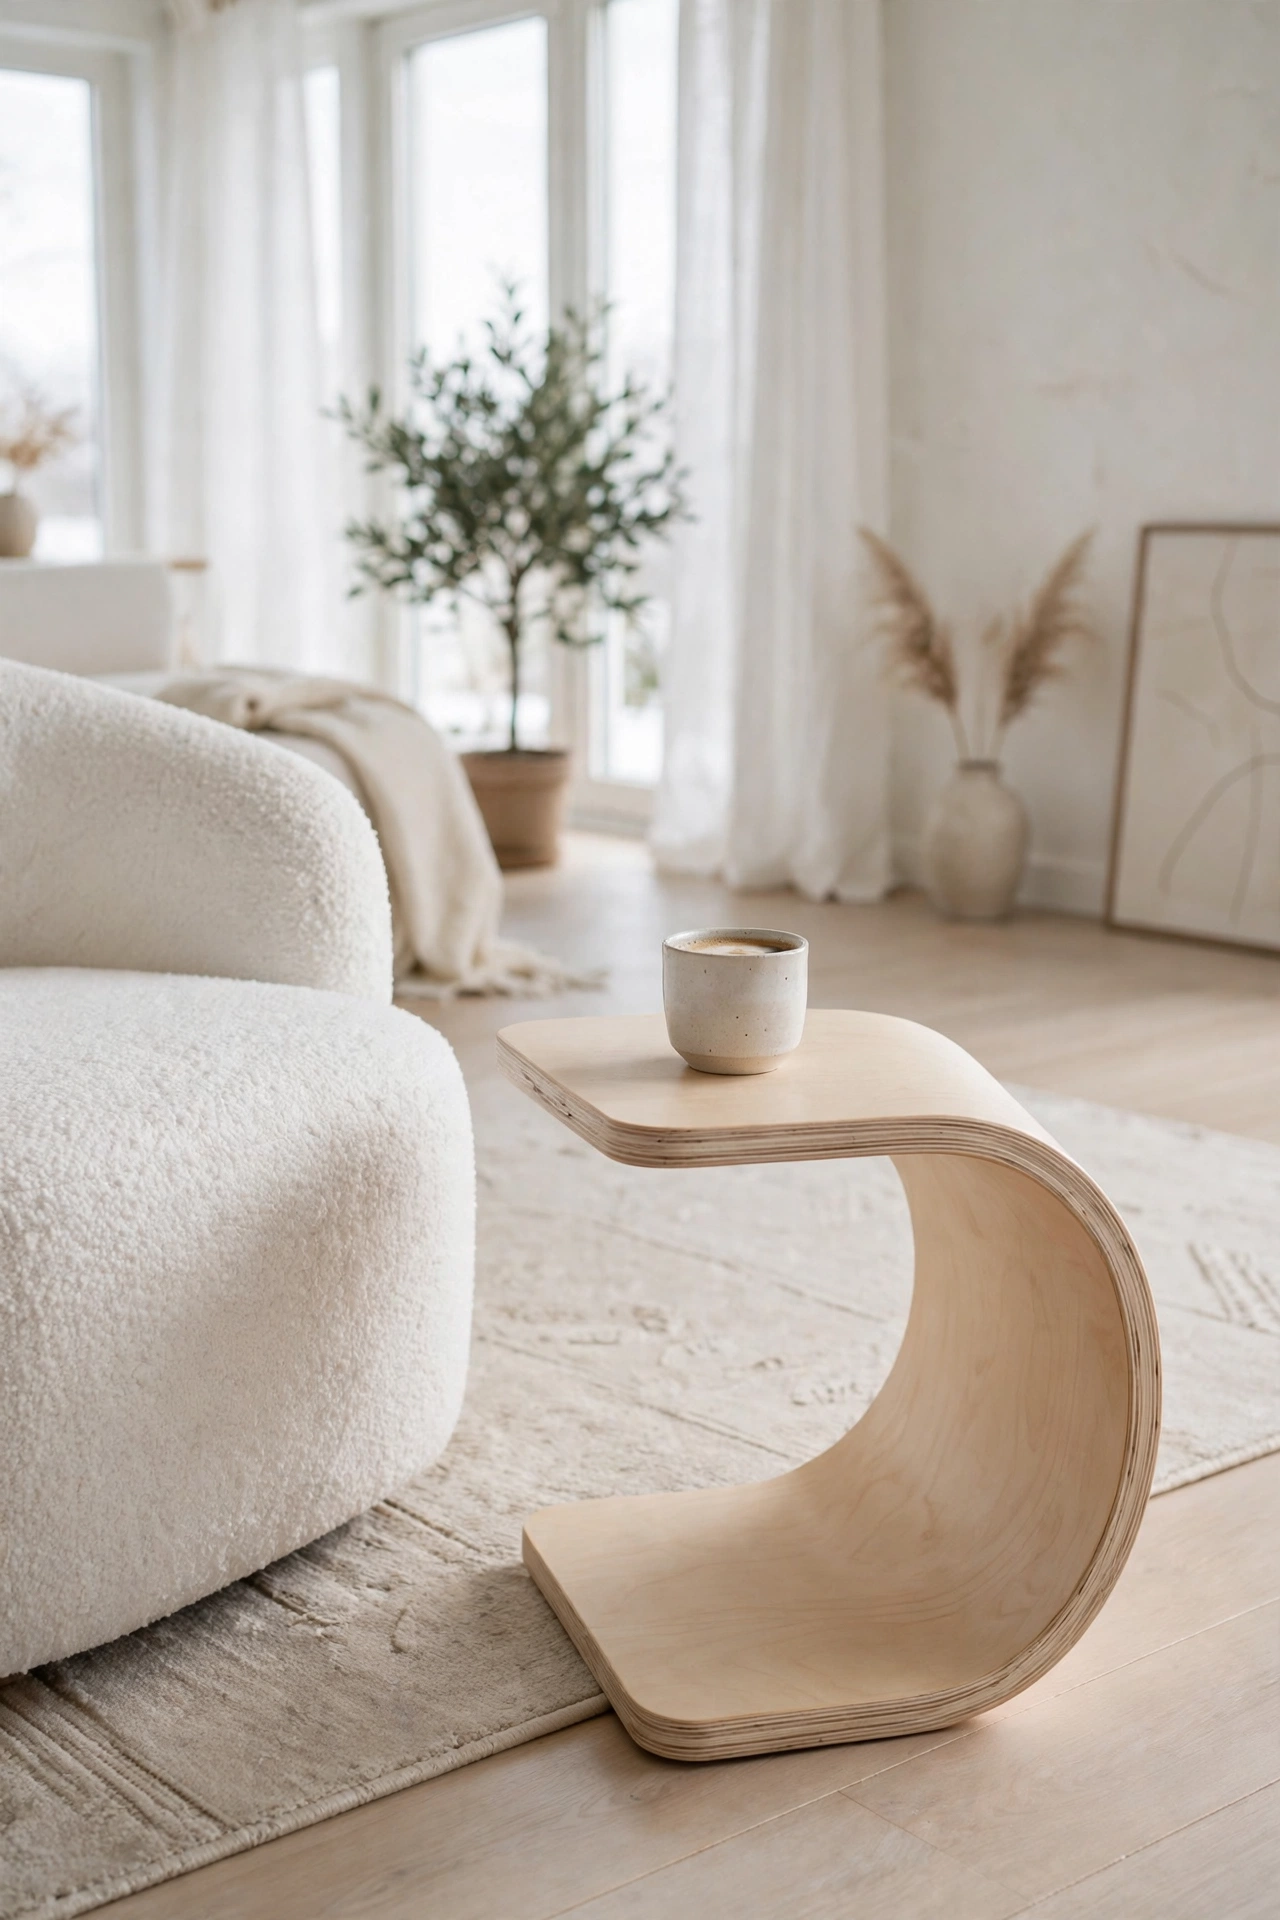
Scandi style is all about honest materials and simple curves. A bent-plywood side table — or even a simple cylinder of birch ply — needs little more than a sheet of quality plywood, a jigsaw, and patience. Keep the finish clear and matte so the pale birch grain is the whole decoration. It pairs beautifully with boucle, linen, and light oak floors.
Try this: spend the extra money on Baltic birch, not big-box plywood. The void-free layers and clean edges are what make plywood furniture look expensive instead of crafty.
20. Copper Pipe Leg Table
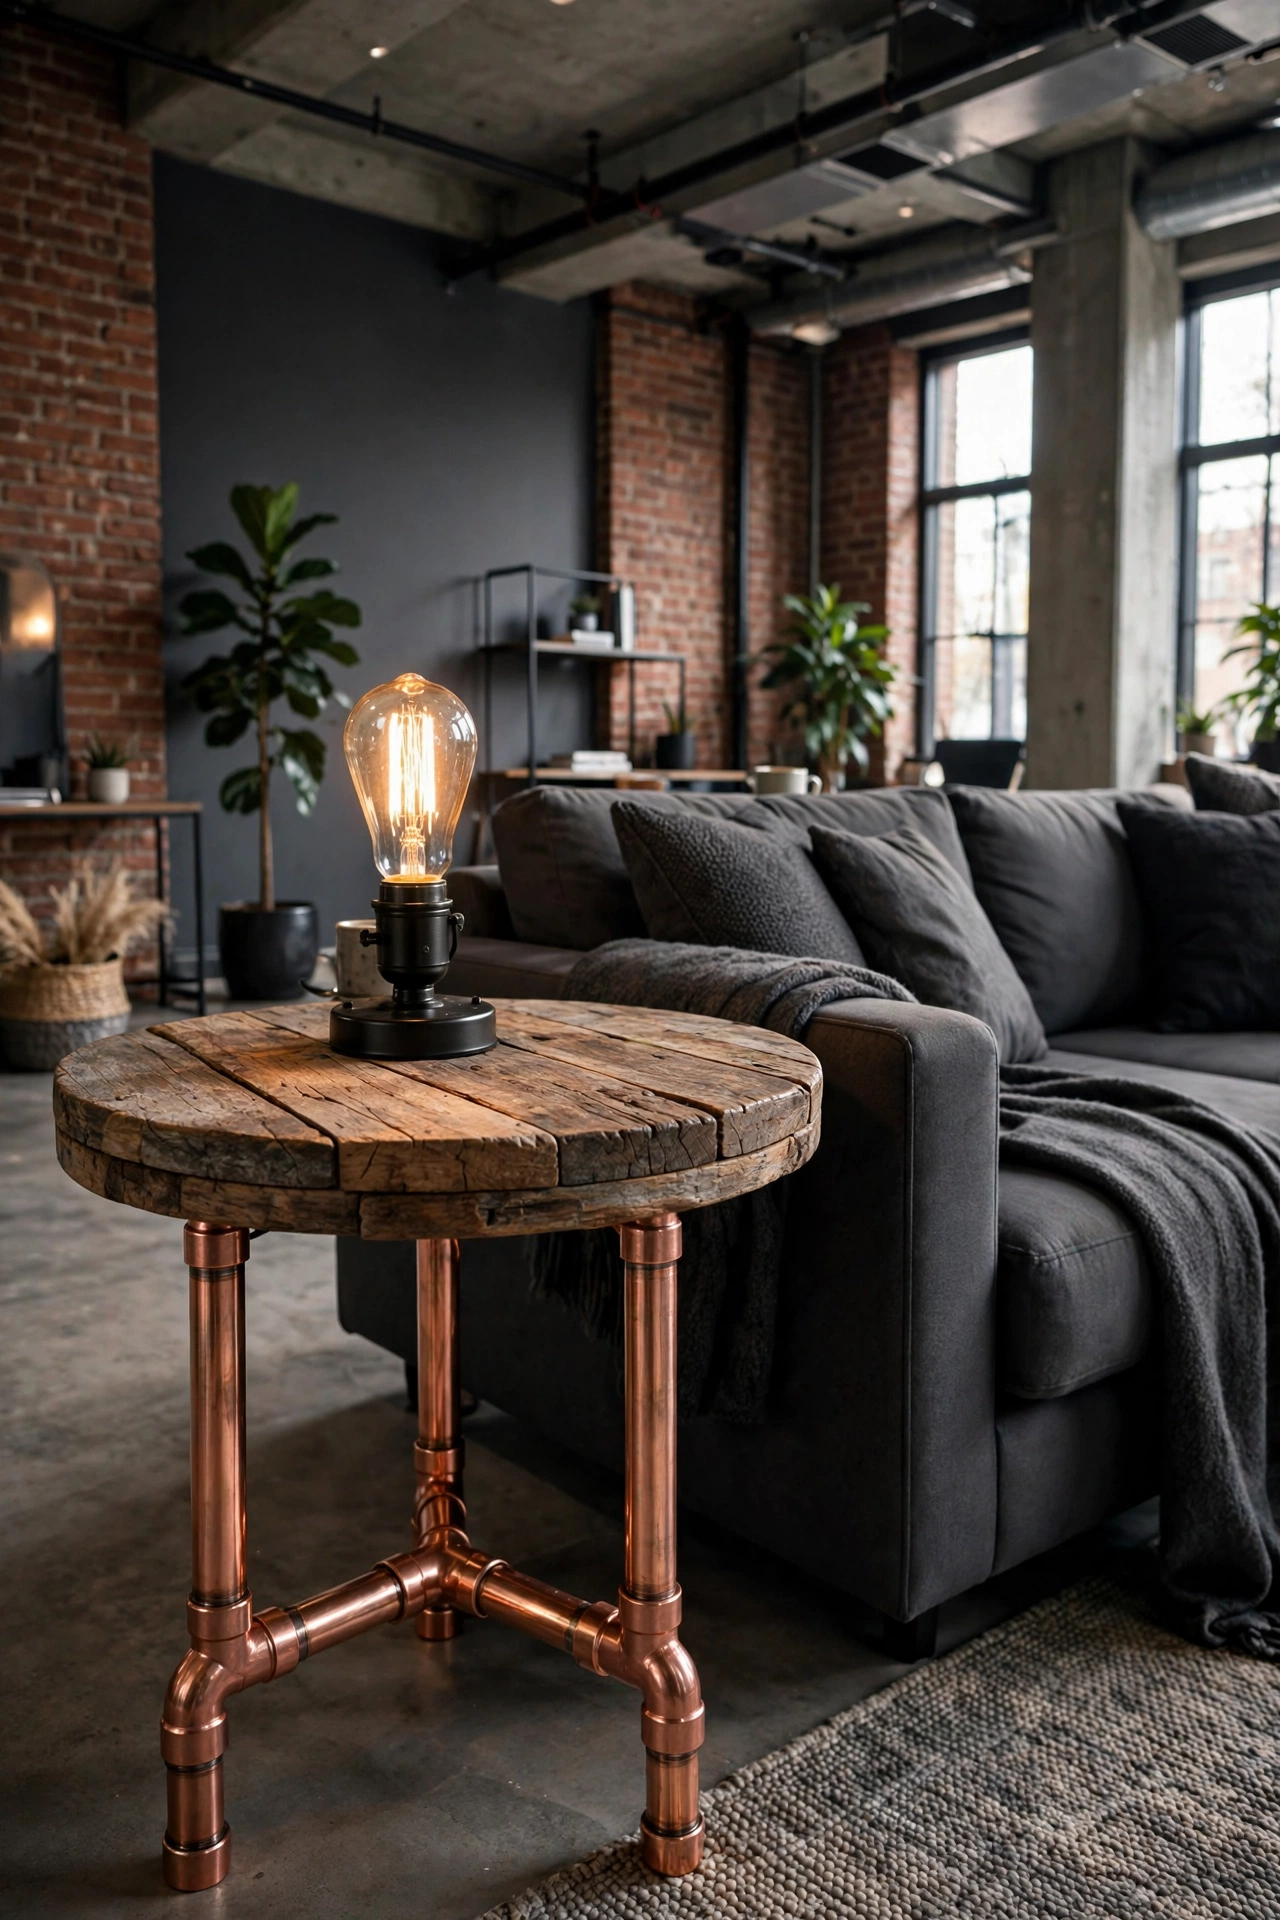
Reclaimed wood top, copper pipe legs, zero welding. Copper plumbing pipe and elbow fittings screw together into sturdy, gorgeous legs — you just cut the pipe to length with a cheap tubing cutter. The warm copper against aged wood is an unbeatable industrial-chic combination, and the whole table goes together in an afternoon.
Try this: clear-coat the copper with lacquer after assembly. Bare copper tarnishes with fingerprints, and a quick spray keeps it bright for years.
21. Log Planter Side Table
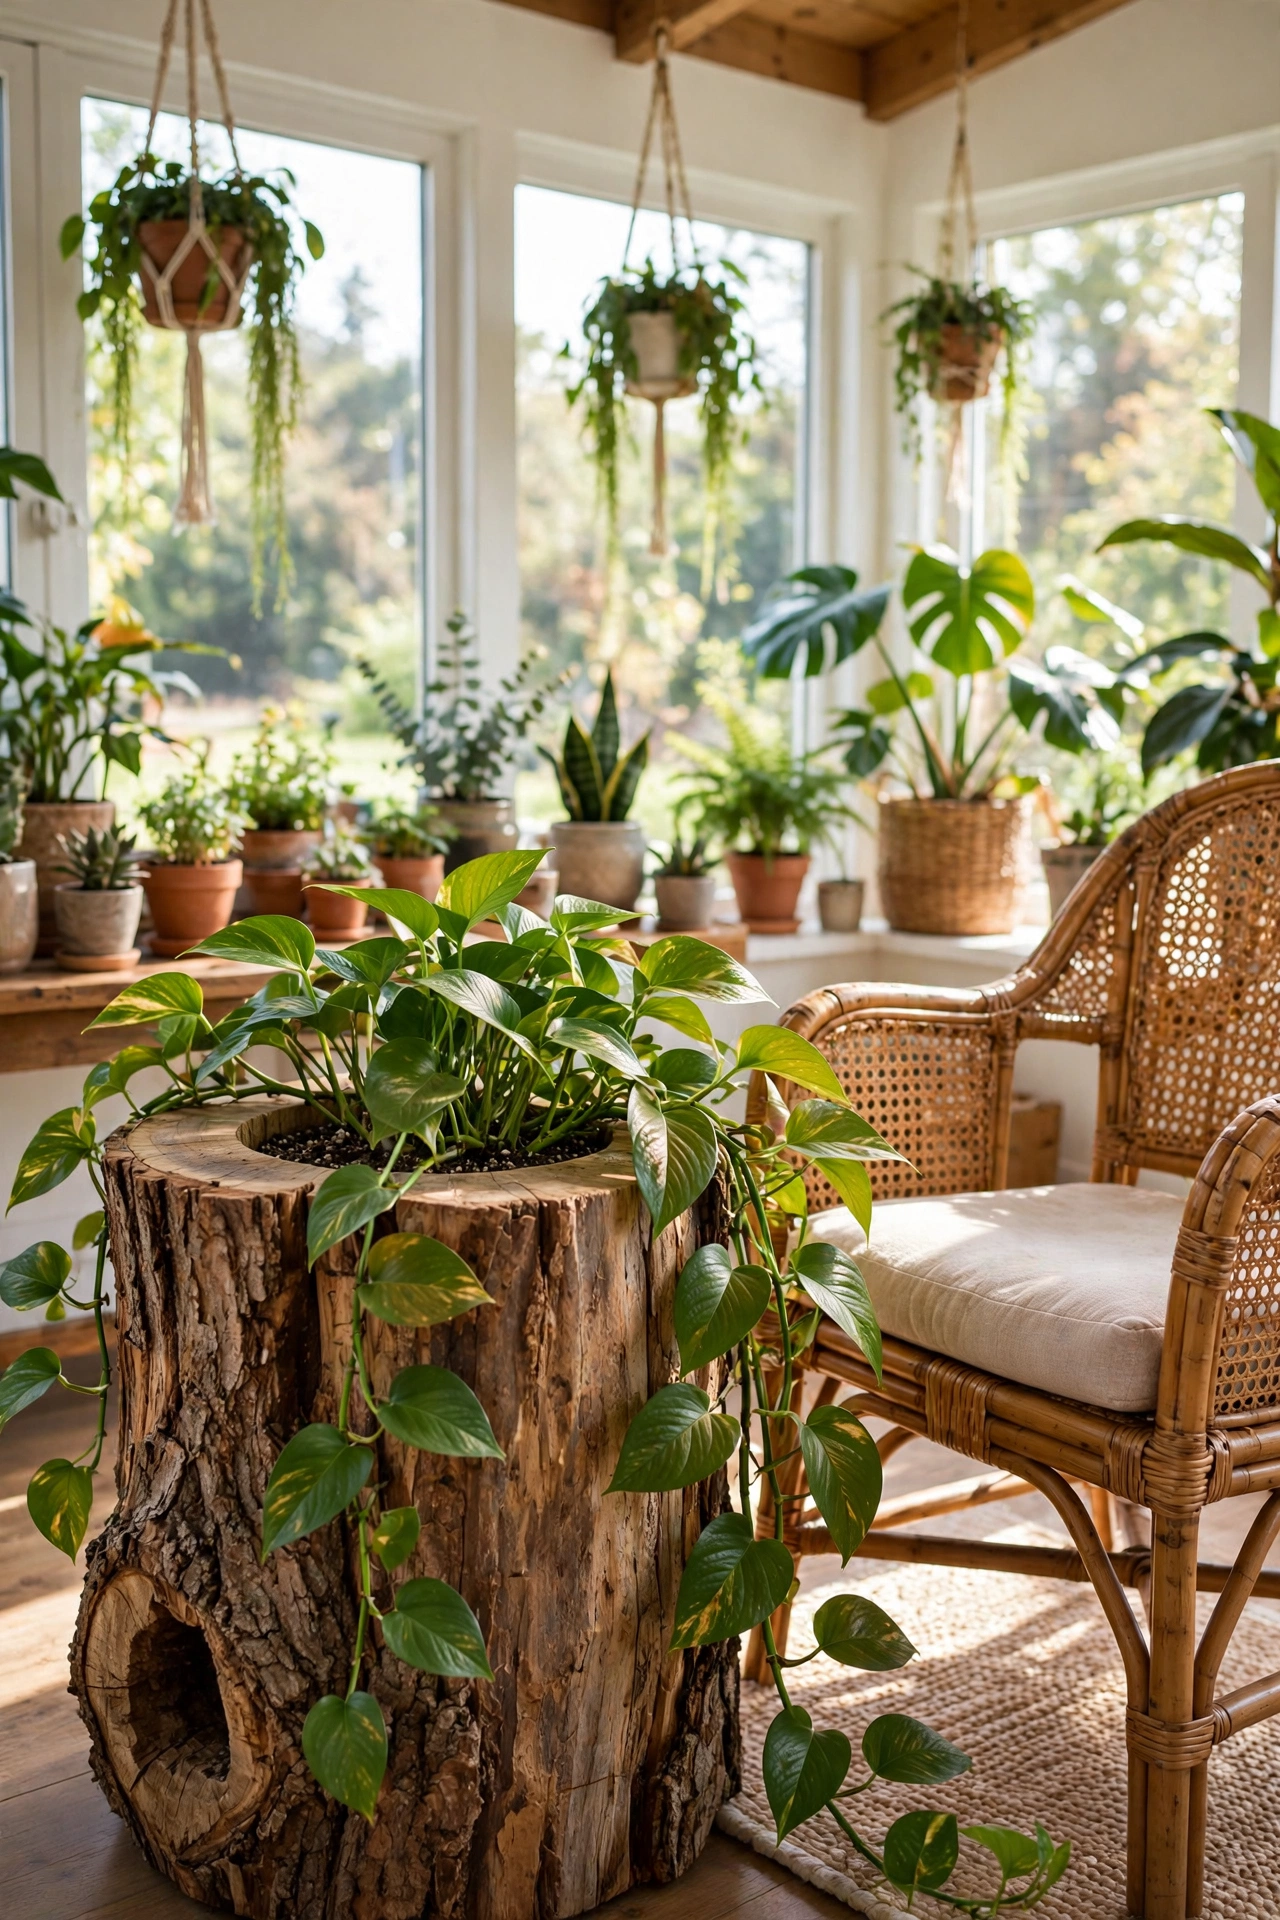
A hollowed log section that holds a plant on top and your coffee on the rim — part side table, part planter. Choose a log wide enough to stay stable, hollow the top center, drop in a plastic nursery pot (never plant directly in the wood), and let a trailing pothos spill over the side. It is the side table for people who cannot stop buying plants.
Try this: seal the inside of the hollow thoroughly and always use a saucer under the nursery pot. Wood plus constant moisture equals rot, no matter how good it looks today.
22. Folding Tray Top Table
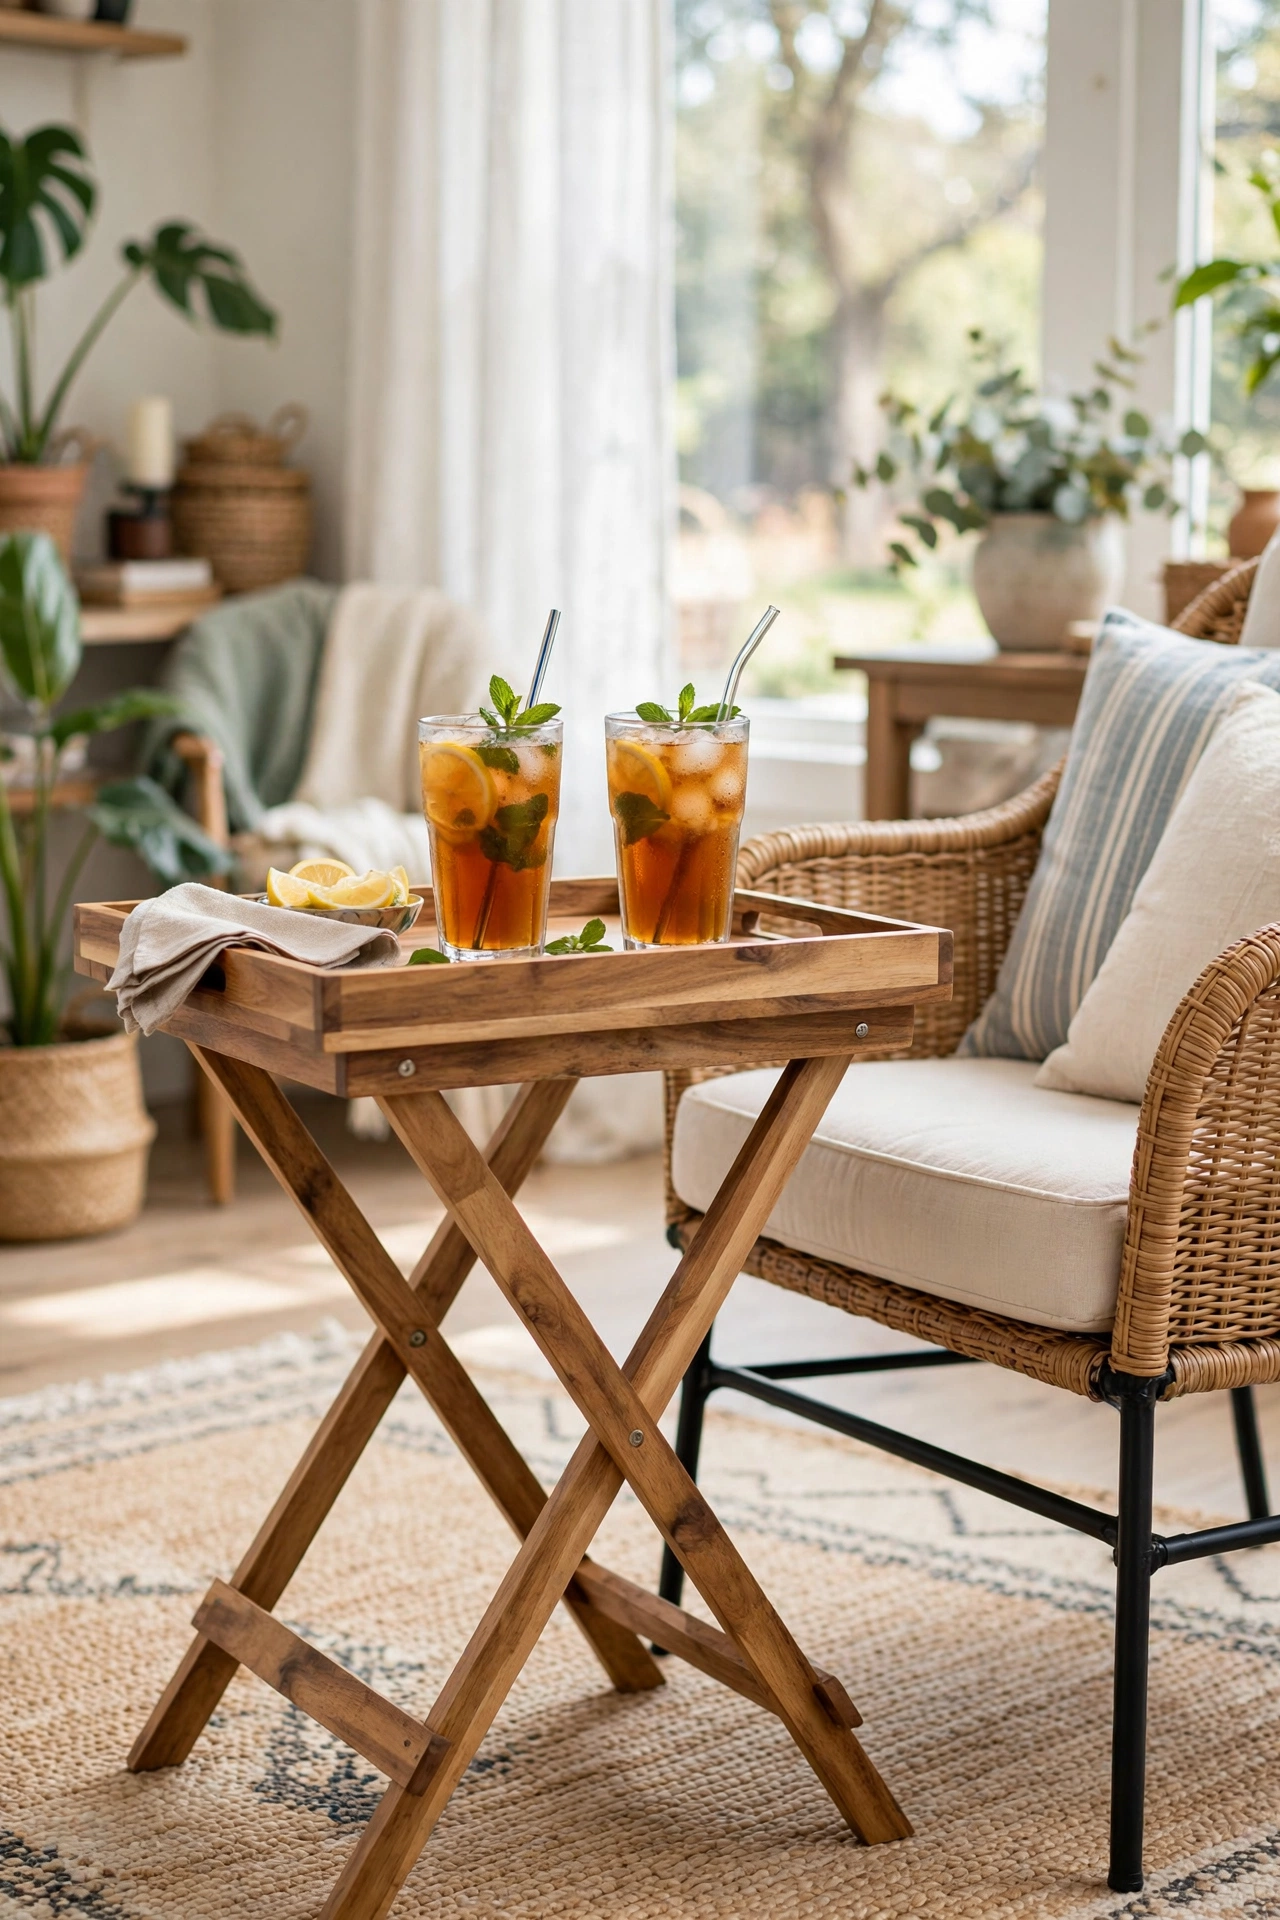
The classic butler’s tray table: an X-frame base with a lift-off rectangular tray top. Use it as a side table daily, then lift the tray and carry drinks to the porch. Build the tray with a raised lip (so nothing slides off) and the X-base from 1×2 hardwood. Hinges are optional — a tray that simply rests in the X is more versatile.
Try this: line the tray bottom with cork or leather. It deadens the clink of glasses and stops mugs from sliding when you carry it.
23. Reclaimed Door Panel Table
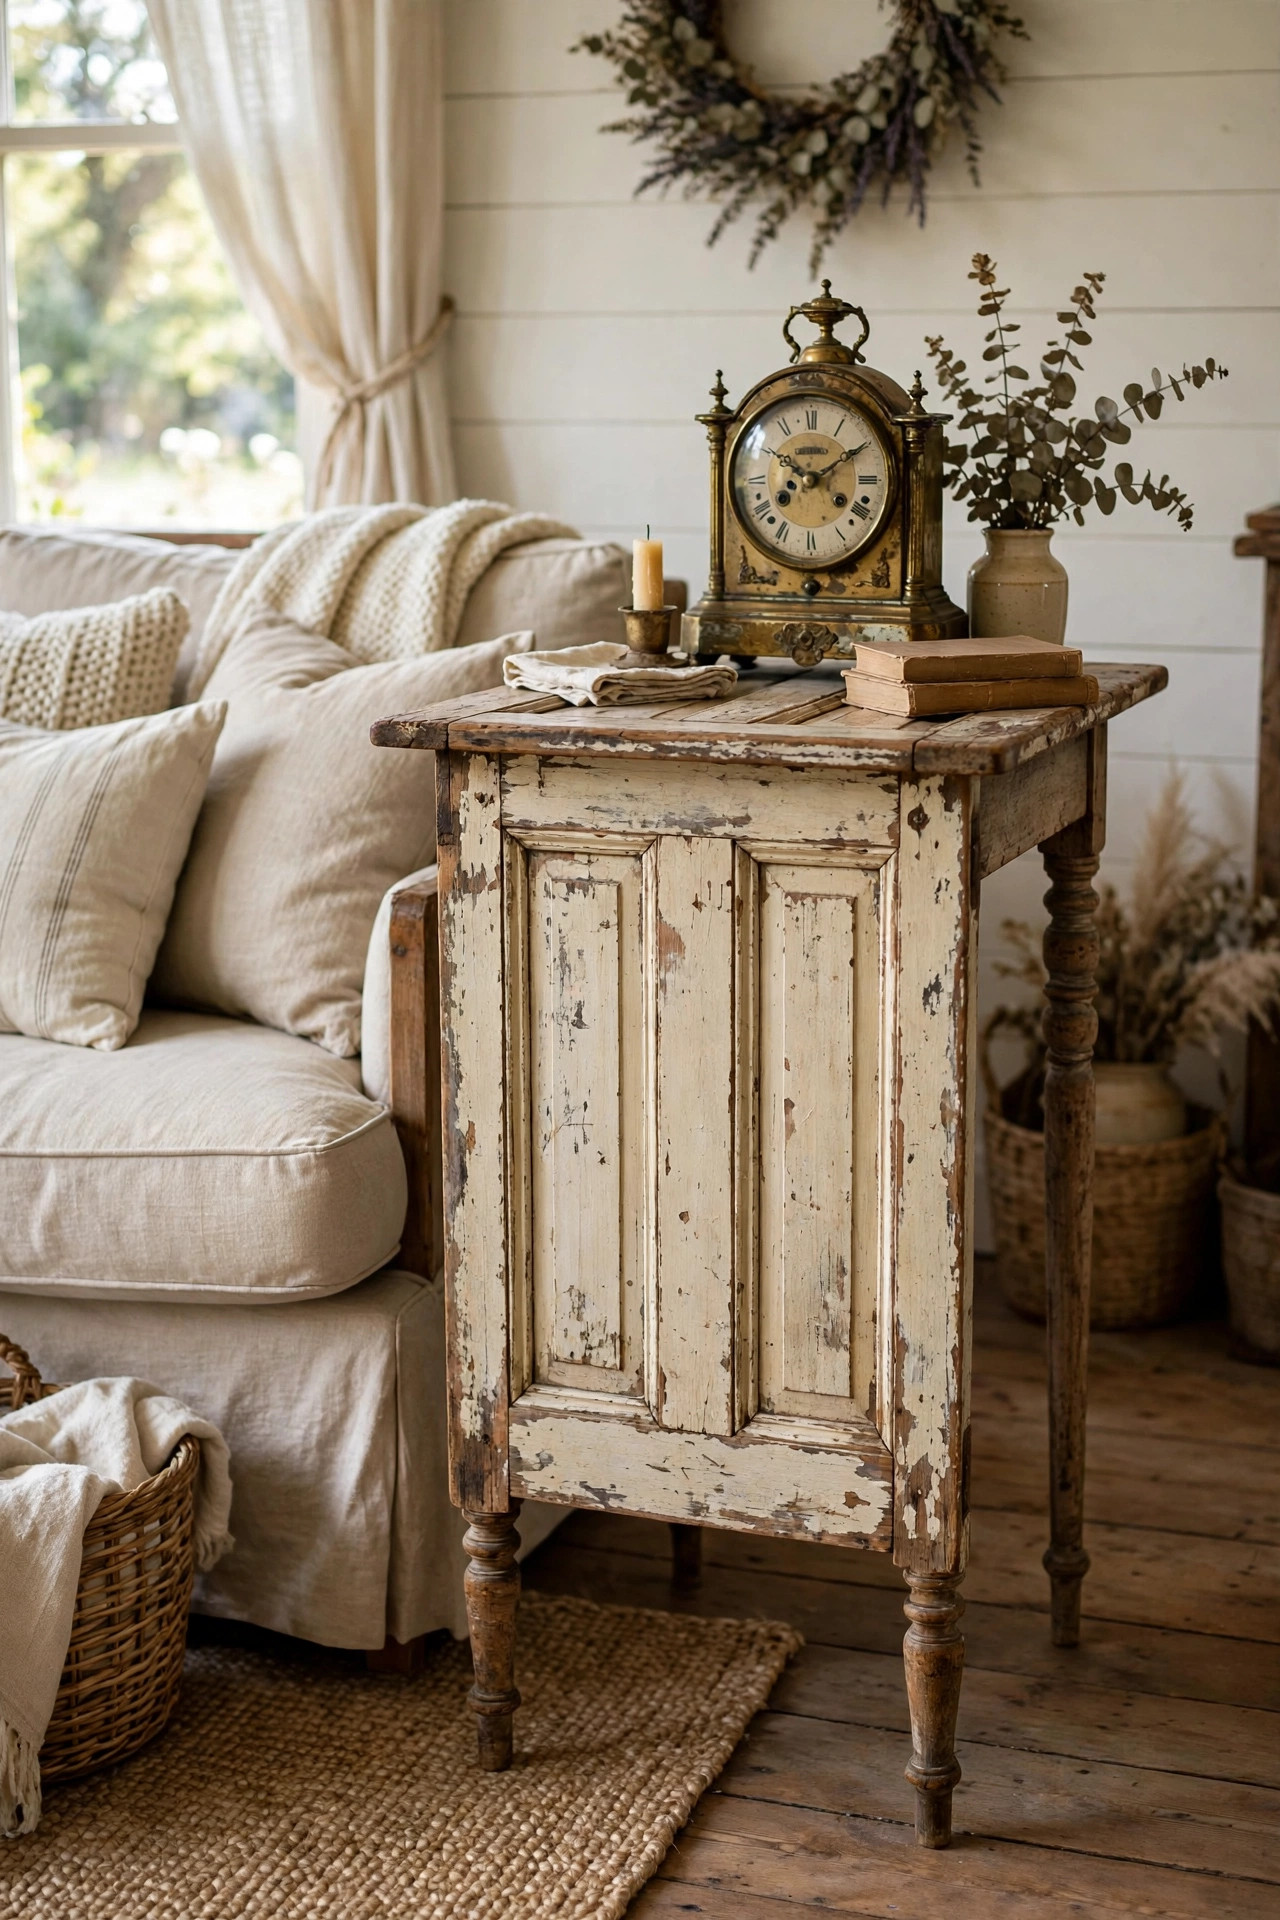
Salvage yards are full of old paneled doors, and a door section makes a spectacularly tall, narrow side table. Cut the door down to table width, mount it on turned or tapered legs, and let the original panels be the design. Distressed paint stays; just seal it so the chips do not keep chipping onto your floor.
If your whole room is leaning farmhouse, these beautiful farmhouse old window projects are perfect weekend companions for a reclaimed-wood table like this one.
Try this: test old paint for lead before sanding anything salvaged. If it tests positive, encapsulate with a fresh coat of paint instead of sanding — no dust, no risk.
24. Ladder Shelf Side Table
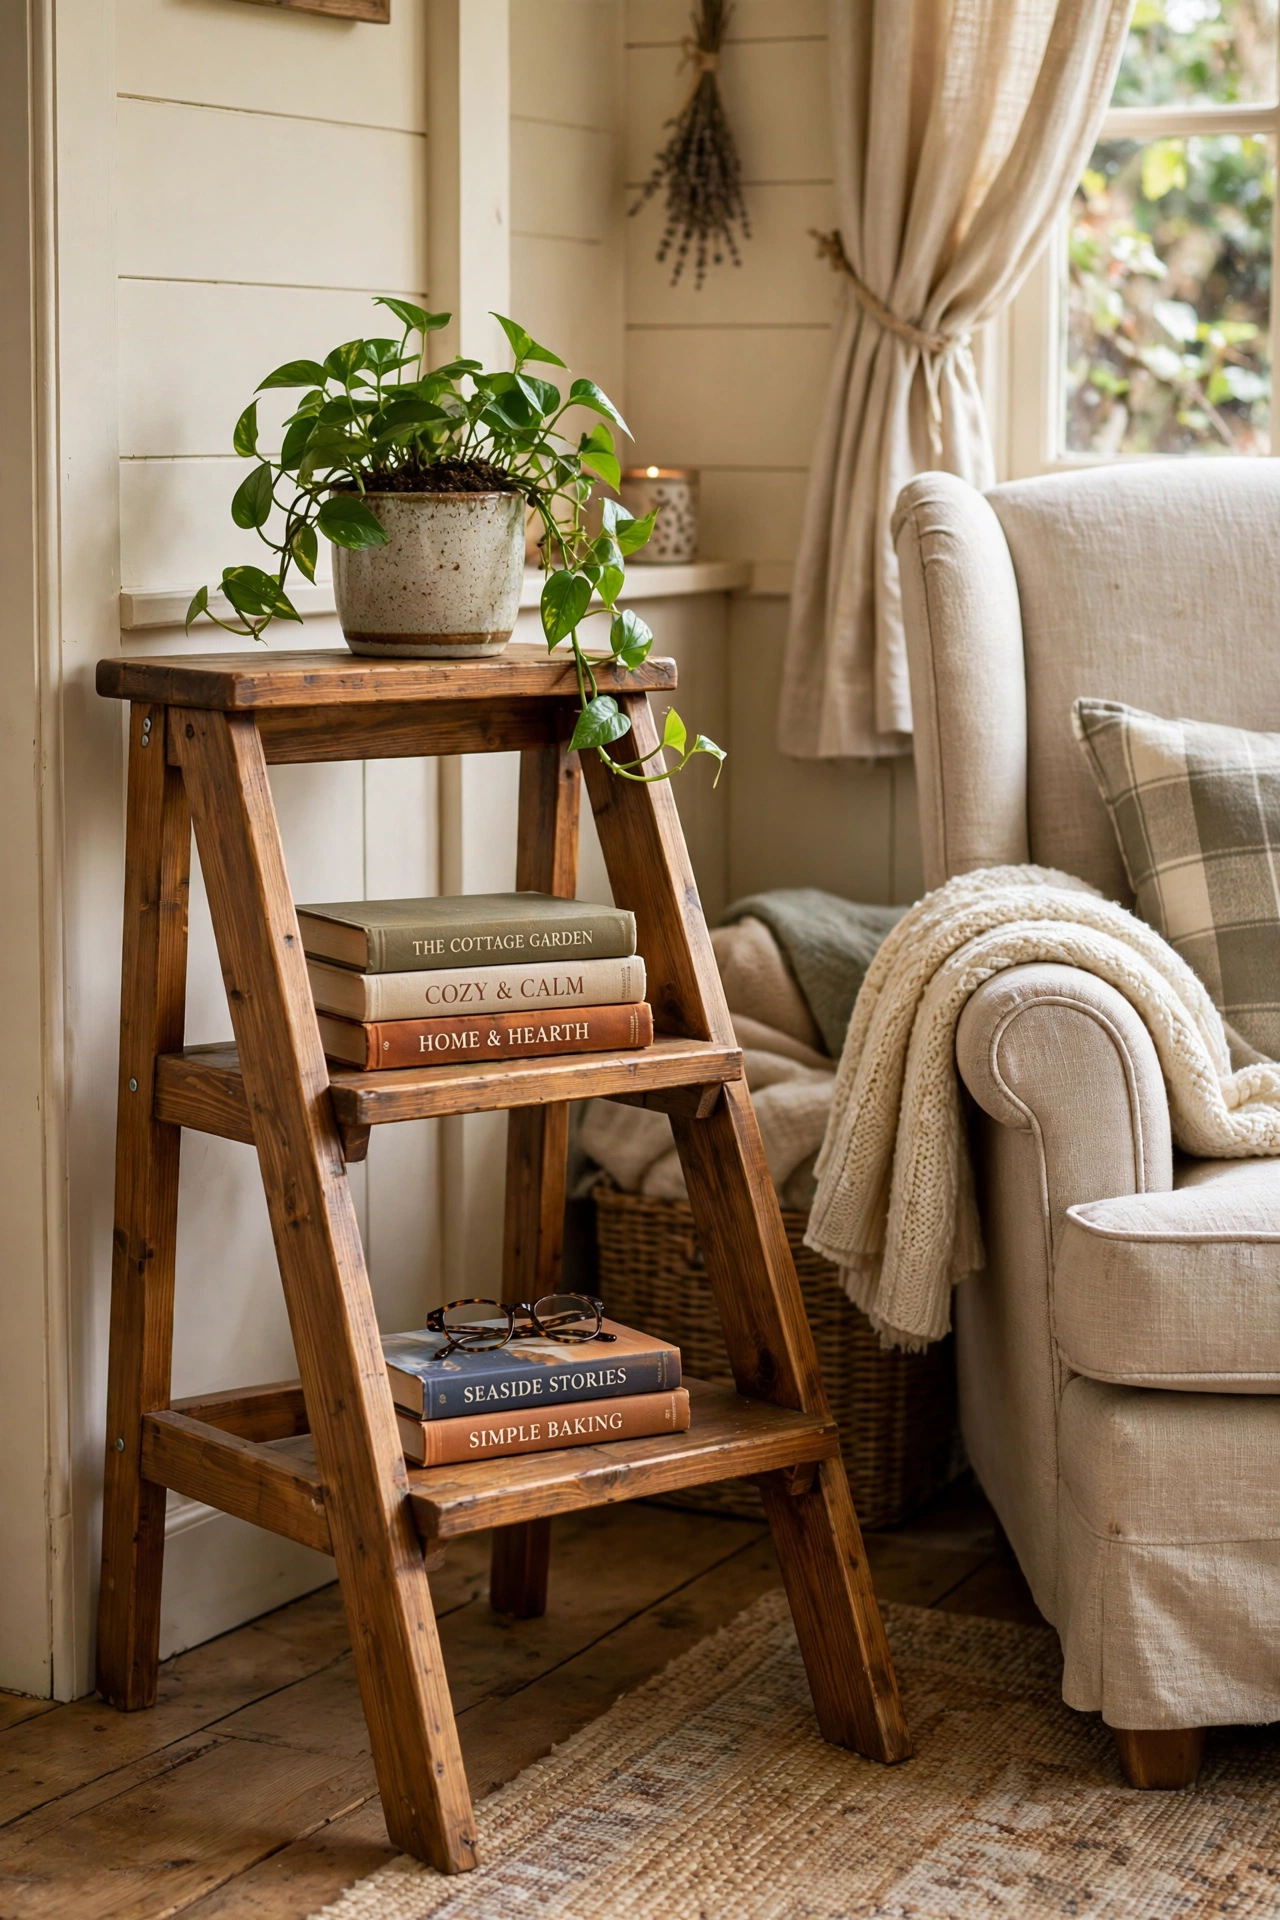
A small wooden step ladder is a side table with three surfaces instead of one. Widen the steps if needed with a plank across two rungs, sand, and stain. Books live on the bottom step, the plant on the middle, your coffee on top — it is vertical storage disguised as furniture, and it looks fantastic in cottage and farmhouse rooms.
Try this: check that all rungs are rock solid before styling. An old ladder that flexes under a paint can will not be happy holding your grandmother’s lamp.
25. Rolling Industrial Cart Table
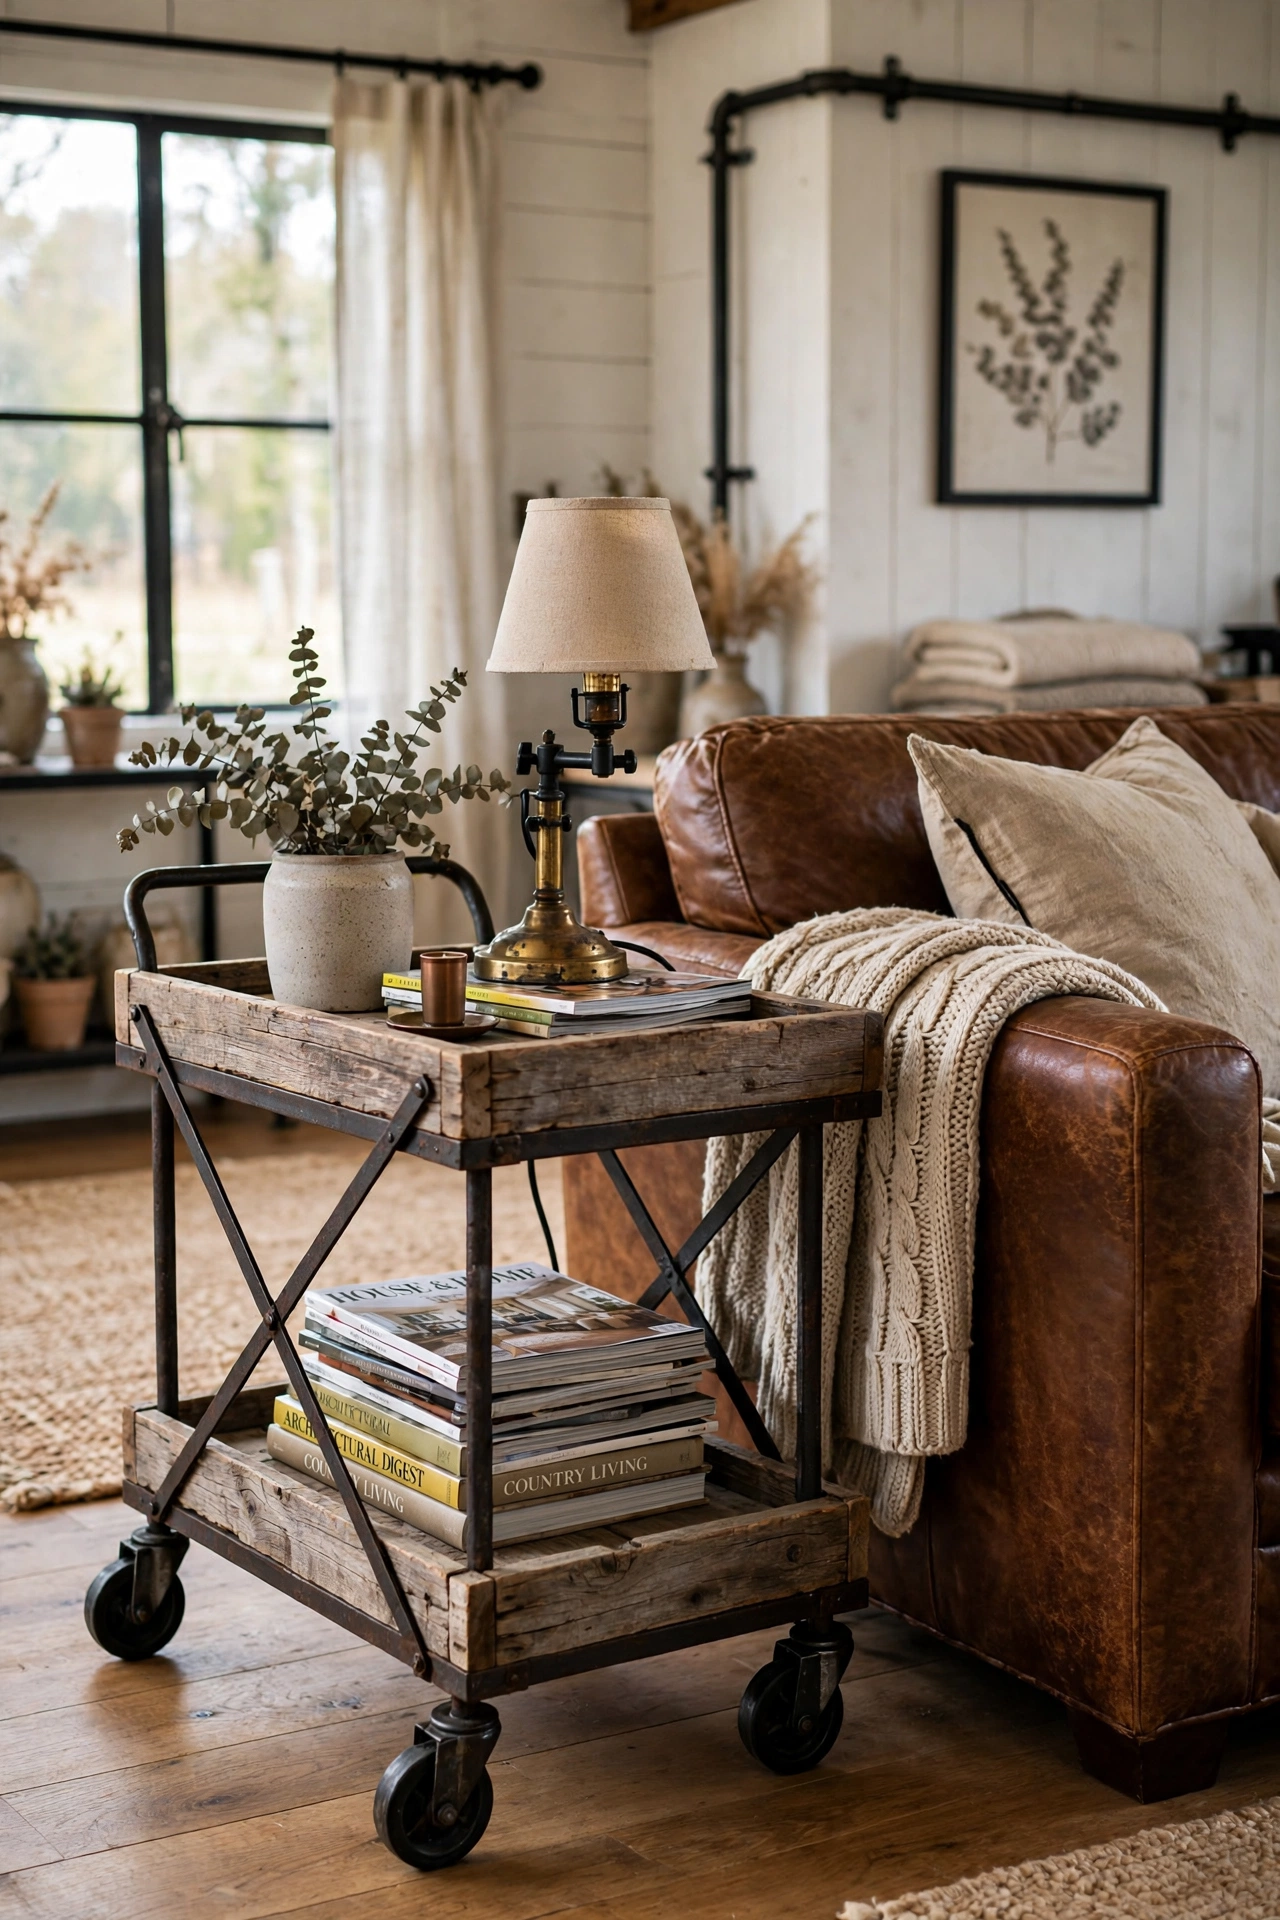
Two tiers of reclaimed wood, an iron frame, and caster wheels — the industrial cart is the hardest-working side table on this list. The lower shelf swallows magazines, throws, and the board games nobody admits to owning. Build the frame from angle iron or black pipe fittings, screw on the wood shelves, and add locking casters.
Try this: make the lower shelf removable. Carts collect clutter, and being able to lift the shelf out makes the twice-yearly purge dramatically easier.
Quick-Pick Cheat Sheet
Not sure which build fits your skill level and weekend? This cheat sheet matches the most popular options to their difficulty, cost, and best use:
| Table Style | Best For | Est. Cost | Difficulty |
|---|---|---|---|
| Tree stump / tree slice | Rustic & cabin rooms | Free–$20 | Beginner |
| Stacked crate table | Farmhouse storage | $10–$30 | Beginner |
| Hairpin leg slab | Modern & mid-century | $25–$60 | Beginner |
| Pallet cube | Budget rustic | $20–$40 | Beginner |
| Farmhouse X-frame | Farmhouse living rooms | $20–$40 | Beginner |
| Cable spool / wine crate | Quirky vintage | Free–$25 | Beginner |
| Mid-century tapered leg | Retro styling | Beginner | |
| Live-edge slab | Statement piece | $40–$120 | Intermediate |
| Herringbone top | Showcase build | $30–$70 | Intermediate |
| Rolling cart | Flexible storage | $40–$90 | Intermediate |
Frequently Asked Questions
What is a good height for a DIY wooden side table?
Aim for 22 to 26 inches tall — roughly level with the arm of your sofa or chair, or within a couple of inches of it. A table much lower than the armrest forces you to reach down awkwardly; much higher and it looks out of proportion. For a nightstand-style table, match the top of your mattress.
What is the cheapest wood for a DIY side table?
Free pallet wood (heat-treated, HT-stamped) is the cheapest option, followed by construction-grade pine 2x4s and 1x6s from the home center. A simple pine side table typically costs $15–$30 in lumber. Avoid the temptation of ultra-cheap warped boards — straight, dry lumber saves more in frustration than it costs.
How do I stop my wooden side table from wobbling?
Wobble almost always comes from uneven legs. Assemble the table on a known-flat surface, measure each leg from the same reference point, and trim or sand the long one. For minor wobble, stick-on felt pads or adjustable screw-in feet fix it in seconds. Always double-check the table is level before applying the final finish.
Can I build a side table with only basic tools?
Yes. A circular saw (or a handsaw), a drill/driver, a sander, a tape measure, and a square are enough for most of the builds in this list — crate tables, stumps, hairpin-leg slabs, and pallet cubes need even less. A miter saw and pocket-hole jig make life easier but are not required to start.
How should I seal a wooden side table?
For everyday use, three thin coats of wipe-on or brush-on polyurethane (satin sheen) give the best protection against coffee rings and spills. Sand lightly with 220 grit between coats. For a more natural feel, hardwax oil or furniture wax works well on low-use tables but needs reapplication every year or two.
Final Thoughts
A side table is the ideal first furniture build because the stakes are low and the payoff is immediate. You learn to cut straight, drill square, sand smooth, and finish properly — every skill you will ever need for bigger furniture — on a project that fits in the trunk of your car.
Start with the build that matches your tools, not your dreams. Got no saw? Start with the stump or the stacked crates. Got a free weekend and a drill? The farmhouse X-frame will teach you more in two days than a month of watching build videos. And when it is sitting next to your chair holding your morning coffee, built with your own two hands, no store-bought table will ever feel quite as good.


