


A kitchen backsplash takes more abuse than any other wall in the house. It catches tomato sauce, steam, grease, and coffee splashes, and it sits right at eye level every time you cook. Picking the wrong tile means a wall that stains fast, dates fast, or costs far more to fix than it did to install.
This guide covers 17 backsplash tile ideas that actually work in real kitchens, from classic white subway to sage green vertical stacks, hexagon, zellige, scallop, and renter-friendly peel-and-stick. Each idea lists a real cost range and a difficulty label, so you can match the tile to your budget and your patience for grout lines. I redid my own backsplash last spring after years of staring at a stained, half-painted wall, and the layout choice mattered more than the tile itself.
Quick takeaways
- Layout changes the look as much as tile color does: herringbone, vertical stack, and chevron all read differently from the same tile.
- Grout color is a design choice, not an afterthought: dark grout makes a pattern pop, matching grout keeps it calm.
- Porcelain and ceramic handle heat and water best behind a range; natural stone needs sealing.
- Peel-and-stick tiles give renters a real update with no grout and no damage.
- Seal grout in wet zones and re-seal it once a year to keep stains from setting in.
1. Classic white subway in a brick bond
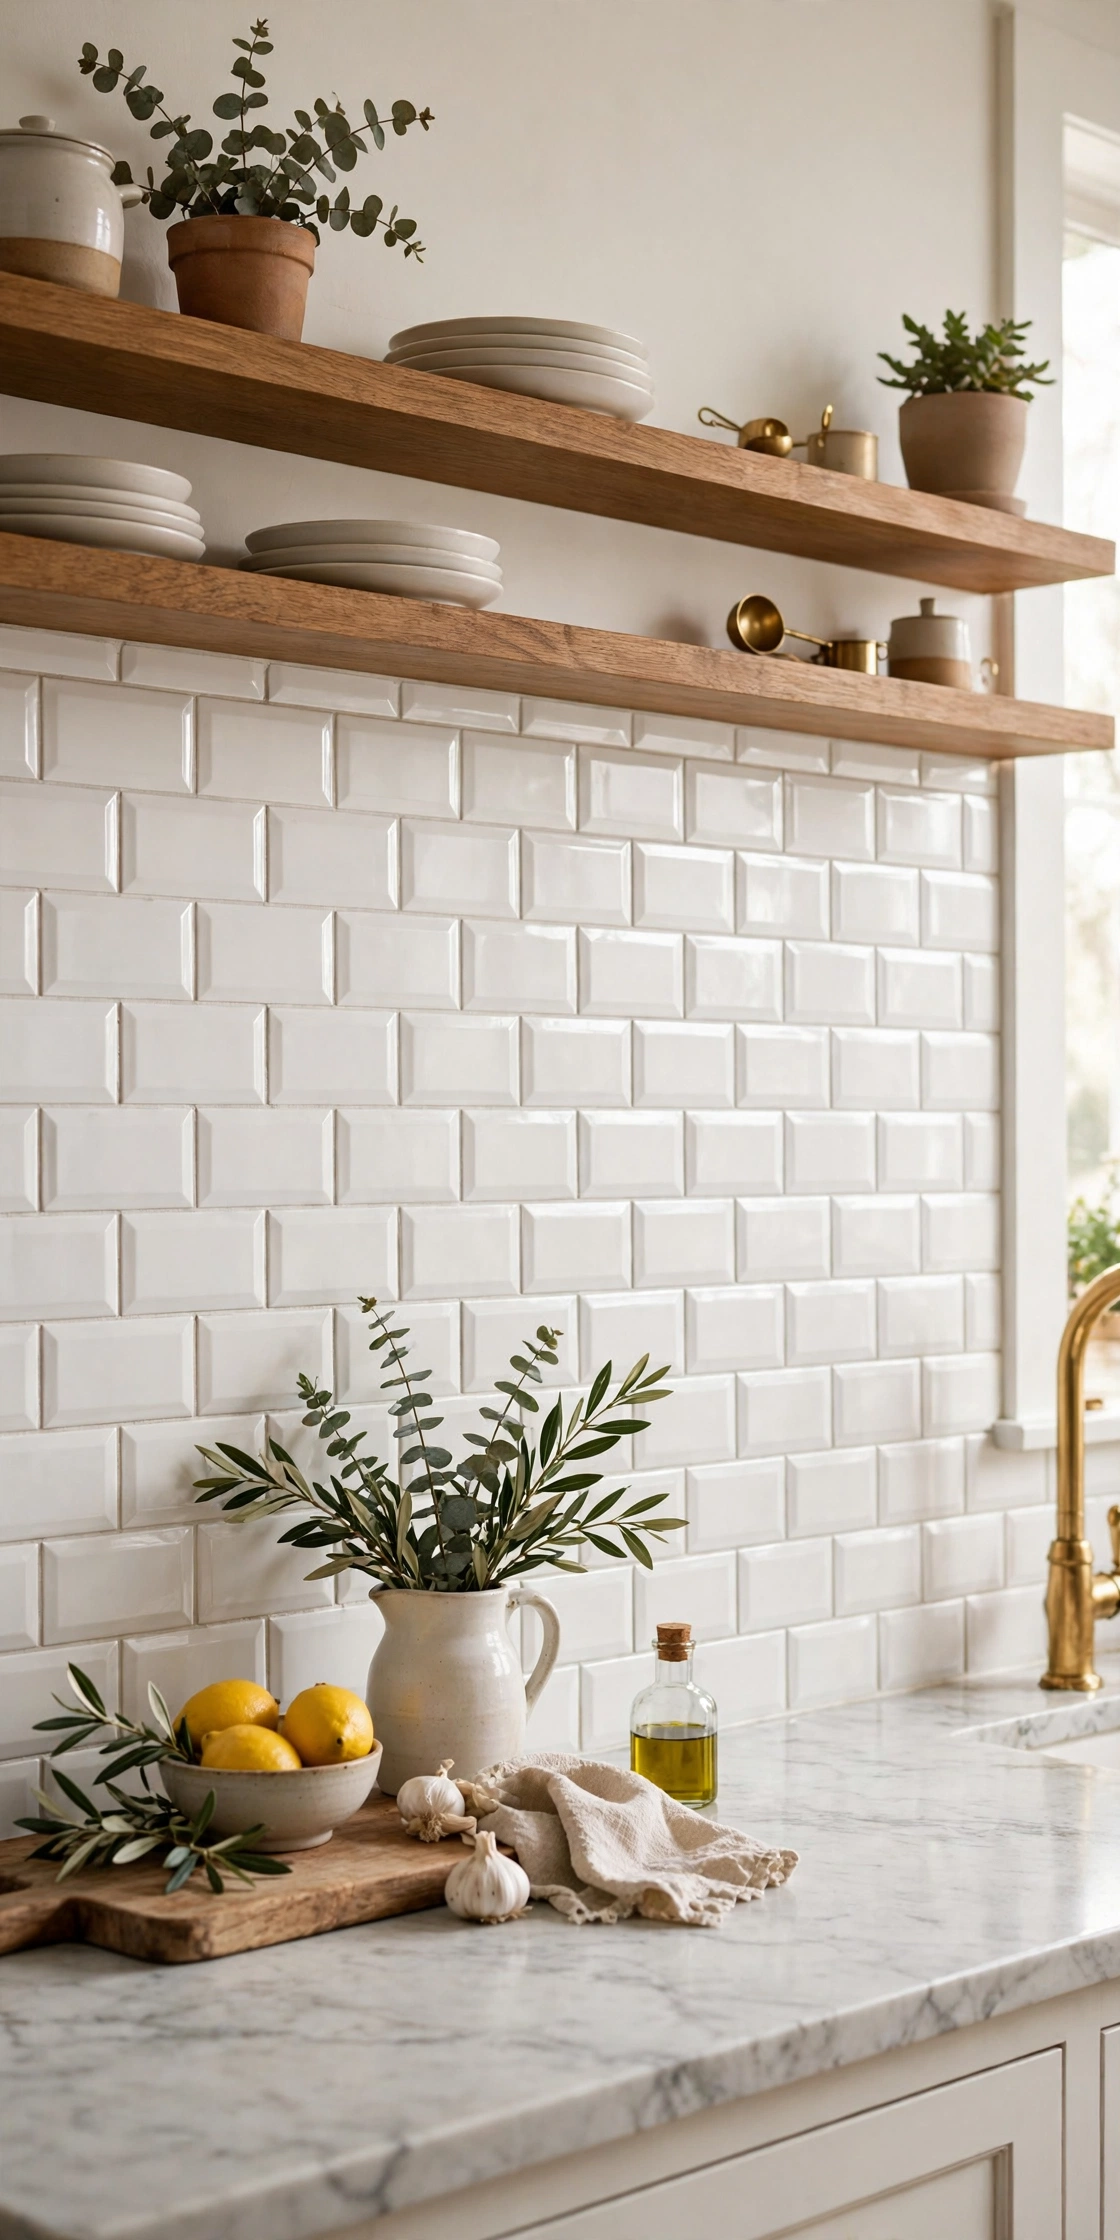
White subway tiles in a standard brick bond remain the safest backsplash choice for a reason. The 3 by 6 inch format fits any cabinet style, from flat-panel modern to Shaker, and it costs less than almost any other tile option. A glossy finish wipes clean with a damp cloth, which matters behind a range where grease lands daily. Pair the tile with light grey grout if you want the grid to stay quiet, or dark charcoal grout if you want the brick pattern to stand out. The whole wall reads calm either way, and it never fights with a busy countertop.
Try this: Run the tile to the underside of the wall cabinets for a finished edge, and add a simple metal trim strip where the tile stops.
Cost: $ | Difficulty: Easy
2. Sage green subway stacked vertically

Stacking subway tiles vertically instead of in a brick bond changes the whole feel of a kitchen. The vertical lines pull the eye upward, which helps a kitchen with low ceilings or short upper cabinets feel taller. Sage green keeps the look soft and current without shouting for attention, and it pairs well with warm wood cabinets and brass hardware. Use a matching green-grey grout so the vertical lines read as one calm surface rather than a grid. This layout takes the same tile as a classic subway wall and makes it look custom.
Try this: Carry the vertical stack all the way to the ceiling behind the range for one tall feature strip.
Cost: $ | Difficulty: Easy
3. White marble look herringbone
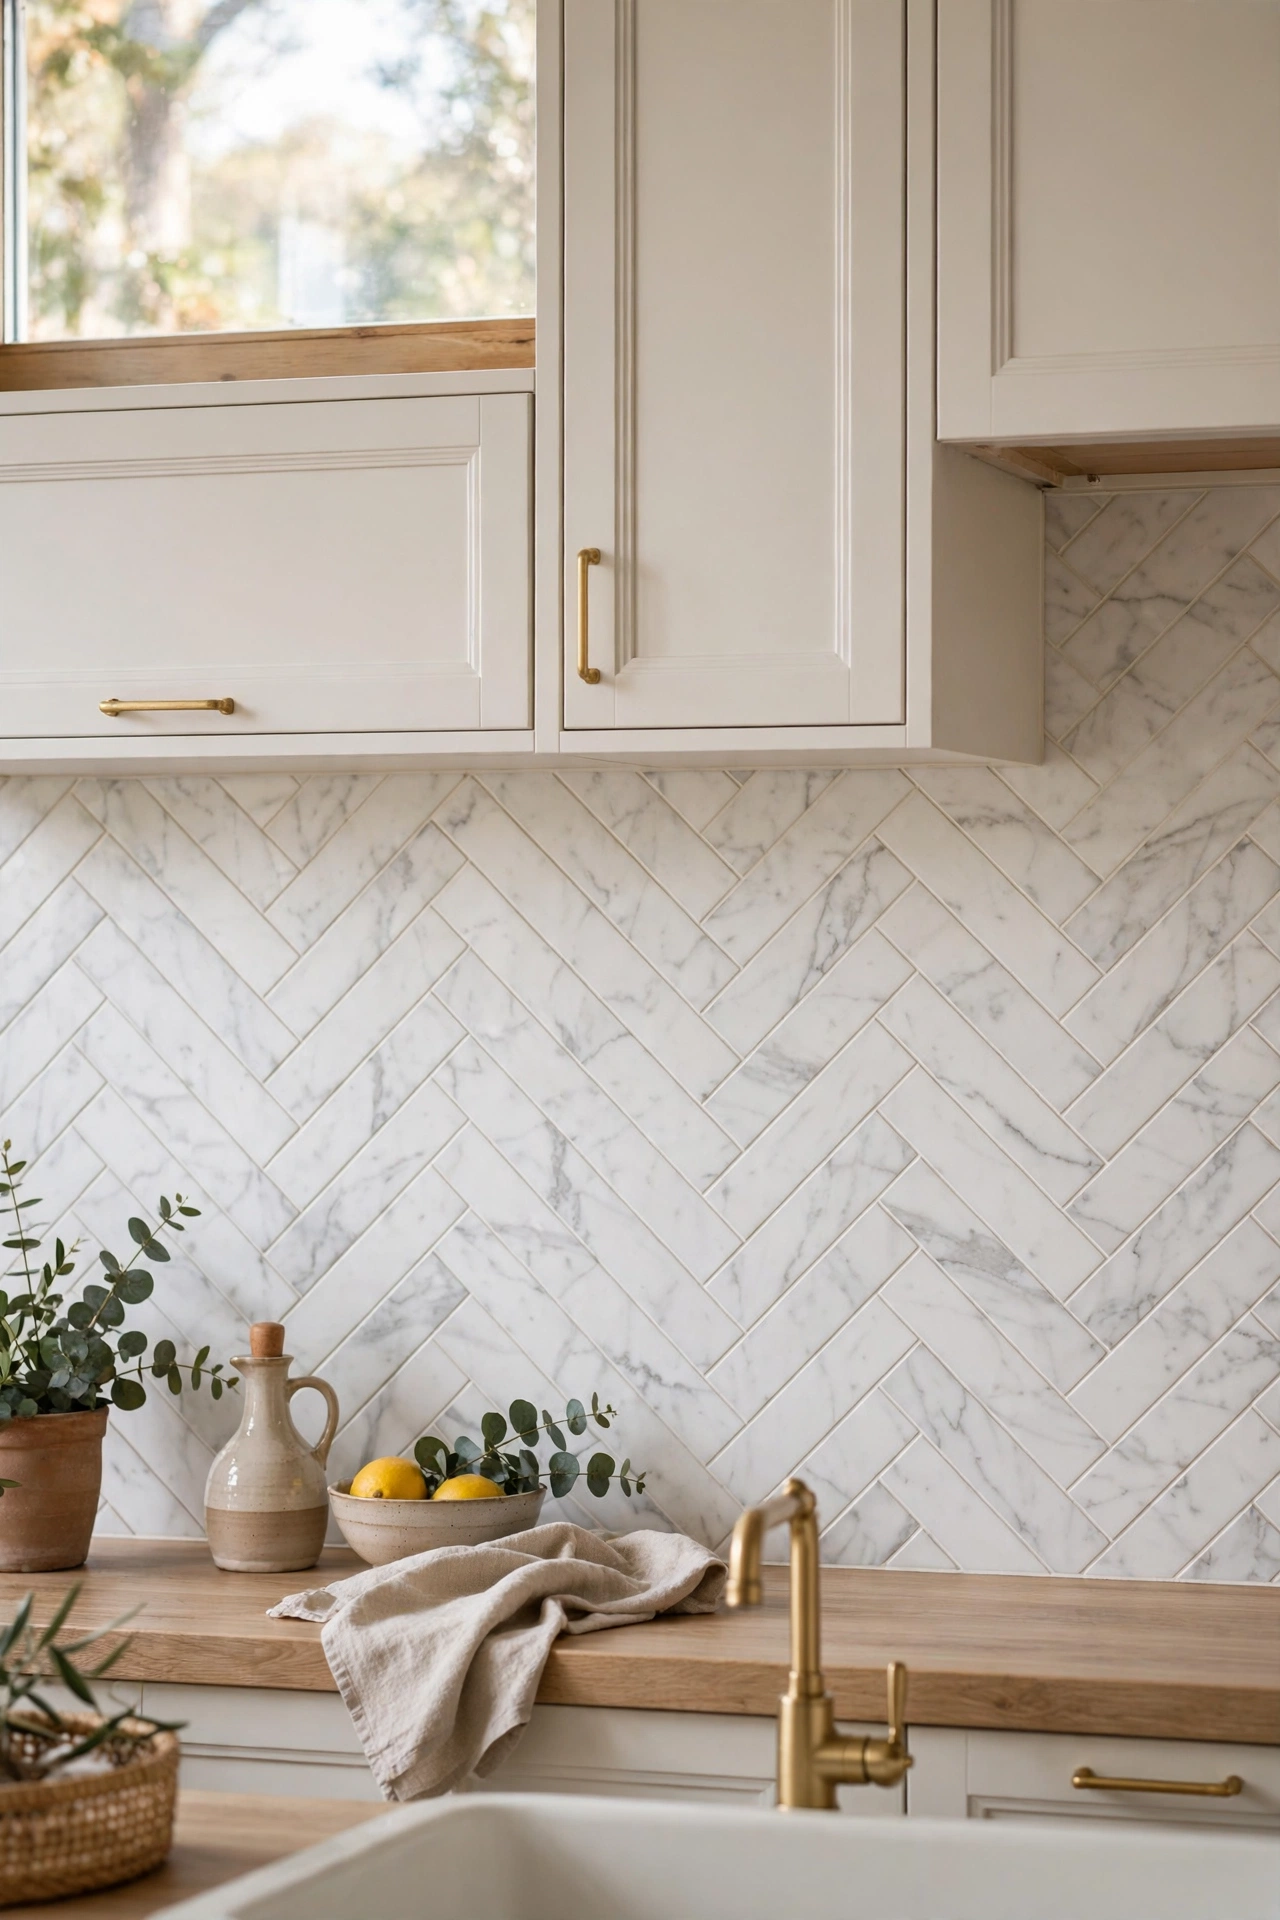
Herringbone uses the same rectangular tile as a subway wall but lays it at an angle, and that angle adds movement to a plain wall. A white marble look porcelain tile gives you the veining of real marble with the stain resistance of porcelain, which matters behind a sink where water spots show. Keep the grout light and close in color so the zigzag pattern stays soft rather than busy. Herringbone takes longer to lay than a grid, so budget for extra labor or extra patience if you lay it yourself.
Try this: Limit herringbone to the range wall and use a simple grid on the side walls to keep costs down.
Cost: $$ | Difficulty: Hard
4. Soft green hexagon honeycomb
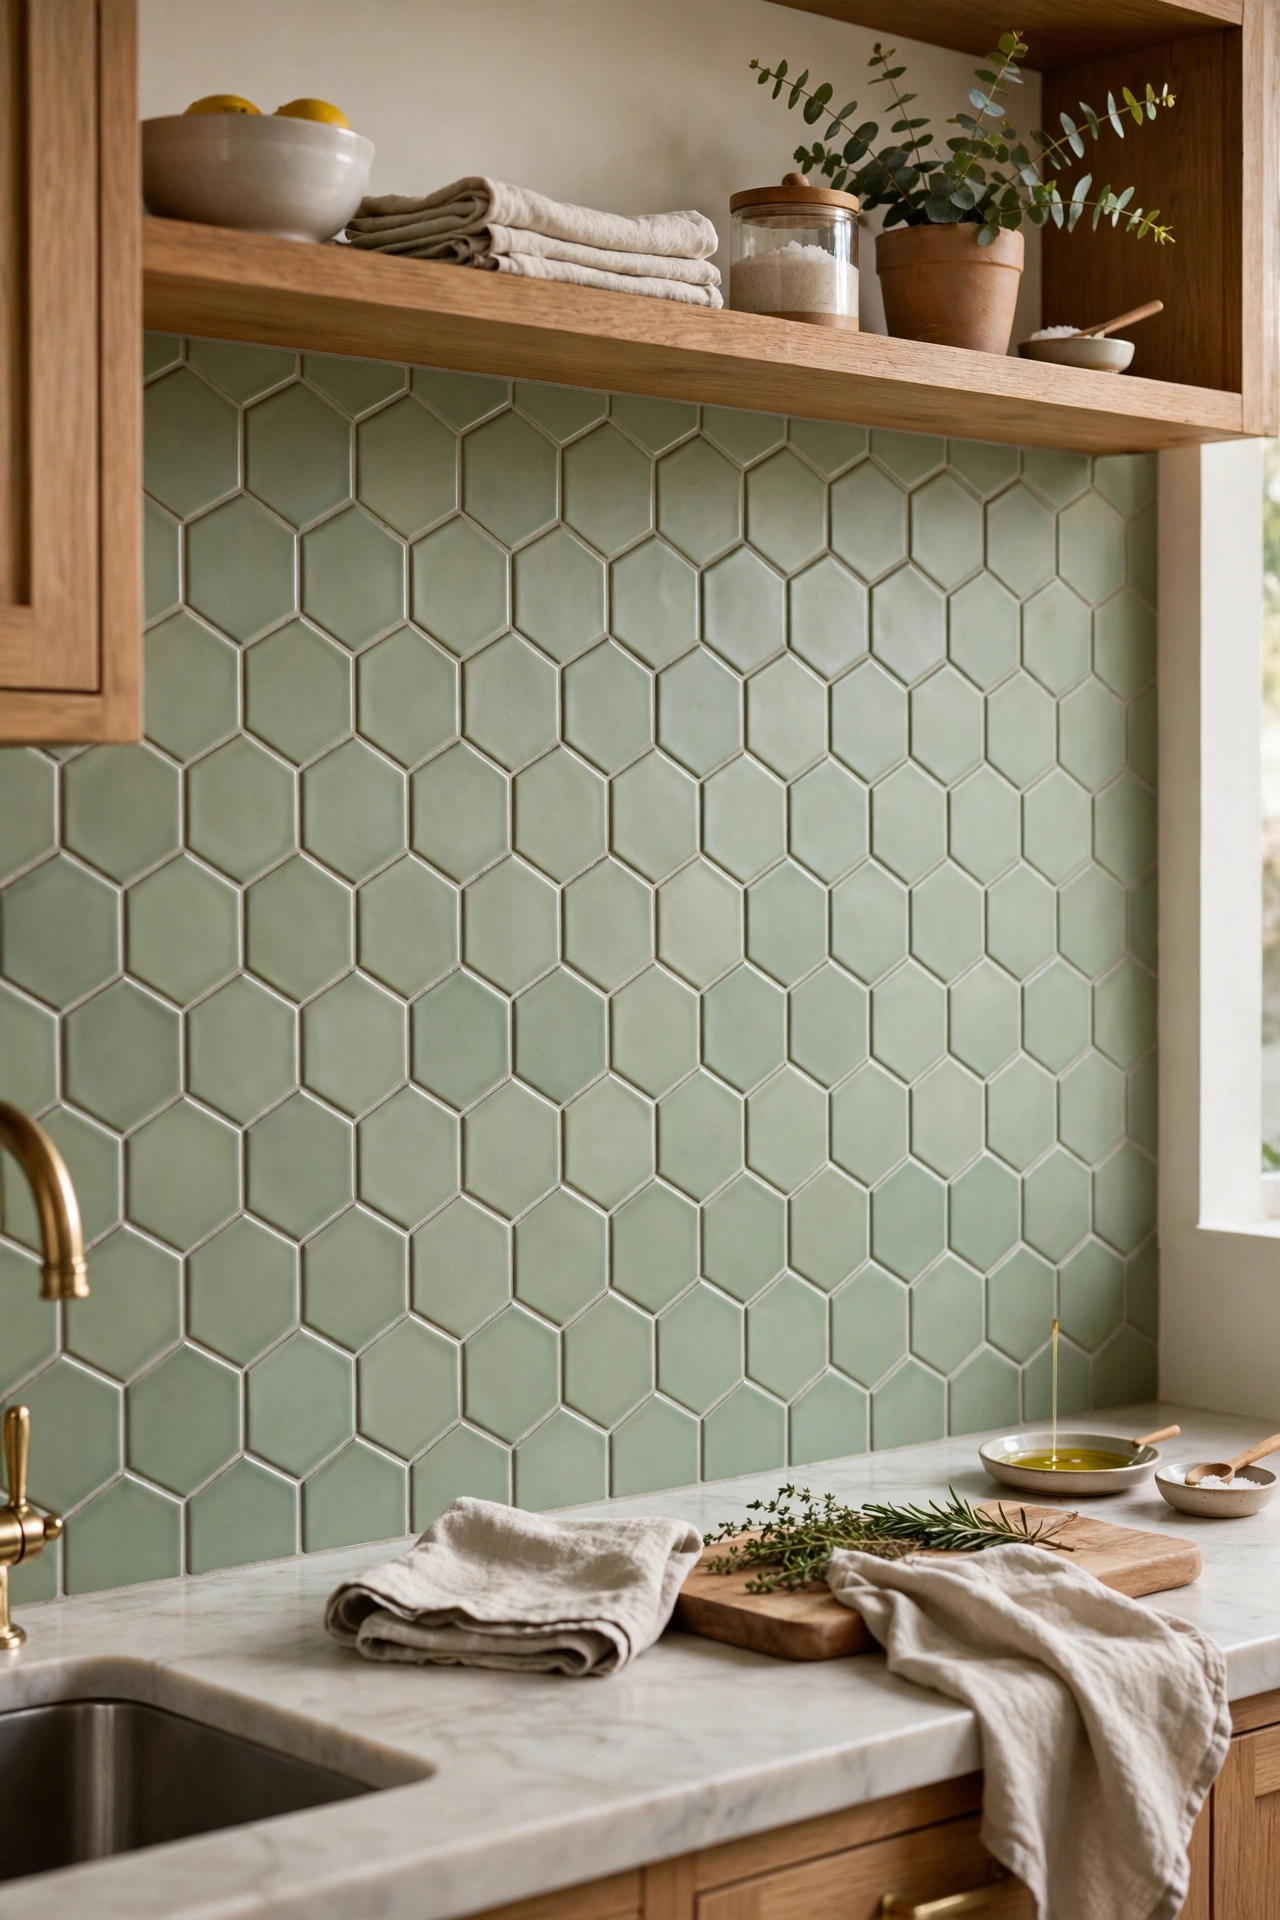
Hexagon tiles break away from rectangles entirely, and the honeycomb shape reads modern without feeling cold. A soft green glaze warms up white cabinets and works with butcher block counters, and the small format fits neatly around outlets and corners. Hexagons come on mesh sheets, which makes installation faster than it looks, though cutting the edge pieces still takes care. Choose a grout color close to the tile so the honeycomb shape shows through the grout lines rather than getting lost in them.
Try this: Use a single row of hexagons as a border strip above a plain subway wall for a two-tone effect.
Cost: $$ | Difficulty: Medium
5. White square tiles with dark grout

Square tiles have made a real comeback, and dark grout is what makes them look current instead of dated. The grid reads graphic and clean, and the dark lines hide the everyday marks that light grout shows within months. White squares suit both traditional kitchens with wood counters and modern kitchens with black hardware. Keep the tile size at 4 inches or smaller so the grid stays in proportion on a standard backsplash height. Seal the dark grout once it cures, since dark grout still stains if it stays unsealed.
Try this: Match the grout to your cabinet hardware color for a pulled-together look.
Cost: $ | Difficulty: Easy
6. Cream handmade look zellige
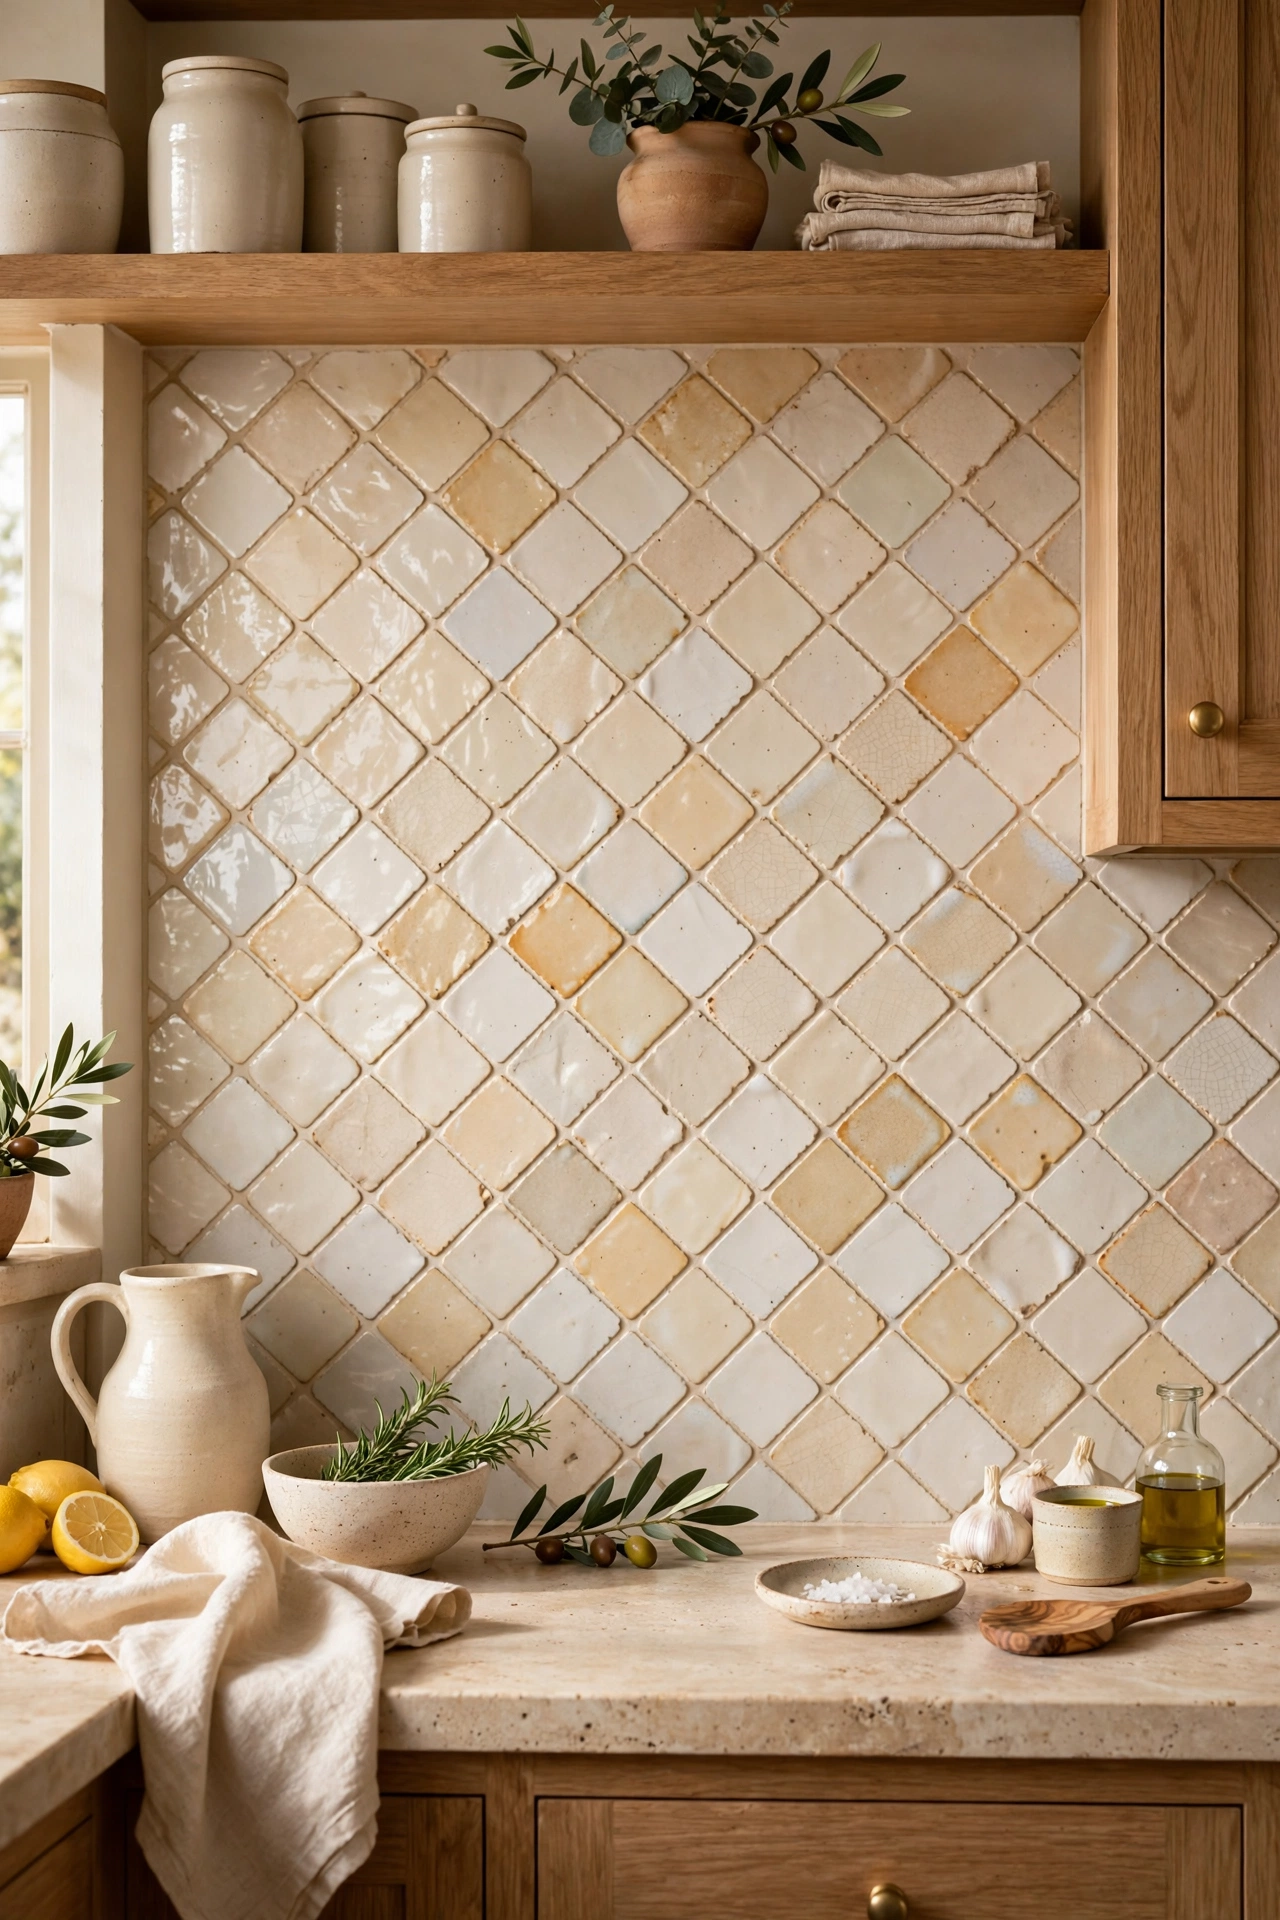
Zellige style tiles are handmade look glazed tiles with slight variation in color and surface from tile to tile. That uneven glaze catches light differently across the wall, so the backsplash shifts tone through the day instead of sitting flat. Cream keeps the look warm and calm, and it works with wood cabinets, brass taps, and stone counters. The uneven surface needs a bit more wiping than flat tile, and the grout lines should match the tile color so the glaze variation stays the star. Order 10 percent extra tile, since handmade look tiles vary more in size than machine-made ones.
Try this: Lay cream zellige in a straight stack for a modern take on a handmade tile.
Cost: $$$ | Difficulty: Medium
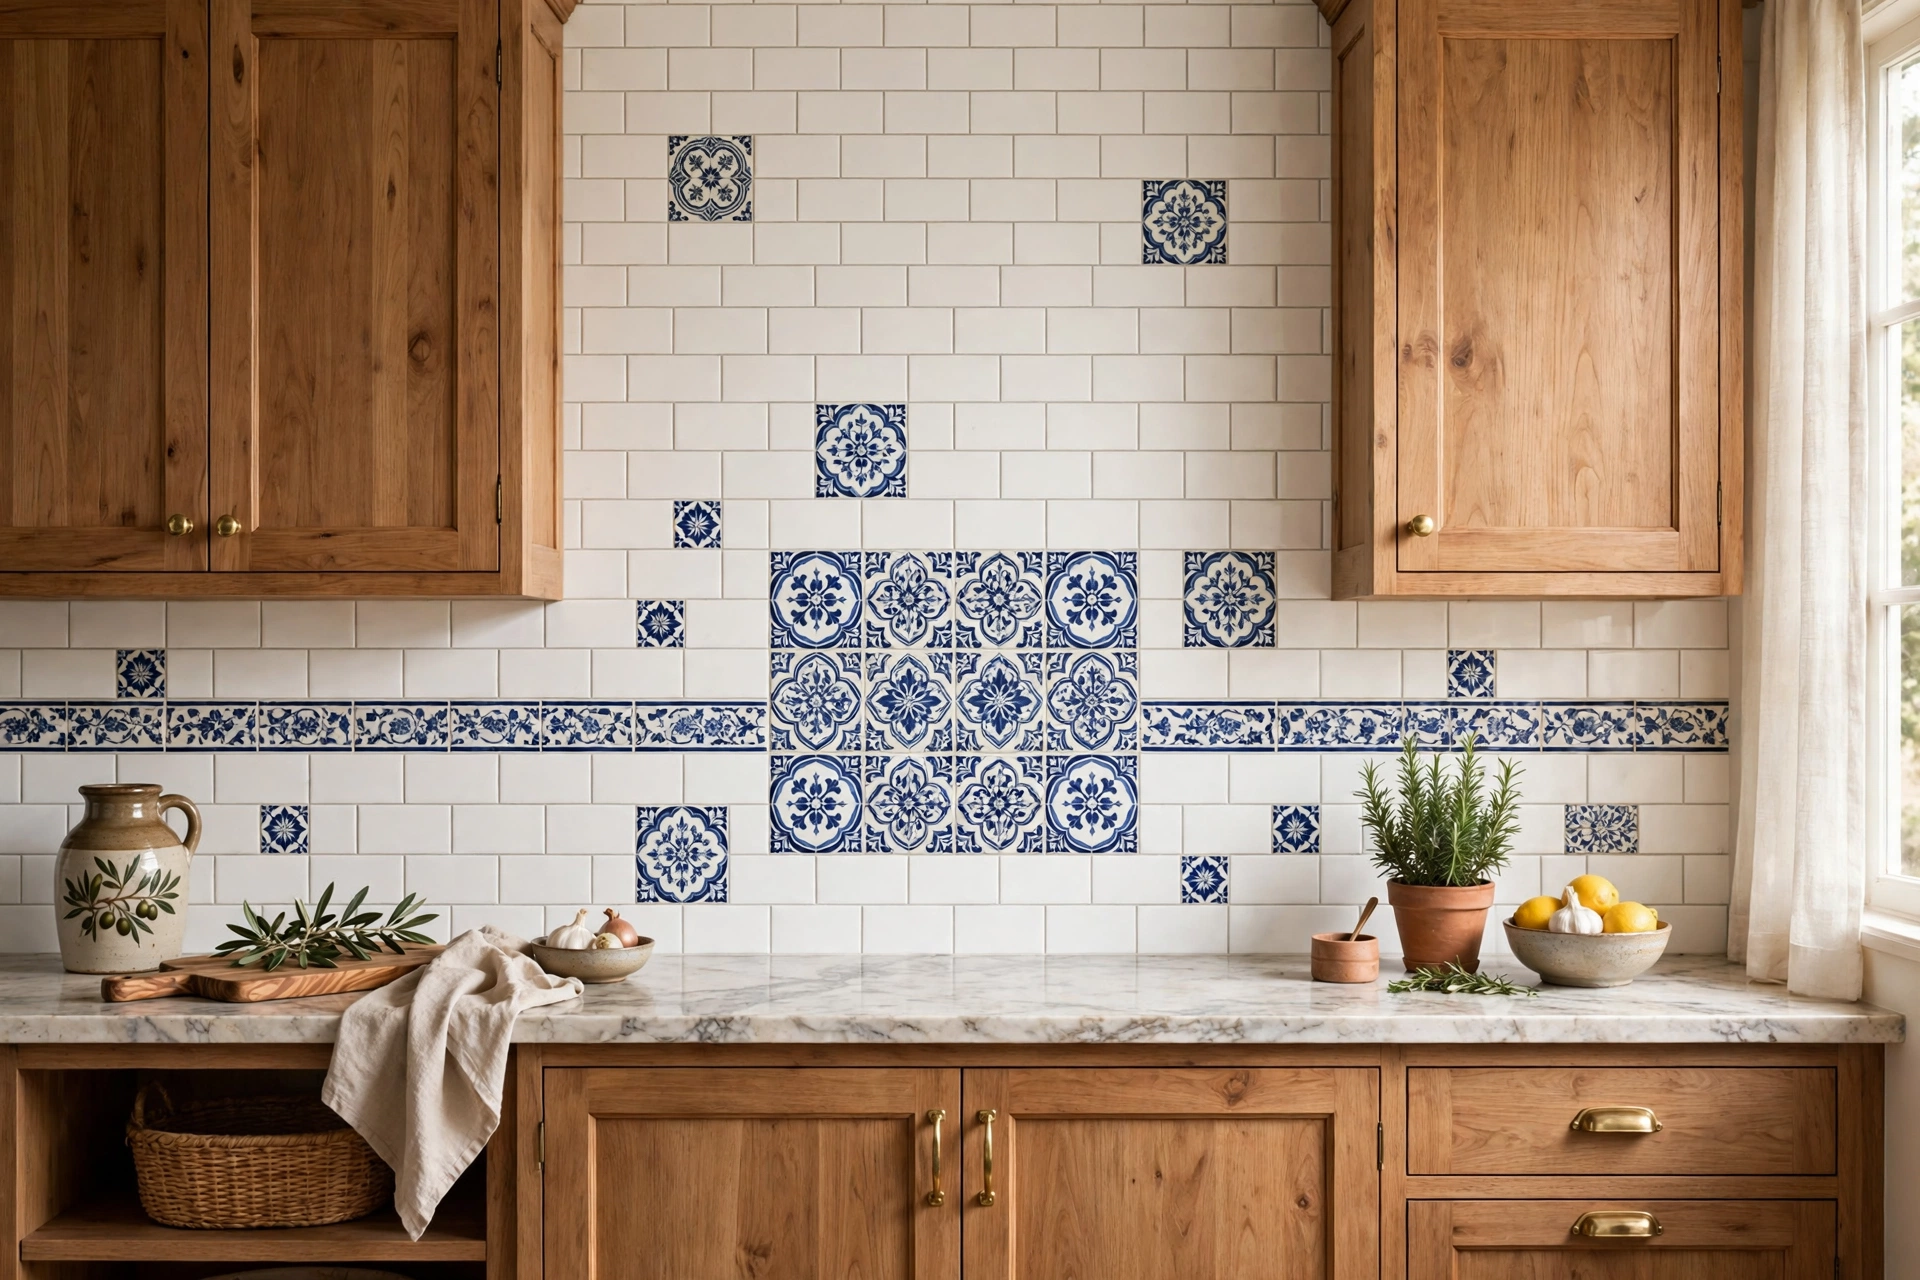
7. Blue and white Moroccan inspired pattern
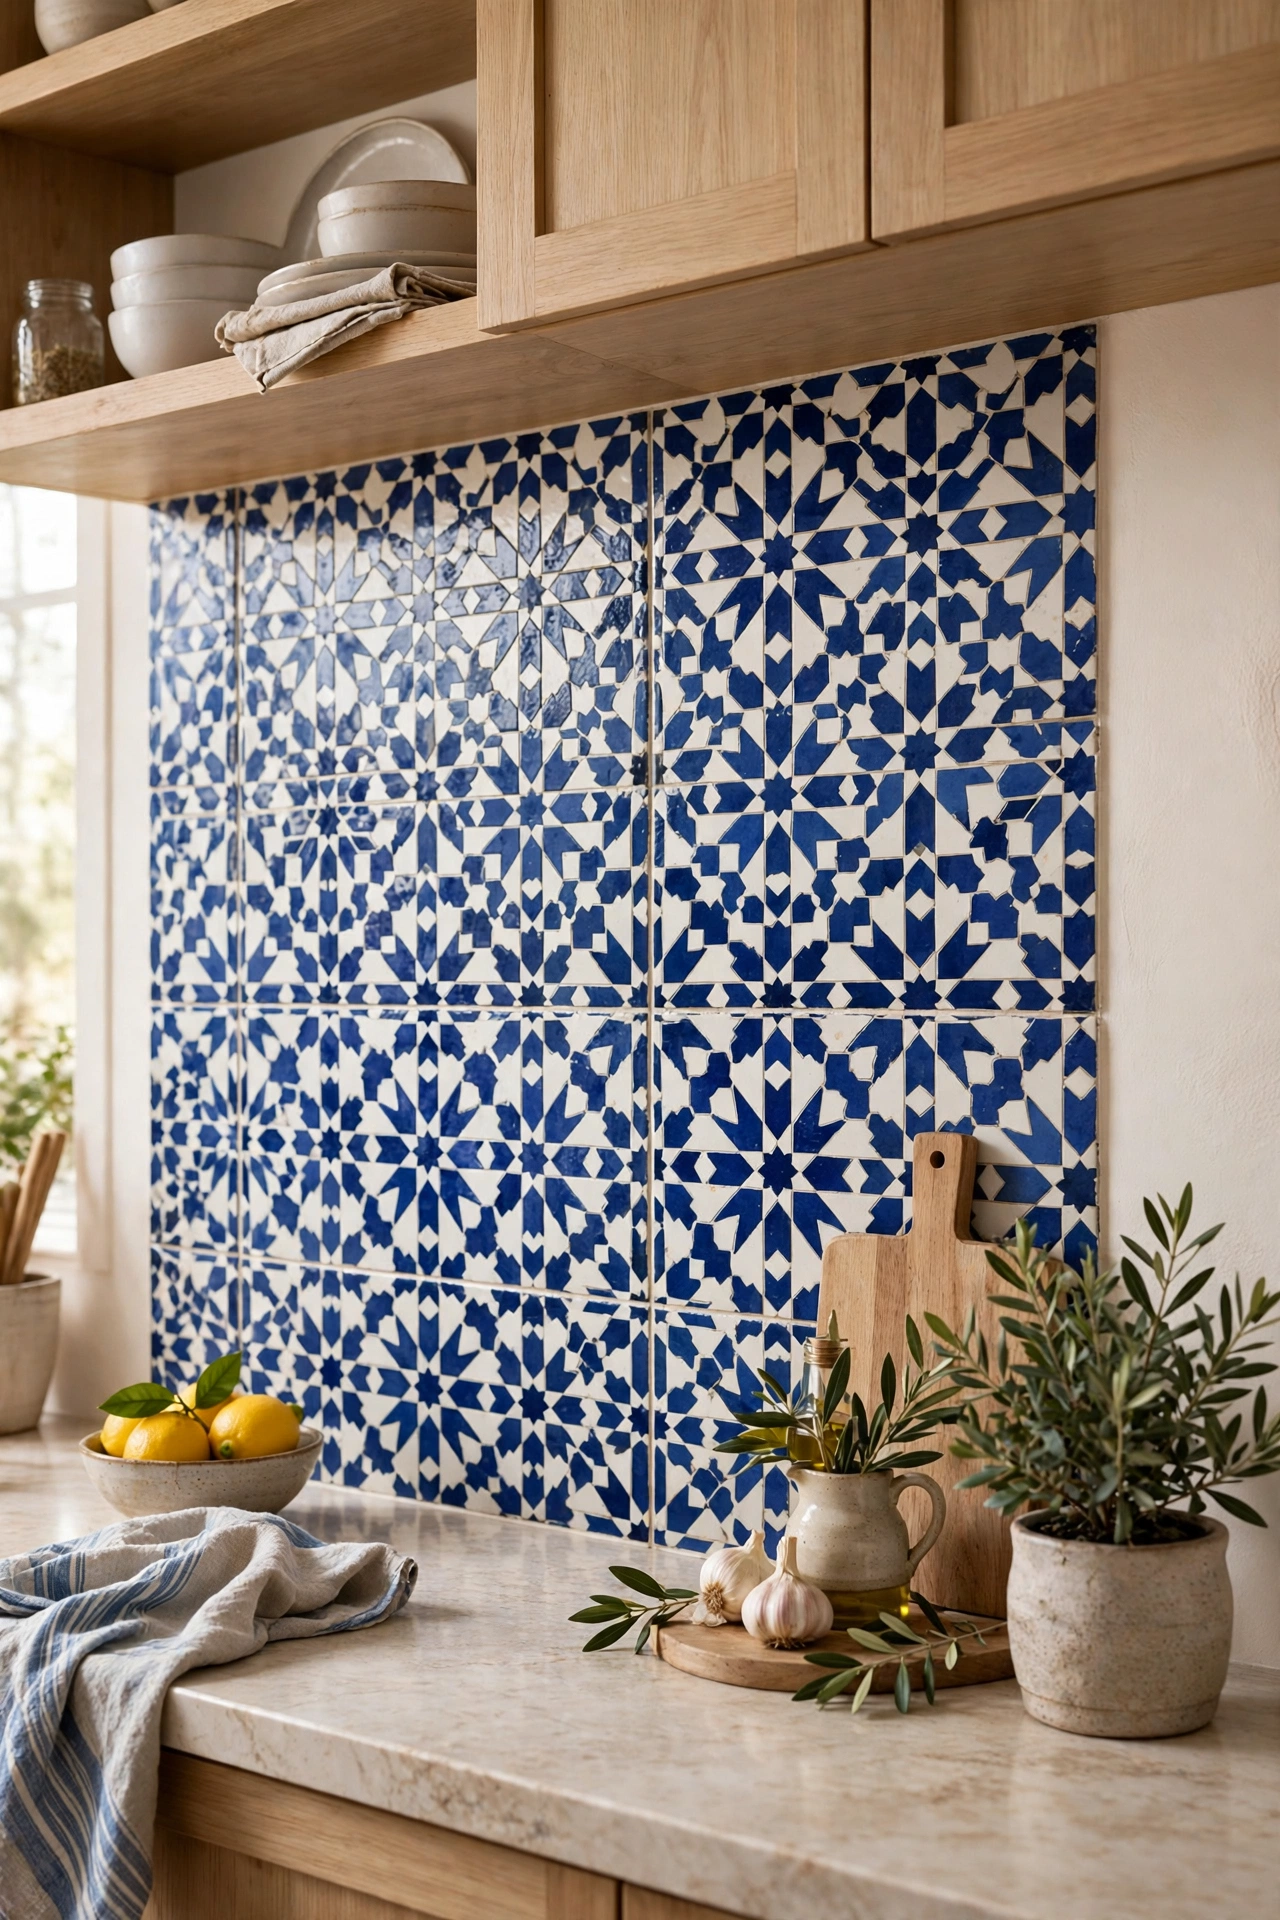
Patterned tiles with a Moroccan inspired print turn the backsplash into the main feature of the kitchen. Blue and white keeps the pattern bold without overwhelming the room, and it pairs with natural wood, white cabinets, and brass hardware. Because the print already carries a lot of detail, keep the counters plain and the upper walls quiet. Patterned tile costs more per square foot than plain tile, so measure carefully and order a few spare tiles for future repairs. This is the idea to pick when the rest of your kitchen is simple and the wall needs to do the talking.
Try this: Run the pattern only behind the range and use plain white tile on the side walls.
Cost: $$$ | Difficulty: Medium
8. Narrow picket tiles with marble counters
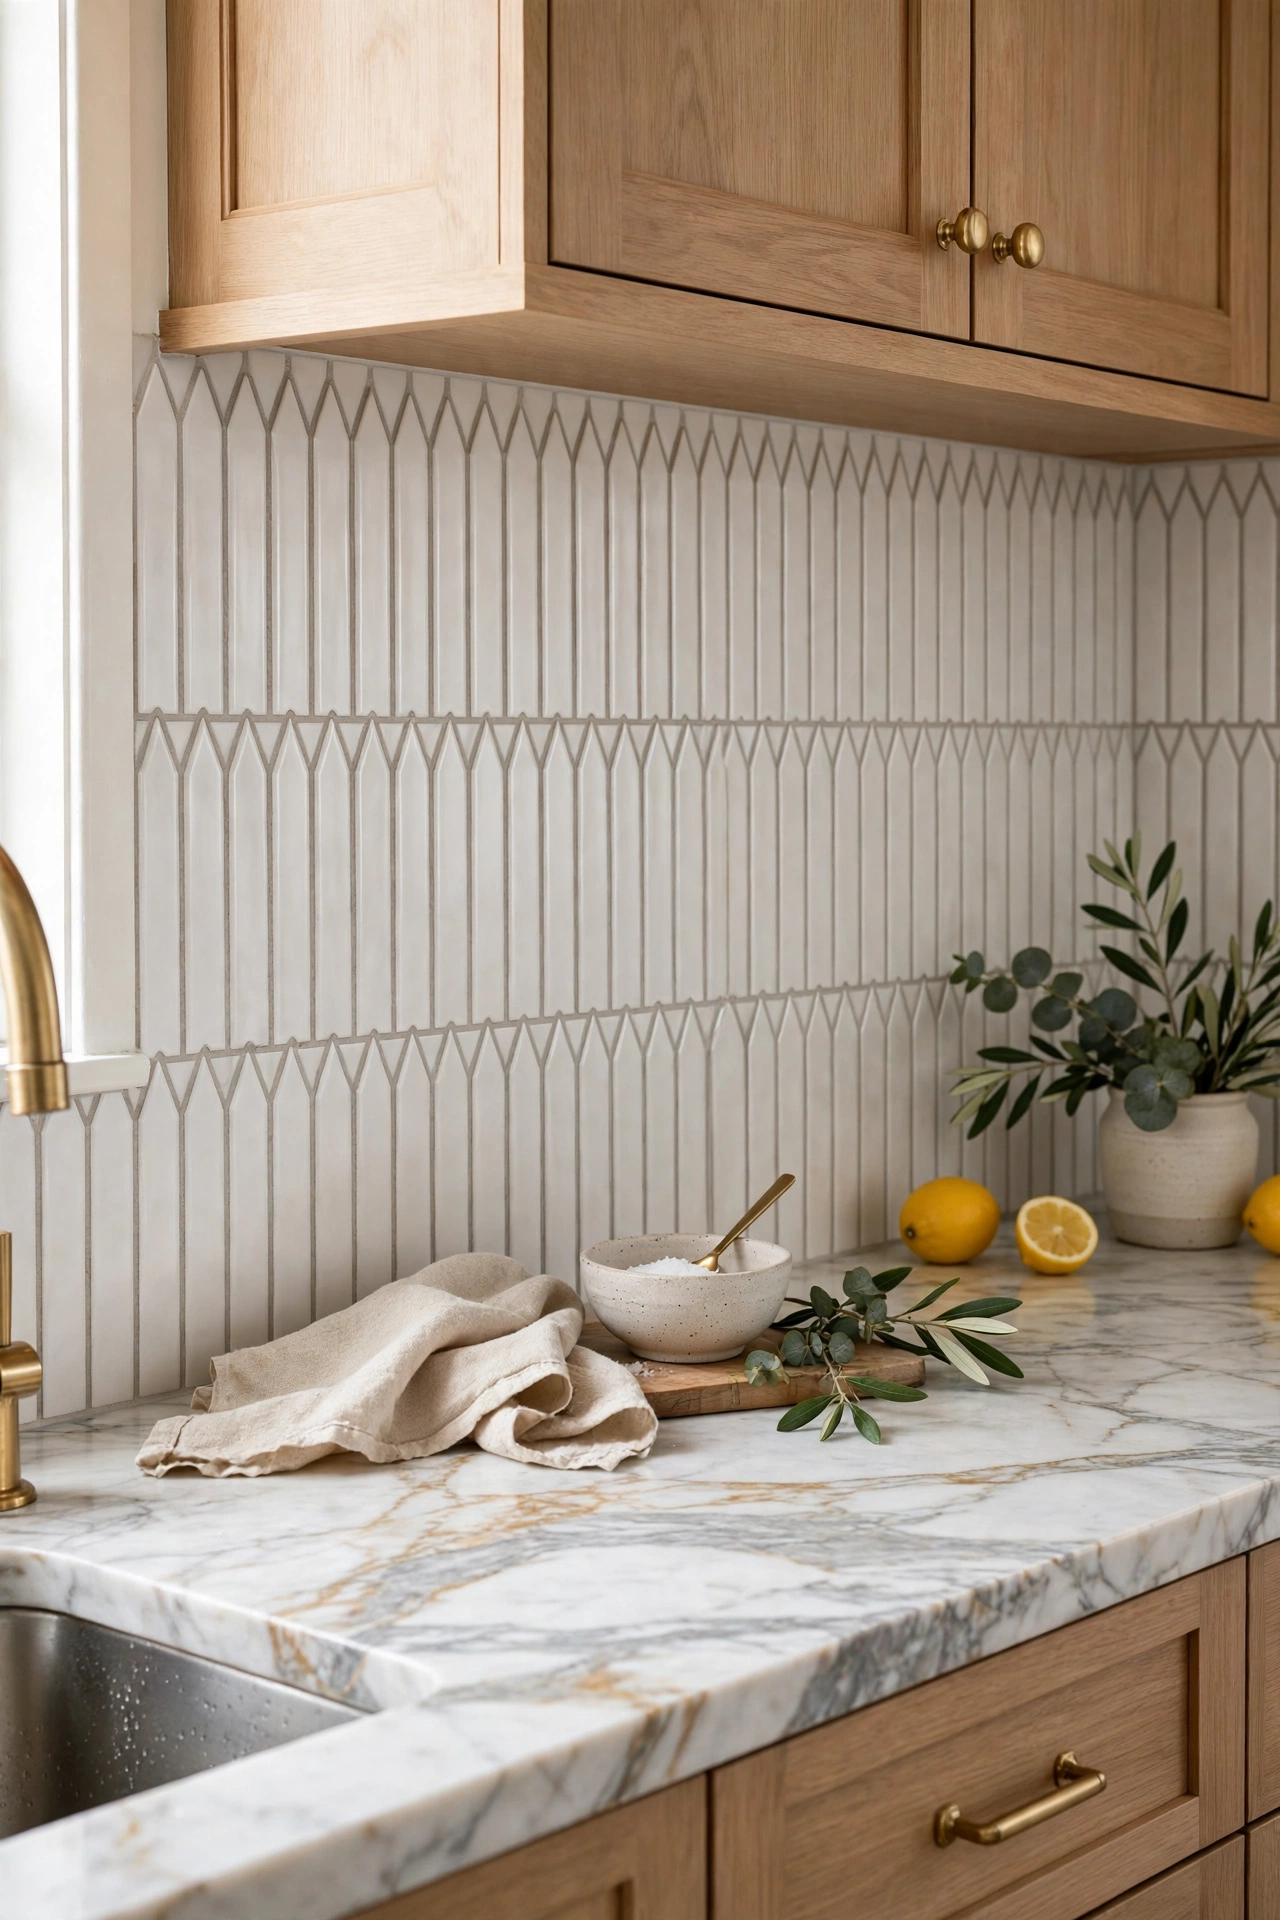
Picket tiles are a longer, narrower take on the subway shape, with a pointed end that gives the wall a tailored finish. They read more refined than standard subway tile, especially next to marble counters and gold fixtures. Lay them vertically for a taller feel or horizontally for a classic feel, and keep the grout close to the tile color so the picket shape stays clean. Picket tiles cost more than basic subway, but the shape alone makes a small backsplash look planned rather than default. They suit kitchens where the counters already carry the luxury and the wall needs to keep up.
Try this: Use picket tiles in white with a soft grey grout for a quiet, high-end look.
Cost: $$ | Difficulty: Medium
9. Dusty blue kit kat finger tiles

Kit kat tiles, also called finger tiles, are slim vertical strips that come on mesh sheets in long lines. Dusty blue gives the wall a calm color that still reads as a deliberate choice, and the vertical lines make a short backsplash feel taller. The slim format fits well in small kitchens where a large tile would look out of scale. Kit kat tiles need careful grouting, since the narrow gaps show uneven grout fast, so take your time with the grout float or hire the grout step out. Pair dusty blue with white cabinets and brushed nickel hardware for a fresh, coastal feel.
Try this: Run kit kat tiles floor to ceiling behind open shelving for one tall stripe of color.
Cost: $$ | Difficulty: Medium
10. Soft blue scallop fish scale tiles
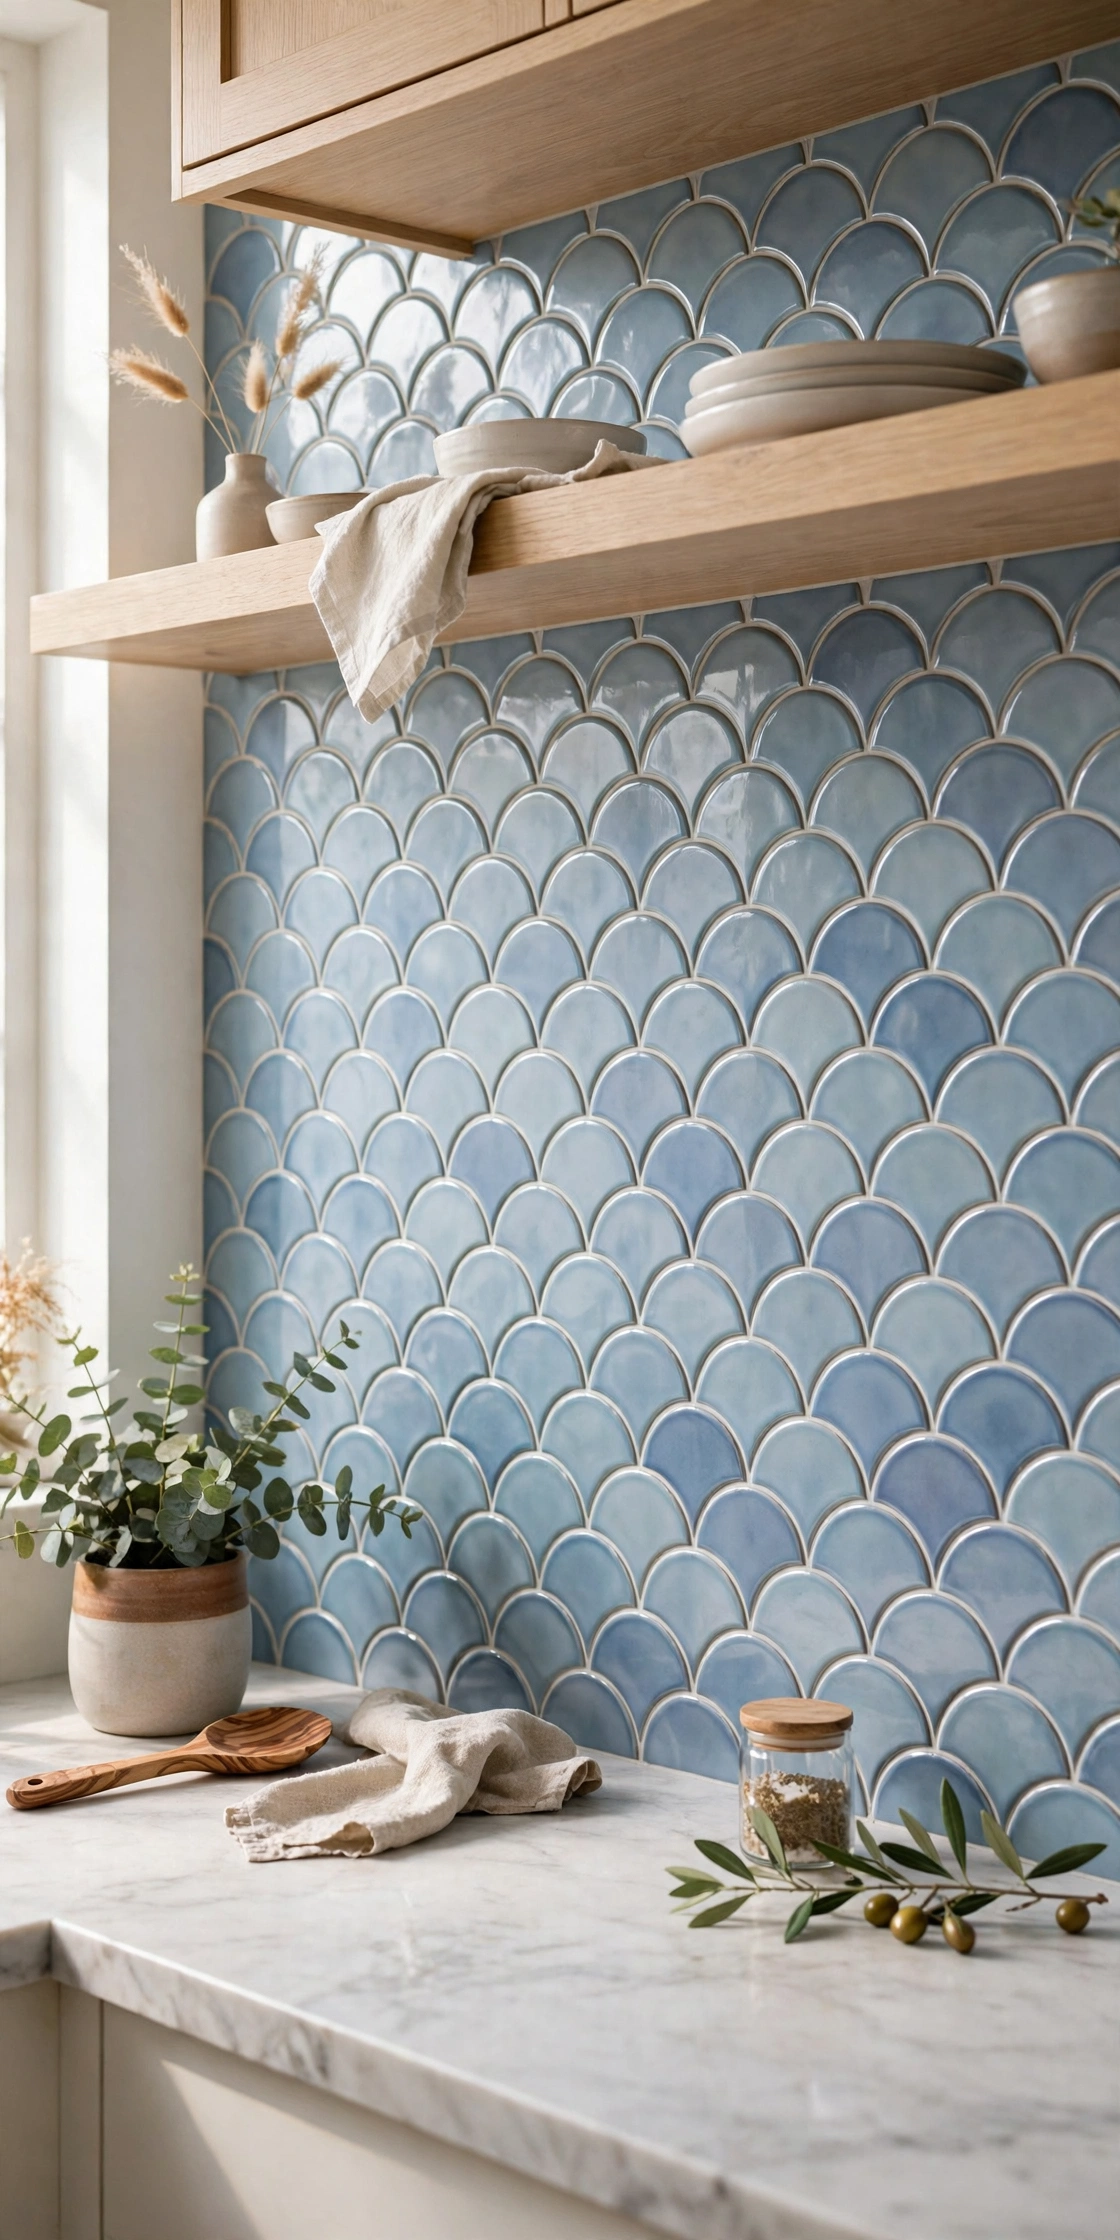
Scallop tiles, shaped like fish scales, add a soft curve to a room full of straight lines. Soft blue keeps the look gentle, and the overlapping scale pattern adds depth without a loud print. Scallops work best on a full wall rather than a small strip, since the pattern needs room to repeat before it reads clearly. The curved edges mean more grout lines than a flat tile, so seal the grout well in the wet zone behind the sink. This tile suits kitchens with curved details elsewhere, like arched doorways or round pendant lights.
Try this: Use scallop tiles in one soft color rather than a mix, so the shape carries the design.
Cost: $$ | Difficulty: Hard
11. Sea glass mosaic behind the range

Glass mosaic tiles reflect light, which helps a dark kitchen or a kitchen with one small window feel brighter. A sea glass blend of soft green and blue tones adds color without a strong pattern, and glass wipes clean fast after cooking splashes. Mosaic sheets make the small tiles easy to set, though grouting a mosaic takes longer than grouting large tiles. Limit glass mosaic to the range wall if the budget is tight, and use a plain tile on the side walls. Glass tile needs a white thinset behind it, or the adhesive color will show through the tile.
Try this: Put the glass mosaic only behind the range hood, where the light hits it most.
Cost: $$ | Difficulty: Medium
12. White and grey marble mosaic in a pattern

Marble mosaic tiles give you real stone veining in a small, affordable format. A white and grey pattern, such as a basketweave or a small herringbone, reads classic and works with both white cabinets and dark wood. Real marble is porous, so seal it before grouting and again after, and wipe up tomato sauce and lemon juice fast, since acids mark marble even through sealer. Marble mosaic costs more than ceramic, but the pattern format uses less stone than a full slab, which keeps the price in reach. This is the pick when you want stone but not a stone budget.
Try this: Use marble mosaic as a framed panel behind the range with plain subway tile around it.
Cost: $$$ | Difficulty: Medium
13. White and grey splitface stone strips
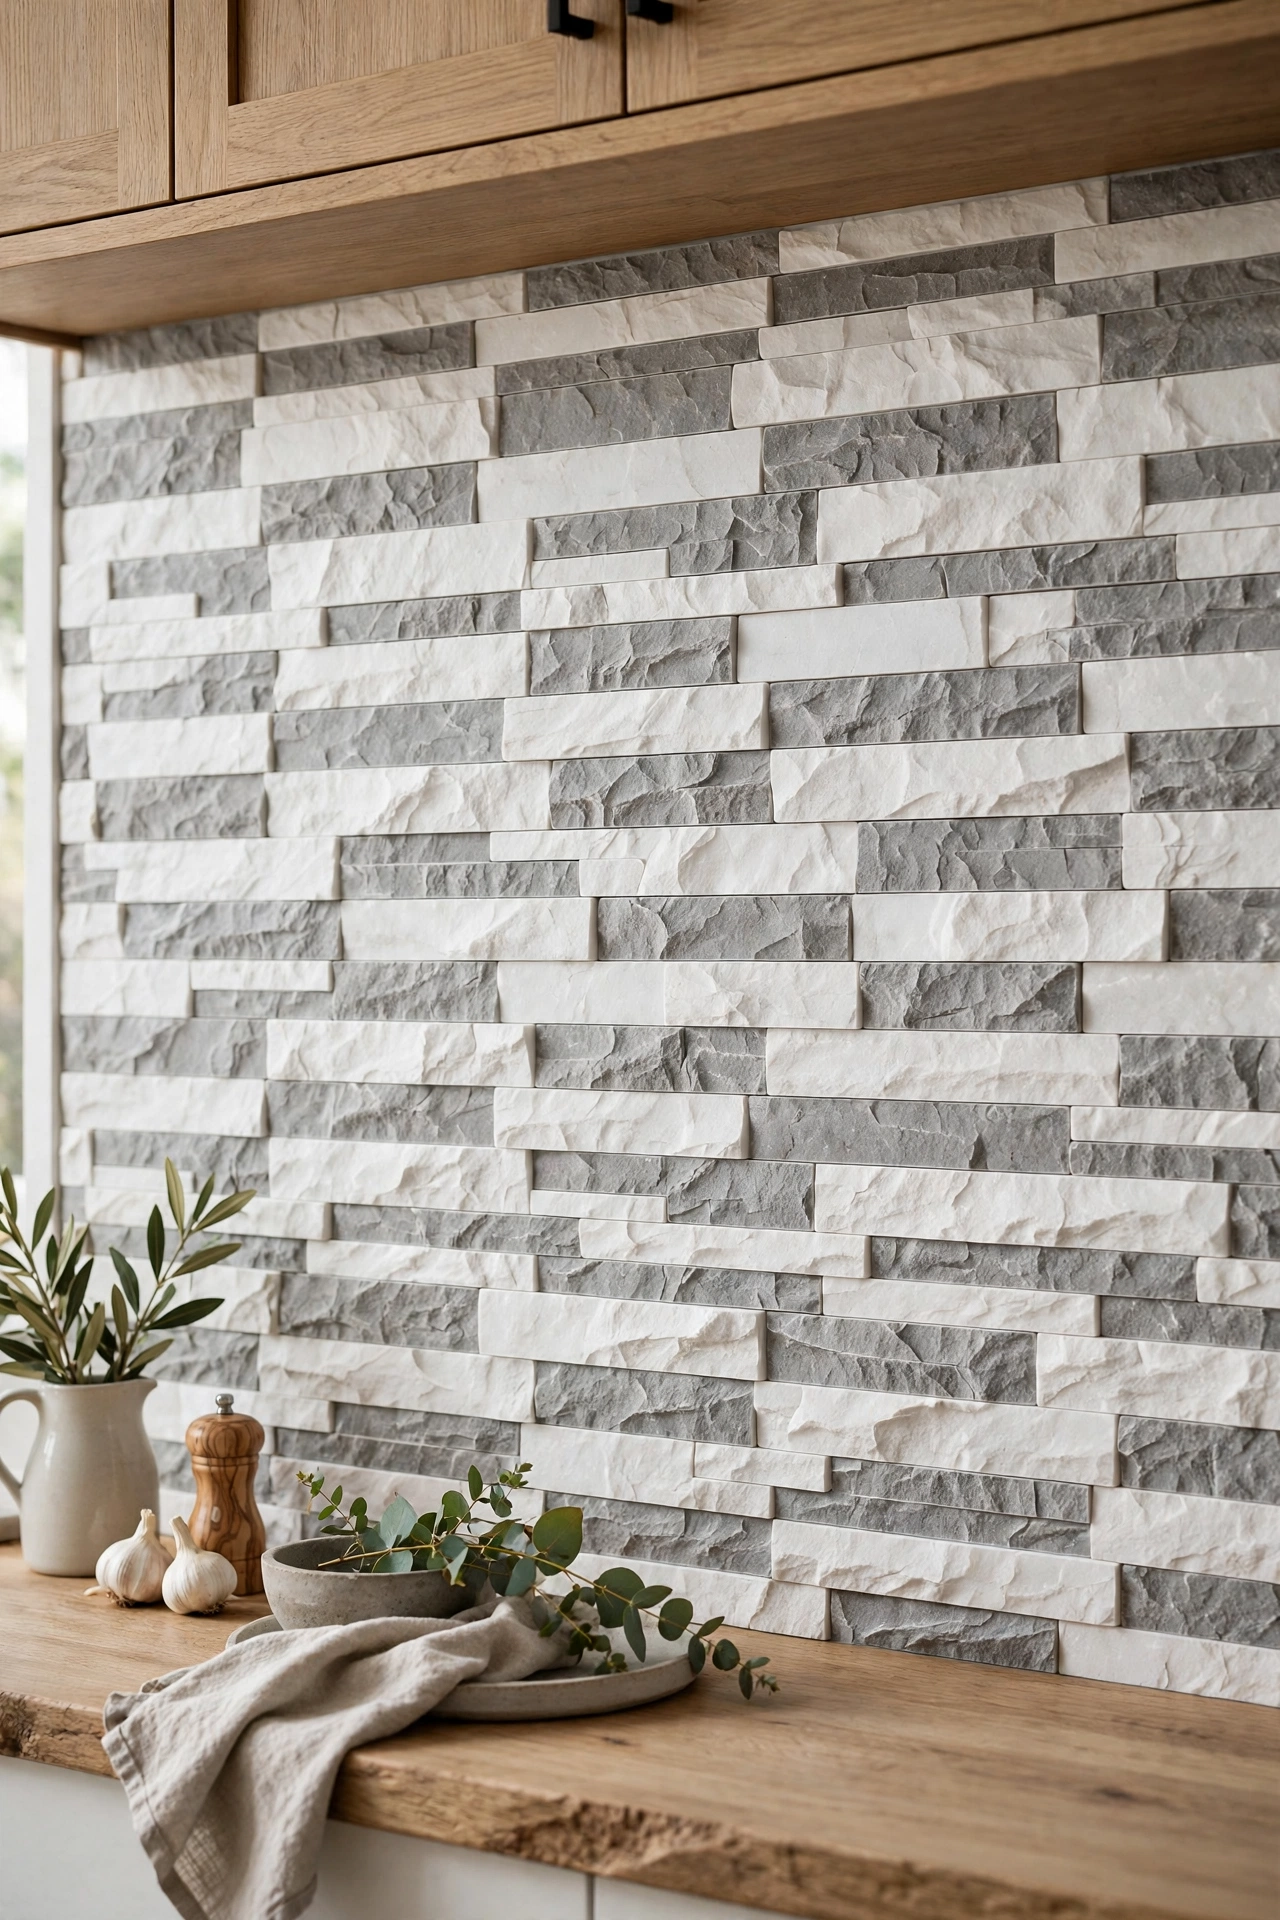
Splitface tiles are thin strips of natural stone cut to different depths, so the wall gets a rough, layered texture. White and grey tones tie together wood counters, grey cabinets, and stainless appliances without adding a new color. The rough surface hides splashes well but needs sealing, since stone absorbs water and grease fast. Splitface suits a rustic or industrial kitchen far better than a sleek modern one, and it looks best on a full wall where the texture can run uninterrupted. Cut splitface with a wet saw and eye protection, since stone dust is hard on lungs and eyes.
Try this: Keep the counters simple when the wall carries this much texture.
Cost: $$ | Difficulty: Hard
14. Black chevron for a bold wall

Black tiles laid in a chevron pattern create a bold wall that still reads tidy, since the V shape repeats in a strict rhythm. Chevron works best in a monochrome kitchen or one with white cabinets, where the black wall becomes the single dark note in the room. Use a matte black tile to cut glare, and match the grout to the tile so the chevron shape shows through the layout rather than the grout grid. Chevron takes more cuts than a grid, so order extra tile and plan the layout from the center of the wall outward.
Try this: Pair a black chevron wall with light wood open shelves to keep the room from feeling dark.
Cost: $$ | Difficulty: Hard
15. Brushed brass inlay strip
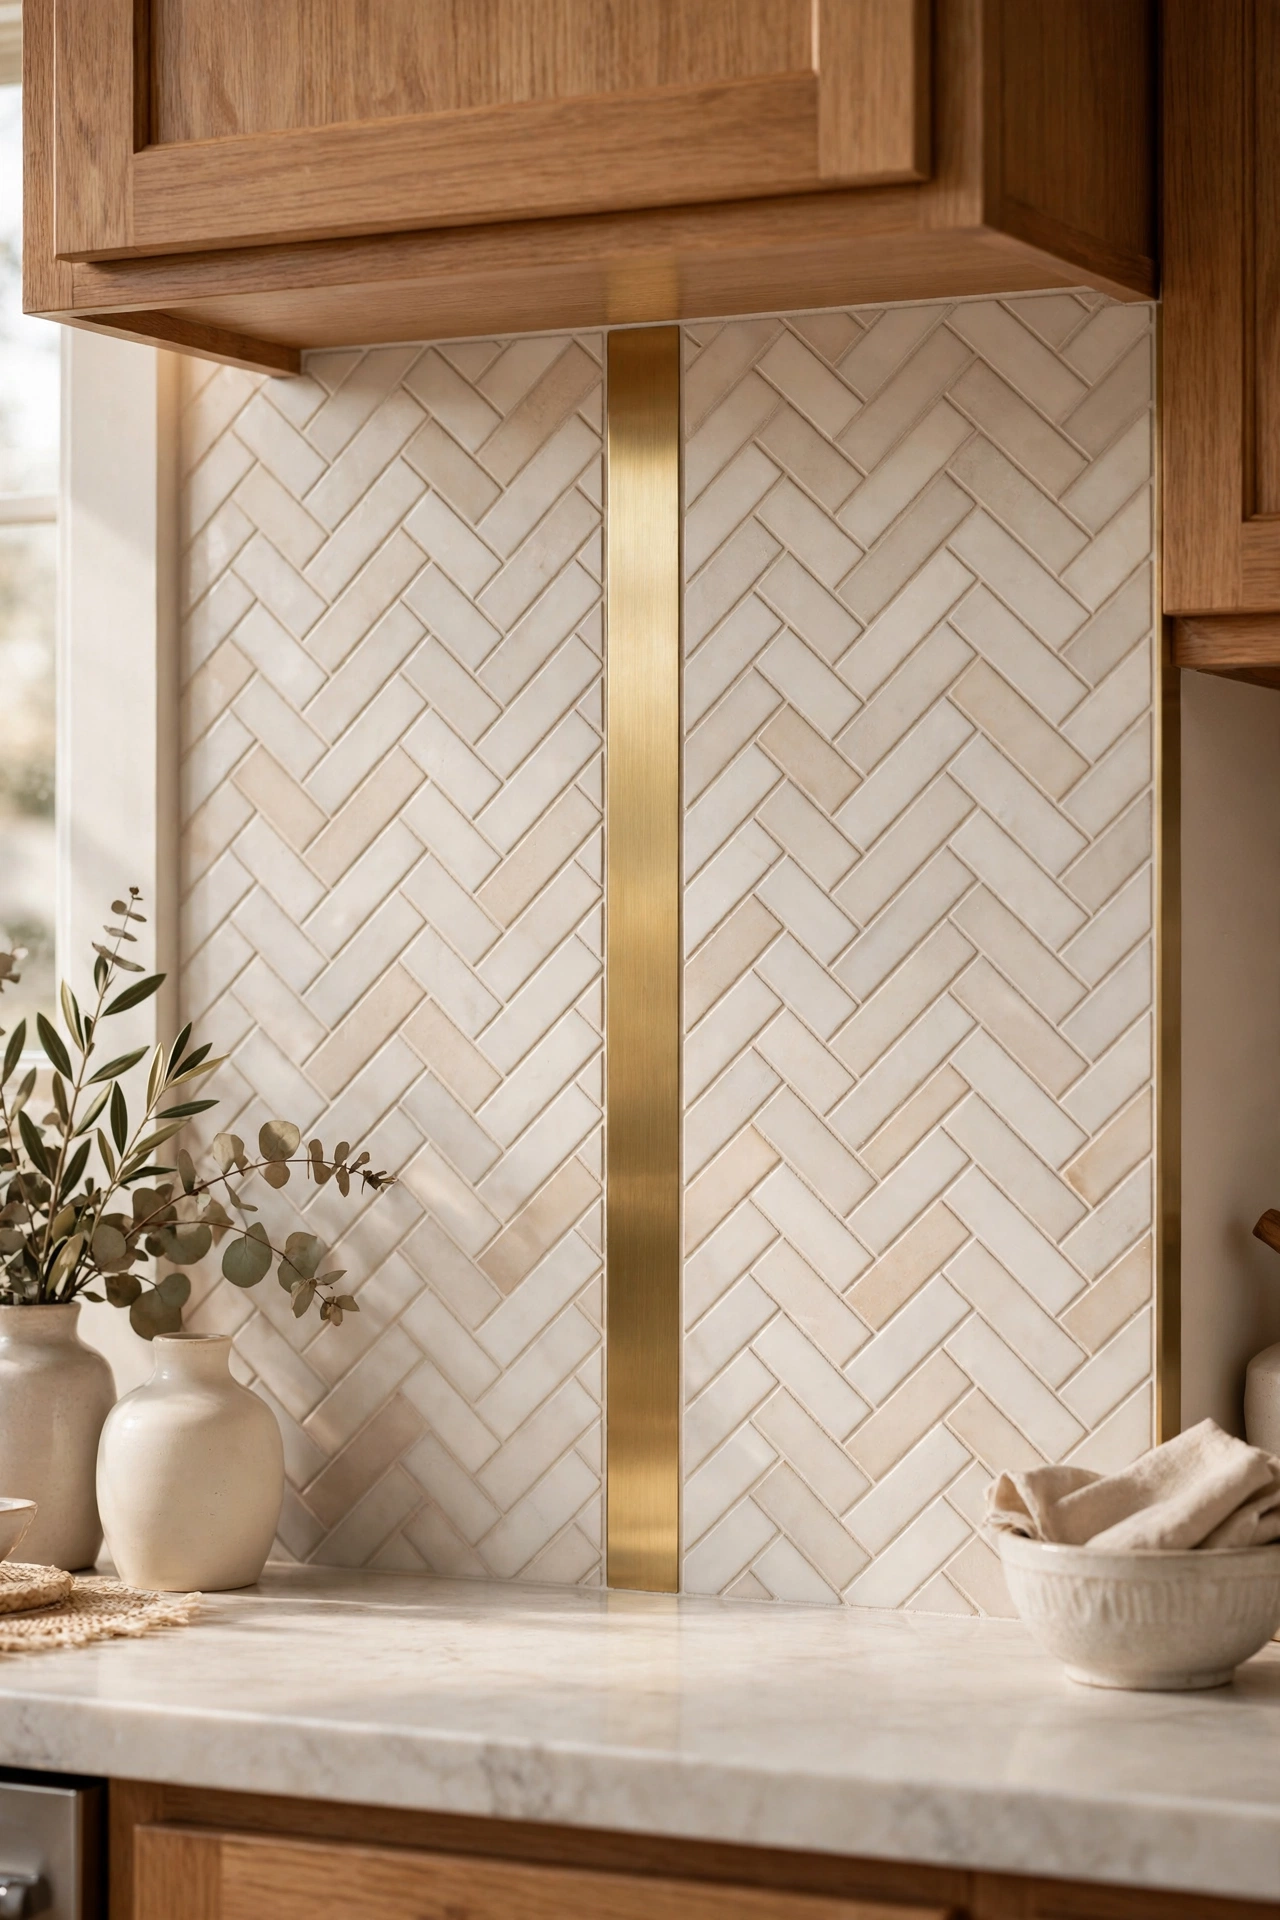
A thin brushed brass inlay strip turns a plain tile wall into a finished design with very little extra cost. The metal line runs horizontally through subway tile or vertically as a border, and it ties in brass taps, cabinet pulls, and light fixtures. Brass inlay strips come in standard lengths and cut with a hacksaw, and they set into the tile adhesive like any other tile trim. Keep the strip to one line per wall, since two or three lines start to look busy fast. This idea suits a kitchen that already has brass hardware and needs the wall to match.
Try this: Run the brass strip at counter height along the full wall for one continuous line.
Cost: $ | Difficulty: Easy
16. Peel-and-stick subway for renters
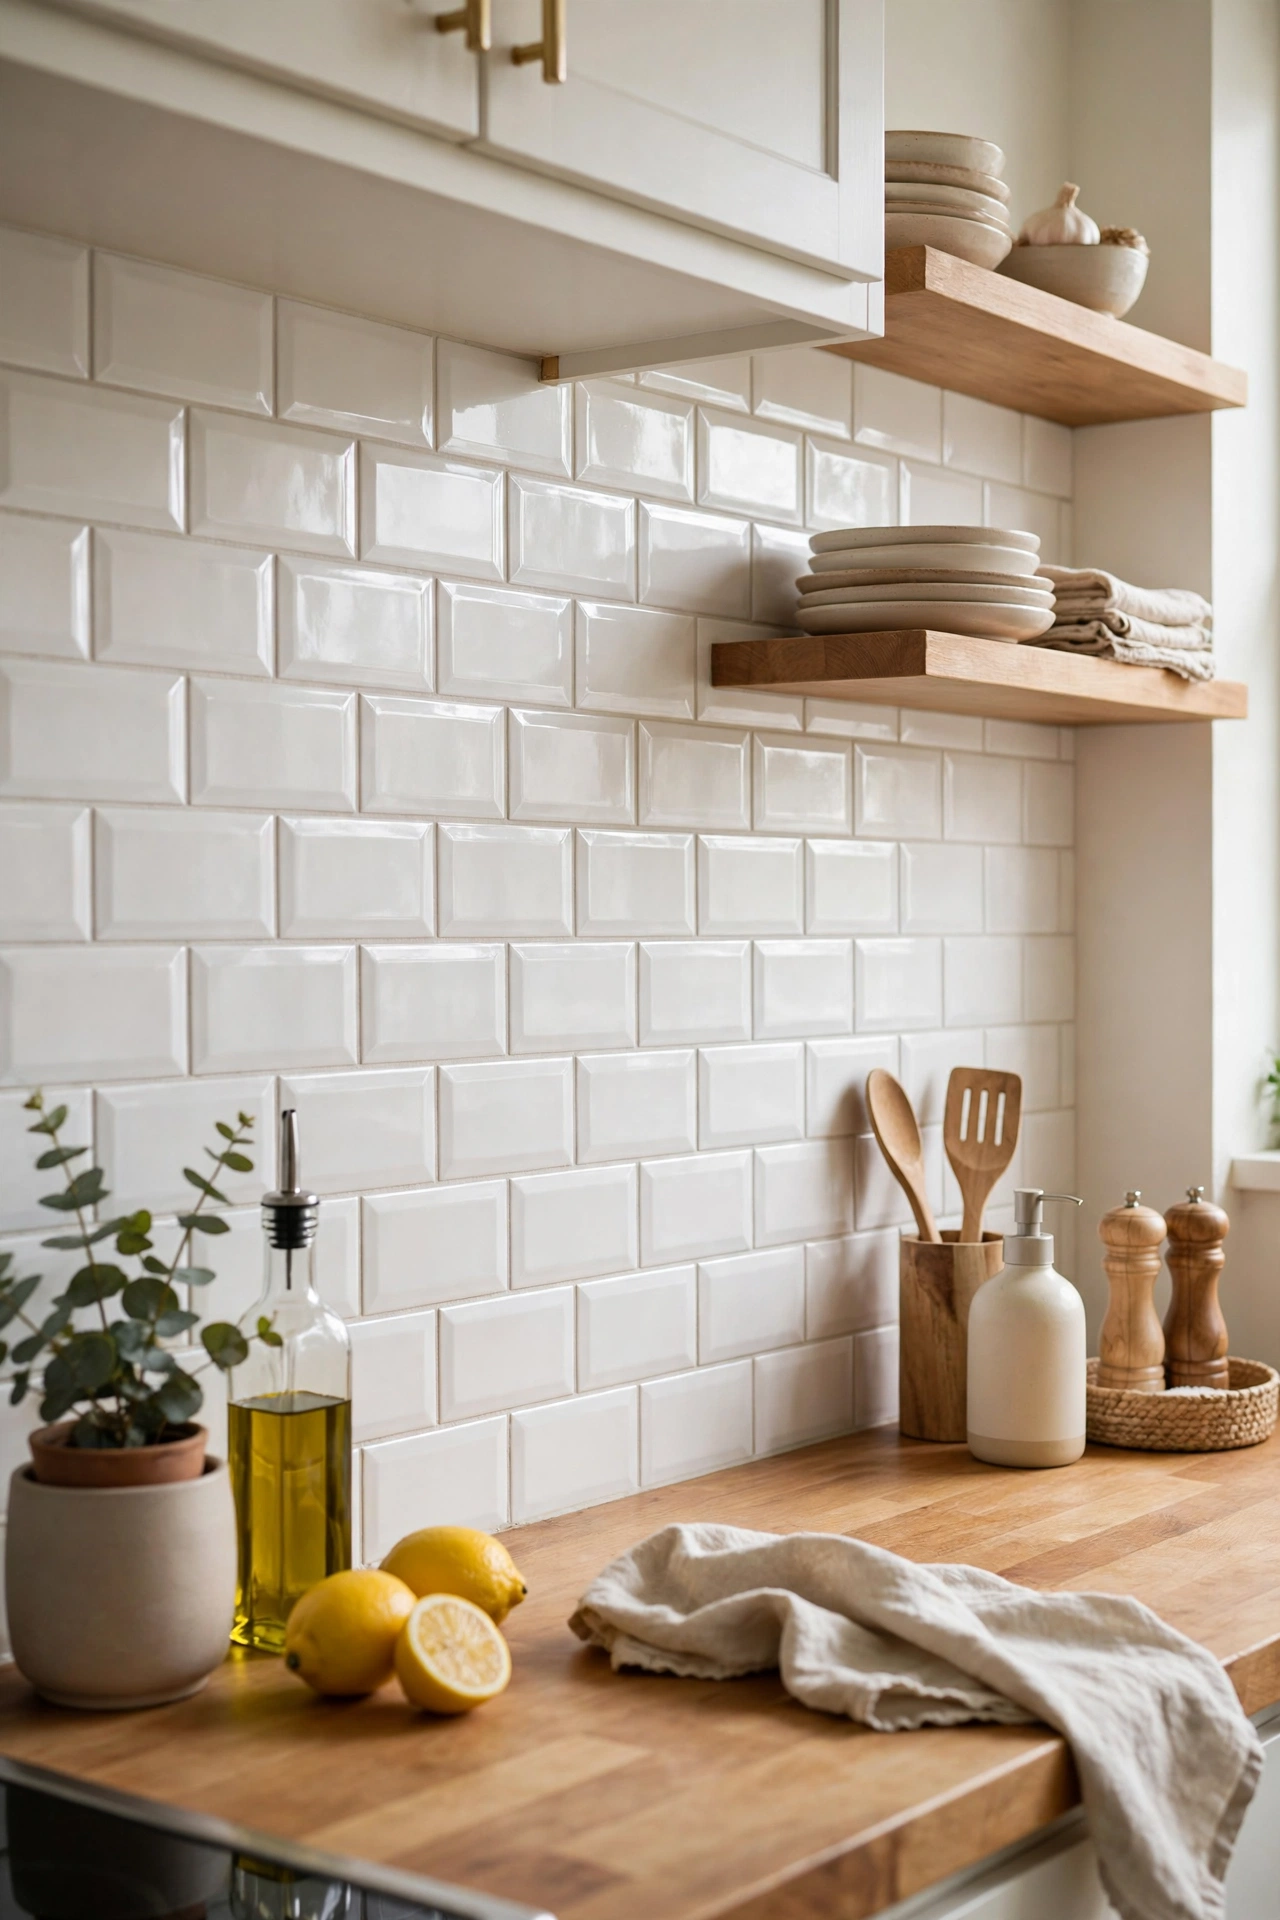
Peel-and-stick subway tiles give renters a real backsplash update with no grout, no thinset, and no damage to the wall underneath. The tiles come as flexible sheets that press onto a clean, smooth wall, and they peel off when the lease ends. They cost far less than real tile and install in an afternoon with a utility knife and a straight edge. Peel-and-stick works best on smooth painted drywall, not on textured walls or over old tile, and it should stay clear of direct stove heat. The look is close to real subway tile from a normal standing distance, which is all most rental kitchens need.
Try this: Clean the wall with rubbing alcohol first so the adhesive grips fully.
Cost: $ | Difficulty: Easy
17. Two-tone contrast behind the range
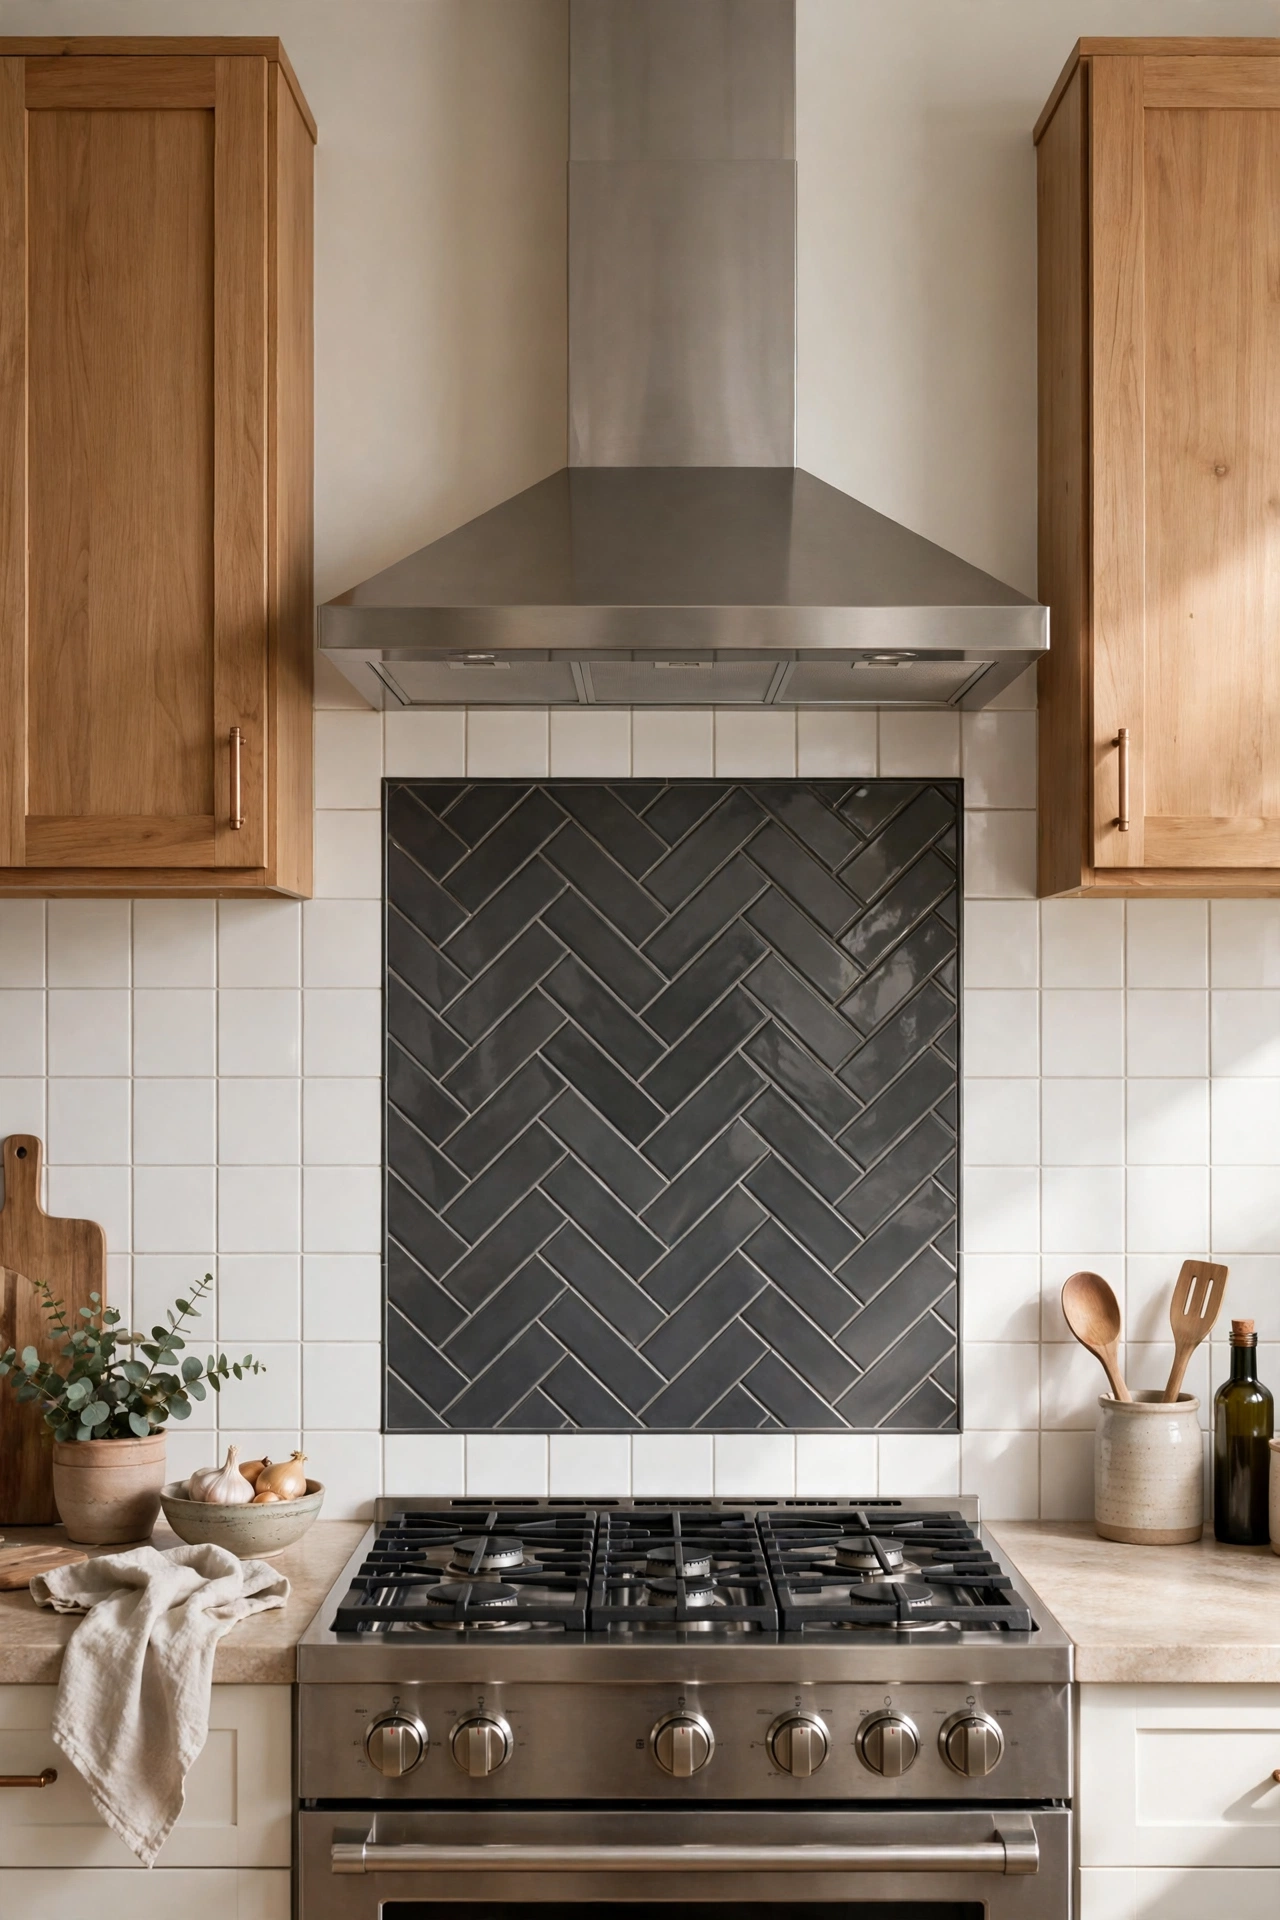
Using two tiles on one wall gives the range its own feature zone without tiling the whole kitchen twice. Dark grey herringbone behind the range draws the eye to the cooking zone, while white square tiles on the side walls keep the rest of the kitchen calm. The contrast works because the two tiles share a similar size and finish, so the wall reads planned rather than patched. Plan the changeover point at a cabinet edge or a natural break in the wall, not in the middle of an open run. This idea costs less than a full feature wall, since the feature tile covers only one section.
Try this: Match the grout color across both tiles so the two zones feel like one design.
Cost: $$ | Difficulty: Medium
How to choose the right backsplash tile
Start with how you cook. If you fry food often, pick a glossy ceramic or porcelain tile that wipes clean, and avoid rough stone right behind the range. If you rarely cook, you can pick a textured or matte tile without worrying about grease buildup. Next, match the tile to your counters: busy counters need a quiet tile, and plain counters can carry a bold pattern. Then check the light. Dark tiles need good under-cabinet lighting, while glossy tiles bounce light around a dim kitchen. Finally, set the budget before you fall for a tile, since layout and labor often cost more than the tile itself.
Grout deserves the same attention as tile. Dark grout hides marks and makes a pattern stand out, while matching grout keeps the wall calm and hides uneven spacing. Epoxy grout resists stains better than cement grout, but it sets fast and suits experienced hands. Cement grout costs less and forgives mistakes, but it needs sealing in wet zones. Pick the grout when you pick the tile, not after the tile is on the wall.
Backsplash tile ideas at a glance
| Idea | Cost | Difficulty | Best for |
|---|---|---|---|
| Classic white subway in a brick bond | $ | Easy | Any kitchen, any budget |
| Sage green subway stacked vertically | $ | Easy | Low ceilings, small kitchens |
| White marble look herringbone | $$ | Hard | A quiet wall that needs movement |
| Soft green hexagon honeycomb | $$ | Medium | Modern kitchens with wood accents |
| White square tiles with dark grout | $ | Easy | Graphic, low-maintenance walls |
| Cream handmade look zellige | $$$ | Medium | Warm, artisan kitchens |
| Blue and white Moroccan inspired pattern | $$$ | Medium | Simple kitchens that need a feature |
| Narrow picket tiles with marble counters | $$ | Medium | Refined kitchens with stone counters |
| Dusty blue kit kat finger tiles | $$ | Medium | Small kitchens, coastal style |
| Soft blue scallop fish scale tiles | $$ | Hard | Full walls with curved details |
| Sea glass mosaic behind the range | $$ | Medium | Dark kitchens that need light |
| White and grey marble mosaic in a pattern | $$$ | Medium | Classic kitchens on a stone budget |
| White and grey splitface stone strips | $$ | Hard | Rustic or industrial kitchens |
| Black chevron for a bold wall | $$ | Hard | Calm kitchens that need one strong move |
| Brushed brass inlay strip | $ | Easy | Kitchens with brass hardware |
| Peel-and-stick subway for renters | $ | Easy | Rentals and fast updates |
| Two-tone contrast behind the range | $$ | Medium | Feature zones on a budget |
Cost key: $ means $1 to $10, $$ means $11 to $99, $$$ means $100 to $999, $$$$ means $1,000 and up. Labor, trim, and sealing add to these figures.
Common mistakes to avoid
The most common backsplash mistake is picking the tile before checking the counters. A busy tile next to a veined countertop fights for attention, and both lose. Pick one star per kitchen: a bold tile with plain counters, or a quiet tile with bold counters. Another mistake is skipping the layout plan. Herringbone, chevron, and hexagon all need a center line marked on the wall before the first tile goes up, or the pattern drifts off-center by the second row. A third mistake is grouting with the wrong grout. Cement grout in a wet zone without sealer stains within months, and epoxy grout sets so fast that a slow first-timer can ruin a wall. Match the grout to your skill level, not just to the tile color.
Safety notes
Tile work has a few real risks worth planning for. Cut tile with a wet saw outdoors or in a ventilated space, and wear eye protection and a dust mask, since tile and stone dust irritate lungs and eyes. Hire a licensed electrician for any outlet that moves or gets added in the backsplash wall, and keep tile and adhesive clear of stove heat unless the tile maker rates it for high heat. In homes built before 1978, test for lead paint before drilling or sanding old walls, and follow the EPA Renovation, Repair and Painting program rules for lead-safe work. Seal grout in wet zones behind the sink and range, and re-seal it once a year so water and grease stay out of the grout lines. For tile installation standards, the Tile Council of North America publishes the industry handbook that most tilers follow.
More kitchen ideas to explore
If your counters need the same attention as your walls, these ideas pair beige countertop materials with backsplash choices that sit well next to them.
Kitchen With Beige Countertops Ideas
For the bigger picture of how a backsplash fits into a full kitchen plan, this general kitchen design guide covers layout, storage, and style in one place.
Inspiring Kitchen Design Ideas
Warm wood lovers can see how walnut cabinets and a tile wall work together in this walnut kitchen guide.
Creative Walnut Kitchens Design Ideas
If dark tile appeals to you, this black and wood kitchen guide shows how black tile walls pair with wood cabinets.
Modern Black And Wood Kitchen Ideas
And if warm brown tones are your thing, the brown tiles guide covers that palette in depth, from floors to walls.
Eye Catching Brown Tiles Kitchen Ideas
Frequently asked questions
What is the easiest backsplash tile for a beginner to install?
Peel-and-stick subway tile is the easiest option, since it needs no thinset, no grout, and no special tools. For real tile, a standard white subway tile in a brick bond is the most forgiving: the grid hides small spacing errors, the tiles cut easily, and cement grout gives you time to work. Avoid herringbone, chevron, and scallop patterns for a first project, since those layouts need precise cuts and a center line plan.
How high should a kitchen backsplash go?
Most backsplashes run from the countertop to the underside of the wall cabinets, which is usually 18 inches. Behind a range, many kitchens run the tile higher, sometimes to the range hood or all the way to the ceiling, for one tall feature strip. A full-height backsplash costs more in tile and labor, so a common compromise is standard height on the side walls and full height only behind the range.
What grout color works best with white subway tile?
Light grey grout is the safest choice: it keeps the wall calm, hides minor spacing differences, and shows less dirt than white grout. Dark charcoal grout makes the brick pattern stand out and hides marks well, but it also makes every spacing error visible, so it suits careful installers. White grout looks fresh at first but stains fastest behind a range, so seal it well if you pick it.
Do I need to seal a tile backsplash?
Glazed ceramic and porcelain tiles do not need sealing, but their grout lines do, especially in wet zones behind the sink and range. Natural stone tiles, including marble and splitface, need sealing before grouting and again after, since stone absorbs water and stains fast. Re-seal grout once a year in the wettest spots, and wipe up acidic splashes like tomato sauce and lemon juice fast on stone.
Can I put tile directly over an old backsplash?
Yes, if the old backsplash is flat, firmly attached, and clean. Rough up glossy old tile with sandpaper so the thinset grips, and check that the added thickness still leaves room for outlet covers and trim. If the old tile is loose, cracked, or uneven, remove it first, since new tile follows every bump underneath. In homes built before 1978, test for lead paint before sanding or removing old tile.
Final thoughts
The best backsplash tile is the one that fits how you cook, how much light your kitchen gets, and how much grout care you will actually do. Start with a tile you can clean without thinking about it, pick a layout you can live with for years, and let the grout color do the quiet work of tying the wall together.
For styling the space above your kitchen cabinets, see our guide to 9 Ideas to Style the Space Above Kitchen Cabinets for a Finished Look for lidded storage bins, oversized pottery, leaned art, faux greenery, LED glow, and closing the gap for good.
For keeping the sink area dry and tidy, see our guide to 20 Kitchen Sink Soap Tray Ideas for a Sink Area That Stays Dry and Tidy for silicone trays with drain spouts, sealed bamboo, marble slabs, suction caddies, and tip-out trays.


