



Walnut is the wood people point to when they want a kitchen that feels warm without feeling dark and heavy. The trouble is that walnut shows up in so many forms, full cabinetry, islands, shelves, countertops, that it is easy to buy the wrong amount of it or pair it with finishes that fight the grain. A kitchen with too much dark wood and too little light ends up gloomy, and a kitchen with walnut scattered everywhere ends up busy.
This guide gives you 14 creative walnut kitchen design ideas, each with a cost range and a difficulty label, so you can pick one clear walnut feature and build the rest of the room around it. I swapped our pale oak cutting board for a thick walnut one last spring, and that single dark board changed how the whole counter looked. That is the rule here: let walnut do one job well, and keep everything around it calm.
Quick takeaways
- Give walnut one clear role: island, lower cabinets, pantry wall, or accents. Spreading it everywhere is the fastest way to a heavy room.
- Pair walnut with light, low-contrast surfaces: white quartz, soft beige stone, pale walls, and light floors keep the wood warm instead of dark.
- Keep hardware quiet. Slim brass, matte black, or handleless fronts let the grain stay in focus.
- Plan lighting before you finalize the finish. Warm under-cabinet light and daylight change how walnut reads more than any stain choice.
- In small or low-light kitchens, use walnut selectively: an island, open shelves, or a coffee station gives you the warmth with less visual weight.
1. Walnut island with a white quartz waterfall
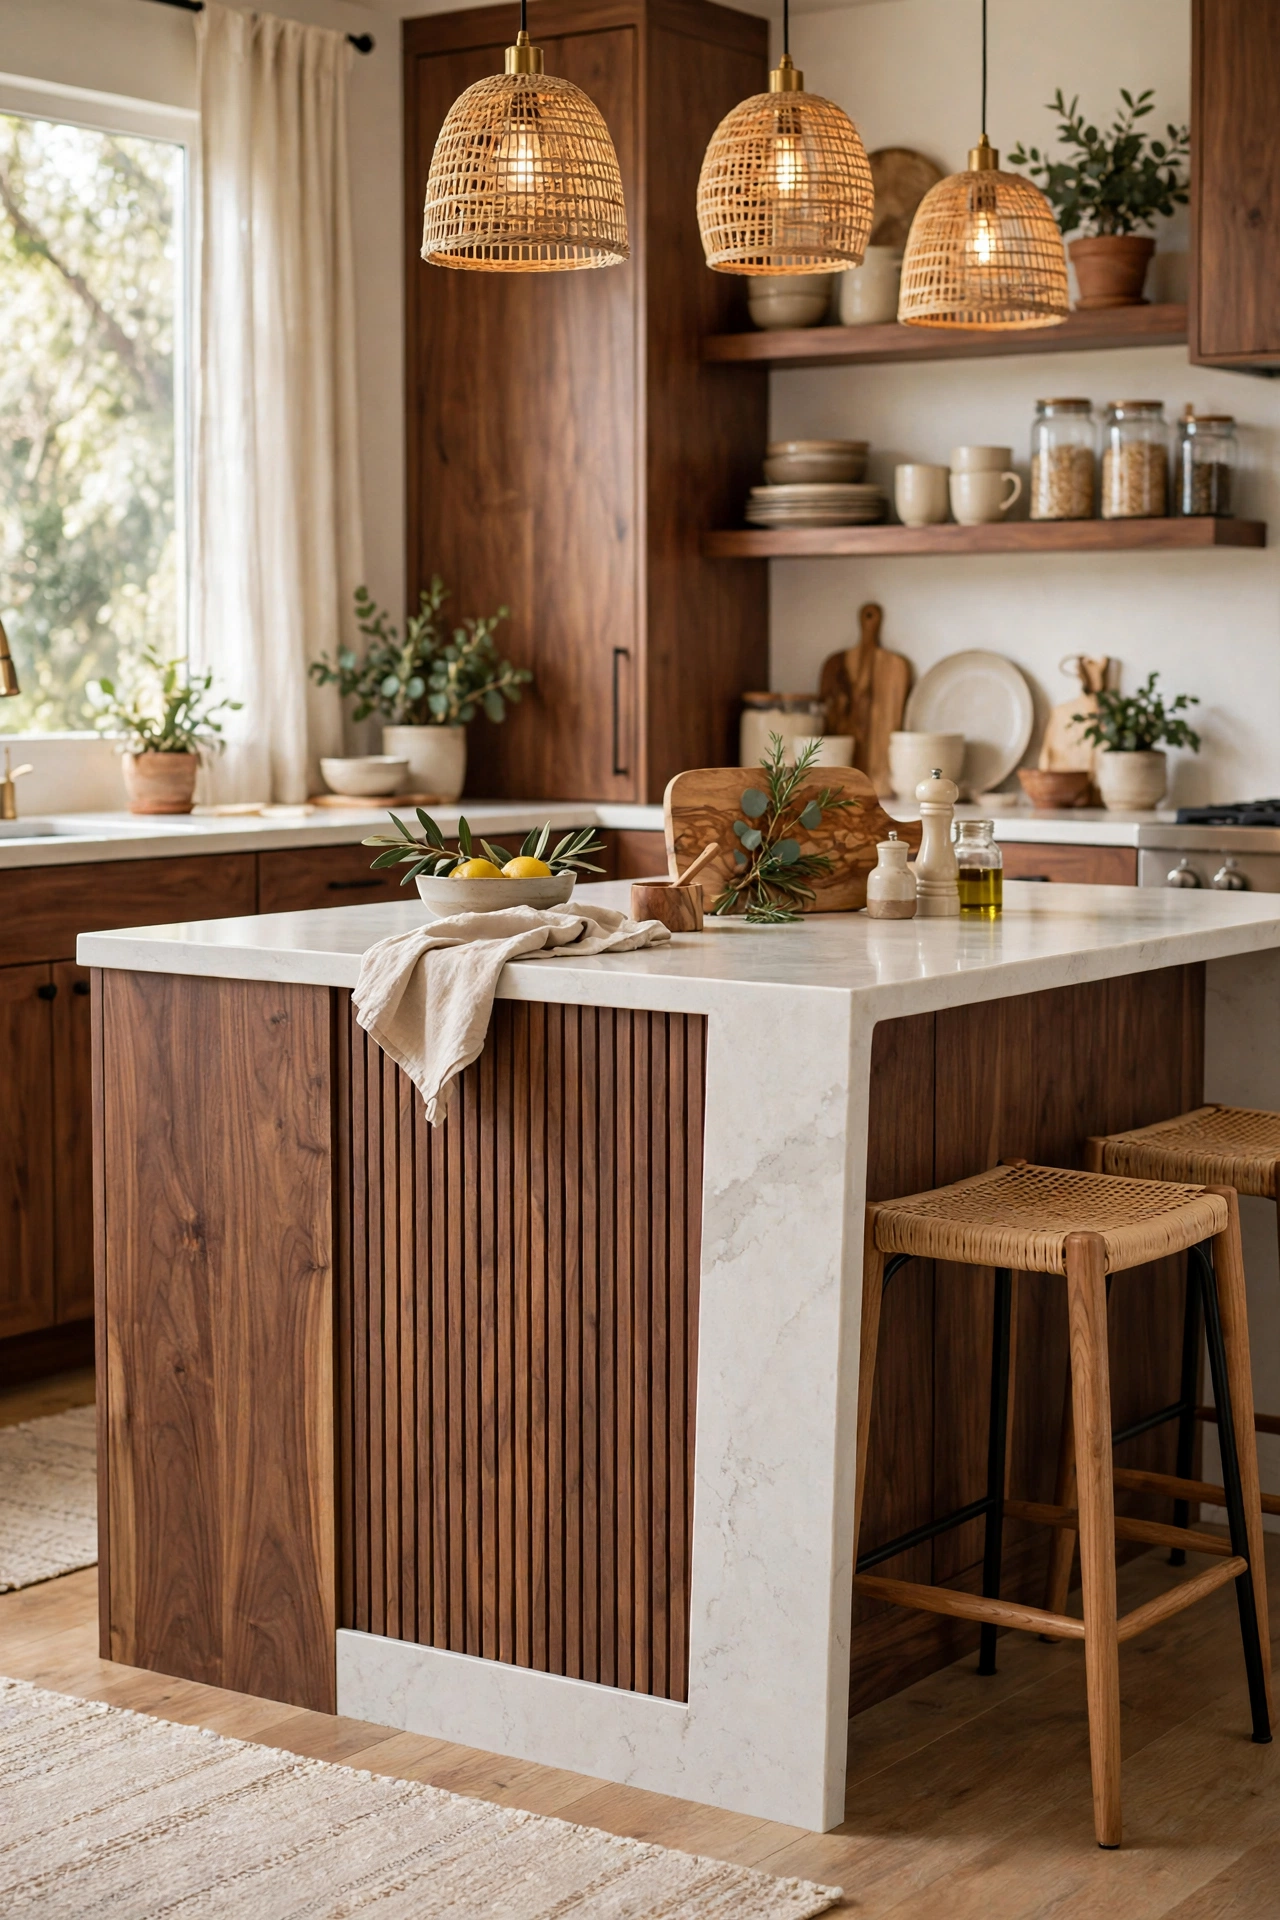
Build the island base from walnut panels and run white quartz down both sides in a waterfall edge. The dark base anchors the room, and the pale stone keeps the island from reading as a solid block of wood. A 9 foot island gives room for three stools on one side and prep space on the other, and a waterfall edge hides the end panels so the grain runs clean to the floor. Keep the perimeter cabinets light so the island stays the clear focal point.
Try this: Ask the fabricator to book-match the walnut panels on the island ends so the grain flows across the corners.
Cost: $$$$. Difficulty: Pro install.
2. Two-tone walnut lowers with cream uppers
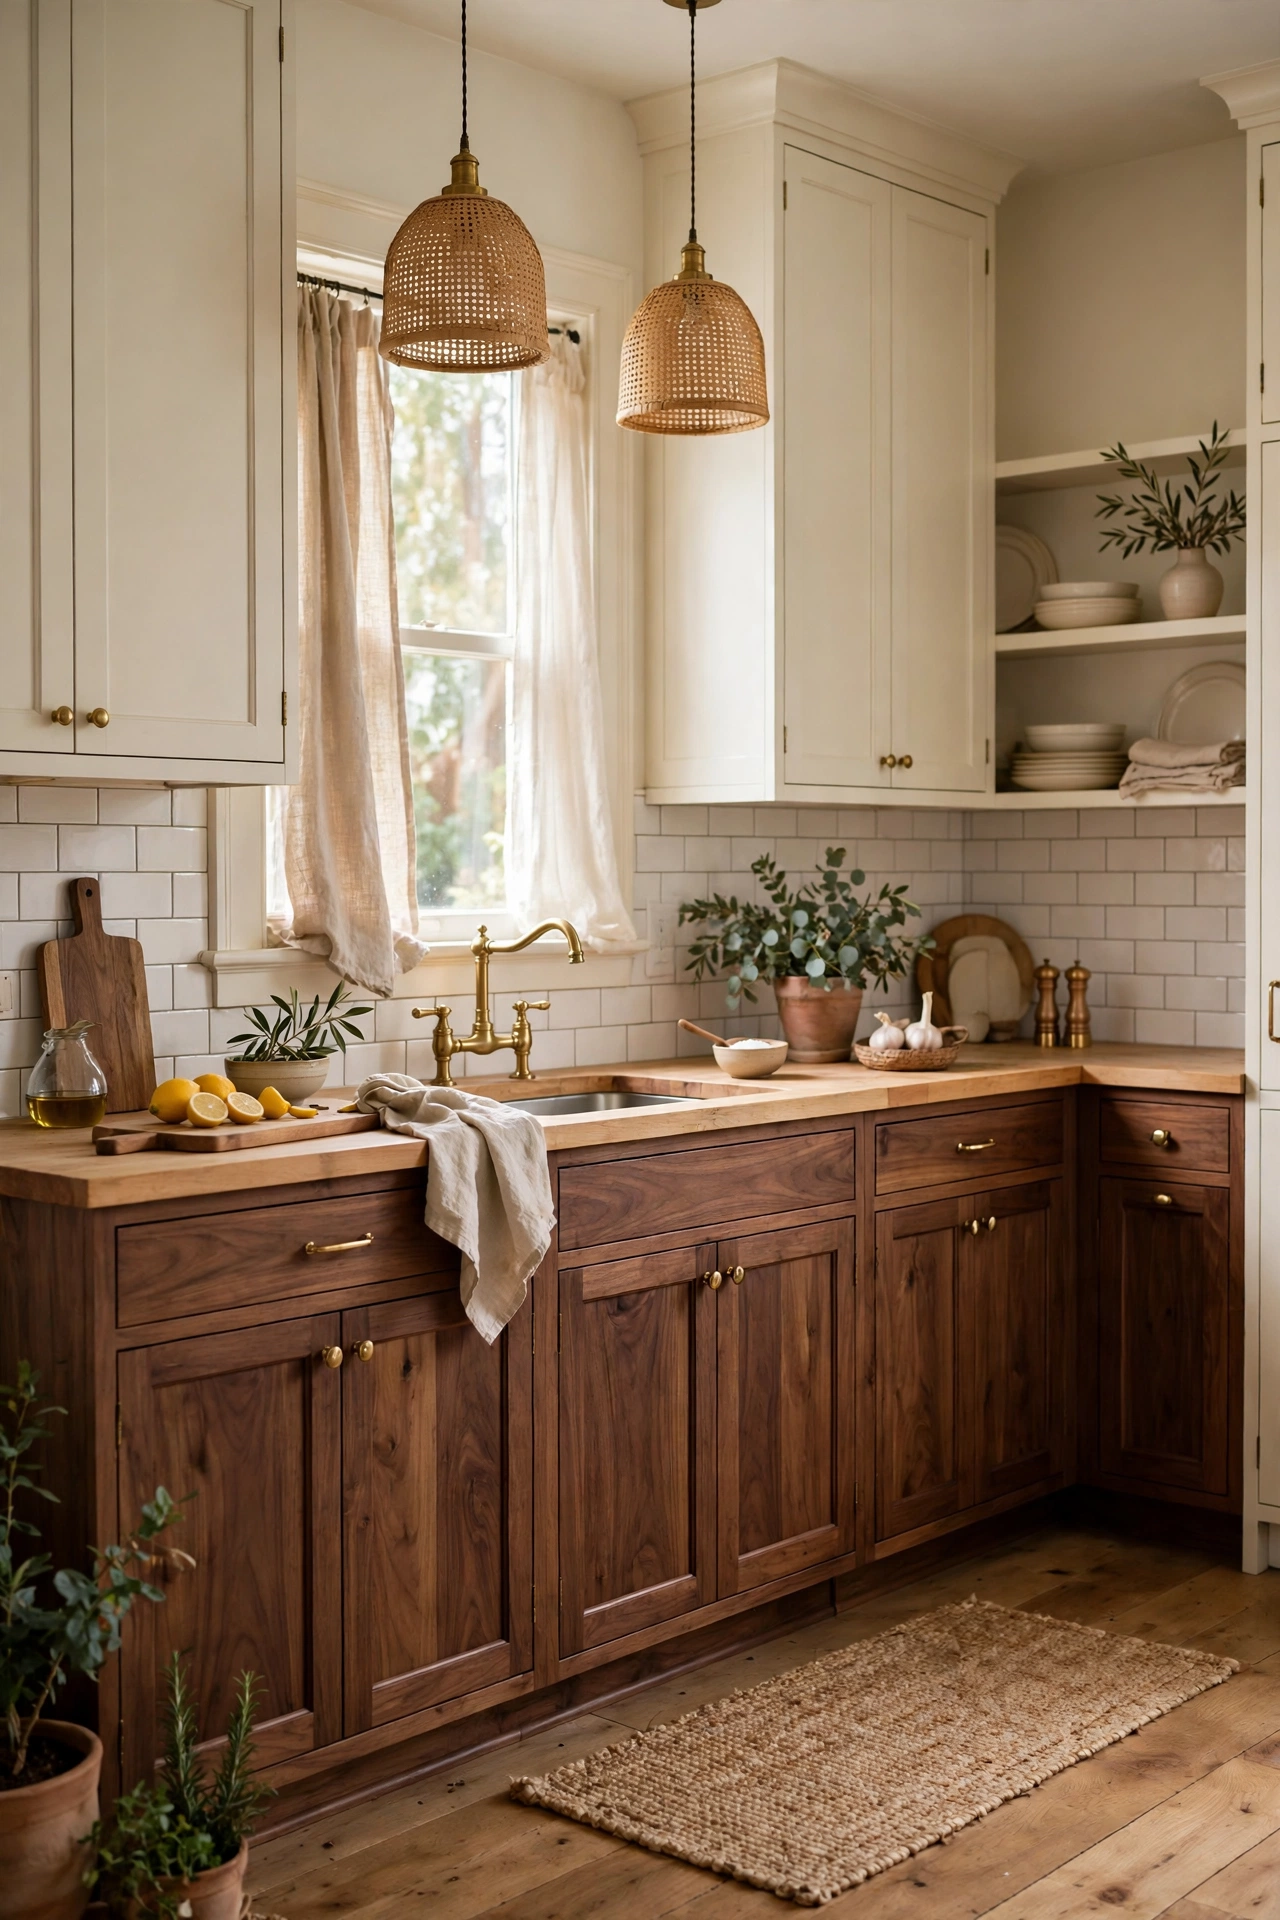
Walnut base cabinets with cream or soft white upper cabinets is the most dependable walnut layout for a mid-size kitchen. The dark wood stays low, where it grounds the room, and the light uppers keep eye level bright. Use the same countertop across both runs so the two tones read as one plan, and pick one hardware finish for every door. This split works in galley kitchens too, because the lighter top half stops a narrow room from closing in.
Try this: Keep the split at roughly 70 percent walnut below and 30 percent light above, counting the tall units as part of the light side if they are painted.
Cost: $$$$. Difficulty: Pro install.
3. Full-height walnut pantry wall

Turn one wall into floor-to-ceiling walnut pantry cabinets with vertical grain panels and hidden pulls. A single tall block of walnut reads like furniture instead of storage, and it hides a surprising amount: dry goods, small appliances, and a broom closet behind one door. Vertical grain matters here, because horizontal grain across tall doors can look striped. Leave the rest of the kitchen pale so the pantry wall gets the attention it deserves.
Try this: Add a shallow open niche in the middle of the pantry wall for cookbooks and a coffee station, so the tall run does not feel like a closed box.
Cost: $$$$. Difficulty: Pro install.
4. Flat-front slab walnut cabinets, handleless

Slab walnut doors with push-to-open catches or recessed channel pulls give a modern kitchen its cleanest look. With no knobs or bars breaking the surface, the grain runs uninterrupted from door to door, and the room feels calm even when the cabinetry covers two walls. A matte or satin finish suits this style better than high gloss, which shows fingerprints and glare. Pair the slabs with a simple white tile backsplash and pale stone counters.
Try this: Order one extra slab door as a spare, since matching walnut grain later is hard when boards come from a different batch.
Cost: $$$$. Difficulty: Pro install.
5. Walnut open shelving beside the range

Replace one bank of upper cabinets beside the range with two thick walnut shelves. The shelves break up a long cabinet run, give you a spot for daily plates and bowls, and add walnut warmth without the cost of full cabinetry. A 2 inch thick shelf reads solid and holds heavy stacks, but it needs stud mounting, since a loaded walnut shelf is heavy. Keep the shelf styling sparse: plates, a few bowls, and one plant, not a full display.
Try this: Mount the lower shelf at 18 inches above the countertop so tall items still fit underneath.
Cost: $$$. Difficulty: Moderate DIY with stud mounting.
6. Walnut butcher block countertop section
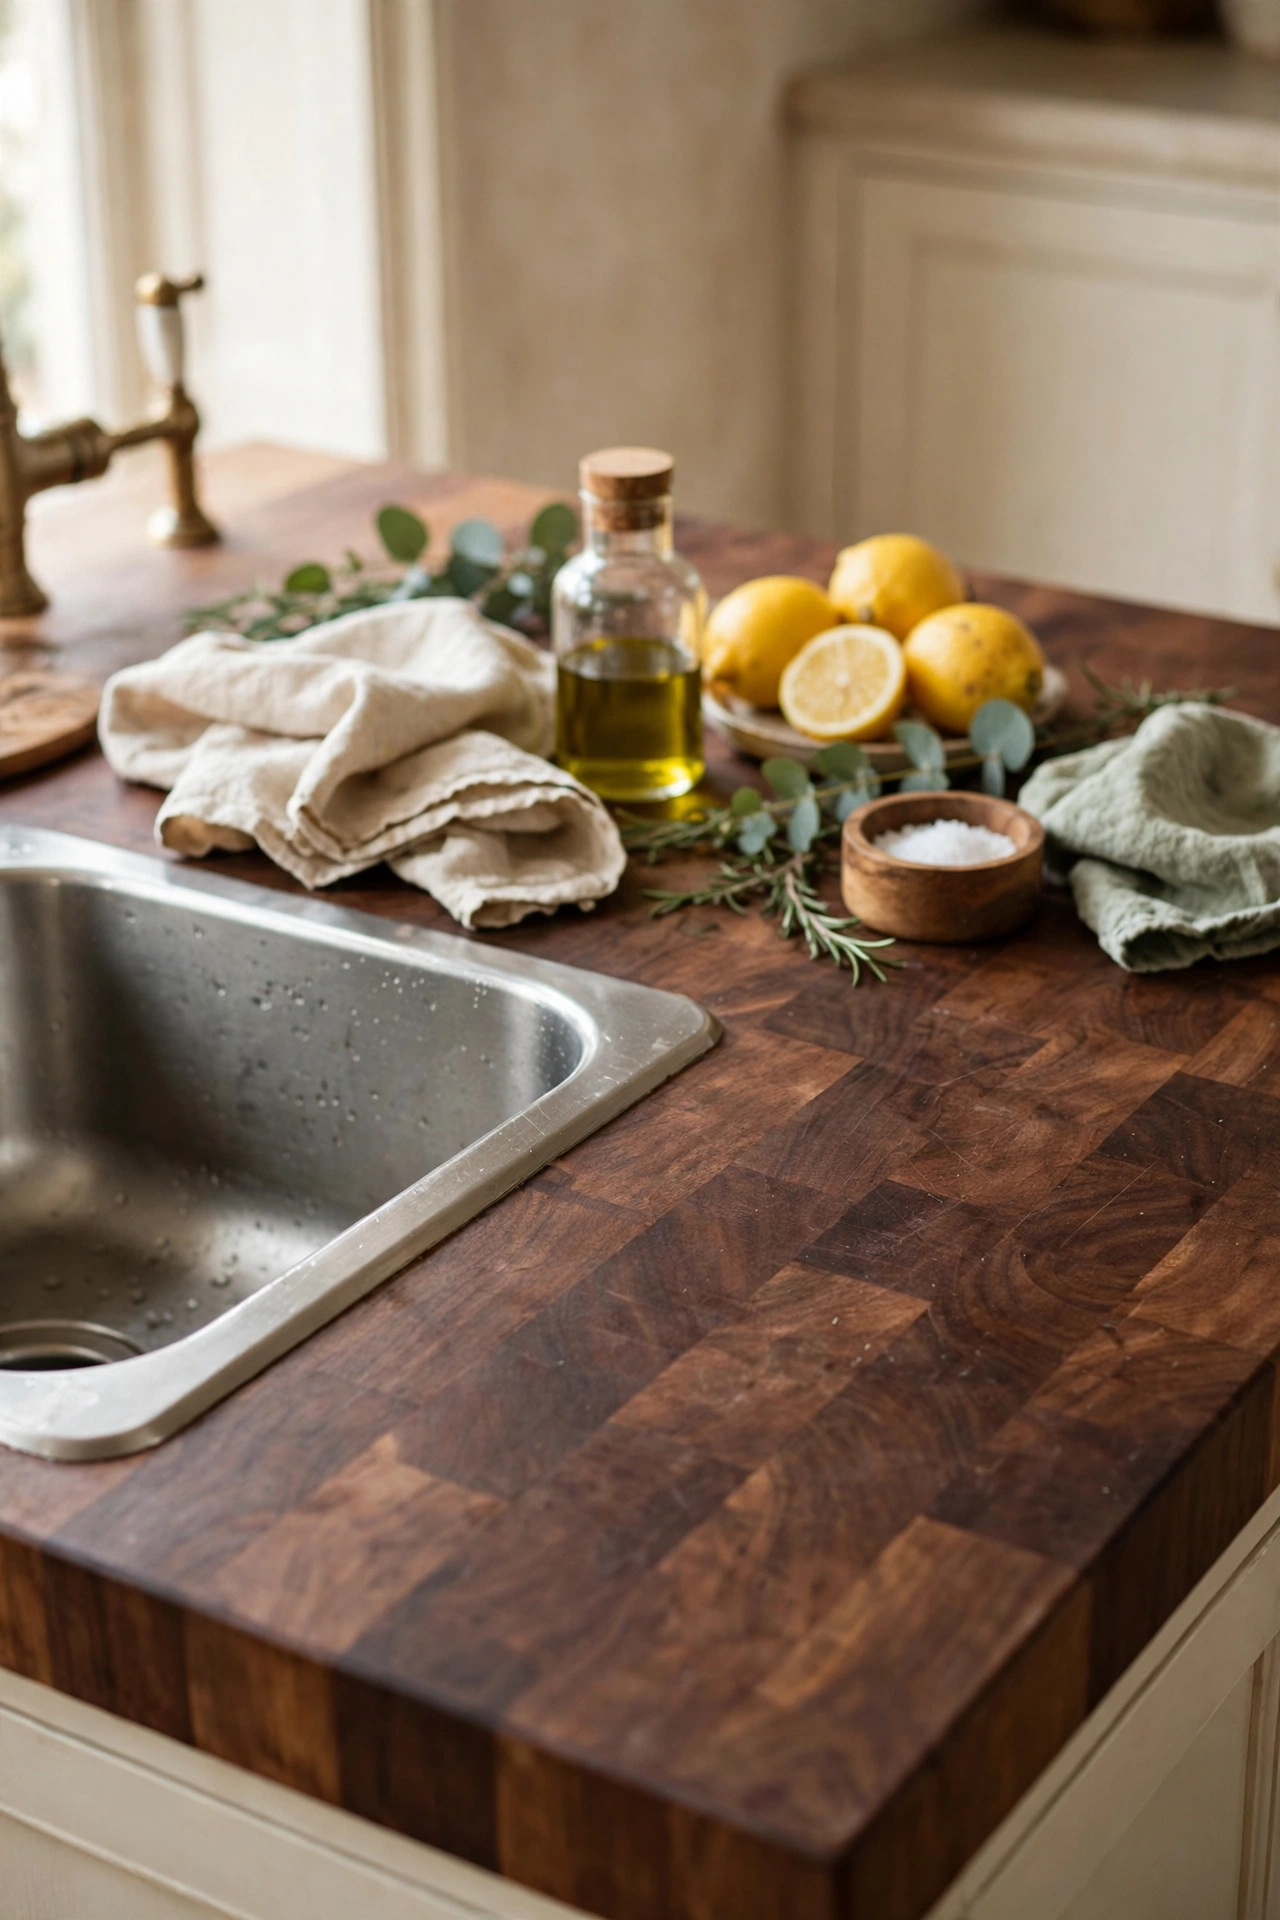
Use walnut butcher block for one countertop zone, usually the baking station or the island top, and keep the rest of the counters in quartz. The wood section gives you a warm prep surface that is kind to knives, and it costs far less than walnut cabinetry across the whole kitchen. Seal it with food-safe oil and re-oil every few months, and keep it away from the sink run, since standing water is the main enemy of a wood top. Cut a juice groove near the edge if you prep a lot of produce there.
Try this: Sand and re-oil the block once a year to erase knife marks before they darken.
Cost: $$$$. Difficulty: Moderate DIY or pro install.
7. Walnut range hood surround

Clad the range hood in walnut panels to turn a plain appliance into the room’s centerpiece. A walnut hood works best when the cabinets around it are simple, because the hood needs clear space to stand out. Keep the hood at least 30 inches above a gas cooktop and 24 inches above an electric one, and use a metal liner inside, since wood near heat needs proper clearance and a rated insert. A slim brass trim strip along the bottom edge ties the hood to brass hardware elsewhere.
Try this: Match the hood panels to the island walnut, not the cabinet walnut, if the two woods come from different batches.
Cost: $$$$. Difficulty: Pro install.
8. Walnut cabinets with brass hardware

Slim brass bar pulls and knobs warm up walnut in a way matte black cannot, because brass picks up the golden tones in the grain. Use one brass finish everywhere, pulls on drawers and knobs on doors, and keep the bars slim, about 5 to 6 inches on standard drawers. Brass shows water spots near the sink, so wipe pulls dry after splashes. This pairing suits transitional kitchens best, where walnut meets classic details like a farmhouse sink or marble counters.
Try this: Test one brass pull against your walnut sample in evening light before ordering a full set, since brass reads very differently under warm bulbs.
Cost: $$$$. Difficulty: Easy DIY.
9. Walnut breakfast bar with counter seating

Extend one counter into a walnut breakfast bar peninsula with room for two or three stools. A walnut bar top feels warmer under elbows than stone, and the peninsula defines the kitchen edge in an open-plan room without building a wall. Leave 15 inches of knee space under the overhang and 24 inches of width per stool so people are not squeezed. A walnut bar pairs well with pale perimeter cabinets, since the bar becomes the wood accent in an otherwise light room.
Try this: Round the bar corners slightly if kids use the stools daily, since sharp walnut edges chip more easily than stone.
Cost: $$$$. Difficulty: Pro install.
10. Shaker walnut doors for a transitional kitchen
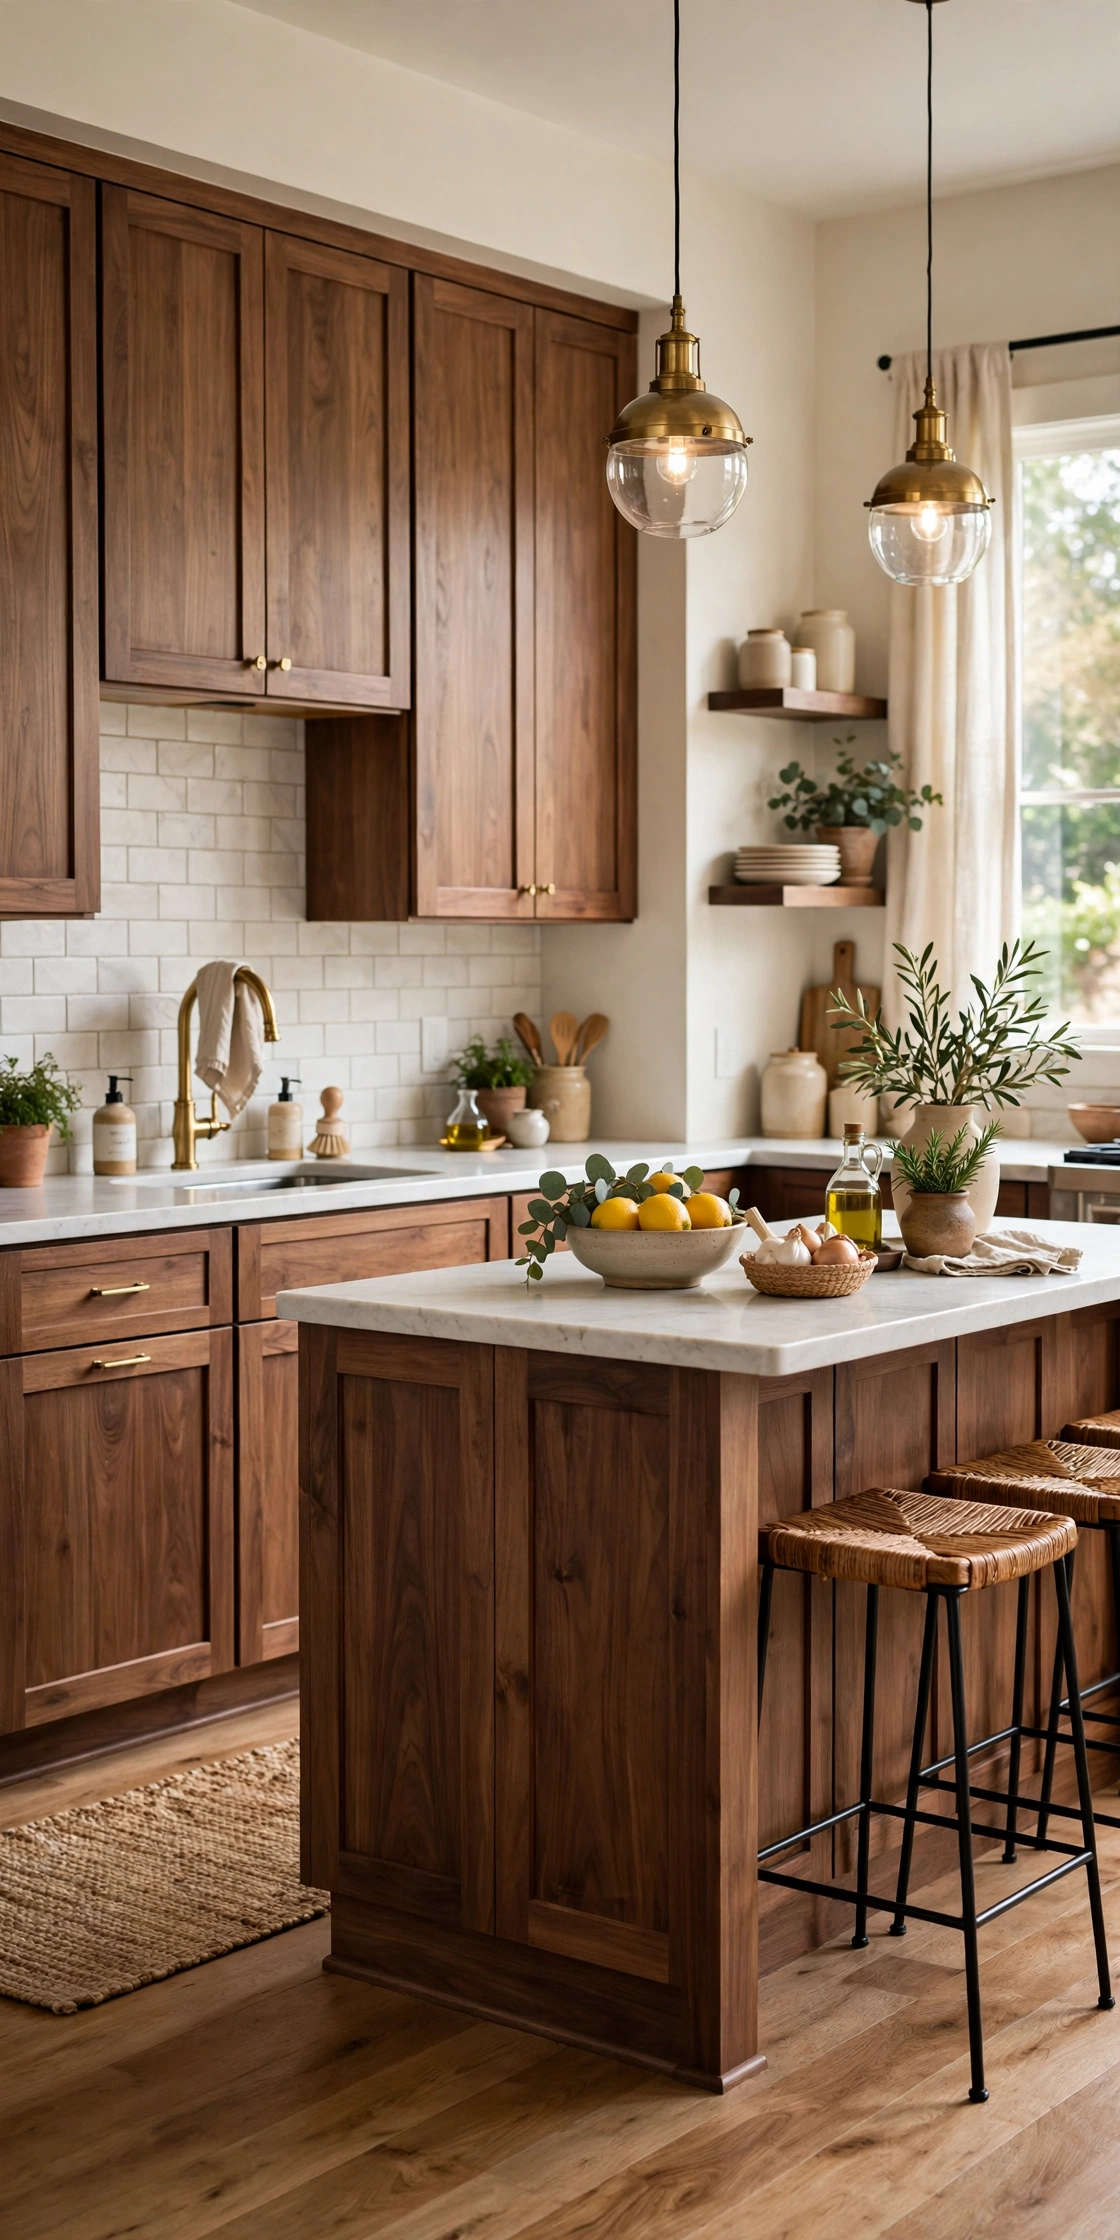
Shaker doors in walnut give a transitional kitchen the structure of a classic cabinet with the warmth of dark wood. The recessed panel adds shadow lines that flat slabs lack, and the style suits painted walls and traditional hardware. Keep the panel profile simple, since heavy molding competes with walnut grain. A soft white wall color and a marble-look counter keep the room from tipping into dark traditional territory, which is the main risk with this style.
Try this: Use shaker doors only on the base cabinets and flat fronts on the uppers to keep the upper half lighter.
Cost: $$$$. Difficulty: Pro install.
11. Walnut shelves with a zellige tile backsplash

Handmade zellige tiles in soft ivory or pale sage give walnut shelves a textured backdrop that flat subway tile cannot match. The slight color variation in each tile keeps the wall interesting, while the walnut shelves add warmth on top. Keep the grout color close to the tile color so the grout lines do not chop up the pattern. This combination works best on one feature wall, usually behind the range or sink, with plainer tile elsewhere.
Try this: Bring a walnut shelf sample to the tile shop and check the pairing in daylight, since zellige glazes shift color under store lights.
Cost: $$$$. Difficulty: Moderate DIY or pro install.
12. Walnut coffee station and appliance garage

Build a walnut coffee station with a tambour or lift-up door that hides the coffee maker, toaster, and grinder when not in use. A single walnut unit concentrates the wood in one useful spot, and closing the door clears the counter in seconds. Add an outlet inside the unit and a heat-safe shelf for the coffee maker, and leave a small open shelf above for mugs. This idea suits small kitchens well, because it adds walnut character without touching the main cabinet run.
Try this: Put the coffee station near the fridge and the sink so the morning routine does not cross the cooking zone.
Cost: $$$$. Difficulty: Pro install.
13. Walnut beams and island trim for a rustic kitchen

A walnut beam or two across the ceiling, matched with walnut trim on the island base, gives a rustic kitchen warmth without a full walnut cabinet suite. Beams work best in rooms with ceilings at least 9 feet high, since lower beams can make the room feel shorter. Use hollow box beams instead of solid ones to keep the weight down, and anchor them into ceiling joists, not drywall alone. Keep the rest of the wood in the room light, such as pale oak floors, so the walnut beams stay the dark accent.
Try this: Stain the beam boxes one shade lighter than the island trim, since overhead wood reads darker than wood at eye level.
Cost: $$$$. Difficulty: Pro install.
14. Light natural walnut in a small kitchen
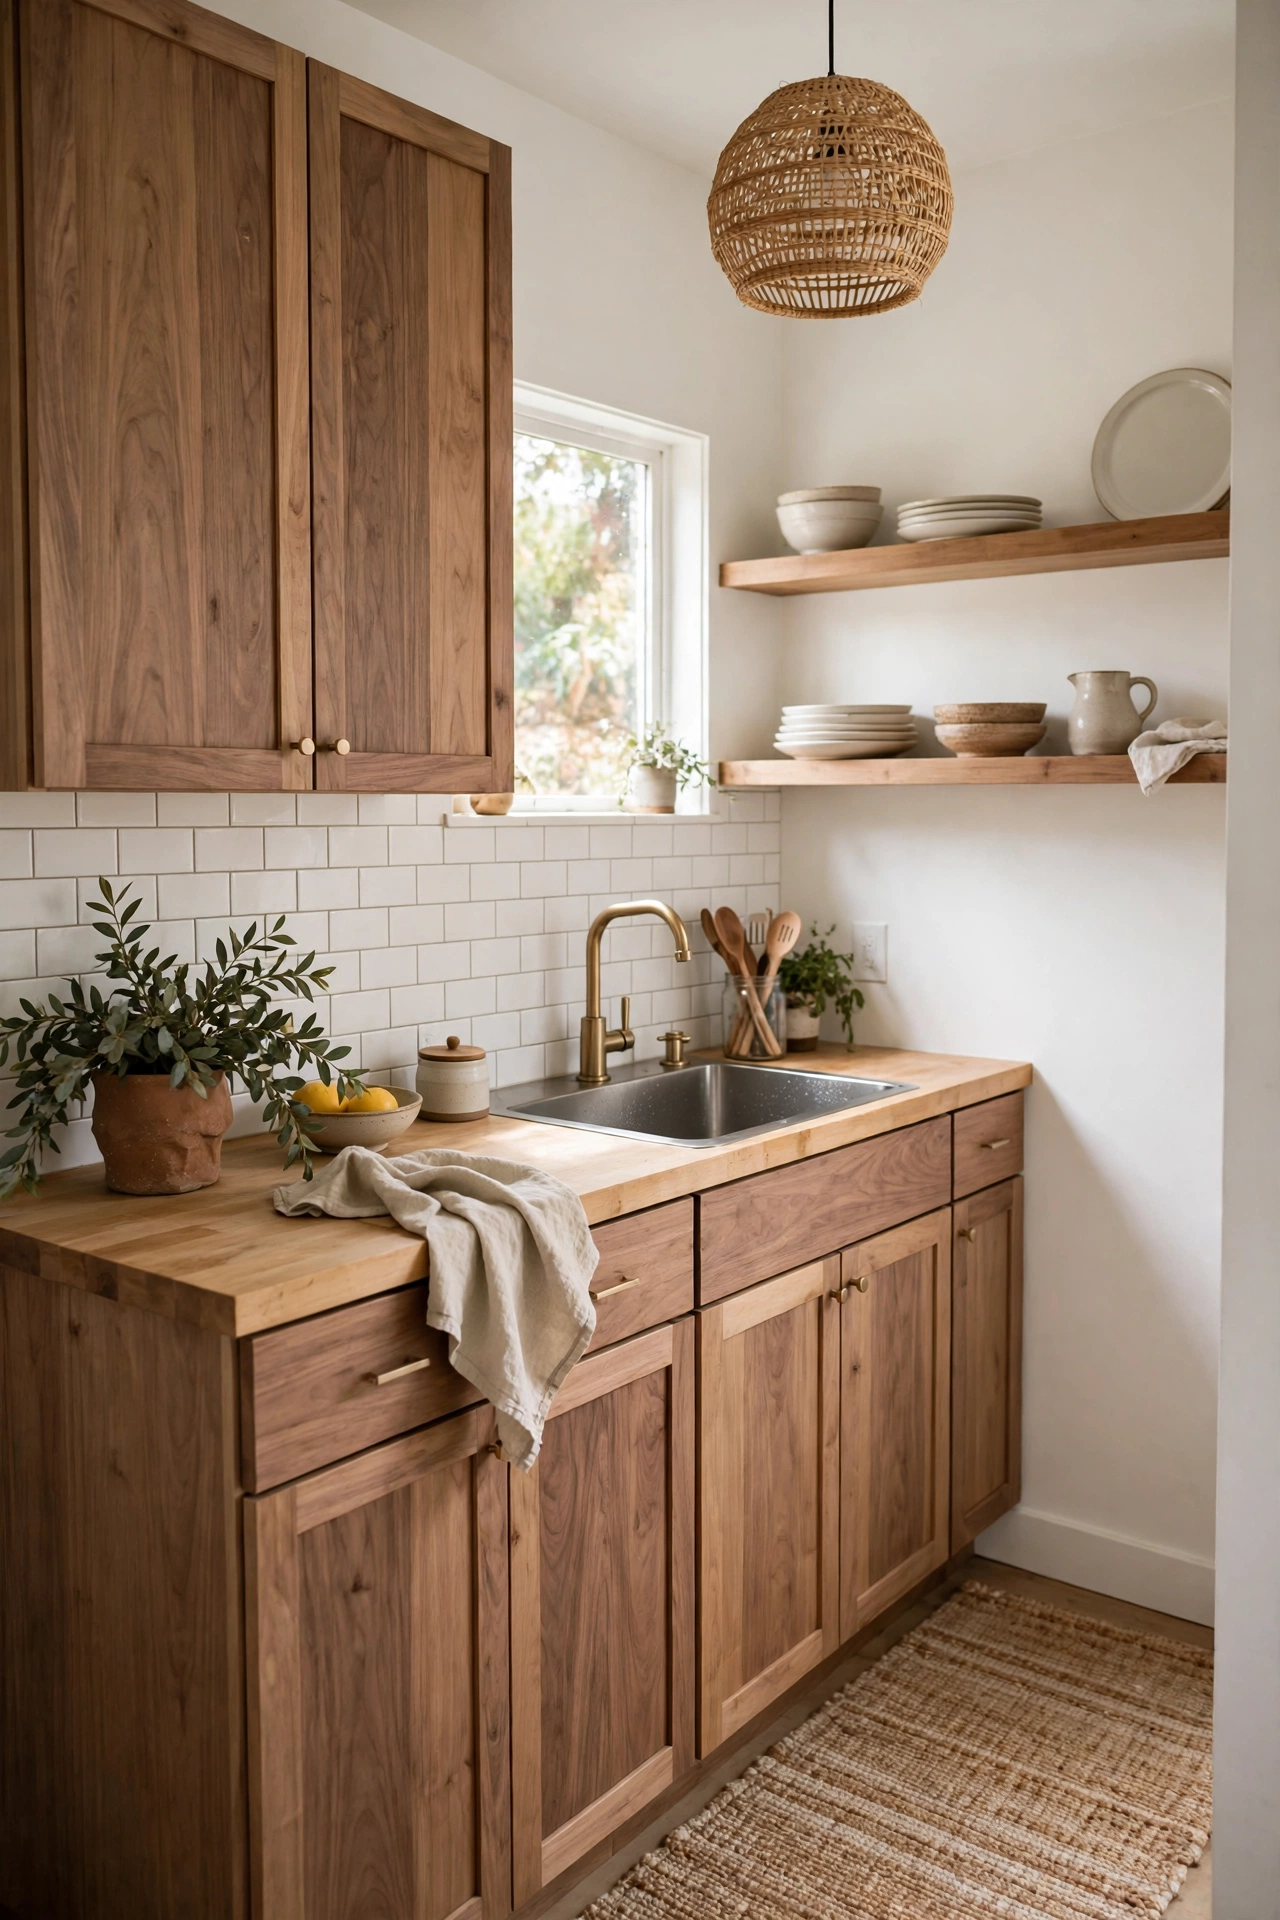
Natural, unstained walnut runs lighter and honey-toned than the dark chocolate walnut most people picture, and that lighter tone suits small kitchens far better. Use it on all the cabinets in a compact kitchen, paired with white walls, pale floors, and a light countertop, and the room keeps its brightness while gaining wood warmth. A clear matte finish protects the lighter tone without adding shine. Skip dark hardware here and use brushed nickel or light brass instead.
Try this: Ask for a sample door in natural walnut and live with it in your kitchen for a week before committing, since light walnut shifts tone a lot between morning and evening light.
Cost: $$$$. Difficulty: Pro install.
How to choose the right walnut approach for your kitchen
Start with light. A kitchen with big windows and pale walls can carry full walnut cabinetry, while a small or north-facing kitchen does better with walnut on one feature, such as the island or shelves. Next, pick one anchor: decide whether walnut lives on the island, the lower cabinets, or a pantry wall, and let that choice settle the rest of the plan. Then choose one metal finish and one stone, and stop there. Two metals and two stones plus walnut grain is usually one material too many. Finally, measure the three biggest pieces, the island, the pantry wall, and the longest cabinet run, and check that walnut covers no more than half of them in a low-light room.
Walnut kitchen ideas at a glance
| Idea | Cost | Difficulty | Best for |
|---|---|---|---|
| Walnut island with white quartz waterfall | $3,000 to $8,000 | Pro install | Open-plan kitchens |
| Two-tone walnut lowers with cream uppers | $8,000 to $20,000 | Pro install | Mid-size kitchens |
| Full-height walnut pantry wall | $4,000 to $10,000 | Pro install | Storage-heavy kitchens |
| Flat-front slab walnut cabinets, handleless | $10,000 to $25,000 | Pro install | Modern kitchens |
| Walnut open shelving beside the range | $300 to $900 | Moderate DIY with stud mounting | Budget updates |
| Walnut butcher block countertop section | $400 to $1,200 | Moderate DIY or pro install | Baking stations |
| Walnut range hood surround | $1,500 to $4,000 | Pro install | Focal-point kitchens |
| Walnut cabinets with brass hardware | $300 to $1,000 | Easy DIY | Quick refreshes |
| Walnut breakfast bar with counter seating | $800 to $3,000 | Pro install | Open-plan rooms |
| Shaker walnut doors for a transitional kitchen | $9,000 to $22,000 | Pro install | Transitional homes |
| Walnut shelves with a zellige tile backsplash | $600 to $2,000 | Moderate DIY or pro install | Feature walls |
| Walnut coffee station and appliance garage | $1,000 to $3,500 | Pro install | Small kitchens |
| Walnut beams and island trim for a rustic kitchen | $1,200 to $4,000 | Pro install | High-ceiling rooms |
| Light natural walnut in a small kitchen | $7,000 to $18,000 | Pro install | Compact kitchens |
Common mistakes to avoid
- Using walnut everywhere. Full walnut cabinets, walnut floors, and a walnut island in one room flatten the grain into background noise. Pick one or two walnut zones and let the rest stay light.
- Skipping the lighting plan. Walnut under cool, dim light looks flat and gray. Warm under-cabinet strips and daylight change the same finish completely.
- Mixing too many wood tones. Walnut plus oak floors plus a maple table plus cherry stools reads as a wood shop. Keep the secondary wood close in tone to walnut or clearly lighter, and limit it to one other species.
- Mounting heavy shelves into drywall only. A loaded walnut shelf can pull straight out of drywall anchors. Always hit studs, and check the load rating before stacking plates.
- Putting wood tops next to the sink without sealing. Standing water darkens and swells walnut butcher block. Seal it, wipe splashes fast, and keep the wood zone away from the wettest run.
- Ignoring lead paint in older homes. If your home was built before 1978, sanding or stripping old painted cabinets can release lead dust. The U.S. Environmental Protection Agency requires lead-safe work practices for renovation in pre-1978 homes, so hire a certified firm for that step. See the EPA Renovation, Repair and Painting Program for the rules.
- Forgetting to anchor tall units. Full-height pantry walls and tall walnut cabinets can tip if a child climbs them. Anchor every tall unit to wall studs, and follow the U.S. Consumer Product Safety Commission Anchor It guidance for furniture anchoring.
More kitchen and home ideas
If you want the broader kitchen picture first, start with these inspiring kitchen design ideas.
For a lighter countertop pairing with walnut, see these kitchen with beige countertops ideas.
If you like the dark wood and light contrast but want a bolder mix, check these modern black and wood kitchen ideas.
For walnut-friendly storage next to the kitchen, these pantry cabinet with pull out shelves ideas keep dry goods visible and easy to reach.
And if your walnut pantry wall grows into a full walk-in, these smart walk in pantry shelving ideas show how to lay it out.
Frequently asked questions
What countertop goes best with walnut cabinets?
Light, low-contrast counters work best: white quartz, soft beige stone, or a subtle marble-look surface. Busy, high-contrast stone fights the walnut grain, while quiet stone lets the wood carry the room. In small kitchens, white quartz is the safest pick because it brightens the whole space.
Are walnut kitchens too dark?
Not when the rest of the room stays light. Walnut feels dark only when it meets other dark elements: dark walls, dark floors, and dark counters all at once. Pair walnut with pale walls, light floors, and good lighting, and it reads as warm rather than heavy. In low-light rooms, use walnut on one feature instead of every cabinet.
Is walnut a good wood for kitchen cabinets?
Yes, walnut is a hard, stable hardwood with a rich grain that suits both modern and traditional kitchens. It costs more than oak or maple, and it can scratch in high-traffic spots, so a matte or satin finish helps hide everyday wear. Sealed walnut handles normal kitchen use well as long as standing water is wiped up.
What hardware finish suits walnut cabinets?
Brass warms walnut up, matte black gives it a modern edge, and brushed nickel keeps it quiet. Pick one finish for the whole kitchen and keep the pulls slim, since heavy or ornate hardware competes with the grain. Handleless fronts are another strong option for a clean modern look.
Can I use walnut in a small kitchen?
Yes, but use it selectively. A walnut island, open shelves, or a coffee station gives a small kitchen warmth without the weight of full walnut cabinetry. Natural, lighter walnut also works across a small kitchen when the walls and counters stay pale. Avoid dark walnut on every surface in a compact, low-light room.
Final thoughts
Walnut works best when it has one clear job in your kitchen, whether that is an island, a pantry wall, or a set of lower cabinets, with light surfaces and warm light doing the rest. Pick your anchor, keep the palette calm, and the wood will give the room warmth for years.


