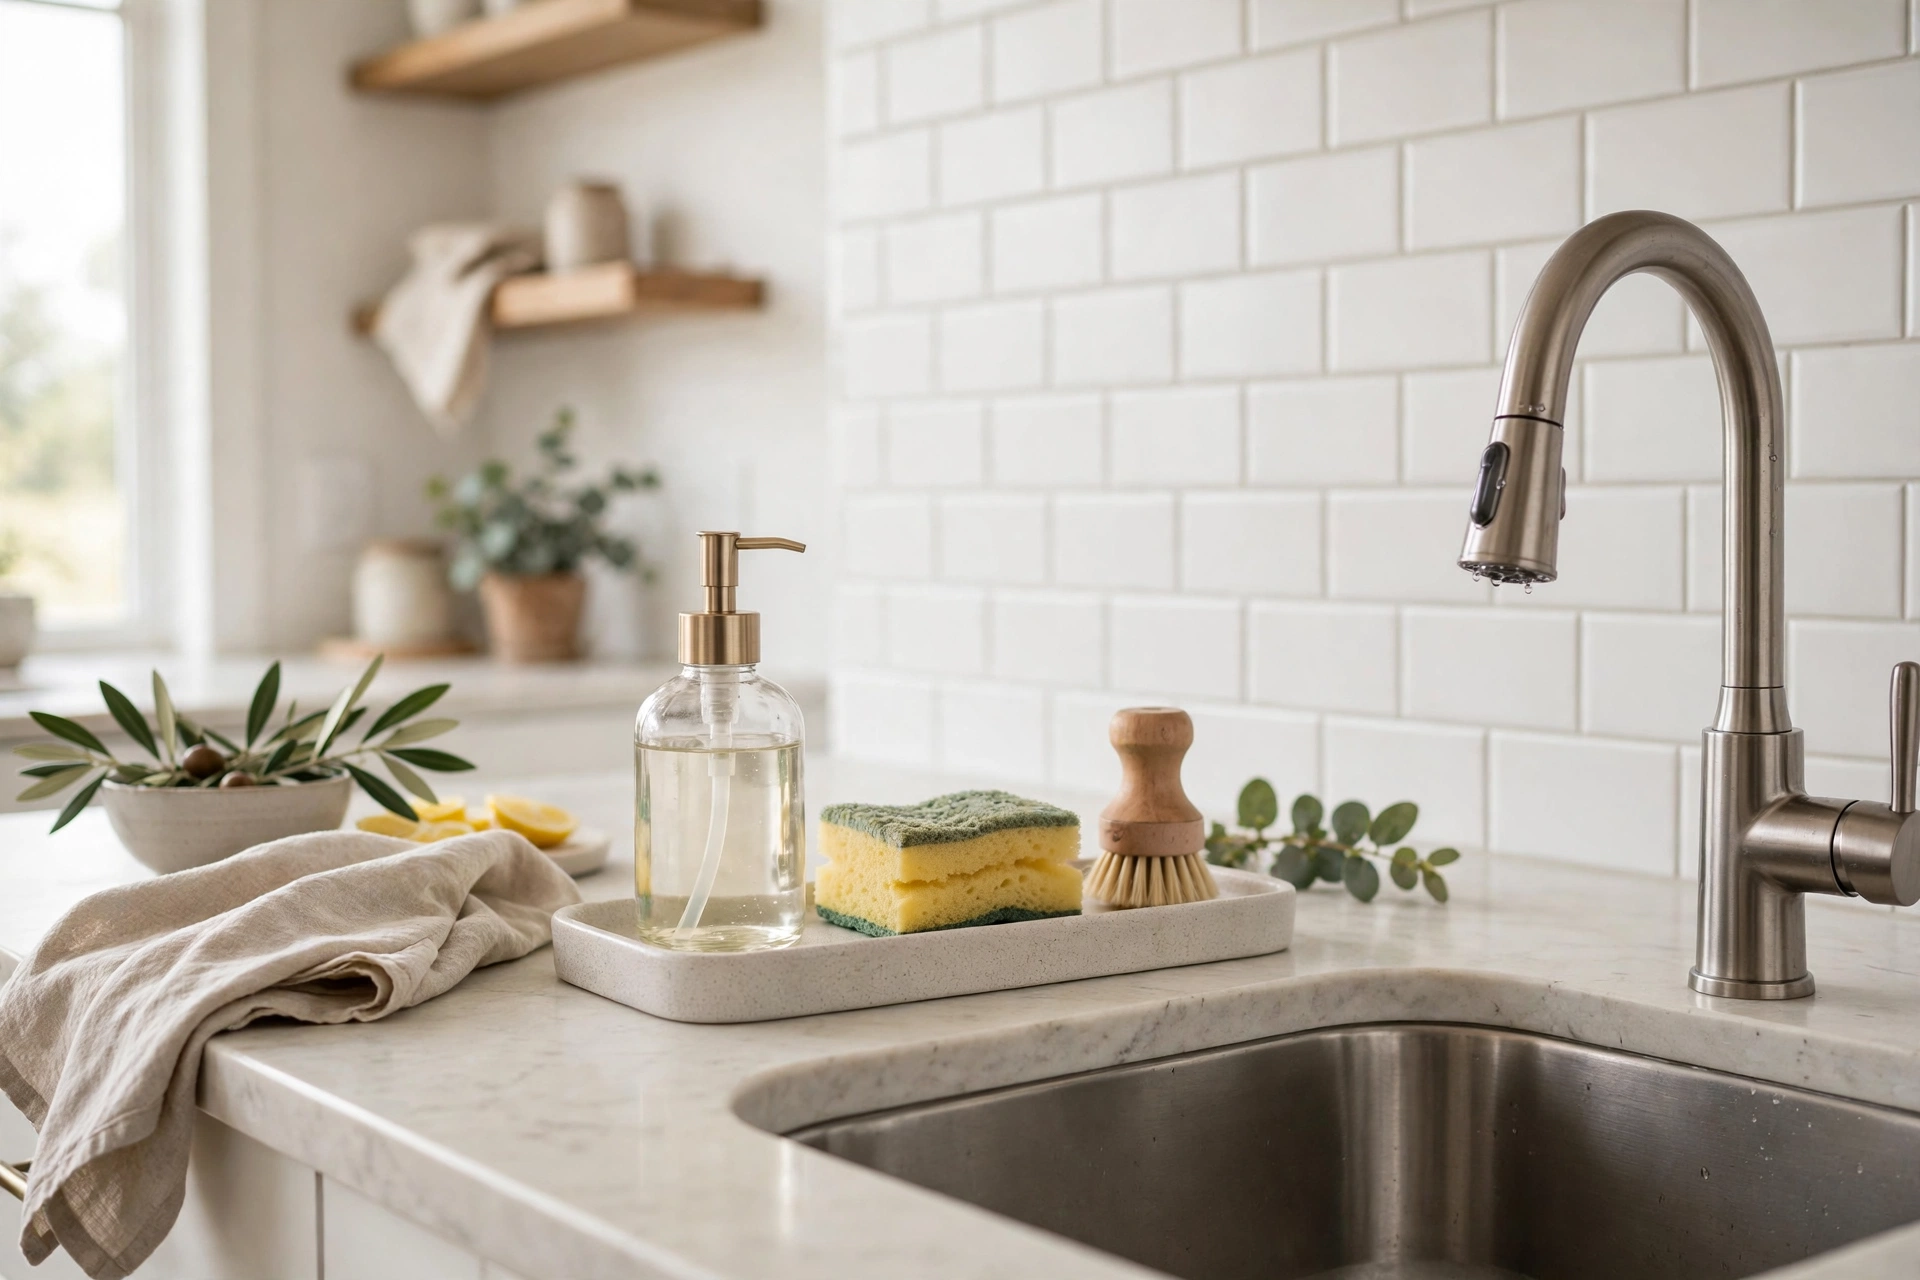
The sink is the hardest working spot in the kitchen, and it shows. Bottles migrate, sponges sit in puddles, and brushes end up wherever they were last dropped. I used to wipe the same ring of soapy water off my counter every night before I gave everything a tray to live on.
This guide rounds up 20 kitchen sink soap tray ideas that keep soap, sponges, and brushes contained, dry, and easy to reach. Every idea includes a real cost range and a difficulty label, so you can pick the setup that fits your sink, your counter space, and your budget.
Quick takeaways
- A tray with a raised lip or a drain spout keeps soapy water off your counter.
- Match the tray material to your sink: silicone and stone dry fastest, wood needs sealing.
- Measure the strip beside your faucet before you buy, since most trays fail on fit, not looks.
- Keep only daily items on the tray and move refills under the sink.
- Rinse the tray once a week so soap scum never gets a chance to build up.
1. Silicone tray with a drain spout

A silicone tray with a raised lip and a small drain spout solves the puddle problem at the source. Water from wet sponges and dripping bottles runs toward the spout and back into the sink instead of pooling on your counter. Silicone grips the counter, so the tray stays put when you grab the soap with wet hands. It also survives the dishwasher, which makes weekly cleaning simple. Pick a tray at least an inch longer than your dispenser and sponge side by side, so nothing hangs over the edge. Dark colors hide stains between washes.
Try this: Point the spout toward the sink basin, not the backsplash, so drained water actually leaves the tray.
Cost: $ | Difficulty: Easy
2. Sealed bamboo slatted tray

A bamboo tray with open slats lets air move under your soap and sponge, so both dry between uses instead of sitting in a damp ring. The catch is the seal. Unsealed bamboo soaks up water, darkens, and can grow mold in a few weeks at a wet sink. Buy a tray that is already sealed with a waterproof finish, or brush on two coats of food safe sealant yourself and let it cure fully before use. Wipe it dry once a day and reseal it every few months. The warm wood tone suits farmhouse and cottage kitchens better than plastic ever will.
Try this: Set the tray on small rubber feet so air flows underneath as well as through the slats.
Cost: $ | Difficulty: Easy
3. Ceramic ridged tray

A ceramic tray with raised ridges holds your soap up out of its own drips. Water collects in the grooves and evaporates, while the bar or bottle rests on dry ridges. Ceramic has real weight, so the tray does not slide when you press a pump with one hand. It also wipes clean with a damp cloth and looks at home in almost any kitchen, from white farmhouse to plain modern. The trade off is breakage: a dropped tray chips, and a chipped glaze can harbor grime. Check the glaze for cracks when you wash it and retire a tray once chips reach the food contact surface.
Try this: Choose a tray with a slightly dished center so water runs to the middle and away from the counter edge.
Cost: $$ | Difficulty: Easy
4. Stainless steel caddy with a brush holder

A stainless steel caddy keeps every sink tool upright in its own slot, which means no more brushes lying across the sponge. Look for a model with a tall loop or tube for the dish brush, a flat section for the sponge, and room for one or two dispenser bottles. Steel resists stains from tomato sauce and coffee grounds, and it rinses clean under the tap. Drainage holes in the base matter more than the finish: without them, the caddy becomes a small pond. Measure your tallest brush before ordering, since some caddies are too short to hold a long handled brush upright.
Try this: Place the caddy on the side of the sink you use least for rinsing, so clean dishes never drip into it.
Cost: $$ | Difficulty: Easy
5. Marble slab tray

A small marble slab turns a soap bottle and a sponge into a deliberate display instead of clutter. The stone is heavy enough that nothing shifts when you pump soap, and its cool surface suits kitchens with stone counters. Marble needs sealing, since lemon juice, vinegar, and tomato splashes can etch or stain it. Seal a new slab before its first use and reseal it twice a year. A pastry slab or a small cutting board sized piece works well and costs less than a tray sold specifically for sinks. Keep the slab at least two inches from the sink edge so splashes land on stone, not bare counter.
Try this: Add small felt pads under the slab to stop it scratching a wood or laminate counter.
Cost: $$ | Difficulty: Easy
6. Diatomite quick dry stone tray
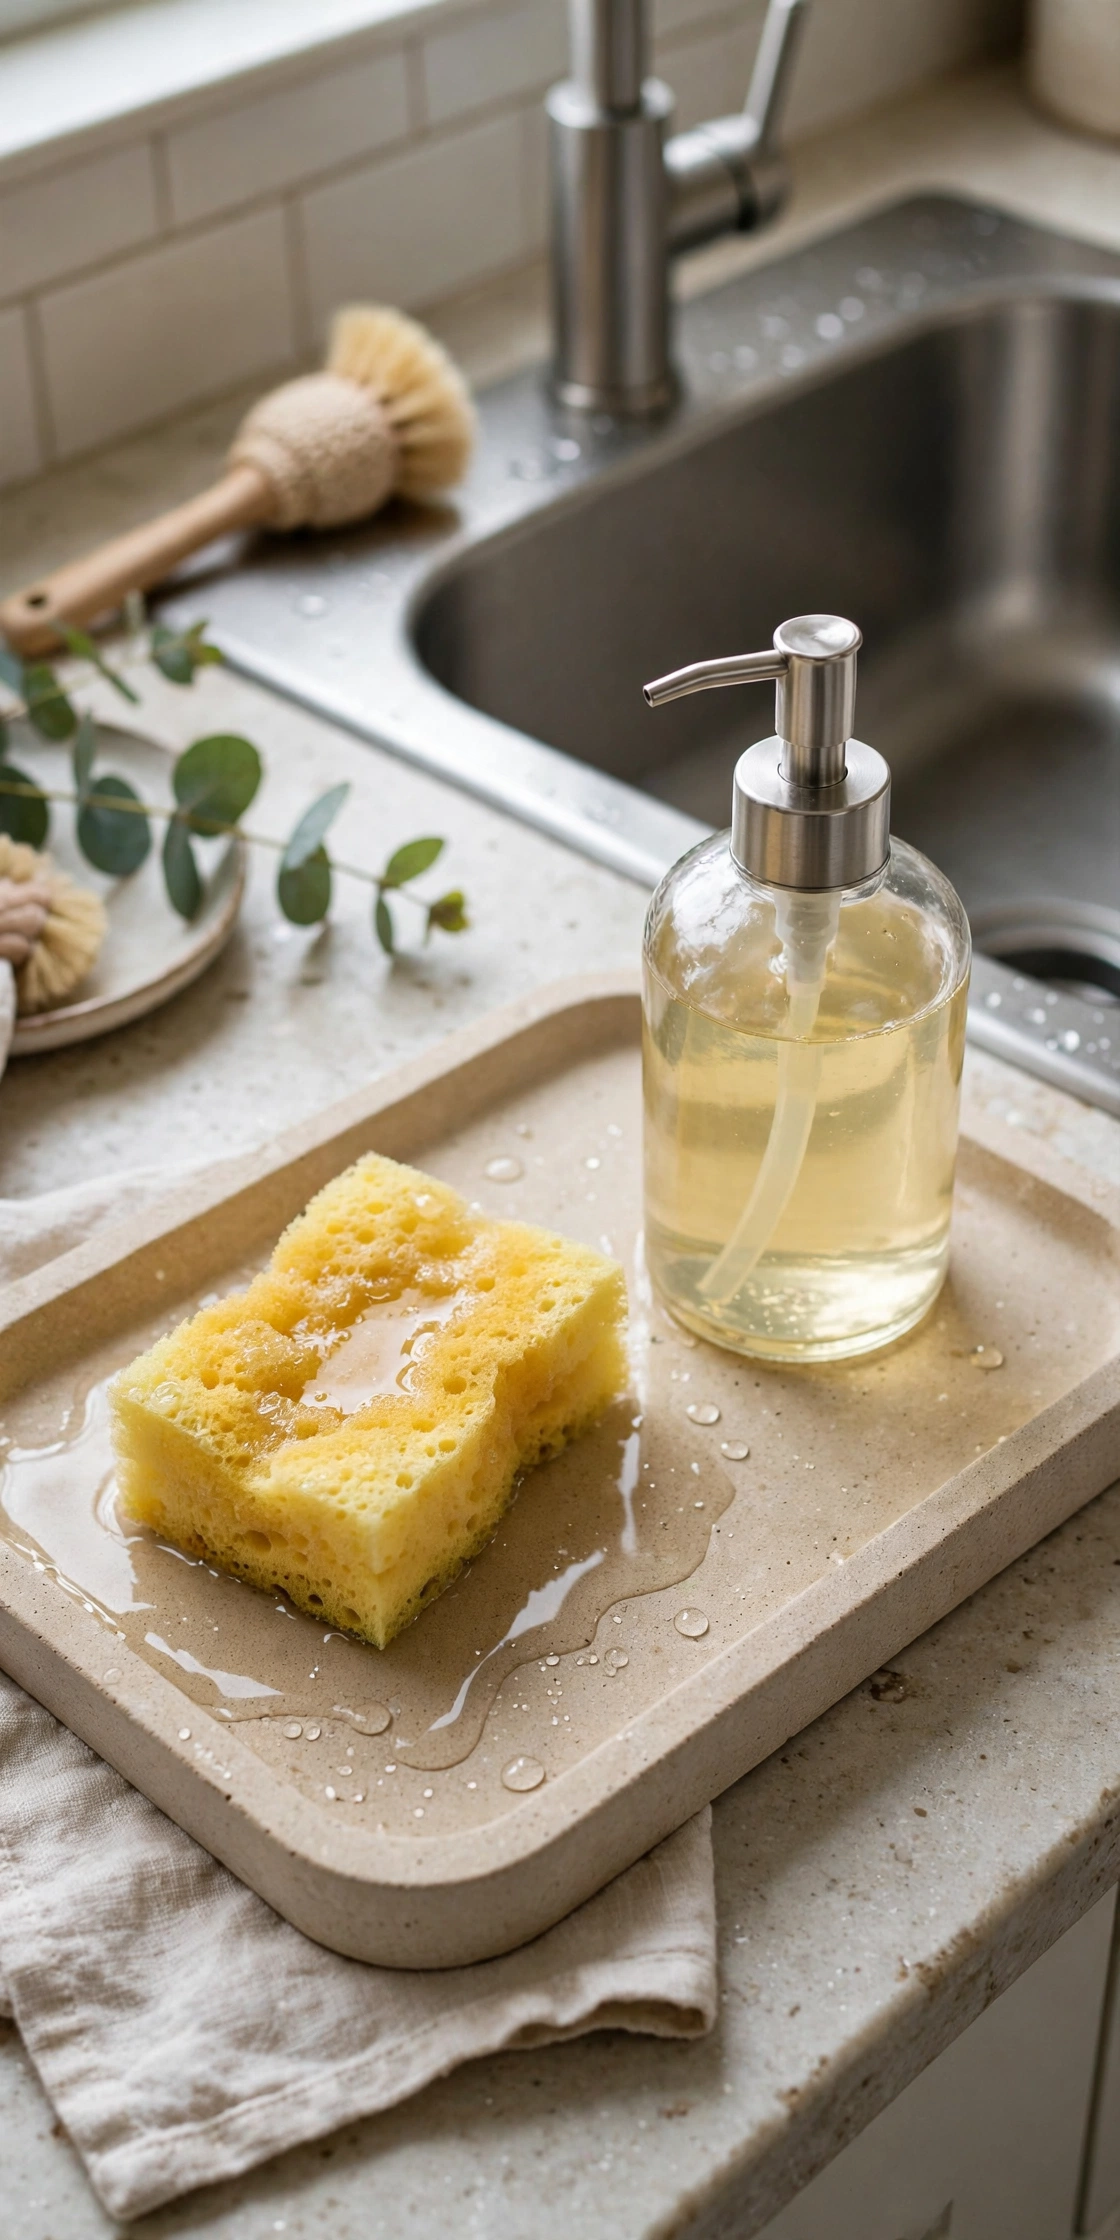
A diatomite stone tray absorbs drips on contact and dries itself within minutes, which makes it one of the lowest maintenance tray options. The porous stone pulls water away from bottles and sponges, so the surface under your soap stays dry even after a big wash up. It works best for a single dispenser and a sponge, since most stone trays run small. Rinse the stone under running water when soap film builds up, and sand it lightly with fine sandpaper if it ever stops absorbing. Avoid dropping it, since the stone can crack or chip on a hard floor.
Try this: Let the tray dry fully overnight once a week to keep its absorbency at full strength.
Cost: $$ | Difficulty: Easy
7. Suction cup in sink caddy
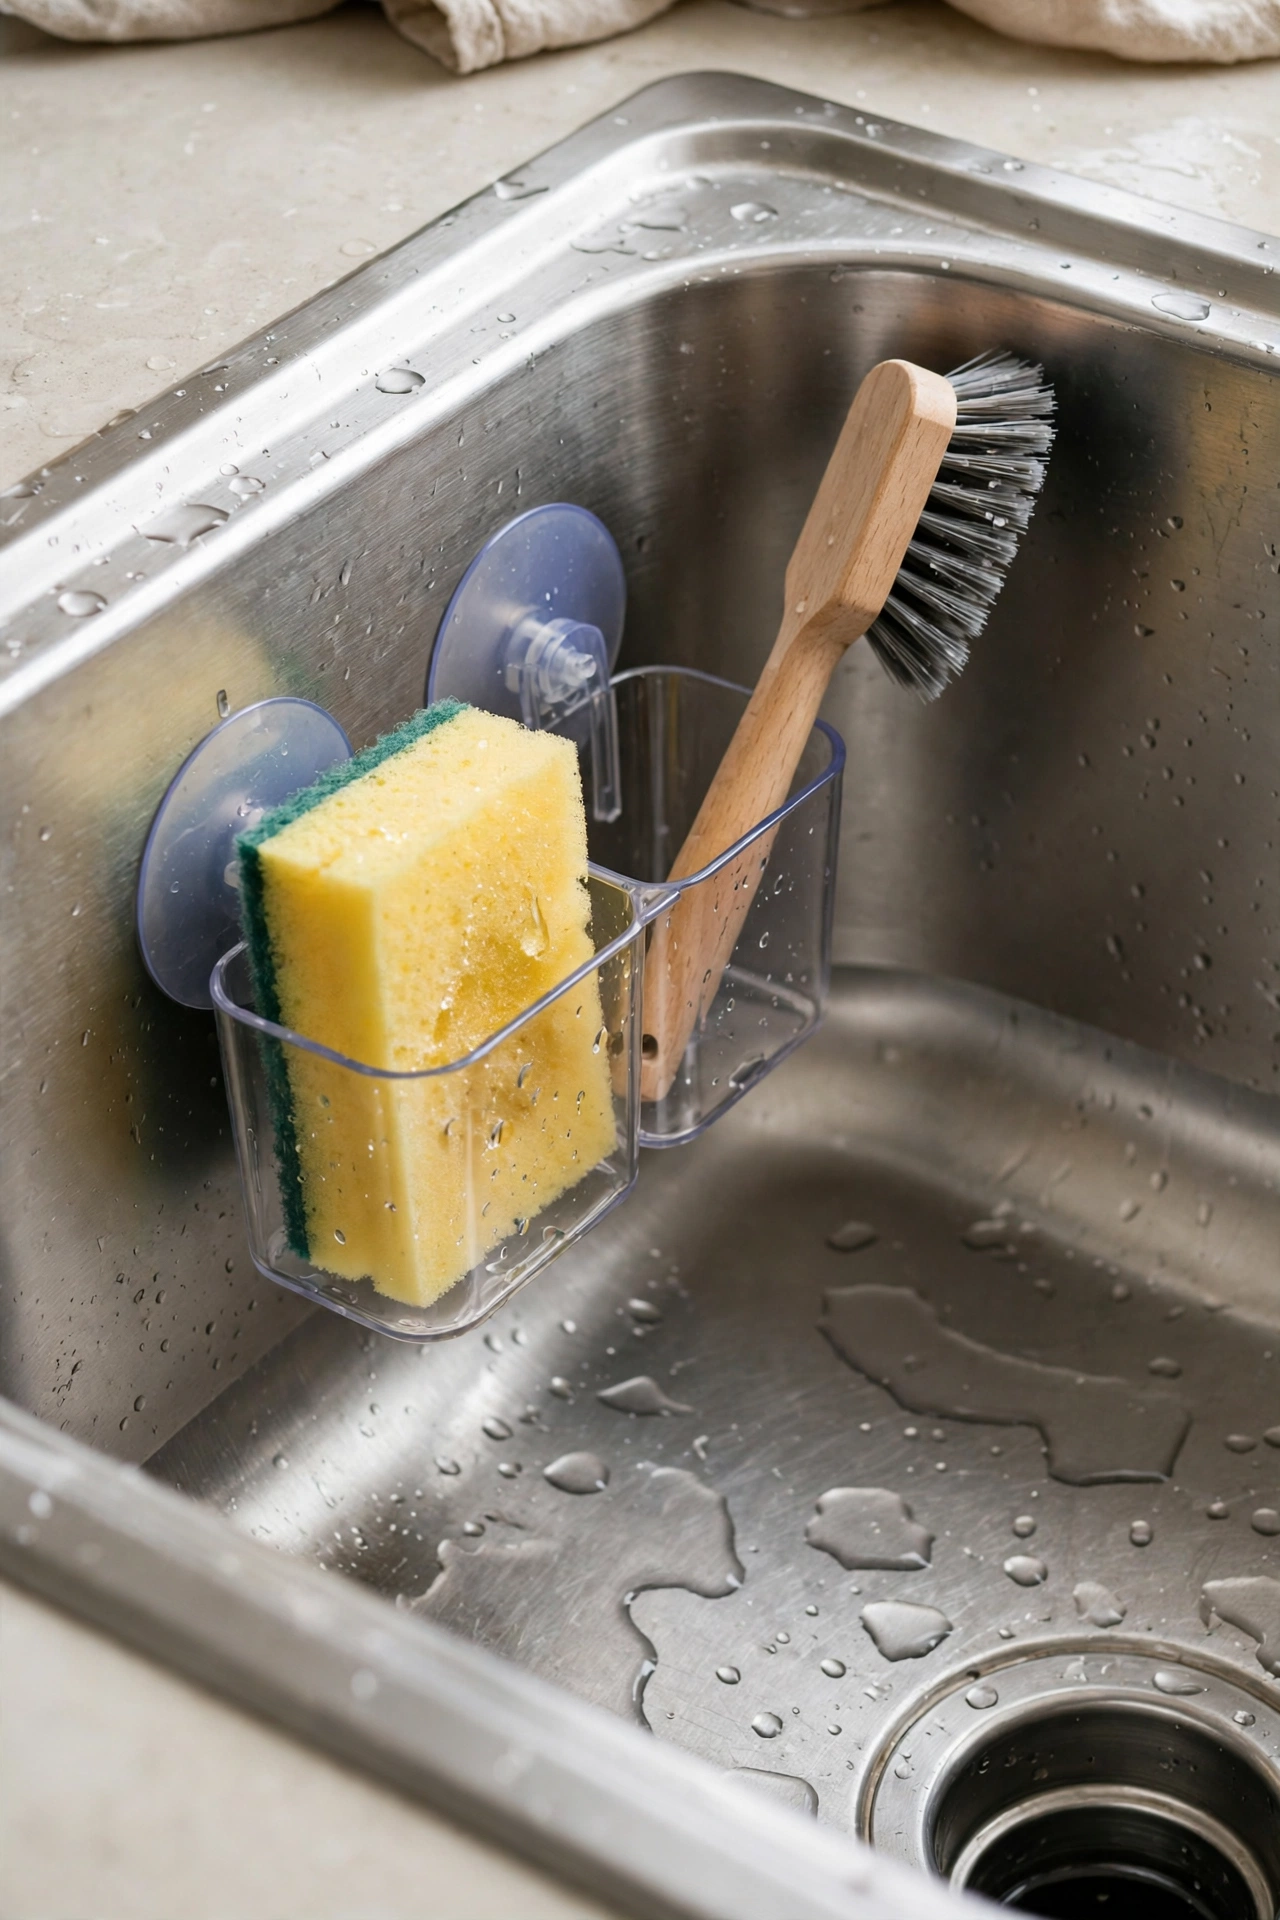
A suction cup caddy sticks to the inside wall of your sink and holds the sponge where it drains straight back into the basin. This is the best option when counter space is nearly zero, since it uses no counter at all. It works on smooth stainless steel and porcelain, but not on textured or hammered sinks where the cups cannot seal. Press each cup firmly and test it with a full wet sponge before trusting it. Re-seat the cups once a week, because steam and soap film slowly loosen the seal. Keep the caddy above the waterline so it never sits submerged.
Try this: Clean the sink wall with a drop of dish soap and dry it before mounting, since grease is the main reason cups fail.
Cost: $ | Difficulty: Easy
8. Over the sink divider caddy
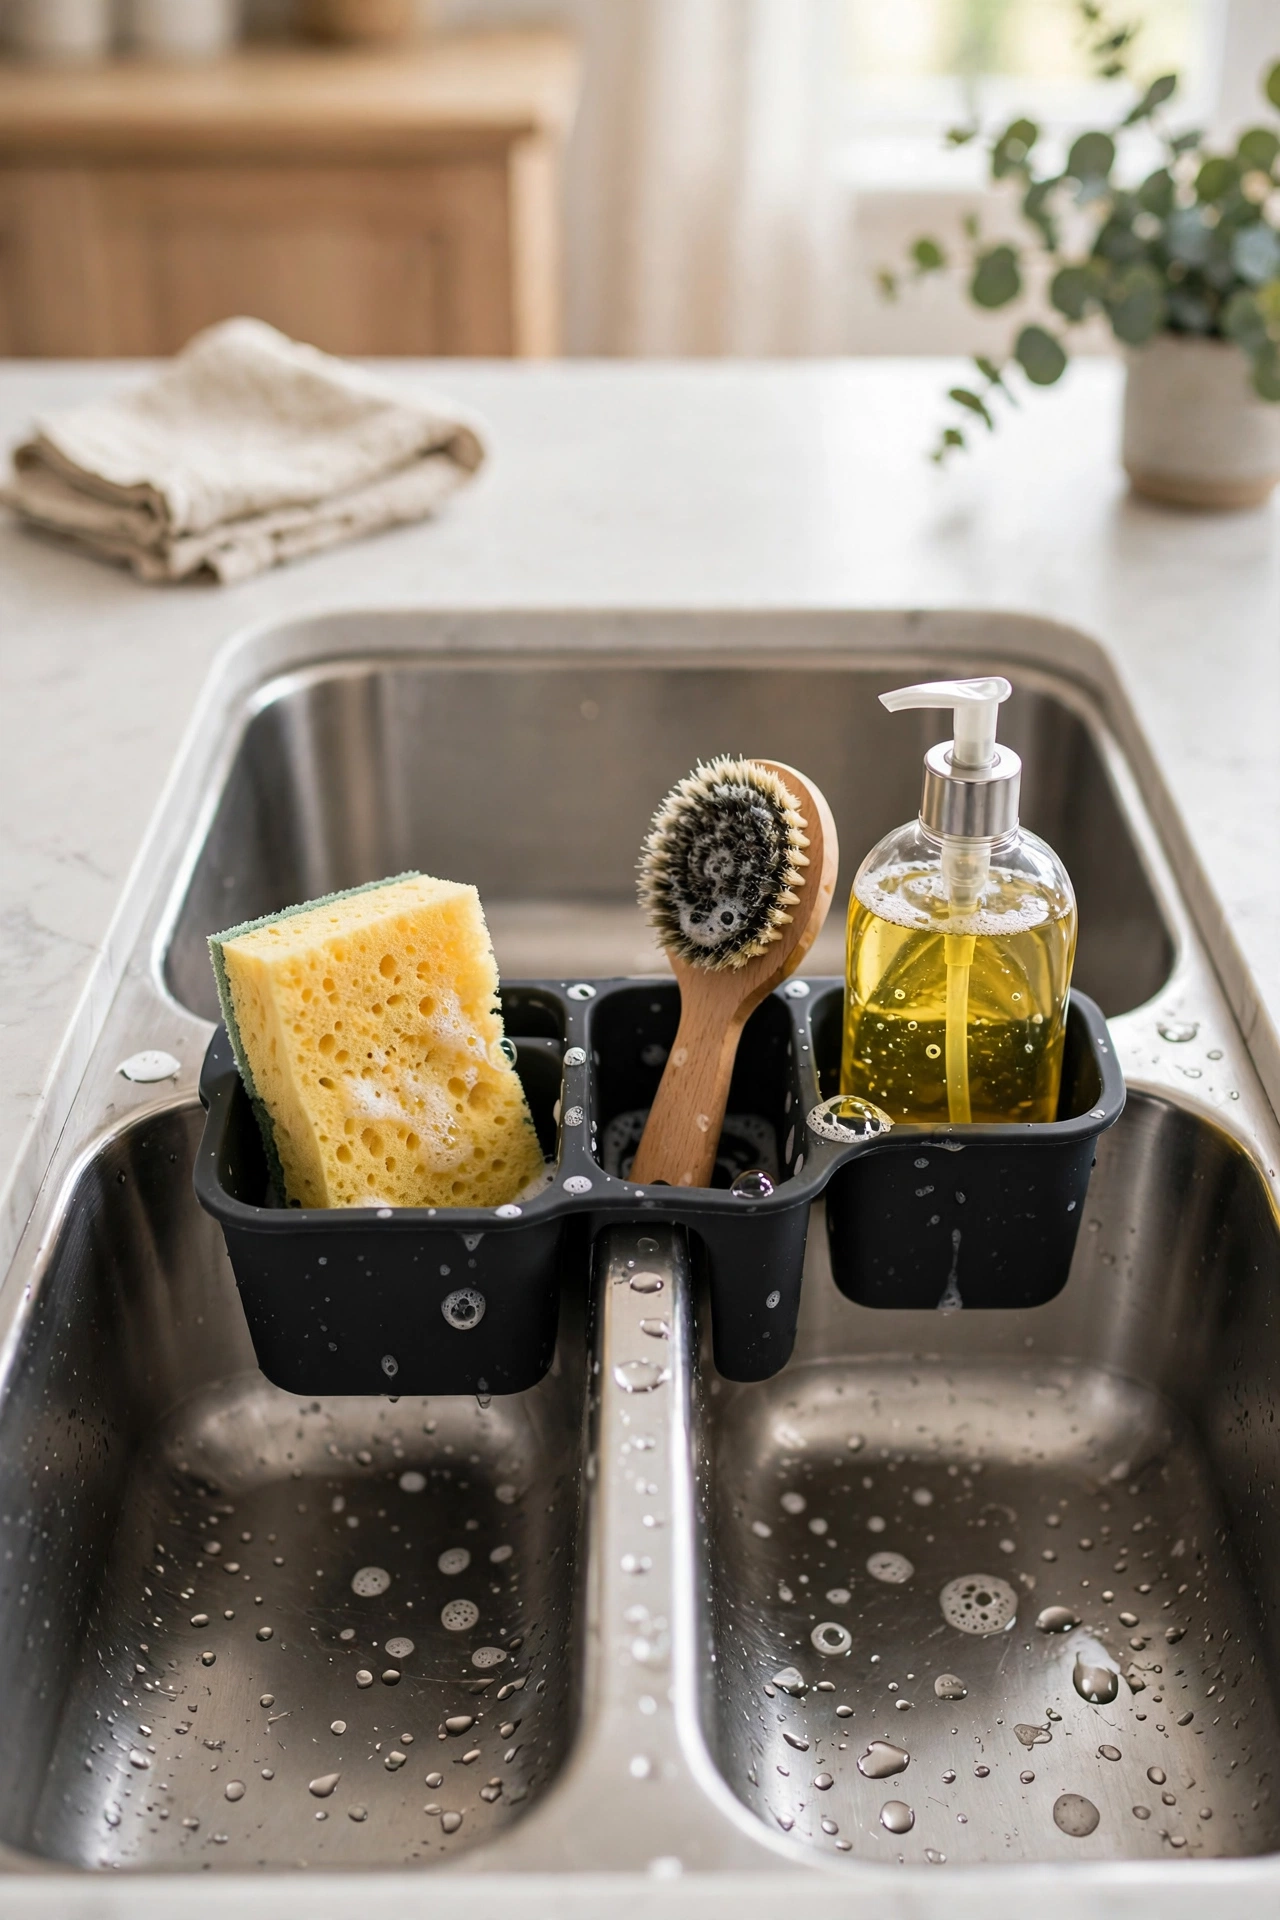
If you have a double sink, a caddy that straddles the center divider puts your tools right where you work without taking counter space. The caddy hangs over the divider with pockets on one or both sides, so the sponge drains into the sink and the brush stays within reach. Measure your divider before buying: dividers vary in width and height, and a caddy sized for a low divider will wobble on a tall one. Stainless and coated wire versions both work, but wire dries faster and shows rust sooner if the coating chips. Rinse the caddy when you rinse the sink.
Try this: Hang the brush on the side facing the basin you use for washing, so drips fall where they belong.
Cost: $ | Difficulty: Easy
9. Adhesive wall dispenser with a small tray
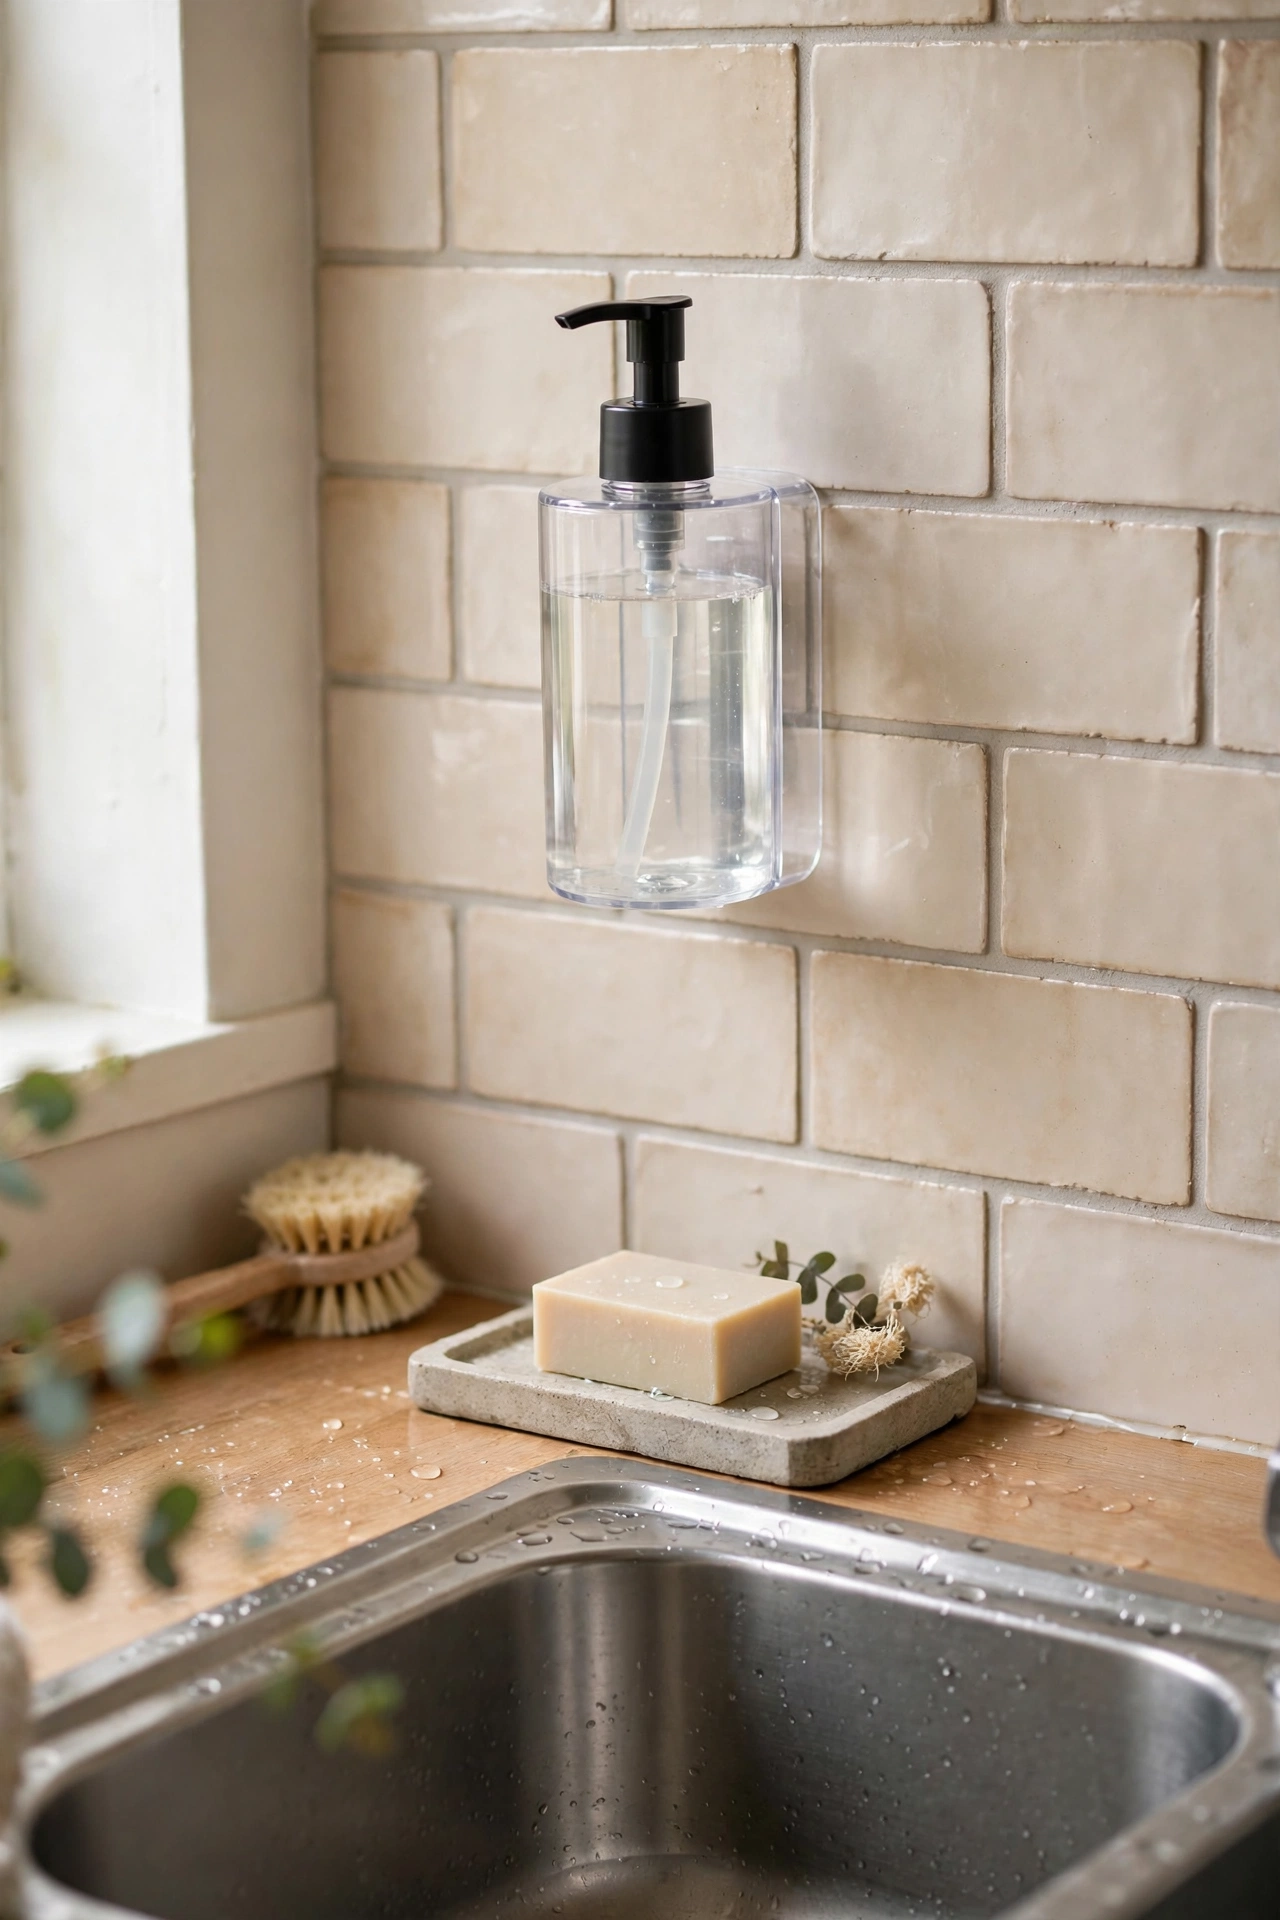
A wall mounted dispenser paired with a small tray below it clears the counter almost completely while still catching drips. The dispenser mounts to the backsplash with a waterproof adhesive plate, and the tray underneath holds the sponge and catches any stray drops. This setup suits renters, since quality adhesive mounts remove without holes when you follow the removal steps. Clean the tile with rubbing alcohol first, press the plate firmly, and wait the full cure time on the package before filling the bottle. A falling dispenser usually means the surface was greasy or the cure time was cut short.
Try this: Mount the dispenser at a height where the pump clears the tray by at least three inches, so refills stay easy.
Cost: $$ | Difficulty: Easy to Moderate
10. Tip out tray behind the false drawer front

The panel in front of many kitchen sinks looks like a drawer but hides nothing, which makes it ideal for a tip out tray. A hinge kit turns that false front into a shallow tray that tips open to hold sponges, scrubbers, and scrapers out of sight. This is the tidiest option for a minimalist counter, since the tools vanish completely. Confirm the panel is truly a false front before you start, and pick a kit sized to your cabinet opening. Choose a tray that pops out for washing, because a fixed tray in a hidden spot will collect grime unnoticed.
Try this: Store only damp tools in the tip out tray, and keep dry refills under the sink, so nothing mildews inside.
Cost: $$ | Difficulty: Moderate
11. Matching dispenser set on a small tray
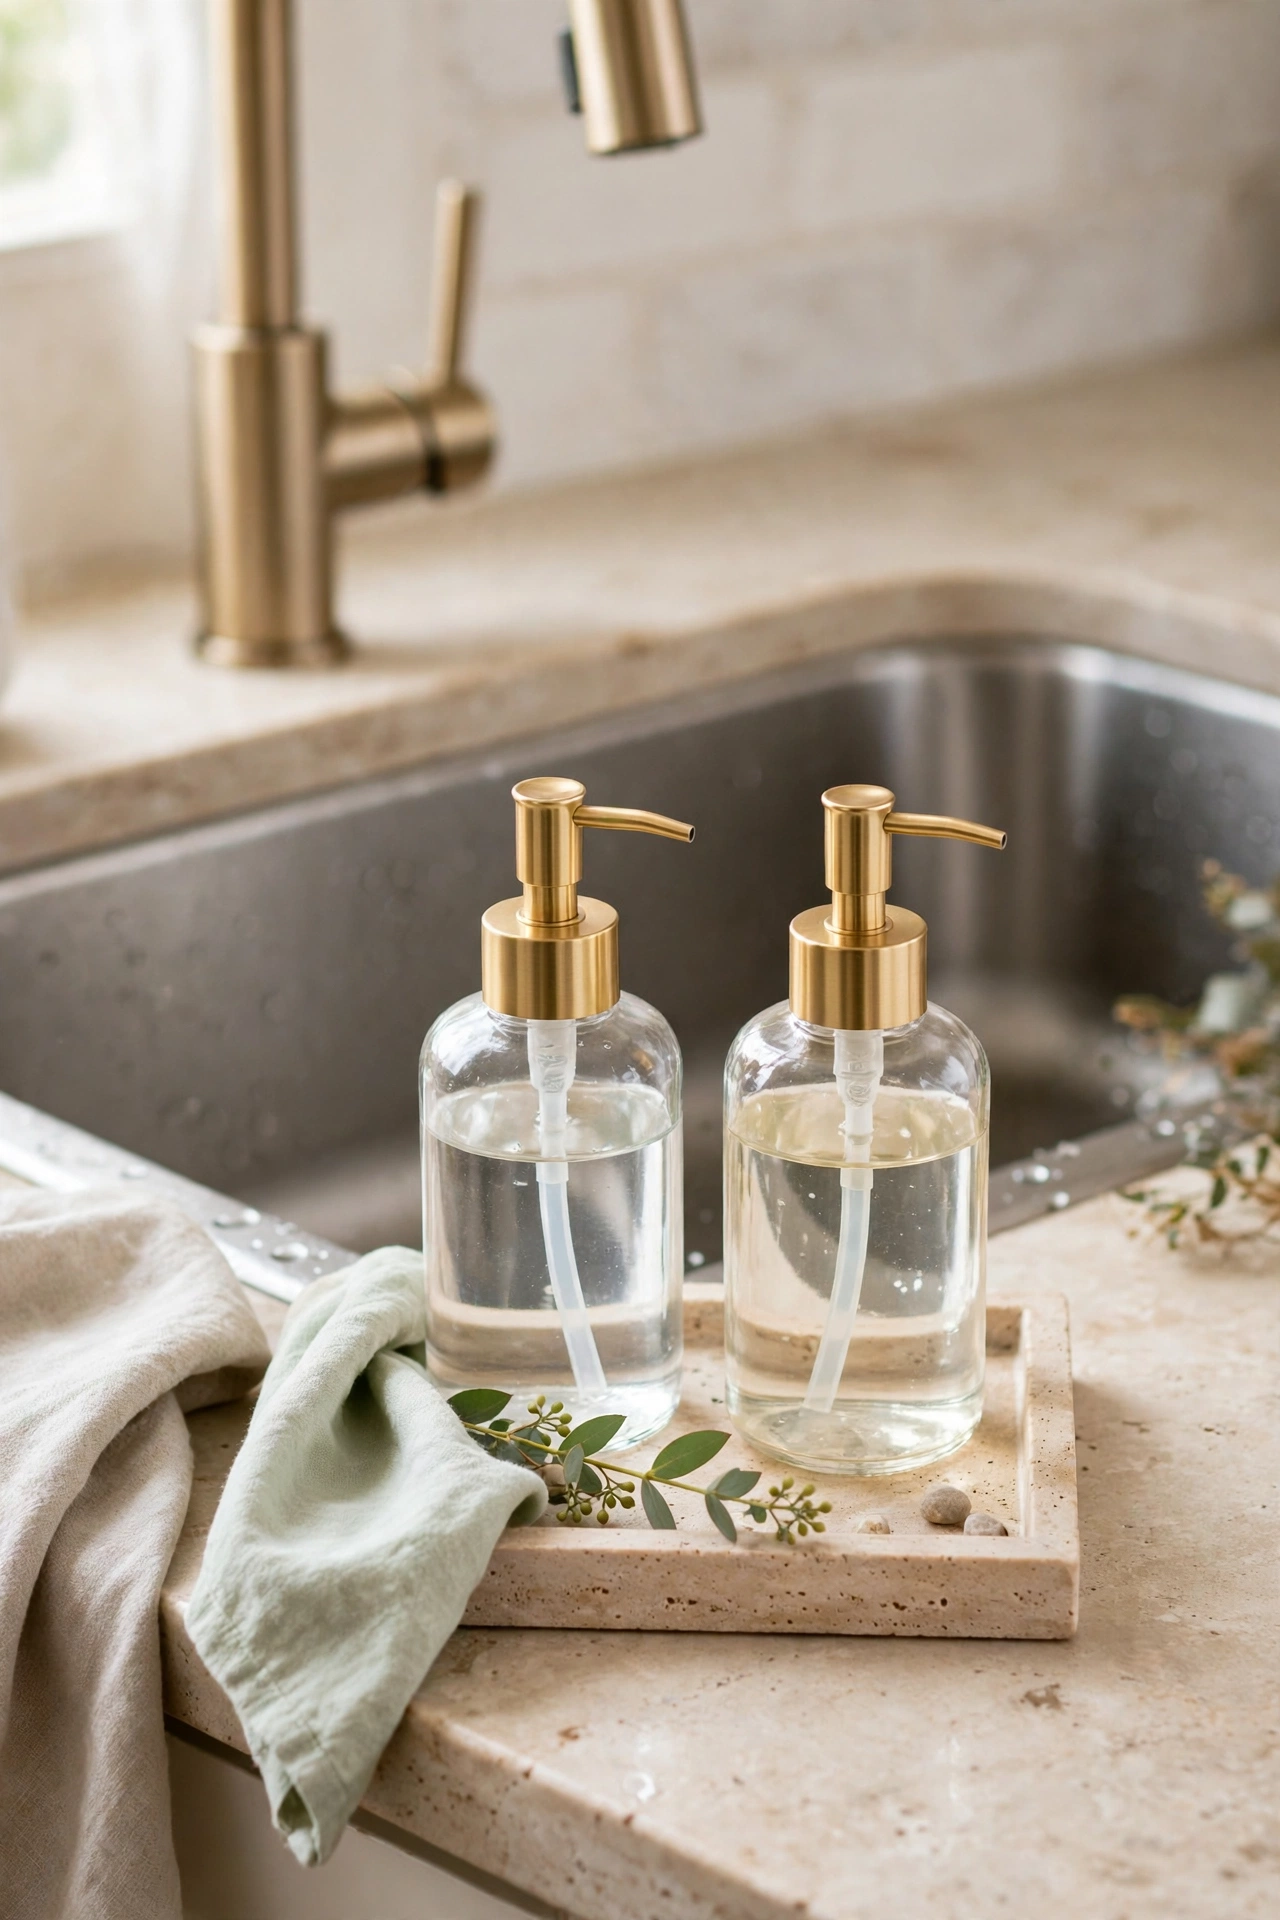
Decanting hand soap and dish soap into a matching set of dispensers, then grouping them on one small tray, removes the loudest visual clutter at the sink: mismatched store bottles. Uniform bottles with waterproof labels read as one intentional unit instead of three separate purchases. Amber glass warms a wood kitchen, while clear glass suits a white or modern one. Label every bottle on the day you fill it, since dish soap and hand soap look identical once decanted and a mix up ruins a wash up. Keep the tray small enough that it holds only the two bottles and a sponge, or it becomes a shelf for everything else.
Try this: Buy a set with one pump style in two sizes, so the dish soap bottle reads larger at a glance.
Cost: $$ | Difficulty: Easy
12. Vintage saucer as a soap tray

A thrifted china saucer makes a charming soap tray for almost no money, and its shallow lip is just enough to catch drips from a single bottle. Look for saucers with a flat center and a raised rim, since a fully flat plate lets water run straight off. Add small clear rubber bumpers to the base so the saucer stays put on a wet counter and never scratches the surface. Check thrifted china for cracks before use, since a cracked glaze can trap bacteria. This idea works best for a single soap bottle or a bar of soap, not a full sponge and brush collection.
Try this: Pair the saucer with a small vintage cup for the brush, so the whole sink corner shares one thrifted story.
Cost: $ | Difficulty: Easy
13. Wooden riser or pedestal tray
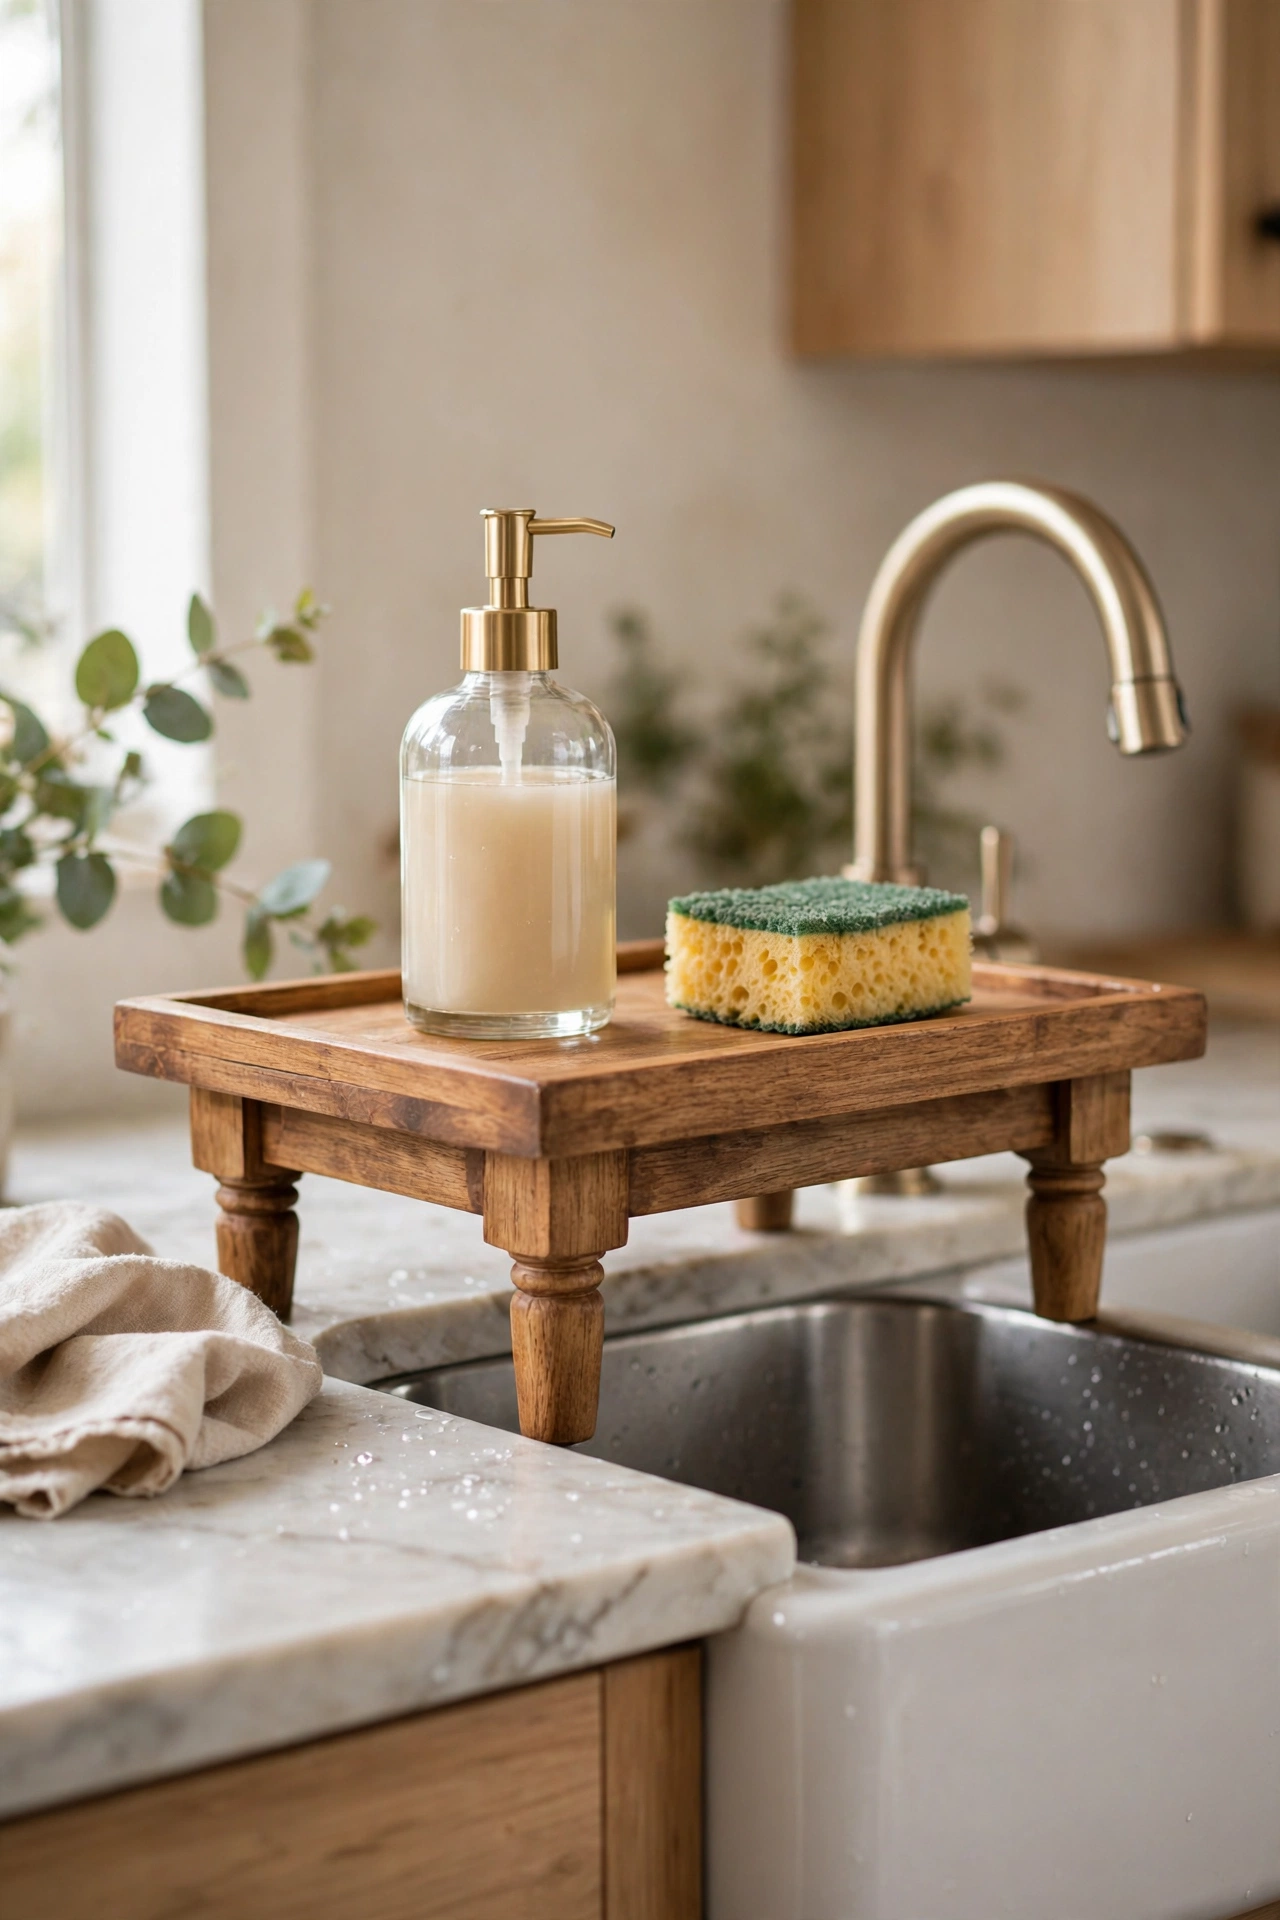
A low wooden riser lifts your soap and sponge above the wet zone and adds height that makes the sink corner look styled rather than stuffed. You can buy a small pedestal stand or build one in minutes from a cutting board with short feet glued to the corners. Seal every surface, including the feet, since the riser sits in splash range. The lift also makes wiping the counter easier: slide a cloth under the riser instead of moving each bottle. Keep the riser low, no more than two inches tall, or bottles become top heavy and easy to knock over.
Try this: Stain or paint the riser to match your cabinets so it reads as part of the kitchen, not an afterthought.
Cost: $ | Difficulty: Easy
14. Two tier corner tray

A two tier tray uses the dead corner where the sink meets the backsplash, a spot most single trays waste. The lower tier holds the soap dispenser and sponge, while the upper tier takes a small plant, a scrub brush, or a hand towel ring. Tiered trays suit L shaped counters and deep corners where a flat tray would leave the back half unreachable. Check the height of the upper tier against your faucet arc, since a tall tier under a low faucet blocks the handle. Wire tiers dry faster than solid ones, but solid tiers catch drips better.
Try this: Put the items you grab with wet hands on the lower tier, so drips fall on the tray and not the counter.
Cost: $$ | Difficulty: Easy
15. Slim tray behind the faucet

The narrow strip of counter behind the faucet is often the only free space in a small kitchen, and a slim tray turns it into a real soap station. Look for trays under four inches deep that fit between the faucet base and the backsplash. A slim stainless or silicone tray holds one dispenser and a sponge, which is enough for most daily washing. Measure the gap twice, once at the counter and once at faucet height, since faucet bases flare and a tray that fits below may not slide in from above. This setup keeps the main counter clear for prep work.
Try this: Choose a tray with a non slip base, since you will reach behind the faucet blind and bump it often.
Cost: $ | Difficulty: Easy
16. Solid dish block tray

A solid dish soap block with a slatted tray cuts plastic bottles out of the sink area entirely. You rub a wet brush across the block to load soap, then set the block back on its tray to drain. The tray must drain well, since a solid block left in standing water turns soft and melts away fast. Bamboo slats or a wire rack both work, and both need a rinse every few days. Solid blocks last longer per dollar than liquid refills for many households, and they suit kitchens aiming to cut plastic. Keep the block away from the direct splash zone or it will dissolve between uses.
Try this: Cut a large block in half and store the spare half in a dry spot, so the working piece stays small and easy to handle.
Cost: $ | Difficulty: Easy
17. Galvanized or enamel farmhouse tray

A galvanized metal or white enamel tray gives a farmhouse sink the rugged, utilitarian holder it suits. Metal trays handle wet sponges without warping, and enamel wipes clean after greasy wash ups. Watch for rust at seams and chips: once enamel chips, the exposed metal underneath rusts quickly in a wet spot. Dry the tray after heavy use and touch up chips with appliance paint to slow rust. A rectangular tray with low sides works better than a deep bin, since deep bins hide small items and collect water at the bottom.
Try this: Line the tray with a small silicone mat so bottles stop rattling and sliding on smooth metal.
Cost: $$ | Difficulty: Easy
18. Matte black tray for a modern kitchen
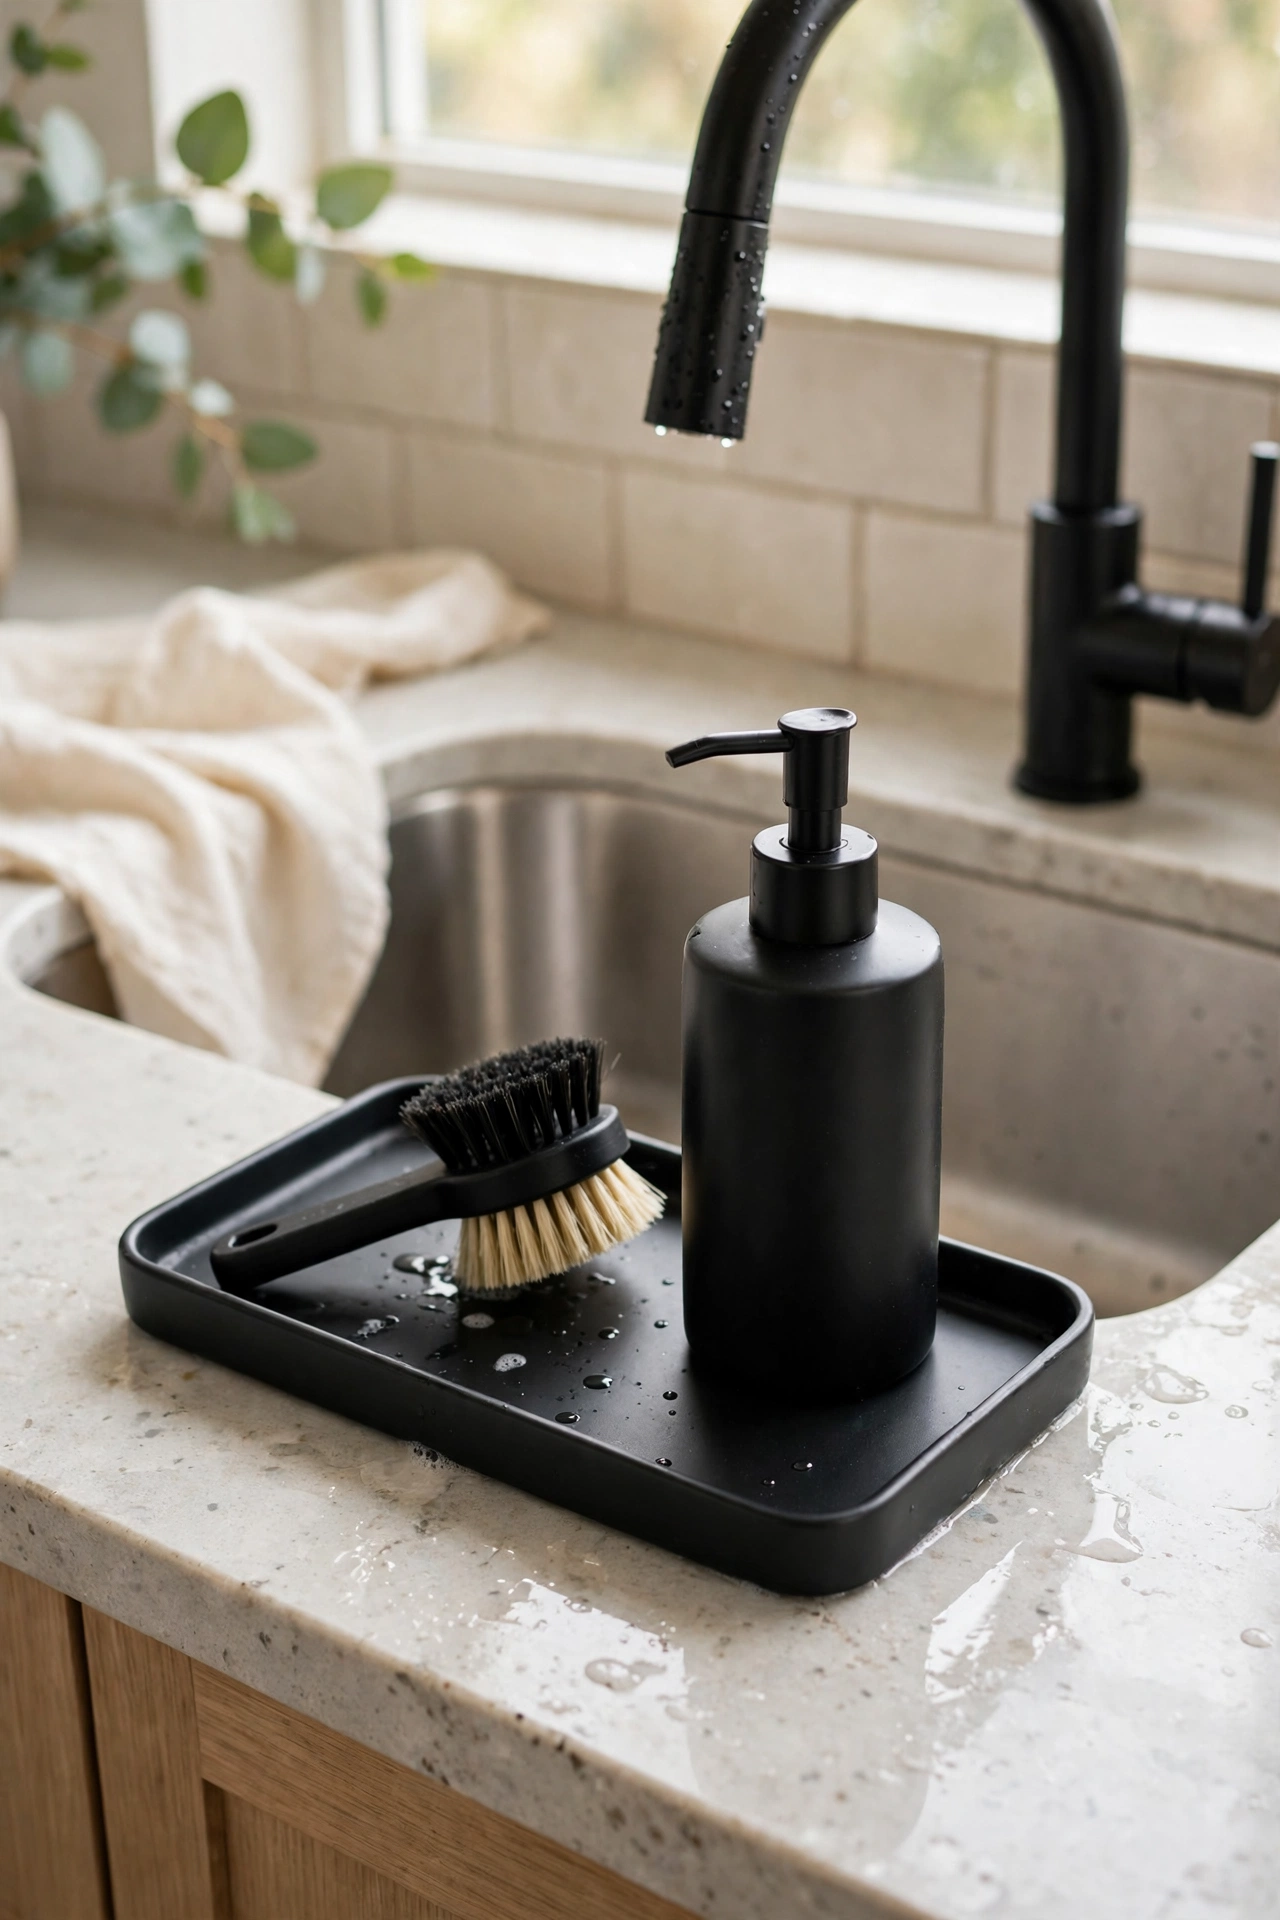
A matte black tray anchors a modern sink the way a dark faucet does: it adds contrast without adding color. Black silicone, coated metal, and matte ceramic all come in tray form, and all hide water spots better than white. The risk is soap film, which shows as a pale haze on black surfaces, so a quick wipe every few days keeps the tray looking sharp. Pair the tray with a black or brushed nickel dispenser rather than mixing metals, since a single finish reads calmer. Keep the tray compact, since a large black slab can darken a small sink corner.
Try this: Wipe the tray with a drop of dish soap on a damp cloth, then buff dry, to prevent the hazy film from building up.
Cost: $$ | Difficulty: Easy
19. Glass tray with brass trim

A clear glass tray with brass or gold trim suits kitchens with warm metals, since it echoes the faucet without competing with it. Glass shows water spots, so this tray asks for a quick wipe after heavy use, but it never stains and it suits a sink that doubles as a display corner. Brass trim needs an occasional polish to keep its shine, and unlacquered brass will patina over time, which some kitchens welcome and others do not. Keep the tray away from the heaviest splash zone, since hard water spots show fastest on glass.
Try this: Place the tray on the side of the sink away from the drying rack, so clean dishes never drip onto the glass.
Cost: $$$ | Difficulty: Easy
20. Pump and sponge combo caddy

A combo caddy with a built in soap pump and a sponge holder merges two sink items into one footprint. Pressing the pump dispenses soap directly onto the sponge sitting in its own compartment, which cuts the usual dance of bottle, sponge, and counter. The sponge compartment must drain, or the sponge sits in soapy water all day. Look for a model with a removable sponge tray for washing, and pick a pump that refills from the top without disassembling the whole unit. This is a strong pick for rental kitchens, since it needs no mounting and moves in one piece.
Try this: Swap the sponge weekly and rinse the compartment with every swap, since soap residue builds up fast in a closed holder.
Cost: $$ | Difficulty: Easy
How to choose the right soap tray
Start with the space, not the style. Measure the strip beside your faucet, note whether you have a single or double sink, and count the items the tray must hold. A tray that fits on paper but crowds the faucet handle will annoy you every day. Next, match the material to your habits: silicone and diatomite forgive forgetful wiping, wood and marble reward regular care, and steel suits heavy daily use. Finally, decide how much of the sink area you want hidden. Suction caddies and tip out trays hide tools completely, while open trays keep everything visible and fast to grab.
Soap tray comparison
Cost key: $ means $1 to $10, $$ means $11 to $99, $$$ means $100 to $999, $$$$ means $1,000 and up.
| Idea | Cost | Difficulty | Best for |
|---|---|---|---|
| Silicone tray with a drain spout | $ | Easy | Puddle prone counters |
| Sealed bamboo slatted tray | $ | Easy | Farmhouse and cottage kitchens |
| Ceramic ridged tray | $$ | Easy | Everyday classic kitchens |
| Stainless steel caddy with a brush holder | $$ | Easy | Brush and sponge collections |
| Marble slab tray | $$ | Easy | Stone counter kitchens |
| Diatomite quick dry stone tray | $$ | Easy | Low maintenance homes |
| Suction cup in sink caddy | $ | Easy | Near zero counter space |
| Over the sink divider caddy | $ | Easy | Double sinks |
| Adhesive wall dispenser with a small tray | $$ | Easy to Moderate | Renters and small kitchens |
| Tip out tray behind the false drawer front | $$ | Moderate | Minimalist counters |
| Matching dispenser set on a small tray | $$ | Easy | Visual clutter control |
| Vintage saucer as a soap tray | $ | Easy | Budget and thrift lovers |
| Wooden riser or pedestal tray | $ | Easy | Styled sink corners |
| Two tier corner tray | $$ | Easy | Dead corner counters |
| Slim tray behind the faucet | $ | Easy | Tiny kitchens |
| Solid dish block tray | $ | Easy | Plastic free kitchens |
| Galvanized or enamel farmhouse tray | $$ | Easy | Farmhouse sinks |
| Matte black tray for a modern kitchen | $$ | Easy | Modern kitchens |
| Glass tray with brass trim | $$$ | Easy | Warm metal kitchens |
| Pump and sponge combo caddy | $$ | Easy | Rental kitchens |
Common mistakes to avoid
Buying before measuring is the most common error, since a tray that blocks the faucet handle or hangs over the counter edge gets moved aside within a week. Using unsealed wood at a wet sink is the second, since it stains and molds fast. The third is overloading the tray: once it holds more than soap, a sponge, and a brush, it stops being a tray and becomes a shelf for clutter. Finally, skipping the weekly rinse lets soap scum cement itself to the tray, which turns a five minute wipe into a scrubbing session.
Safety notes
Anchor tall shelves and heavy wall mounted dispensers into studs with hardware rated above the load, since a falling dispenser can crack a sink or injure a foot. Keep cords from electric soap pumps and nearby appliances clipped along baseboards and away from walkways and the sink splash zone. Lead paint test and lead safe rules apply for pre-1978 homes before sanding or drilling a backsplash for a mounted dispenser, and a licensed electrician should handle new outlets or hardwired lights near the sink. Keep soap trays clean and dry to avoid mold, keep small items like sponge clips away from sink drains, and never mix cleaning chemicals when decanting supplies into matching bottles. Label every decanted bottle on the day you fill it. For wall mounted dispensers and shelves, follow the CPSC Anchor It guidance on anchoring heavy items safely, and for older homes check the EPA Renovation, Repair and Painting program for lead safe rules before drilling.
Related reading
If you are planning a wider kitchen refresh, start with our guide to inspiring kitchen design ideas for layouts that make the sink area work harder.
For the wall behind the sink, see our stunning backsplash tile ideas to pick a surface that shrugs off splashes.
Seasonal sink styling pairs well with our fall kitchen decor ideas for a warmer autumn kitchen.
For a collected, thrifted sink corner, our vintage cottage kitchen ideas show how old pieces earn new jobs.
And to keep refills close but out of sight, read our smart walk in pantry shelving ideas for bulk storage that stays tidy.
Frequently asked questions
What is the best material for a kitchen sink soap tray?
Silicone and diatomite dry fastest and need the least care, stainless steel suits heavy daily use, and sealed wood or marble suit kitchens where looks matter most. Pick based on how often you are willing to wipe the tray, not only on appearance.
How do I keep a soap tray from getting moldy?
Choose a tray that drains, either with a spout, slats, or holes, and rinse it once a week. Let sponges dry fully between uses, and keep the tray out of standing water. Sealed wood and stone need resealing on schedule to stay mold resistant.
Where should I put a soap tray in a small kitchen?
Use the strip behind the faucet, the inside wall of the sink with a suction caddy, or the false drawer front with a tip out tray. These three spots hold daily tools without taking prep counter space.
Can I use a soap tray for bar soap and liquid soap together?
Yes, as long as the bar sits on a raised or slatted section that drains. A bar left in a puddle of liquid soap residue turns soft fast, so keep the bar on the driest part of the tray.
Do soap trays work for farmhouse sinks?
Yes. Farmhouse sinks pair well with galvanized trays, wooden risers, and marble slabs, and their wide aprons give you a generous ledge for a tray. Suction caddies also work on smooth porcelain apron fronts.
Final thoughts
A soap tray is a small purchase, but it ends the daily wipe of soapy rings and gives every sink tool a home. Measure your space, pick a material you will actually maintain, and keep only the daily items on the tray.