


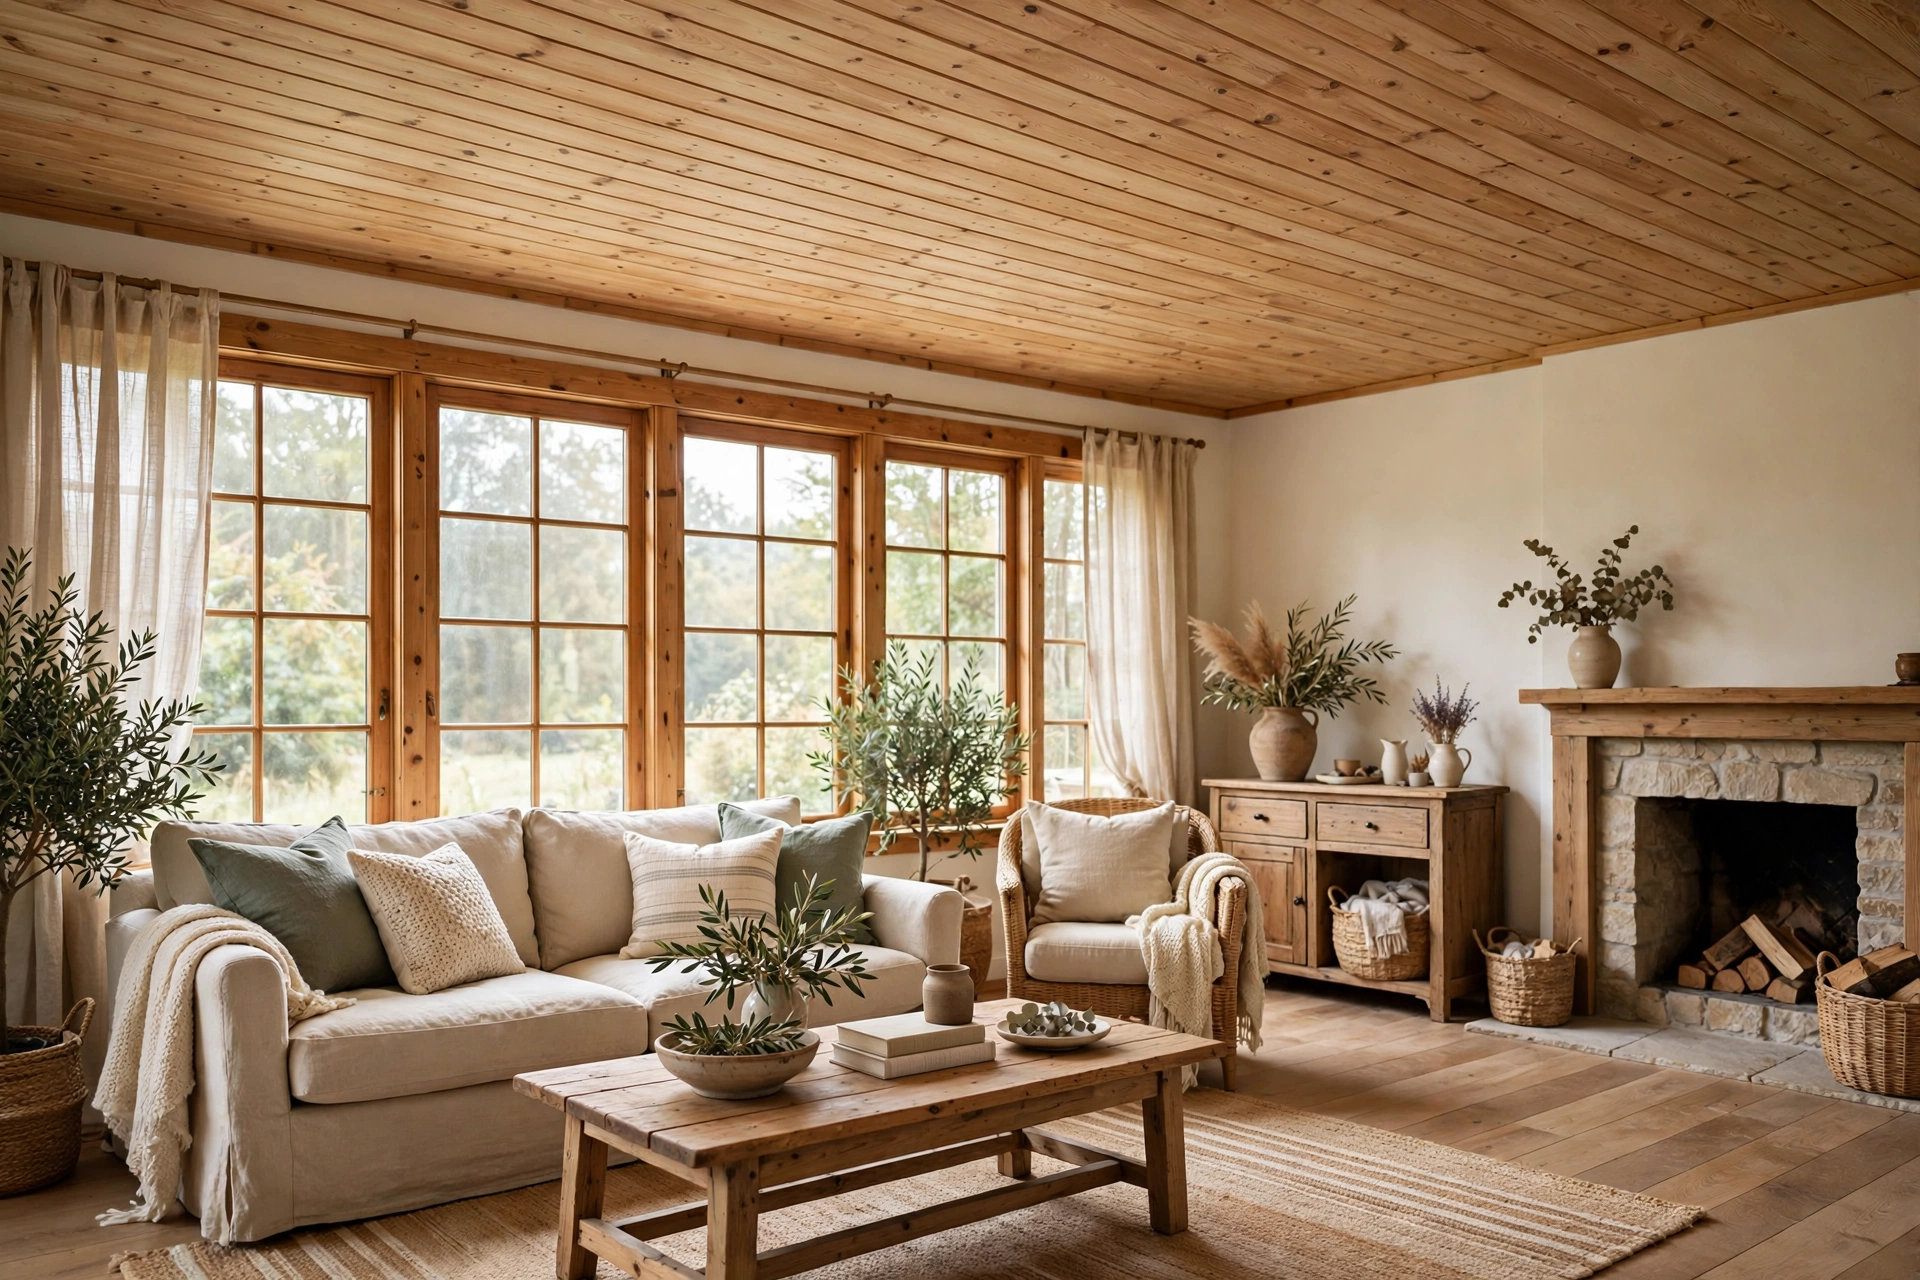
The ceiling is the most ignored surface in the house. We repaint walls, swap rugs, rearrange furniture — and then we look up and realize the big white slab over our heads has been silently making every room feel flat and unfinished. I learned this the hard way in our first house, when I painted the living room walls a gorgeous sage green and the ceiling just… sat there, boring and bright white, fighting the whole mood.
A wood plank ceiling changed everything. One weekend, two hundred dollars in pine tongue-and-groove, and suddenly the room had warmth, texture, and something interesting to look at above the eye line. Plank ceilings are one of those rare projects that are genuinely beginner-DIY-able, cost less than most weekend getaways, and transform a room more than almost any wall treatment. You do not need a contractor, you do not need a nail gun collection — for some of these, you barely need tools at all.
Below are 25 creative DIY wood plank ceiling ideas I have researched, costed, and in several cases lived under. They cover every style (farmhouse, coastal, moody modern, rustic), every room (bedroom, bathroom, kitchen, porch), and every budget — from real reclaimed barn wood to a plywood trick that looks shockingly like the real thing for under a hundred bucks. Every idea includes a practical tip so you can start with confidence.
- The classic beginner pick is 1×6 pine tongue-and-groove: lightweight, cheap, and forgiving for a first ceiling project.
- Always install planks perpendicular to the ceiling joists — or add furring strips first so you have something solid to nail into.
- Order 10–15% extra material for waste, bad cuts, and the knotty board you will absolutely want to swap out.
- Pre-finish your planks (stain or paint) BEFORE they go up. Finishing overhead is miserable.
- Light-colored planks brighten and open a room; dark planks make it feel cozy and intimate — pick your mood on purpose.
1. Classic Tongue-and-Groove Pine
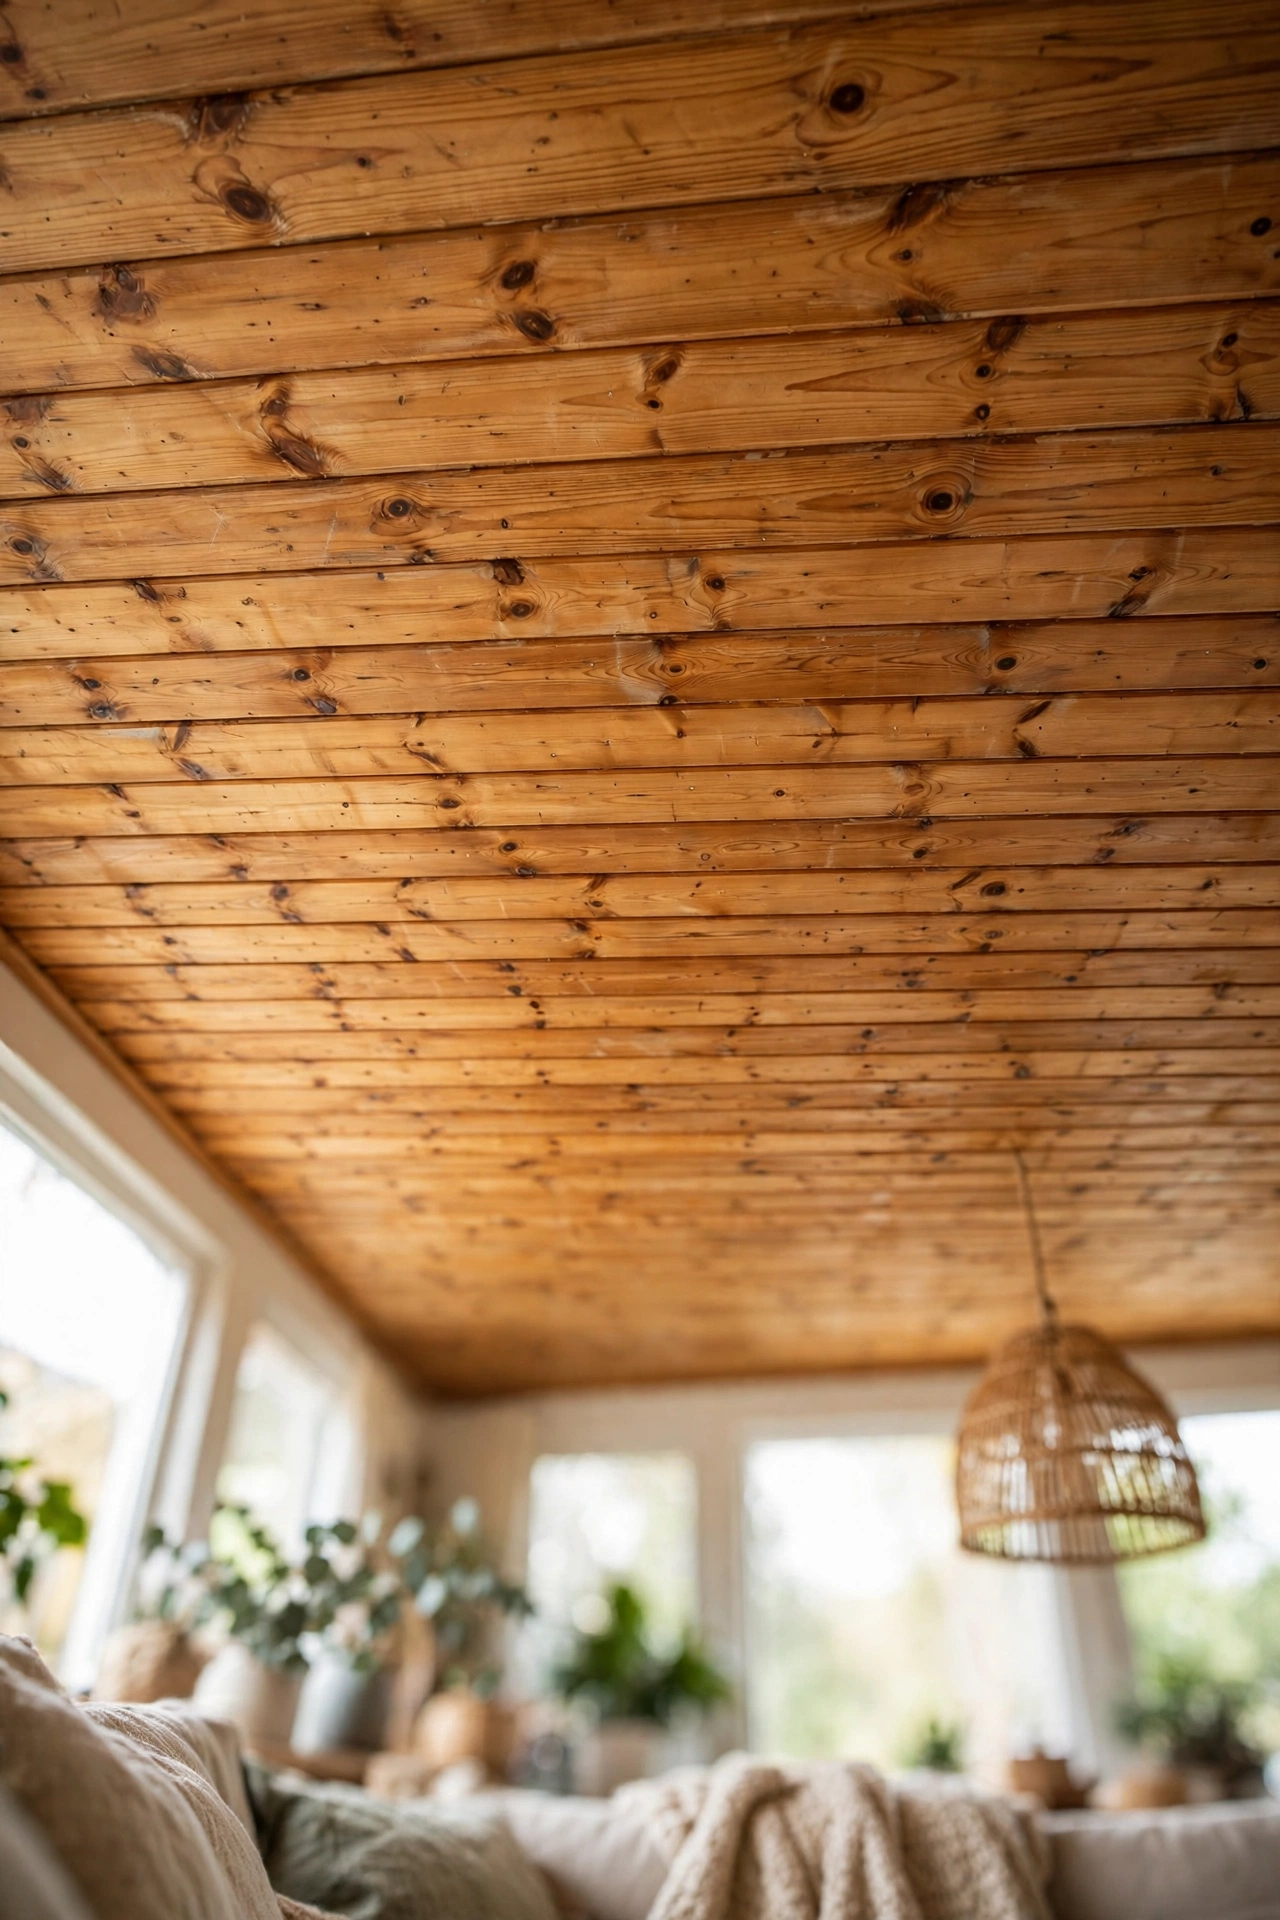
This is the one that started the whole trend, and it is still the best first project. One-by-six pine tongue-and-groove boards go up fast because each board locks into the last, hiding the nails in the joint — the classic “blind nail” trick. The warm honey tone of natural pine instantly makes a white box of a room feel like a cabin, and a clear matte poly keeps it from yellowing too fast. Expect to spend roughly $2–$4 per square foot on materials.
For a proper step-by-step on the technique itself, This Old House’s guide to installing a pine tongue-and-groove ceiling walks through the chalk-line layout, blind-nailing angles, and how to handle that tricky last board against the wall.
Try this: sort your boards by tone before you start and mix light and dark ones across the ceiling — it avoids the “striped” look you get when a batch of pale boards ends up all in one row.
2. Whitewashed Shiplap Ceiling
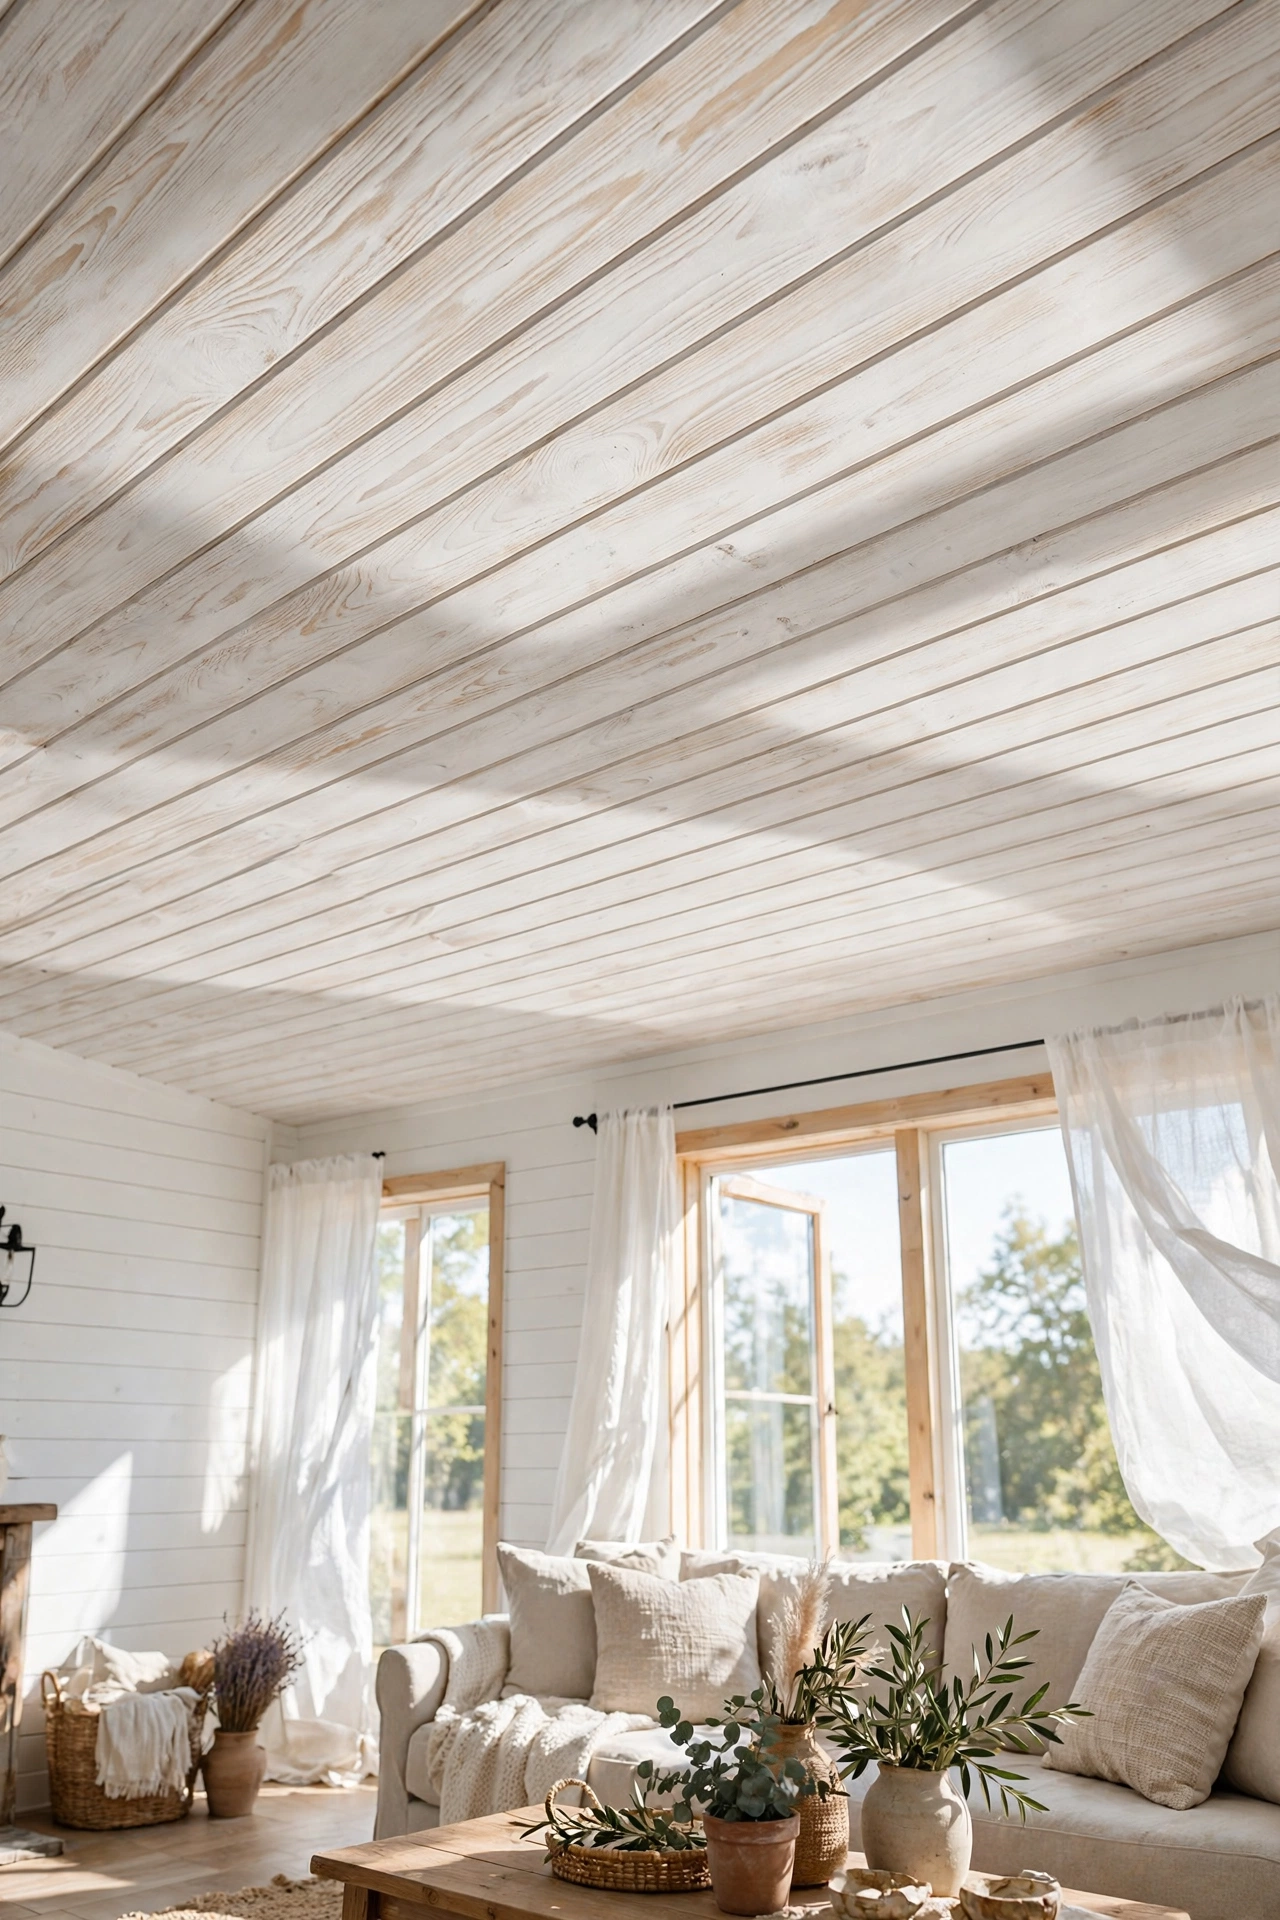
Whitewash gives you the texture of real wood without the visual weight — perfect if you love farmhouse style but your ceilings are only eight feet. Thin down white paint about 50/50 with water, brush it on, and wipe it back so the grain shows through. The slight gaps between shiplap boards add shadow lines that read as “expensive millwork” even though you spent a weekend and a gallon of paint.
Try this: whitewash is easier to control on pre-painted boards — paint first, whitewash second — rather than trying to whitewash raw pine, which drinks the wash unevenly.
3. Haint Blue Porch Ceiling
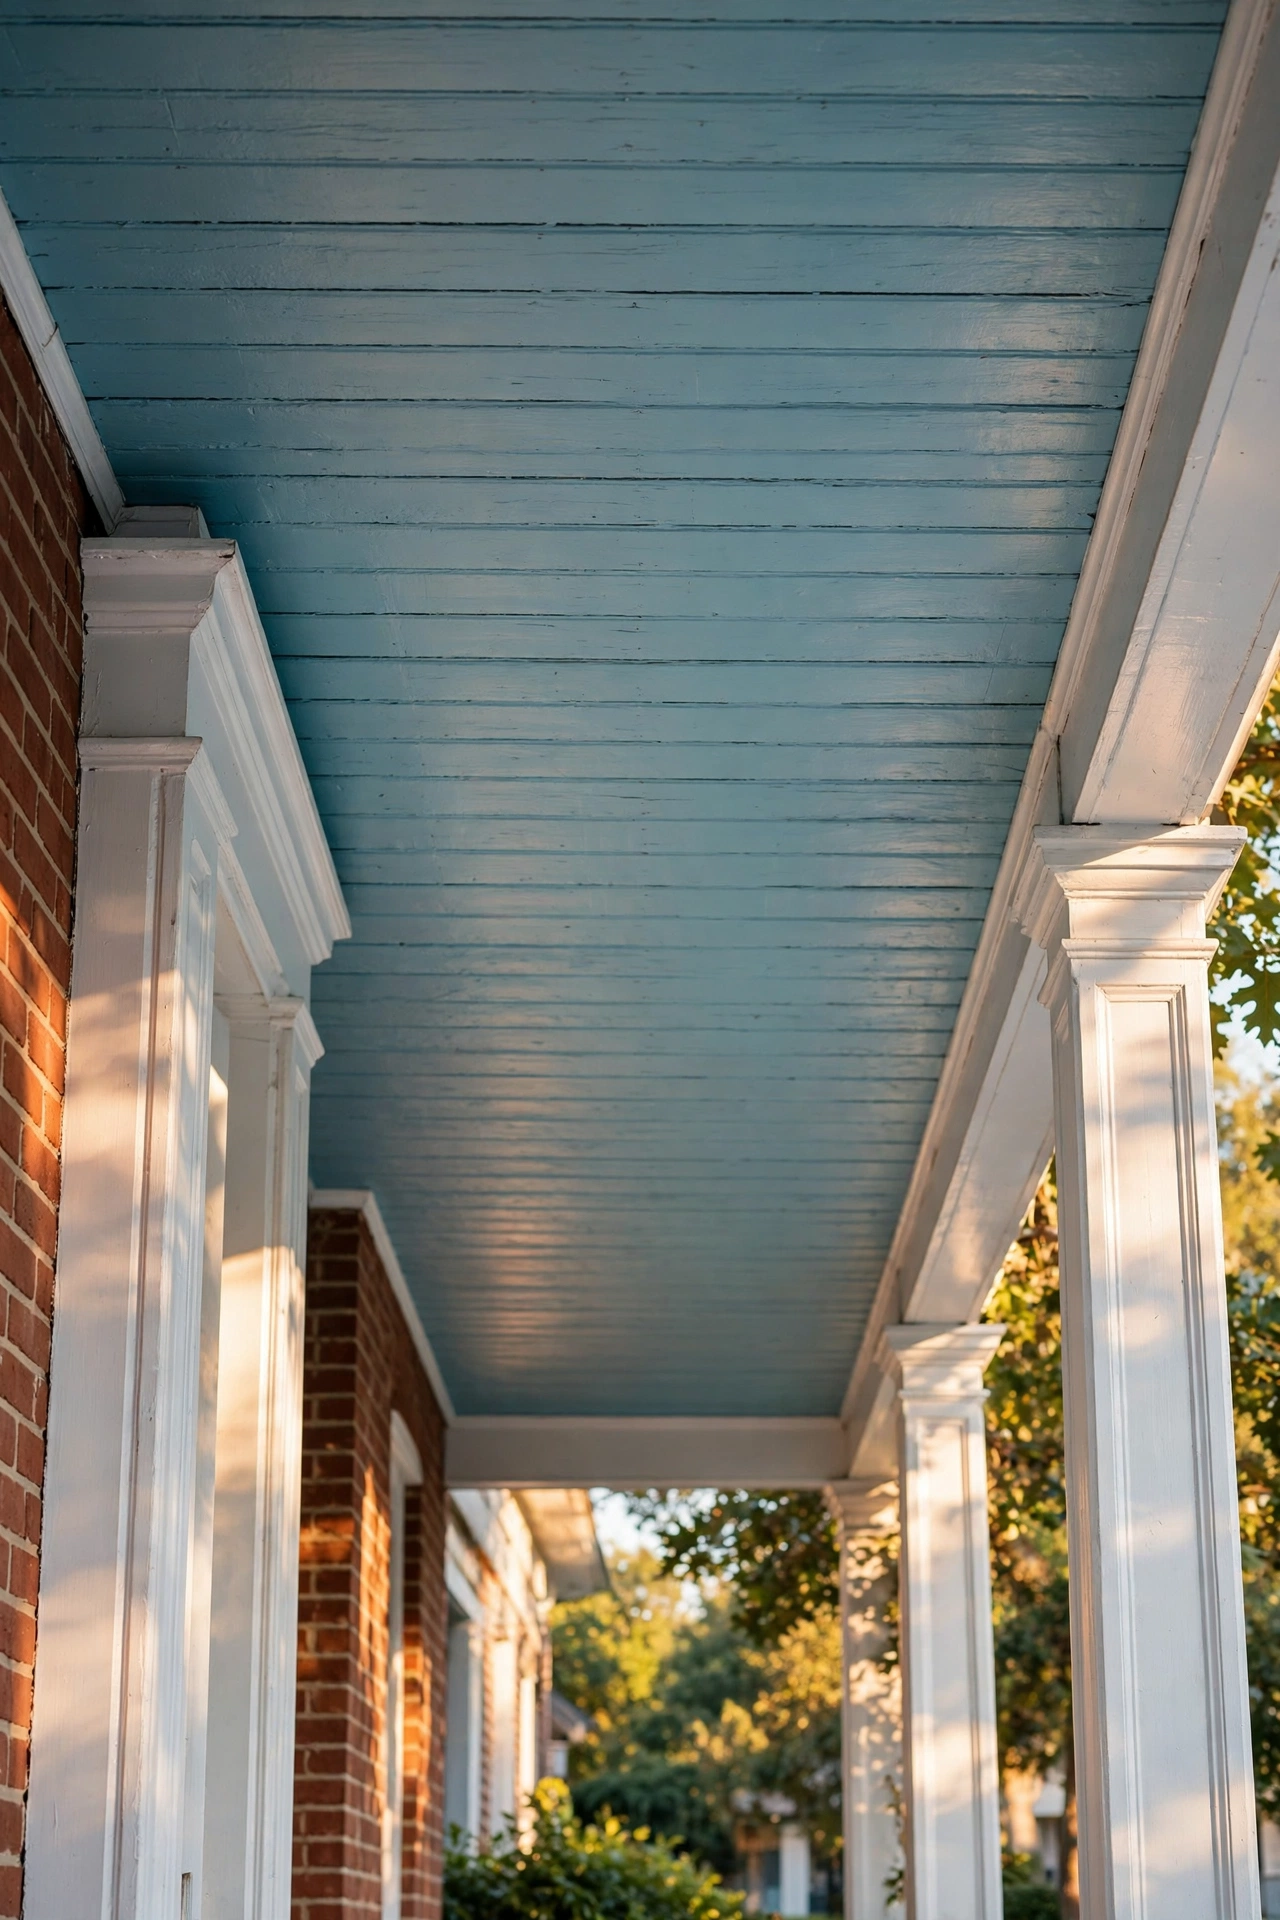
The Southern tradition of painting porch ceilings haint blue — meant to ward off spirits and wasps alike — has become one of the prettiest ceiling looks anywhere. On tongue-and-groove or beadboard planks, a soft robin’s-egg blue looks incredible against white columns and brick. Use exterior-grade paint and it holds up for years of weather.
Porch ceilings get their own special treatment because they sit over plywood in exposed conditions, so This Old House’s beadboard porch ceiling installation is worth reading for the underlayment and nailing details that keep an outdoor ceiling flat and dry.
Try this: sample the blue on a scrap board and look at it in morning AND afternoon light — haint blue shifts dramatically, and you want the version you love at both times of day.
4. Reclaimed Barn Wood Planks
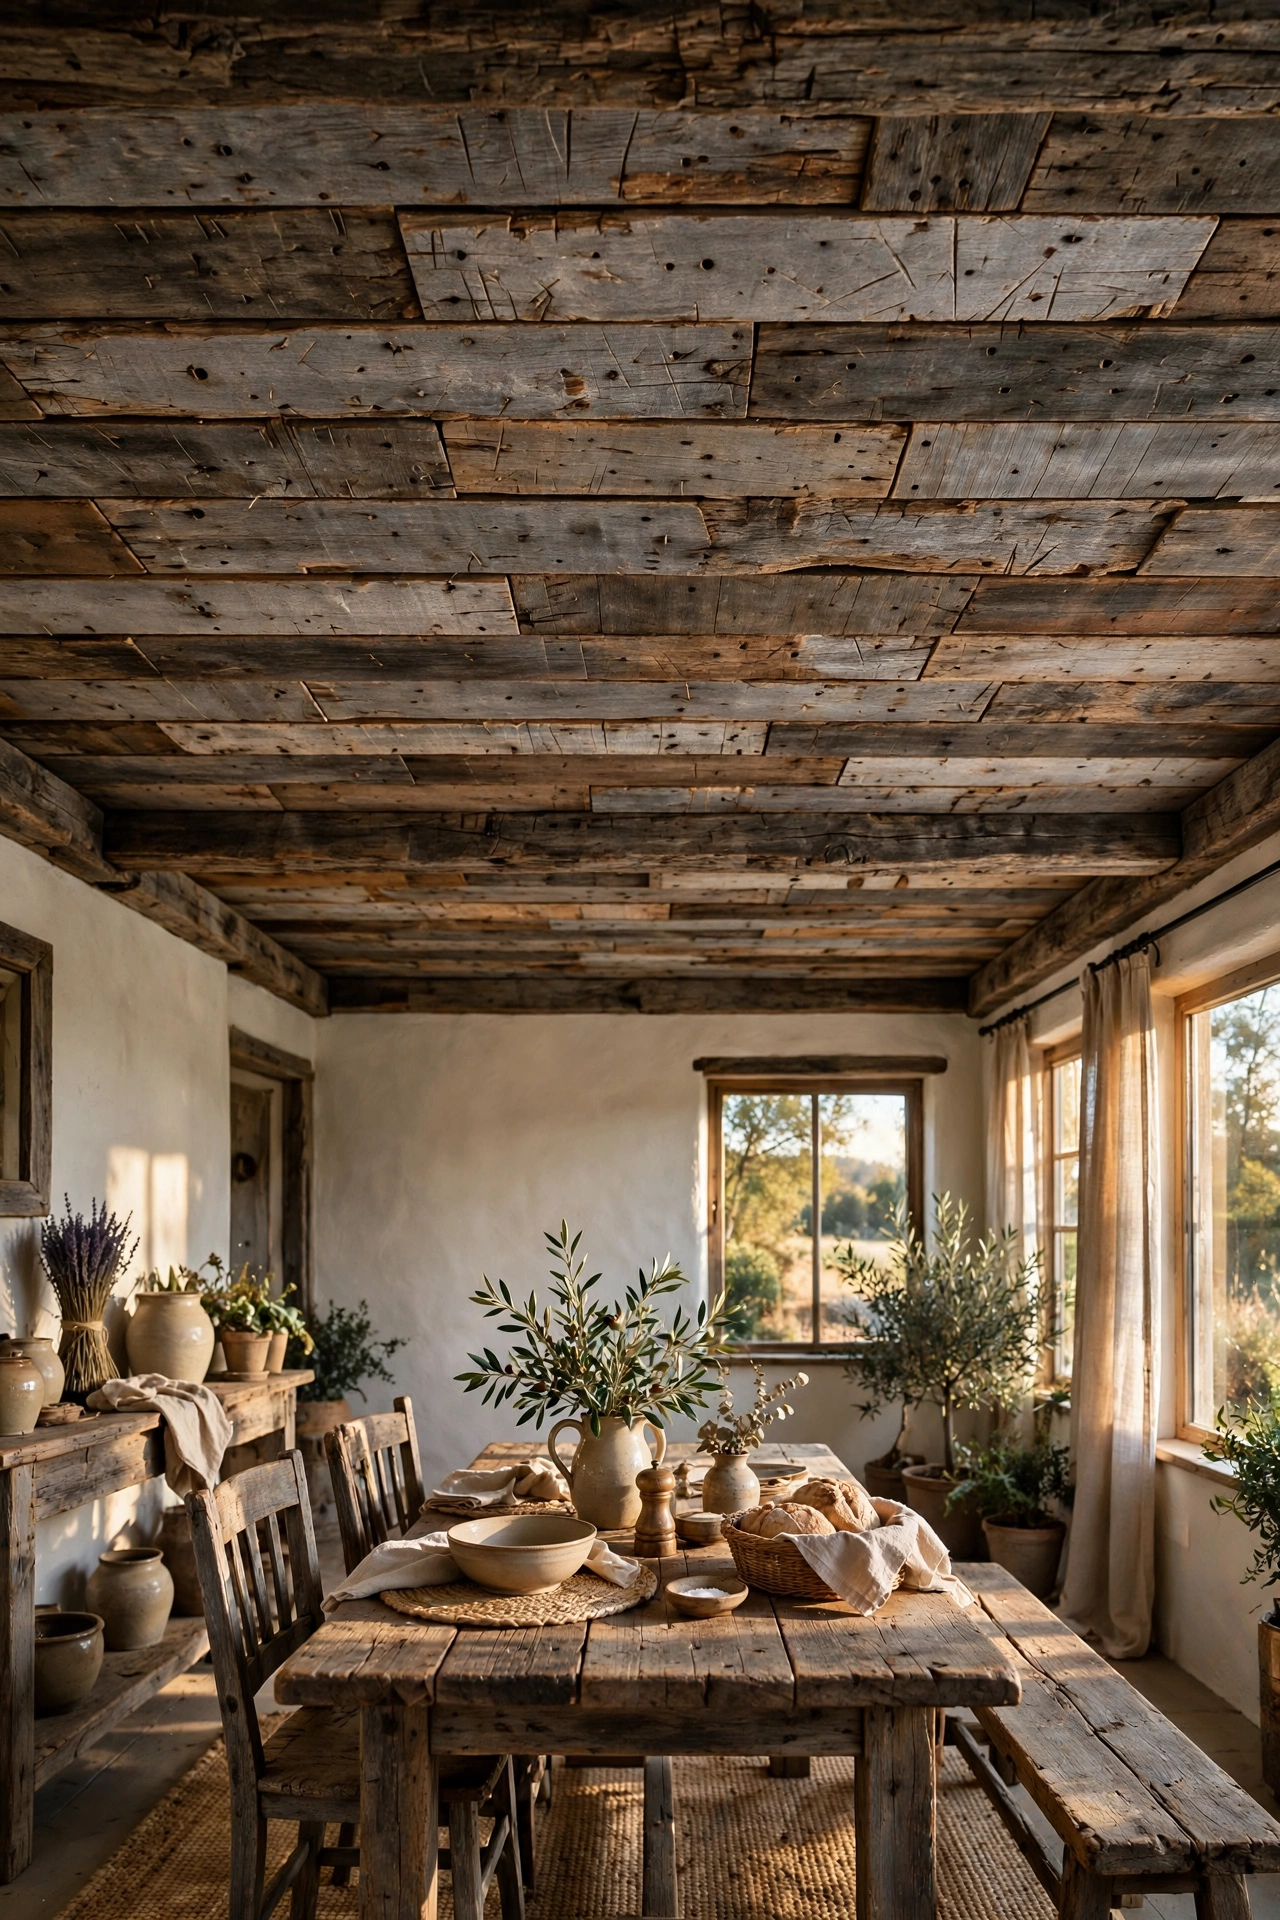
Nothing beats the real thing. Reclaimed barn boards — with their nail holes, saw marks, and hundred-year patina — turn a ceiling into the room’s main event. Because each board is already weathered, you skip finishing entirely; just clean, denail, and install. Cost varies wildly: if you demo your own source, it is nearly free; bought from a salvage yard, budget $4–$8 per square foot.
Try this: install reclaimed boards over a layer of dark roofing felt or black landscaping fabric on the ceiling first — it hides any tiny gaps between uneven old boards so you never see drywall peeking through.
5. Dark-Stained Walnut Look
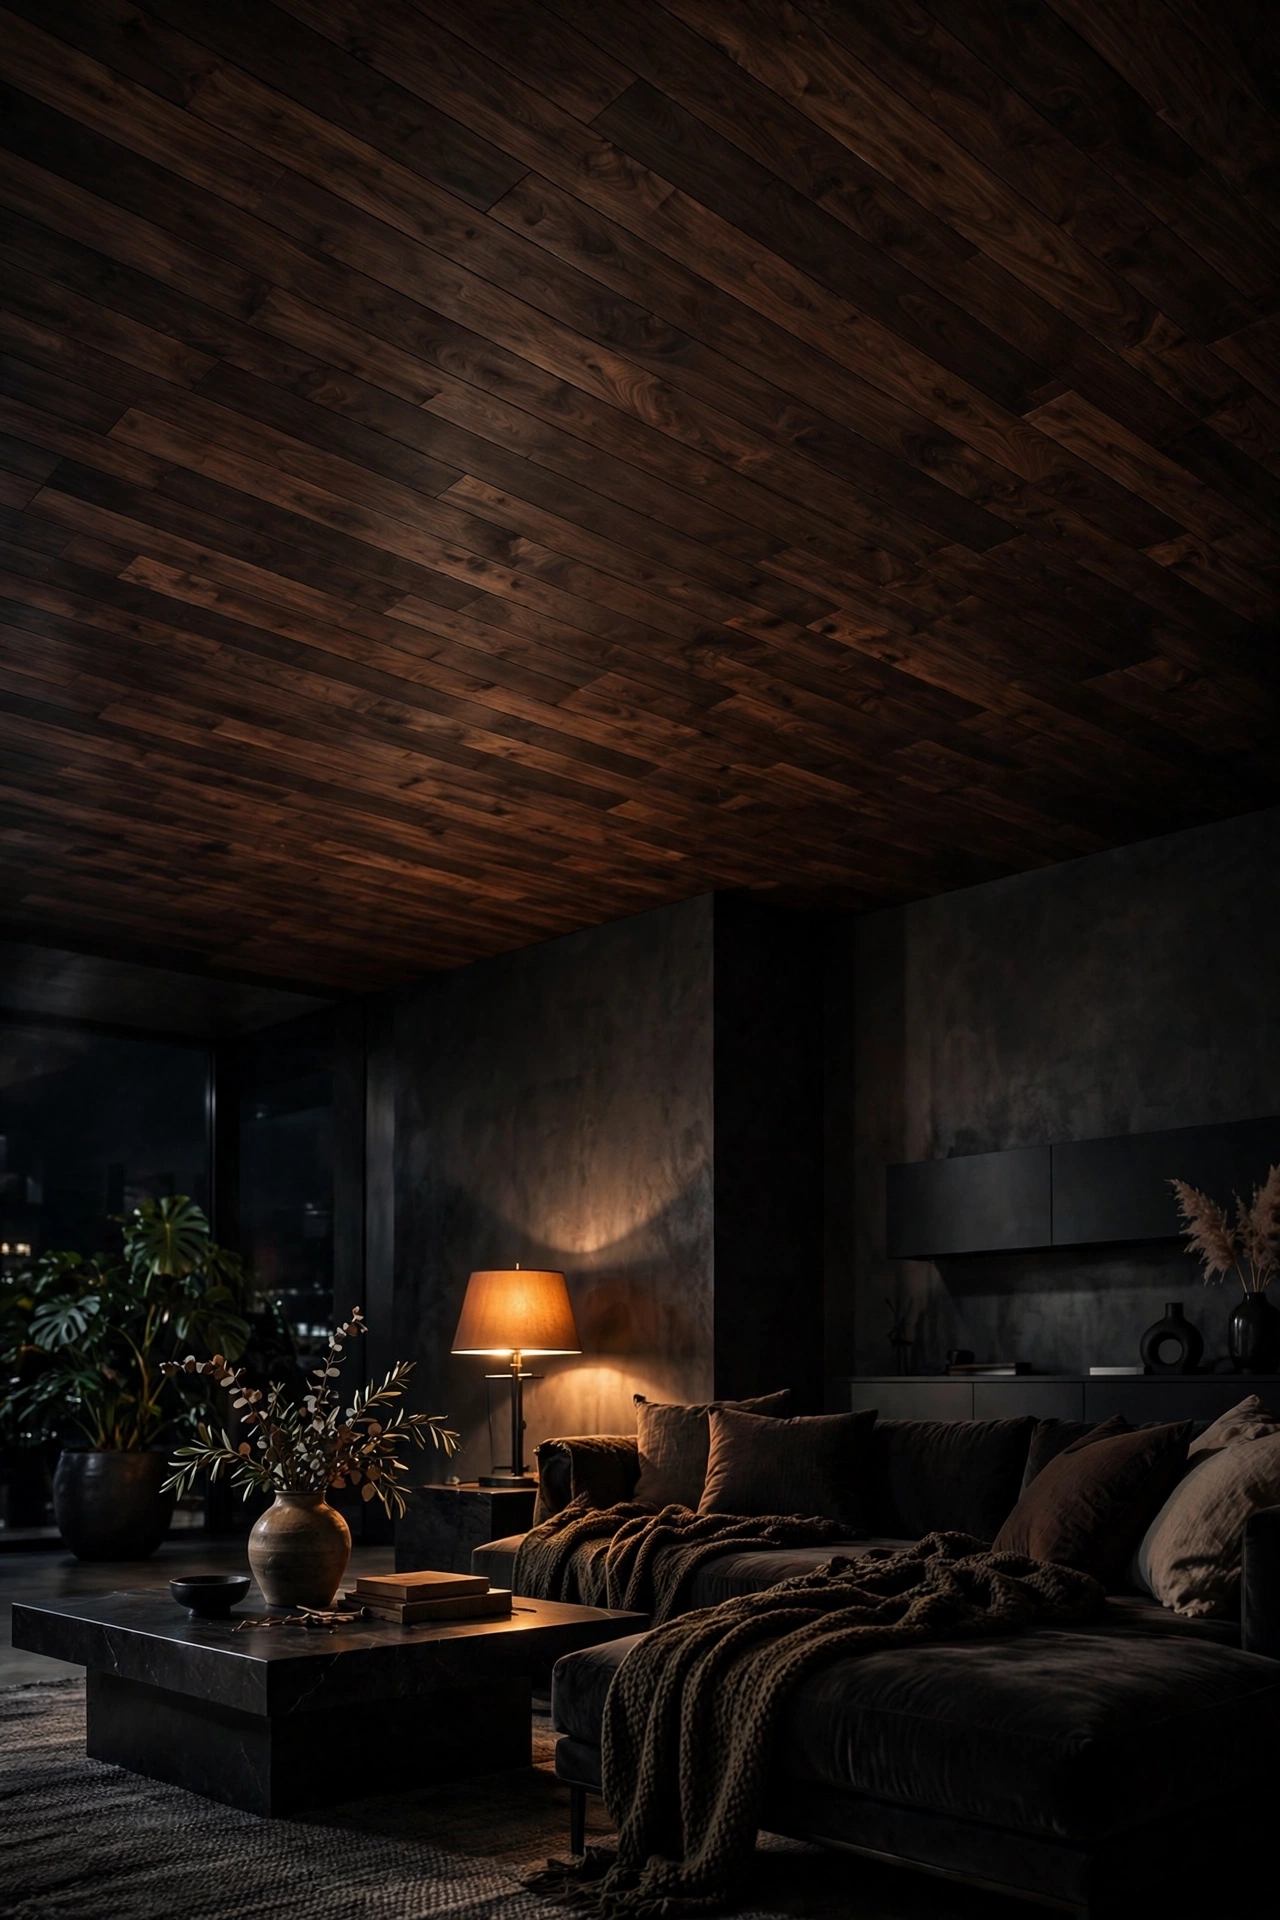
Dark wood on the ceiling is pure drama — it pulls the ceiling “down” visually and wraps a room in warmth, which is exactly what you want in a media room, a dining room, or a bedroom that needs to feel like a retreat. You do not need actual walnut: stain pine with a dark walnut or espresso gel stain (gel stains are more forgiving on soft pine) and top with satin poly.
Try this: always apply a wood conditioner before staining pine dark — without it, you will get blotchy tiger stripes instead of that rich even tone.
6. Herringbone Plank Pattern
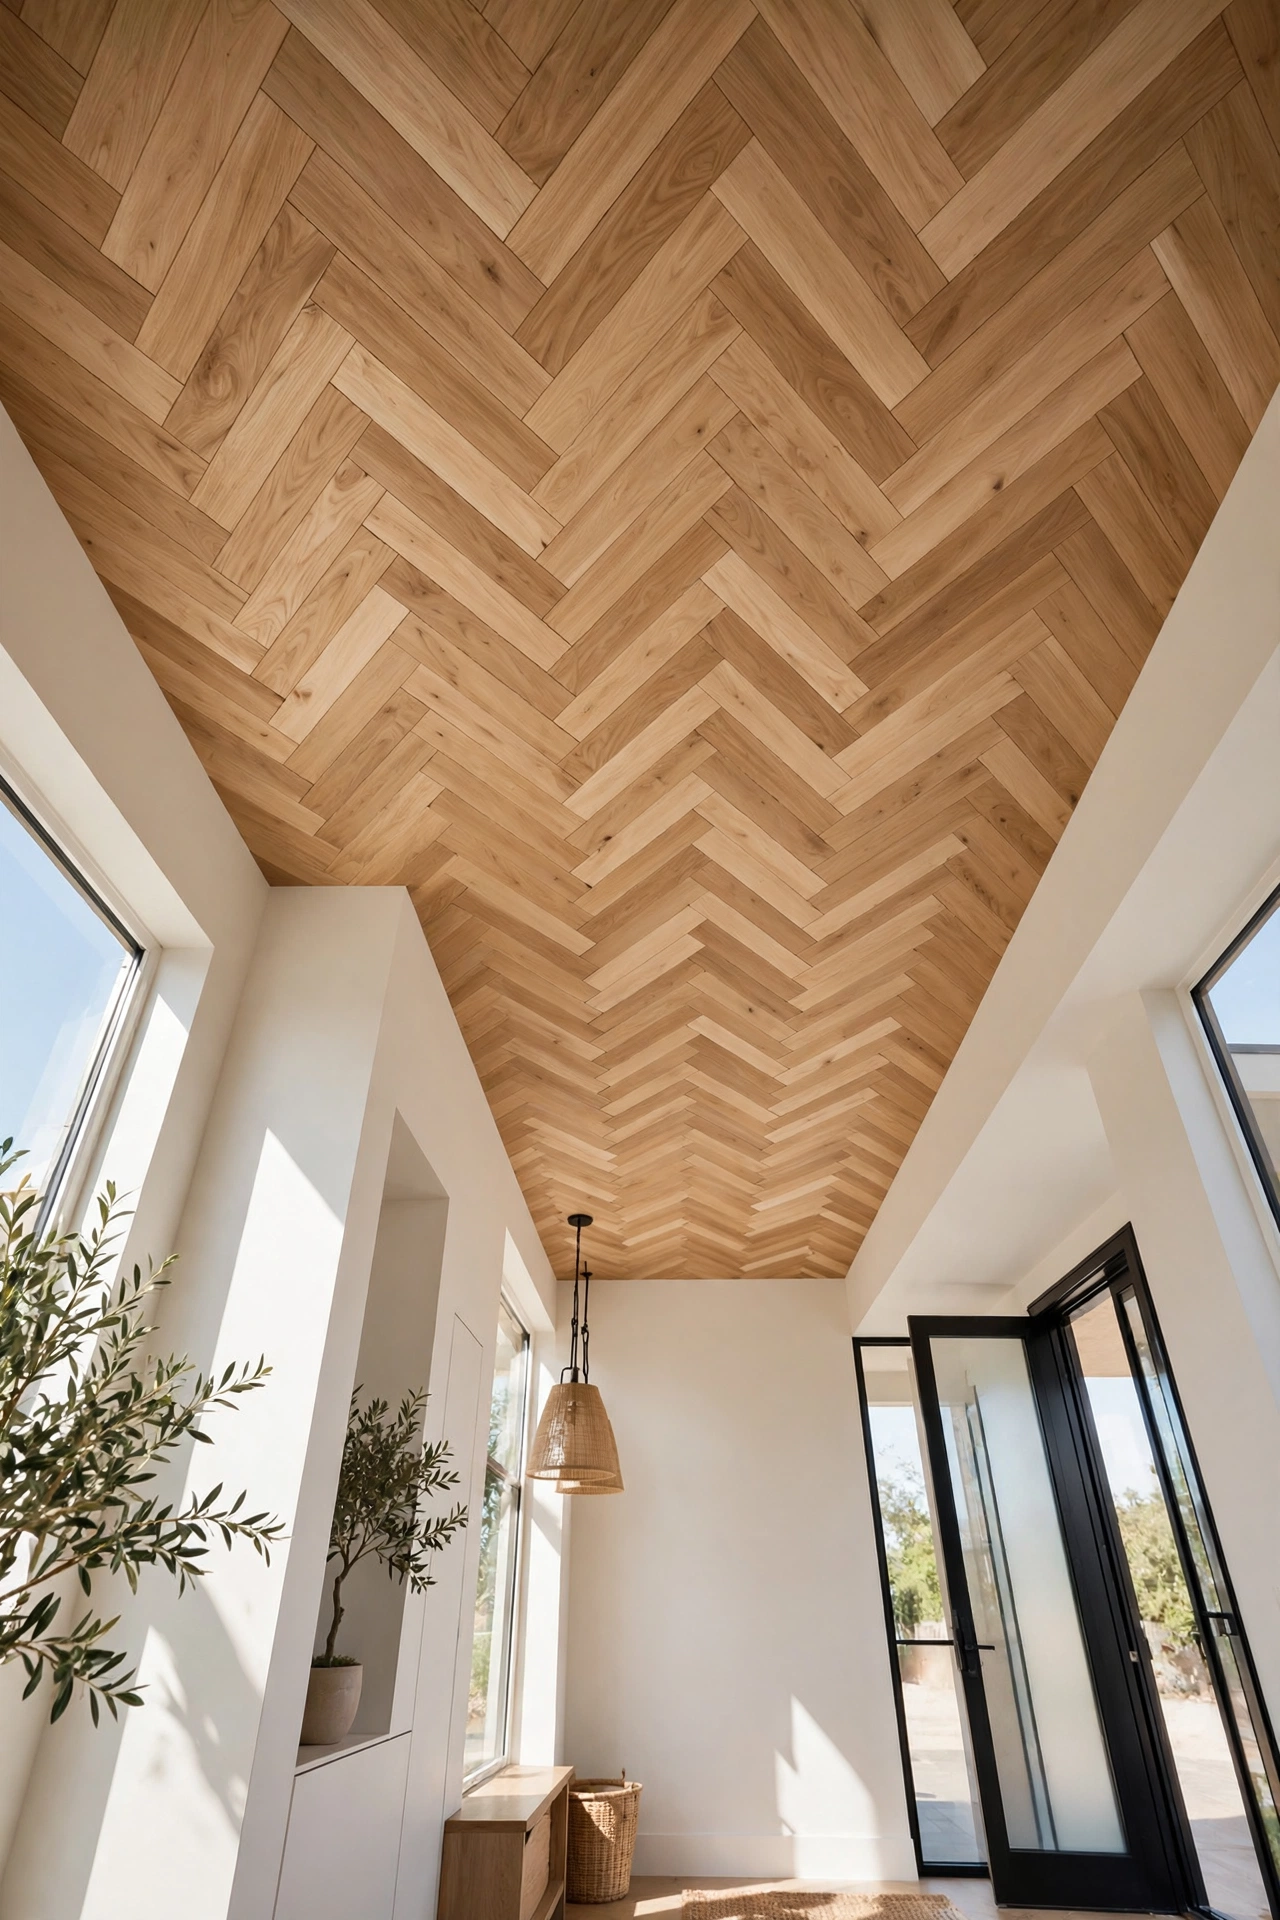
Herringbone takes a plank ceiling from “nice weekend project” to “wait, who did you hire?” The zigzag pattern catches light from every angle, so the ceiling shimmers with movement all day. It is more cutting and more planning — every piece meets at 45 or 90 degrees — but the boards are short, so mistakes are cheap. Do it in a small space first: a hallway, a powder room, or an entryway makes a stunning, manageable test run.
Try this: snap a full chalk-line grid on the ceiling before a single board goes up. Herringbone lives or dies by its layout lines.
7. Chevron or Diagonal Layout
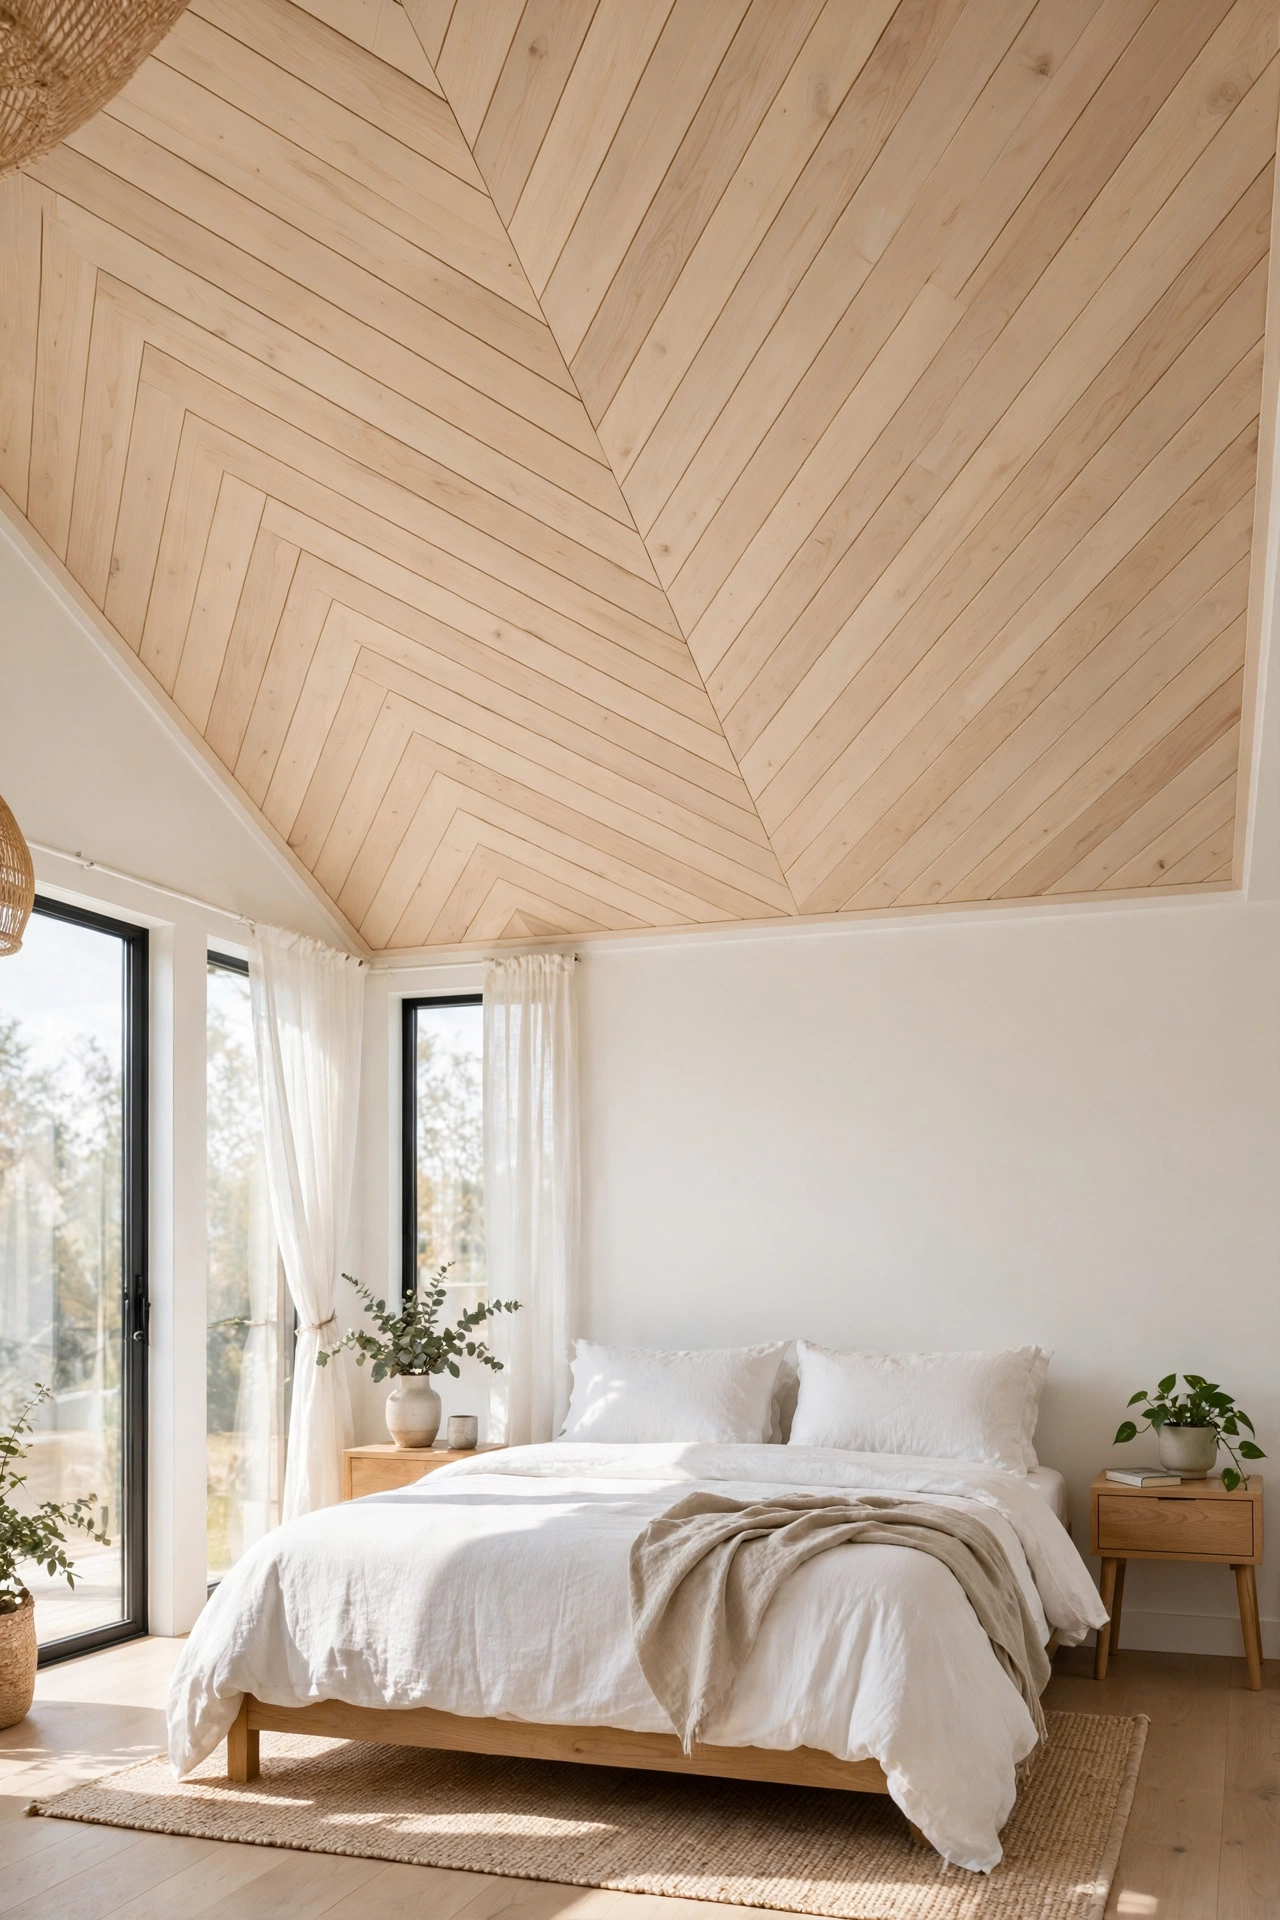
Slightly easier than herringbone but with the same wow factor: run your planks on a diagonal, or miter them into chevron points. Diagonal planks visually stretch a small room, making a boxy bedroom feel longer and more dynamic. You will waste more wood on angled cuts (order 15–20% extra), but the result looks like a custom design choice instead of a DIY.
Try this: start at the center of the room and work outward so the angled cuts land symmetrically at both walls — starting at one wall guarantees a lopsided finish.
8. White Beadboard Cottage Ceiling
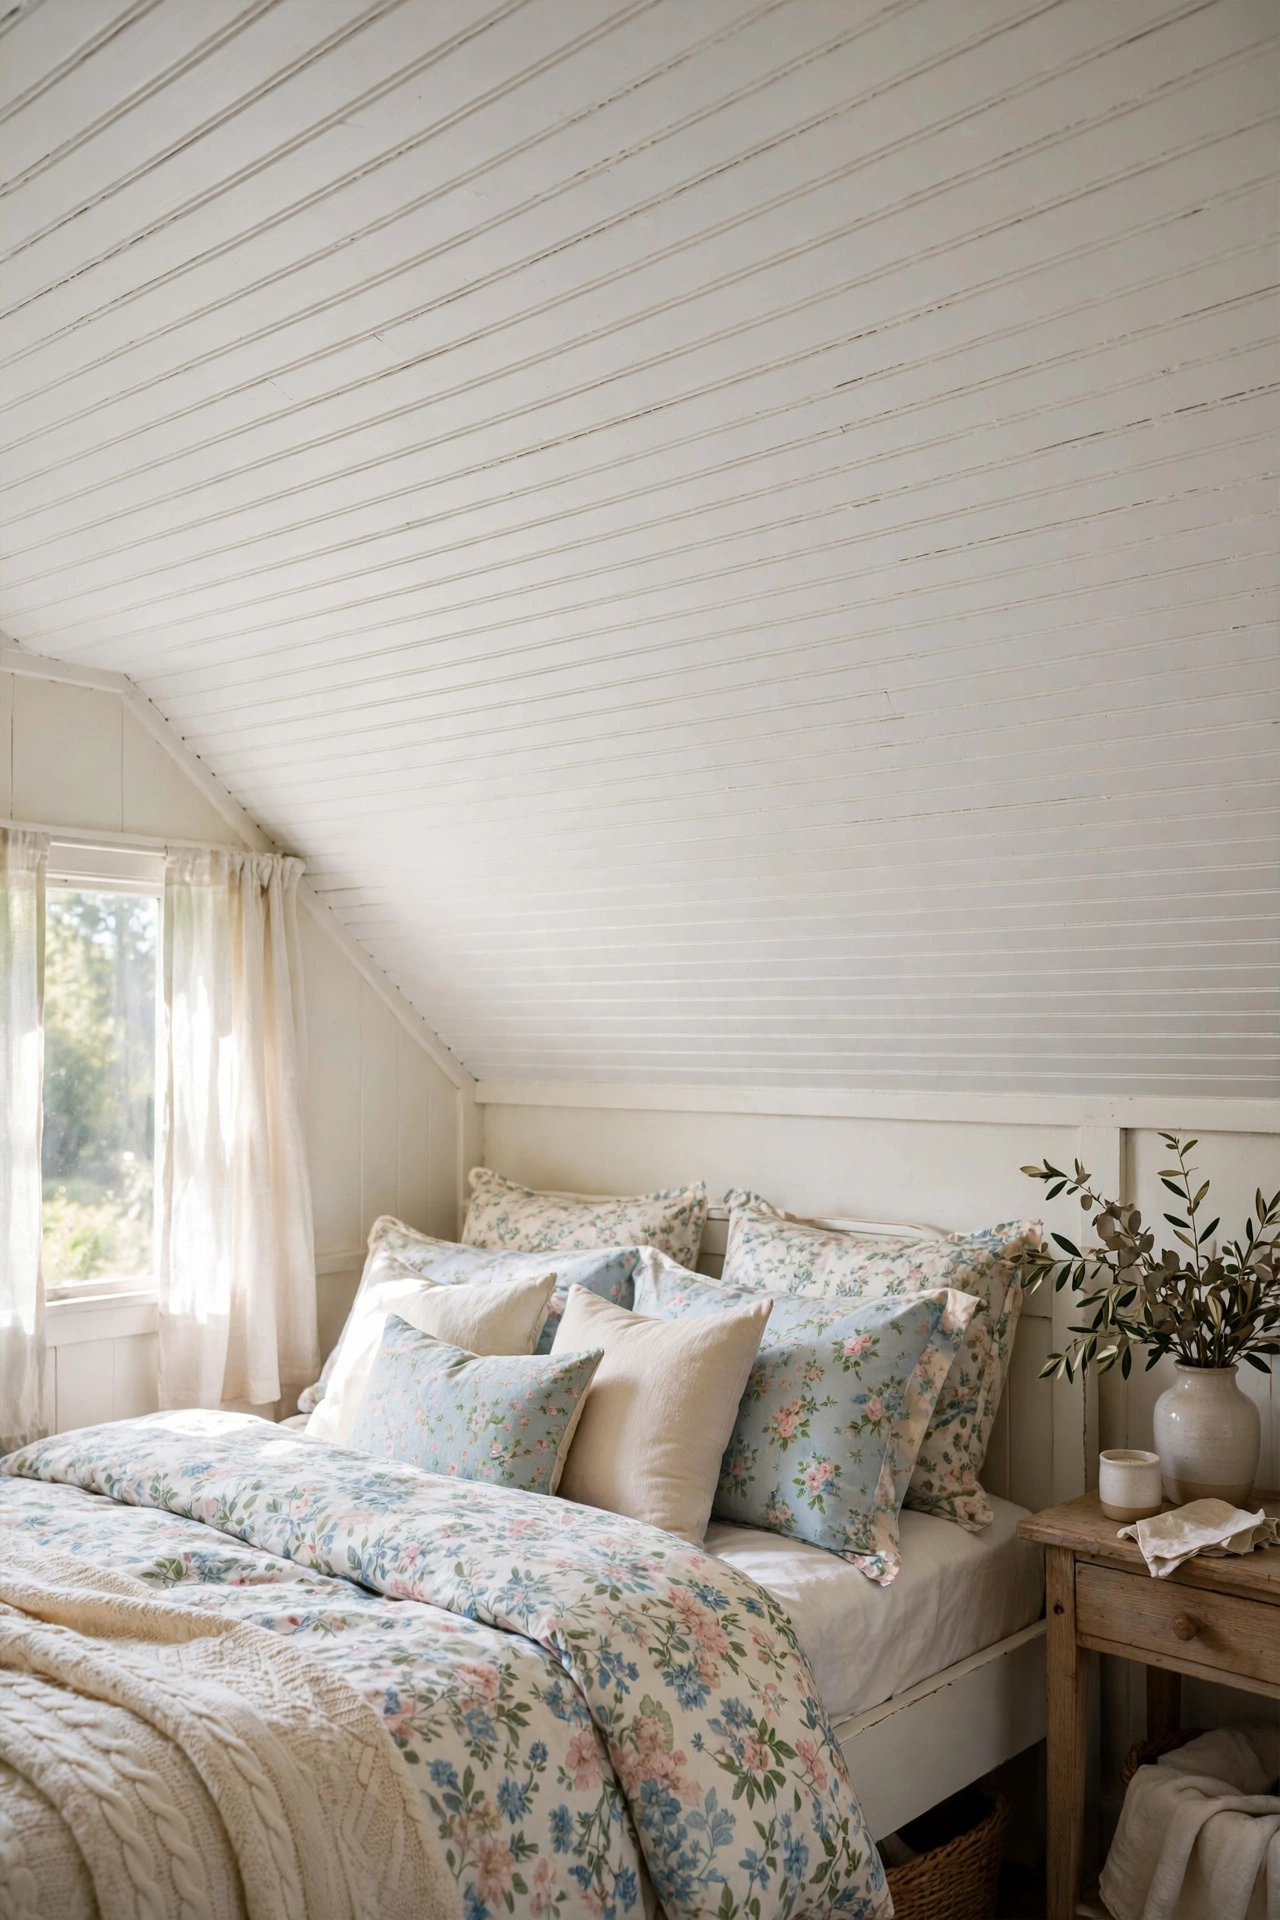
Beadboard is the cottage classic: narrow boards with a little rounded groove between each one that reads as pure charm. Painted bright white, it keeps low ceilings feeling airy while adding more character than flat drywall ever could. It comes in 4×8 sheets or individual tongue-and-groove boards — the sheets are cheaper and faster, the boards look better up close.
Try this: if you use sheets, caulk the seams and use a high-quality satin paint — cheap paint on beadboard sheets shows every seam and roller mark from below.
9. Whitewashed Pine Coastal Ceiling
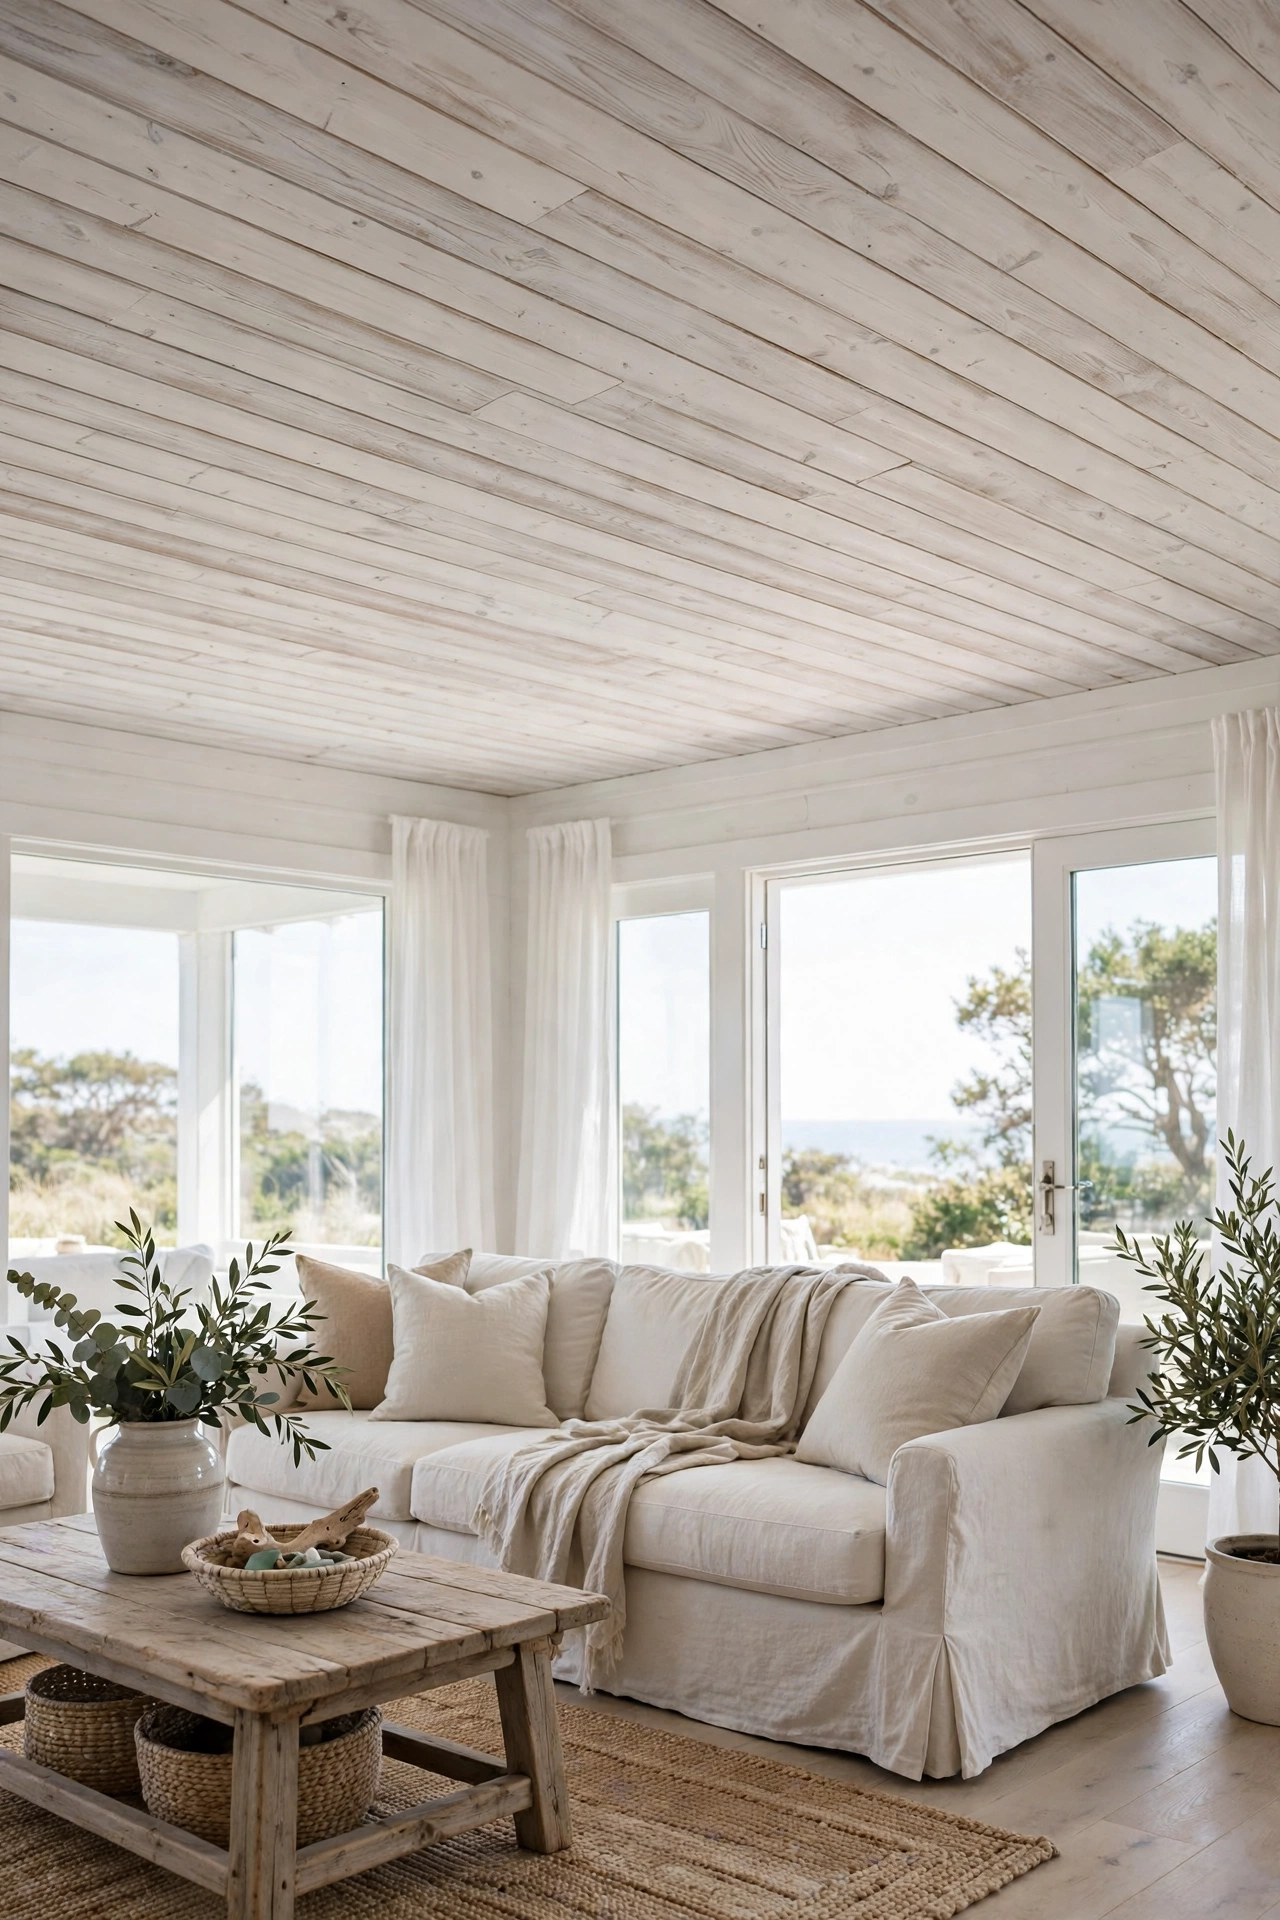
Coastal style lives in the space between white and wood, and a whitewashed pine ceiling nails it. Lighter than a full stain, warmer than white paint, it bounces light around the room while adding the organic texture that keeps coastal rooms from feeling sterile. Pair it with linen slipcovers, jute rugs, and black or brass fixtures for contrast.
Try this: seal whitewash with a water-based matte poly — oil-based poly yellows over time and will turn your airy coastal ceiling honey-colored within a couple of years.
10. Exposed Beams Over Plank Ceiling
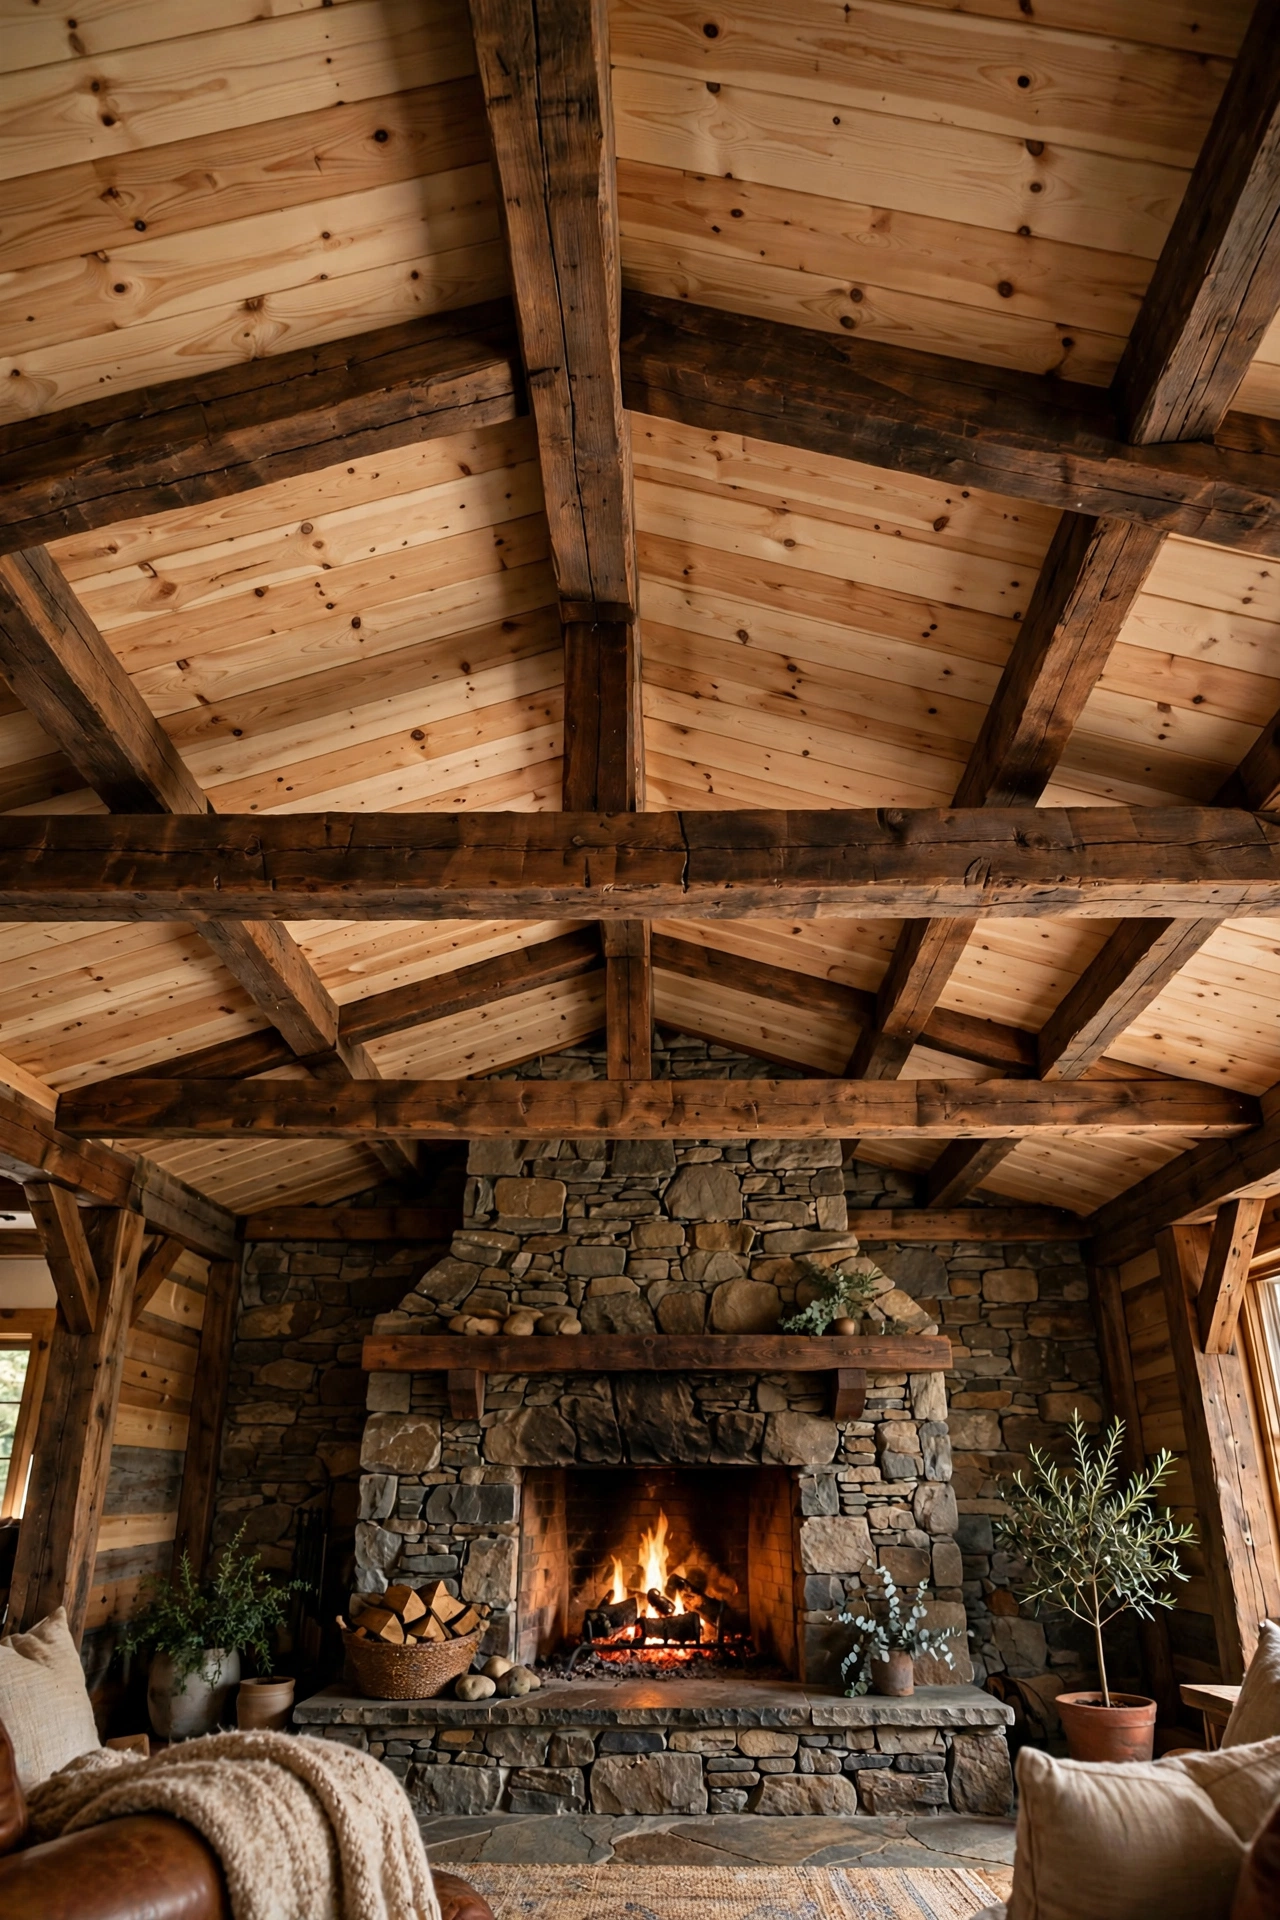
Planks plus beams is the timber-frame look that makes grown adults gasp. The trick most people miss: the beams do not have to be structural. Hollow faux beams (built from three boards) weigh almost nothing, cost a fraction of solid timbers, and go up with a couple of screws into joists. Run your planks first, then lay the beams across them on a grid — instant great-room architecture.
If you love this rustic-timber look enough to carry it through a whole home, these trendy modern pine cabin interior ideas show how pine ceilings, beams, and warm wood tones work together across every room.
Try this: stain the beams one shade darker than the planks. The contrast defines the grid and keeps the ceiling from reading as one flat brown mass.
11. Faux-Coffered Wood Grid
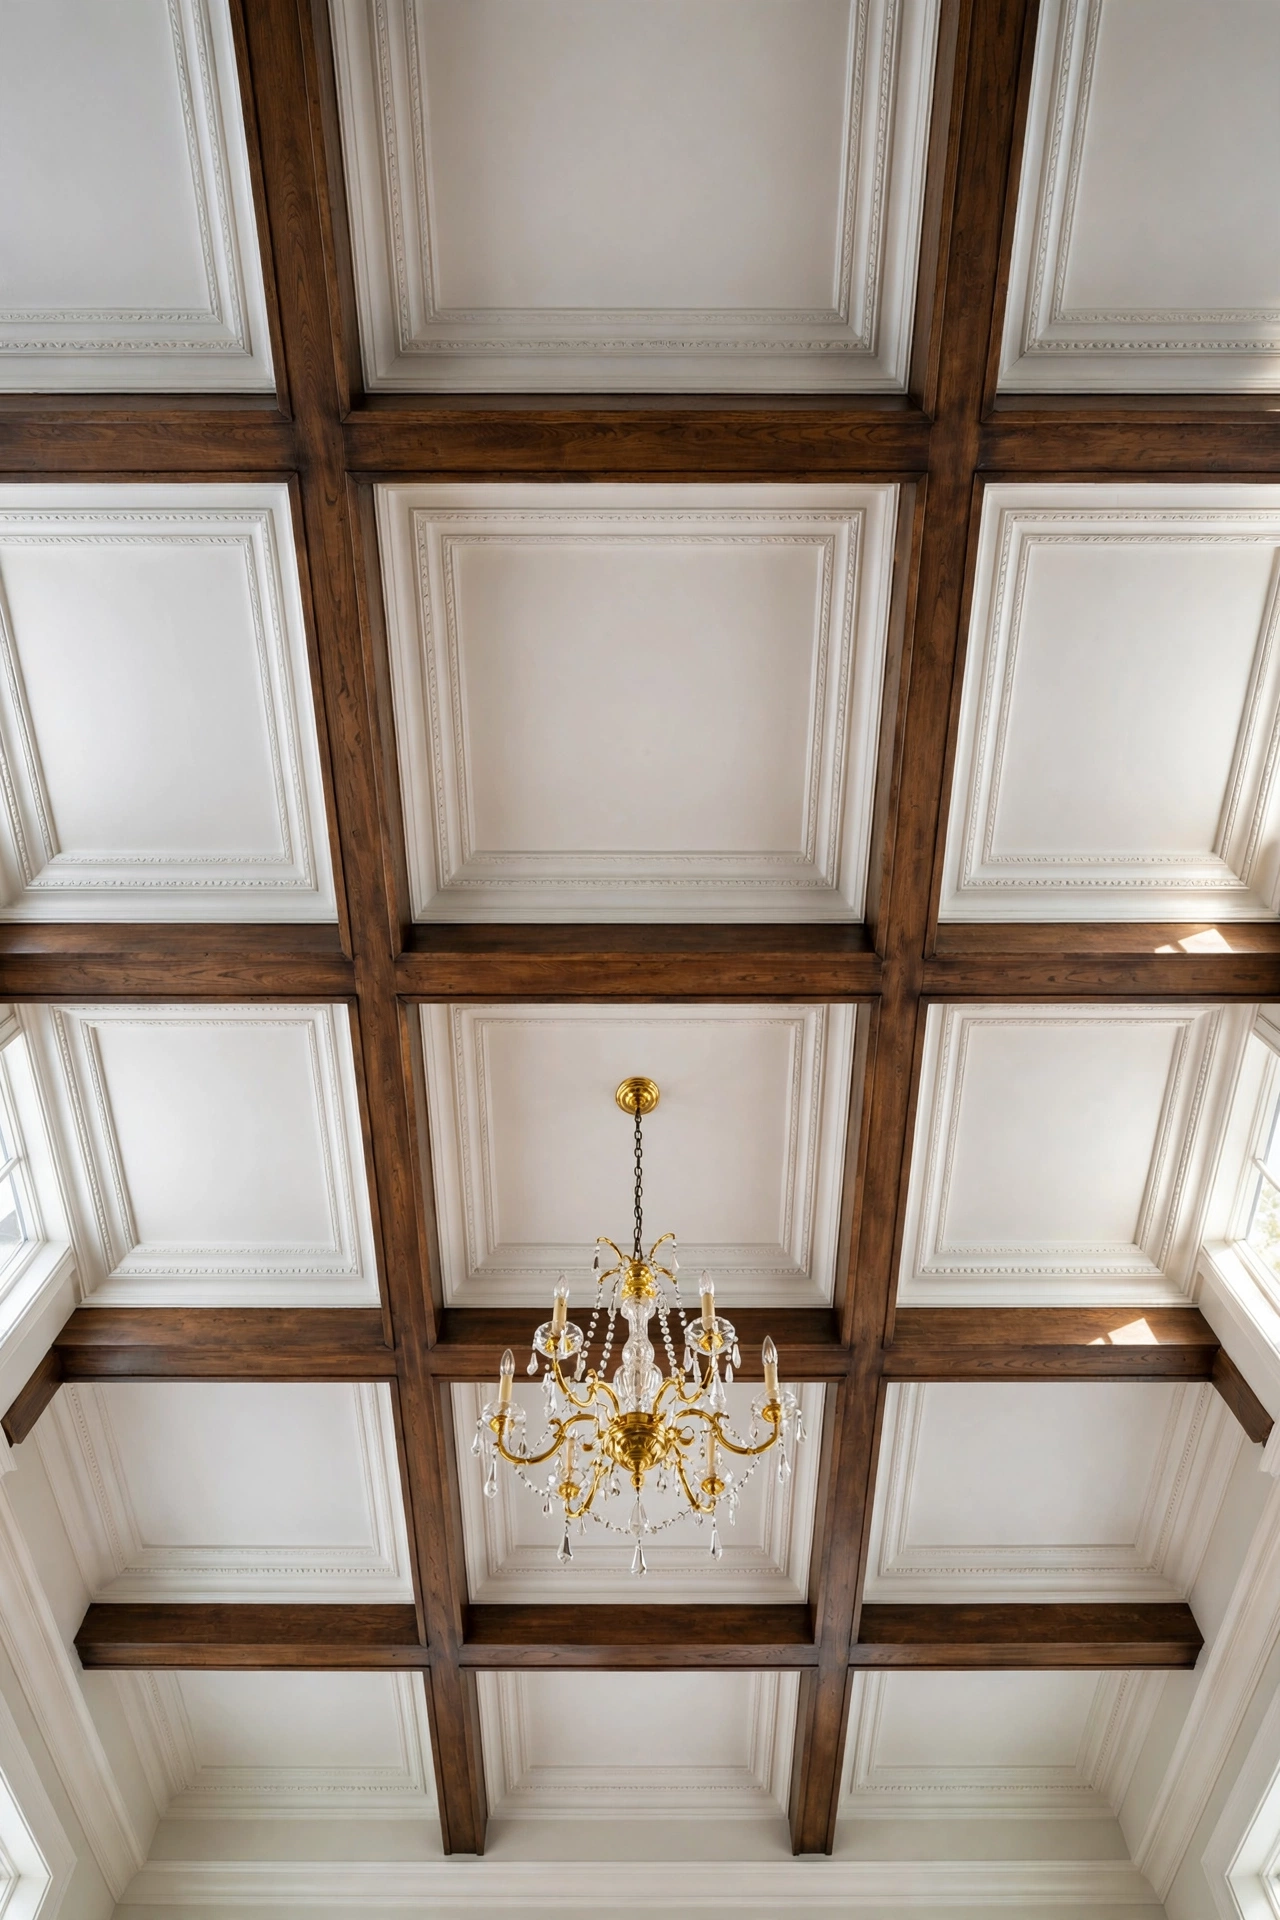
Coffers are the dress-up version of beams: a grid of shallow boxes, usually trimmed with molding, that makes a plain ceiling look architecturally designed. Do it DIY by nailing up a grid of 1×4 or 1×6 boards over a planked (or even painted) ceiling, then paint everything one color. White-on-white coffers look classic and expensive; stained wood coffers look rich and traditional.
Try this: keep the coffer grid squares roughly proportional to the room — too many small boxes looks busy, too few looks unfinished. A 3×3 or 4×4 grid suits most dining rooms.
12. Black Painted Plank Ceiling
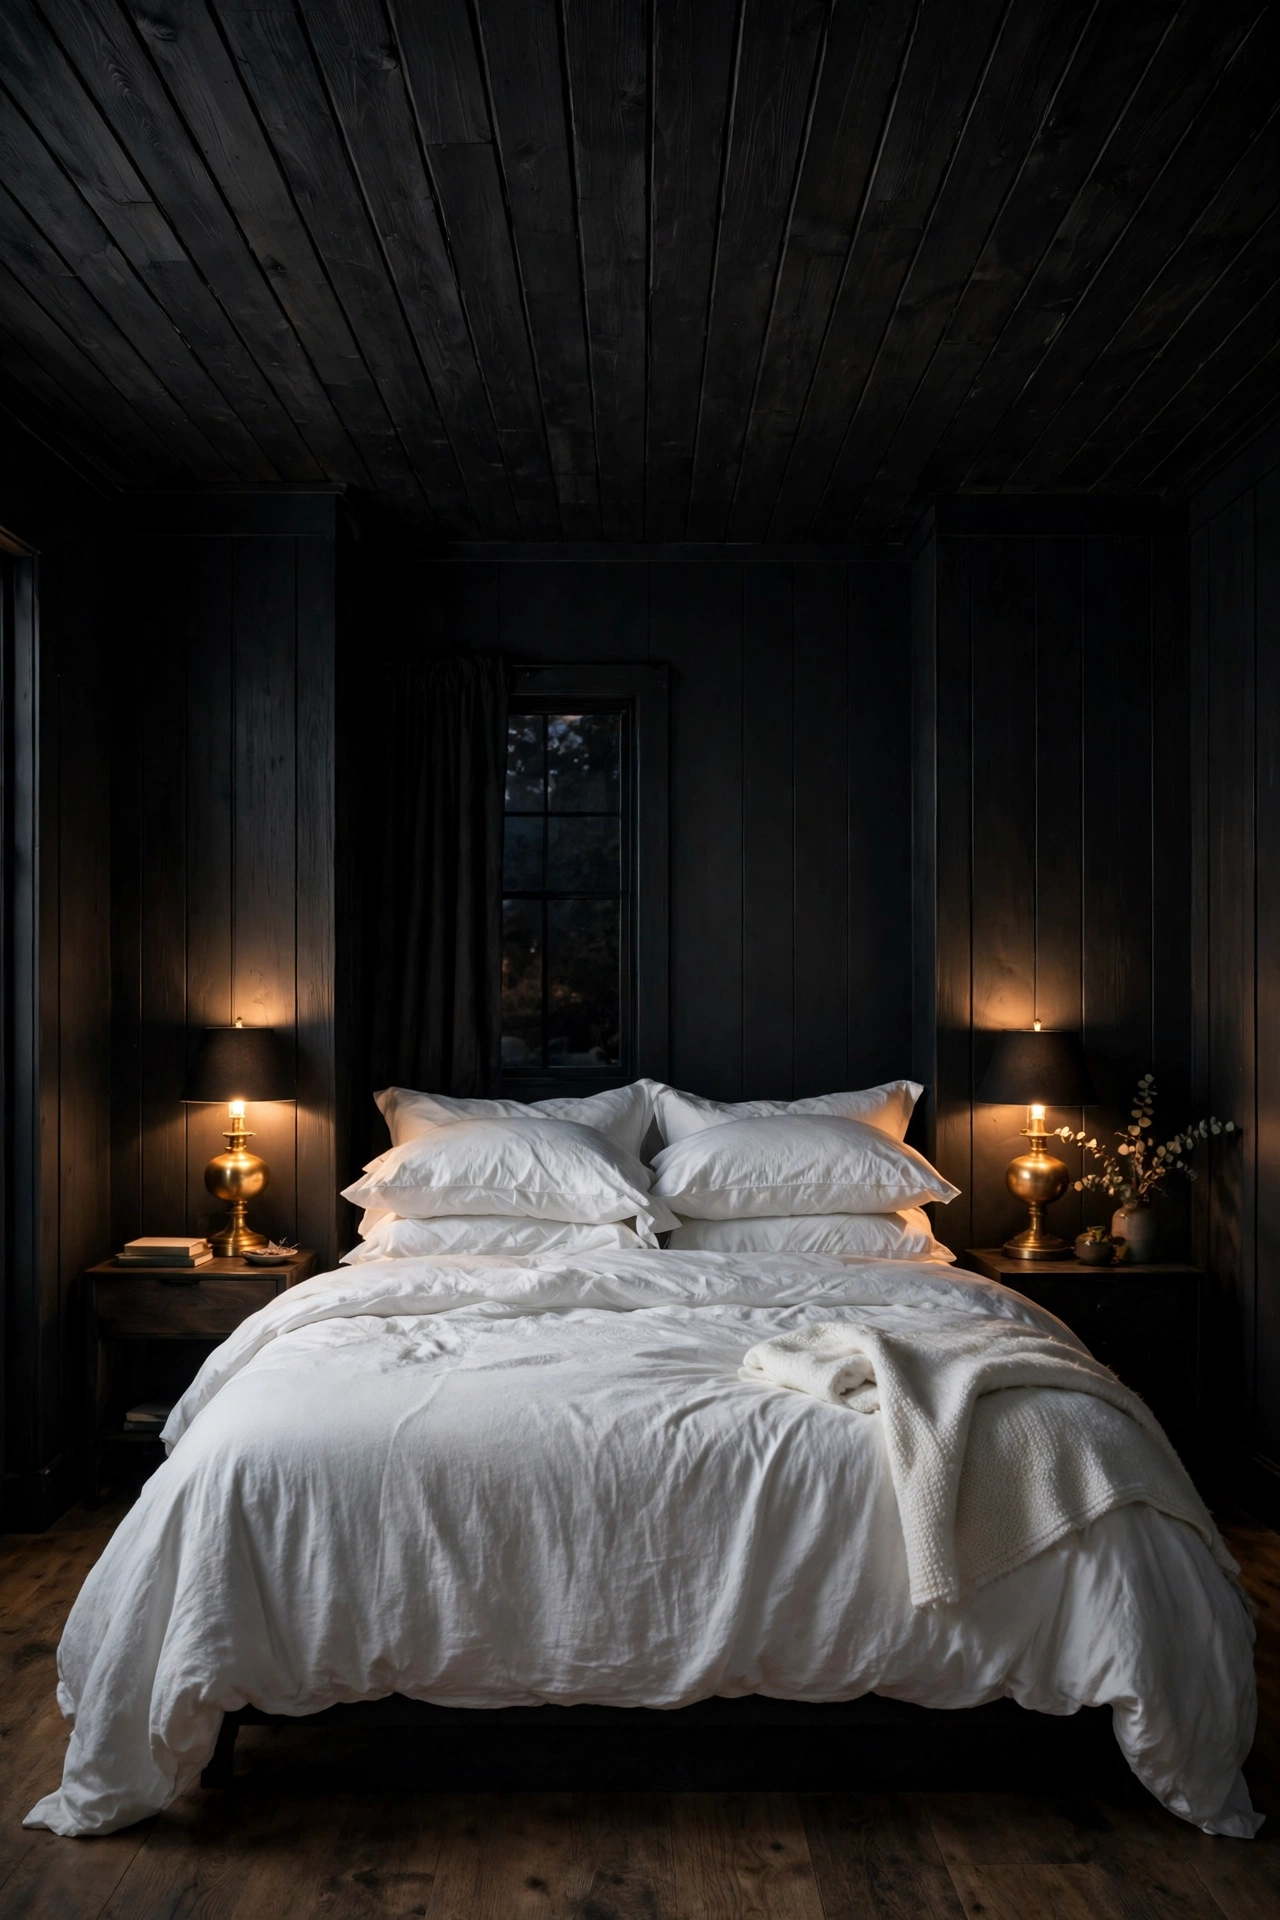
A black ceiling sounds terrifying and looks incredible. Painted planks in a soft black (not blue-black, not jet — think “espresso at midnight”) make a bedroom feel like a cocoon and make white bedding and brass lamps pop like a magazine shoot. It works best in rooms with good natural light or strong artificial lighting, since the ceiling absorbs light instead of bouncing it.
Dark ceilings pair beautifully with dark, romantic bedroom palettes, and these black romantic bedroom ideas are full of ways to balance a dramatic ceiling with bedding, lighting, and accents that keep the room sultry instead of gloomy.
Try this: use flat or matte paint — any sheen on a black ceiling shows every imperfection, while matte hides a multitude of DIY sins.
13. Cozy Bedroom Plank Ceiling
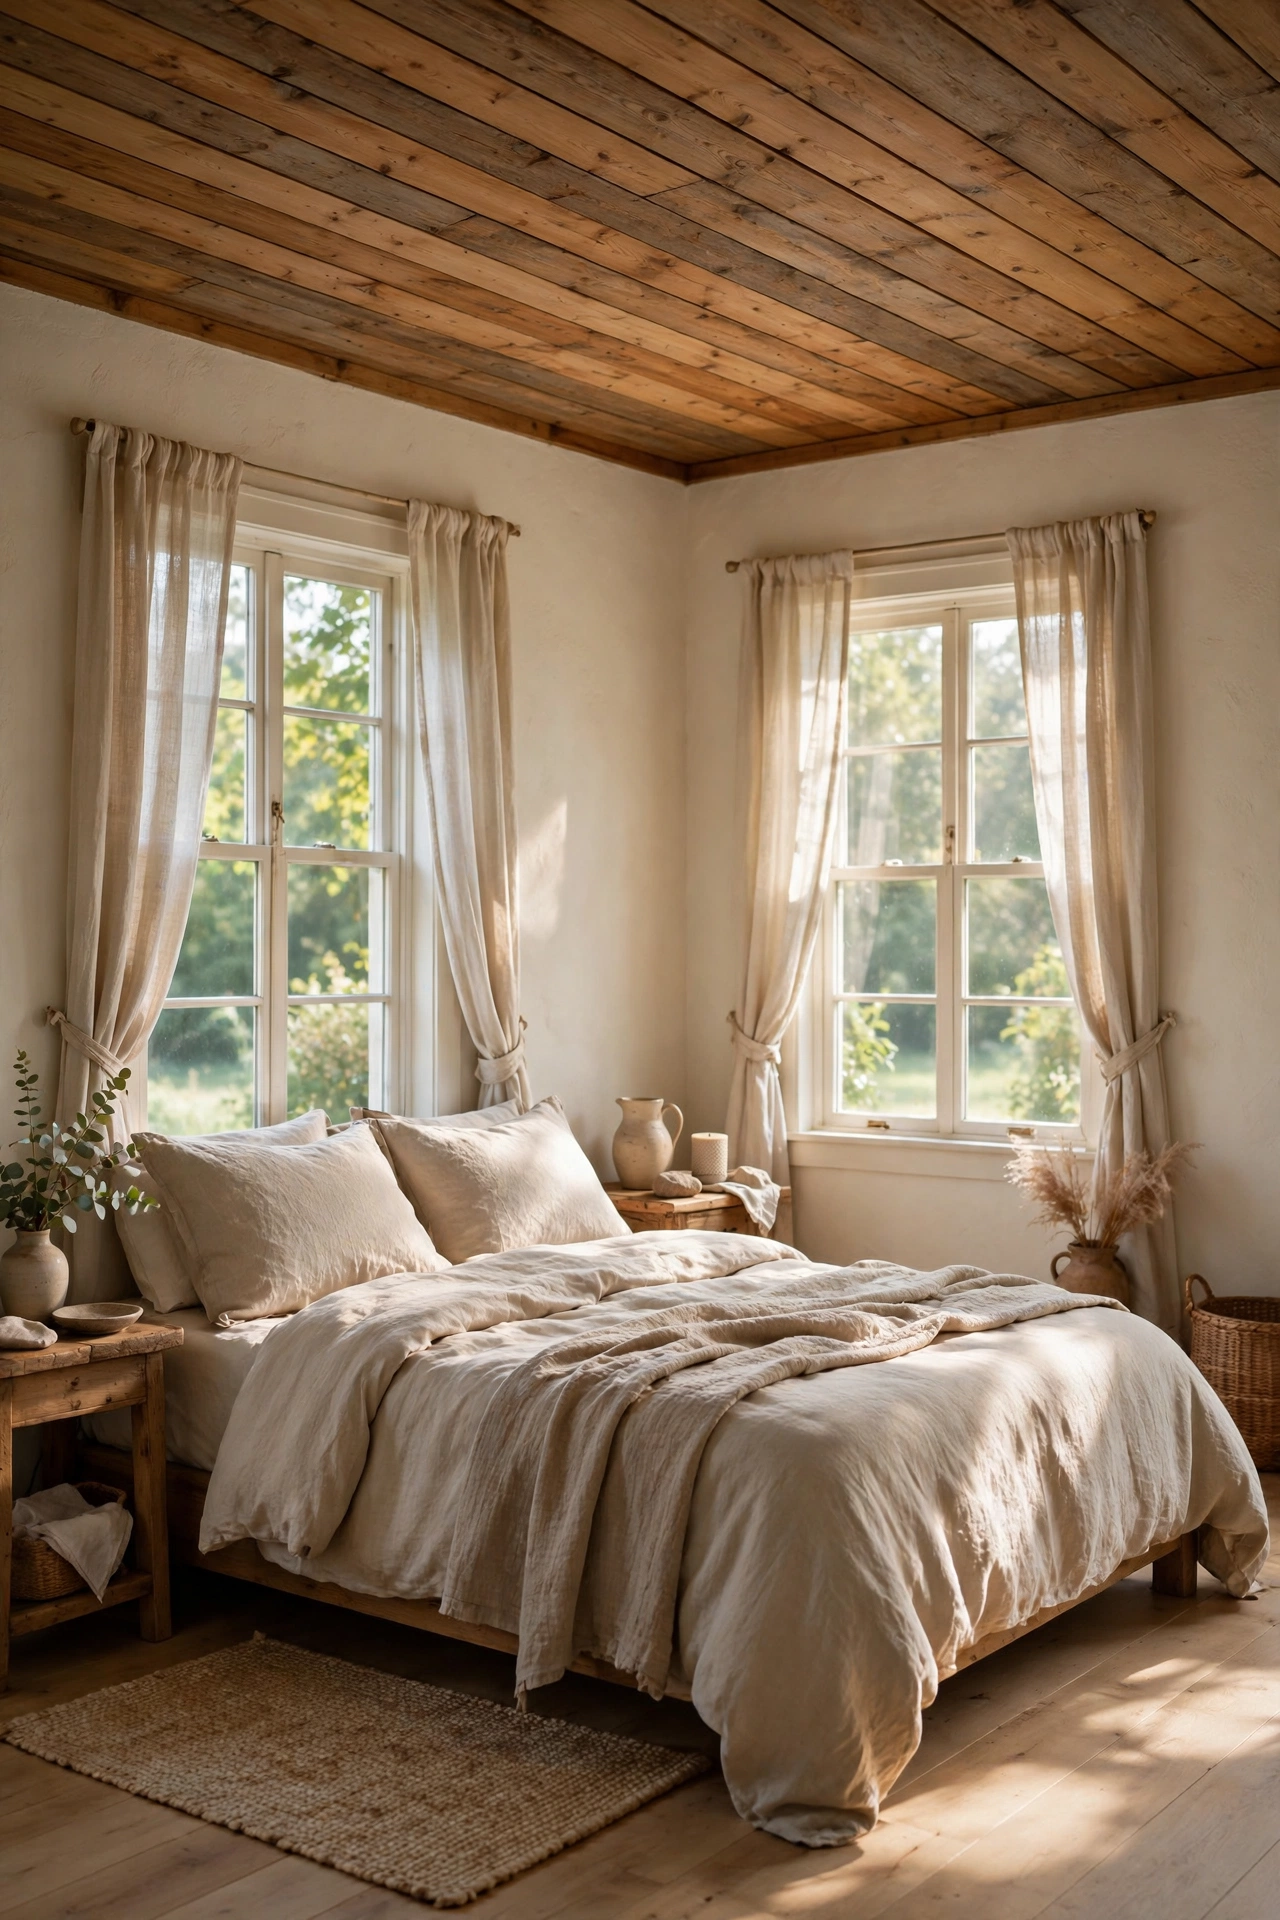
The bedroom is where plank ceilings earn their keep. You spend more time looking at your bedroom ceiling than any other — lying in bed, half-awake, staring upward. Warm natural planks make that view feel like a cabin retreat instead of a blank slab. Keep walls light and bedding neutral so the ceiling is the star, and add a simple fan or a pretty flush-mount fixture that does not fight the wood.
Try this: run the planks in the direction of the bed’s length — it draws the eye toward the headboard wall and makes the room feel longer.
14. Spa-Like Bathroom Plank Ceiling
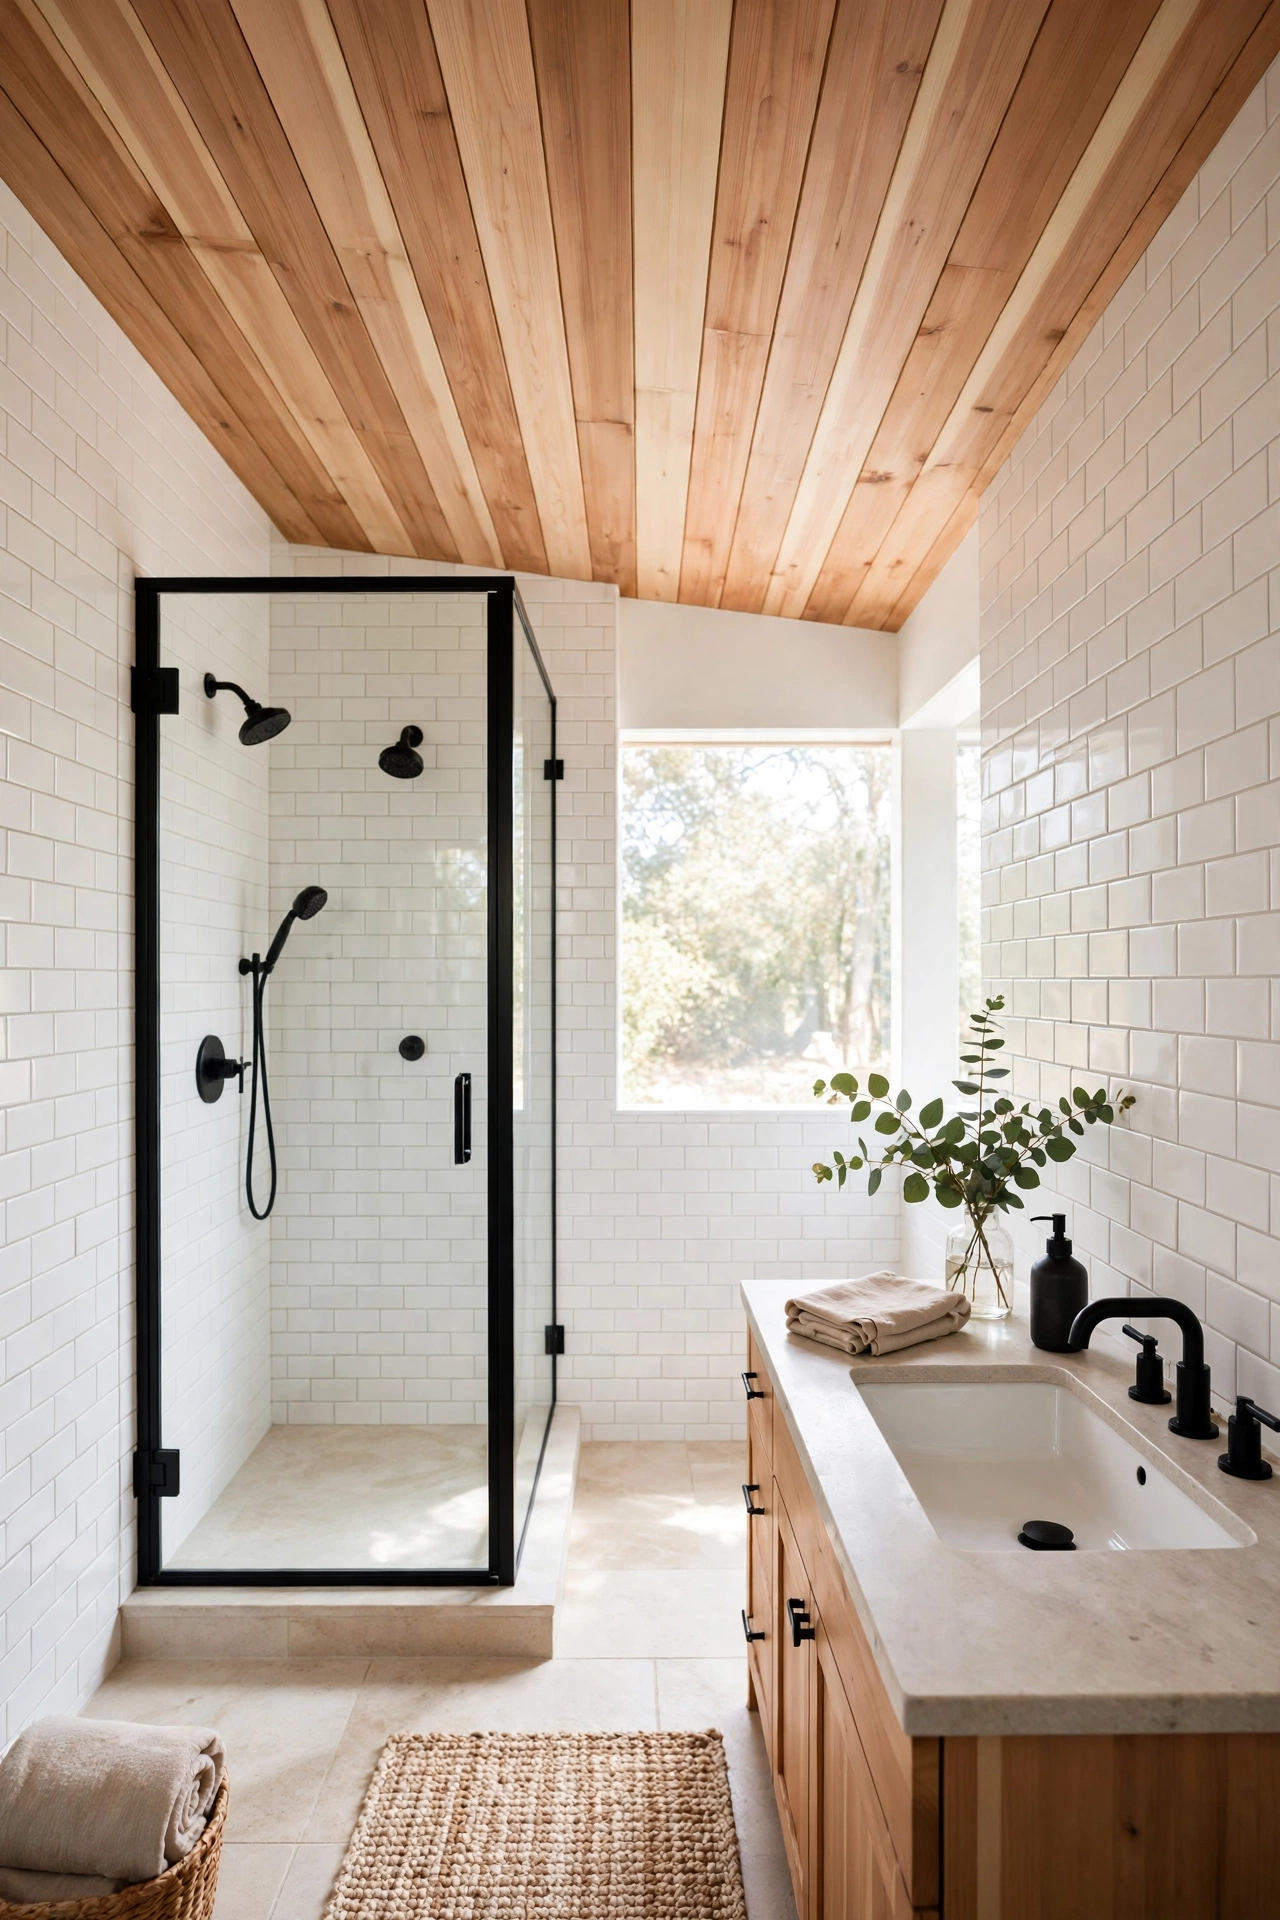
Wood in the bathroom sounds risky, but with the right finish it is one of the prettiest upgrades you can make. Light pine or cedar planks on the ceiling turn a plain bathroom into a spa — especially paired with white tile and black fixtures. The key is ventilation and finish: a quality bath fan plus a moisture-resistant finish (marine-grade or exterior poly) keeps the wood happy for years.
Ceilings deserve as much design attention in the bath as anywhere else, and The Spruce’s bathroom ceiling ideas show how shiplap, wood paneling, and bold paint choices can turn a forgotten surface into the room’s best feature.
Try this: avoid installing raw wood directly over the shower — use PVC or composite “wood-look” planks in the wet zone and real wood everywhere else.
15. Farmhouse Kitchen Plank Ceiling
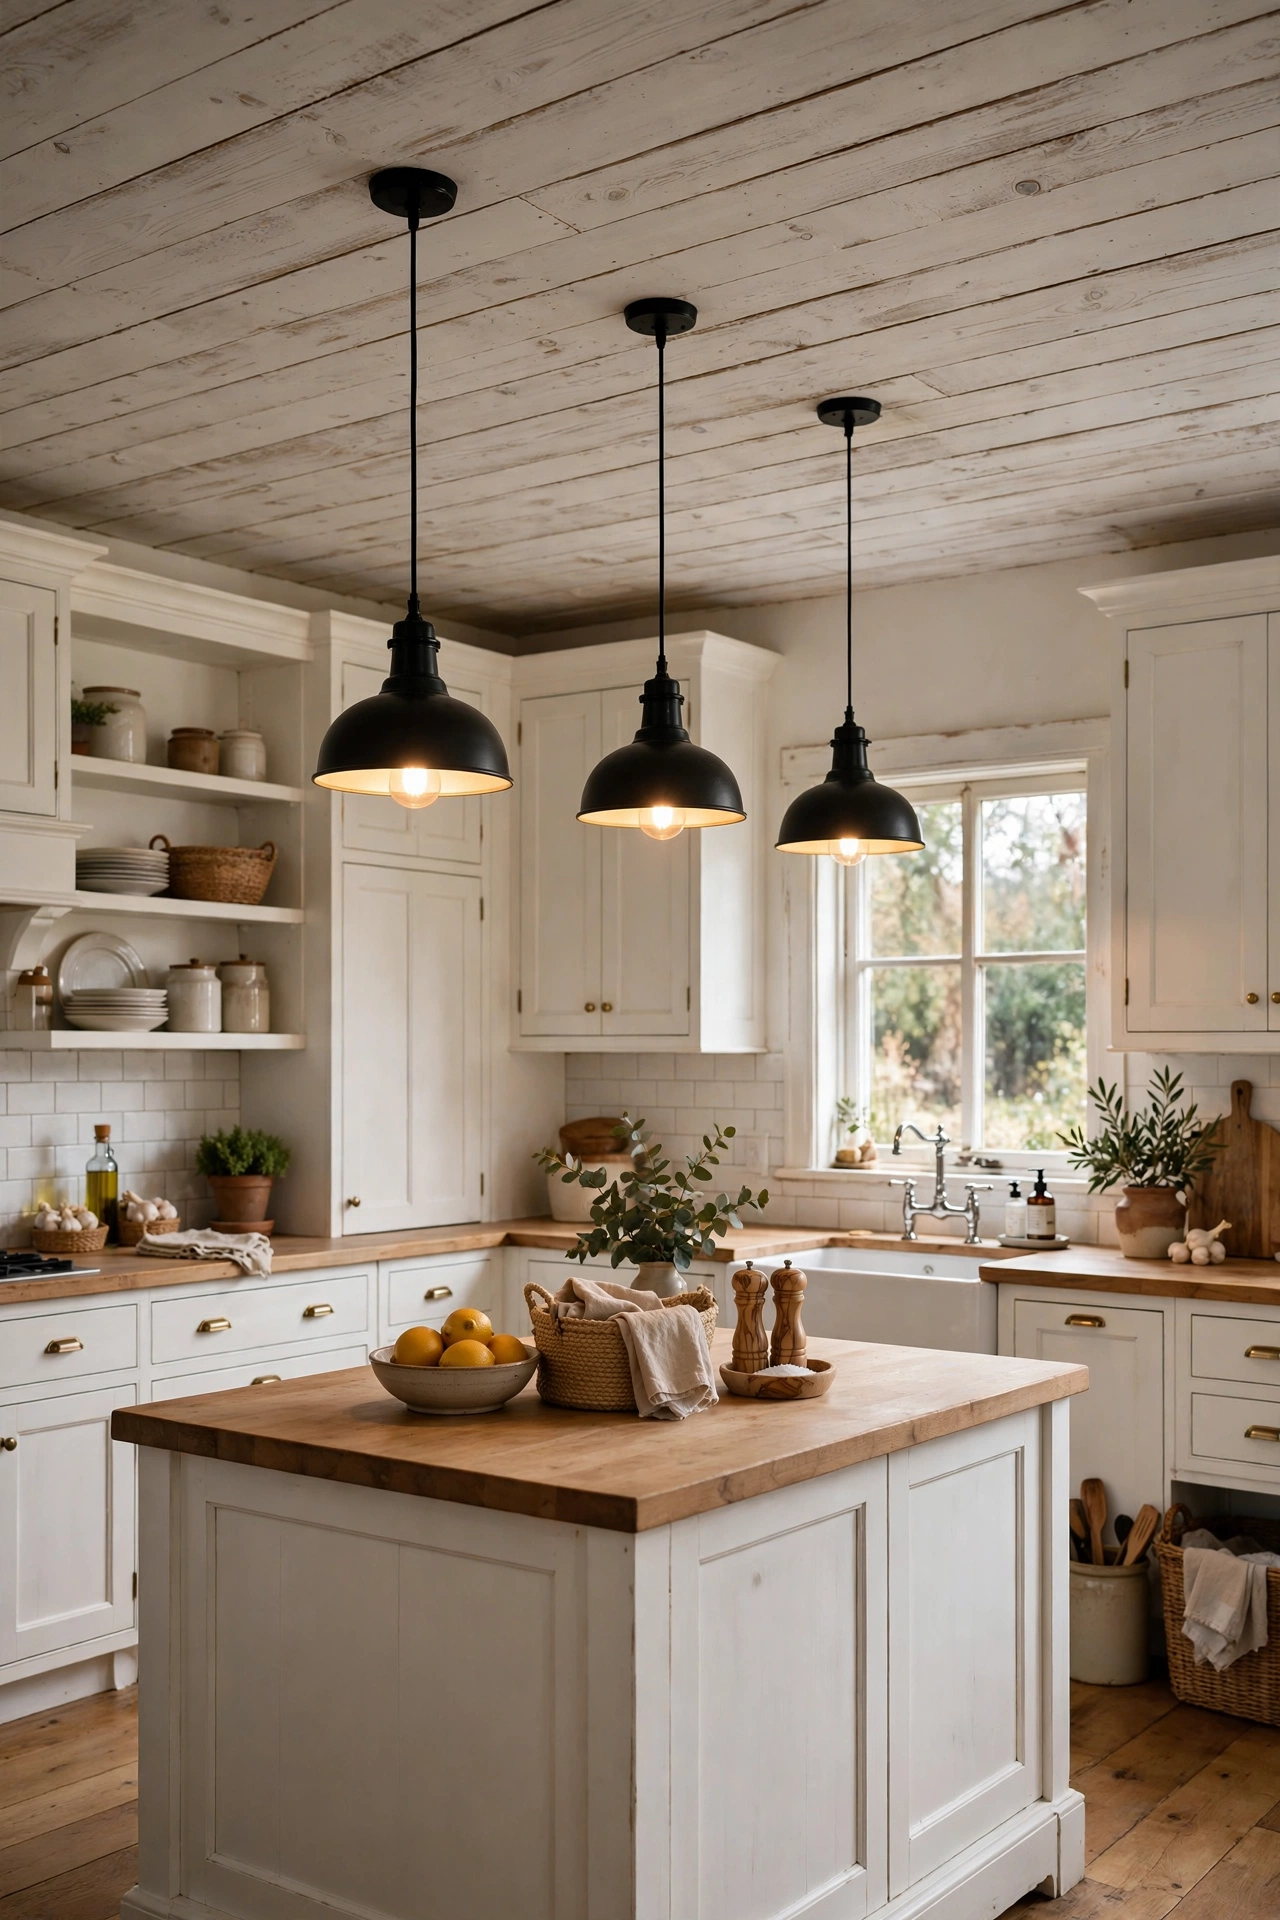
Kitchens get all the design attention at eye level and none above it — which is a shame, because a planked kitchen ceiling ties the whole room together. Whitewashed or soft-white planks keep a kitchen bright while adding farmhouse warmth that plain drywall cannot. And the wood gives pendant lights and pot racks something beautiful to hang from visually.
A plank ceiling also changes how your kitchen lighting feels, so if you are refreshing both at once, these creative kitchen lighting transformations pair pendant and under-cabinet ideas with the kind of warm wood backdrop that makes every fixture look better.
Try this: install a simple wood mounting block where each pendant or fan will hang — it gives you a solid anchor point and looks intentional against the planks.
16. Budget Plywood Faux-Plank Ceiling
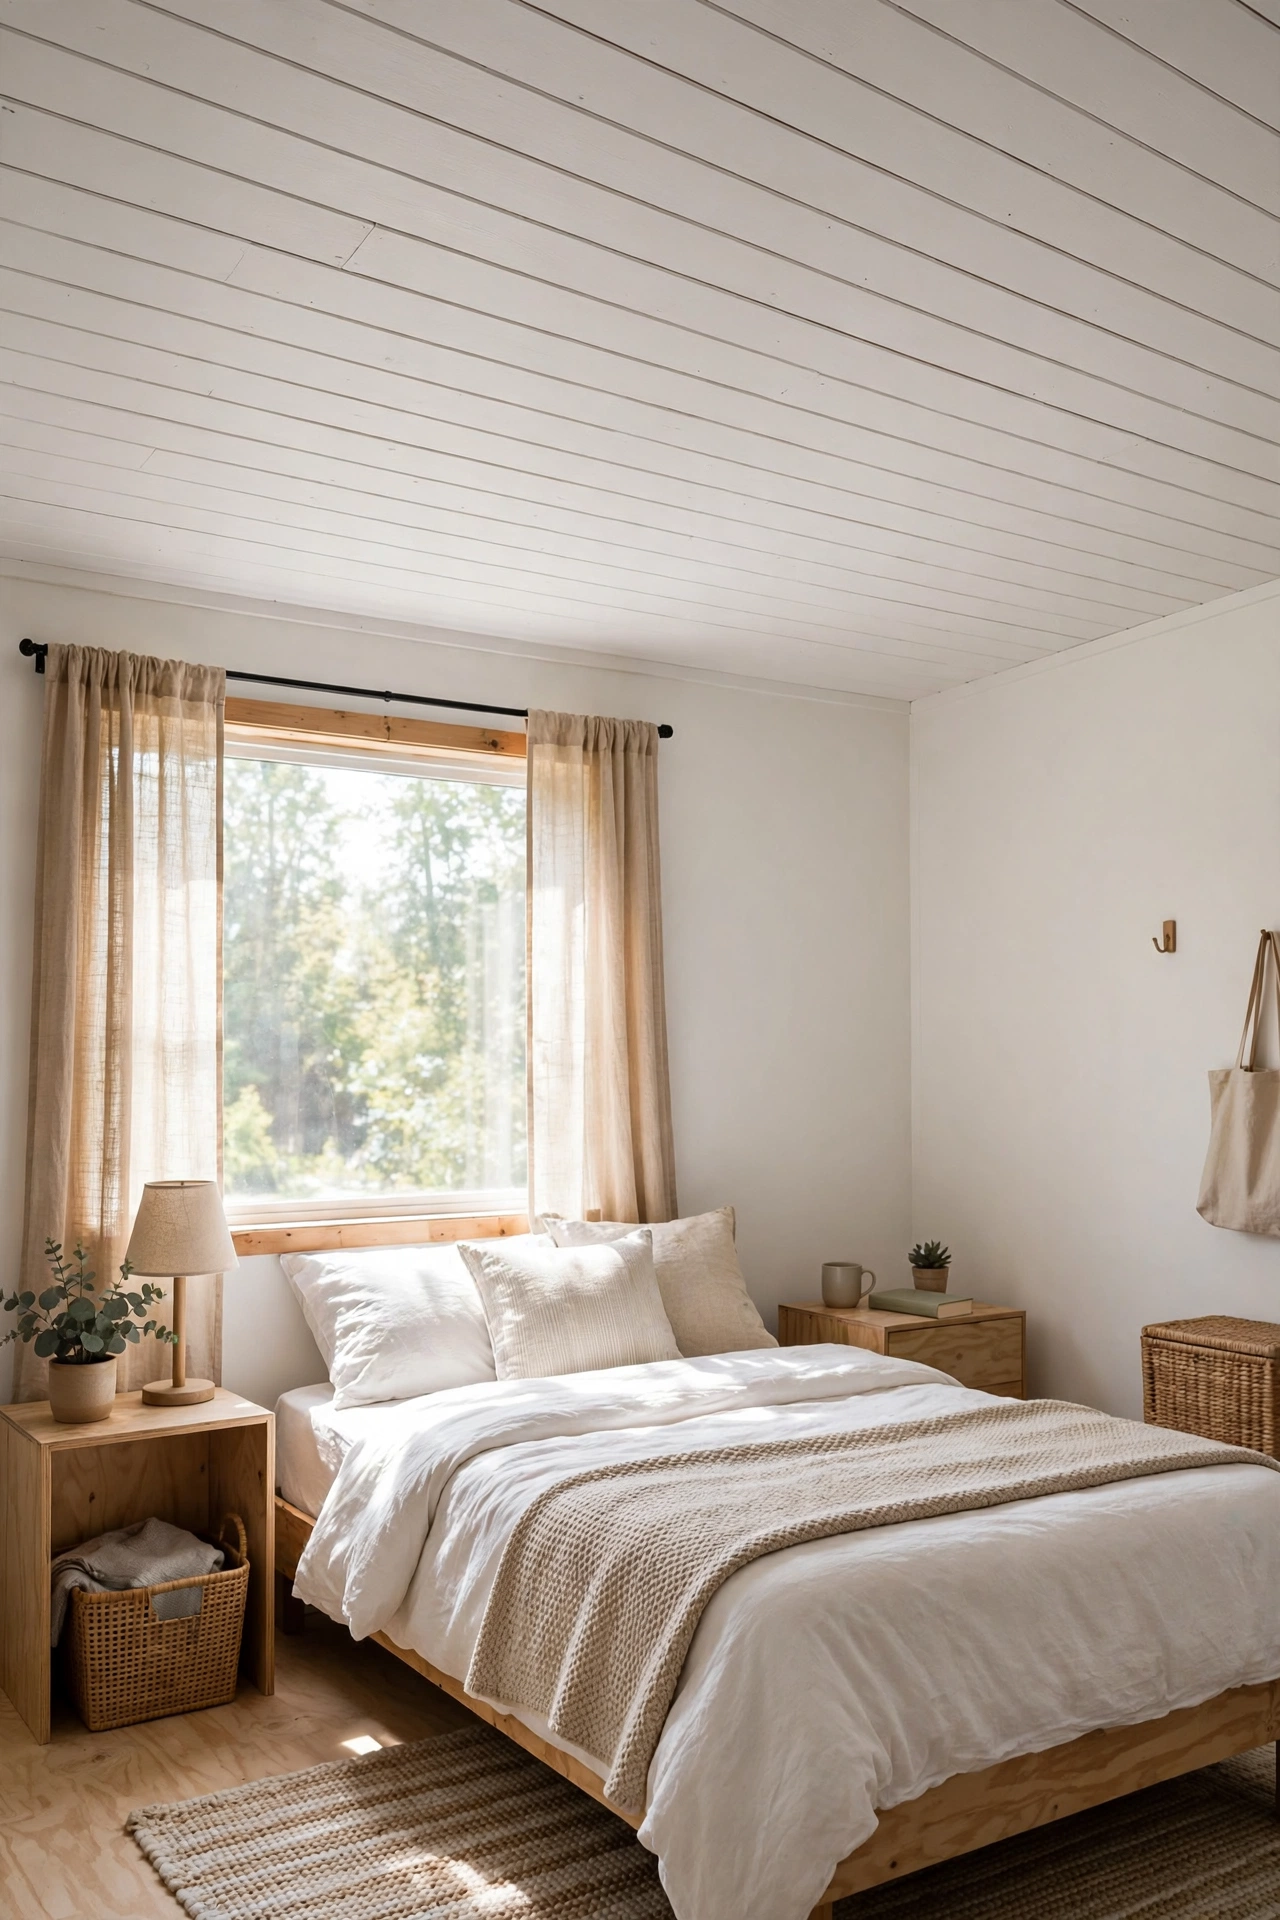
Here is the open secret of budget farmhouse bloggers: most “shiplap” ceilings are ripped plywood. A sheet of 1/4-inch underlayment plywood, ripped into 6-inch strips on a table saw and installed with small gaps, looks remarkably like real shiplap once painted — for under $1 per square foot. Sand the edges lightly so the strips do not look razor-cut, and use a nickel as a gap spacer as you go.
Try this: buy the plywood a week early and let it acclimate flat in the room — plywood that is still adjusting to your home’s humidity will warp after installation.
17. Stenciled or Hand-Painted Pattern
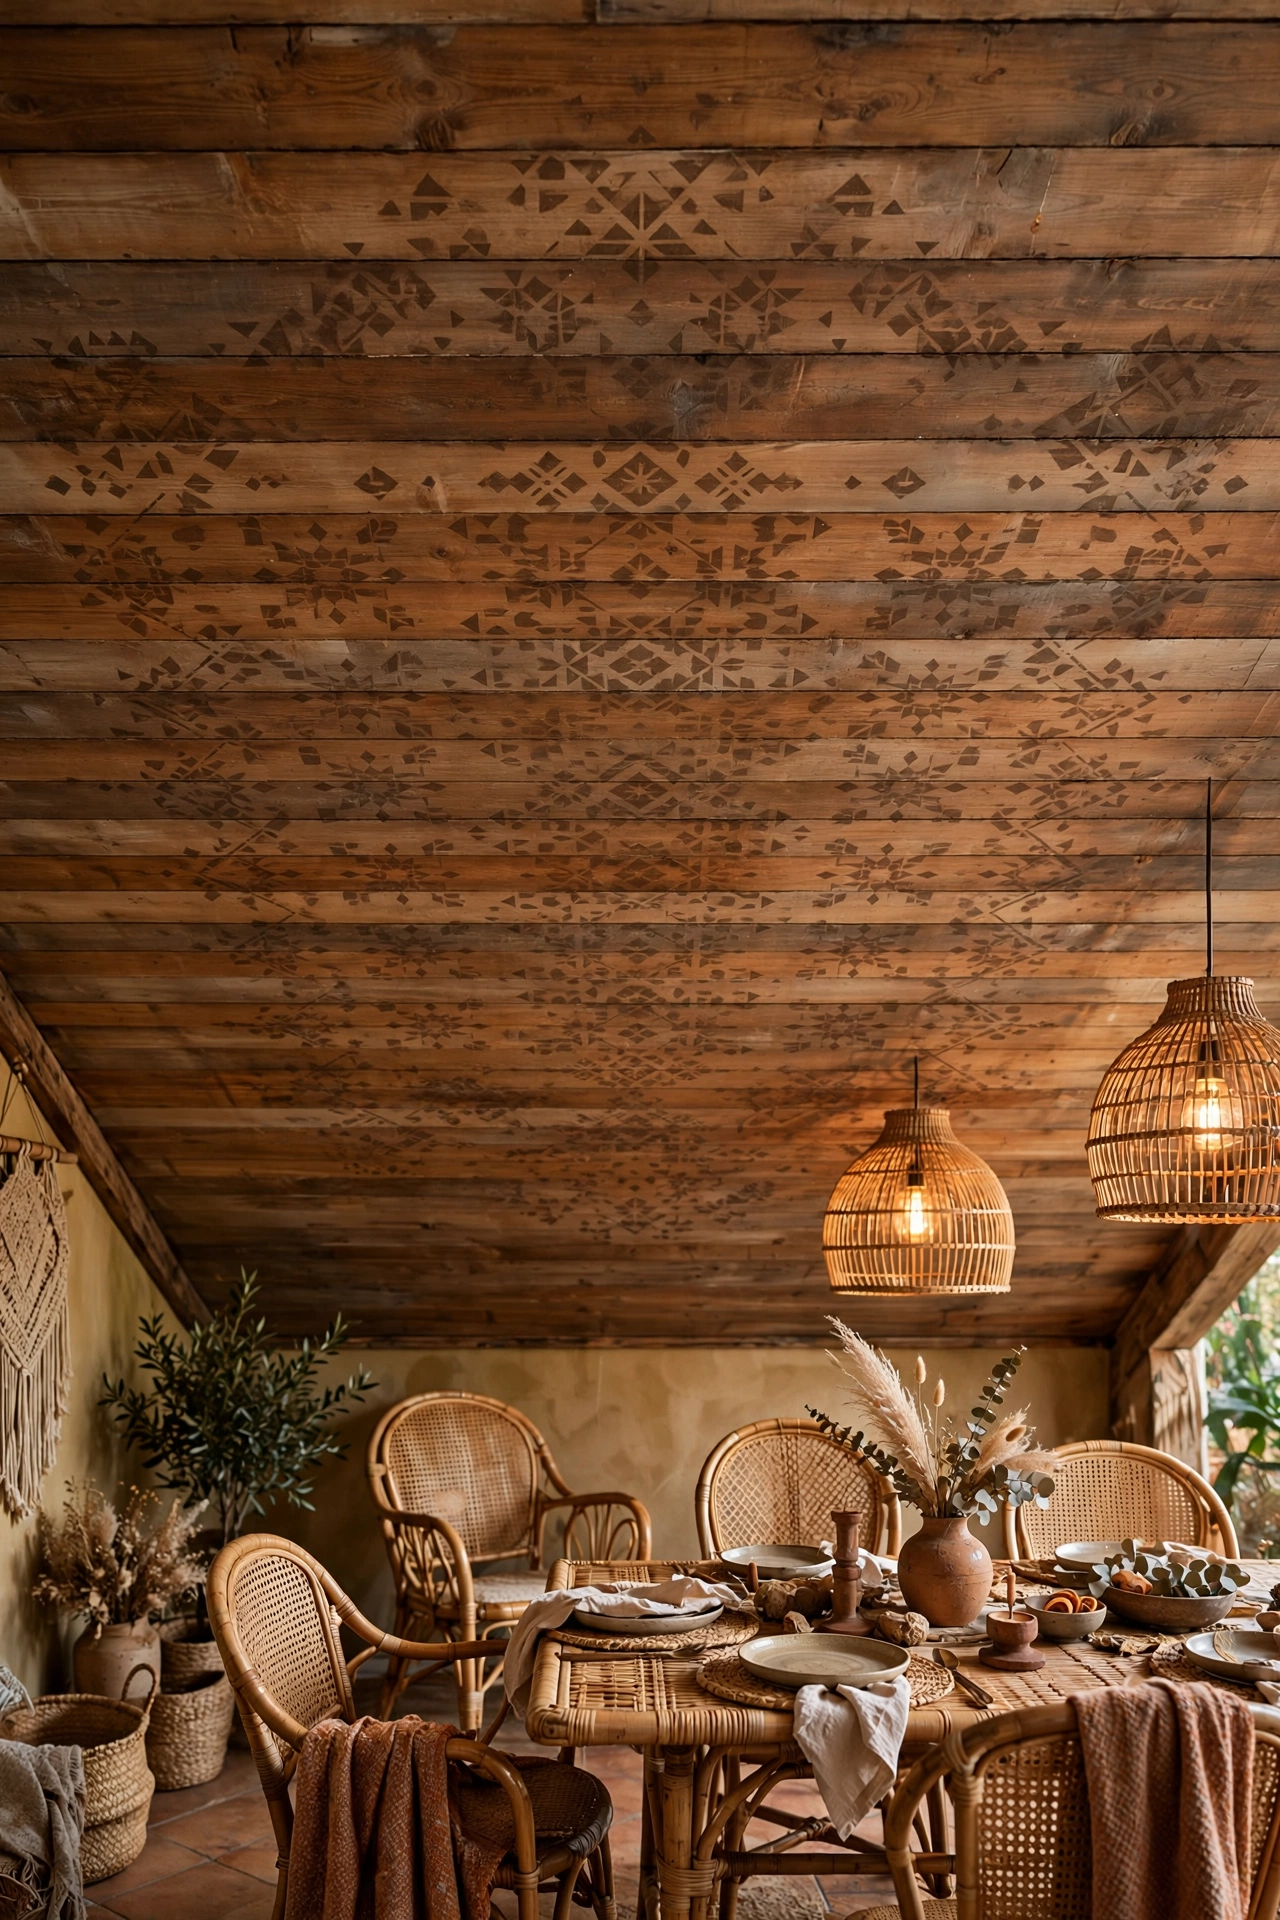
Once your planks are up, the ceiling becomes a canvas. A large stencil — Moroccan tile, damask, or a simple geometric repeat — painted in a tone-on-tone color over stained or painted planks adds pattern without wallpaper’s commitment. Tone-on-tone (slightly darker or lighter than the base) looks sophisticated; contrasting colors look bold and boho.
Try this: stencil BEFORE you seal with poly, then seal over the stencil — it locks the pattern in and gives the whole ceiling one uniform sheen.
18. Wide-Plank Rustic Ceiling
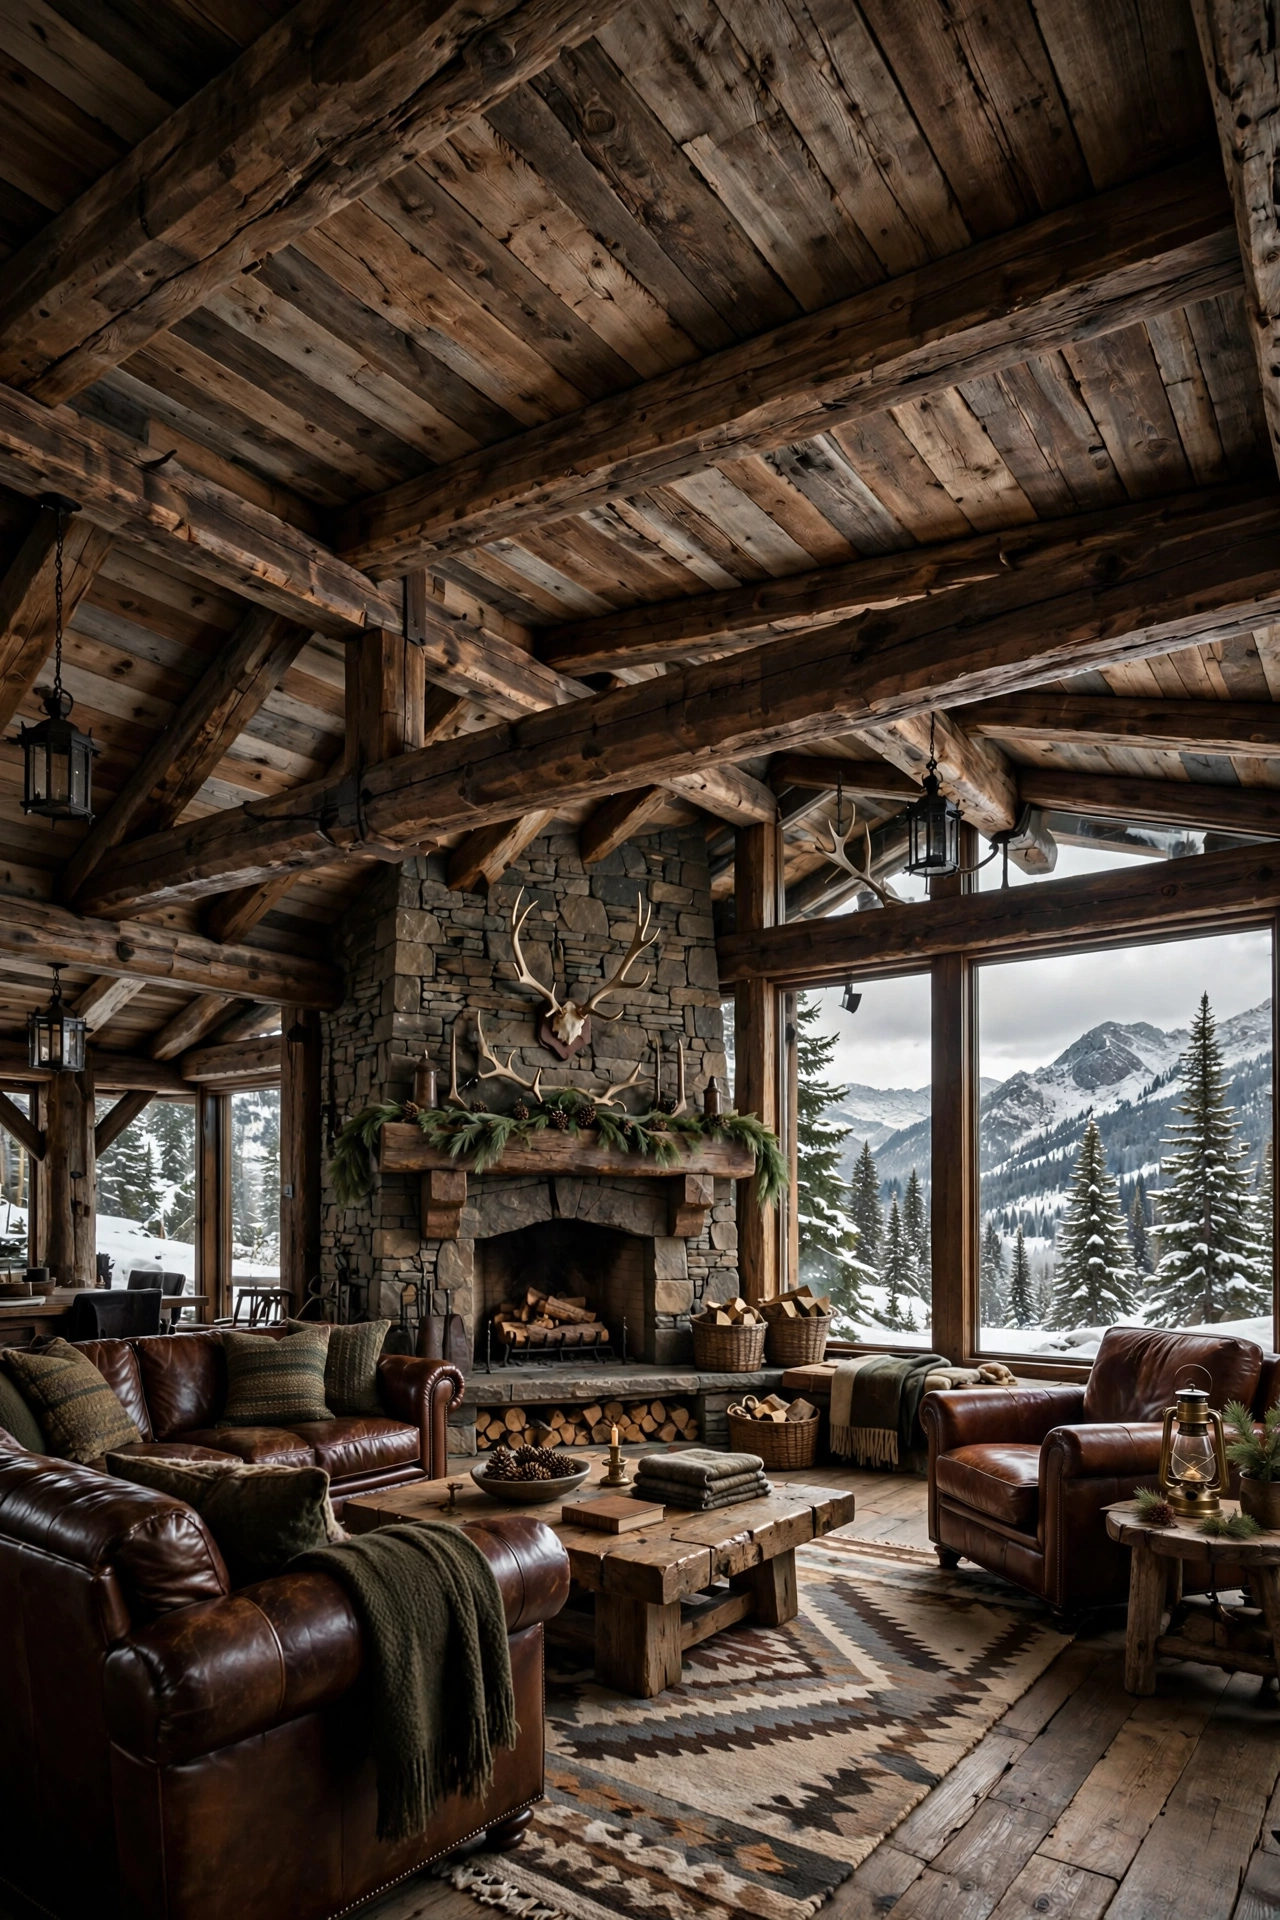
Standard 6-inch planks are classic, but 10- or 12-inch wide planks make a bolder, more modern-rustic statement — fewer seams, bigger grain, more drama. Wide planks suit large rooms and high ceilings; in a small room they can feel heavy, so scale the plank width to the room. Look for “wide plank pine” at lumber yards, or rip your own from wider boards.
Try this: wide planks move more with humidity, so leave a slightly bigger expansion gap at the walls and cover it with chunky crown molding.
19. Mixed-Stain Patchwork Ceiling
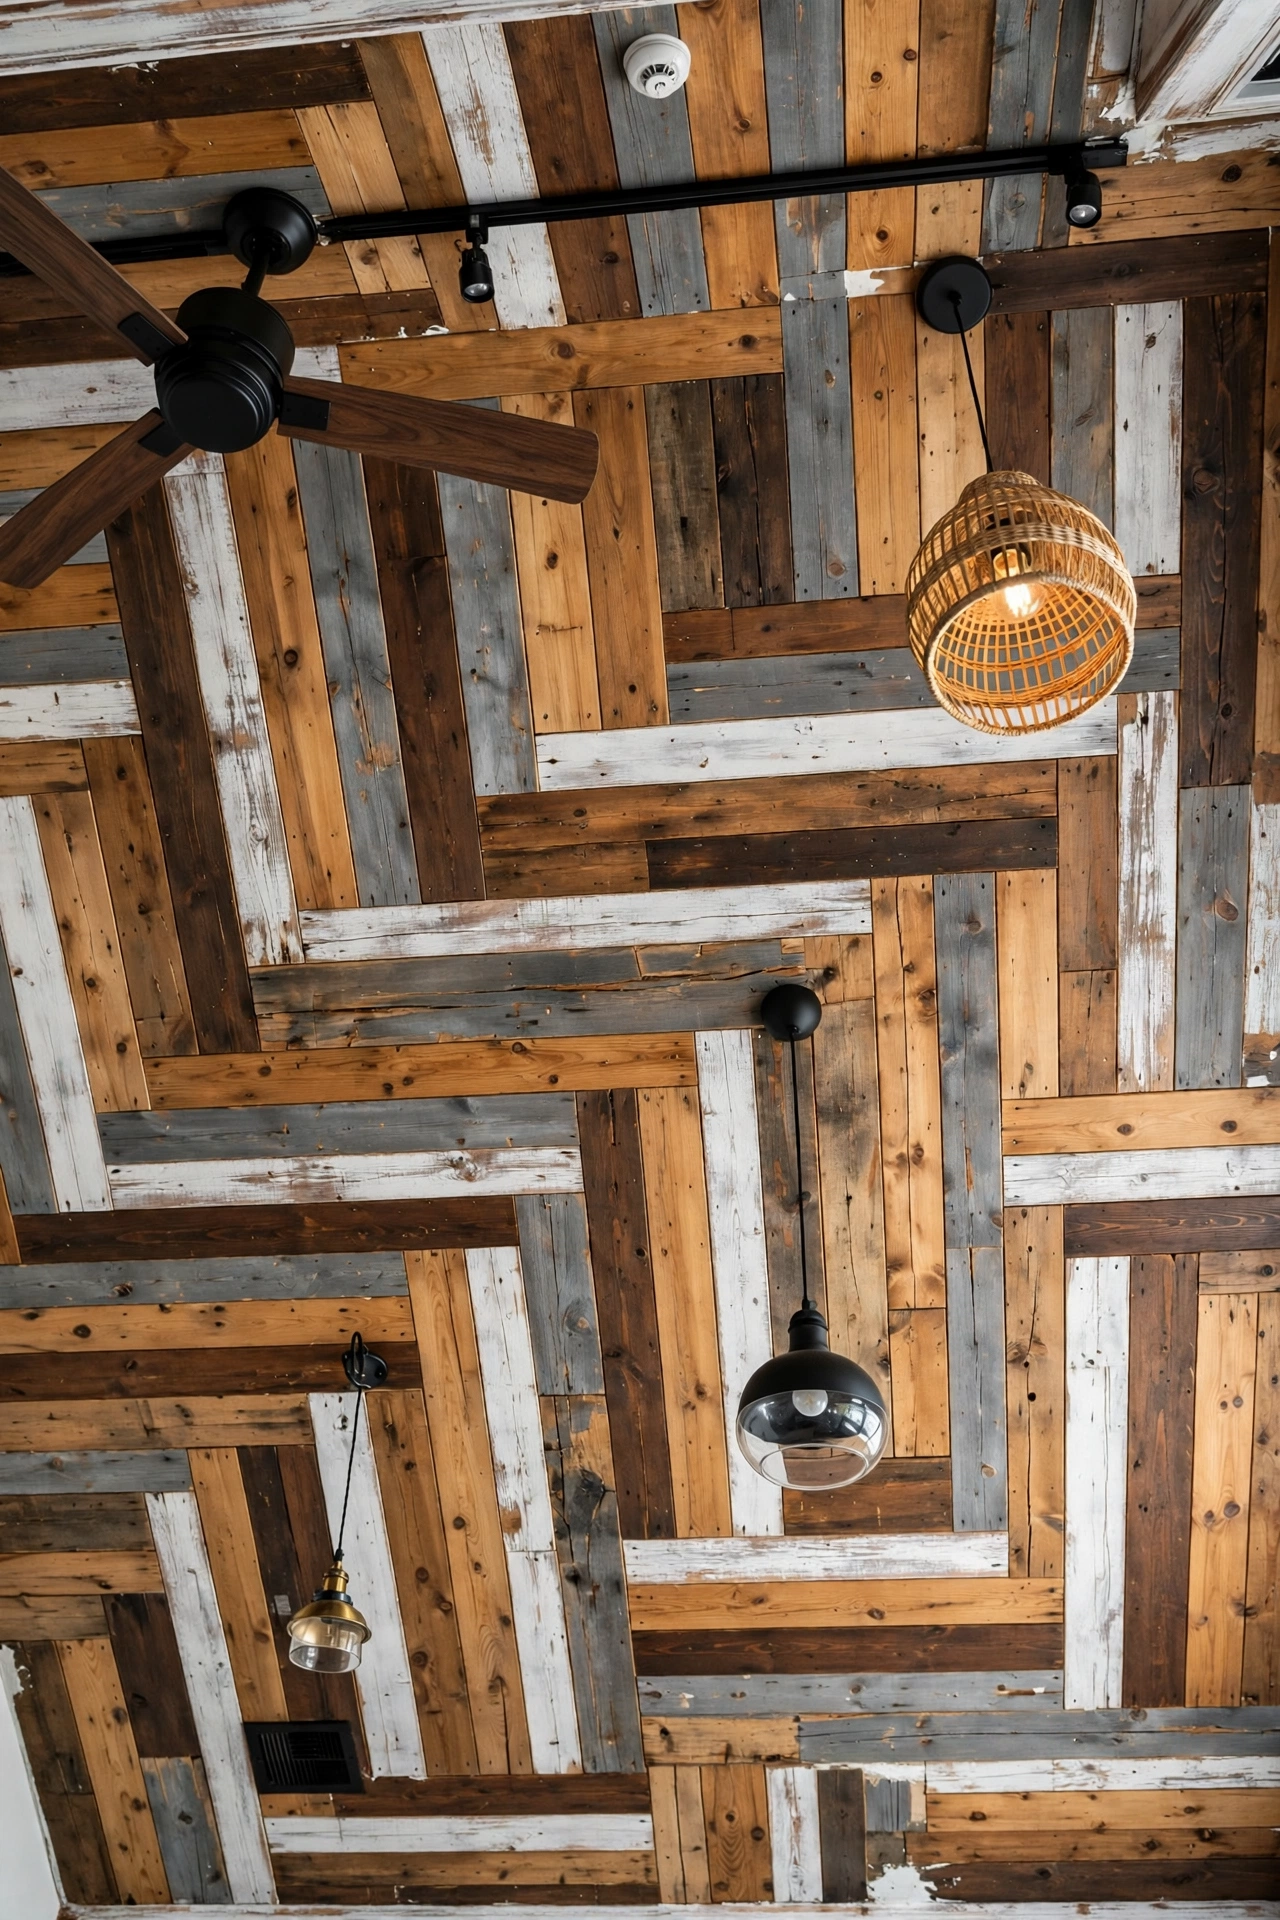
Why pick one stain when you can use five? Stain individual boards in a mix of complementary tones — honey, walnut, gray, natural, whitewash — and install them randomly for a patchwork quilt effect. It is the perfect use for leftover stain cans and mis-tinted “oops” paint from the hardware store. The key is keeping all the tones in the same family (all warm or all cool) so it reads as curated, not chaotic.
Try this: lay out a full row on the floor first and photograph it — the camera reveals clumping and awkward neighbors your eye misses in person.
20. Peel-and-Stick Wood-Look Planks
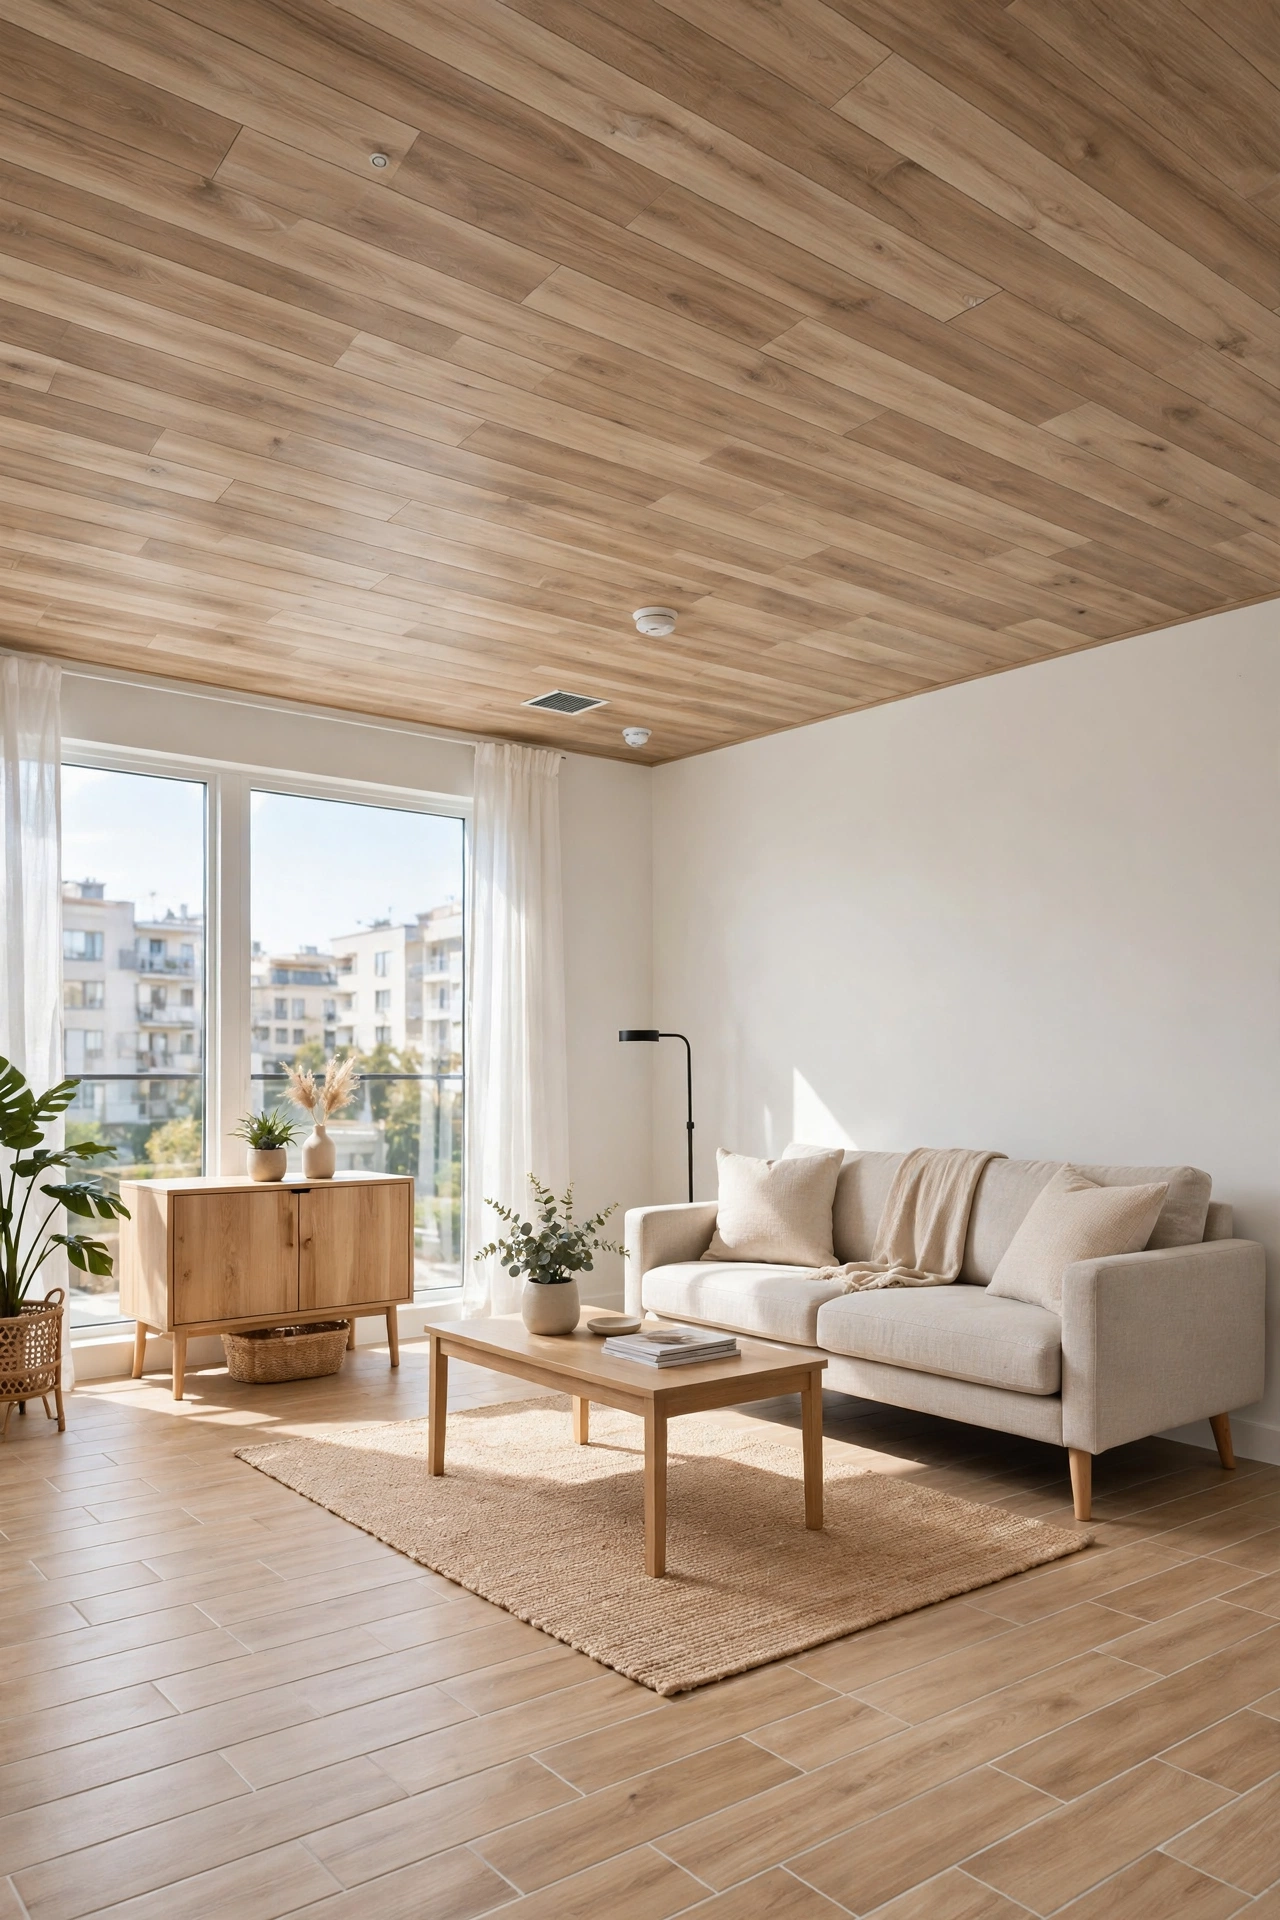
Renters, this one’s for you. Peel-and-stick wood-look planks (real thin wood veneer with adhesive backing, or high-quality vinyl) go up with no nails, no nail gun, no landlord drama — and come back down when you move. They are lighter than real planks, which matters on a ceiling, and the best ones look genuinely woody from normal viewing distance. Not forever-wood, but a fantastic 2–3 year upgrade.
Try this: wipe the ceiling with a degreaser (TSP substitute) before sticking — kitchen ceilings especially have a film of grease that kills adhesive.
21. Vaulted and Sloped Ceiling Planks
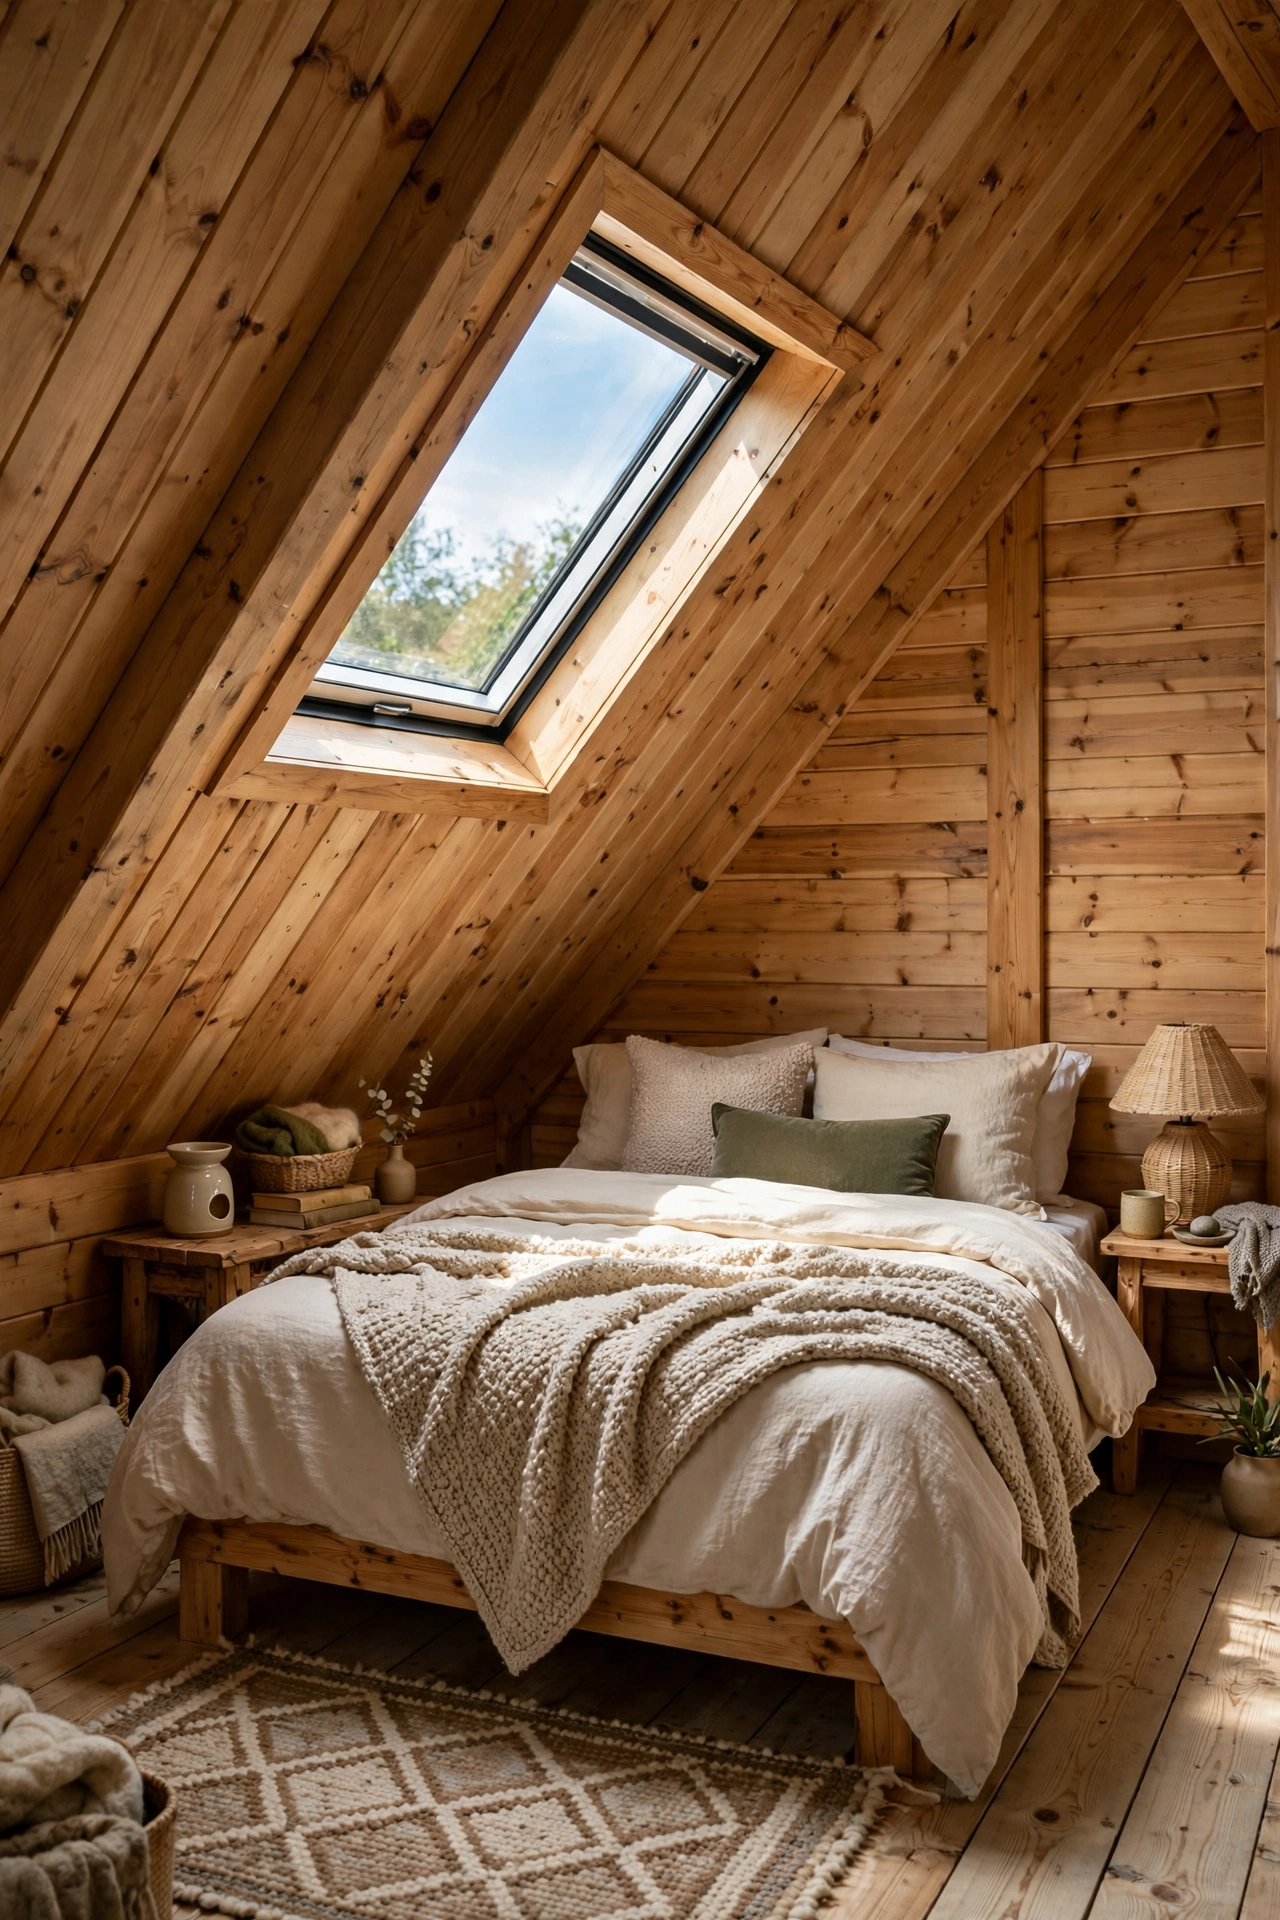
Vaulted ceilings are begging for planks. Running tongue-and-groove up the slope emphasizes the height and turns the roofline into architecture instead of just… more ceiling. Start at the bottom edge and work up so gravity helps seat each board, and expect more scaffolding time than a flat ceiling — budget a full weekend for the average vault.
Try this: rent a drywall lift or a pair of tall sawhorses with a plank across them. Holding 12-foot boards overhead while nailing is a two-person, save-your-back situation.
22. Sunroom Natural Pine Ceiling
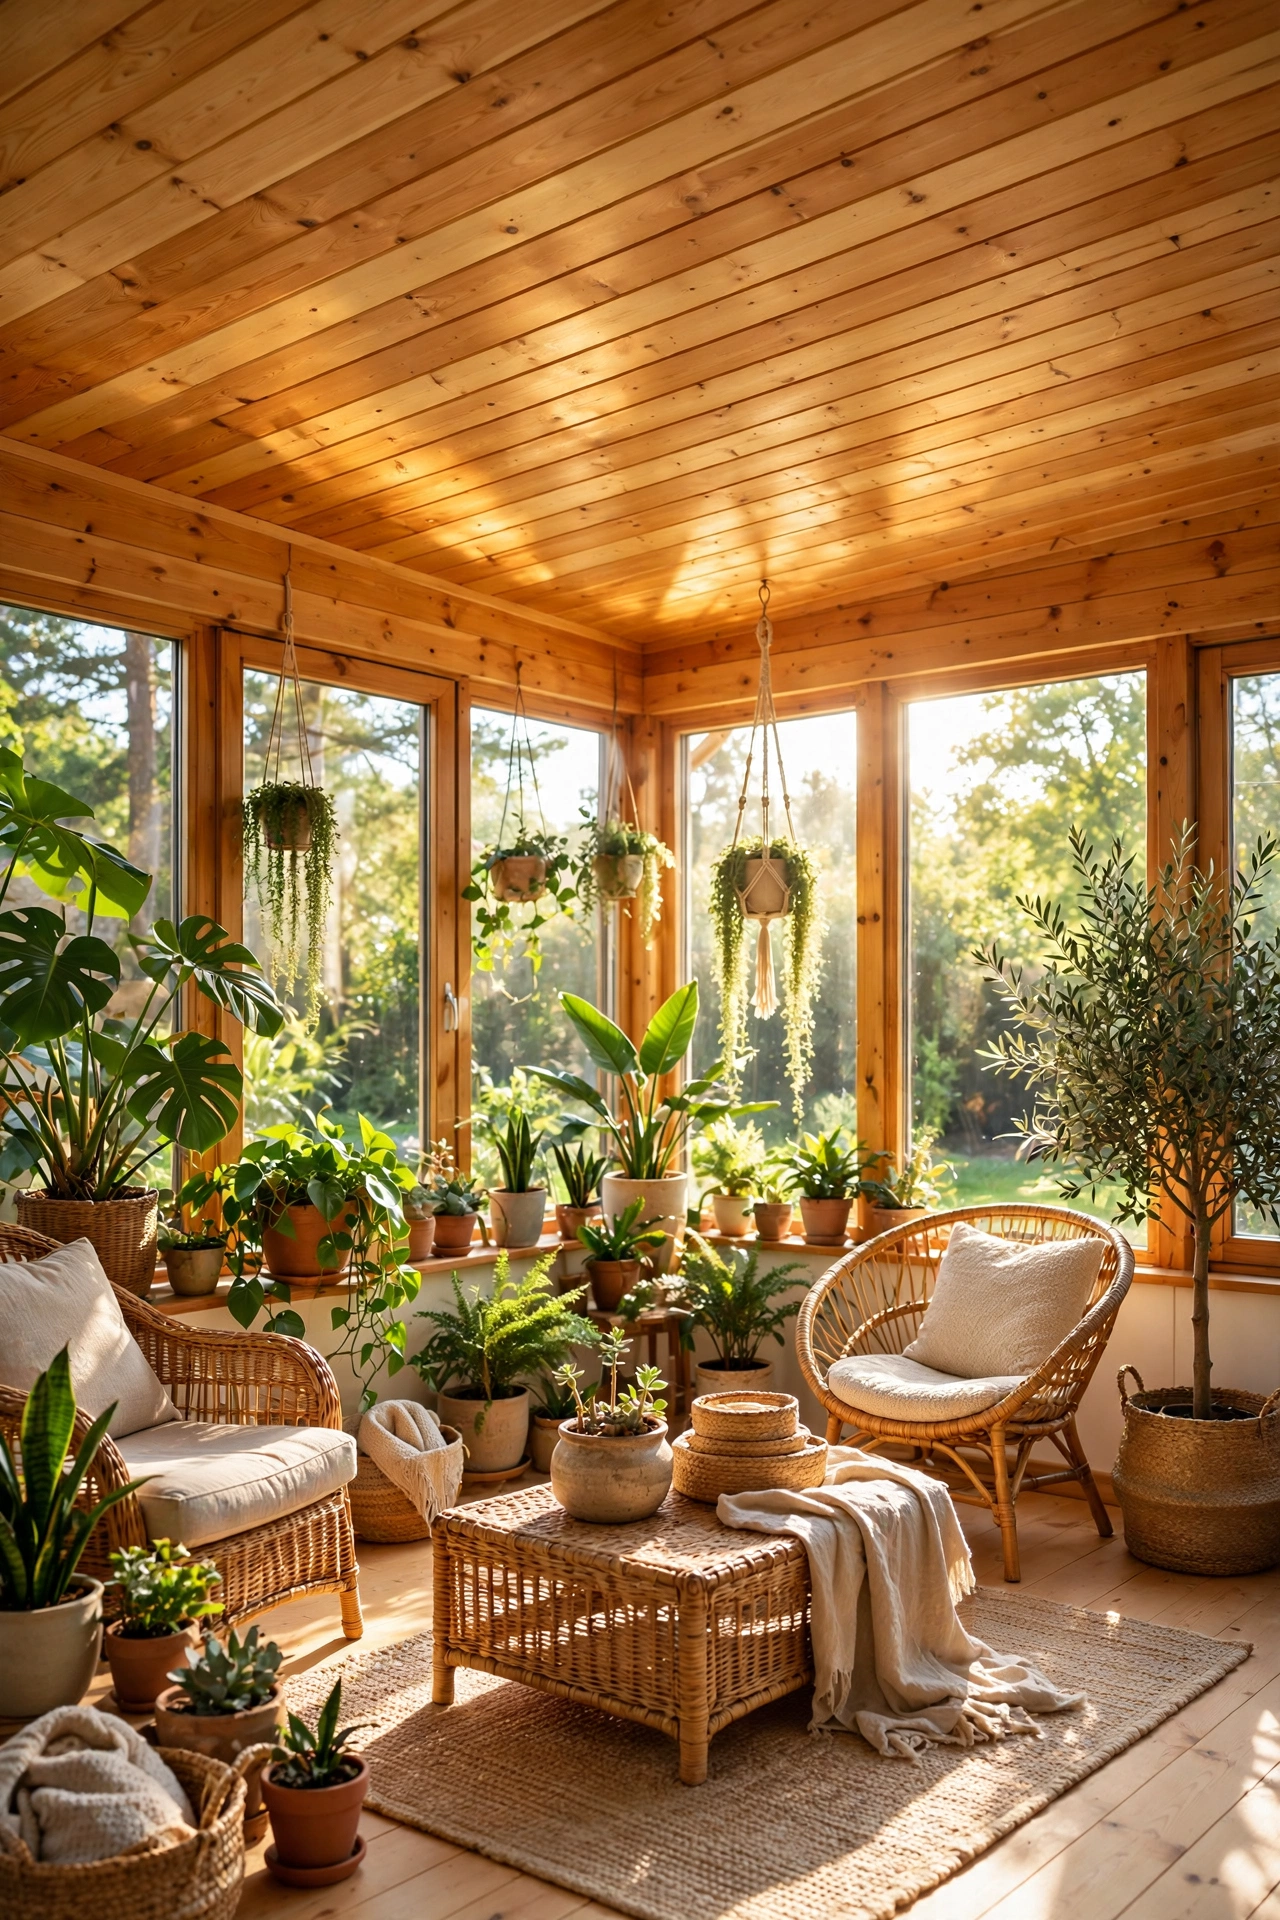
Sunrooms and three-season porches are plank-ceiling heaven: natural pine with a clear finish glows in all that daylight and makes the space feel like a treehouse. Because these rooms swing in temperature and humidity, use a flexible exterior-grade finish and leave proper expansion gaps. The result is worth it — a sunroom with a wood ceiling feels finished in a way drywall never manages.
Try this: choose a UV-resistant clear finish — constant sun will amber and darken an unprotected pine ceiling faster than you expect.
23. White Planks with Dark Wood Beams
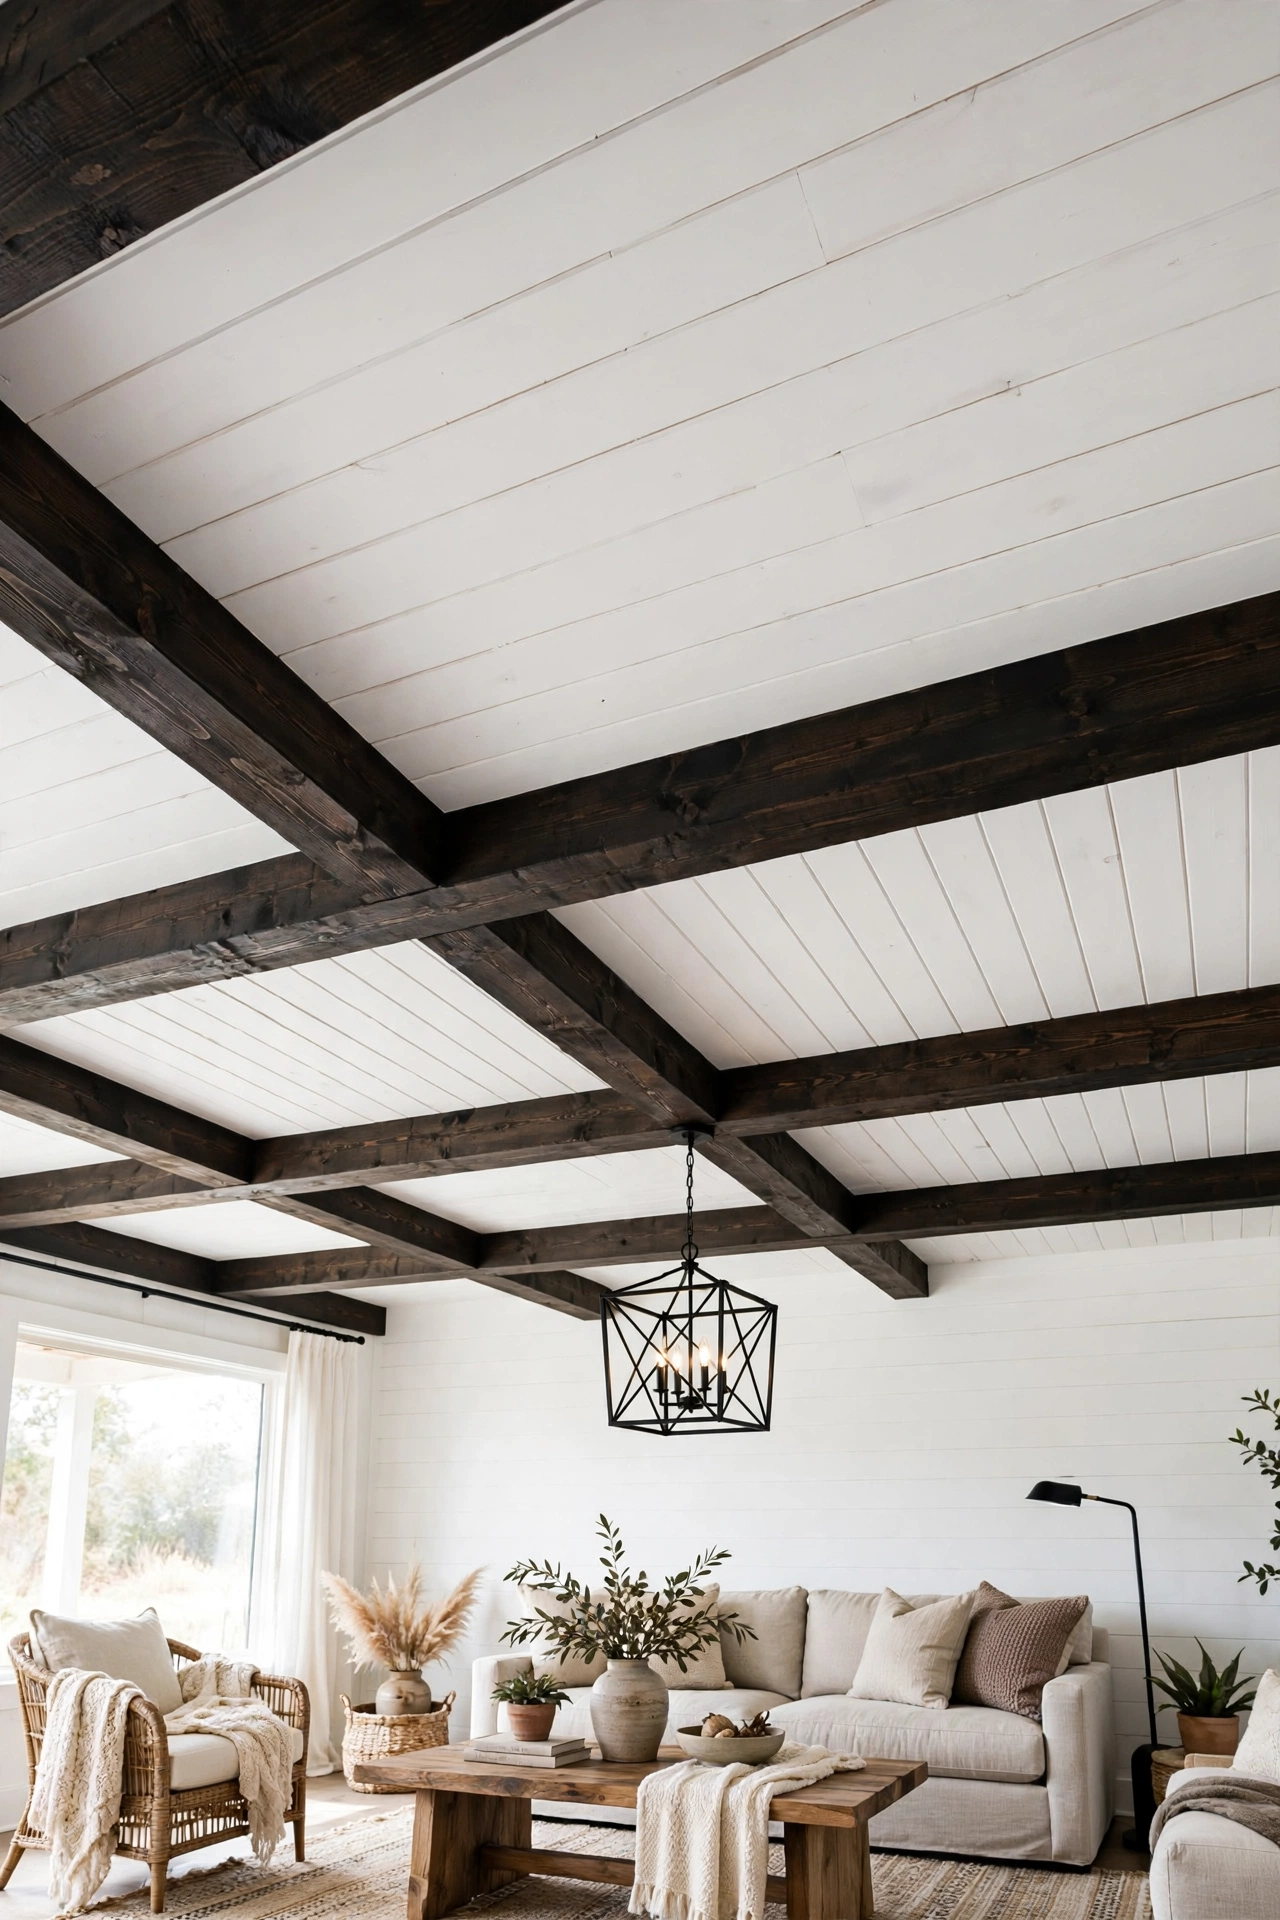
The highest-contrast, most photogenic combo in this whole list: crisp white planks crossed by dark-stained beams. The white keeps the room bright and airy, the dark beams add the architectural punch. It works in farmhouse, modern, and transitional homes alike — it is basically the “white shirt, dark jeans” of ceilings. Paint the planks first, stain the beams separately, and install the beams last.
If you are layering wood on both walls and ceiling, these decorative wall ideas help you balance all that texture so the walls and ceiling complement each other instead of competing.
Try this: wrap the beam ends into the wall with a simple corbel or trim block — beams that just “stop” at the wall look unfinished.
24. Weathered Gray Wash Finish
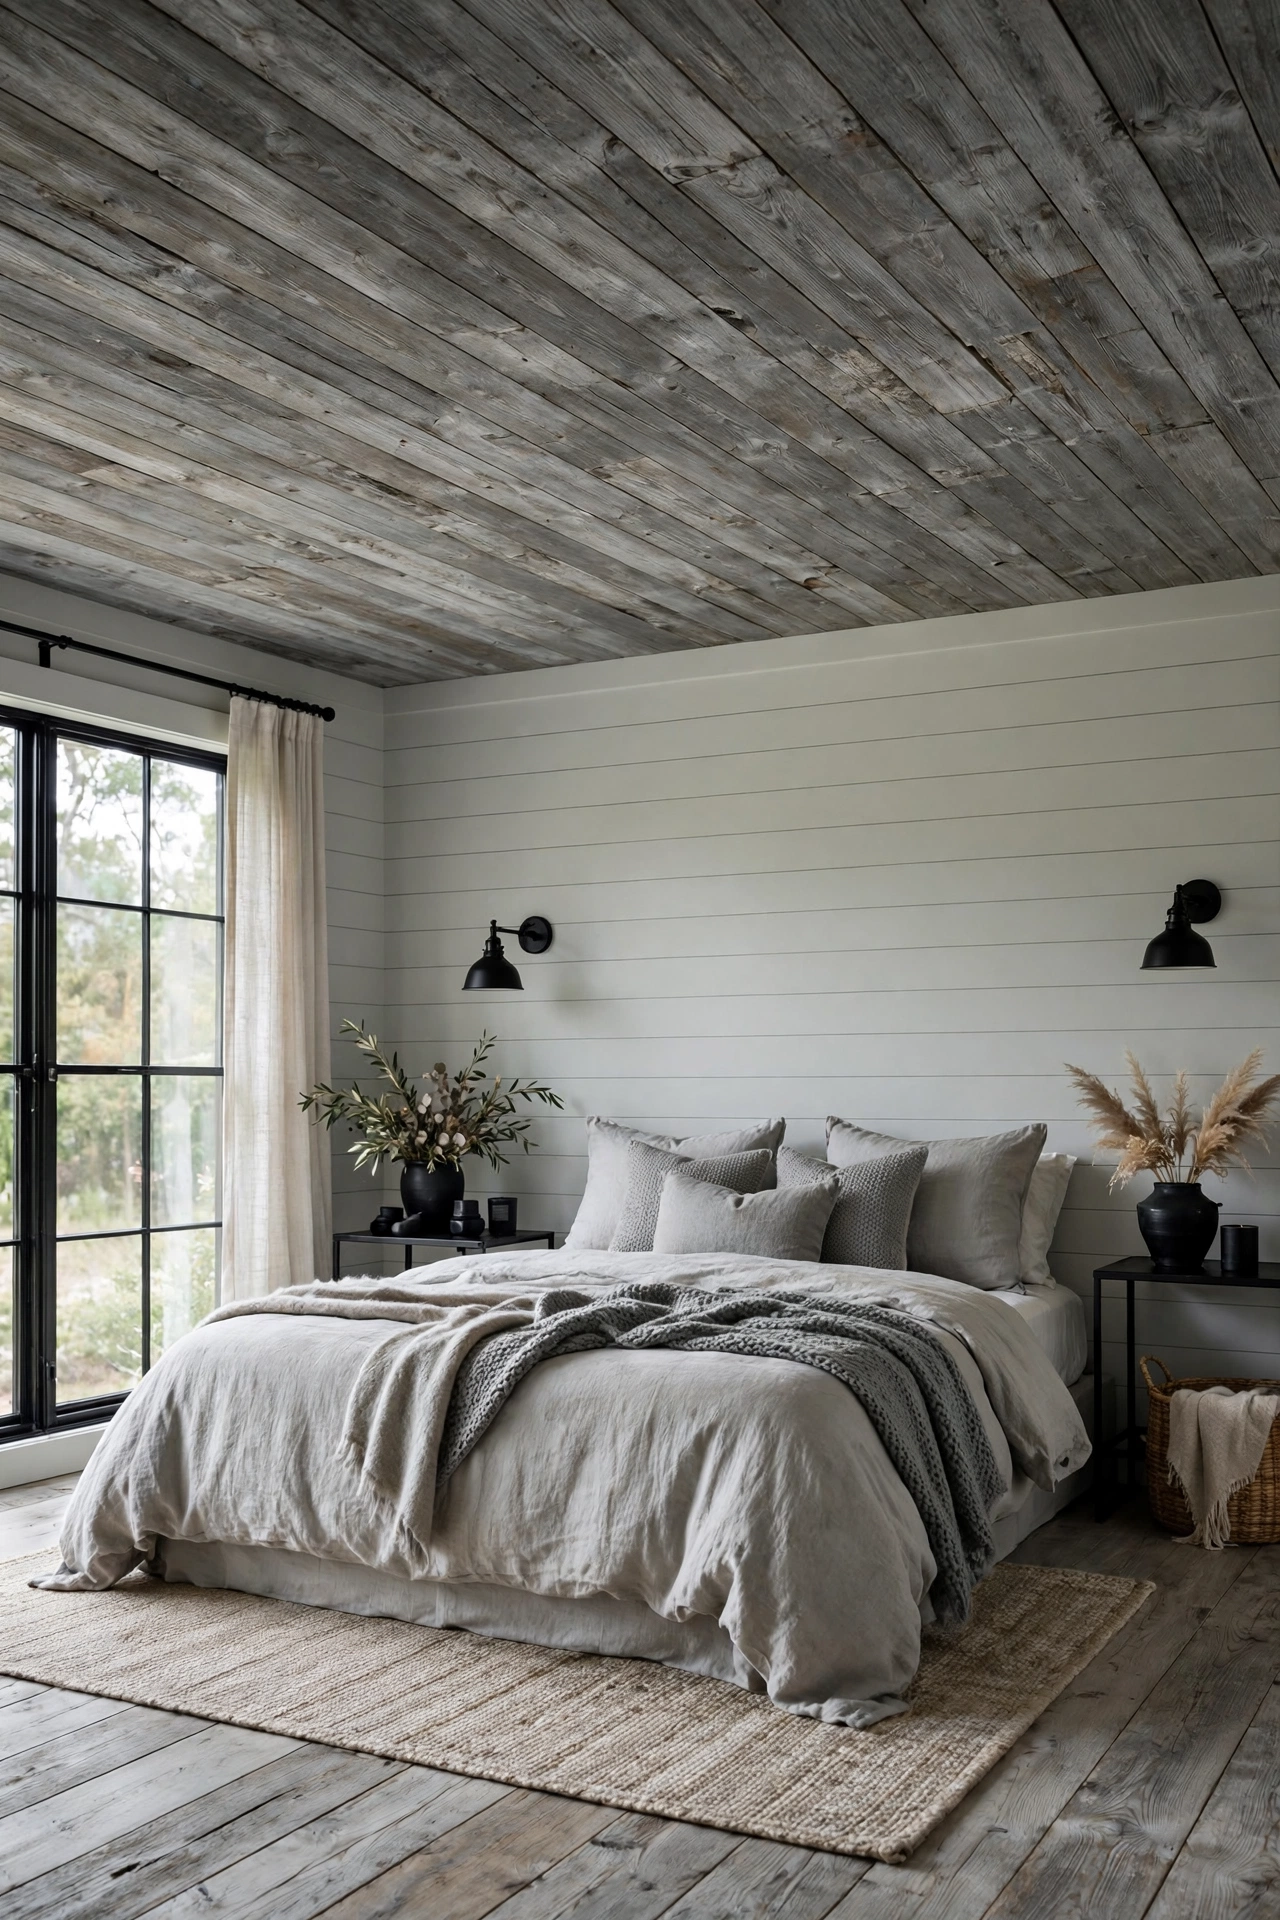
Gray-washed wood is the cooler, more modern cousin of whitewash — it gives you driftwood tones that pair beautifully with black fixtures, concrete accents, and modern farmhouse palettes. Mix gray paint with water or use a dedicated “weathered wood” stain, and apply it unevenly on purpose: the variation is the whole point. Two light coats beat one heavy one.
Try this: test your gray wash next to your wall color — grays clash quietly, and a warm gray wash against cool gray walls will look “off” in a way you cannot quite name until it is too late.
25. Painted Plank Ceiling for Kids’ Rooms
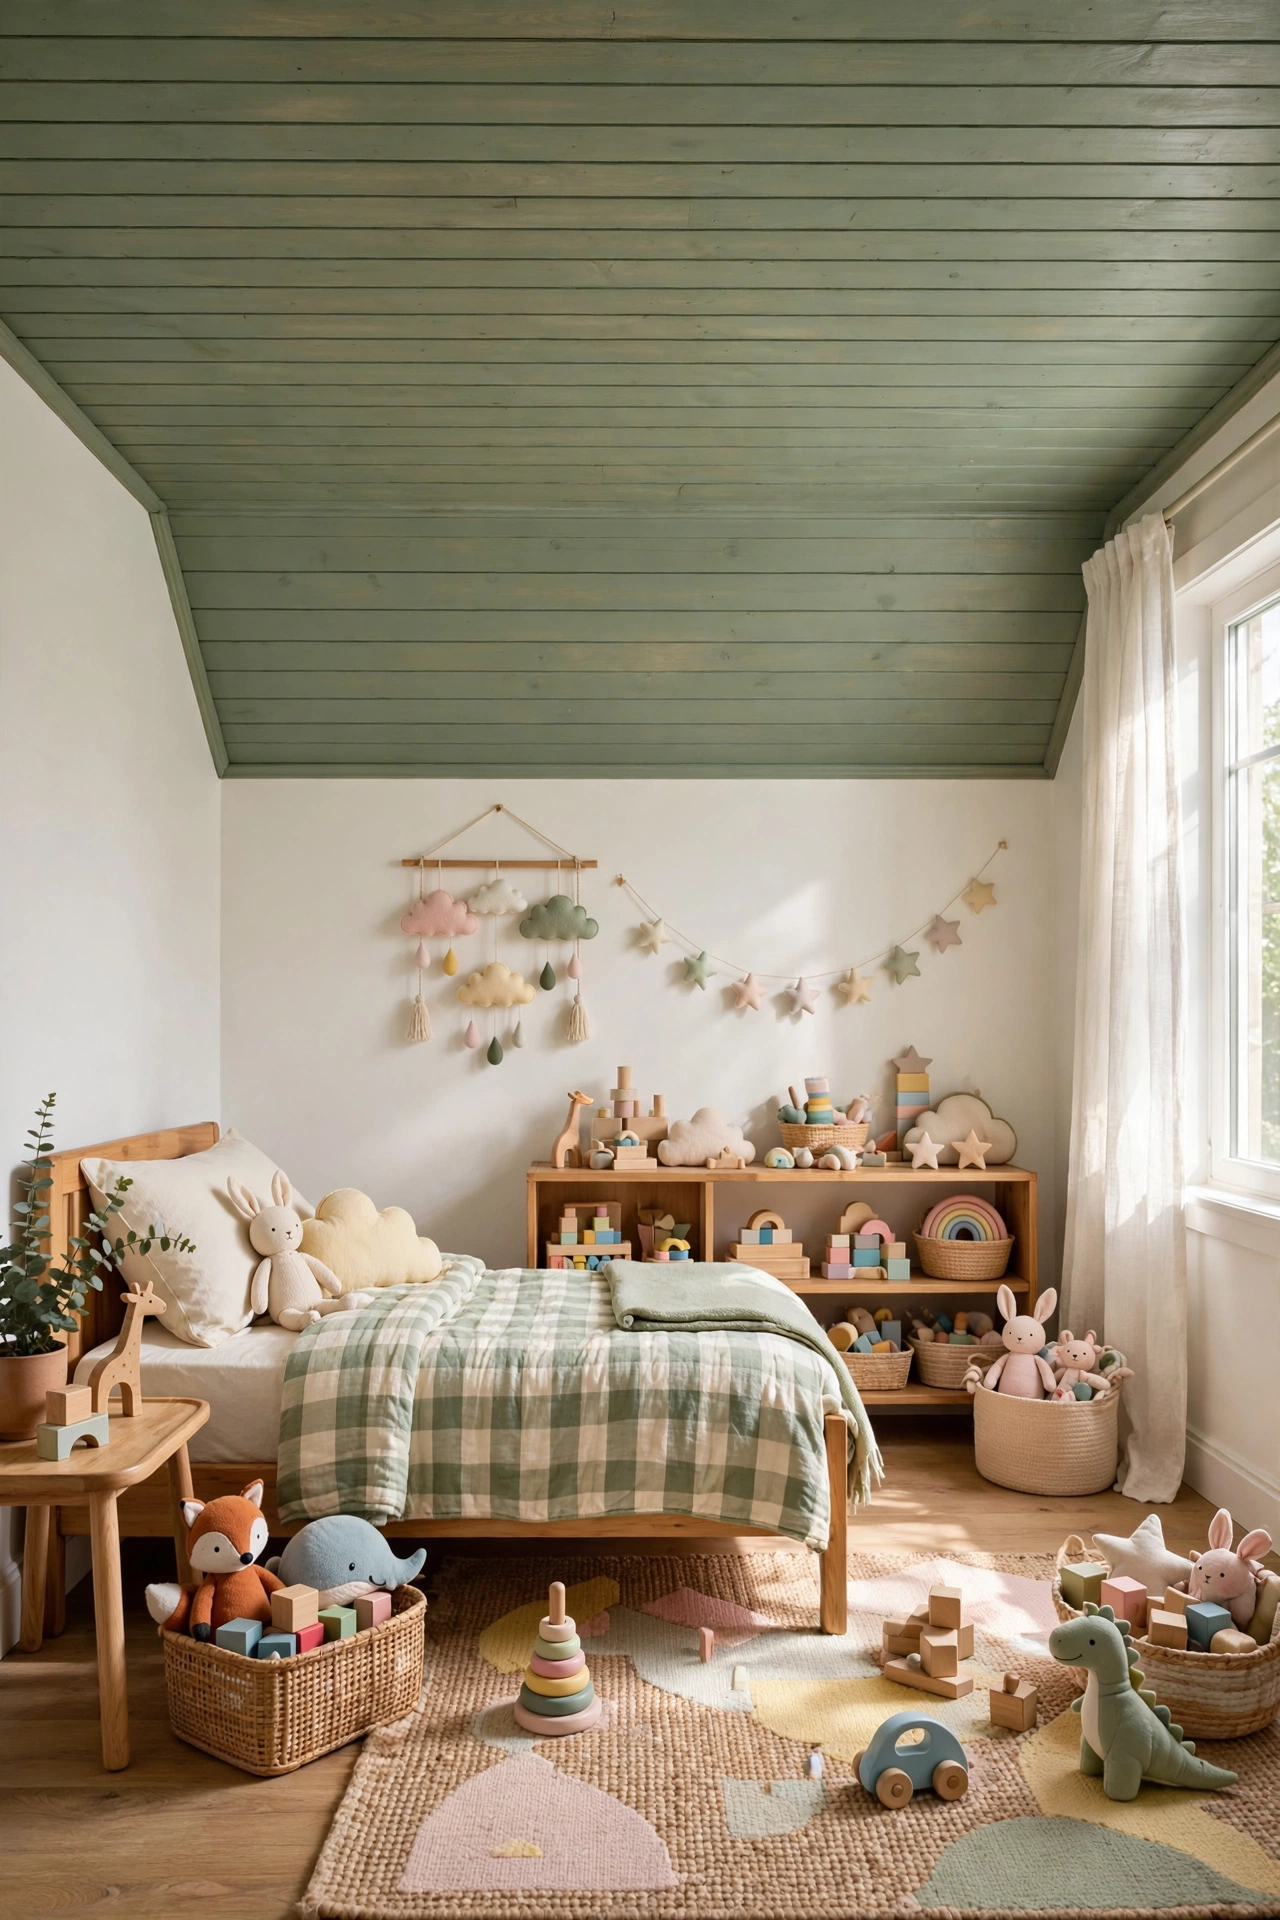
Kids stare at ceilings more than anyone — during bedtime stories, sick days, and rainy afternoons. A plank ceiling painted in a soft color (sage, dusty blue, blush, warm white) adds texture to a kids’ room without visual noise, and it is endlessly repaintable as they grow. Add glow-in-the-dark stars on painted planks and you have officially won parenting.
Try this: use scrubbable satin paint — kids’ ceilings collect more fingerprints, stickers, and mystery marks than you would ever guess.
Quick-Pick Cheat Sheet
Not sure which plank style fits your room? This cheat sheet matches the most popular options to the rooms they suit best, with realistic costs and difficulty:
| Plank Style | Best Rooms | Est. Cost / sq ft | Difficulty |
|---|---|---|---|
| Pine tongue-and-groove | Living room, bedroom | $2–$4 | Beginner |
| Plywood faux shiplap | Any room (budget pick) | Under $1 | Easy |
| Whitewashed shiplap | Kitchen, bedroom | $2–$5 | Beginner |
| Reclaimed barn wood | Dining room, entry | $4–$8 | Medium |
| Herringbone / chevron | Hallway, powder room | $3–$6 | Easy |
| Beadboard | Porch, cottage bedroom | $1.50–$3 | Beginner |
| Peel-and-stick | Rental, apartment | $3–$5 | Beginner |
| Beams + planks | Great room, living room | $4–$7 | Intermediate |
| Dark stained | Bedroom, media room | $2–$4 | Beginner |
| Faux coffered | Dining room, office | $3–$5 | Easy |
For a cozy living room that ties a plank ceiling into the rest of the seasonal decor, these fall mantel decorating ideas show how warm wood tones overhead pair beautifully with a styled mantel below.
Frequently Asked Questions
How much does a DIY wood plank ceiling cost?
For a typical 12×12 bedroom (144 square feet), budget $150–$600 depending on material. Ripped plywood faux shiplap is the cheapest at well under $1 per square foot; pine tongue-and-groove runs $2–$4 per square foot; reclaimed barn wood is the splurge at $4–$8. Add $50–$100 for fasteners, adhesive, finish, and trim.
Can I install a plank ceiling over a popcorn ceiling?
Yes — and it is one of the best ways to hide popcorn texture without the miserable scraping job. Install 1×3 furring strips screwed into the joists through the popcorn, then nail your planks to the furring. You lose about an inch of ceiling height, which is invisible in practice. If your popcorn predates the 1980s, test for asbestos first and do not disturb it.
What is the difference between shiplap and tongue-and-groove for ceilings?
True shiplap boards have overlapping rabbet joints that create a small reveal gap; tongue-and-groove boards interlock for a tighter, nearly seamless fit. On a ceiling, tongue-and-groove is generally the better pick — the interlock hides fasteners (blind nailing) and handles wood movement with fewer visible gaps. “Shiplap” in most DIY tutorials actually means nickel-gap boards, which is a style choice rather than a true joint.
Will a wood plank ceiling make my room feel smaller?
It depends entirely on the finish. Dark-stained planks absorb light and visually lower the ceiling, making a room feel cozy and intimate — great for bedrooms, too much for a small dark hallway. White, whitewashed, or natural light pine planks do the opposite: the texture adds interest while the light color keeps the room feeling open. Low ceilings (8 feet) do best with light finishes.
How do I clean and maintain a wood plank ceiling?
Dust it twice a year with a microfiber mop or a vacuum with a soft brush attachment — ceilings collect more dust than you think. For kitchens, wipe grease-prone areas near the range with a damp cloth and mild soap. Sealed planks (poly or lacquer) just need dusting; oiled or waxed finishes benefit from a refresh coat every few years. In bathrooms, run the exhaust fan and check the finish yearly for moisture wear.
Final Thoughts
A wood plank ceiling is one of those rare projects where the effort-to-impact ratio is wildly in your favor. You are working on a surface most people never touch, so even a simple pine installation looks like a custom design decision — and because it is overhead, small imperfections that would bug you on a wall simply disappear.
Start with the room you look up in most. For most of us, that is the bedroom or the living room. Pick the finish that matches the mood you want — light and airy, or dark and cocooning — pre-finish your boards on sawhorses in the garage, and give yourself a full weekend. By Sunday night, you will be lying on the couch staring at your ceiling on purpose, which is a sentence I never thought I would write, but here we are.


