

Blank classroom walls are a missed opportunity. Walk into a room that feels instantly warm and you will notice it — the walls are doing half the work. Paper is the quiet hero of school decoration: cheap, lightweight, forgiving, and wildly versatile. A stack of construction paper and a pair of scissors can turn a dull hallway into something kids actually stop to look at.
What makes paper especially right for schools is that it pulls double duty. Most of these ideas are not just decor — they are projects students can help build, which means the walls end up reflecting the class itself instead of a store-bought theme. They are also easy to refresh: when a season changes or a unit ends, you take the old display down and start fresh without guilt or storage headaches.
Below are 20 paper-only wall decoration ideas for classrooms, doors, bulletin boards, and hallways. Every one of them uses supplies you probably already have in the art closet.
Quick takeaways
- Paper beats store-bought decor on cost, weight, and flexibility — and students can help make it.
- Match the paper to the job: cardstock for 3D pieces, tissue for soft volume, construction paper for everyday cutting.
- Hang with painter’s tape, removable hooks, or clothespins on wire — never staples directly into painted walls if you can avoid it.
- Plan one “evergreen” wall (student work, goals) and rotate the rest by season or unit.
1. Giant 3D Paper Flower Wall

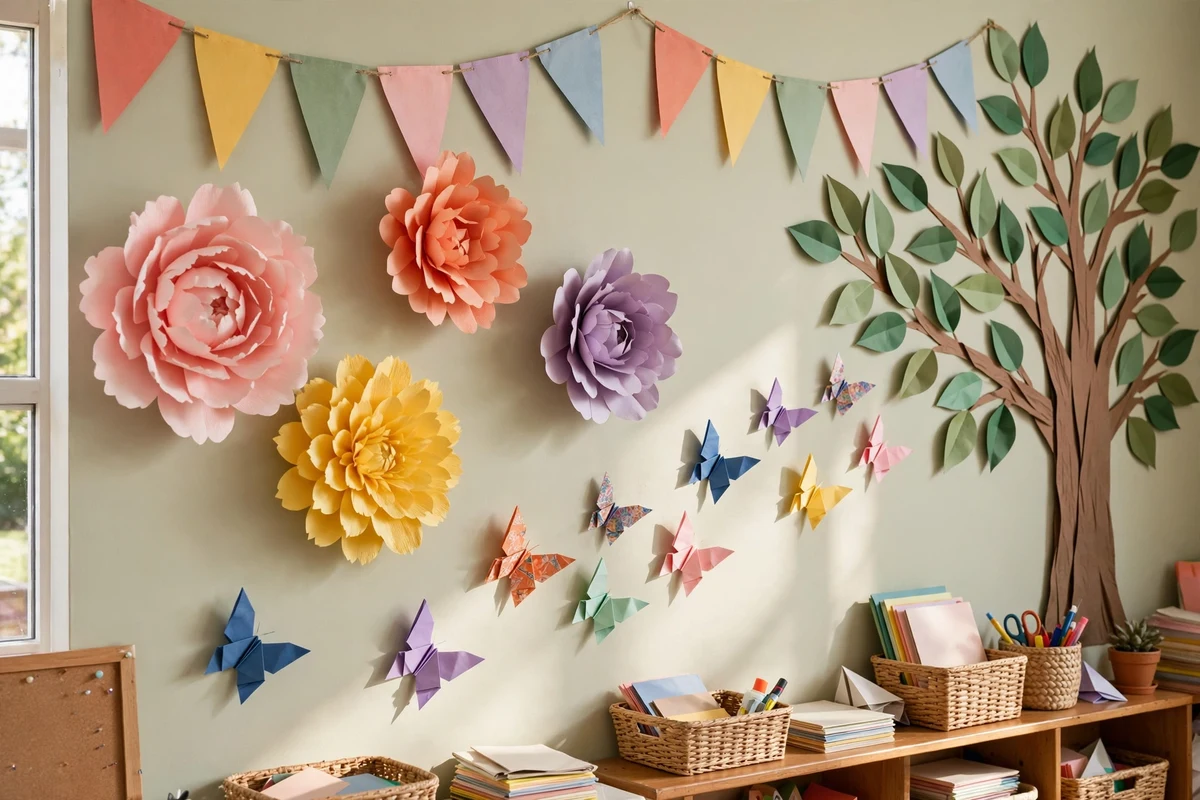
Nothing fills a big empty wall faster than oversized paper flowers. Layered petals cut from cardstock or tissue paper, curled slightly at the edges, give you real depth and shadow — from across the hallway it reads like an art installation, up close it is clearly handmade. Pick a tight color palette (three shades of one color always looks intentional) and cluster the blooms at varying heights.
How to make it: Cut petal templates in three sizes, trace onto cardstock, curl each petal around a pencil, then hot-glue layers from largest to smallest around a paper circle center. Have an adult handle the hot-glue gun — or swap in tacky craft glue and give it extra drying time. Mount the finished flowers with removable adhesive strips so you can rearrange the composition.
Teacher tip: If you want to take the dimensional look further, these easy DIY 3D wall art ideas use the same layering tricks and adapt well to a classroom scale.
2. Origami Butterfly Migration Wall

A scattered trail of origami butterflies climbing a wall or pouring out of a classroom door has genuine movement to it. Fold simple butterflies from two-tone origami paper — one classic fold repeated twenty or thirty times — and arrange them in a loose diagonal stream, denser at one end and thinning out as it “flies” across the wall. It works beautifully for spring, for a metamorphosis science unit, or as a symbol of a class “taking flight” into a new grade.
How to make it: Use the standard origami butterfly fold; vary wing patterns by mixing solid and patterned paper. Attach with small loops of painter’s tape on the body only so the wings lift off the wall.
Teacher tip: Let each student fold and sign one butterfly during the first week — instant ownership of the room.
3. Woven Paper Heart Wall Hanging

Danish-style woven paper hearts look far more intricate than they are, and they are a genuinely satisfying classroom craft for older elementary kids. Two contrasting strips of paper woven together form a little basket-heart that can hang from a string or be mounted in a grid on the wall. A whole wall of them in reds, pinks, and creams makes a striking Valentine’s display; switch to autumn tones for fall.
How to make it: Cut two rounded strips per heart, weave over-under, glue the top edges, and thread a loop of yarn through for hanging. Mount a dozen or more on a large paper backing in offset rows.
Teacher tip: This is a great fine-motor-skill workout disguised as decor — the weaving pattern clicks for most kids around age eight.
4. Paper Quilling Art Frames

Quilling — rolling thin paper strips into coils and shapes — produces delicate, almost lace-like wall art that surprises people when they learn it is just paper. Frame a few quilled pieces (flowers, trees, abstract swirls) in simple frames or on cardstock mats and hang them as a mini gallery. It reads as “real art,” which makes it perfect for hallways where you want the school to look polished.
How to make it: Roll thin paper strips around a toothpick or quilling tool, pinch into teardrops, eyes, and coils, then glue the shapes onto a backing card in your design. A little goes a long way — one strong focal piece beats ten fussy ones.
Teacher tip: Pre-cut strips in the school colors for instant spirit-week decor.
5. Tissue Paper Stained Glass Windows

Layered tissue paper on windows (or on paper “window” frames mounted to the wall) glows when light hits it, mimicking stained glass at about one percent of the cost. Kids tear or cut tissue into shapes and arrange them on clear contact paper; the finished panels go up on windows or backlit on a wall. Geometric patterns look modern; nature scenes suit younger grades.
How to make it: Stick a sheet of clear contact paper sticky-side-up to the table, have students place tissue pieces, seal with a second sheet, trim, and hang. For walls without windows, mount panels on white paper with a simple black “leading” border drawn in marker.
Teacher tip: This doubles as a color-mixing lesson — overlapping yellow and blue tissue visibly makes green.
6. Ombre Paper Fan Wall

Folded paper fans arranged in an ombre gradient — deep color melting into pale — create a graphic, high-impact wall with almost no skill required. It is all cutting and folding, which means even the youngest students can contribute fans. The look suits everything from a reading corner backdrop to graduation decor, just by changing the palette.
How to make it: Accordion-fold circles of paper, pinch the centers, and glue pairs back-to-back into full fans. Plan your gradient on the floor first, then mount in tight rows with the darkest fans at the bottom.
Teacher tip: Metallic gold or silver fans mixed in catch the light and keep the display from looking flat. If you like the handmade wall-hanging look, these DIY boho wall decor ideas play with the same textures.
7. Cut-Paper Student Silhouette Portraits

Classic silhouette portraits never go out of style, and the paper-cut version is a wonderful getting-to-know-you project. Trace each student’s profile, cut it from black paper, and mount on cream or colored cardstock in a uniform grid. The result looks like a proper portrait gallery — parents love it on open-house night, and kids are fascinated by seeing themselves in profile.
How to make it: Photograph profiles against a plain background, print at uniform size, trace onto black paper, cut carefully, and mount. Keep frames identical (simple paper mats work) so the grid looks cohesive.
Teacher tip: Add each student’s name and one “expert at…” line under their portrait for a personal touch.
8. Torn Paper Mosaic Mural

Torn paper edges have a soft, painterly quality that scissors cannot replicate, which makes torn-paper mosaics ideal for big collaborative murals — landscapes, sunsets, underwater scenes. Students tear construction paper into small pieces and glue them inside a large outlined drawing, filling it like a mosaic. From a distance it looks almost like a painting; up close you see hundreds of little hands in it.
How to make it: Sketch a large simple scene on butcher paper, divide it into sections, and assign color zones. Students tear and glue pieces with slight overlaps so no backing shows through.
Teacher tip: This is the ultimate rainy-day or sub-day activity — low mess, high engagement, and it genuinely moves the mural forward.
9. Hanging Paper Lantern Canopy

Paper lanterns strung at varying heights turn a boring ceiling-wall junction into something magical, and they are a staple for a reason. Cluster round paper lanterns (or accordion lanterns students decorate themselves) over a reading nook or along a hallway, mixing sizes and keeping to two or three colors. They add warmth without adding visual clutter to the walls themselves.
How to make it: Hang lanterns from clear fishing line or yarn at staggered heights using removable ceiling hooks. Let students decorate plain white lanterns with markers or cut-paper appliqués before hanging.
Teacher tip: Battery fairy lights tucked inside a few lanterns make a reading corner kids will fight over. Stick to battery-operated lights only — never run plug-in string lights through paper lanterns.
10. Paper Doll Diversity Chain

The classic folded paper-doll chain gets a meaningful upgrade when each doll is decorated to represent a different student — skin tones, hair, favorite colors, cultural dress. Linked hand-in-hand across a wall, it becomes a concrete, visual statement that the class is a community of different people holding together. It is simple enough for kindergarteners and still lands with fifth graders.
How to make it: Accordion-fold long strips of paper, cut the doll silhouette (keeping the hands connected at the folds), then let each student decorate one doll as themselves. Link the chains end to end across the wall.
Teacher tip: Pair this with a first-week discussion about what makes a good classmate — the display then carries the conversation all year. For more simple projects kids can build themselves, these easy paper crafts for kids are a good next stop.
11. Origami Starburst Wall

Dozens of small origami stars or modular starbursts radiating from a central point create a display with real energy — part decor, part math manipulative. The repetition is meditative to fold in bulk, and the finished burst can mark anything from a “stellar work” board to a graduation countdown. Metallic and jewel-tone papers make it feel celebratory.
How to make it: Fold lucky stars or simple modular units (one design, repeated), then arrange on the wall radiating from a center medallion with the class name or theme word. Work outward in rings for a clean burst effect.
Teacher tip: Assign each student a ring to complete — the burst “grows” over a week, which builds anticipation.
12. Pocket Book Recommendation Wall

Turn a wall into a working classroom library display: rows of folded paper pockets, each holding a student-written book recommendation card. Kids browse the wall, pull out cards that catch their eye, and discover their next read through peer recommendations instead of a teacher list. It promotes reading far better than a poster ever could, and it refreshes itself as students add new cards.
How to make it: Fold simple origami pockets from colorful paper and mount in neat rows on a backing board. Provide blank recommendation cards (title, author, star rating, one-line pitch) in a basket nearby.
Teacher tip: Color-code pockets by genre so browsers can scan quickly.
13. Chalkboard Paper Quote Wall

Black kraft or chalkboard paper plus chalk markers gives you the beloved chalkboard look with zero dust and full repositionability. Dedicate a wall or large board to rotating quotes — growth mindset lines, literary quotes for English units, historical quotes for social studies. The high-contrast black-and-white look is calm rather than visually noisy, which matters in rooms already full of color.
How to make it: Cover the area with black paper, frame it with a simple washi-tape or paper border, and letter quotes with chalk markers (they wipe off with a damp cloth if you want to rotate them). Let students take turns as the week’s “quote curator.”
Teacher tip: Photograph each week’s quote before wiping — by June you will have a lovely record of the year’s thinking.
14. Paper Kite Sky Display

Paper kites pinned as if soaring across a wall bring instant joy — diamonds of bright paper with ribbon or crepe-paper tails that actually flutter when the door opens. It is a natural fit for spring, for weather units, or for a “let your dreams soar” theme at the start of the year. The tails add movement that flat cutouts cannot match.
How to make it: Cut kite diamonds from cardstock, add cross-sticks of thin dowel or extra cardstock strips for structure, attach tails of ribbon or twisted crepe paper, and pin at slight angles as if catching wind. Cluster in groups of three to five.
Teacher tip: Have students write a personal goal on the back of their kite before it goes up.
15. Layered Papercut Seasonal Tree

A large tree silhouette built from layered paper — trunk plus three or four overlapping canopy layers in graduating tones — becomes a year-round anchor display you simply redress each season: blossoms in spring, full green in summer, oranges in fall, snow-dusted branches in winter. One strong base, four looks, minimal redo work.
How to make it: Cut the trunk from brown butcher paper and canopy layers from tissue or construction paper in seasonal palettes. Attach canopy pieces with removable adhesive so swaps are quick. Store off-season pieces flat in a labeled envelope taped behind the display.
Teacher tip: For fall, pair the tree with a few of these thanksgiving crafts for kids to build a full seasonal corner.
16. Student Self-Portrait Gallery Wall

There is a reason self-portraits are a first-week staple: they tell every child “you belong on these walls.” Unlike the traced silhouette portraits in idea 7, these are fully student-drawn — every wobbly line is theirs. Mount them uniformly — same paper size, same mat color, hung in a tight grid — and a pile of kid drawings transforms into a legitimate gallery wall. Add small “artist statement” cards and it feels like a real exhibition, which is exactly the point.
How to make it: Have students draw self-portraits on identical paper (half-sheet cardstock works well), mount each on a slightly larger mat in one accent color, and hang in straight rows with even spacing. A simple title banner — “Room 4’s Artists” — finishes it.
Teacher tip: Redo portraits in the last month of school and hang them side by side with the September versions. The growth is startling.
17. Paper Pinwheel Garden Row

Pinwheels are pure happiness on a wall. A row of colorful paper pinwheels “planted” along the bottom of a bulletin board or hallway wall — stems of green paper strips, blooms of spinning pinwheels — makes a garden that never wilts and actually moves when the air stirs. Younger grades adore making them; older students can handle patterned double-sided paper for extra polish.
How to make it: Fold classic pinwheels from square paper, pin through the center into a small eraser or cork on the wall (so they spin freely), and add paper stems and leaves below. An adult should do the pinning — keep loose pins away from very young children. Vary sizes for a natural look.
Teacher tip: Use pinwheels as a quiet fidget-friendly reward — students who finish early can go “spin the garden.”
18. Accordion Bunting Name Banner

A bunting banner spelling out the class name, a welcome message, or a rotating vocabulary word dresses up doorways and blank wall stretches in minutes. Accordion-folded paper fans or simple triangle flags on string, in the school colors, look intentional rather than thrown together — the trick is consistent spacing and a limited palette.
How to make it: Cut uniform triangles or fold mini fans, attach to twine with glue dots at even intervals, and hang with a gentle swag (not pulled taut). Layer two strands at different lengths for depth.
Teacher tip: Make the letters on separate flags so you can swap messages all year — one banner, endless uses. It is also one of the quickest wins among these back-to-school bulletin board ideas if you are decorating in August.
19. 3D Paper City Skyline

A city skyline built from folded paper buildings — boxes, towers, and rooftops in grays, blues, and metallics, with yellow paper windows — turns a long hallway wall into a miniature metropolis. It is a fantastic cross-curricular build: geometry (nets and 3D shapes), social studies (famous skylines), even a night-versus-day lesson with dark backing paper and lit windows.
How to make it: Fold simple box nets from cardstock in varying heights, glue shut, cut and attach paper windows, and mount in a row along the wall with a darker “sky” backing. Add a paper moon or sun for the finishing touch.
Teacher tip: Let each student design one building — the skyline becomes a portrait of the class’s imagination.
20. Kindness Leaves Gratitude Tree

Some of the best wall decor is not decoration at all — it is a practice. A bare paper tree trunk on the wall, plus a basket of blank paper leaves, invites students to write gratitudes, compliments, or kind notes and add them to the branches. The tree fills in over weeks, and the wall becomes a living record of the classroom’s character. It works for Thanksgiving, for kindness week, or all year long.
How to make it: Mount a large trunk and branches cut from brown paper, place a basket of pre-cut leaves and markers nearby, and model the first few notes yourself. Set a gentle rhythm — “leaf Friday,” for instance — so it keeps growing.
Teacher tip: Read a few leaves aloud each week (with permission). The effect on classroom culture is disproportionate to the effort.
Choosing the right paper for the job
Not all paper behaves the same on a wall. A quick guide — and if you are stocking up, browsing classroom bulletin board supplies alongside this list helps you match materials to ideas:
| Paper type | Best for | Notes |
|---|---|---|
| Construction paper | Everyday cutting, kids’ crafts, mosaics | Cheap and colorful; fades in direct sun over months |
| Cardstock (65–80 lb) | 3D flowers, fans, buildings, anything structural | Holds folds and curls; worth the small upgrade for focal pieces |
| Tissue paper | Stained glass, flower volume, soft layering | Beautiful but fragile — handle gently and keep dry |
| Origami paper | Butterflies, stars, cranes, modular pieces | Crisp folds, saturated color; small sheets suit small elements |
| Butcher/kraft paper | Backings, trees, murals, large silhouettes | Covers big areas cheaply; brown or black both useful |
| Crepe paper | Tails, streamers, ruffles | Stretches and fringes nicely; colors can bleed if wet |
A practical rule: back anything that must survive the semester in cardstock or laminate it, and save the delicate tissue work for shorter seasonal runs.
Frequently asked questions
What kind of paper is best for classroom wall decorations?
It depends on the project. Cardstock (65–80 lb) is the workhorse for anything three-dimensional — flowers, fans, buildings — because it holds its shape. Construction paper is fine for flat cutting and kids’ crafts. Tissue paper is best for soft, layered effects like stained glass or flower volume, but it tears easily so save it for shorter displays or laminate key pieces.
How do you hang paper decorations without damaging walls?
Painter’s tape rolled into loops, removable adhesive strips, and removable hooks handle most paper decor. For heavier 3D pieces, use two strips instead of one. Clothespins on a strung wire or yarn let you swap student work in and out without touching the wall at all — a favorite trick for rotating galleries.
How can I make paper wall decor last the whole school year?
Choose cardstock over construction paper for permanent displays, keep pieces out of direct sunlight (which fades color), and laminate anything students will handle. Designs meant to last — like the silhouette gallery or quote wall — do best in low-traffic spots away from doors.
What are some cheap paper decoration ideas for back to school?
The paper doll chain, bunting name banner, silhouette portraits, and pinwheel garden all cost almost nothing beyond paper you already own, and students make most of the pieces themselves during the first week. That keeps your budget near zero while the room fills up fast.
Final thoughts
The best school walls are not the most polished ones — they are the ones with student fingerprints on them, literally and otherwise. Paper makes that possible: it is cheap enough to experiment with, light enough to hang anywhere, and simple enough that kids can be genuine co-creators rather than spectators.
Pick one idea that fits a wall you walk past every day, make it with your students, and let it grow from there. Classrooms are never really finished — and that is exactly how they should feel.


