


The strip beside our house stayed muddy every winter. We walked it ten times a day to reach the back gate, and every trip left dirt on the porch and shoes by the door. A real path fixed that in one weekend, and it cost less than the rugs we kept replacing.
This guide covers 10 narrow side pathway ideas for strips from 3 to 5 feet wide. Each one gives you a material, a width rule, a drainage detail, and a cost range, so you can pick a path that stays dry, holds up to daily use, and fits the space you actually have.
- Keep a side path at least 36 inches wide, and 42 to 48 inches if you push a wheelbarrow through it.
- Slope every path 1 to 2 percent away from the house so water runs off instead of pooling at the foundation.
- A compacted crushed stone base matters more than the surface material for stopping dips and trip edges.
- Hard edging on both sides keeps gravel in place and pavers from drifting apart.
- Light-colored surfaces bounce light into shaded strips and make a narrow path read wider.
How to choose the right path for a narrow side yard
Start with width. Measure the strip at its tightest point, then subtract room for a planting edge or a fence clearance. If you end up under 36 inches of walking surface, pick a flat, continuous material such as pavers or concrete slabs rather than spaced steppers, since tight steppers force an awkward stride.
Next, check drainage. Watch where water sits after rain. If the strip holds puddles against the house wall, you need a permeable surface or a drainage channel before you need a pretty one. Slope the finished path away from the foundation, and keep soil and mulch at least 6 inches below siding.
Then match the material to how you use the path. A daily route to the back gate wants a firm, even surface. A route you walk once a week to reach the bins can be gravel or mulch. If you need the path to carry a wheelbarrow, skip loose mulch and spaced stones and go with pavers or slabs.
For paver patterns beyond a path, including patios that meet the side walk, see 12 Paver Patio Ideas for a Backyard That Feels Finished.
1. Running bond concrete pavers

Rectangular concrete pavers in a running bond pattern give a narrow strip a clean, finished look without a high price. Each row offsets by half a paver, so the eye follows the length of the path instead of stopping at every joint. Use 12 by 18 inch pavers in a light gray or buff tone, which brightens a shaded strip. Set them on 4 to 6 inches of compacted crushed stone with a 1 inch sand bed, and finish with a header course along both edges. The pattern wastes little material because cuts happen only at the ends.
Try this: Dry-lay one row first and check the width against your stride before you excavate.
Cost: $$ | Difficulty: Moderate
2. Brick herringbone runner
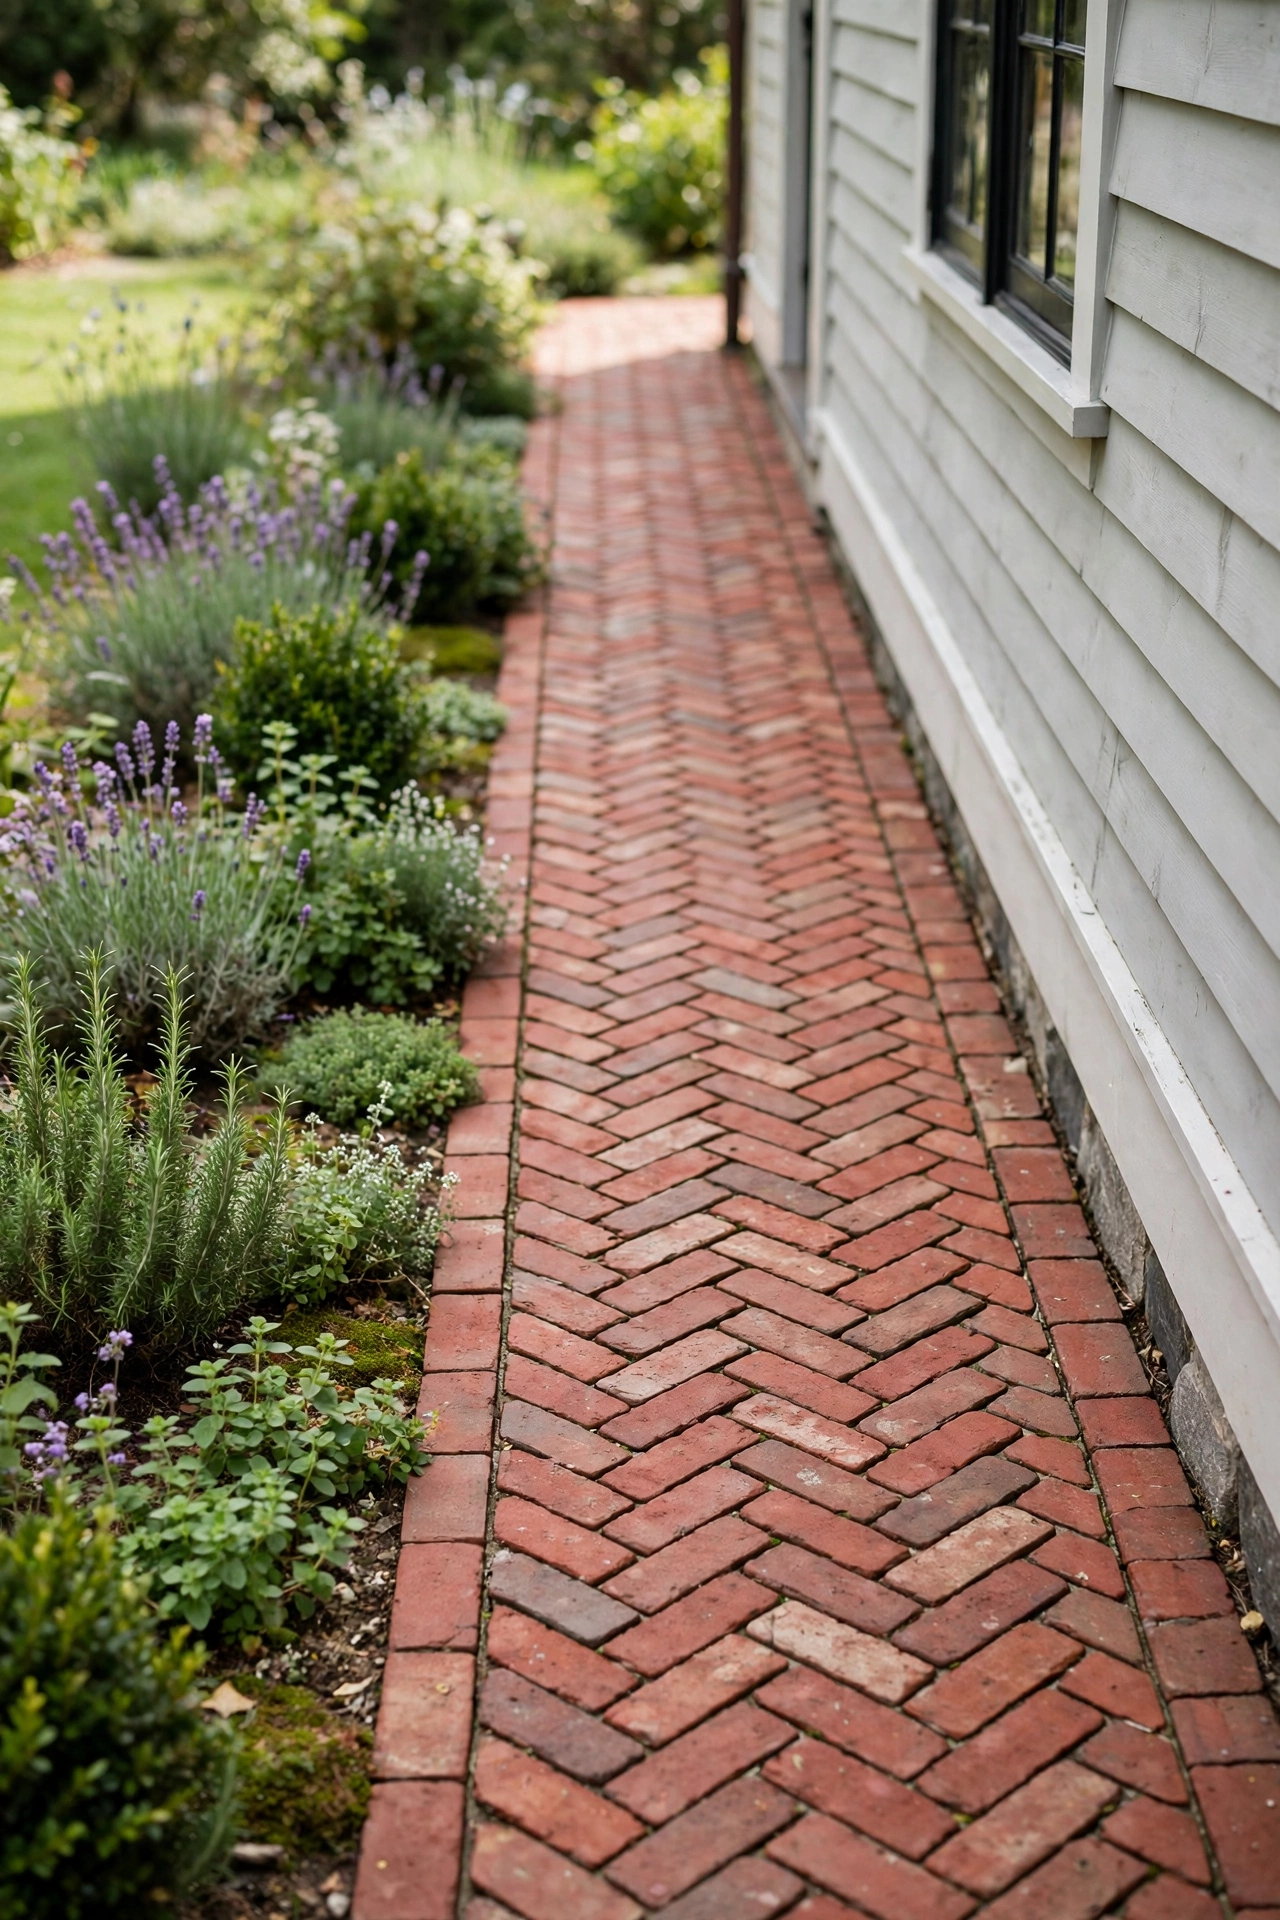
A brick herringbone runner adds texture that a plain paver path cannot match. The zigzag pattern locks each brick against its neighbors, so the surface stays tight under daily foot traffic. Classic red clay brick suits brick and cottage-style houses, while a gray or tan brick suits a modern exterior. The rough brick surface grips shoes in rain, which matters on a path you use in every season. Plan on more cutting at the edges than a running bond layout needs, and keep joints tight so weeds have little room to start.
Try this: Lay a 3-foot test section on sand first to confirm the herringbone angle reads well in your strip width.
Cost: $$ | Difficulty: Moderate
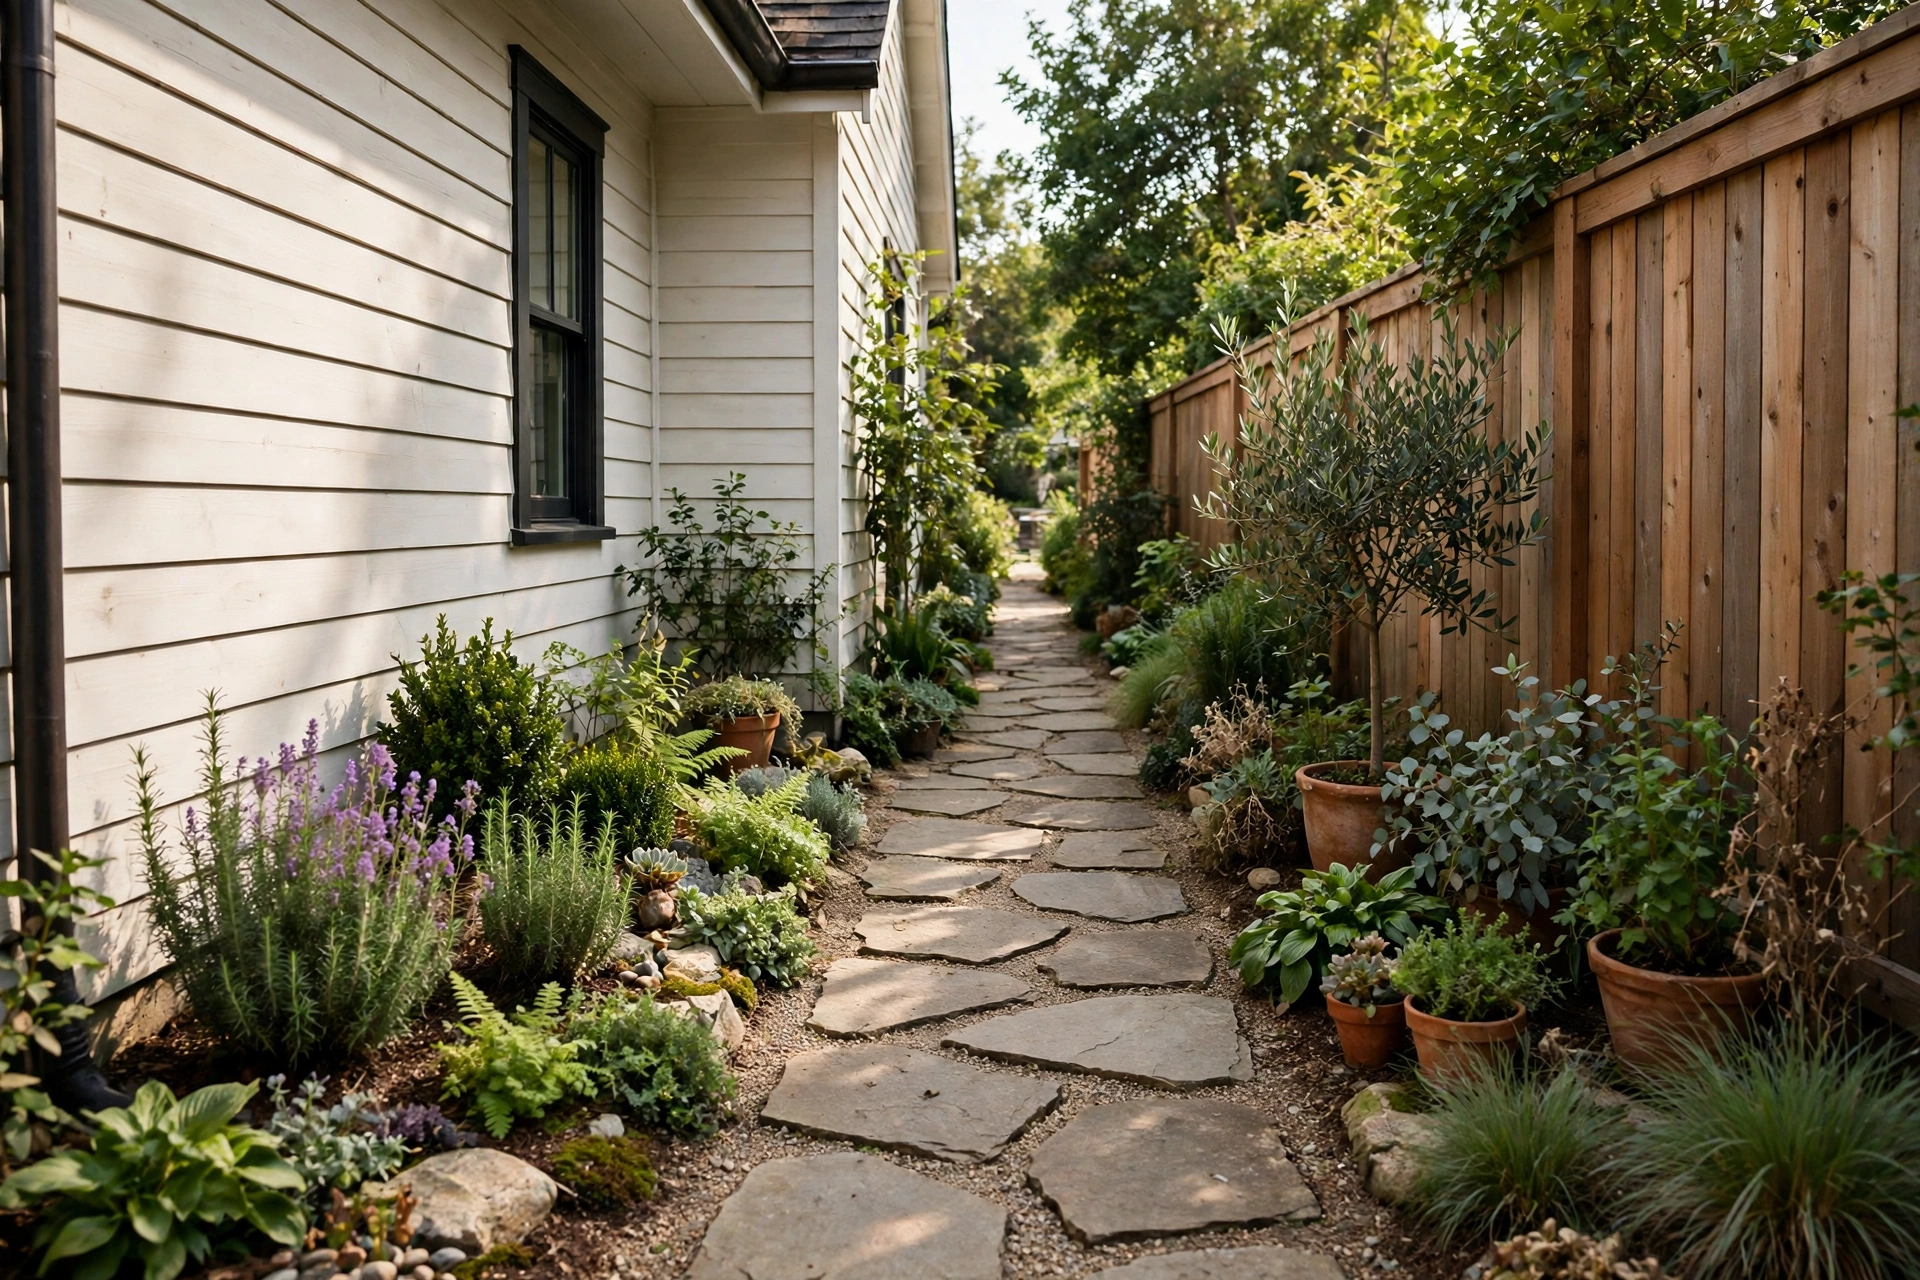
3. Flagstone steppers in pea gravel
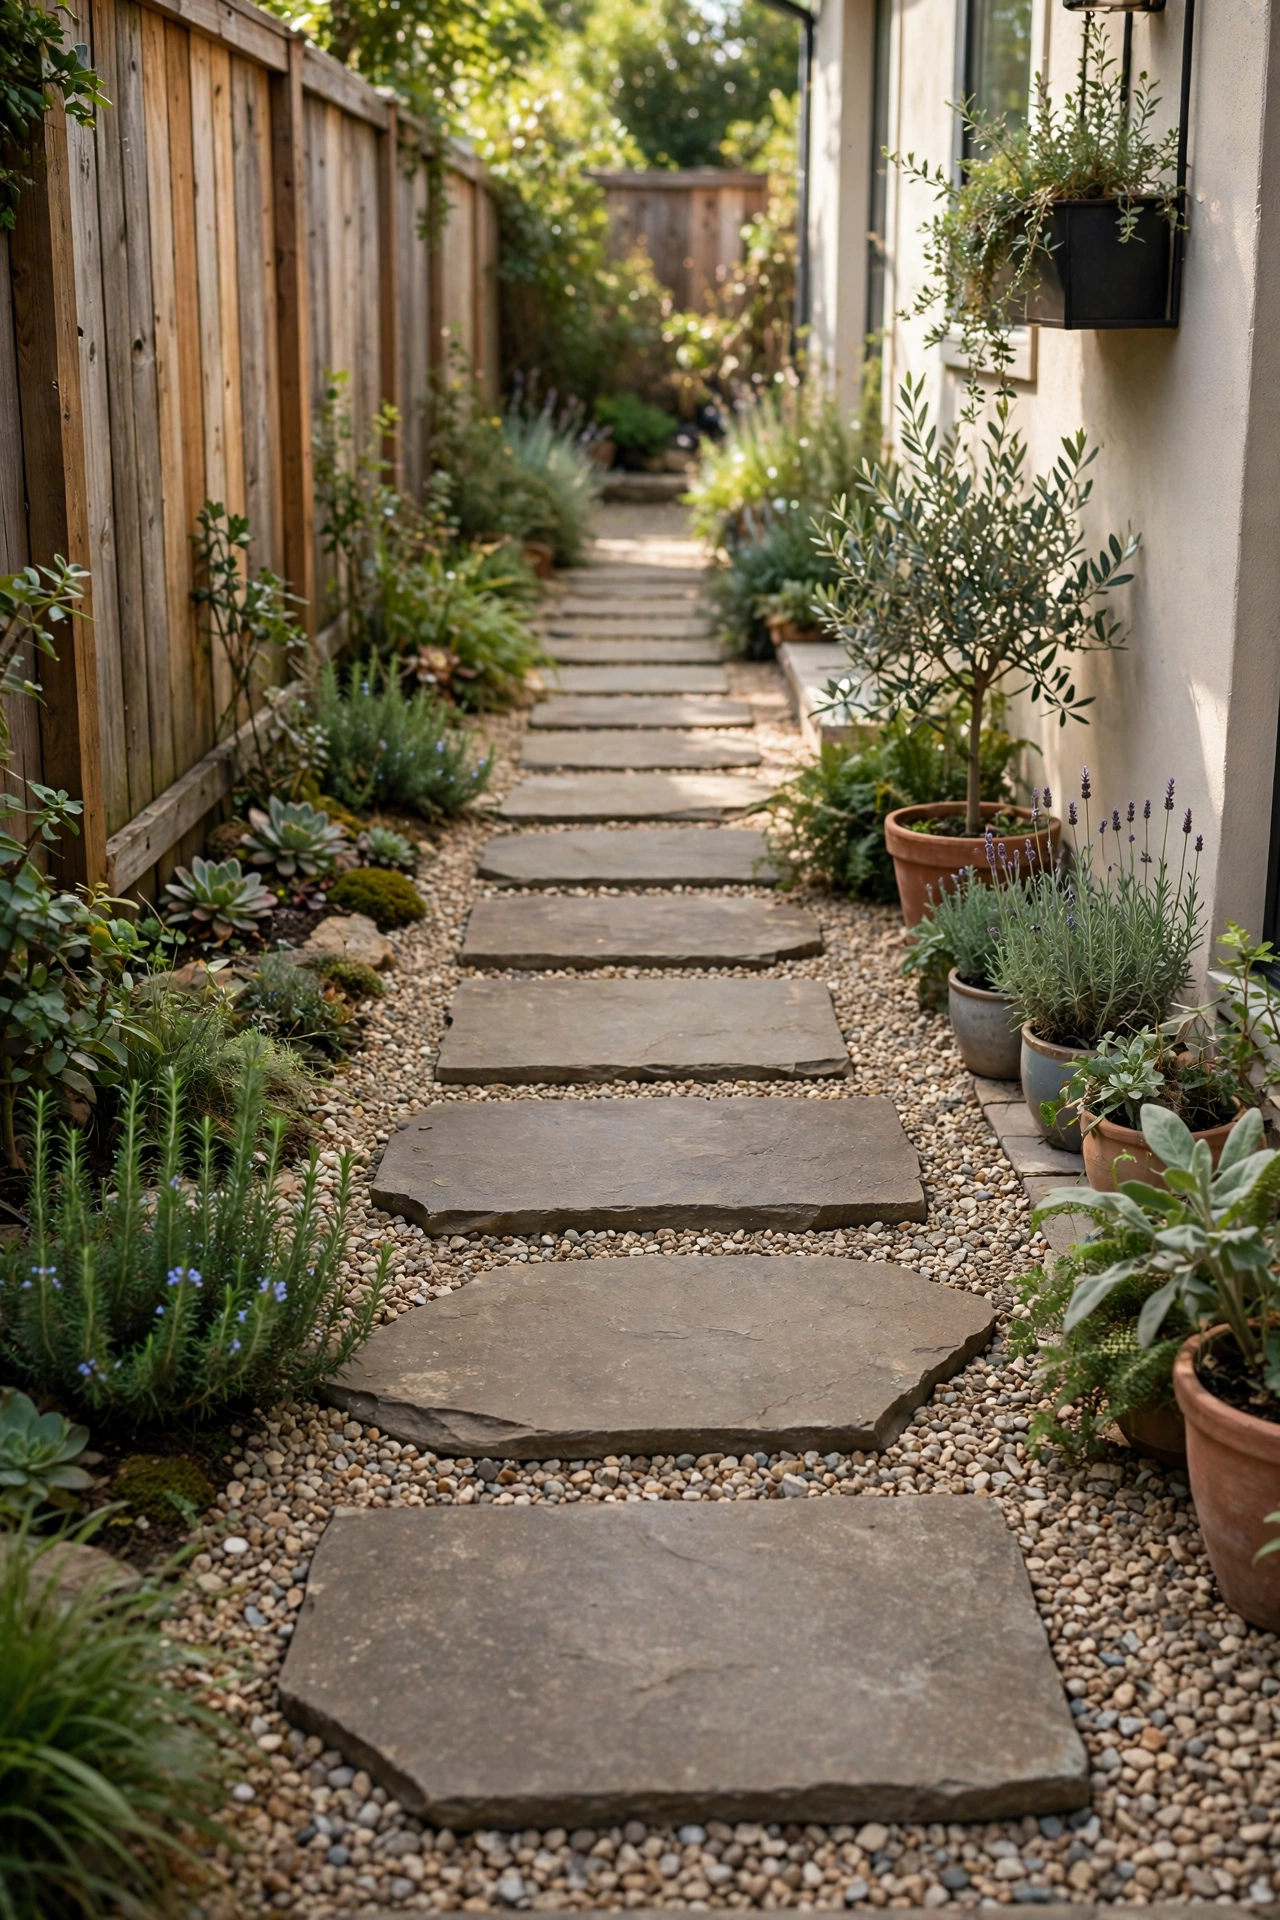
Large, flat flagstones set into pea gravel give you firm footing with a relaxed look. Space the stones to match a normal stride, usually 18 to 24 inches apart center to center, and set each stone level so none rocks underfoot. The gravel between stones drains fast, which keeps the path usable after rain, and it costs less than a full paver field. Choose stones at least 18 inches across so each step lands fully on stone. A steel or stone edge on both sides stops the gravel from drifting into beds.
Try this: Walk the stone spacing barefoot in socks before you set anything, since a stride that feels fine on paper can feel cramped in a 3-foot strip.
Cost: $ | Difficulty: Easy
4. Compacted crushed granite path
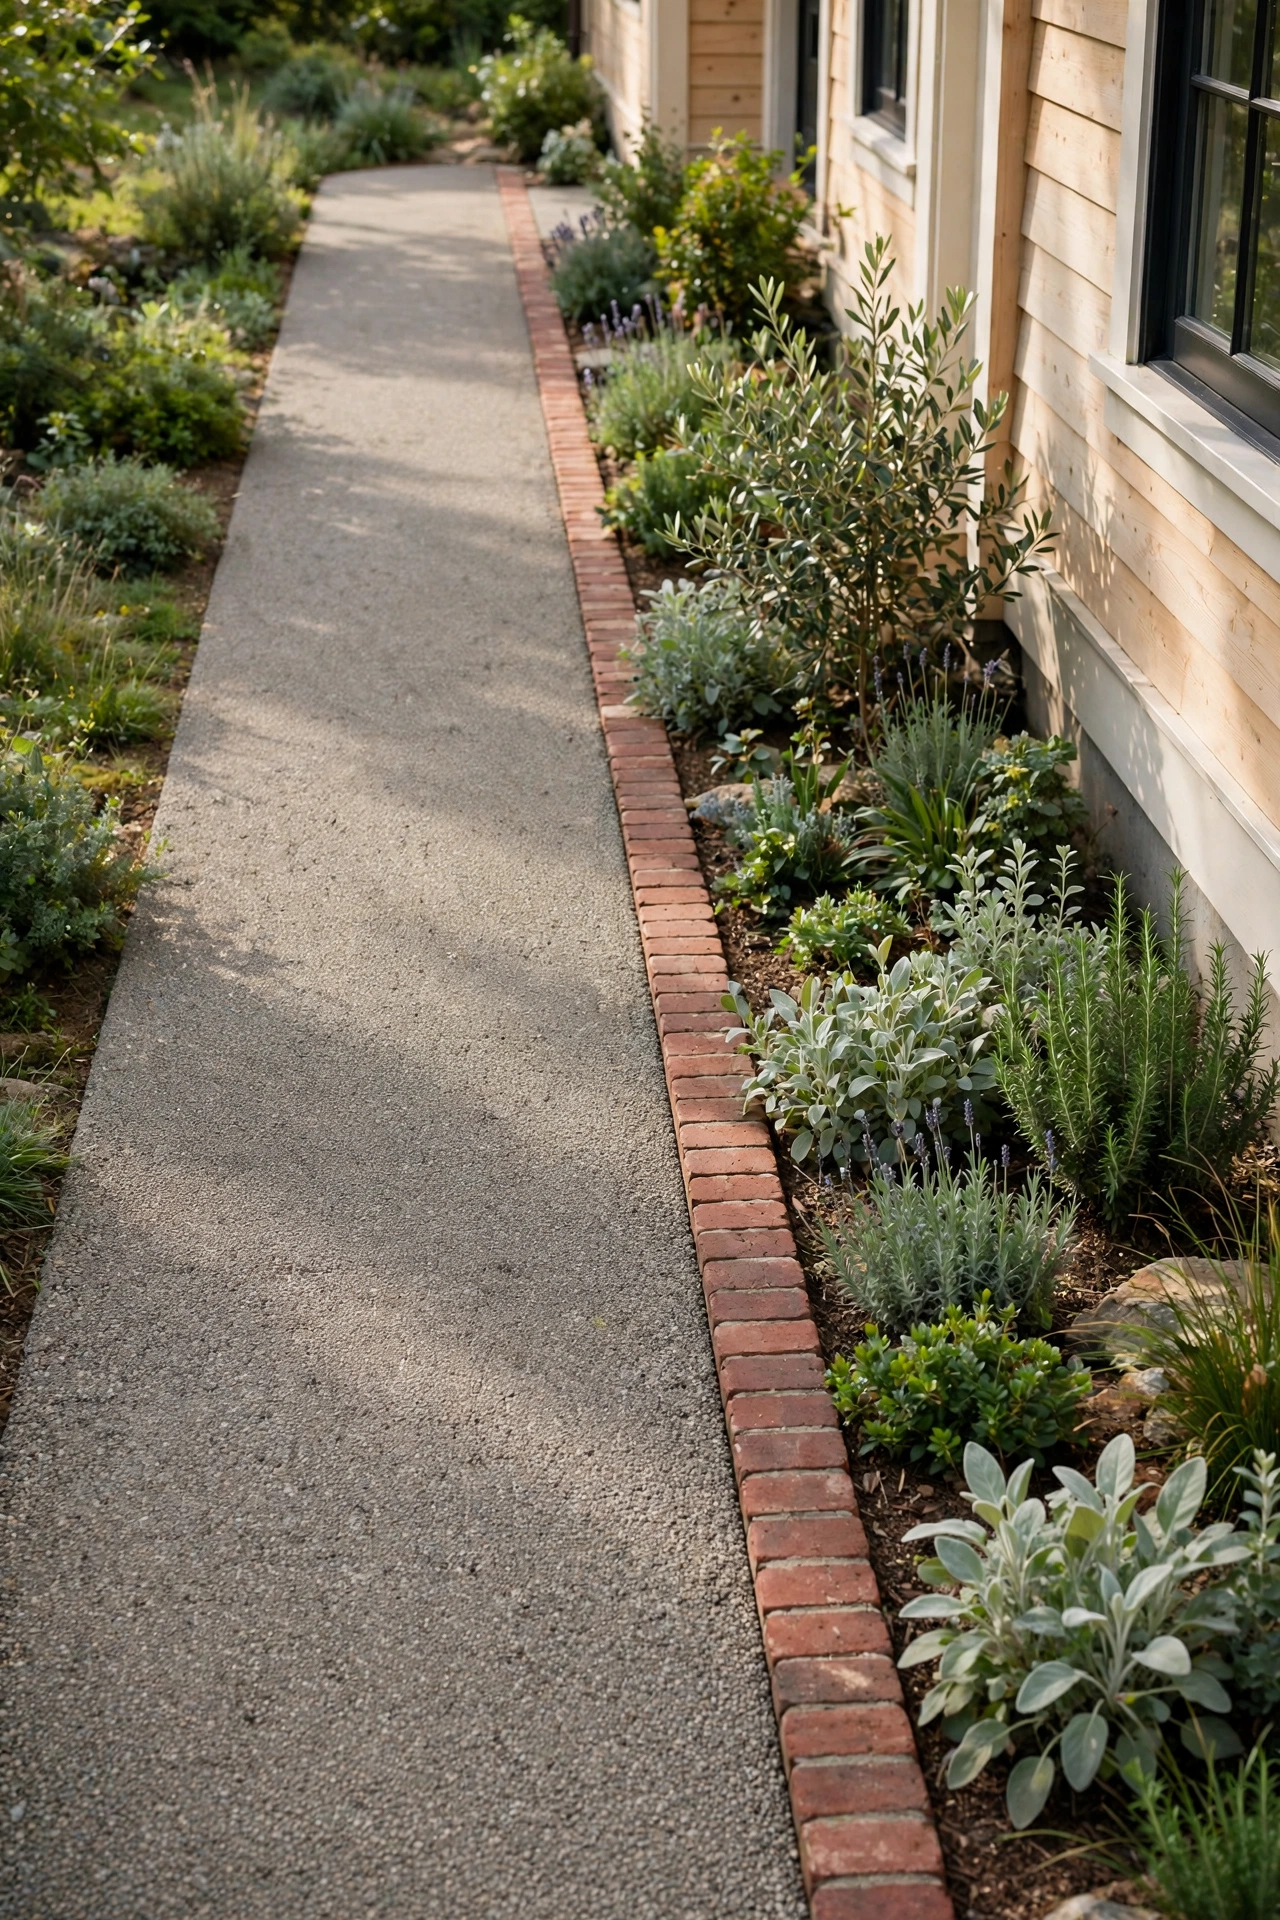
Crushed granite packs down into a firm, smooth surface that suits narrow strips where a full paver path feels too heavy. Spread it 3 to 4 inches deep over compacted base, wet it, and tamp it in layers until it holds a footprint without shifting. A brick or steel edge keeps the granite from spreading, and the pale gold tone reflects light into shaded passages. The surface needs a fresh top layer every year or two in high-traffic spots, but that top-up takes an afternoon and a wheelbarrow, not a rebuild.
Try this: Order granite with angular particles rather than rounded gravel, since angular stone locks together when compacted.
Cost: $ | Difficulty: Easy
5. Permeable pavers with gravel joints

Permeable pavers solve the most common side yard problem, which is water with nowhere to go. The pavers sit with half-inch joints filled with small angular aggregate, so rain soaks through the path instead of running toward the house. Use pavers made for permeable installation, and keep the base open-graded stone rather than sand, which would block drainage. This path suits strips that puddle after storms or sit below a roof drip line. Sweep the joints clear of leaves each fall so the gaps keep draining.
Try this: Pour a bucket of water on the finished section and watch it drain before you call the job done.
Cost: $$ | Difficulty: Moderate
The U.S. Environmental Protection Agency explains how permeable pavement lets stormwater soak through instead of running off, which is the same principle behind this path: EPA: Soak Up the Rain, Permeable Pavement.
6. Cedar plank boardwalk
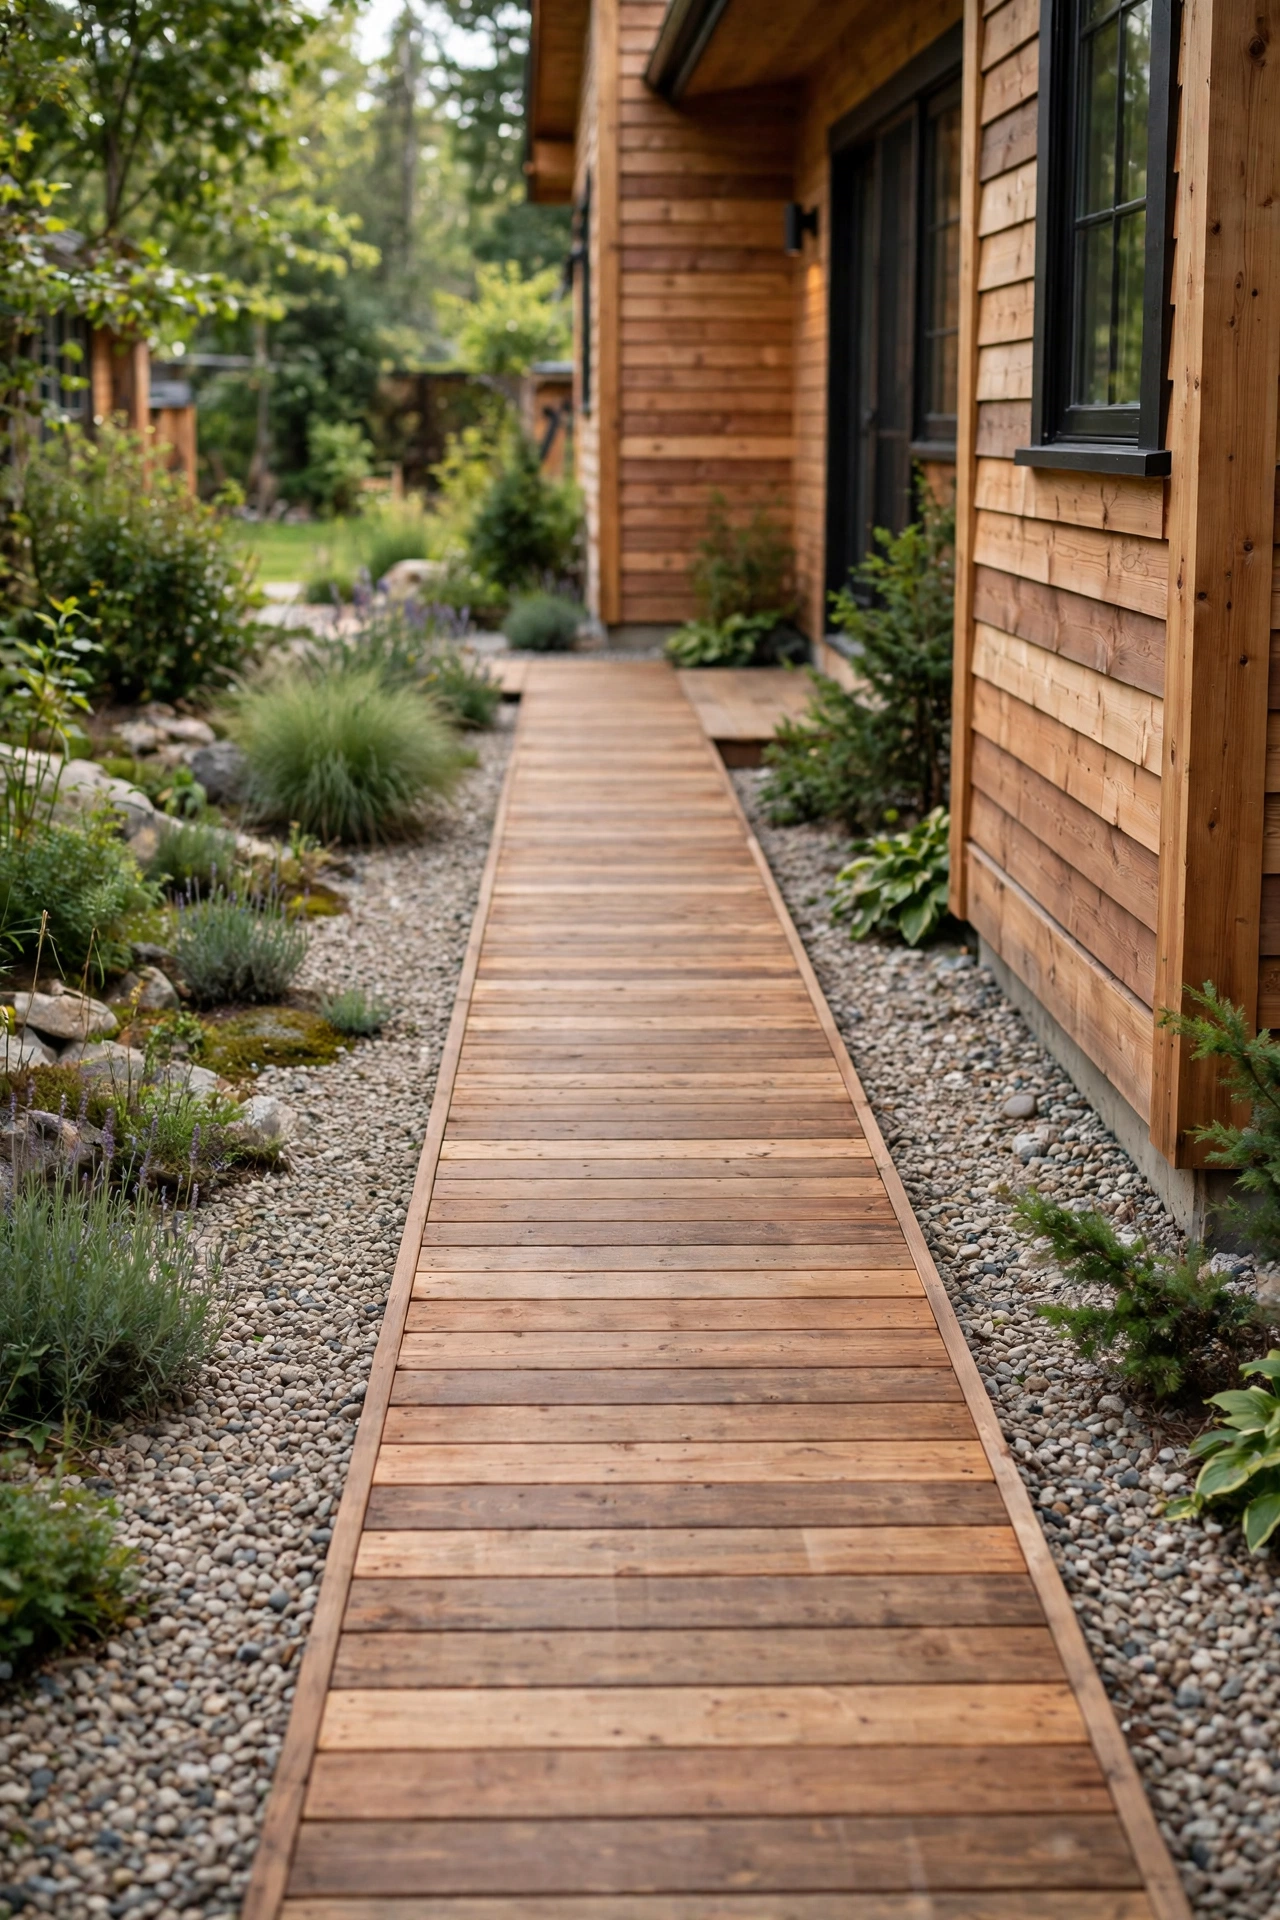
Cedar planks laid as a boardwalk warm up a shaded strip where grass will not grow. Use 2 by 6 inch cedar or treated boards running across the path width, with a small gap between boards for drainage, and support them on pressure-treated sleepers set on compacted gravel. The wood surface stays cooler than concrete in summer and gives a cabin-like feel that suits wood-sided houses. Seal the boards once a year, and keep the ends clear of soil so moisture does not wick into the grain.
Try this: Leave a quarter-inch gap between boards so rain drains instead of pooling on the surface.
Cost: $$ | Difficulty: Moderate
7. Concrete slab grid with grass seams

Large square concrete slabs with grass seams between them give a modern look without a poured slab. Set 24 inch slabs on a compacted base, leave 3 to 4 inch gaps, and fill the gaps with soil and grass seed or a low groundcover that tolerates foot traffic. The grid pattern breaks up a long strip so it reads wider, and the grass softens the concrete. Set the slabs flush with the surrounding grade so a mower rides over them. This path works best where the strip gets at least some sun for the grass.
Try this: Use a string line across the slab tops as you set them, since even a half-inch height difference becomes a trip edge.
Cost: $$ | Difficulty: Moderate
8. Bark mulch path with timber edging

A bark mulch path suits a shaded side strip that you walk a few times a week rather than daily. Spread shredded bark 3 to 4 inches deep over landscape fabric, and hold it in with timber edging on both sides so the mulch stays put. The soft surface quiets footsteps, suppresses weeds, and feeds the soil as it breaks down. Plan to top it up once or twice a year, and skip this material on a route that carries a wheelbarrow, since wheels sink into loose mulch.
Try this: Use coarse bark nuggets rather than fine shredded mulch on a path, since fine mulch mats down and holds water.
Cost: $ | Difficulty: Easy
9. Slate steppers on a gravel base

Dark slate steppers bring a refined look to a narrow passage, and the deep gray tone sets off green planting beside the path. Set each stone on 2 to 3 inches of compacted gravel so the base drains and the stone sits level. Slate resists slipping better than polished stone, which matters on a shaded path that stays damp. Arrange the stones in a straight run for a formal feel or offset them slightly for a relaxed one, and keep the gaps narrow enough that a heel cannot catch.
Try this: Choose stones with a natural cleft surface rather than honed slate, since the rough face grips shoes better when wet.
Cost: $$ | Difficulty: Easy
10. Widened gate landing pad

The gate is where a narrow path fails most often, since two people, a dog, or a wheelbarrow all need room to turn. Widen the path into a landing pad at each gate, at least 4 feet square, using the same material as the path so the widening reads as part of the design. Set the pad flush with the gate threshold so nothing catches a wheel or a shoe. A small step light or a solar stake at the pad corners marks the transition after dark and keeps the gate swing clear of planting.
Try this: Stand in the gate swing with the gate open and check that you can turn around without stepping off the pad.
Cost: $ | Difficulty: Easy
If the strip beside your house needs plants and screening as well as a path, see 20 Easy Side of House Landscaping Ideas for Narrow Spaces for beds, screens, and shade planting that fit the same tight space.
Side pathway ideas compared
| Path idea | Cost | Difficulty | Best for |
|---|---|---|---|
| 1. Running bond concrete pavers | $$ | Moderate | Daily routes, clean look |
| 2. Brick herringbone runner | $$ | Moderate | Texture, brick houses |
| 3. Flagstone steppers in pea gravel | $ | Easy | Relaxed look, fast drainage |
| 4. Compacted crushed granite path | $ | Easy | Firm surface, low budget |
| 5. Permeable pavers with gravel joints | $$ | Moderate | Wet strips, drainage problems |
| 6. Cedar plank boardwalk | $$ | Moderate | Shaded strips, warm look |
| 7. Concrete slab grid with grass seams | $$ | Moderate | Modern houses, some sun |
| 8. Bark mulch path with timber edging | $ | Easy | Shaded strips, light use |
| 9. Slate steppers on a gravel base | $$ | Easy | Refined look, damp shade |
| 10. Widened gate landing pad | $ | Easy | Gate transitions, turning room |
Cost key: $ means $1 to $10, $$ means $11 to $99, $$$ means $100 to $999, $$$$ means $1,000 and up. Professional installation costs more.
Mistakes to avoid on a side path
Skipping the base is the most expensive mistake. A path laid straight on soil dips within a season, and the fix means lifting the whole surface. Excavate 6 to 8 inches, compact crushed stone in layers, and only then set your surface.
Grading toward the house is the second mistake. Even a path that looks level can send water to the foundation if the strip slopes the wrong way. Check the slope with a level before you set the final surface, and keep the finished path at least 6 inches below siding.
Loose material without edging is the third mistake. Gravel and mulch migrate into beds and lawns within weeks when nothing holds them. A steel, stone, or timber edge on both sides costs little and saves constant raking.
For front yard walkway planting that pairs with a side path, see 15 Inspiring Walkway Landscaping Ideas for a Beautiful Front Yard.
Side path safety notes
Call 811 before you dig, even for a shallow path base, so buried utility lines get marked first. Keep the finished surface slip-resistant, and avoid polished stone on shaded paths that stay damp. Slope every path away from the house, and keep drains and downspout outlets clear so water does not pool on the walking surface.
For wired path lights, hire a licensed electrician and use GFCI-protected circuits outdoors. Solar stakes avoid wiring altogether and suit most side paths. Keep cords, hoses, and tools off the walking surface, and check local rules before moving a fence or gate. The national utility locator service explains how to get lines marked before digging: Call 811 Before You Dig.
If you want stone edging along the path, river rock has uses beyond mulch beds, including path borders and drainage edges: see 17 River Rock Landscaping Ideas Instead of Mulch. For screening the fence above a side path, see 14 Trellis Ideas for Privacy That Block the View Without Blocking the Light.
Frequently asked questions
How wide should a narrow side pathway be?
At least 36 inches of clear walking surface for one person, and 42 to 48 inches if you push a wheelbarrow or walk beside someone. Measure at the tightest point, such as a hose bib or an AC unit, and keep that width through the whole run.
How do I stop water pooling on a side path?
Slope the finished surface 1 to 2 percent away from the house, and use a permeable surface or gravel joints where the strip holds water. Keep soil and mulch at least 6 inches below siding, and keep downspout outlets clear so roof water does not dump onto the path.
Can I lay a path over an existing concrete strip?
Yes, if the concrete is level, drains away from the house, and has no major cracks or settling. A thin sand bed lets you set pavers over it, but a cracked or sunken slab needs repair first, since pavers will follow the same dips.
What is the cheapest durable side path?
Compacted crushed granite or a bark mulch path with timber edging, both under $150 in DIY materials for a typical 3-by-30-foot strip. Granite holds up better under daily use, while mulch suits light-use shaded strips and needs topping up once or twice a year.
How do I keep weeds out of a gravel path?
Lay landscape fabric under the base, use angular gravel that compacts well, and edge both sides so soil cannot wash in. Sweep leaves off the surface each fall, and pull seedlings early, since weeds root fastest in the fine dirt that collects on top of gravel.
Final thoughts
Our side strip went from a muddy chore to a path we use without thinking, and the change came from three choices: a width that fits a real stride, a base that stays level, and a slope that sends water away from the house. Pick one idea from this list that fits your strip, and start with the base, since everything above it depends on that layer.
Finishing the space under your deck? See these 26 lattice alternatives for under deck skirting, from cedar slats to stone veneer.


