


The open gap under a raised deck is hard to ignore once you notice it. You see the posts, the joists, the mud, and whatever the last storm blew underneath. It makes even a new deck look unfinished, and it gives raccoons, skunks, and stray balls a place to settle. Our own deck hid a muddy gap for two summers before we closed it in, and the yard felt finished the week we did.
This guide covers 26 lattice alternatives for under deck skirting, from horizontal cedar slats and composite boards to stone veneer, metal screens, and planted edges. Every idea lists a cost range, a difficulty level, and a time estimate, so you can match the skirt to your deck height, your house style, and the amount of upkeep you want.
- Leave air moving under every skirt, through gaps, vents, or open slat spacing, so trapped moisture never rots the framing.
- Build at least one removable section or hinged door into the skirt for maintenance, plumbing, and pest checks.
- Match the skirt material to the house, not just the deck, so the base reads as part of the home.
- Keep the bottom edge off the soil with a gravel strip or a small clearance gap to slow rot and splashback.
- Back open designs with half inch hardware cloth if critters are a problem in your yard.
1. Horizontal Cedar Slats
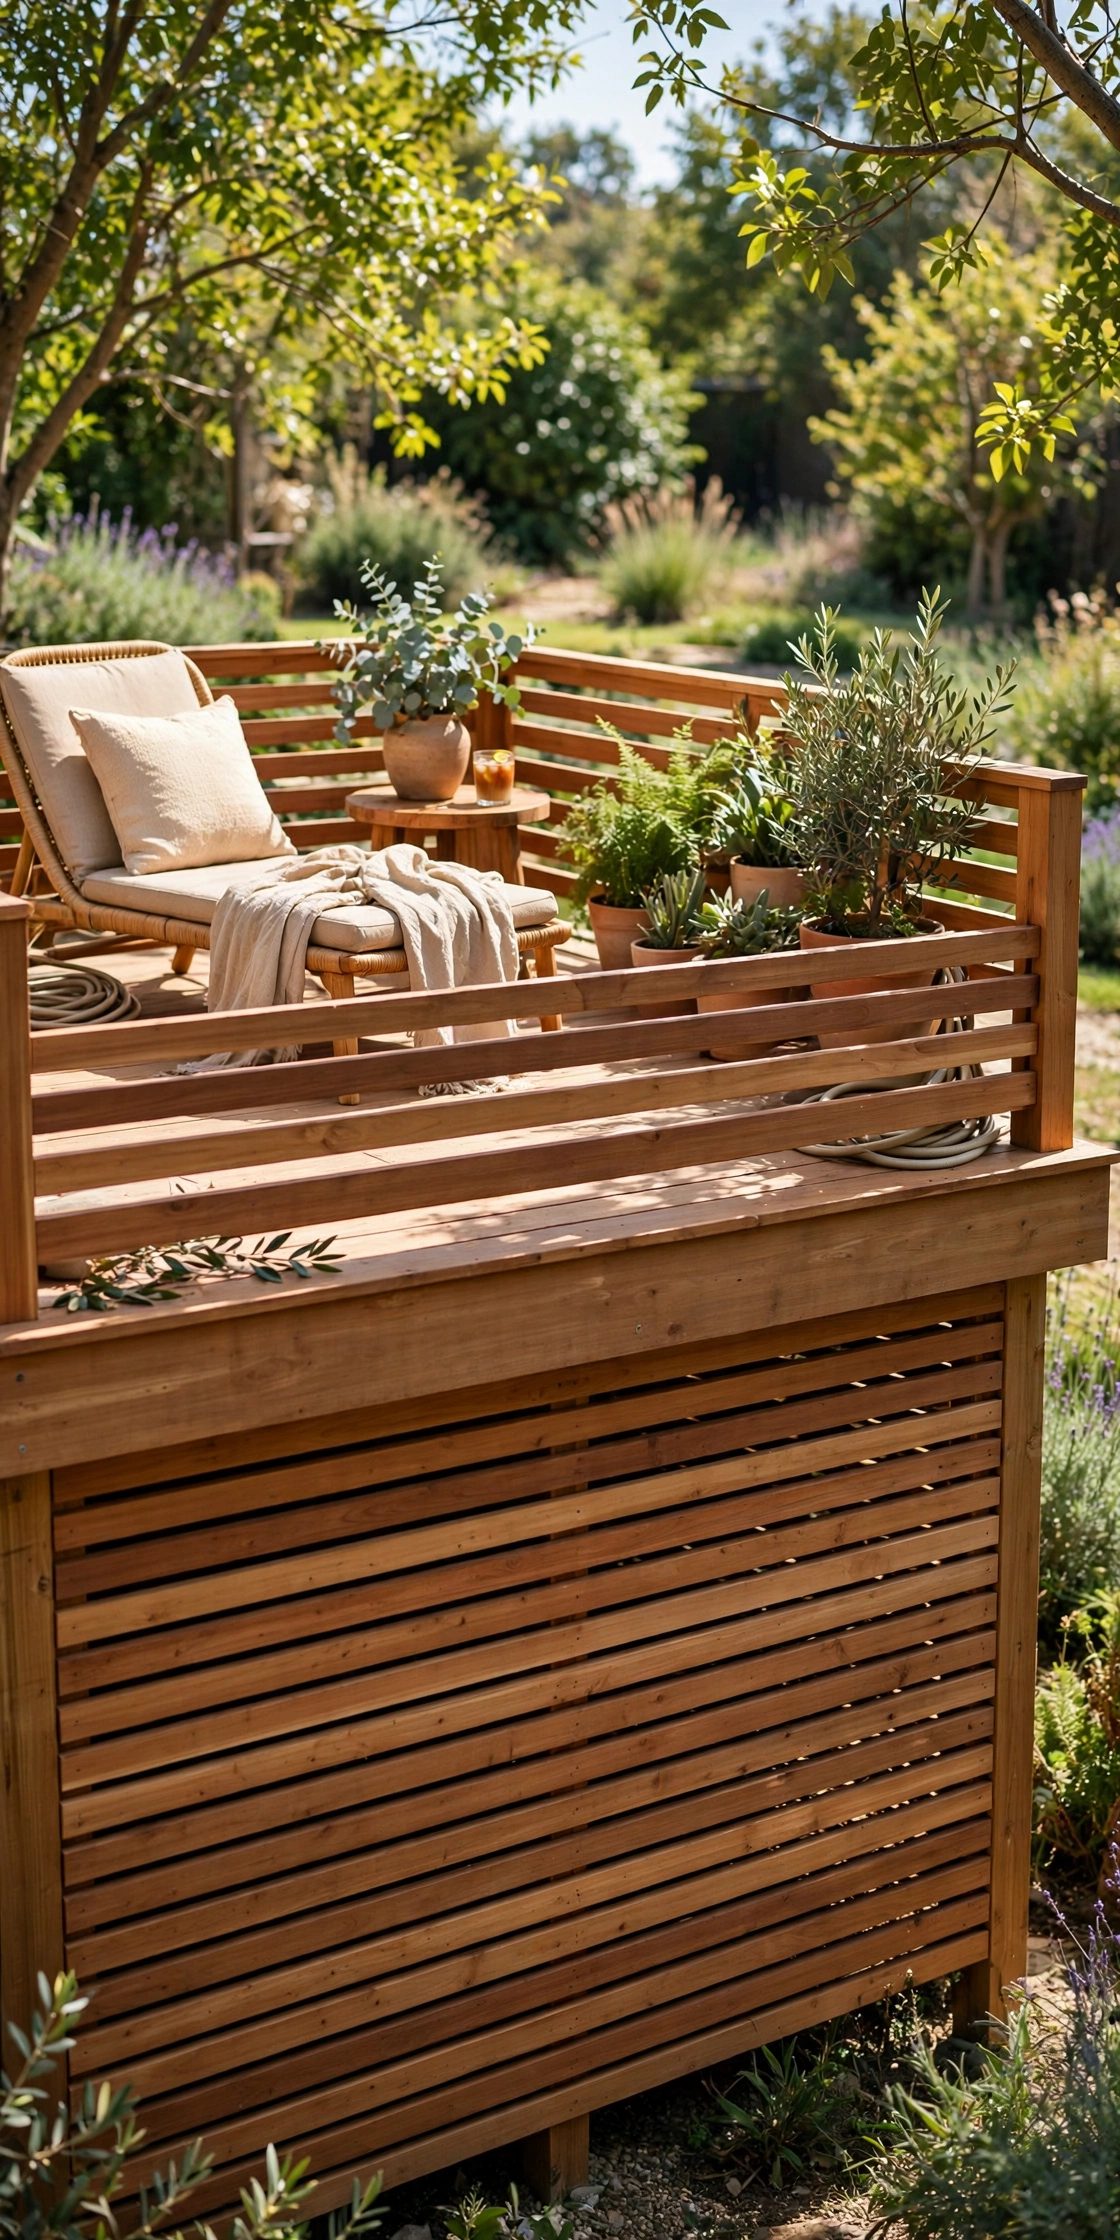
Horizontal cedar slats run long boards across the deck base with a narrow gap between each board, usually a quarter inch to half an inch. The lines make a deck look longer and lower, and the gaps keep air moving so the framing dries after rain. Cedar holds up well near grade, takes stain evenly, and smells good on a warm day. Build a level frame first, because horizontal lines show every dip in the ground. Stain the boards on all sides before you fasten them.
Try this: stain the frame boards the same dark tone as the slats so the shadow gaps read as clean lines instead of bright stripes.
Cost: $| Difficulty: Moderate | Time: 1 to 2 weekends
2. Vertical Composite Slats

Vertical composite slats stand boards upright around the deck base, which makes a short deck look taller and hides uneven ground better than horizontal runs. Composite boards resist rot, insects, and splinters, and they never need stain. Leave the gaps the manufacturer calls for, because composite moves more with heat than wood does, and a tight fit can buckle in summer. A dark frame behind the slats keeps the gaps from flashing white in sunlight.
Try this: mix one narrow slat width into the run every few boards so the skirt has rhythm instead of a flat warehouse wall.
Cost: $| Difficulty: Moderate | Time: 1 to 2 weekends
3. Board and Batten
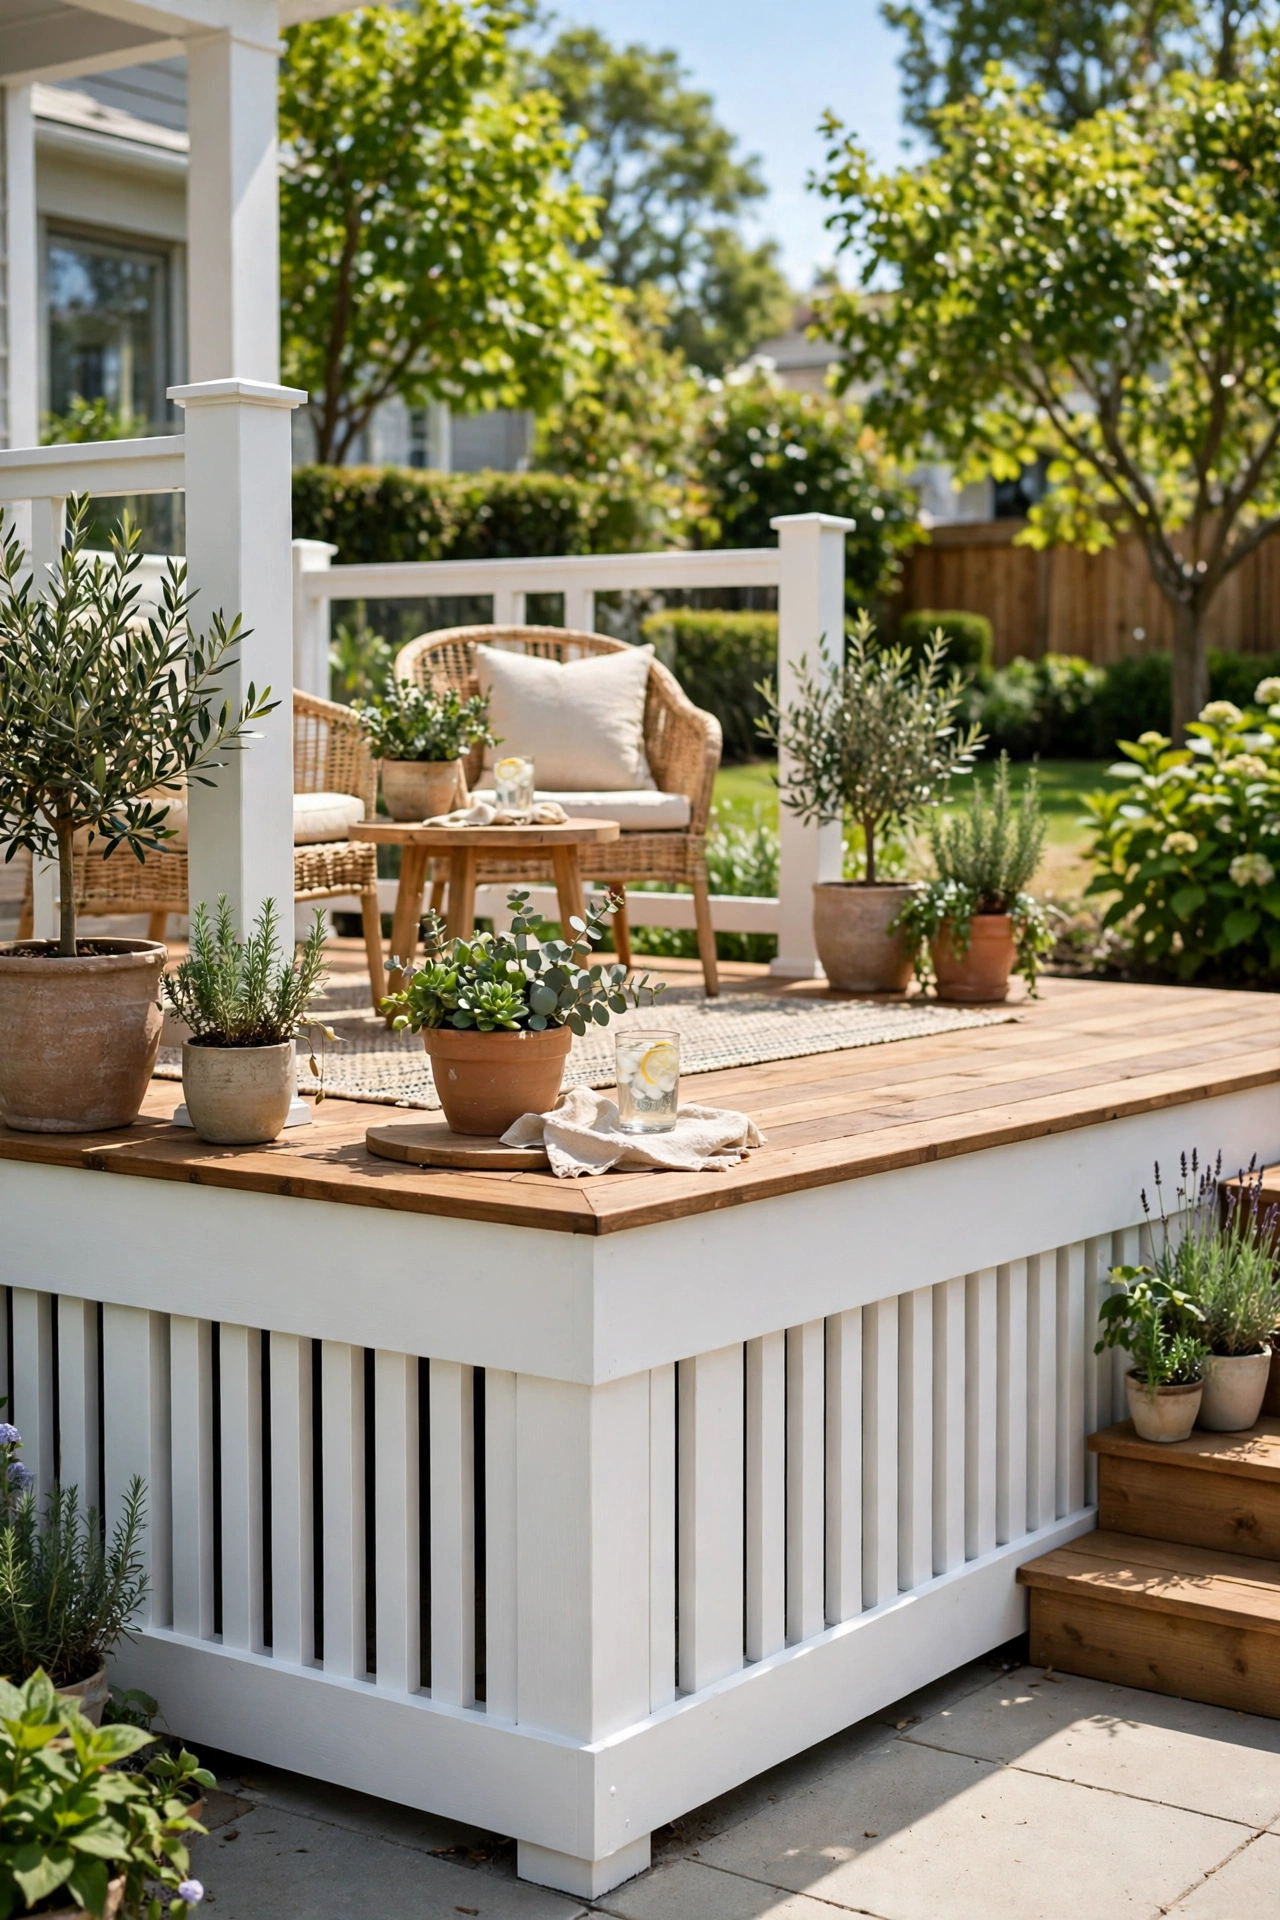
Board and batten pairs wide vertical boards with narrow battens over the seams, which gives the deck base an architectural look closer to house siding. It suits craftsman and traditional homes, and it works best when the deck sits at least 24 inches above grade, since the vertical breaks keep a tall base from feeling heavy. Use cedar, fiber cement, or PVC boards if you want less upkeep than pine. Keep battens narrow, around 2 to 3 inches, so the skirt reads as trim rather than bulk.
Try this: paint the skirt the house trim color instead of the deck color to tie the deck base to the home.
Cost: $| Difficulty: Moderate | Time: 2 weekends
4. Shiplap Boards
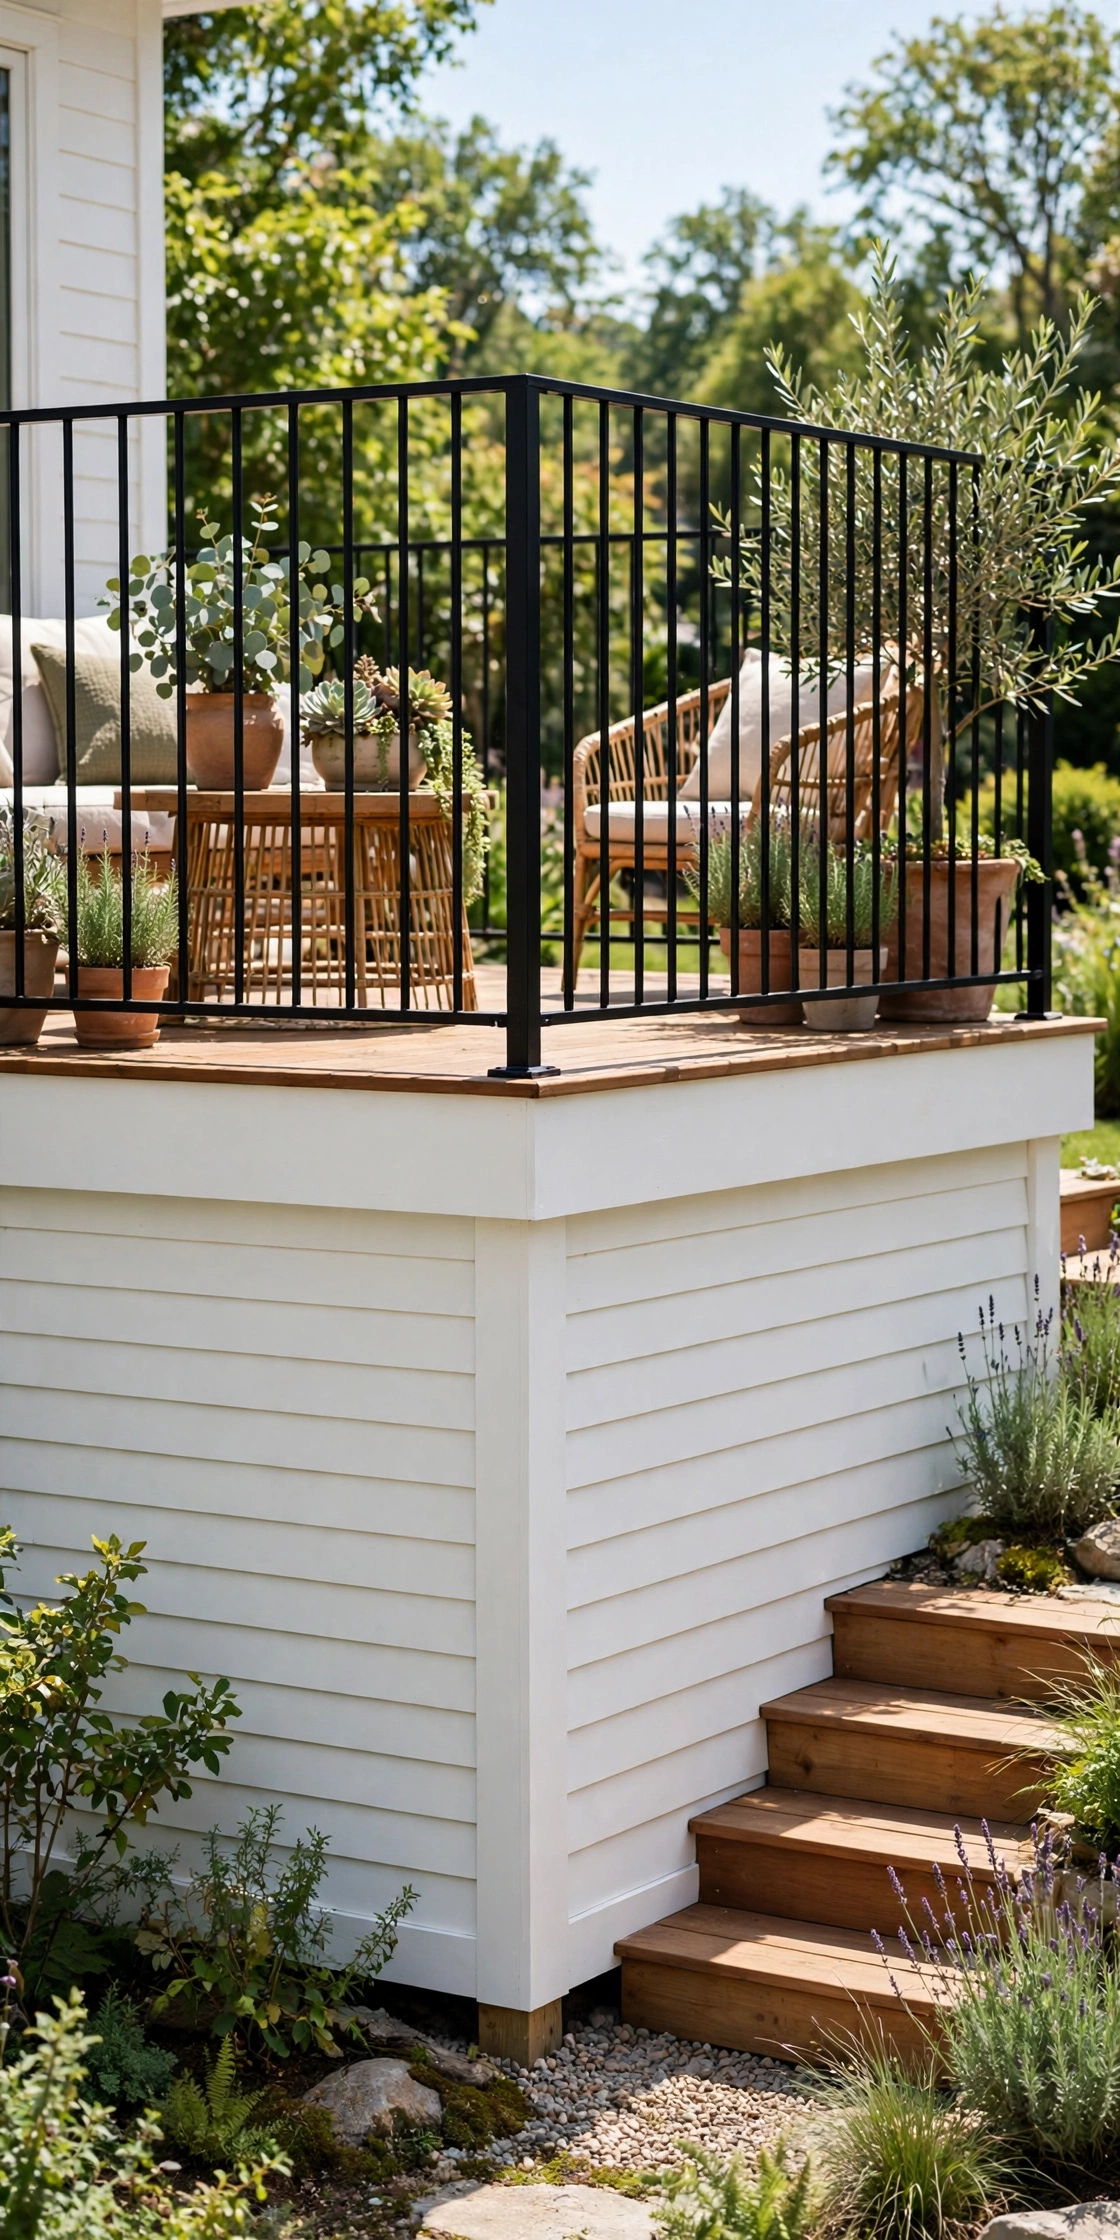
Shiplap boards lock together with a small overlapping joint that sheds rain and hides the frame behind a smooth, lined face. The look fits farmhouse and coastal homes, and it reads as finished from the patio without any extra trim. Exterior shiplap needs a vent plan, because the tight joints block airflow on their own, so add screened vents near the top and bottom of each run. Seal the end grain and the bottom edge well, since those spots soak up splashback first.
Try this: run the shiplap horizontally on low decks and vertically on tall decks, since the direction changes how tall the base feels.
Cost: $| Difficulty: Moderate | Time: 1 to 2 weekends
5. Tongue-and-Groove Cedar
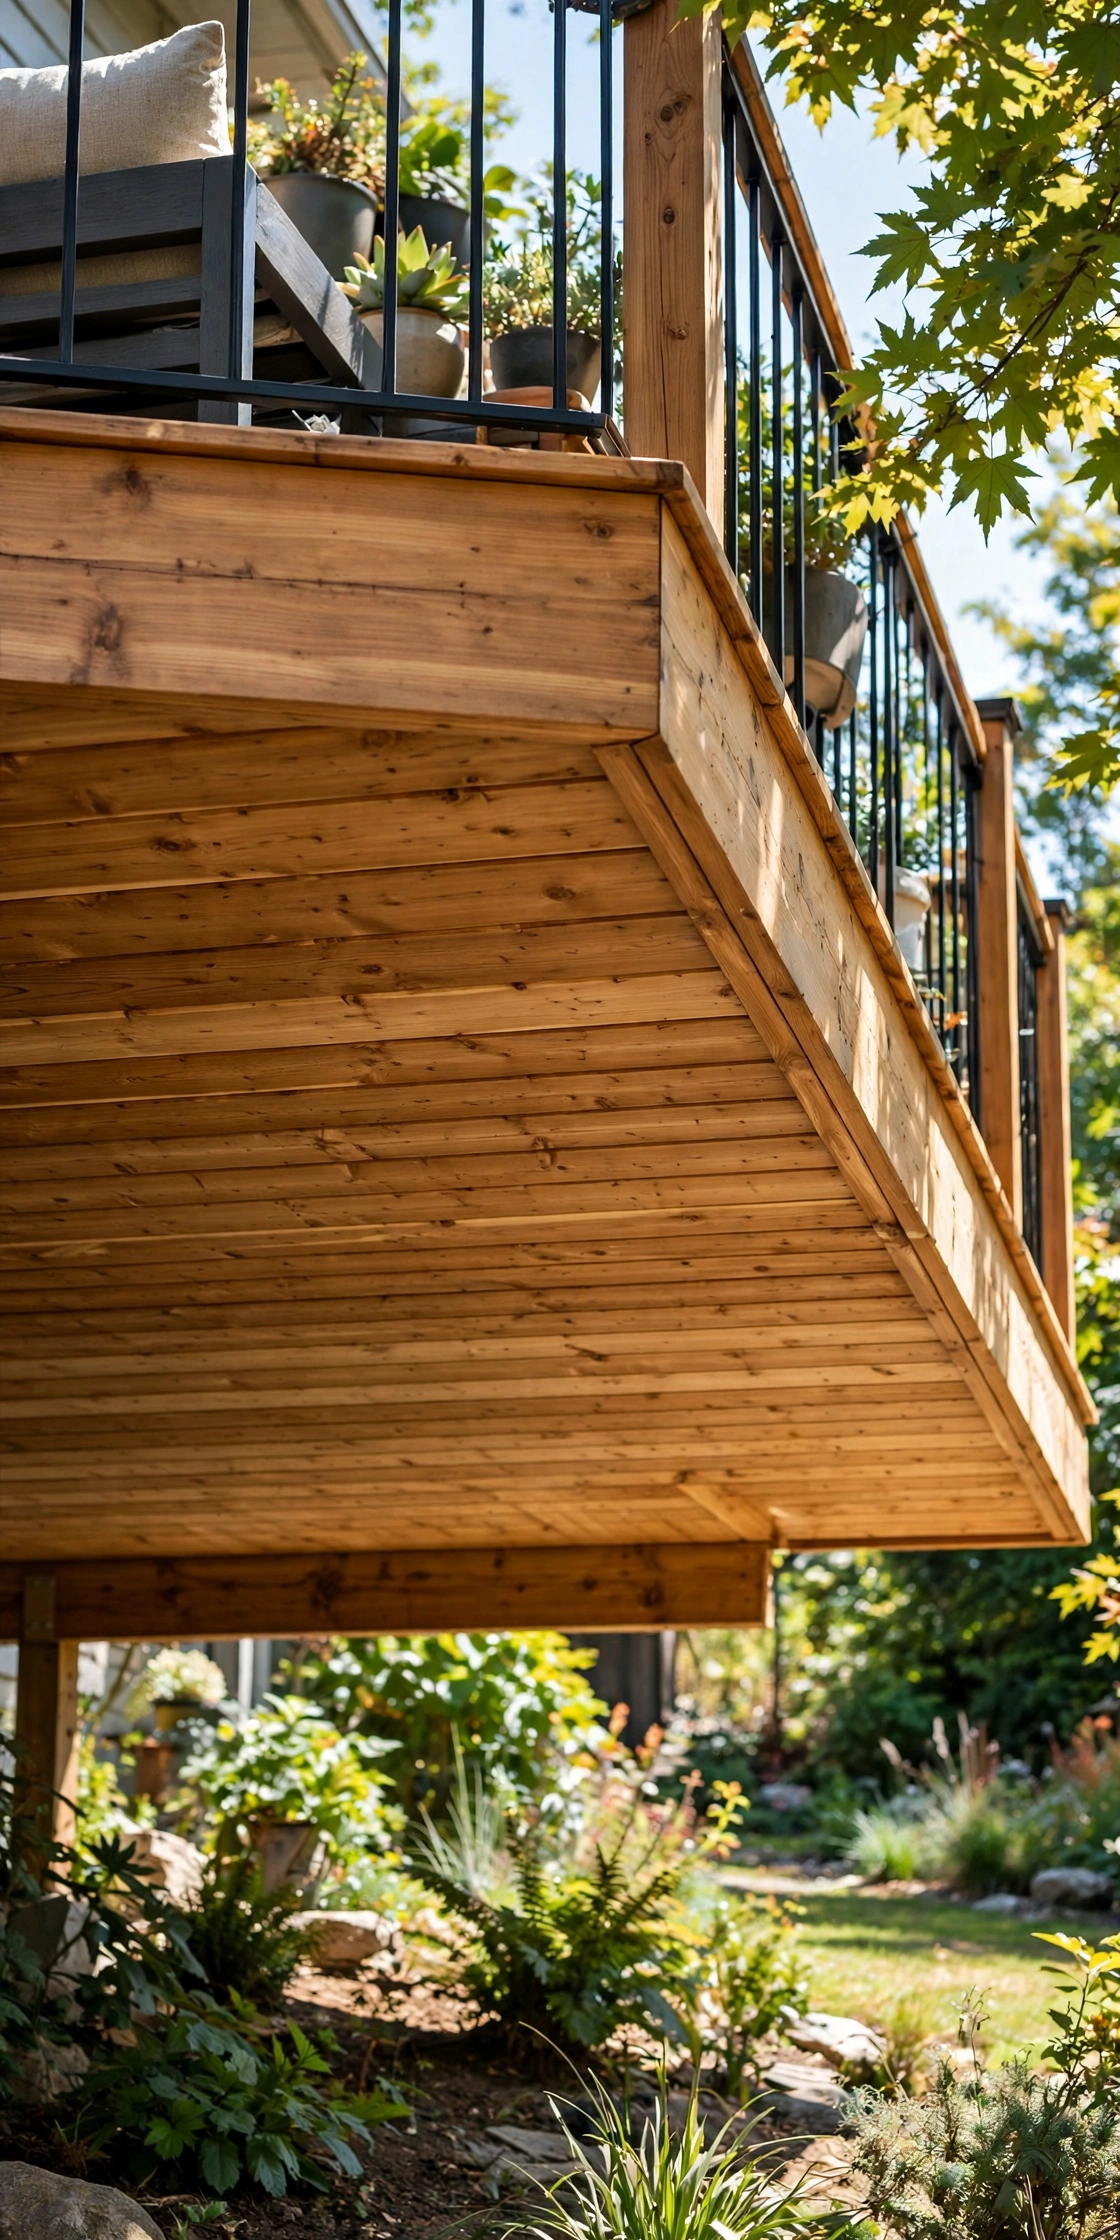
Tongue-and-groove cedar gives a tight, furniture-like face under the deck, with each board locking into the next for a gap-free wall. It suits decks near outdoor dining areas, where a clean backdrop matters more than a rustic one. The tight fit means you must plan vents from the start, with screened grilles cut into the skirt at both ends of the run. Cedar moves with the seasons, so leave a small expansion gap at the ends and fasten with stainless screws to avoid dark stains.
Try this: finish the cedar with a clear exterior sealer the first year, then decide on stain once you see how the wood weathers.
Cost: $| Difficulty: Moderate | Time: 2 weekends
6. Matching Composite Deck Boards

Using the same composite boards as the deck surface for the skirt gives the most built-in look available, because the base matches the deck exactly in color and texture. Run the boards vertically for a calm face or horizontally to echo the decking above. The upfront cost runs higher than wood, but the skirt needs no staining and resists rot and insects for years. Follow the maker rules for gaps and fasteners, since composite expands in heat and a tight install can warp.
Try this: pick a skirt color one shade darker than the deck boards to hide dirt splash at the bottom edge.
Cost: $| Difficulty: Moderate | Time: 1 to 2 weekends
7. Vented Vinyl Skirting Panels
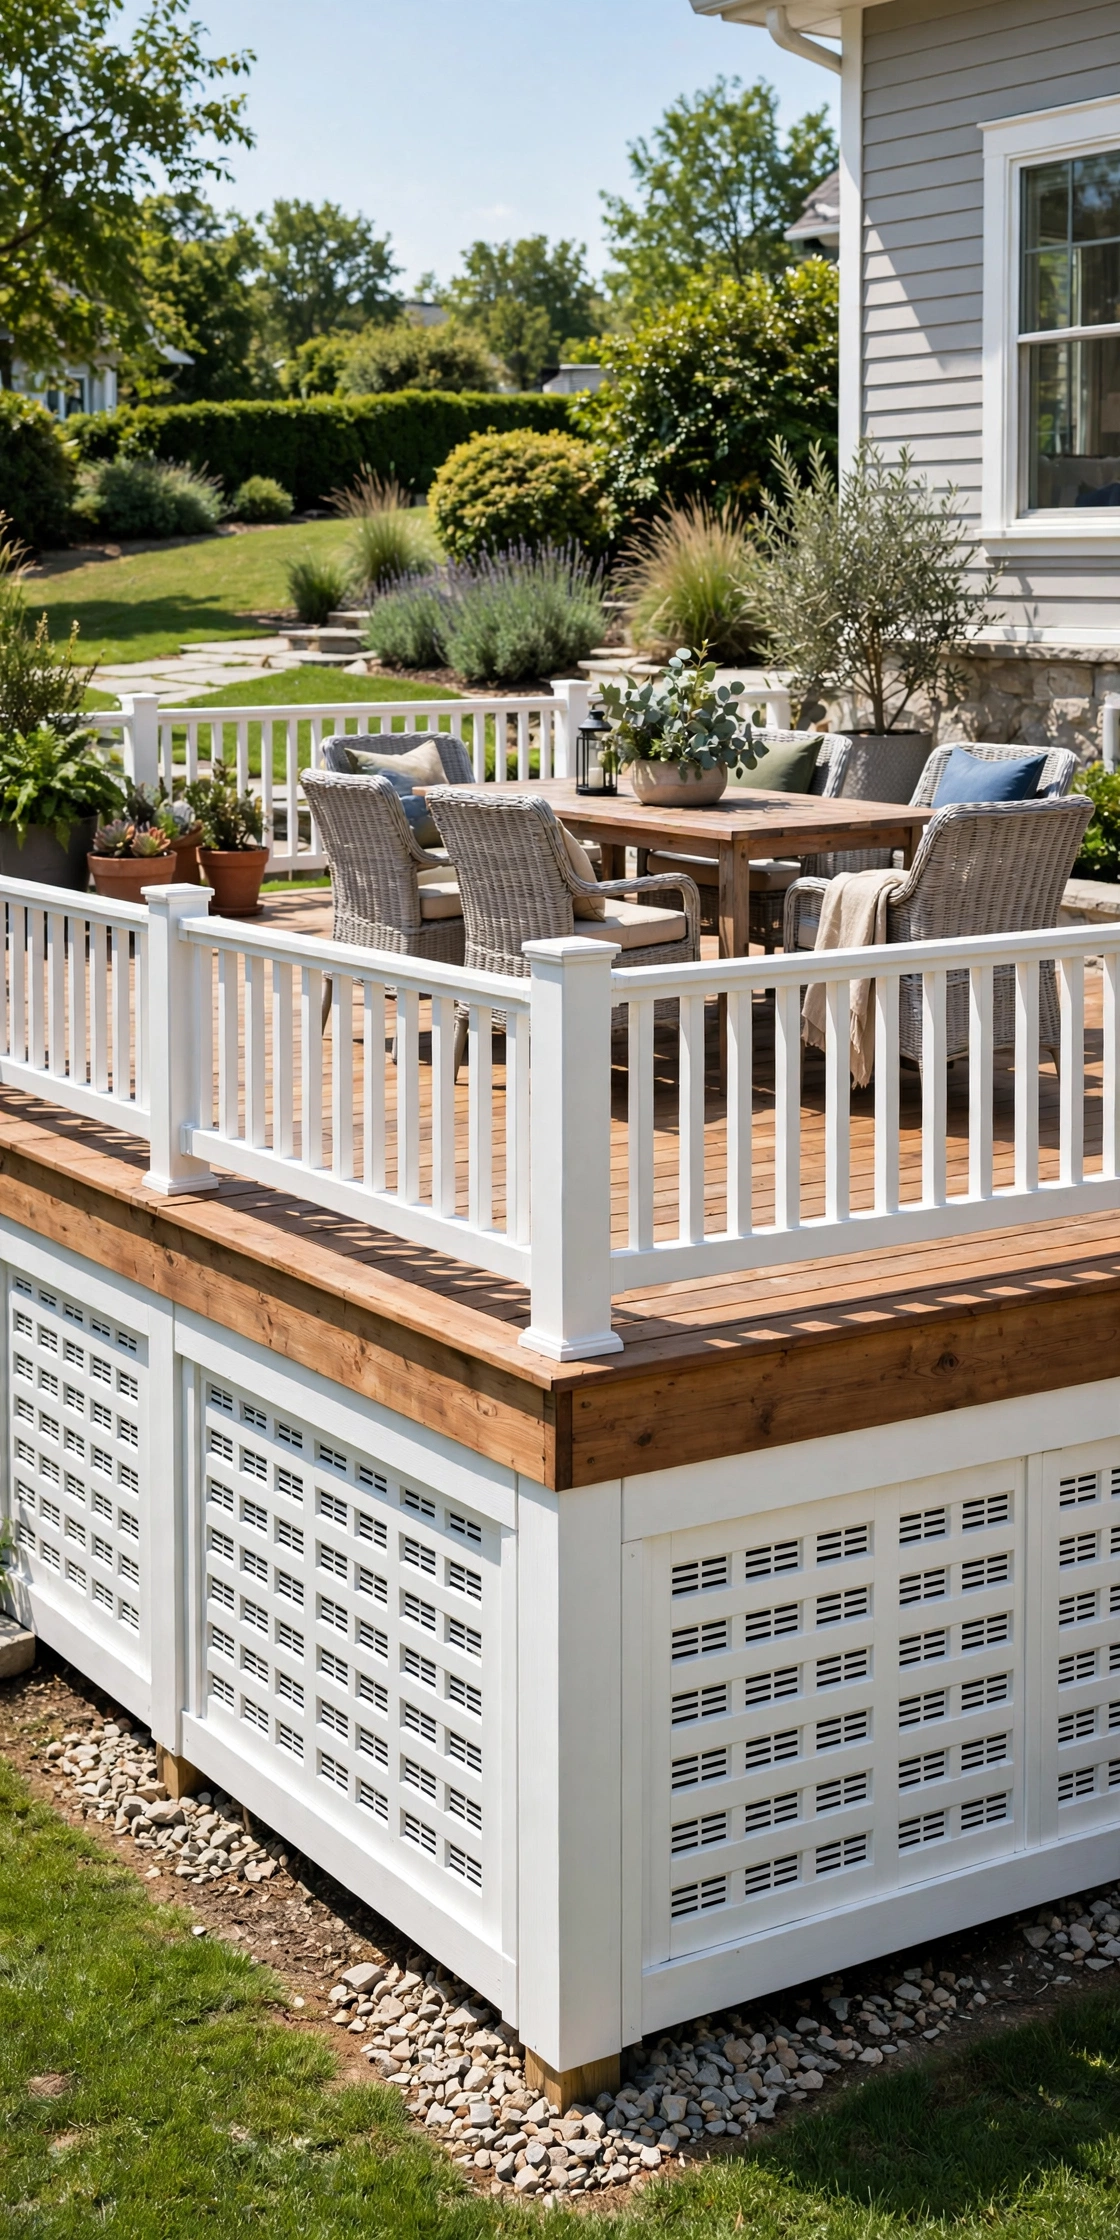
Vented vinyl skirting panels come as ready-made sections with built-in airflow slots, so you get a finished face and ventilation in one product. They snap or screw onto a rail system, need no painting, and wash clean with a hose. Vinyl handles rain and mud well, but it can sag or rattle in high wind if the edges are not framed tightly, so anchor every panel edge. Pick UV-stable panels, since cheap vinyl chalks and fades after a few summers in full sun.
Try this: order one extra panel and a length of matching trim at the start, since exact color matches get hard to find later.
Cost: $| Difficulty: Easy | Time: 1 weekend
8. Solid PVC Trim Panels
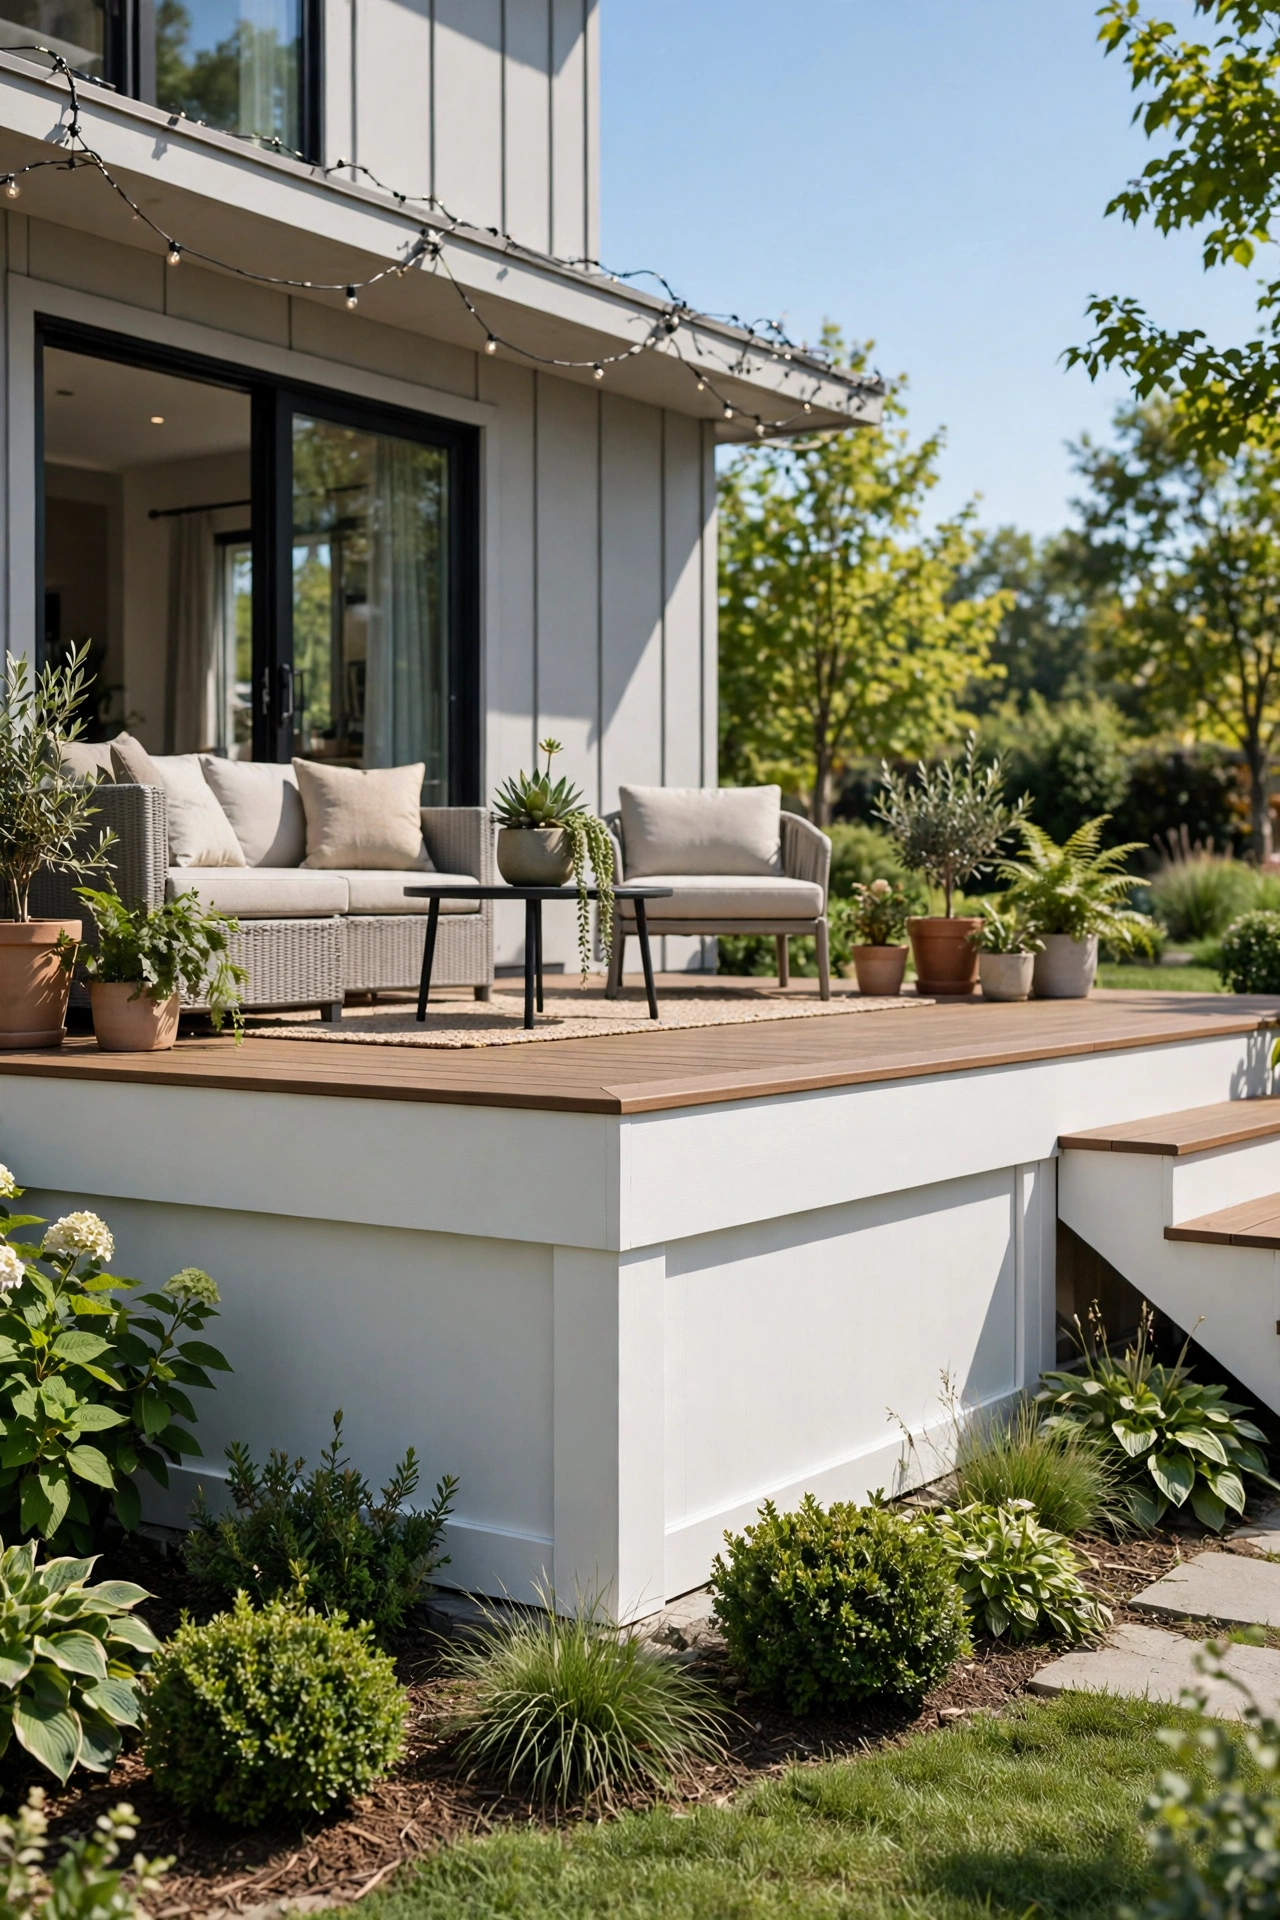
Solid PVC trim panels form a flat, clean wall under the deck that reads like painted wood without any of the upkeep. PVC never rots, never needs paint, and holds up to wet soil and snow splash at the bottom edge. Because solid panels block airflow completely, pair them with screened vents near the top and bottom of each run, or moisture will sit against the framing. Cut PVC with a fine-tooth blade and leave room for expansion, since the boards move with temperature swings.
Try this: use PVC trim boards for the top rail and corner boards too, so the whole skirt edge stays crisp for years.
Cost: $| Difficulty: Moderate | Time: 1 to 2 weekends
9. Corrugated Metal Panels
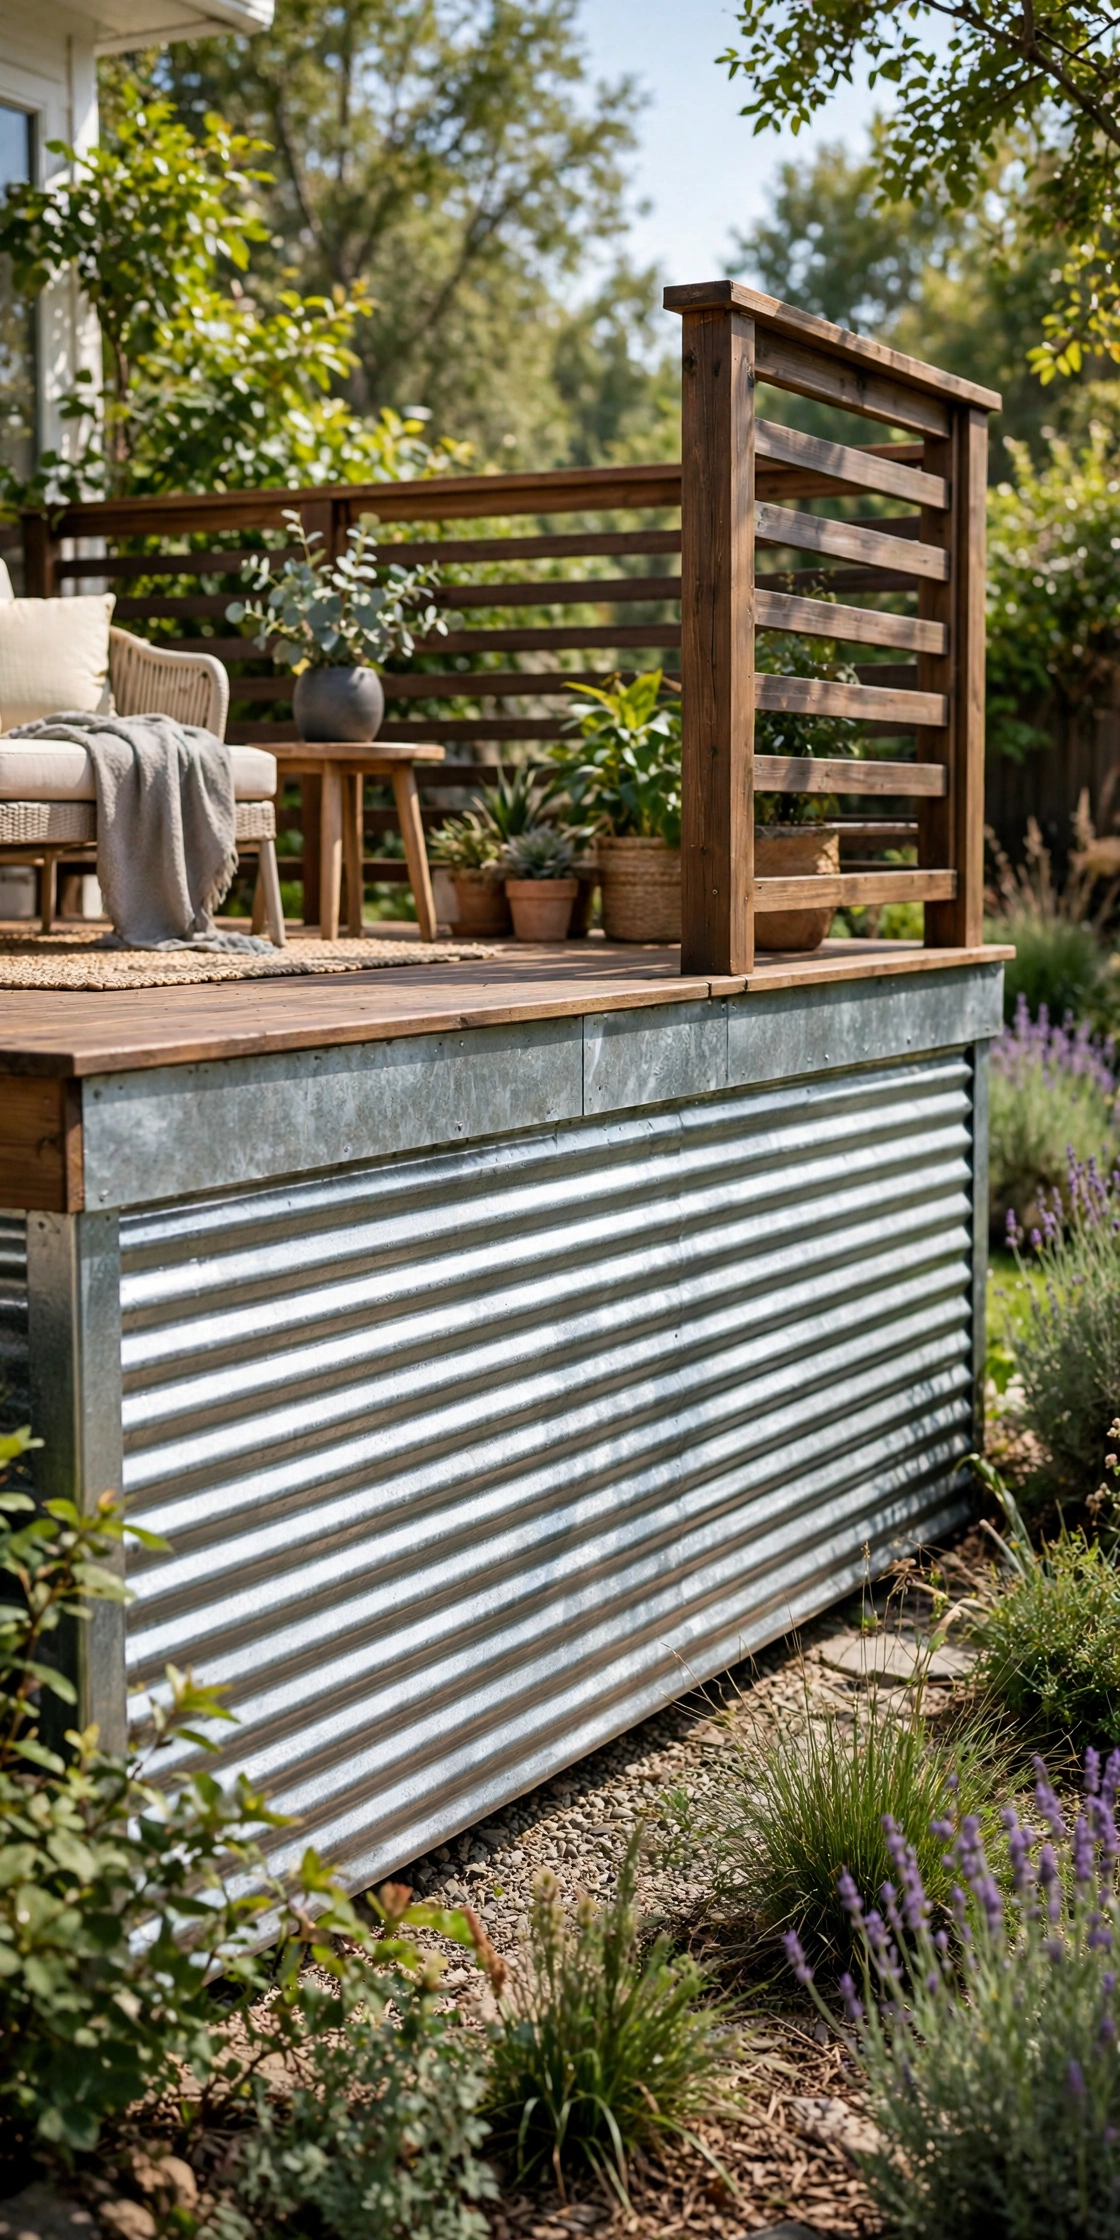
Corrugated metal panels bring a tough, industrial edge to the deck base and shrug off rot, wet soil, and snow splash. Galvanized or painted steel works best, and a dark matte finish keeps glare down and hides small dents better than gloss. Metal can sound loud in heavy rain and ring hollow if the panels span too far, so fasten to a close frame and add a wood top rail to calm the look. Cover every cut edge with trim, since raw metal edges rust first and look unfinished.
Try this: pair corrugated panels with black trim and black deck rails for a cabin or modern farmhouse look that feels planned.
Cost: $| Difficulty: Moderate | Time: 1 weekend
10. Matte Flat Steel Panels

Flat steel panels give a smooth, modern face that suits homes with black window trim and simple siding. Unlike corrugated sheets, flat panels read as quiet architecture rather than utility siding, but they demand a flat, well-built frame, since every wave in the framing shows through. Use exterior-rated steel with a matte powder coat, and seal the bottom edge against standing water. Flat panels block airflow, so add screened vents at both ends of each run to keep the framing dry.
Try this: break a long flat run with one recessed access door in the same steel so maintenance access stays invisible.
Cost: $$| Difficulty: Hard | Time: 2 weekends
11. Laser-Cut Metal Screens

Laser-cut metal screens turn the deck base into a design feature, with geometric or leaf patterns cut through steel or aluminum panels. The cutouts let air pass while blocking the view of posts and joists, which solves ventilation and screening in one move. Aluminum suits wet yards because it never rusts, while steel needs a good powder coat. Mount the screens on a frame with a gap behind them, so the pattern casts shadows and the panels never sit flat against damp framing.
Try this: back the screen with dark hardware cloth to keep critters out without hiding the cut pattern from the patio.
Cost: $$| Difficulty: Hard | Time: 2 to 3 weekends
12. Stacked Stone Veneer

Stacked stone veneer makes the deck base read like part of the foundation, with thin ledgestone pieces layered over a framed backing. Manufactured veneer is lighter and easier to install than real stone, and it suits homes with brick, stucco, or traditional siding. The substrate must be right: a flexing frame or a missing drainage gap will crack the veneer within a few seasons. Leave a weep path at the bottom so water escapes instead of sitting behind the stone.
Try this: carry the same veneer onto a nearby porch pier or stair cheek so the deck base matches the rest of the house.
Cost: $$| Difficulty: Hard | Time: 3 to 4 weekends
13. Faux Stone Panels
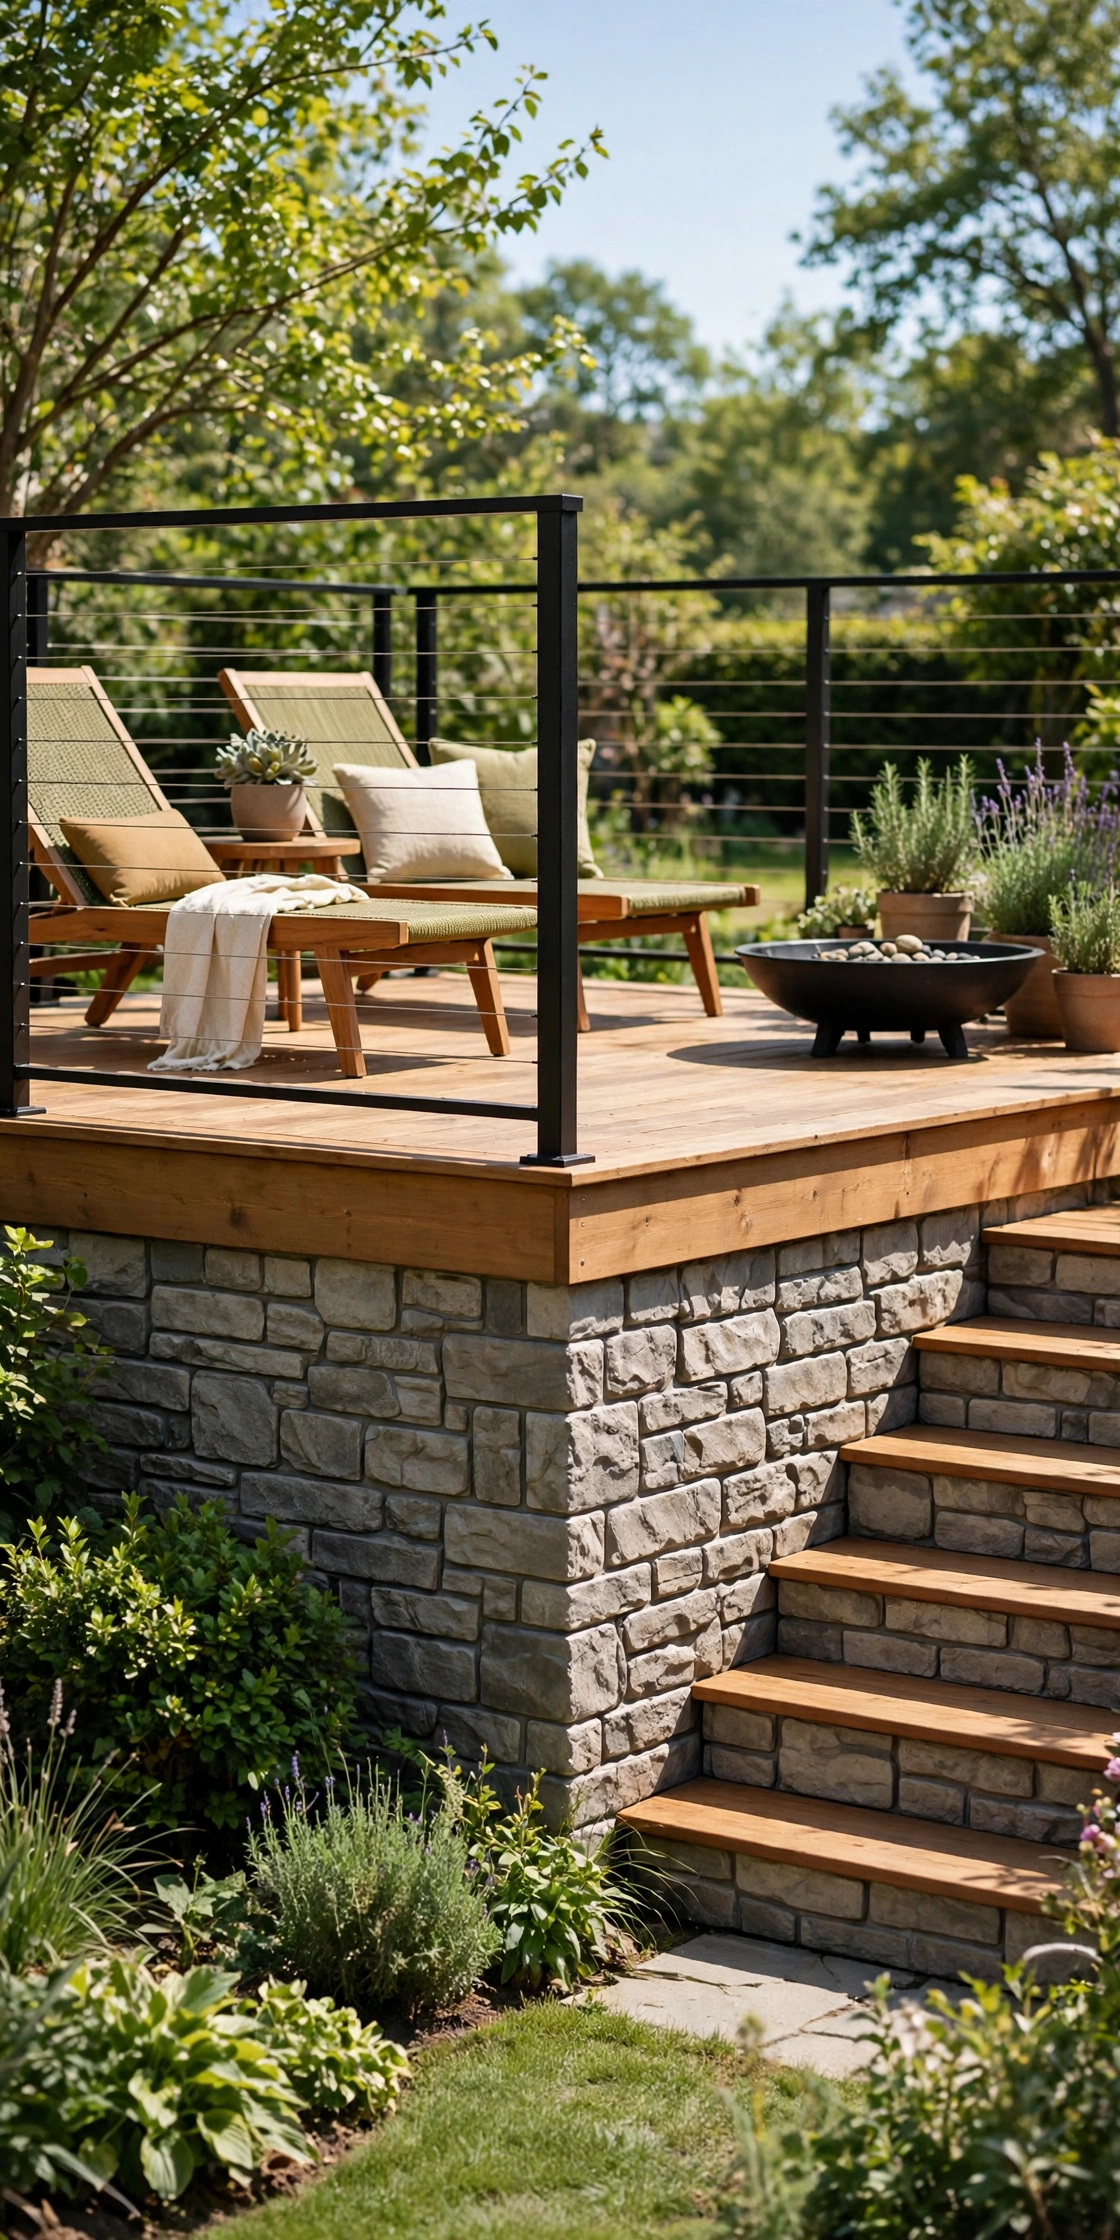
Faux stone panels give the masonry look at a fraction of the weight, labor, and cost of real veneer, since each lightweight panel covers several square feet at once. A crew can close a deck base in a weekend, and the better panels are UV-stable and impact-resistant for exterior use. Up close, the seams can still read as panels, so pick darker, irregular textures that hide joints, and stagger the panel edges like real stonework. Faux panels suit raised decks where a full masonry base would need a footing you do not have.
Try this: paint the wall behind the panels dark before install, so any seam gap reads as shadow instead of bright backing.
Cost: $$| Difficulty: Moderate | Time: 1 weekend
14. Brick Veneer Base
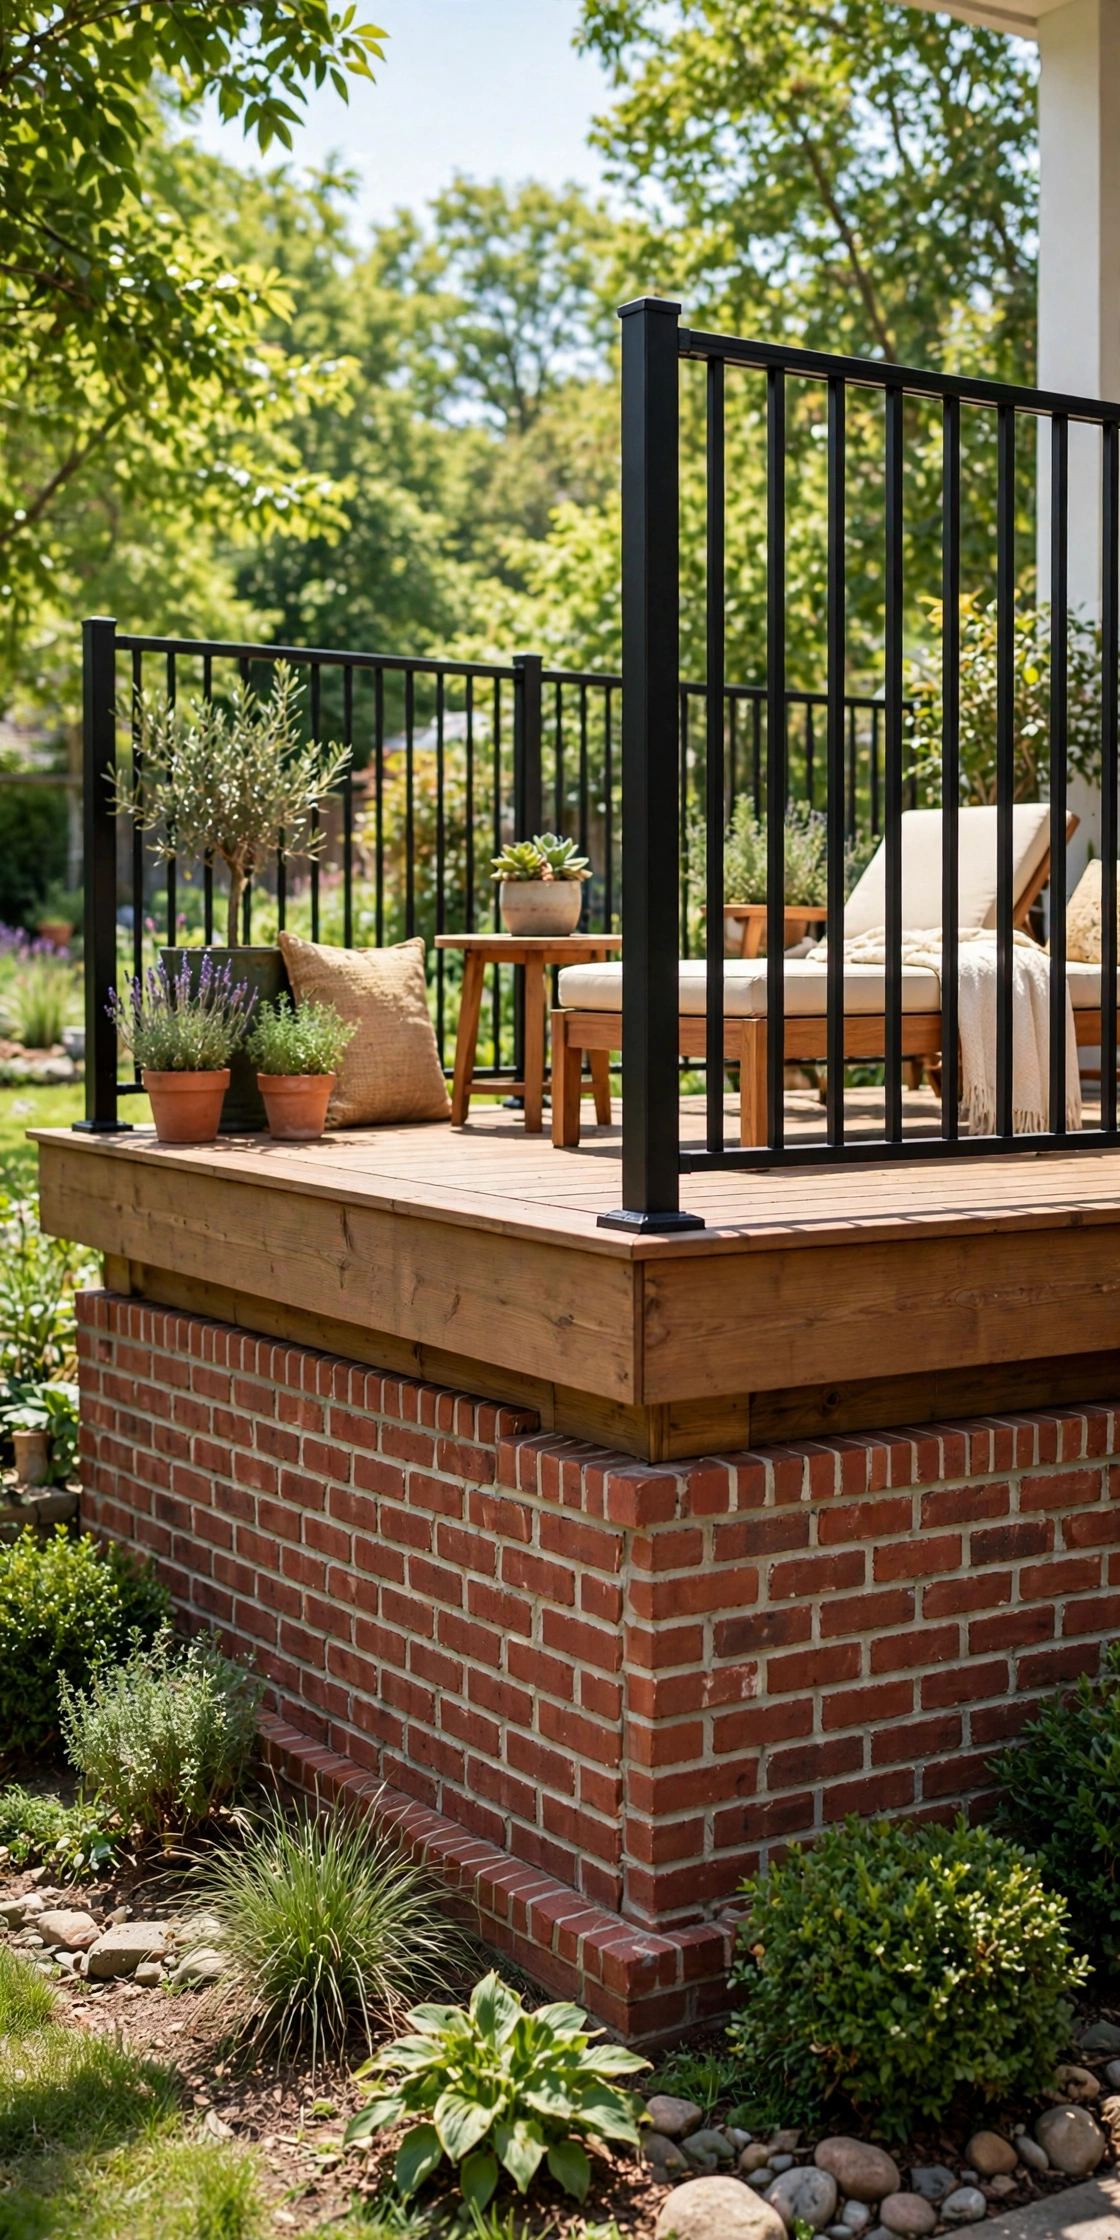
A brick veneer base gives the deck real weight and suits older homes where masonry already appears on the house. Brick steps neatly down a slope, which helps on uneven ground where rigid panels need cutting and shimming. Brick needs a stable ledge or footing to sit on, so this is not a casual weekend fix on a flimsy frame; a pro should check the base before you start. Match the mortar color to the house masonry, since mortar tone changes the whole match more than the brick itself.
Try this: use thin brick veneer on a framed backing for the look without the full weight of a structural brick wall.
Cost: $$| Difficulty: Hard | Time: 3 to 4 weekends
15. Stucco Finish Panels

Stucco finish panels coat a cement board backing with a textured plaster face, which makes the deck base blend into stucco and Mediterranean style homes. The finish is smooth, paintable, and easy to patch if a mower throws a stone into it. Stucco needs a drainage gap behind it and a sealed bottom edge, since trapped water softens the coat and stains the base. Keep sprinklers off the face, because constant wetting streaks the finish and feeds mildew near grade.
Try this: tint the stucco to the house wall color instead of the deck color so the base reads as foundation, not furniture.
Cost: $$| Difficulty: Hard | Time: 2 to 3 weekends
16. Fiber Cement Panels
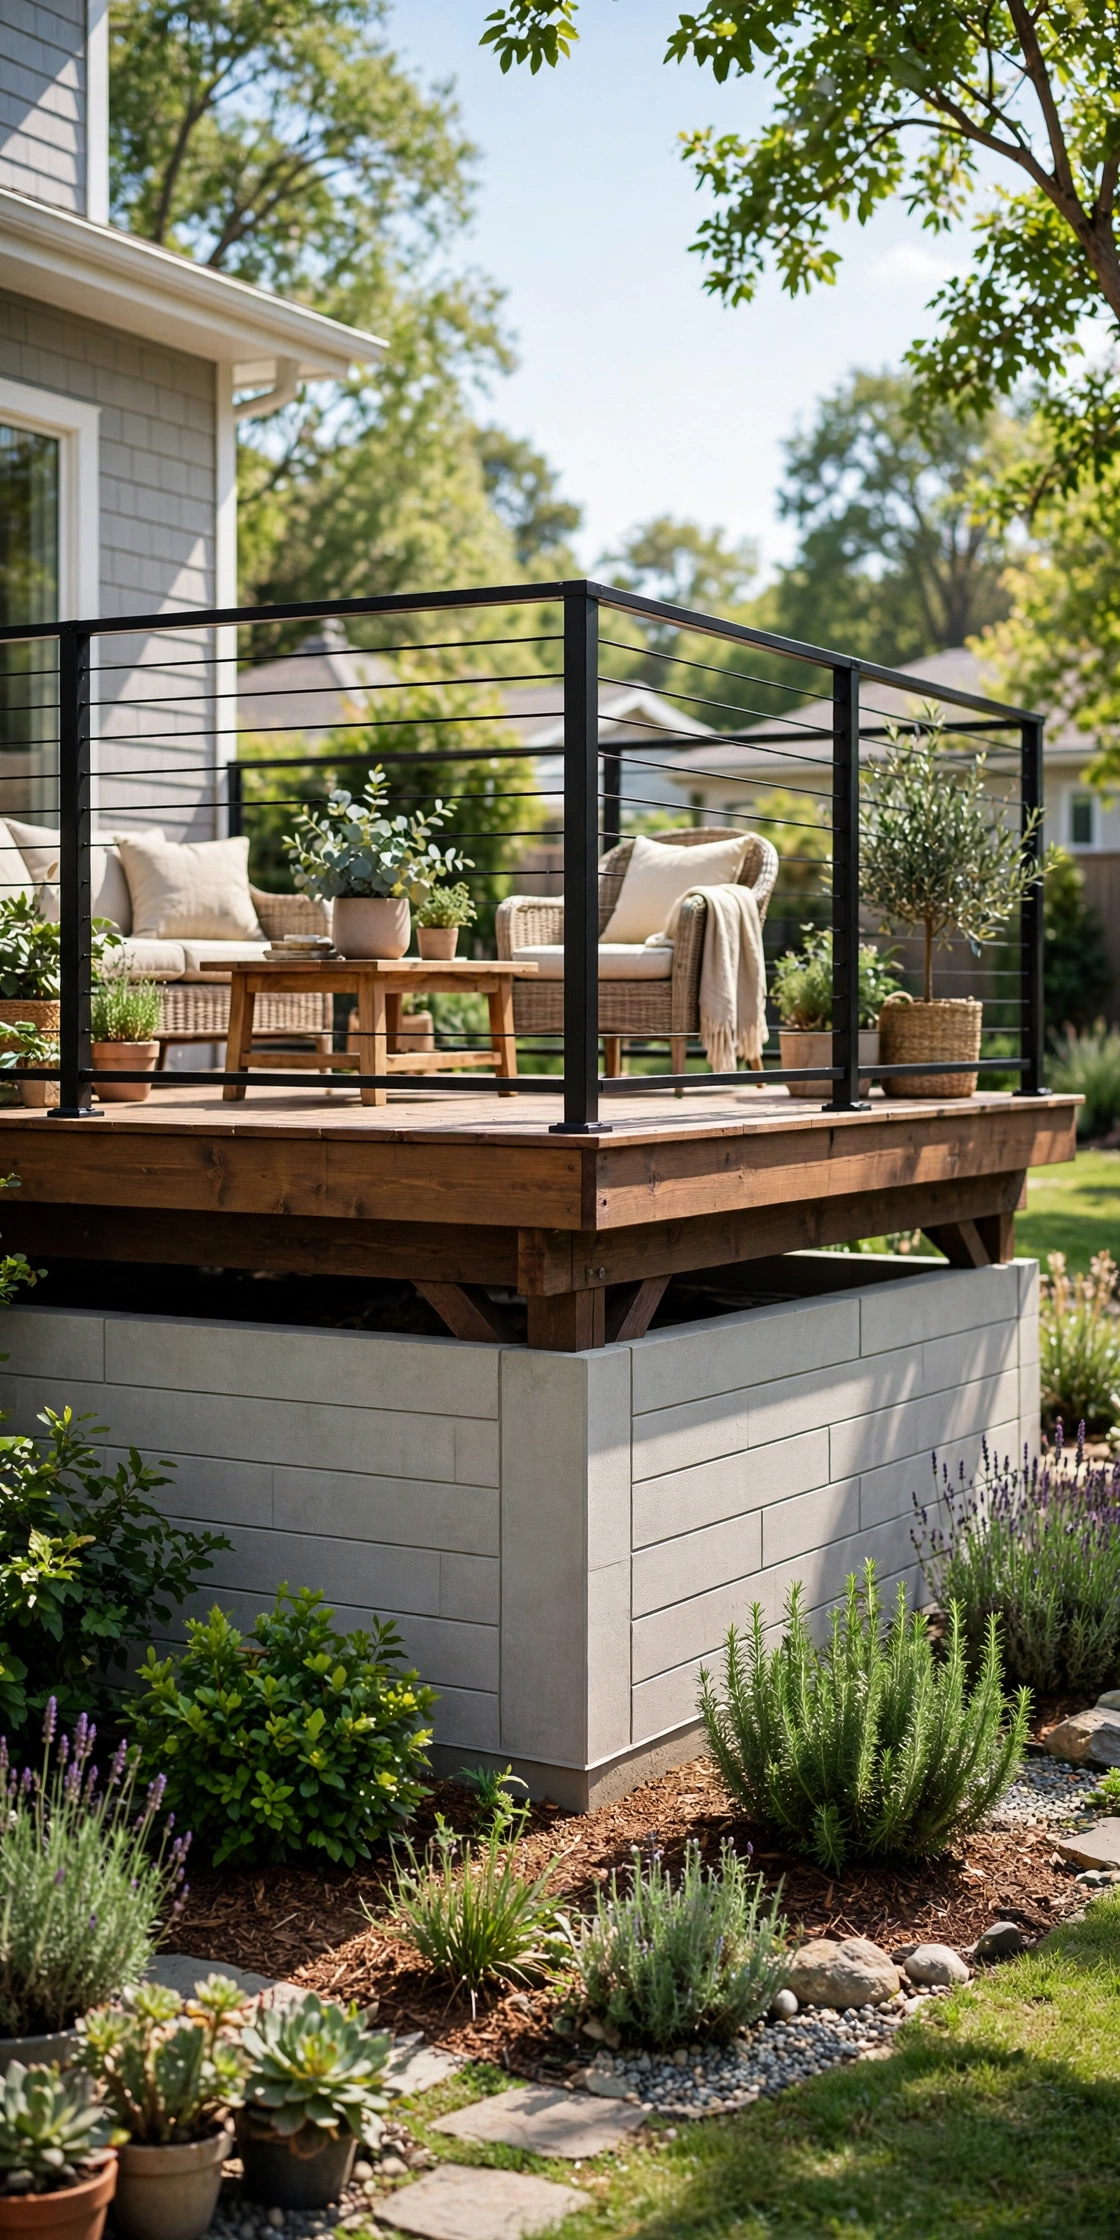
Fiber cement panels are dense, flat sheets that hold paint well and resist rot, insects, and fire better than wood boards. They suit contemporary homes where a smooth, painted base looks right, and they work well as the backing for board and batten layouts too. Fiber cement is heavy and dusty to cut, so use a dust-rated blade, wear a respirator, and fasten to a solid frame. Leave a clearance gap above grade and seal cut edges, since the bottom edge sees the most splash and soil contact.
Try this: use fiber cement for the skirt on the weather side of the deck and wood on the sheltered side to balance cost and durability.
Cost: $| Difficulty: Moderate | Time: 2 weekends
17. Gabion Rock Cages

Gabion rock cages are galvanized wire baskets filled with stone, and they give the deck base a rugged, grounded look that also drains well. They shine on sloped yards, where the cages step down the grade and handle drainage movement better than flat panels. Use galvanized cages, not thin decorative wire, and mix rock shapes so the fill locks together instead of settling. Gabions look heavy, so they suit larger decks and rustic or modern homes better than small cottage decks.
Try this: fill the front face with one stone color and the sides with cheaper fill stone to keep the budget in check.
Cost: $$| Difficulty: Hard | Time: 2 to 3 weekends
18. Bamboo Screens
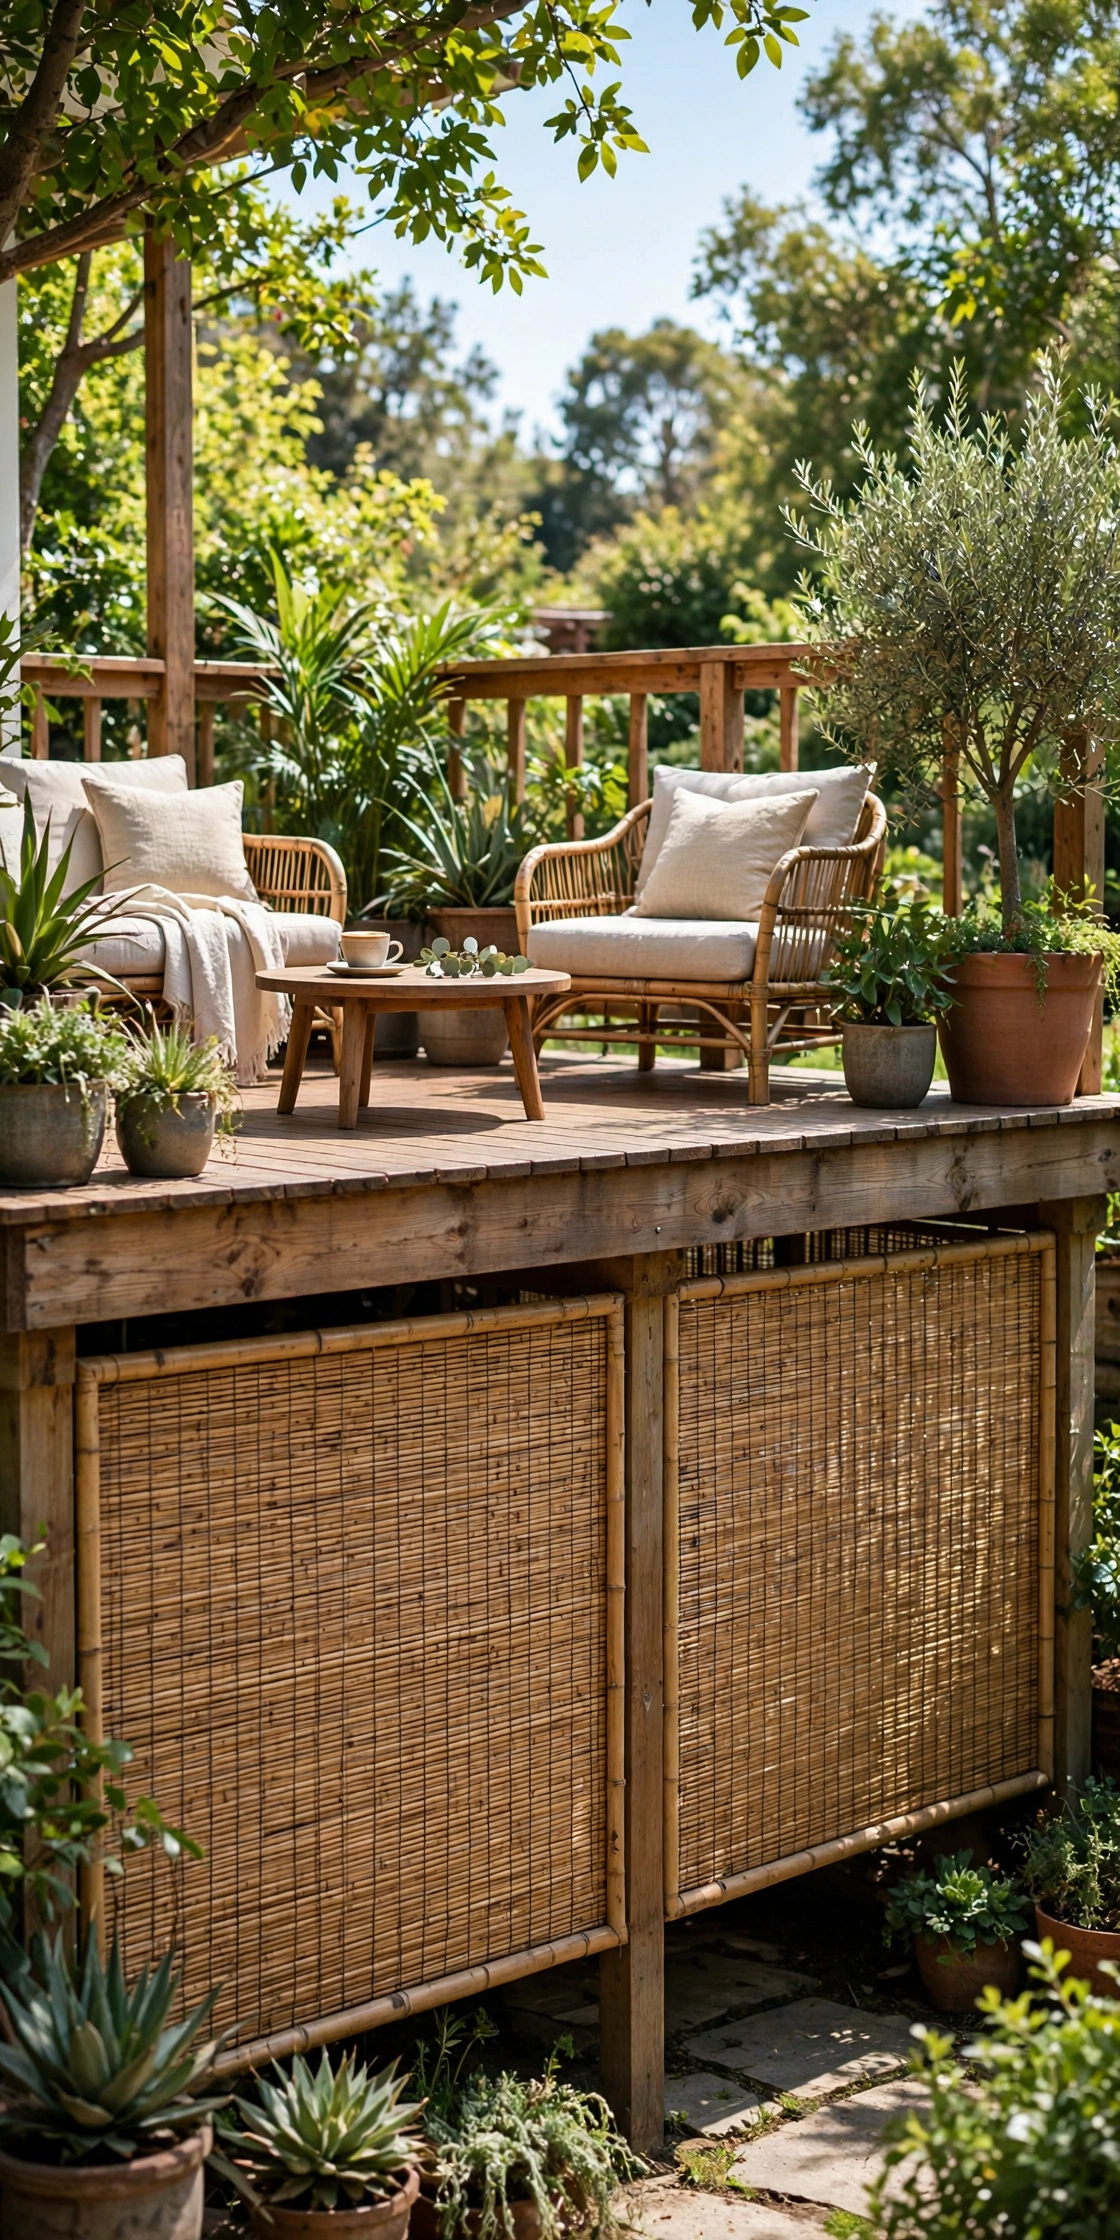
Bamboo screens close the deck base with warm, natural poles or woven fencing that reads as tropical and relaxed. Rolled bamboo fencing installs fast over a frame, while individual poles take longer but look more custom. Bamboo weathers to grey in sun and can split near grade, so seal it yearly and keep the bottom edge off the soil with a gravel strip. It suits decks near patios and pools where a soft, resort feel beats a hard wall.
Try this: stain bamboo poles a cedar tone before install so the screen matches the deck instead of reading yellow.
Cost: $| Difficulty: Easy | Time: 1 weekend
19. Woven Wood Panels

Woven wood panels interlace thin wood strips into a basket pattern that looks rustic and hand-built while still letting some air through the weave. The texture hides posts and framing well, and it suits cottage and farmhouse decks better than sleek modern ones. Woven panels need a sturdy frame, since the weave itself carries little load, and the strips need sealing on all sides to slow warping. Keep the bottom edge clear of soil, because woven strips wick moisture fast at grade.
Try this: weave wider strips at the bottom and narrower strips at the top for a skirt that feels grounded and light at once.
Cost: $| Difficulty: Moderate | Time: 1 to 2 weekends
20. Board-on-Board Shadowbox
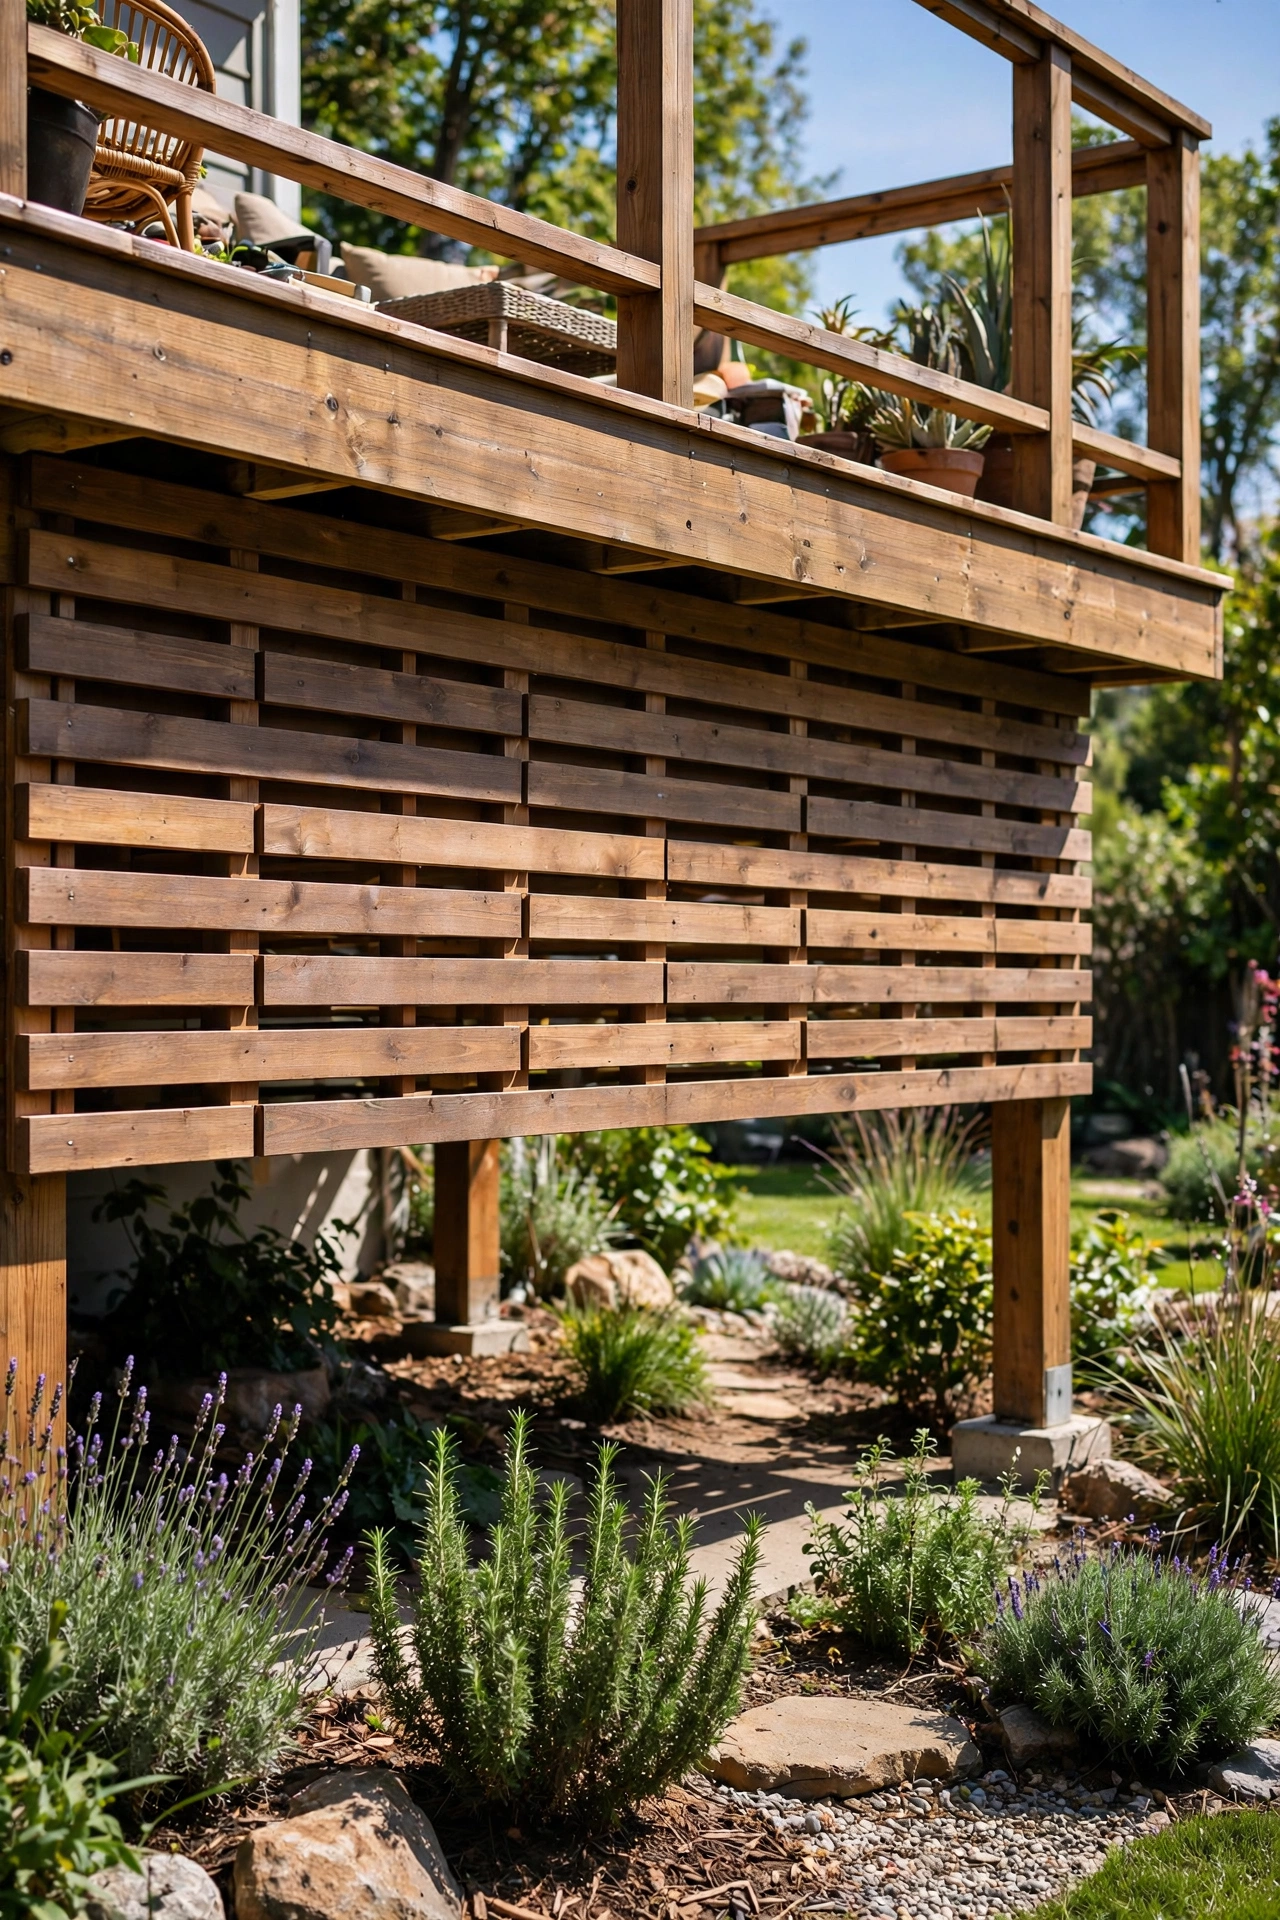
Board-on-board shadowbox skirting mounts one layer of boards, then covers the gaps with a second layer, which gives full privacy with air still passing through the seams. The layered face adds depth and a custom feel, and it looks good from both sides, which matters on corner decks seen from two yards. Use the same material as the deck surface for continuity, and fasten each layer to its own rail so boards can move without buckling. The double layer costs more wood, but it hides framing completely.
Try this: stain the back layer dark and the front layer natural so the shadow lines give the skirt extra depth.
Cost: $| Difficulty: Moderate | Time: 2 weekends
21. Louvered Panels
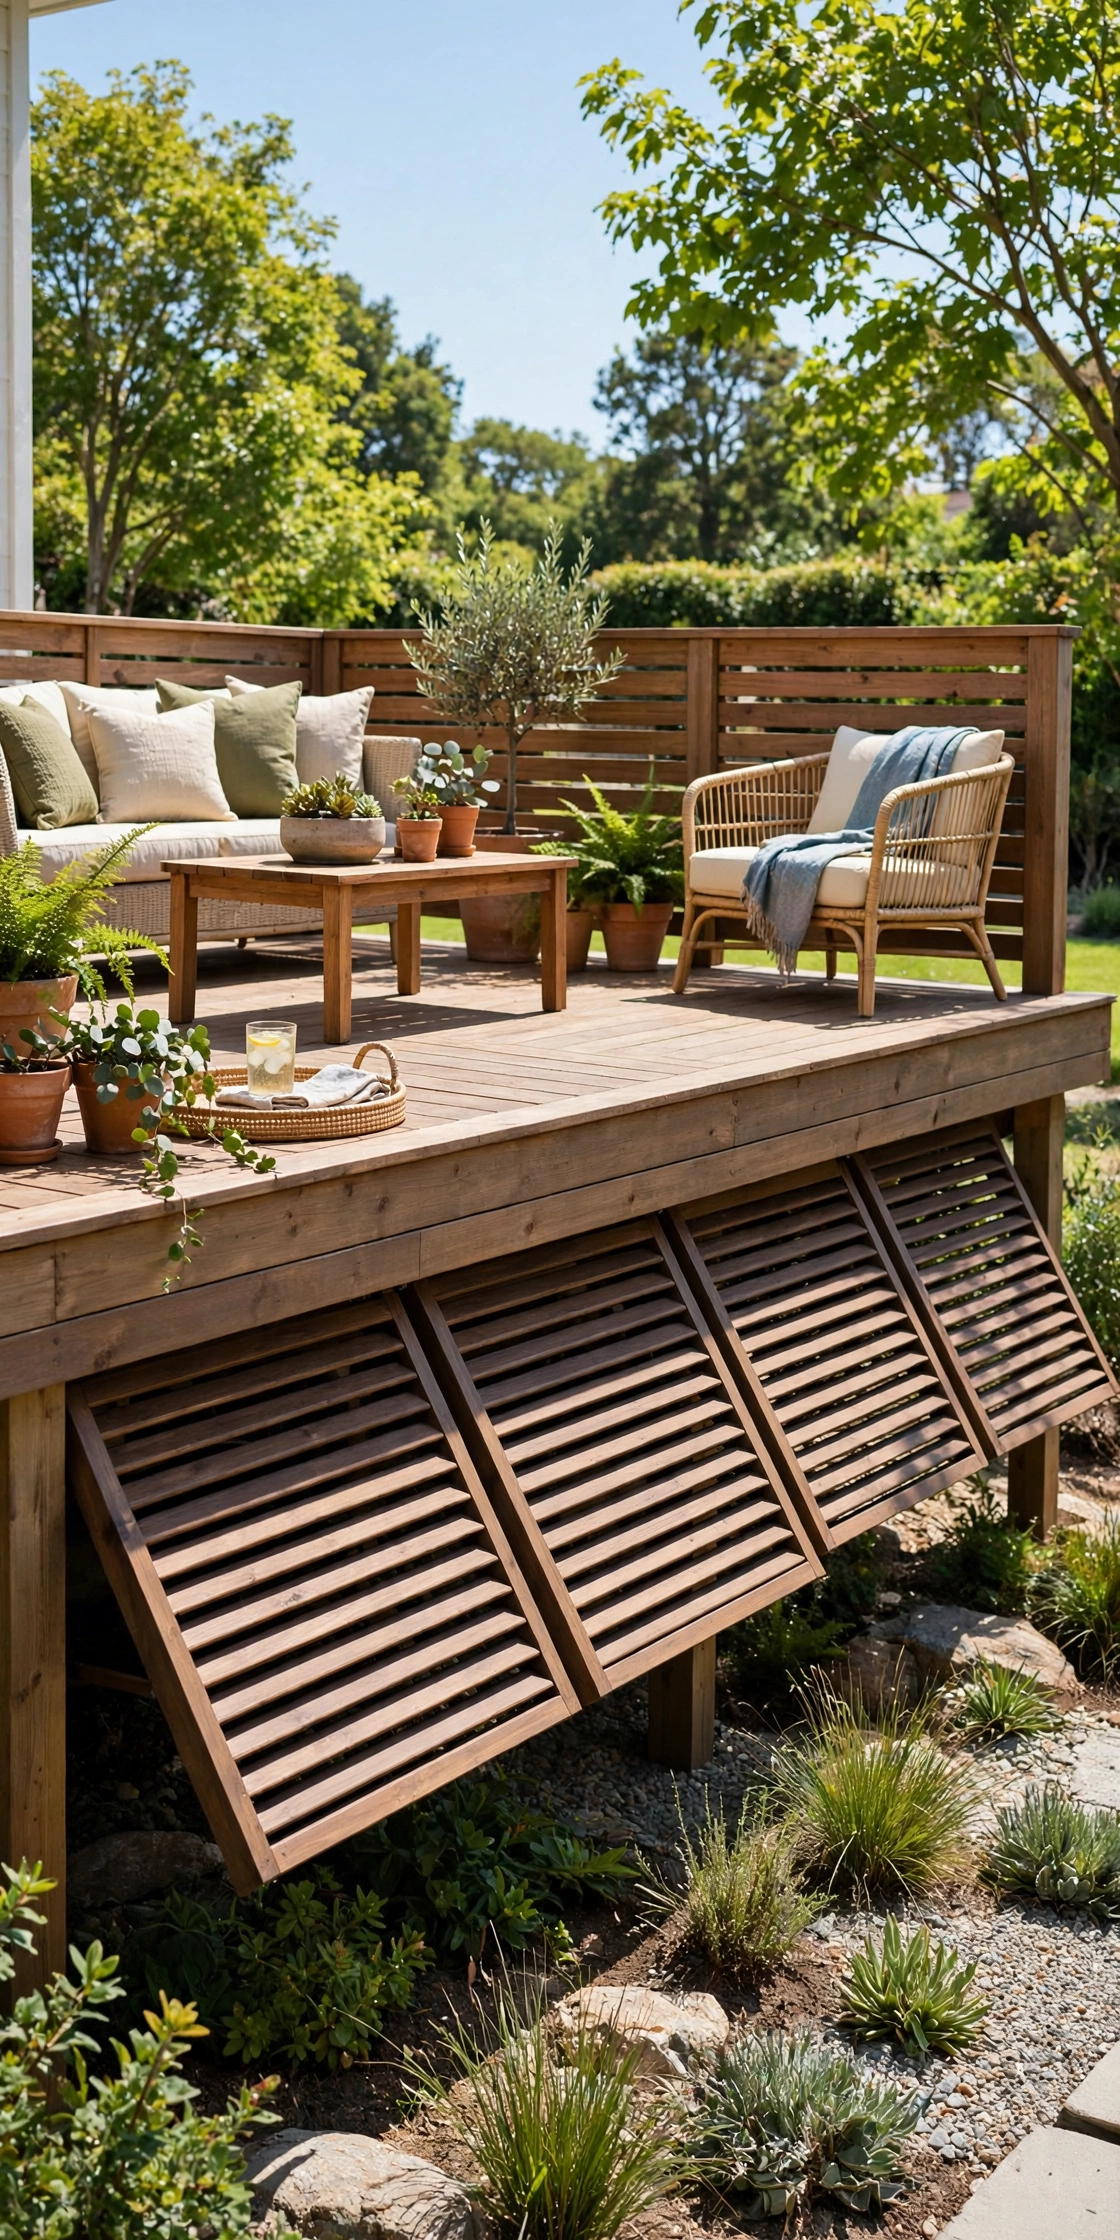
Louvered panels use angled boards that block the view from the patio while leaving steady airflow between the slats, which is exactly what an enclosed deck base needs. Fixed louvers suit most decks, while adjustable louvers let you open the skirt wider in summer and close it down in storms. Angle the louvers downward toward the outside so rain sheds away from the framing instead of pooling on the boards. Louvers collect leaves in the slots, so plan a quick seasonal brush-out.
Try this: set the louver angle to match the deck stair angle nearby so the whole structure shares one visual rhythm.
Cost: $| Difficulty: Moderate | Time: 1 to 2 weekends
22. Cedar Planter Boxes

Cedar planter boxes sit along the deck base as a living skirt, with flowers or shrubs softening the structure instead of a hard wall. Build them as fixed boxes or as removable sections, so you can still reach the framing when you need to. Line each box with a waterproof barrier and leave drainage room, because wet soil pressed tight against deck framing causes rot. Planter boxes suit cottage homes and gardeners, but they need watering and seasonal replanting to keep looking good.
Try this: plant trailing vines at the front of each box so the greenery spills down and hides the box seams.
Cost: $| Difficulty: Moderate | Time: 1 to 2 weekends
23. Shrub and Grass Screen
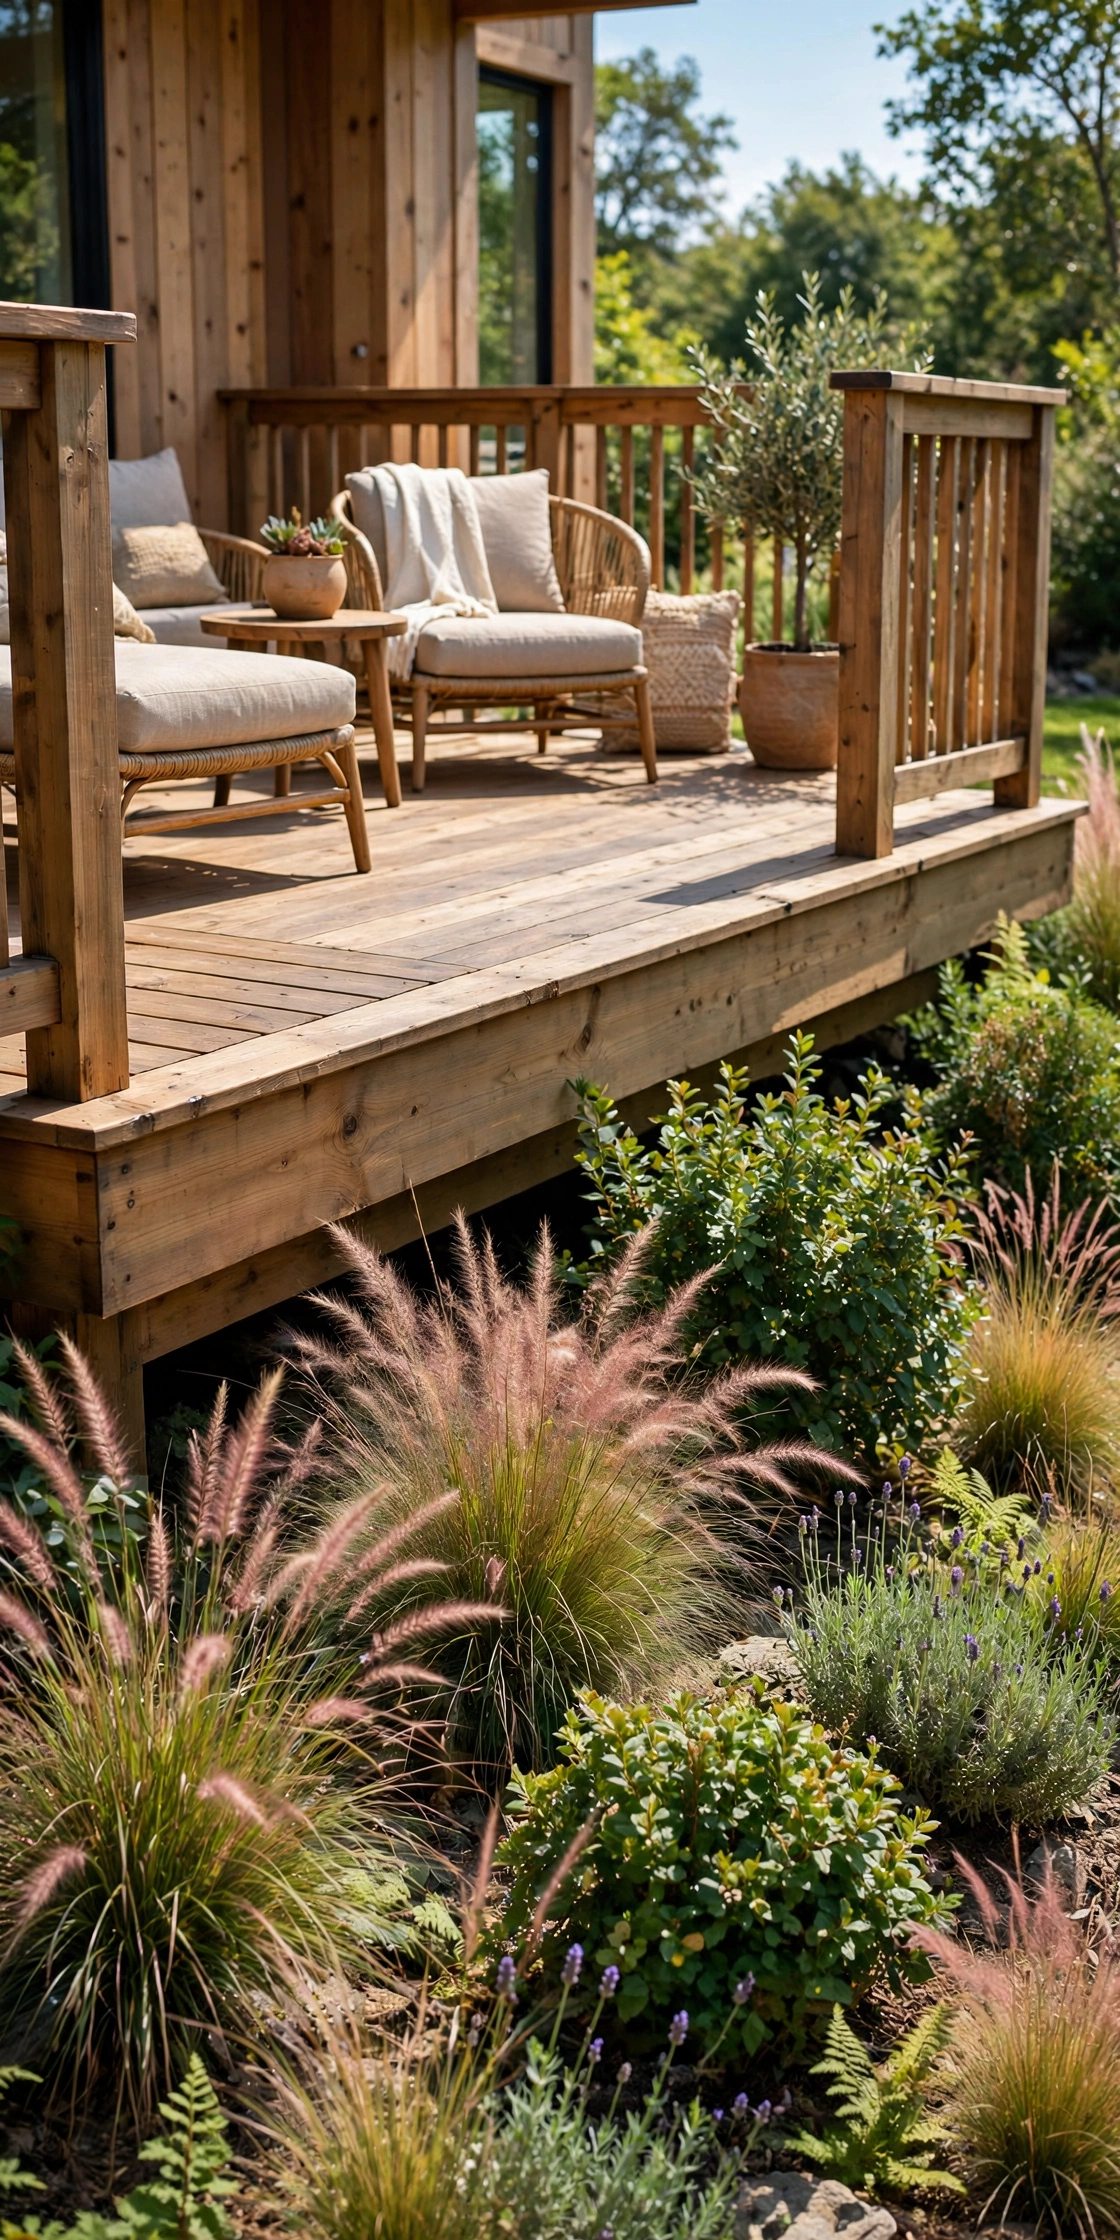
A shrub and grass screen skips panels entirely and hides the deck base with a planted border of evergreen shrubs, ornamental grasses, or both. The plants soften the deck edge, blend the structure into the yard, and cost less than most built skirts. Leave a gap between the plants and the deck so air still moves and you can reach the framing for checks. On raised decks, add a partial skirt behind the plants so critters and leaves stay out even where the planting is thin.
Try this: mix one evergreen shrub with one grass that changes color in fall so the screen looks good in more than one season.
Cost: $| Difficulty: Easy | Time: 1 weekend
24. River Rock Bed With Low Skirt

A river rock bed with a low partial skirt handles drainage first and looks second, which suits decks on wet or low ground. A band of river rock or gravel around the base hides the posts, moves water away from the framing, and keeps mud from splashing onto the skirt. Add a short skirt, just tall enough to block the view of stored items and keep critters out, and let the rock do the rest. Edge the rock bed with steel or stone edging so the gravel stays put.
Try this: lay landscape fabric under the rock so weeds stay down without blocking drainage through the bed.
Cost: $| Difficulty: Easy | Time: 1 weekend
25. Hinged Storage Access Doors
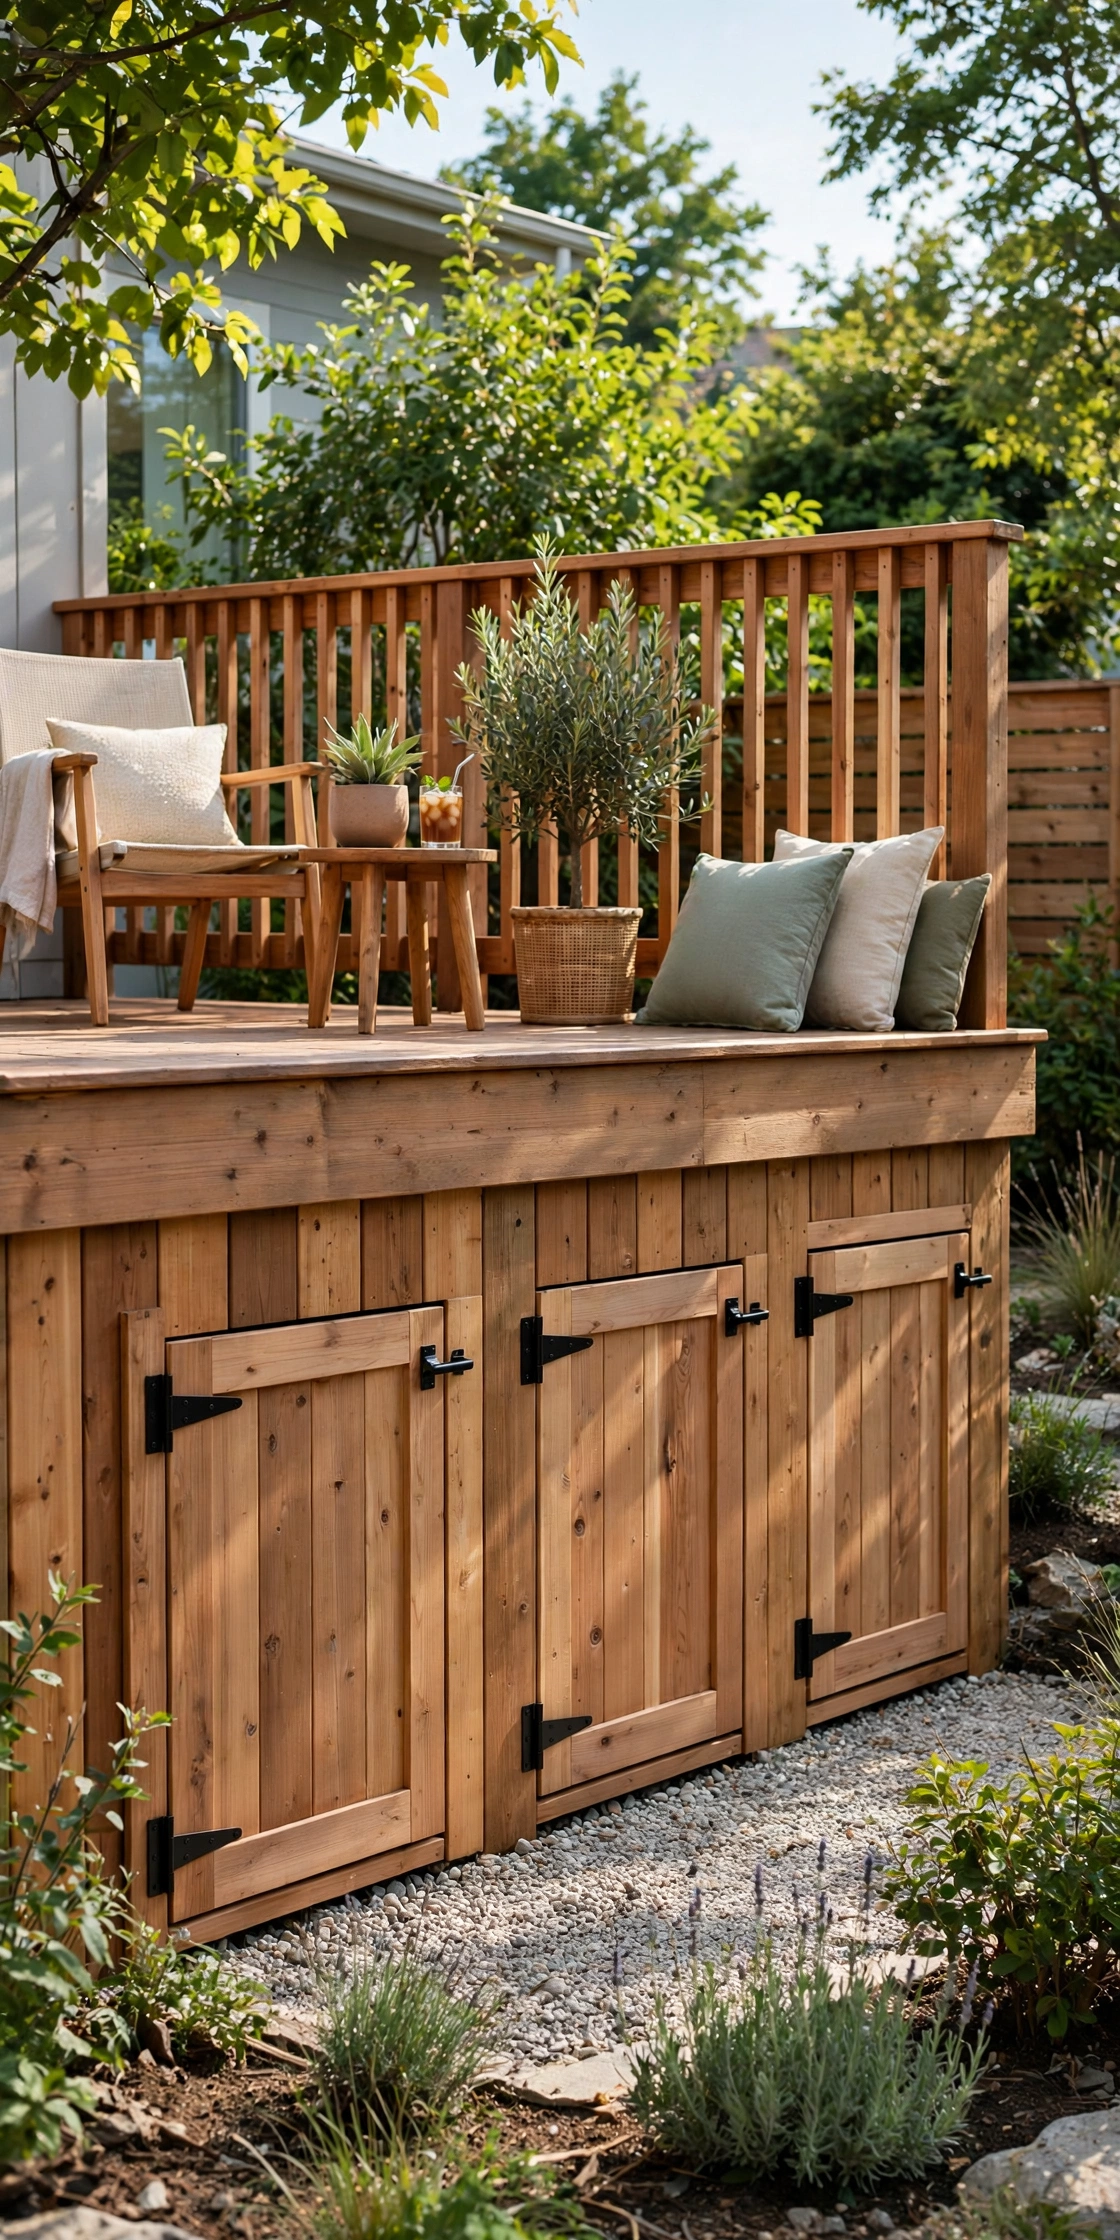
Hinged storage access doors turn part of the skirt into usable access, so the space under the deck holds outdoor cushions, tools, or garden gear behind a finished face. Build the doors from the same skirt material as the rest of the run, with hidden hinges and a latch that sits flush, so the doors disappear into the pattern. Vent the storage bay well, since stored cushions mildew fast in a sealed, damp space. Keep heavy items near the door and light items deep inside so you never crawl far to reach them.
Try this: add a small gravel pad in front of each door so you can kneel and load gear without standing in mud.
Cost: $$| Difficulty: Moderate | Time: 1 to 2 weekends
26. Reclaimed Barn Wood Boards
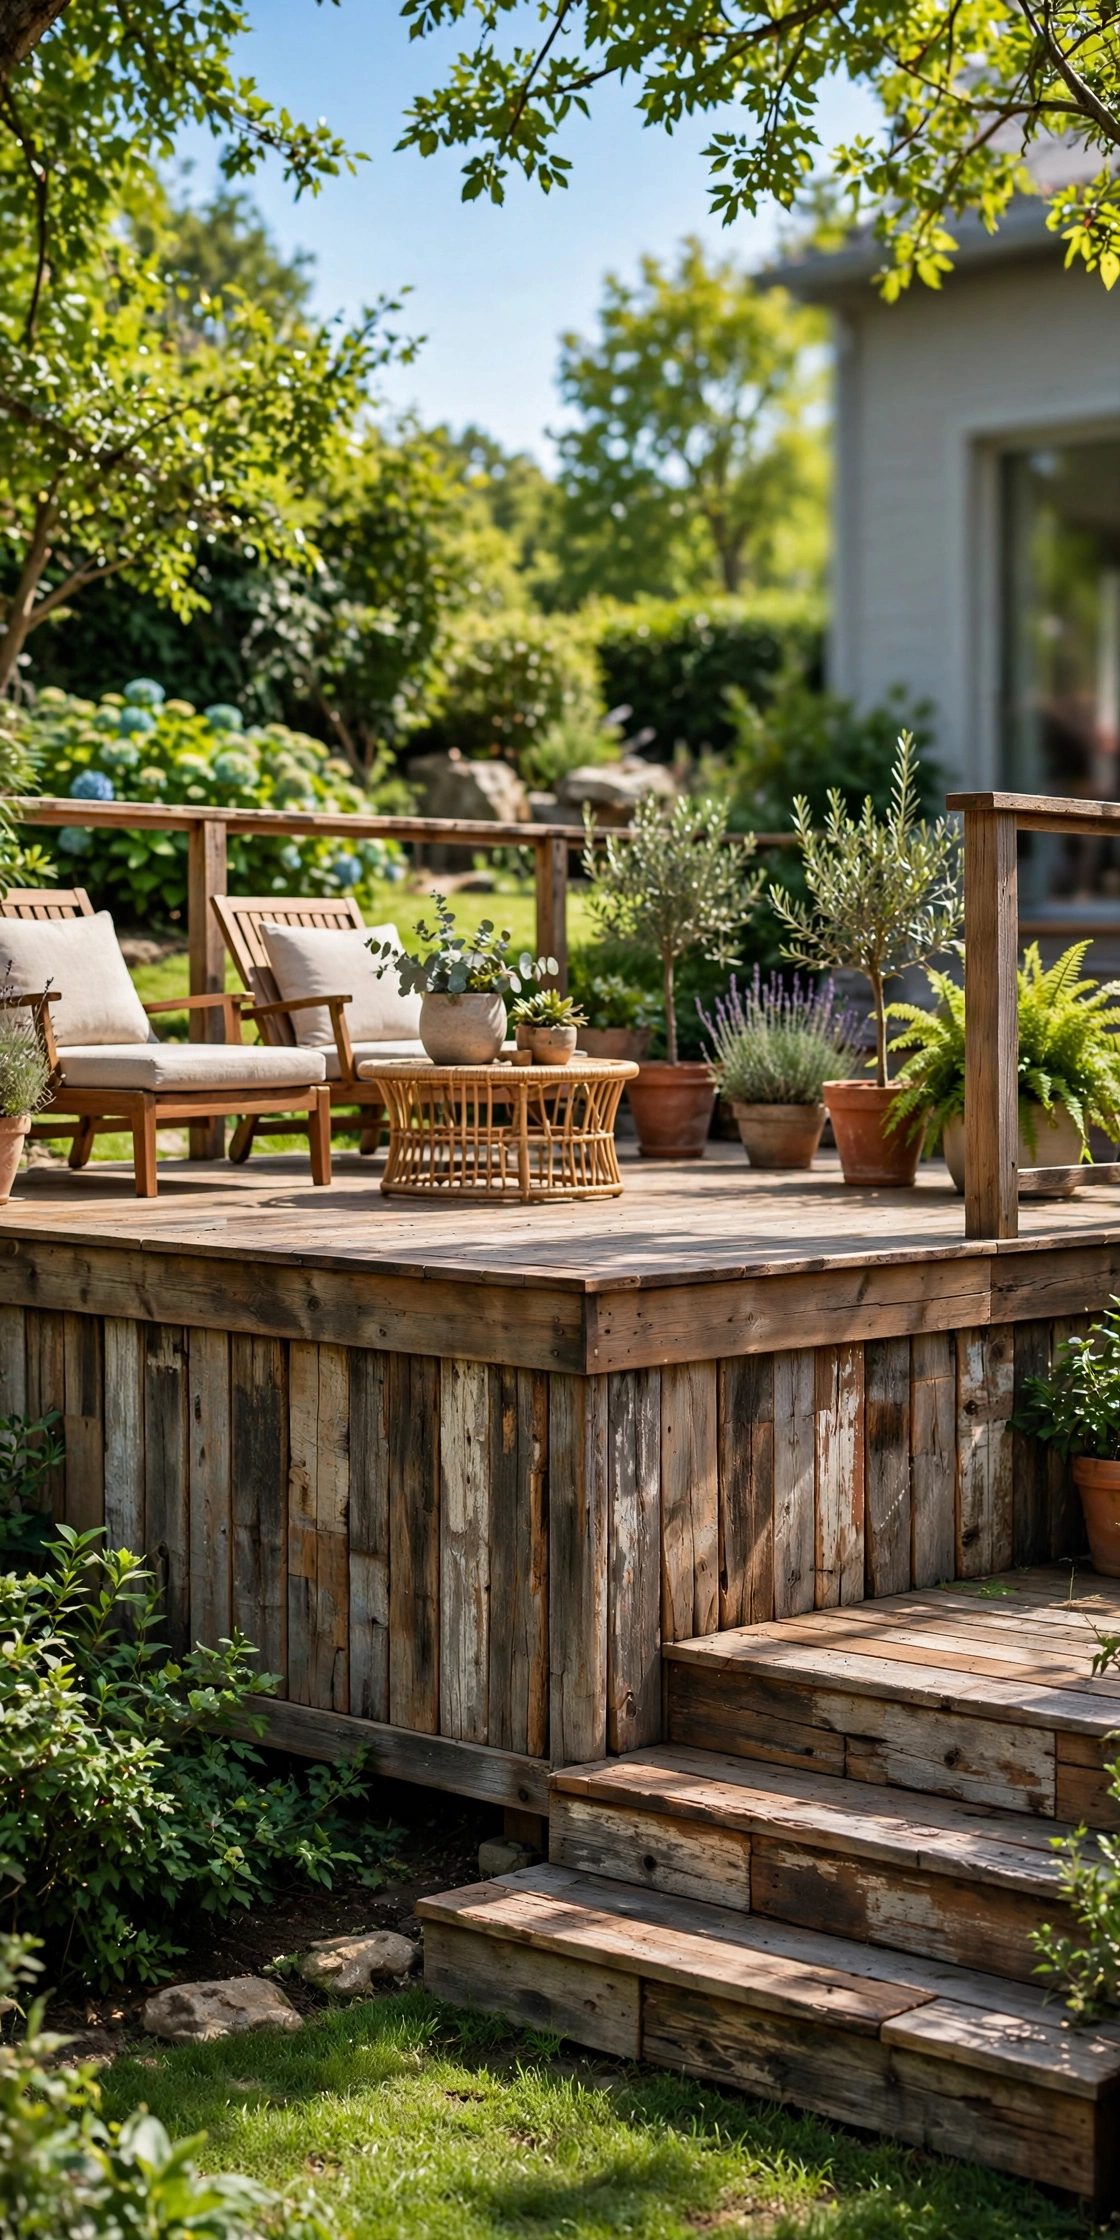
Reclaimed barn wood boards give the deck base a weathered, one-of-a-kind face with nail holes, saw marks, and varied grey and brown tones. Each board differs, so the skirt never looks like a factory panel, which suits farmhouse and rustic homes. Check every board for rot, insects, and old fasteners before install, and seal the finished wall to slow further weathering. Barn wood varies in thickness, so shim the frame to keep the face flat instead of wavy.
Try this: sort boards by tone before you start, then deal them out across the run so dark and light boards mix evenly.
Cost: $| Difficulty: Moderate | Time: 2 weekends
Compare the 26 skirting ideas
| Idea | Cost per sq ft | Difficulty | Time | Best for |
|---|---|---|---|---|
| Horizontal cedar slats | $3 to $6 | Moderate | 1 to 2 weekends | Modern decks, airflow |
| Vertical composite slats | $5 to $9 | Moderate | 1 to 2 weekends | Tall decks, low upkeep |
| Board and batten | $4 to $8 | Moderate | 2 weekends | Craftsman homes |
| Shiplap boards | $4 to $7 | Moderate | 1 to 2 weekends | Farmhouse, coastal |
| Tongue-and-groove cedar | $5 to $8 | Moderate | 2 weekends | Dining decks, clean face |
| Matching composite boards | $6 to $10 | Moderate | 1 to 2 weekends | Built-in match |
| Vented vinyl panels | $2 to $4 | Easy | 1 weekend | Budget, fast install |
| Solid PVC trim panels | $5 to $9 | Moderate | 1 to 2 weekends | Wet yards, no paint |
| Corrugated metal | $3 to $6 | Moderate | 1 weekend | Industrial, farmhouse |
| Matte flat steel | $6 to $11 | Hard | 2 weekends | Modern homes |
| Laser-cut metal screens | $12 to $25 | Hard | 2 to 3 weekends | Statement base |
| Stacked stone veneer | $12 to $20 | Hard | 3 to 4 weekends | Permanent, anchored look |
| Faux stone panels | $6 to $12 | Moderate | 1 weekend | Stone look, fast |
| Brick veneer base | $10 to $18 | Hard | 3 to 4 weekends | Older masonry homes |
| Stucco finish panels | $8 to $14 | Hard | 2 to 3 weekends | Stucco homes |
| Fiber cement panels | $5 to $9 | Moderate | 2 weekends | Painted, fire-resistant |
| Gabion rock cages | $10 to $18 | Hard | 2 to 3 weekends | Sloped yards |
| Bamboo screens | $3 to $6 | Easy | 1 weekend | Tropical, poolside |
| Woven wood panels | $4 to $8 | Moderate | 1 to 2 weekends | Cottage, farmhouse |
| Board-on-board shadowbox | $5 to $9 | Moderate | 2 weekends | Privacy, corner decks |
| Louvered panels | $6 to $10 | Moderate | 1 to 2 weekends | Airflow plus screening |
| Cedar planter boxes | $5 to $10 | Moderate | 1 to 2 weekends | Gardeners, cottage |
| Shrub and grass screen | $2 to $5 | Easy | 1 weekend | Lowest cost, soft edge |
| River rock bed, low skirt | $2 to $5 | Easy | 1 weekend | Wet ground, drainage |
| Hinged storage doors | $6 to $12 | Moderate | 1 to 2 weekends | Gear storage access |
| Reclaimed barn wood | $4 to $9 | Moderate | 2 weekends | Rustic, one of a kind |
How to pick the right skirting
Start with deck height. Low decks under 24 inches suit simple, cheap options like vinyl panels, bamboo screens, or a rock bed with a low skirt, since there is little base to hide. Tall decks need materials with presence, like board and batten, stone veneer, or vertical slats, or the base will look thin against the house. Next, check the ground: sloped yards favor stepped brick, gabions, or slatted panels that follow grade, while wet yards need drainage-first designs like rock beds and metal panels.
Then weigh airflow against screening. Solid faces like PVC, stucco, and flat steel need screened vents at both ends of every run, or moisture will sit against the joists. Open faces like slats, louvers, and screens breathe on their own but need hardware cloth behind them where critters dig. Finally, plan access before you build: one hinged door or removable section per side keeps plumbing, wiring, and pest checks possible without tearing the skirt apart.
Mistakes that shorten a skirt’s life
The most common mistake is fastening the skirt straight to the deck with no level frame, which leaves wavy lines and gaps that widen every season. Another is burying the bottom edge in soil or mulch, which rots wood, stains stone, and invites insects into the frame. A third is sealing the base tight with no vents, which traps moisture and can void decking warranties that require airflow under the joists. Skip any of these and even a good material will fail early.
Safety checks matter too. Call 811 before you dig any trench for mesh, footings, or edging, so you never hit a buried line. Check that nothing is living under the deck before you seal it, since a sealed-in animal causes far more damage than an open gap. For masonry bases, get a pro to confirm the footing or ledge can carry the weight, and wear gloves when you handle cut metal panels, since the edges stay sharp until trimmed.
Related outdoor projects
If the deck itself still needs design work before you skirt it, these patio and backyard deck designs show how the deck, the patio, and the yard fit together as one space.
14 Inspiring Patio Backyard Deck Designs You Will Want to Copy
Once the deck base is finished, the ground beside it still needs attention, and these narrow side pathway ideas turn the muddy strip beside a house into a path that actually works.
10 Narrow Side Pathway Ideas for a Side Yard That Finally Works
And if the finished deck frees up the yard for weekend use, these DIY backyard games use the same lumber, paint, and basic tools as a skirting project.
15 Remarkable Backyard Games to DIY Right Now
For digging safety, the national Call Before You Dig service explains how to get buried lines marked before any trench work: Call 811 Before You Dig. For deck construction standards and safety guidance, the North American Deck and Railing Association publishes builder resources here: North American Deck and Railing Association.
Frequently asked questions
What can I put under a deck instead of lattice?
Horizontal or vertical slats, composite boards, vinyl or PVC panels, corrugated or flat metal, stone or brick veneer, stucco, fiber cement, gabion cages, bamboo screens, louvered panels, planter boxes, or a planted shrub screen all close the gap without lattice. Pick by deck height, house style, airflow needs, and upkeep tolerance, and back open designs with hardware cloth where critters dig.
Does under deck skirting need ventilation?
Yes. Airflow keeps the framing dry and slows rot and mold. Slatted, louvered, and screened designs breathe on their own, while solid faces like PVC, stucco, and flat steel need screened vents near the top and bottom of each run. Never seal a deck base tight with no air path.
How do I keep animals out from under my deck?
Close every gap with a chew-resistant barrier, and bury half inch galvanized hardware cloth in an L shape, down 12 inches and out 6 to 12 inches, along the base to stop digging. Check that nothing is living underneath before you seal it, and keep the barrier tight to the frame with no gaps larger than a quarter inch.
What is the cheapest lattice alternative for under a deck?
Vented vinyl panels, a shrub and grass screen, and a river rock bed with a low skirt all land around $2 to $5 per square foot in material. Vinyl installs fastest, planting costs least in materials but needs watering and trimming, and rock beds suit wet ground best.
Should I leave an access door in my deck skirting?
Yes, at least one per side. A hinged door or removable section lets you reach plumbing, wiring, and the framing for inspections and pest checks without tearing the skirt apart. Build it from the same material as the rest of the run so it blends in.
Final thoughts
Pick the skirt that fits your deck height, your house, and the upkeep you will actually do, then build it on a level frame with air moving and one door you can open. Our deck went from a muddy gap to a finished base in two weekends, and the yard has felt like part of the house ever since.

More ideas you’ll love: 16 Stunning Kolam Koi Designs, and 15 Bi-Level Deck Ideas That Make the Most of Two Levels.


