



A sloped backyard can make one big flat deck feel wrong. The upper end floats too high, the lower end sits almost on the grass, and the space under the middle goes to waste. Our last house had a yard that dropped almost four feet from the back door to the fence, so a single-level deck was never going to work.
A bi-level deck fixes that by splitting the deck into two connected tiers, usually joined by wide steps or a small landing. Each level gets its own job, like dining up top and lounging below, so the slope becomes a design feature instead of a problem. These 15 ideas show how to plan the split, pick materials, and dress each level so the whole thing feels like one intentional outdoor room.
Quick takeaways
- Split by use: dining and grilling on the upper level, relaxing and play on the lower level.
- Wide, shallow steps double as extra seating and make the levels feel connected.
- Use one decking material in two tones, or change board direction, to define each tier.
- Plan lighting and railings early, since two levels mean more edges and stairs to light safely.
- Get a permit and check the structure with a licensed contractor before you build.
1. Upper dining deck, lower lounge nook

Put the dining table on the level closest to the kitchen door, then step down to a lounge area with a sofa and coffee table. This is the most common bi-level split because it shortens the trip from stove to table. A 12 by 14 foot upper deck fits a six-person table with room to pull chairs out, while a 10 by 12 lower deck holds a compact sectional. Keep the railing on the upper level low and open so the cook can still see the kids below.
Try this: choose an outdoor rug for each level in the same color family to tie the two zones together without matching them exactly.
Budget: about $25 to $45 per square foot built. Difficulty: moderate to advanced.
2. Covered lower level, open upper sun deck

Roof the lower level and leave the upper level open to the sun. The covered tier becomes a rain-proof hangout with an outdoor sofa and a ceiling fan, while the sunny tier is for loungers and container plants. This split works well when the upper deck sits above a walkout basement, because the lower roof also shades the basement doors. Add an under-deck drainage system above the lower level so drips from the upper deck never reach the furniture.
Try this: mount a retractable shade on the upper level too, so midday sun never forces everyone downstairs.
Budget: about $35 to $60 per square foot with the roof structure. Difficulty: advanced.
3. Wide stadium steps for extra seating

Make the steps between levels wide and shallow, like bleachers, so they double as seating for a crowd. Three steps at 14 inches deep and 7 inches high give you two comfortable sitting rows. Guests naturally gather on the steps during parties, which means you need fewer chairs. This detail also softens the drop between levels, so the deck reads as one flowing space instead of two stacked boxes. Stain the step treads a shade darker to make each edge visible after dark.
Try this: add flat outdoor cushions on the widest step for movie nights and game days.
Budget: about $300 to $800 extra over standard stairs. Difficulty: moderate.
4. Built-in benches on both tiers
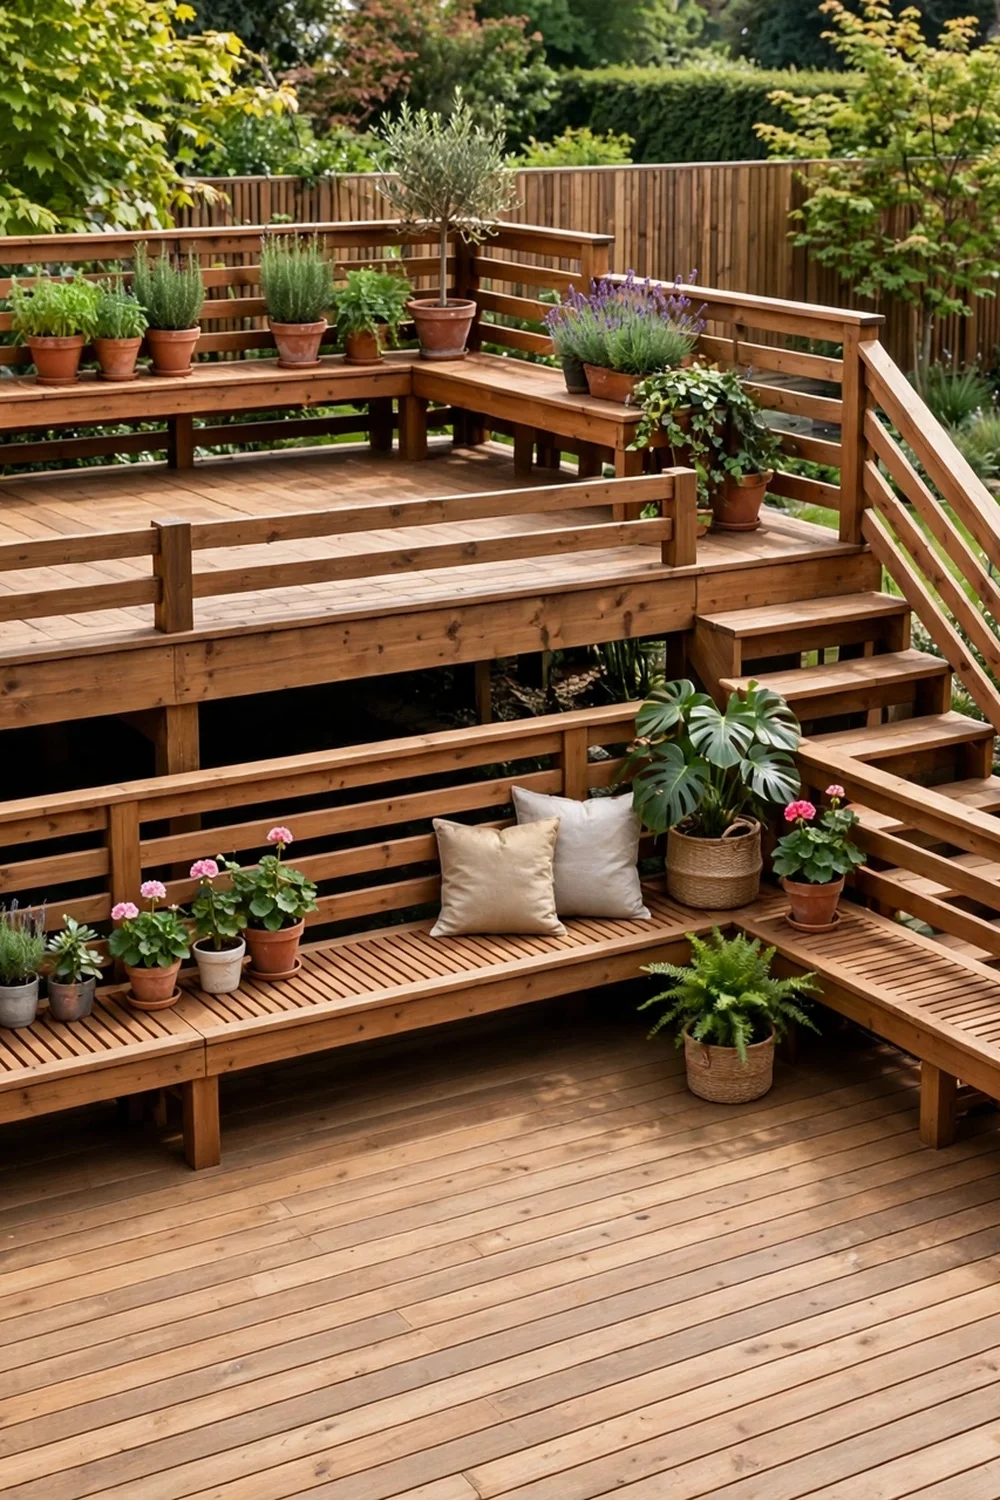
Build perimeter benches along the railing of each tier so seating never has to be stored or rearranged. A 16-inch-deep bench with a hinged top adds hidden storage for cushions and toys on the lower level, and the upper bench can hold grill tools near the cooking zone. Built-ins keep sightlines open because the bench backs double as the railing. Leave a 1-inch gap between bench boards for drainage, and slope the seat slightly forward so rain runs off.
Try this: stain bench tops to match the decking so the benches read as part of the deck, not furniture.
Budget: about $150 to $400 per 8-foot bench in materials. Difficulty: moderate.
5. Pergola up top, fire pit below

Frame the upper level with a cedar pergola for shade and string lights, and put a fire pit circle on the lower level. Heat and smoke rise, so keeping the fire on the lower tier protects the pergola beams and anyone dining above. A smokeless wood pit or a propane fire table keeps the smoke off the upper deck. Surround the pit with four Adirondack chairs and a gravel or paver pad that extends 3 feet past the chairs.
Try this: hang string lights from the pergola down toward the fire pit to pull the two levels together visually at night.
Budget: about $1,500 to $4,000 for the pergola plus $300 to $900 for the pit area. Difficulty: moderate.
6. Two-tone decking to define each level
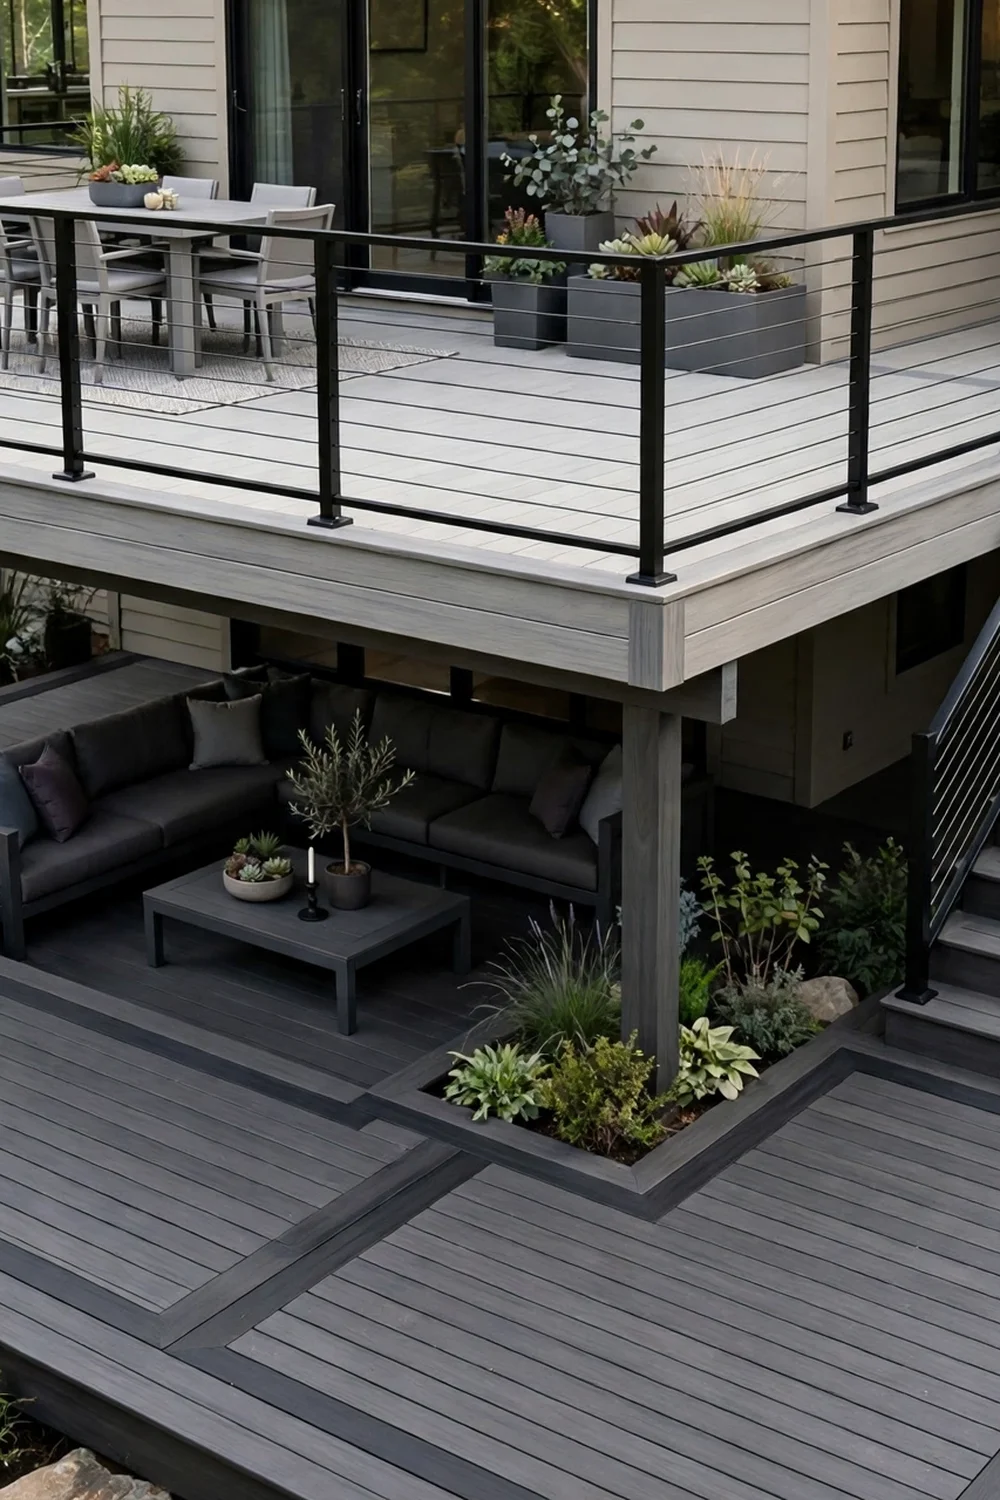
Use one decking line in two tones, a lighter shade upstairs and a darker one downstairs, to give each level its own identity while keeping the palette calm. The contrast marks the step edge, which helps guests notice the level change. If you prefer one color, run the boards diagonally on the upper level and straight on the lower level for the same effect. Picture-frame the perimeter of each tier with a border board to hide cut ends and make both levels look finished.
Try this: order 10 percent extra boards in each tone so repairs years later still match the dye lot.
Budget: about 10 to 15 percent more than a single-tone deck. Difficulty: easy to moderate.
7. Cable railings for an open view
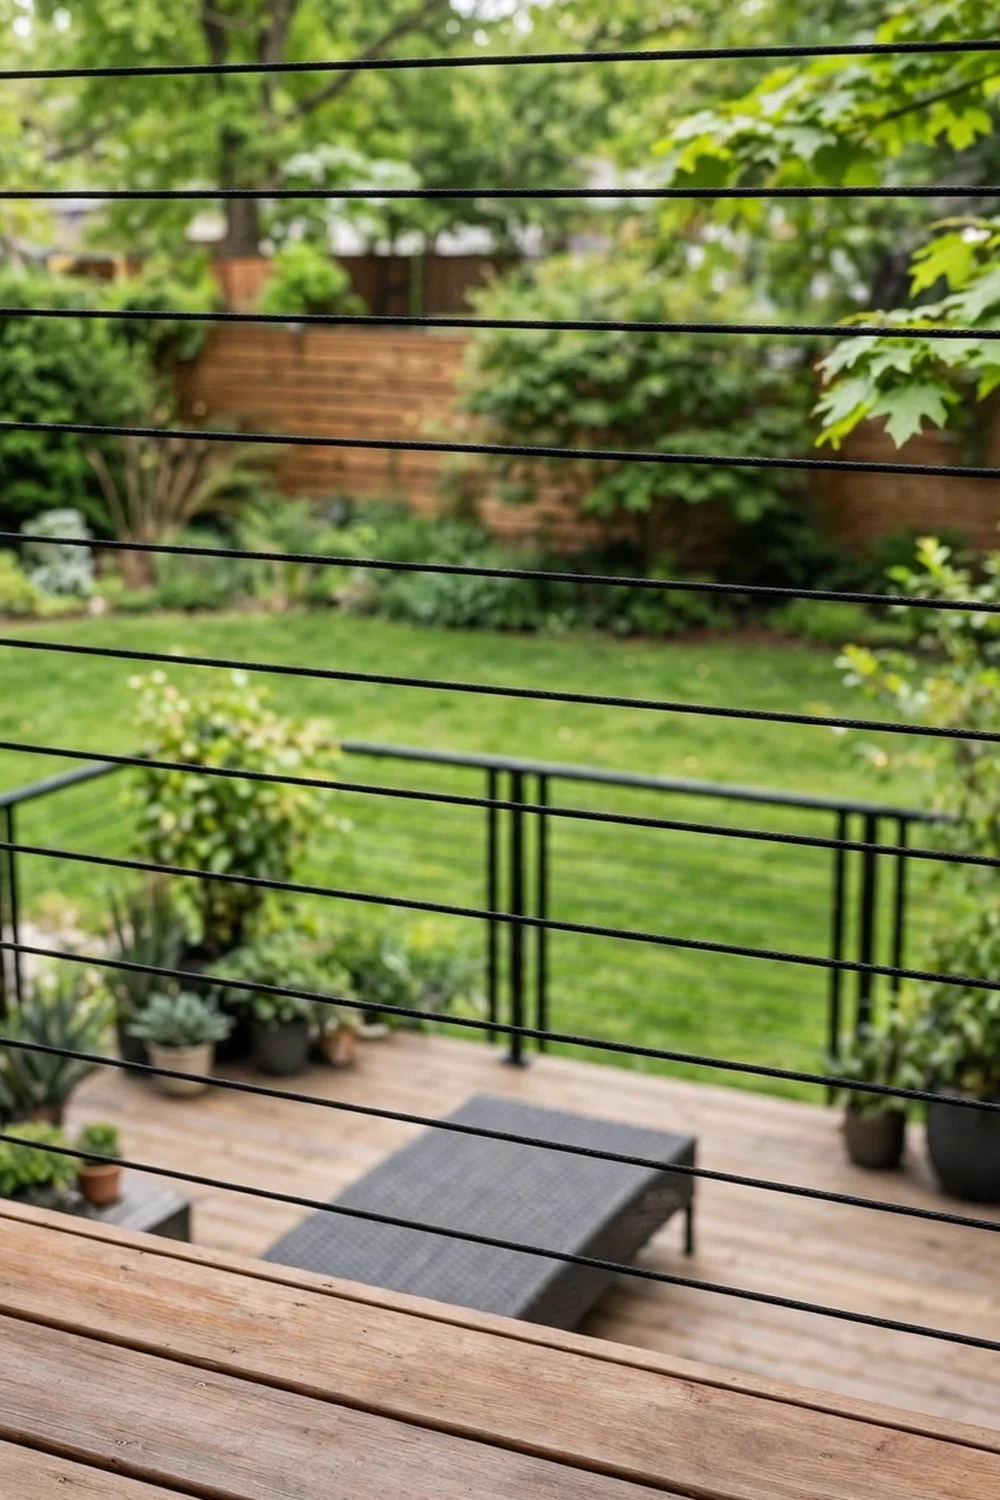
Swap chunky balusters for slim cable railings on the upper level so the view from the top stays wide open. Cable systems use metal posts and tensioned horizontal wires that almost disappear past 10 feet. They suit yards with a view, a garden, or a pool you want to watch from the grill. Check your local code first, because many areas require the cables spaced so a 4-inch sphere cannot pass through, and they need regular re-tensioning.
Try this: use cable rail on the view side only and wood balusters elsewhere to cut the cost nearly in half.
Budget: about $60 to $120 per linear foot installed. Difficulty: moderate to advanced.
8. Stair landing turned herb garden

If the stairs between levels need a landing, make it wide enough for planter boxes and turn it into a mini herb garden. A 4 by 4 foot landing fits two cedar planters with basil, thyme, rosemary, and mint within arm’s reach of the upper grill. The greenery softens the hard lines of the stairs and puts fresh herbs steps from the kitchen door. Use self-watering planters so the herbs survive a hot week without daily trips up the stairs.
Try this: add a small solar path light at the landing so the step edges stay visible after dark.
Budget: about $80 to $200 for planters and soil. Difficulty: easy.
9. Under-deck dry space for storage

A bi-level deck creates a tall, sheltered cavity under the upper tier. Add an under-deck ceiling system to keep it dry, then use the space for a garden shed zone: mowers, bikes, and seasonal bins on gravel or pavers. This reclaims square footage that single-level decks waste. Keep the area ventilated and never store gasoline or chemicals under a deck, since fumes can drift up through the boards toward the grill.
Try this: hang bikes from the joists on hooks rated for the load, with a stud finder to confirm solid wood.
Budget: about $8 to $15 per square foot for the ceiling system. Difficulty: moderate.
10. Sunken hot tub on the lower level

Set a hot tub into the lower level so its rim sits about 18 inches above the deck, which makes getting in and out easy and hides the bulky shell. The upper deck gives the tub privacy from neighbors’ windows while you still get open sky. Plan the structure for the filled weight, which can top 4,000 pounds, and run a dedicated GFCI circuit with a disconnect switch. A licensed electrician should handle all of the wiring near water.
Try this: leave a 3-foot service panel gap on one side of the tub so a technician can reach the equipment.
Budget: about $5,000 to $12,000 for the tub plus $2,000 to $5,000 for framing and electrical. Difficulty: advanced.
11. Wrap-around upper deck with a corner view
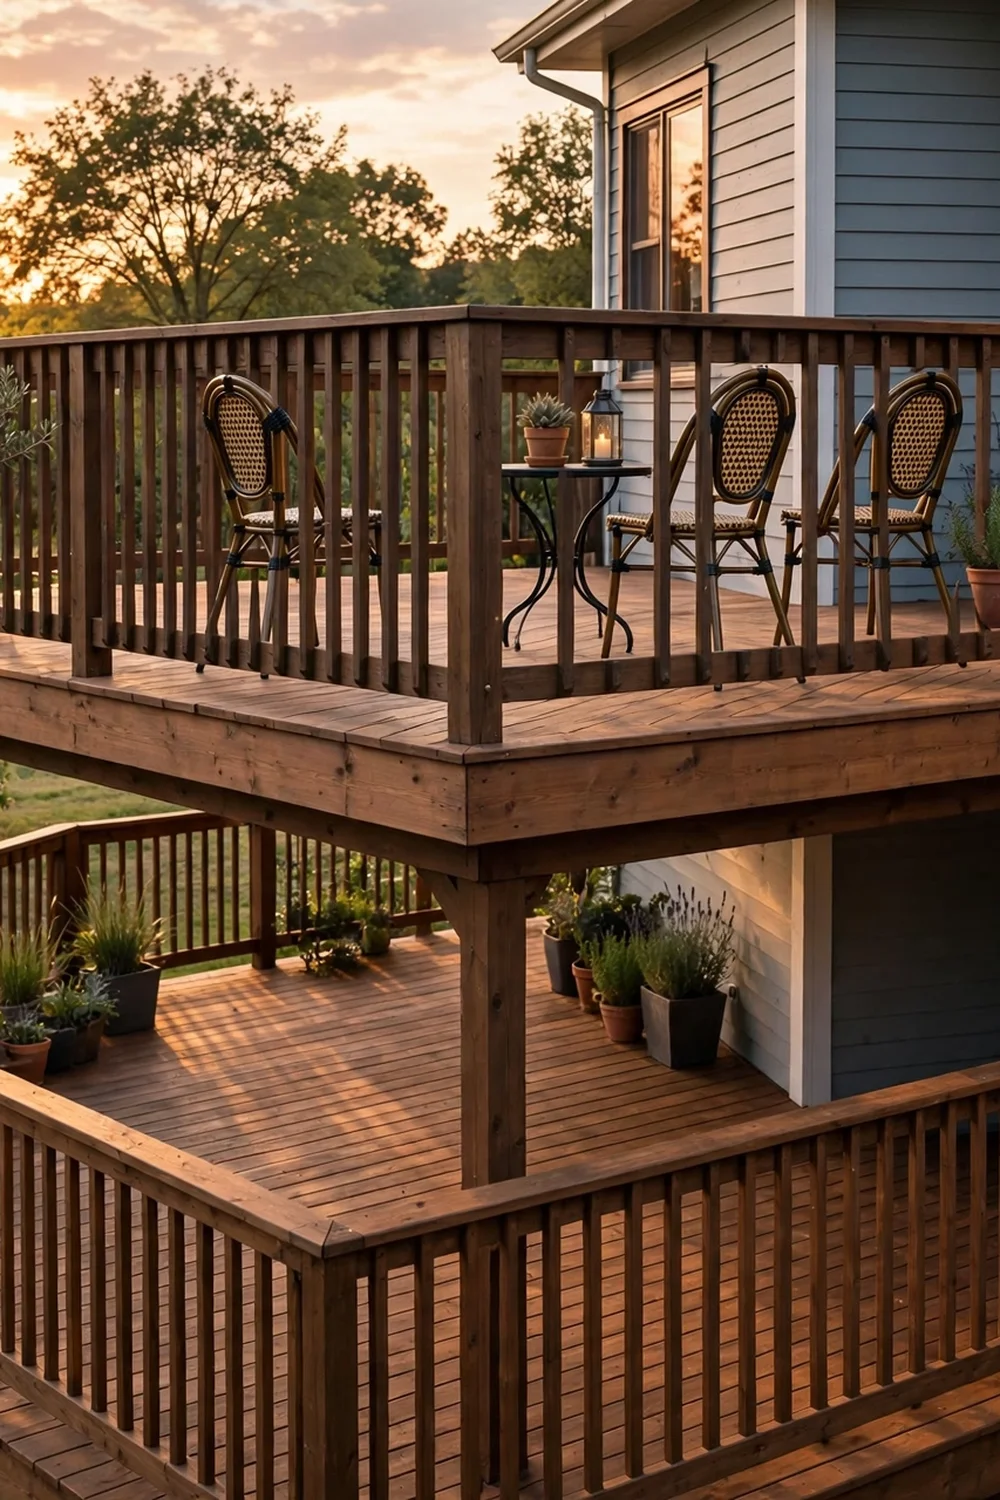
Run the upper level around the corner of the house in an L shape, then drop to a smaller lower deck off one arm. The wrap gives you a morning coffee corner on one side and a sunset side on the other, while the lower deck anchors the stairs to the yard. Corner posts carry more load, so this layout needs proper footings at the corner, but the payoff is a deck that feels twice as big because you can always chase the sun or the shade.
Try this: put a small bistro set on the quieter arm so it becomes a reading spot instead of dead space.
Budget: about $30 to $50 per square foot built. Difficulty: advanced.
12. Planter walls as living railings
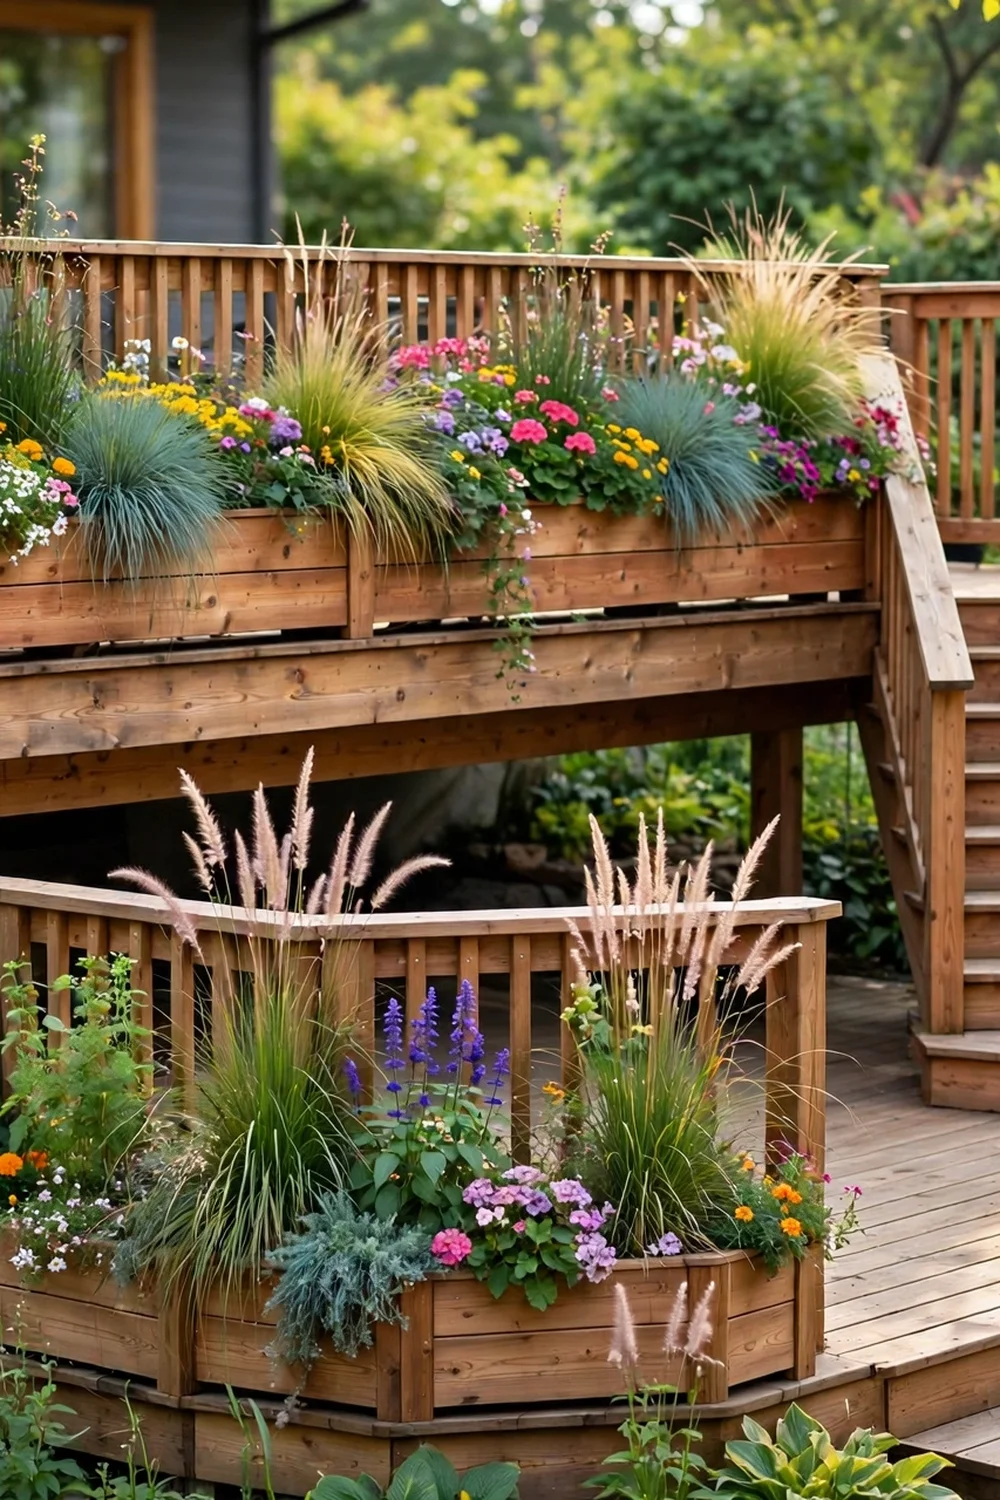
Replace part of the railing on each level with built-in planter boxes to add privacy and color without blocking light. A 12-inch-deep cedar box along the lower deck holds tall grasses that screen the neighbors, while shallow boxes on the upper rail hold trailing flowers. Line the boxes with landscape fabric and drill drainage holes so water never pools against the deck framing. Keep soil away from cut board ends, which rot fastest.
Try this: plant the upper boxes with trailing sweet potato vine for fast summer coverage.
Budget: about $60 to $150 per 6-foot planter box. Difficulty: easy to moderate.
13. String light canopy over both tiers
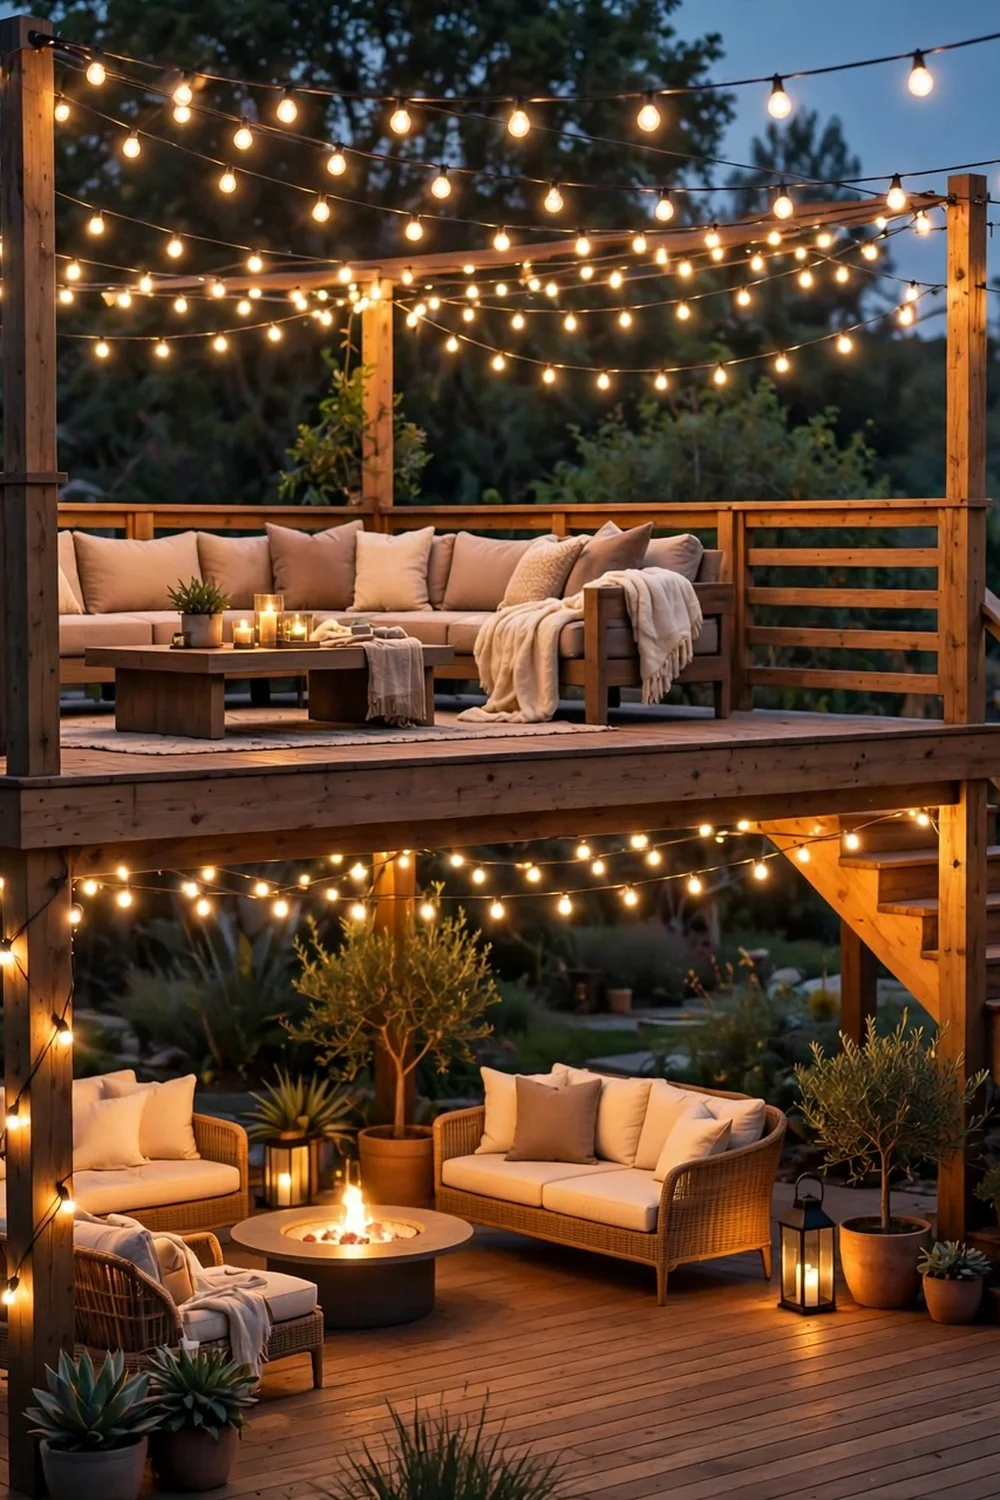
Drape string lights in a loose canopy over both levels so the whole deck glows as one space after dark. Run the strands from the house to tall posts on the deck edge, crossing over the stairs so the level change stays visible at night. Use outdoor-rated LED strands on a timer, and keep bulbs at least 3 feet above head height on walking paths. One warm-white canopy beats a mix of colors for a calm evening look.
Try this: add a dimmer switch rated for outdoor LEDs so you can lower the lights for late-night talks.
Budget: about $60 to $200 for lights and posts. Difficulty: easy.
14. Grill station up top, dining below

Flip the usual split: put a compact grill station with a prep counter on the upper level near the kitchen, and the dining table on the lower level. The cook gets counter space and stays out of foot traffic, while diners get the view from the lower tier. A 4-foot stainless prep table with locking casters works as the station and rolls inside for winter. Keep the grill at least 3 feet from the railing and never under a low roof or pergola fabric.
Try this: add a small under-counter fridge on the upper level so drinks stay close to the grill.
Budget: about $400 to $1,200 for the station setup. Difficulty: easy.
15. Glass panel railing on the upper deck
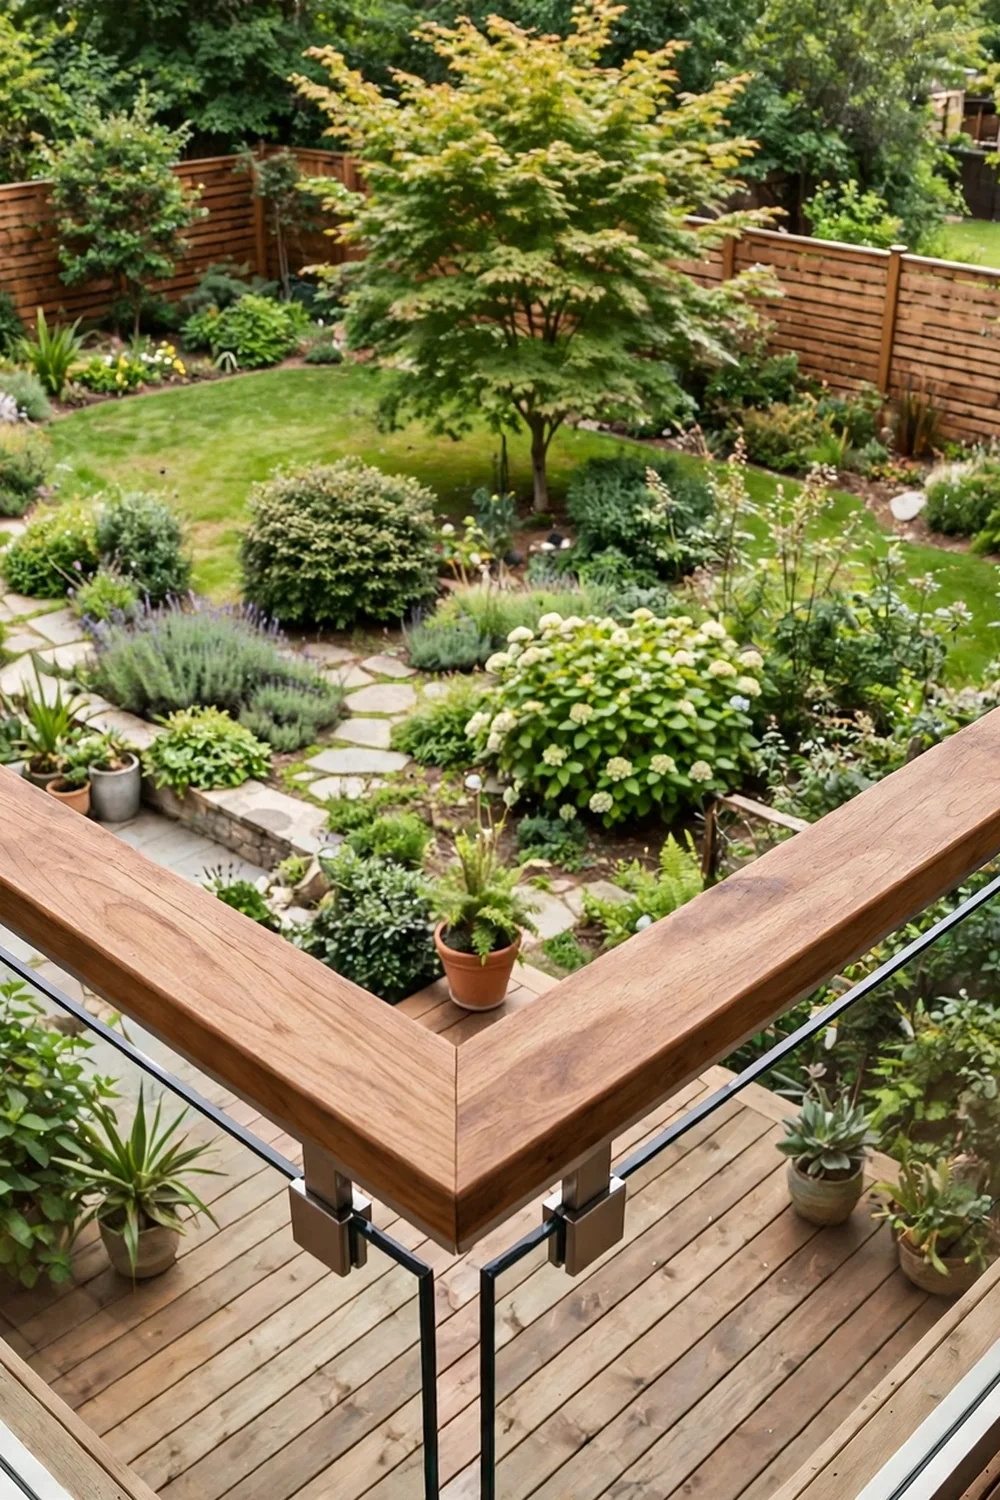
Use tempered glass panels for the upper-level railing when the view is the whole point. Glass keeps wind off the dining table while leaving the sightline completely open, which makes a small upper deck feel much larger. It needs regular cleaning to stay clear, and it costs more than cable or wood, but nothing else disappears like glass does. Pair it with a wood handrail on top for a warm grip and a finished edge.
Try this: choose panels with a slight bronze tint to cut glare on bright afternoons.
Budget: about $100 to $200 per linear foot installed. Difficulty: advanced.
Bi-level deck layouts compared
Pick the split that matches how you actually use your backyard. This table compares the most popular layouts by cost, effort, and best fit.
How to plan a two-level layout
Start with the slope. Measure the drop from the door threshold to the yard across the full width of the planned deck. A drop of 2 to 4 feet suits two levels with 3 to 5 steps between them. A bigger drop may need three tiers or a taller single deck with a staircase, which changes the budget completely.
Next, assign each level one clear job before you draw anything. Decks fail when both levels try to do everything. Write the jobs down, then size each level for its furniture plus 3 feet of walking room on each side. A dining level needs more depth than a lounge level because chairs pull out.
Finally, plan the stairs as a feature, not an afterthought. Place them where foot traffic naturally flows from the door to the yard, make them at least 4 feet wide, and light every step. For more layout inspiration, these patio backyard deck designs show how single-level decks handle the same zoning problems. If your yard is small, these tiny townhome patio ideas prove that tight spaces can still hold two distinct zones. And if the lower level will host evening gatherings, these outdoor pavilion with fireplace ideas show how covered structures handle heat and smoke safely.
Bi-level deck safety: permits, structure, and digging
A two-level deck carries more load and more edges than a flat one, so the safety bar is higher. Pull a building permit before you start, since most cities require one for any deck over 30 inches high or attached to the house. Footings must sit below the local frost line, and the ledger board connection to the house is the most common failure point, so have a licensed contractor review the framing plan even if you build it yourself.
Before you dig a single footing hole, contact 811 a few days ahead so utility companies can mark buried lines. The free 811 before-you-dig service covers every state and takes one call or online request. For material and span guidance, manufacturers like Trex publish decking installation guides that spell out joist spacing and fastener rules for their boards. Light every stair and level change, keep railings at code height, and re-check hardware and board fasteners each spring.
Frequently asked questions
How much does a bi-level deck cost?
A professionally built bi-level deck usually runs $25 to $60 per square foot, depending on materials and complexity. A 300-square-foot pressure-treated deck lands near $8,000 to $12,000, while the same size in composite with a covered lower level can reach $15,000 to $25,000. Stairs, railings, and permits add to the base price, so get at least three local quotes.
Do I need a permit for a bi-level deck?
In most US cities and counties, yes. Any deck attached to the house or more than 30 inches above grade typically needs a building permit and inspections. The permit office will want a site plan showing the deck’s distance from property lines, plus a framing plan. Building without one can force a costly teardown if a neighbor complains or you sell the house.
Is a bi-level deck good for a sloped yard?
Yes, slopes are the best reason to build one. Instead of tall posts holding up a single flat platform, two levels step down with the grade, which uses shorter posts and looks natural. A drop of 2 to 4 feet across the yard is the sweet spot. Steeper slopes may need retaining walls or a third tier.
What decking works best on a low lower level?
Capped composite or PVC decking handles ground moisture far better than wood on a lower tier close to the soil. Wood needs airflow underneath to avoid rot, which a low deck cannot always provide. If you love real wood, keep the lower framing at least 12 inches above grade and use ground-contact-rated lumber.
Can I add a second level to my existing deck?
Sometimes, but the existing footings and ledger were sized for one level, so an engineer or licensed contractor should check the structure first. In many cases it is simpler and safer to extend outward at a lower height with its own footings than to stack a new level on old framing.
How do I keep two deck levels looking connected?
Repeat one material and one color across both levels, then vary only the accent: board direction, a two-tone stain, or matching planters. Carry the same railing style and lighting down the stairs, and use rugs in the same color family on each tier. The eye reads the repeats as one design.
Two levels turn a tricky slope into the best seat in the yard. Pick one job per level, light the stairs, and build the structure to code, and the deck will host dinners, quiet mornings, and late-night talks for decades. We still miss that sloped yard, mostly because the lower deck became everyone’s favorite reading spot.


