


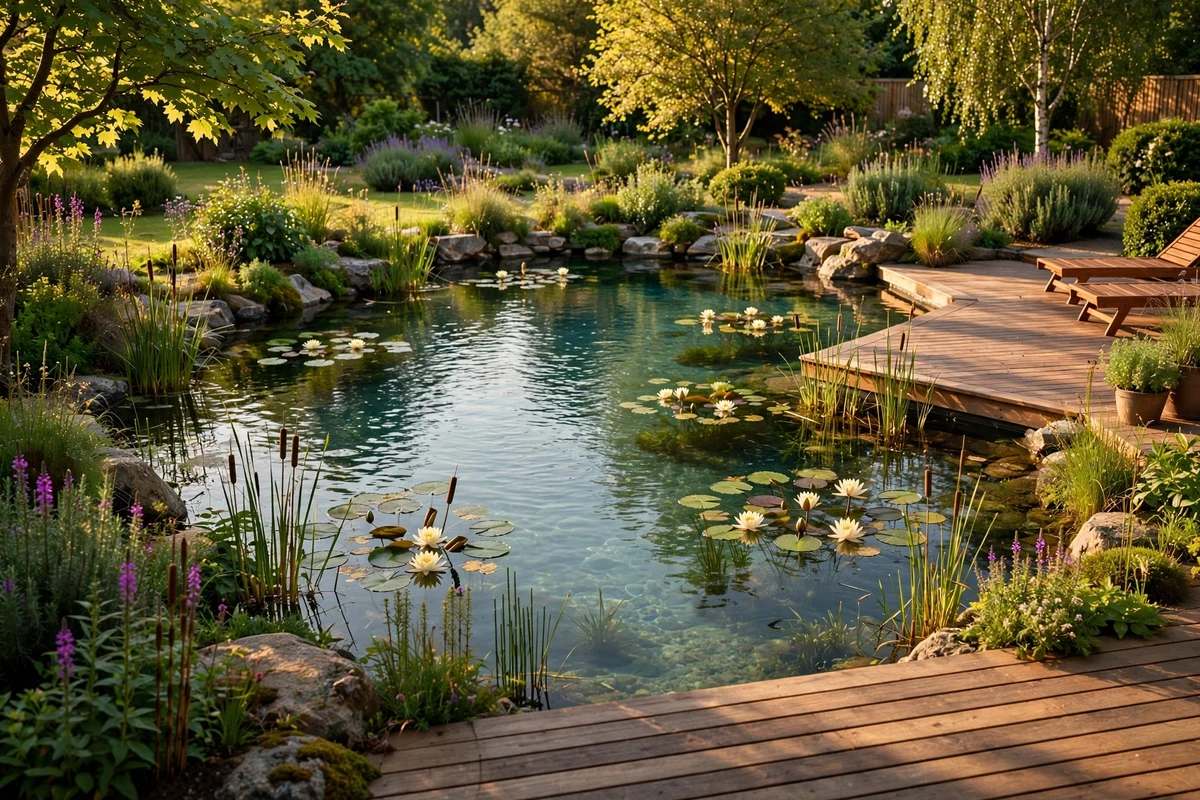
A traditional pool means chlorine smell, chemical bills, and water that stings your eyes. You want to swim in clean water without the chemical soup, but natural pools sound like a mystery only professionals can build. The truth is simpler: a natural pool is a pond you swim in, filtered by plants and gravel instead of chemicals.
This guide walks you through 12 steps to build a natural pool in your yard, from permits and excavation to planting the regeneration zone that keeps water clear. Written for serious DIYers with realistic budgets and timelines. If you want a chemical-free swim surrounded by water lilies instead of chlorine, start here.
Quick takeaways
- A natural pool splits into a swim zone and a plant-filled regeneration zone that filters the water.
- Call 811 before digging and check local permits; many towns classify pools by depth and fencing rules.
- Budget 8 to 12 weeks for the full build, and plan for a pro electrician for all pump wiring.
- The regeneration zone should cover 30 to 50 percent of the total water surface.
- Expect a season of balancing before the water runs crystal clear; the ecosystem needs time to mature.
1. Check permits and call 811 before you dig

Every pool project starts with paperwork, not a shovel. Many towns require building permits for pools deeper than 24 inches, plus fencing that meets local pool barrier codes. Call 811 (the national free service at call811.com) at least 3 business days before digging so utilities mark buried gas, electric, and water lines. Hitting a gas line turns a weekend project into an emergency, and most dig-in damages are completely preventable with one free call.
Try this: ask your building department specifically whether natural pools need the same fencing as chlorinated pools; most do. Cost: $· Difficulty: easy
2. Pick the right spot in your yard

Choose level ground away from large trees, since roots puncture liners and falling leaves overload the filter plants. Aim for at least 6 hours of sun daily; warmth speeds the biological filtration, though some afternoon shade reduces algae pressure. Leave room for equipment access: an excavator needs a 10-foot-wide path to reach the dig site. Walk the yard after heavy rain and avoid spots where water already ponds.
Try this: mark the outline with spray paint and live with it for a week before committing. Cost: $· Difficulty: easy
3. Design the swim zone and regeneration zone

A natural pool is two zones in one basin. The swim zone is the deep, open swimming area; the regeneration zone is a shallow planted shelf (12 to 18 inches deep) that filters the water through gravel and plant roots. Plan the plant zone at 30 to 50 percent of total surface area. Simple rectangular shapes are far easier to line and excavate than curves, which matters a lot for DIY builders.
Try this: sketch both zones on graph paper with depths labeled before you rent any equipment. Cost: $· Difficulty: easy
4. Excavate both zones

Dig the swim zone 5 to 7 feet deep in the center with sides sloping at roughly 1 foot of vertical drop per 3 feet of horizontal run, which keeps soil walls stable. Dig the regeneration zone as a separate shallow shelf 1 to 3 feet deep beside it. A rented mini-excavator ($300 to $500 per day) handles most backyard pools in 2 to 3 days. Keep topsoil separate from subsoil so you can reuse the good soil in garden beds later.
Try this: over-dig by 6 inches everywhere; the gravel base and liner need that extra room. Cost: $$$$· Difficulty: moderate to hard
5. Install the waterproof liner

Line the entire excavation with a 45-mil EPDM pond liner or reinforced PVC liner, the same material professionals use. Remove every sharp stone and root first, then lay a geotextile underlayment as a protective cushion. Overlap liner sheets by 12 inches at seams and seal with manufacturer-approved tape or adhesive. Buy the liner 20 percent larger than your measurements so it drapes fully into every corner without stretching.
Try this: install on a calm, warm day; wind turns a big liner sheet into a sail. Cost: $$$$· Difficulty: moderate
6. Build the separator wall

A low wall divides the swim zone from the regeneration zone while letting water flow between them. Stack natural stone or concrete block to just below the planned waterline, leaving gaps or a notched top so water circulates over and through. The wall keeps plant roots and gravel out of the swimming area. Cap it with flat stones for a finished edge you can sit on.
Try this: dry-stack the wall first without mortar to test the fit, then set the final courses. Cost: $$$· Difficulty: moderate
7. Install the pump and circulation plumbing

Water must move constantly through the plant roots to stay clear, so size a pond pump for 2 to 4 full water turnovers per day. Run flexible PVC pipe from a bottom drain in the swim zone, through the pump and any biological filter, and discharge it into the regeneration zone gravel bed. Add a surface skimmer to catch leaves before they sink and rot. Bury pipes below frost depth in cold climates.
Try this: install a union fitting on each side of the pump so you can remove it for winter without cutting pipe. Cost: $$$$· Difficulty: moderate
8. Wire the pump safely with GFCI protection

All pool electrical work belongs to a licensed electrician, no exceptions. Outdoor pump circuits need GFCI protection, weatherproof conduit, and proper grounding and bonding of all metal parts near the water. This is the one step where DIY ends: faulty pool wiring can electrify the water, and it has killed swimmers. Budget $500 to $1,500 for the electrician to run a dedicated circuit, install the GFCI breaker, and bond the equipment.
Try this: have the electrician install the conduit and junction boxes during excavation, before the liner goes in. Cost: $$$$· Difficulty: hire a pro
9. Add the gravel substrate to the regeneration zone

Fill the regeneration zone with 8 to 12 inches of washed 3/4-inch gravel, which gives beneficial bacteria enormous surface area to colonize. This gravel bed is the biological engine of the pool: bacteria convert ammonia from organic debris into plant food. Use clean, lime-free gravel so it does not spike the pH. A typical 200-square-foot plant zone needs about 6 to 8 tons of gravel, delivered by truck.
Try this: rinse each load lightly as you spread it; dusty gravel clouds the water for weeks. Cost: $$$· Difficulty: hard (heavy work)
10. Plant the regeneration zone

Plant oxygenators (hornwort, waterweed) in the deeper gravel, marginals (pickerel rush, iris, cattail) at mid-depth, and floating plants (water lilies) on the surface. Aim for one plant per 2 to 3 square feet to start; they multiply fast. Native species handle local winters and support wildlife. Tuck roots directly into the gravel; no pots or soil needed, since the plants feed from the circulating water.
Try this: buy plants from a native aquatic nursery, not a pet store, for species matched to your climate. Cost: $$$· Difficulty: easy
11. Fill the pool and start circulation

Fill with a garden hose over 2 to 4 days, letting the liner settle and smoothing wrinkles as the water rises. Start the pump immediately so water begins flowing through the gravel bed from day one. If your tap water is chlorinated, let it circulate 48 hours before adding plants, or use a hose-end dechlorinator. Test pH with a basic kit and aim for 7.0 to 7.4 for comfortable swimming.
Try this: fill during cool morning hours; hot sun makes liner wrinkles harder to smooth. Cost: water bill only · Difficulty: easy
12. Let the ecosystem mature before judging the water

The pool will look cloudy or greenish for the first 4 to 8 weeks while bacteria colonize the gravel and plants establish. This is normal. Keep the pump running 24/7, skim leaves daily, and resist the urge to add chemicals, which would reset the biology. Once plants are growing strongly and the water turns clear, the system is balanced. From then on, maintenance is skimming, seasonal plant trimming, and pump checks.
Try this: add a small bale of barley straw in a mesh bag; as it breaks down it gently suppresses algae. Cost: $· Difficulty: easy
Natural pool vs. chlorine pool compared
Realistic costs and timeline for a DIY natural pool
A DIY natural pool typically costs $8,000 to $20,000 depending on size, liner choice, and how much excavation you do yourself. The biggest line items are the liner, the pump and plumbing, gravel, and the electrician. Expect 8 to 12 weeks from first dig to first swim, with the ecosystem needing one full season to reach peak clarity. Professional builds run $50,000 to $150,000, so DIY saves enormously if you have the time and equipment access.
Safety rules you cannot skip
Electrical: hire a licensed electrician for all pump wiring; pools require GFCI protection, weatherproof conduit, and bonding of metal parts, and faulty wiring near water is lethal. Fencing: most local codes require a 4-foot minimum fence with a self-closing, self-latching gate around any pool; check your town’s pool barrier rules before you fill. Digging: call 811 at least 3 business days before excavation so utilities mark buried lines. Heavy work: gravel, stone, and liner rolls are extremely heavy; use a wheelbarrow and a helper, lift with your legs, and rent equipment for anything over 50 pounds. Water safety: natural pools have the same drowning risk as any pool, so supervise children constantly and consider a pool alarm.
Mistakes that ruin a natural pool build
The classic mistake is undersizing the regeneration zone; below 30 percent of surface area, the plants cannot keep up and algae wins. The second is skipping the skimmer, which lets leaves rot on the bottom and feed algae blooms. Third, do not seal the liner with cheap tarp material; a proper 45-mil EPDM liner lasts decades while thin liners puncture within seasons. Finally, impatience kills more pools than anything: adding chemicals during the cloudy startup phase resets the biology you are trying to build.
Planning the rest of your backyard? These 17 backyard playground landscaping ideas help design a kid-friendly yard around the pool. For evening gatherings after a swim, these backyard fire pit ideas create the perfect nightcap spot.
For science-backed pond construction guidance, the University of Georgia Extension covers water garden installation at fieldreport.caes.uga.edu, and the national Call 811 service is the free way to get buried utility lines marked before any digging project.
Frequently asked questions
How much does it cost to build a natural pool yourself?
A DIY natural pool typically costs $8,000 to $20,000, with the liner, pump, gravel, and electrician as the biggest expenses. Professional installation runs $50,000 to $150,000. Doing your own excavation with a rented mini-excavator saves thousands.
Do natural pools really stay clean without chlorine?
Yes, once the ecosystem matures. The regeneration zone’s gravel hosts bacteria that convert waste into plant food, and aquatic plants absorb the nutrients algae would otherwise use. Continuous pump circulation is essential; without it, the water stagnates.
How long does it take to build a natural pool?
Construction takes 8 to 12 weeks for a DIY build: excavation, liner, plumbing, and planting. The water then needs 4 to 8 weeks of circulation for the biological filter to mature and the water to run clear.
Can you build a natural pool in a small yard?
Yes, compact designs work in yards as small as 400 square feet of pool area. Keep the regeneration zone at 30 to 50 percent of the surface and choose a simple rectangular shape to maximize swimmable space.
Do natural pools attract mosquitoes?
A properly circulating natural pool does not breed mosquitoes, since larvae cannot survive in moving water. Keep the pump running 24/7 during warm months, and the dragonflies the pool attracts will eat any mosquitoes nearby.
Do I need a fence around a natural pool?
In most places, yes. Local pool barrier codes usually apply to any pool deeper than 24 inches, requiring a minimum 4-foot fence with a self-closing, self-latching gate. Check with your building department before filling.
Building a natural pool is the biggest garden project most of us will ever take on, and the first swim in chemical-free water makes every shovelful worth it. I spent a summer helping a neighbor through this exact process, and the moment the water ran clear that fall felt like magic. Take it step by step, hire the electrician, respect the 811 call, and you will have a living pool your family enjoys for decades.


