


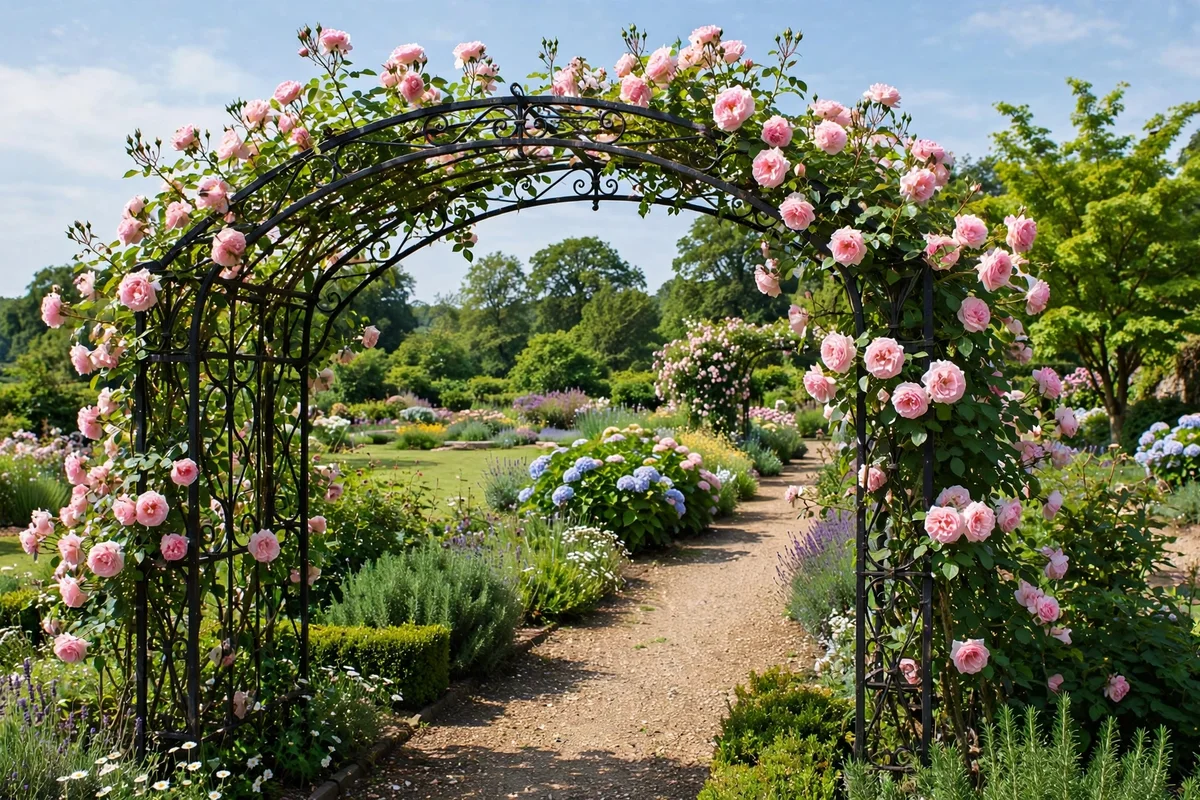
Climbing roses without support are just thorny shrubs lying on the ground. The right trellis lifts those long canes into the air, spreads them wide for more blooms, and turns an ordinary wall or path into the prettiest part of the garden.
These 20 climbing rose trellis ideas cover every style and budget, from a simple fan trellis to a full rose tunnel. Each one includes what it costs, how hard it is to build or install, and which roses it suits best. I trained my first climbing rose on a basic wooden trellis five years ago, and watching it cover the whole panel by year three sold me on giving roses real support from day one.
Quick takeaways
- Pick a trellis 6 to 8 feet tall. Climbing roses outgrow short supports fast.
- Train main canes as close to horizontal as possible. Horizontal canes produce far more flowers.
- Install the trellis before planting so you never crush young roots later.
- Keep the trellis 3 to 4 inches off walls for airflow, which cuts disease pressure.
- Plan for the rose at maturity, not year one. A flimsy support topples under a full-grown climber.
1. Classic cedar fan trellis
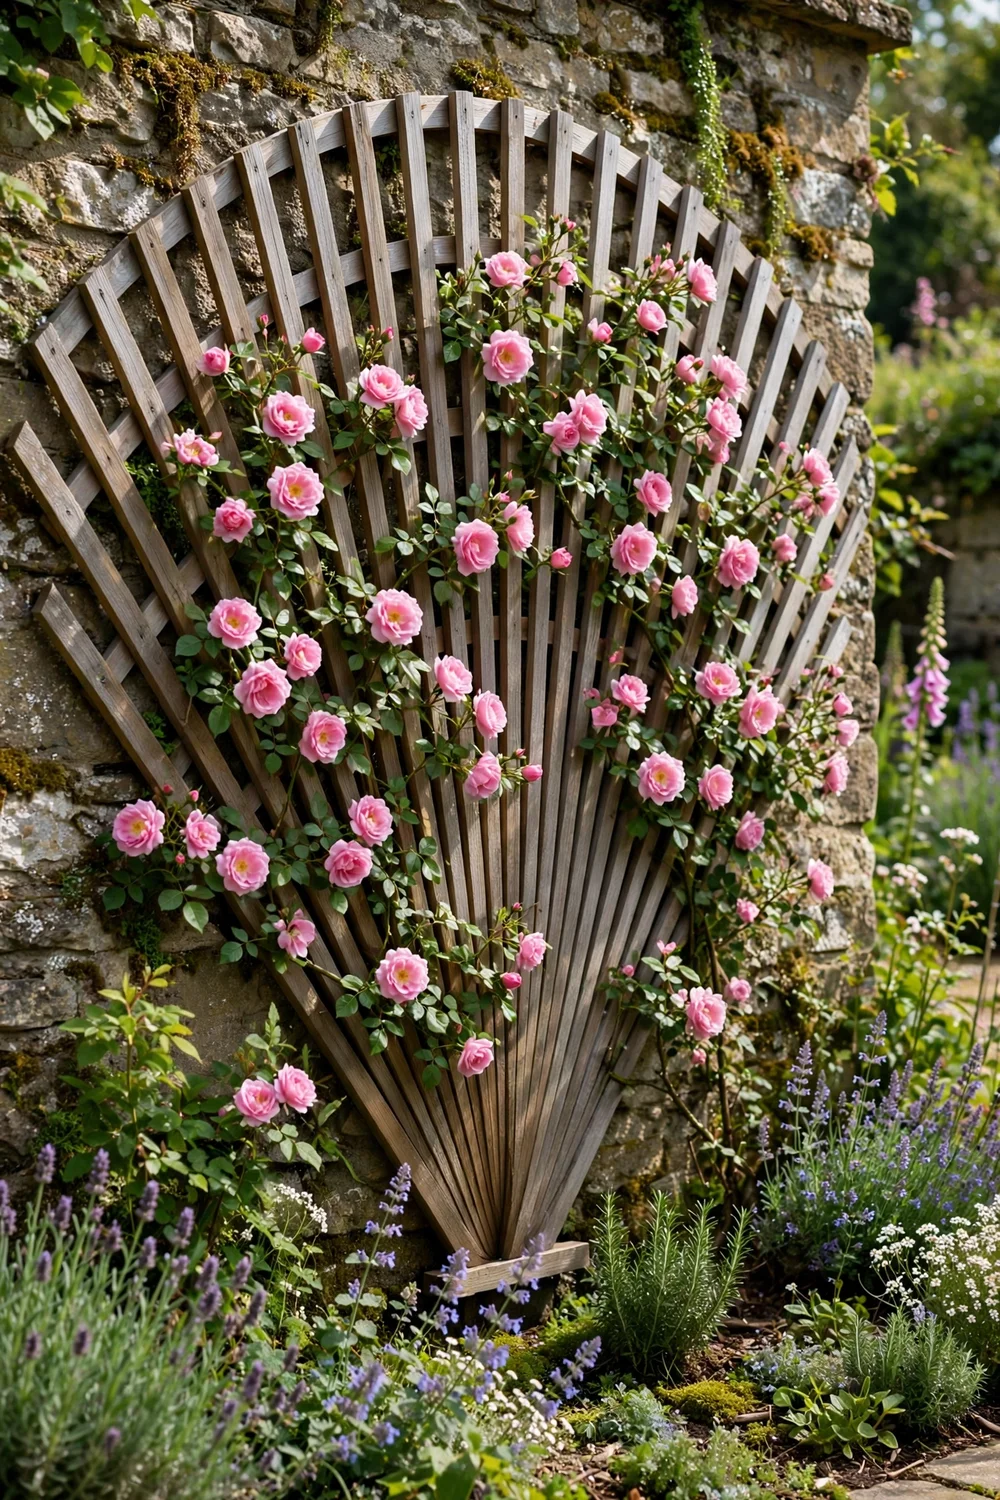
The fan trellis is the workhorse of rose supports. Its spreading slats naturally guide canes outward into the fan shape that produces the most blooms. Cedar resists rot for years without treatment, and the open design gives you easy access for pruning and tying. Mount it on wall brackets so it stands a few inches off the surface. This suits repeat-blooming climbers against cottage walls and fences, and it costs little for the years of service it gives.
Cost: $$· Skill: beginner · Time: 1-2 hours to install
Try this: tie the lowest canes first and work upward, keeping each cane slightly below horizontal as you go.
2. Wrought iron garden arch

An iron arch over a path or gate creates the classic rose-covered entryway. Iron is strong enough for the heaviest mature climbers and lasts decades with occasional rust touch-ups. Anchor the feet in concrete or deep post holes, since a rose-covered arch catches a lot of wind. Plant one rose on each side and train them to meet at the top. This is the focal-point option, and it earns its place in any garden with a path worth framing.
Cost: $$$· Skill: intermediate · Time: half a day
Try this: choose a repeat-blooming variety so the arch carries color all season, not just in June.
3. Whitewashed lattice wall
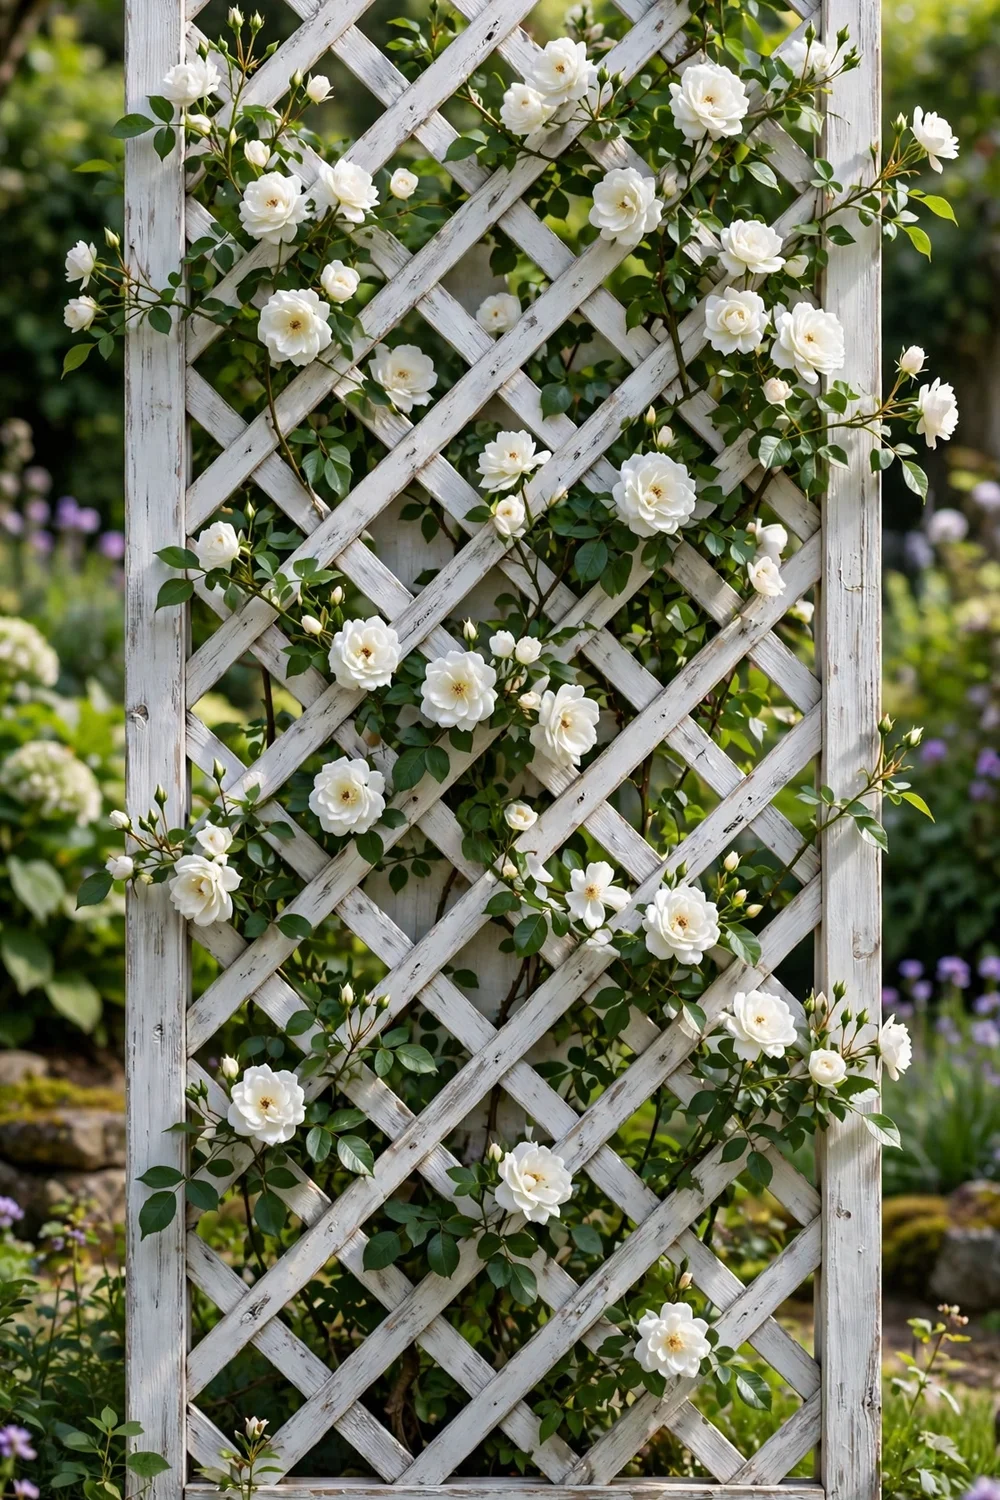
A large whitewashed lattice panel turns a plain wall into a romantic backdrop. The light color makes rose blooms stand out, and the grid gives you attachment points every few inches for precise training. Build a simple 2×4 frame behind the lattice to hold it off the wall for airflow. This works beautifully in shady-side gardens where the white finish bounces light around. Seal the wood well, since white paint shows weathering faster than stain.
Cost: $$· Skill: beginner · Time: one afternoon
Try this: pair white or blush roses with the whitewash for a soft, tonal look that glows at dusk.
4. Freestanding cedar tower
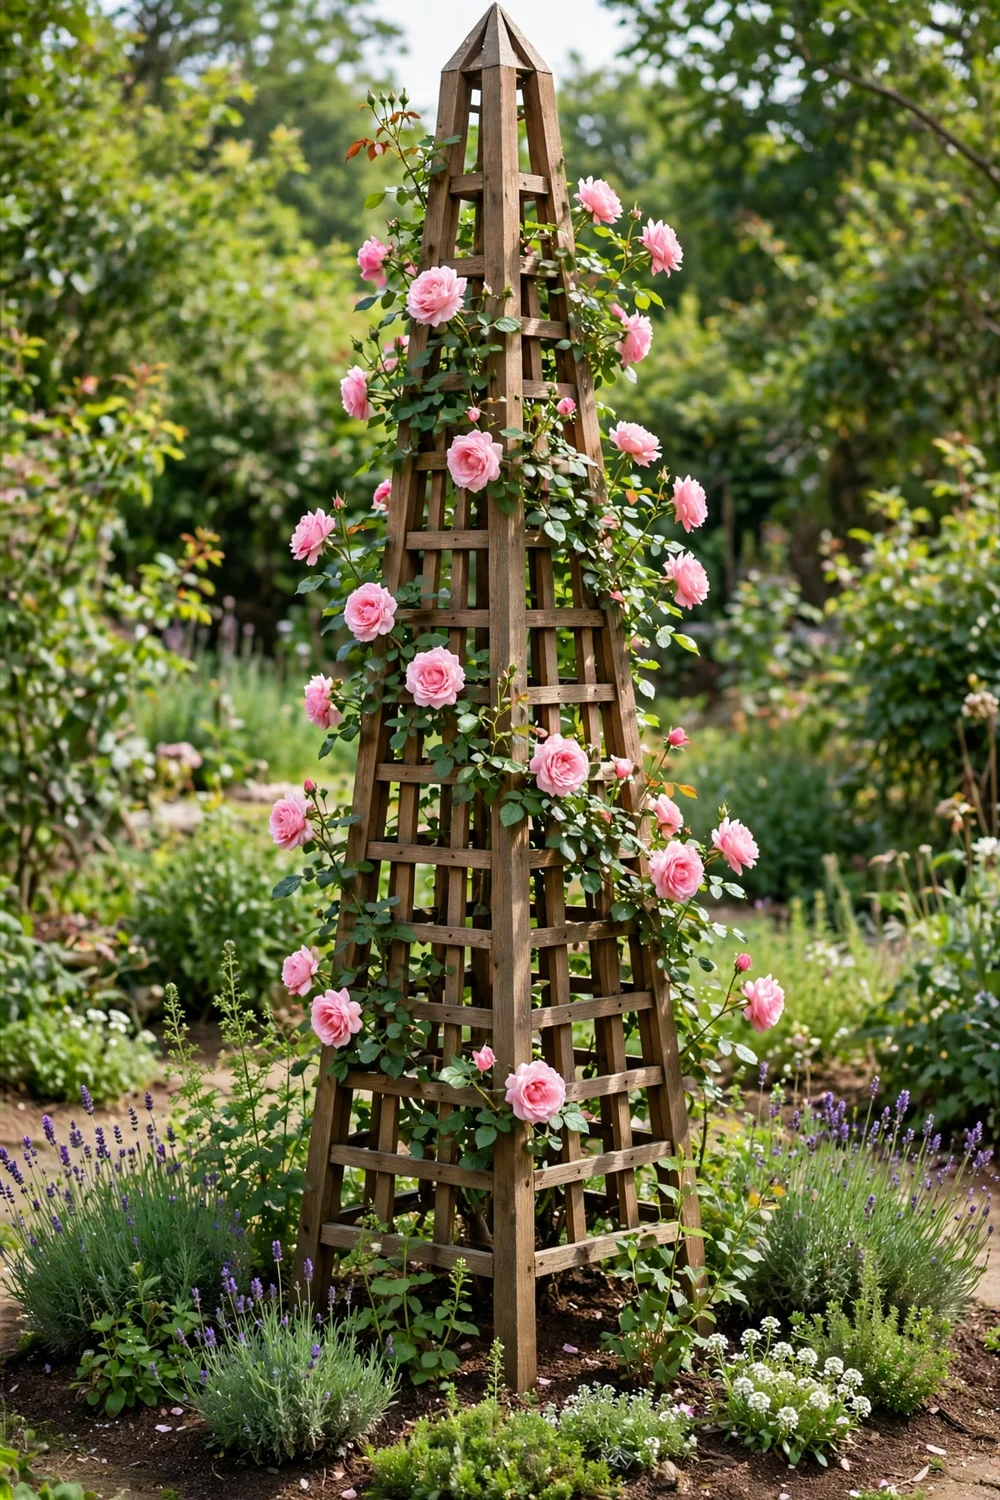
A cedar tower, sometimes called an obelisk, gives roses a vertical home in the middle of a bed. The four-sided pyramid shape lets you spiral canes upward in a barber-pole pattern, which looks striking even in winter. Sink the legs 18 inches deep or bolt the tower to a buried base plate so it cannot tip once the rose fills out. This is the best pick for open beds where you want height without a wall nearby.
Cost: $$$· Skill: intermediate · Time: half a day
Try this: plant the rose on the south side of the tower so the canes get full sun as they spiral up.
5. Copper pipe ladder trellis

Copper pipe and elbow fittings build a sleek ladder trellis for modern gardens. The metal weathers to a soft brown patina that looks intentional against rose foliage. Use 3/4-inch pipe for the uprights so the structure stays rigid under a mature rose, and anchor the feet well. This suits lighter climbers and contemporary beds where a rustic wood trellis would feel out of place. The build needs only a pipe cutter and basic fittings.
Cost: $$$· Skill: intermediate · Time: half a day
Try this: add horizontal rungs every 12 inches. Roses need frequent tie points to train neatly.
6. Wooden garden arbor

A full arbor gives roses overhead room to bloom where you walk underneath. Build or buy one at least 7 feet tall so the blooms hang above head height, and make it wide enough that thorny canes do not brush passersby. Painted wood suits formal gardens, while natural cedar fits cottage styles. Plant roses on both sides for a full canopy in 3 to 4 years. This is the most romantic structure on the list and the one guests photograph most.
Cost: $$$· Skill: intermediate · Time: one weekend
Try this: train two different roses, one per side, for a two-tone canopy at bloom time.
7. Picket fence trellis run
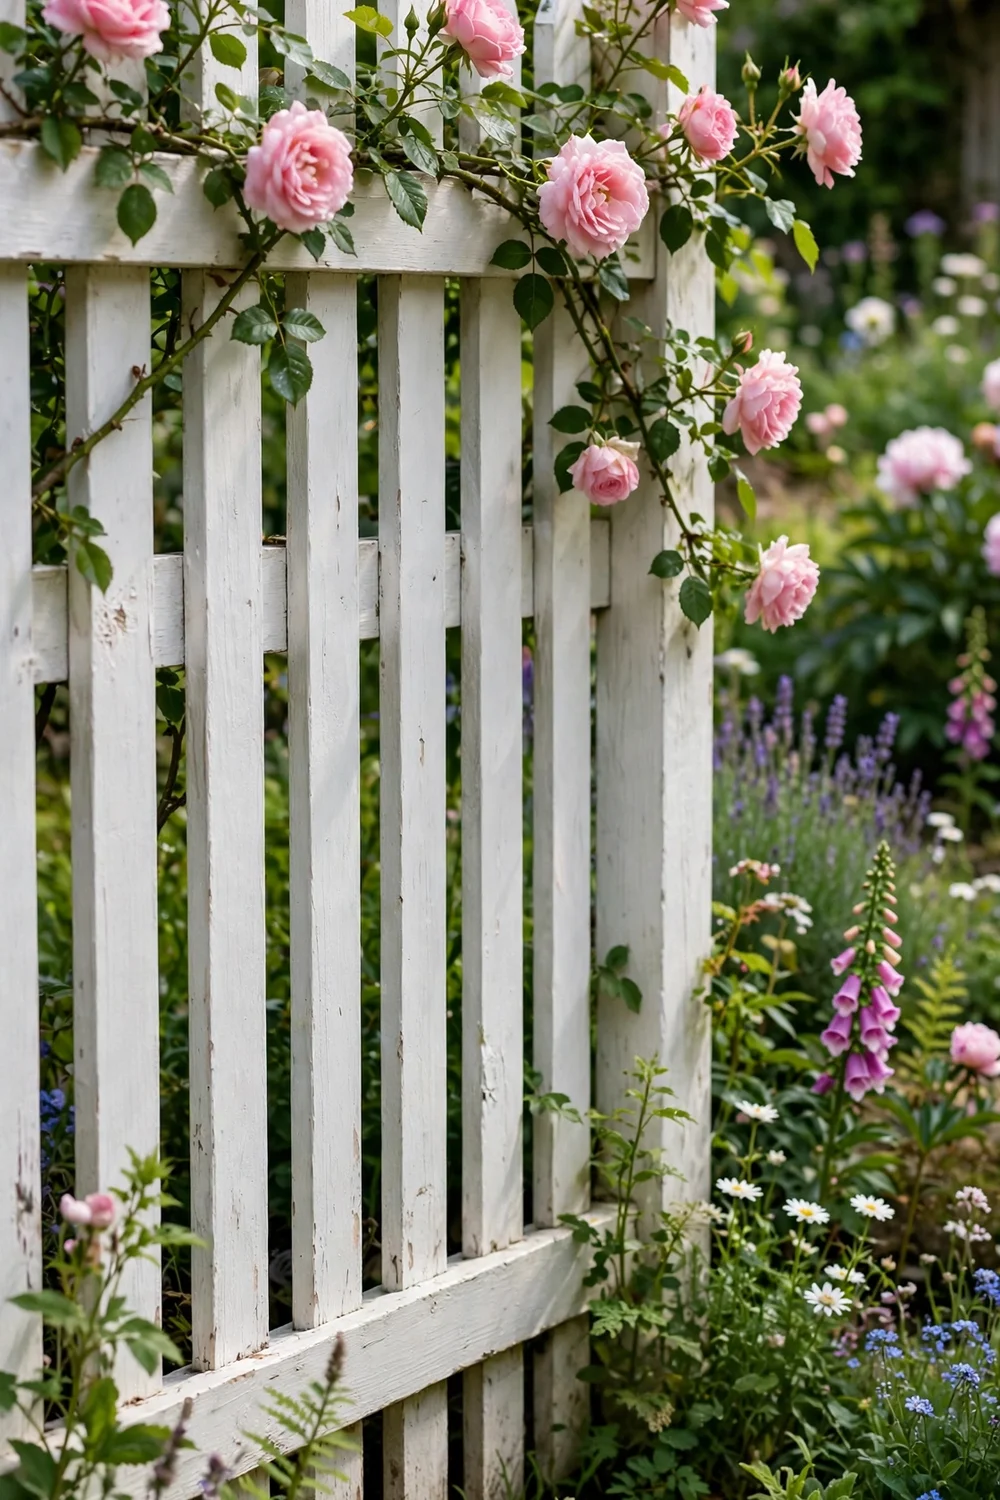
A run of picket fence doubles as a rose trellis along a boundary or path. The horizontal rails are perfect for tying canes sideways, which is exactly the training that maximizes flowers. Add a wire or two above the top rail for extra height, since most picket fences are only 3 to 4 feet tall. This suits low, spreading climbers and cottage boundaries. Paint the fence first, because painting around established roses is miserable work.
Cost: $$$· Skill: beginner · Time: one weekend
Try this: keep the bottom 12 inches clear of canes so you can weed and mulch without fighting thorns.
8. Powder-coated steel obelisk
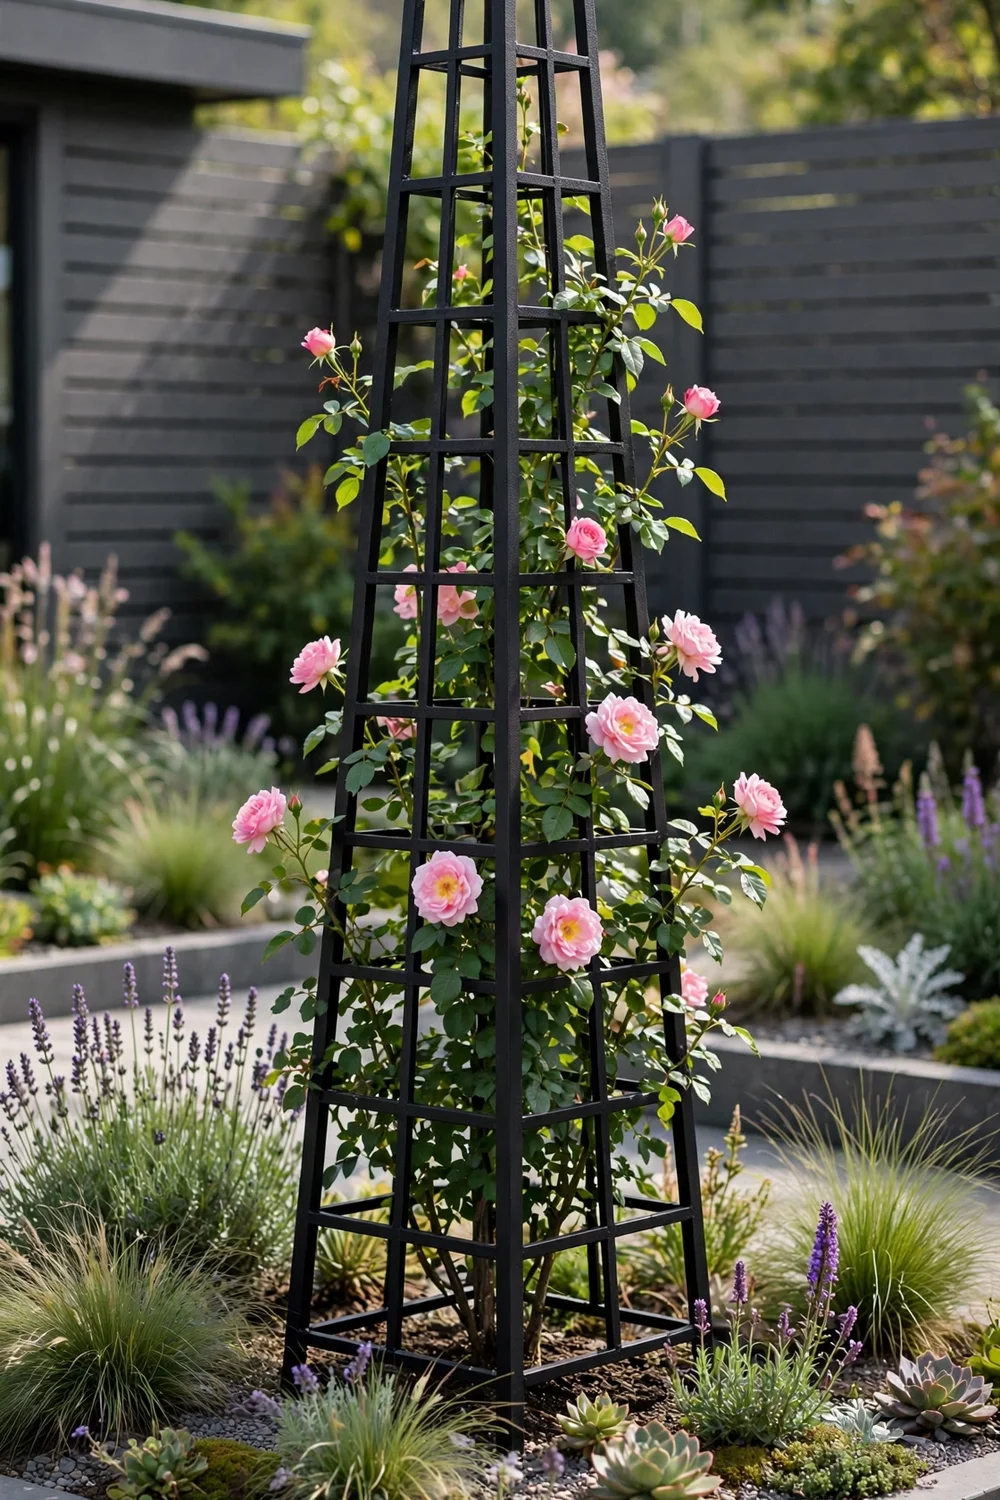
A powder-coated steel obelisk is the low-maintenance version of the wooden tower. The coating resists rust for years, the slim profile suits modern beds, and it arrives ready to install with no building required. Choose one at least 6 feet tall with a wide base for stability. Spiral the canes loosely and tie at 8-inch intervals. This is the set-it-and-forget-it pick for gardeners who want the look without the upkeep.
Cost: $$$· Skill: beginner · Time: 30 minutes
Try this: push the obelisk legs 12 inches into the soil and pack firmly. Even heavy obelisks need anchoring.
9. Stainless wire grid on brick

Stainless wires on standoff mounts create an almost invisible trellis on brick or stone walls. The rose becomes the entire visual, with no wood or metal competing. Space the wires 12 to 18 inches apart in a grid, and use masonry anchors rated for the load of a mature plant. This suits contemporary homes and historic brick where a bulky trellis would look wrong. It is also the easiest trellis to maintain, since there is almost nothing to rot or repaint.
Cost: $$· Skill: intermediate · Time: half a day
Try this: run one extra wire near the top beyond the rose’s current reach. It will need it by year three.
10. Twin pillar entryway
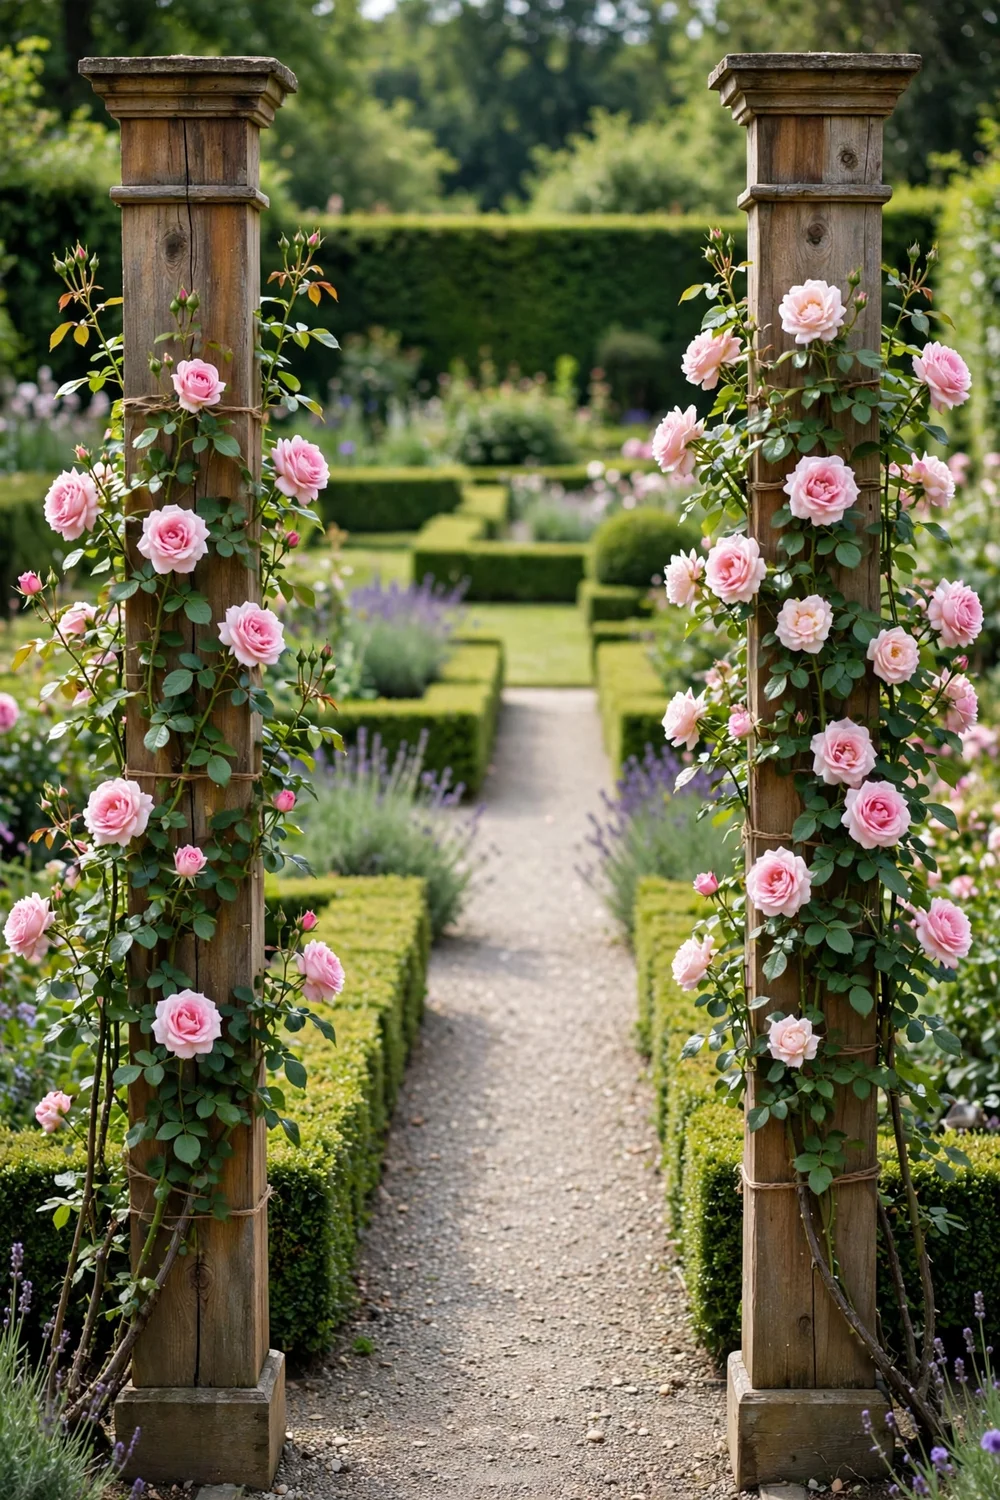
Two sturdy pillars flanking a path give you a formal entry with half the work of a full arch. Wrap one climbing rose up each pillar in a slow spiral, tying every 8 inches. The pillars can be wood, metal, or even brick piers with a trellis panel between them. This suits symmetrical, formal garden designs and narrow side passages. Keep the path between them at least 4 feet wide so the roses never snag clothing.
Cost: $$$· Skill: advanced · Time: one weekend
Try this: cap each pillar with a finial or lantern. The detail makes the entry feel finished before the roses fill in.
11. Pergola with rose beams

Training roses along pergola beams puts the blooms overhead where their scent drifts down. This works best on pergolas with closely spaced rafters that give canes plenty of tie points. Tie the main canes along the beams horizontally and let the flowering laterals drape. Choose a thornless or nearly thornless variety for any pergola over a seating area. The result is a living roof that shades the patio and smells wonderful in bloom season.
Cost: $$$· Skill: intermediate · Time: ongoing training
Try this: prune the underside growth each winter so the seating area below stays clear and airy.
12. Repurposed wooden ladder

An old wooden ladder leaned against a wall or fence becomes a free, charming rose trellis. The rungs give canes natural horizontal tie points every foot or so. Sand it smooth, seal it with exterior finish, and anchor the top to the wall so wind cannot slide it. This suits cottage gardens and costs nothing if the ladder is already in the garage. Check the ladder’s strength first, since a mature rose is heavy and old wood can be brittle.
Cost: $· Skill: beginner · Time: 1 hour
Try this: lean the ladder at a slight angle and plant the rose at its base, not behind it, for easy tying.
13. Vintage bed spring trellis
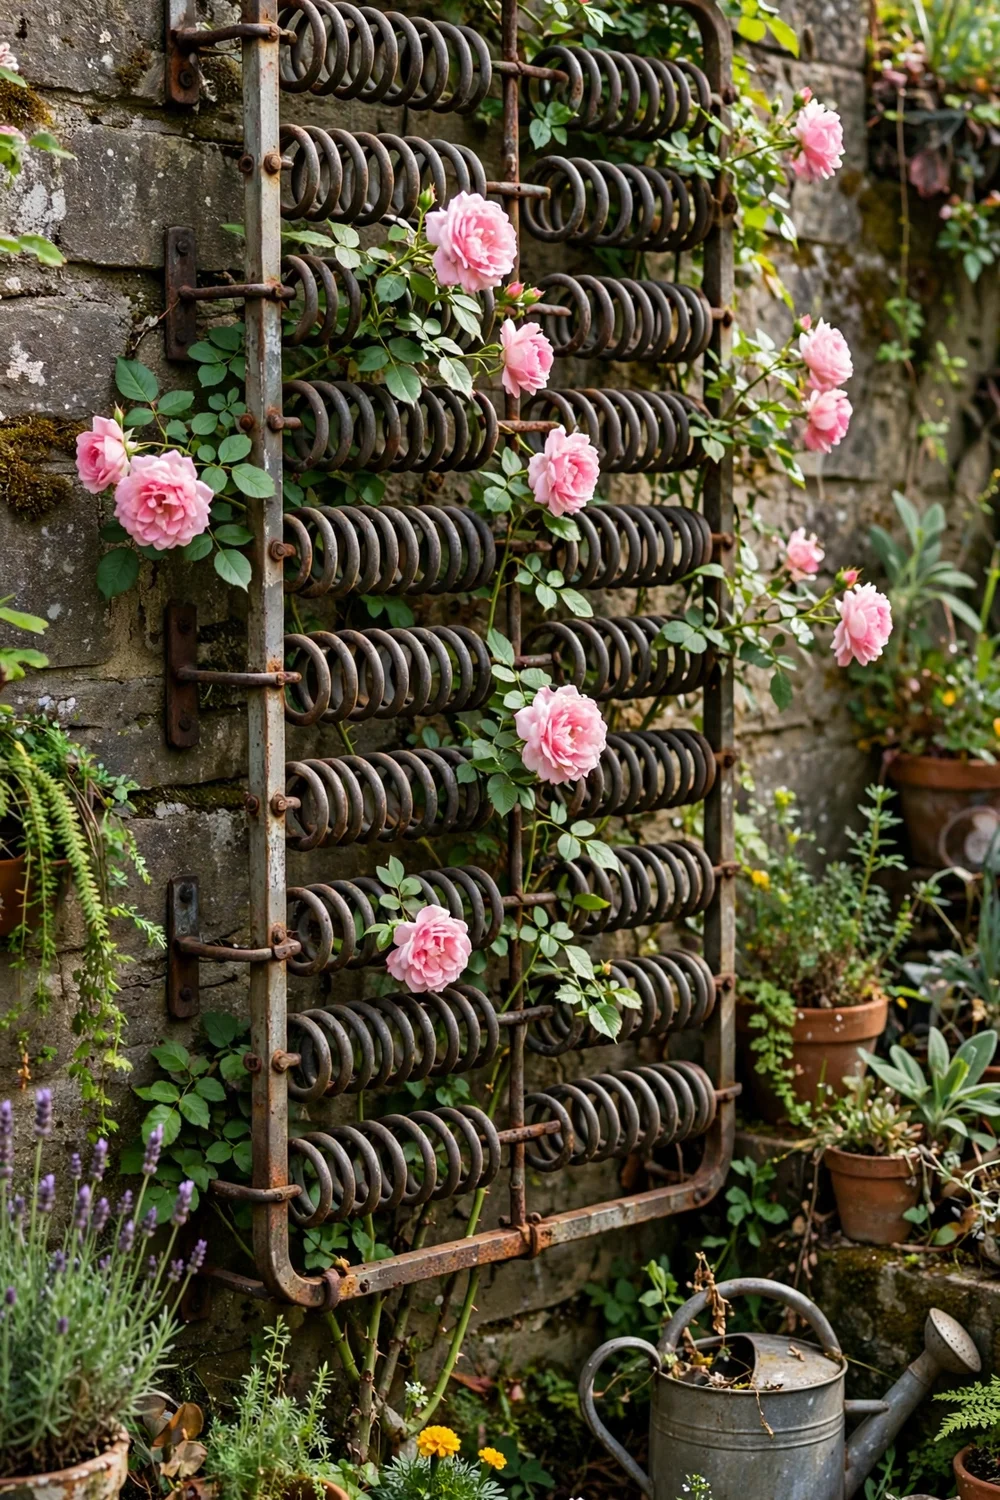
A vintage bed spring mounted on a wall makes a quirky trellis with a built-in wire grid. Clean off rust, paint it with rust-inhibiting paint, and bolt it securely to wall anchors. The tight grid is ideal for fanning out canes and weaving laterals. This is a conversation piece as much as a support, and it suits eclectic and vintage-style gardens. Look for springs at salvage shops and flea markets, and avoid any with sharp broken wires.
Cost: $$· Skill: beginner · Time: 2 hours
Try this: paint the spring matte black. It recedes behind the foliage and the roses take center stage.
14. Iron headboard trellis

An old iron headboard staked into a bed becomes a romantic trellis with built-in ornament. The decorative top adds sculptural interest even before the rose covers it, and the vertical bars train canes neatly upward. Drive two steel posts behind it and bolt the headboard on so it stands rigid. This suits vintage and romantic garden styles. Thrift stores and flea markets turn them up regularly for very little money.
Cost: $$· Skill: beginner · Time: 1-2 hours
Try this: train the canes in an S-curve across the bars rather than straight up, which triggers more flowering laterals.
15. Cattle panel arch
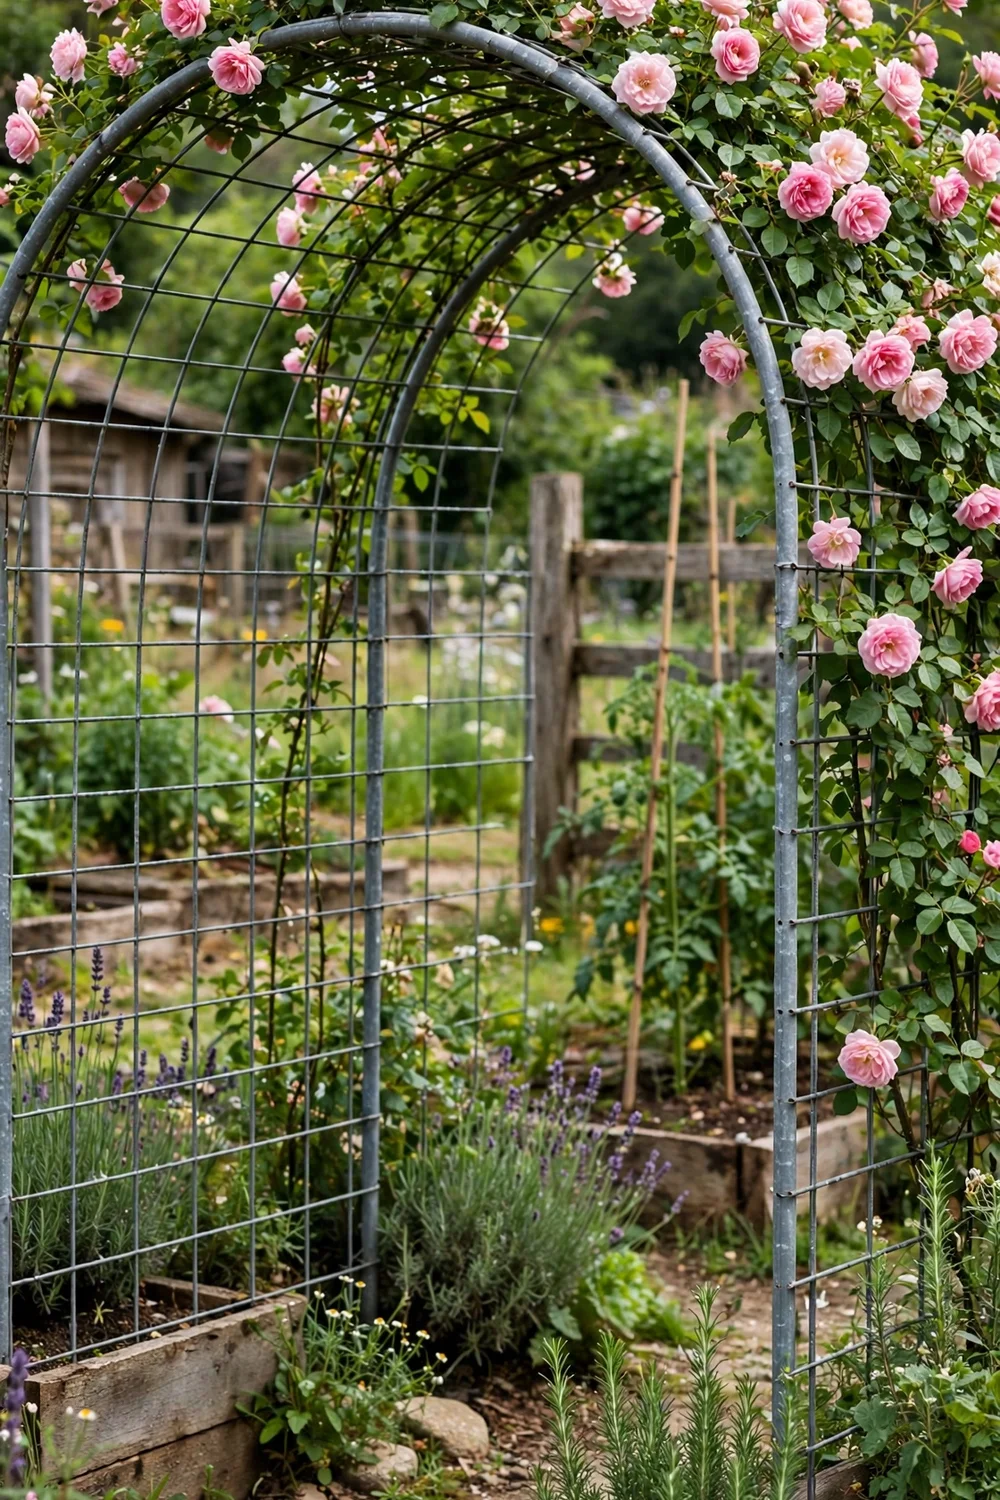
A 16-foot cattle panel bent into an arch between two raised beds or posts makes a sturdy, cheap rose tunnel. The heavy-gauge wire holds mature roses without sagging, and the 4-inch grid is perfect for tying. Anchor the panel feet deeply, since the arch acts like a sail in wind. This suits vegetable-garden edges and rustic yards where function matters more than form. One panel covers a 4-foot-wide path with room to spare.
Cost: $$· Skill: intermediate · Time: half a day
Try this: wear thick gloves when bending the panel. The cut ends are sharp until they are buried or capped.
16. Bamboo cane teepee
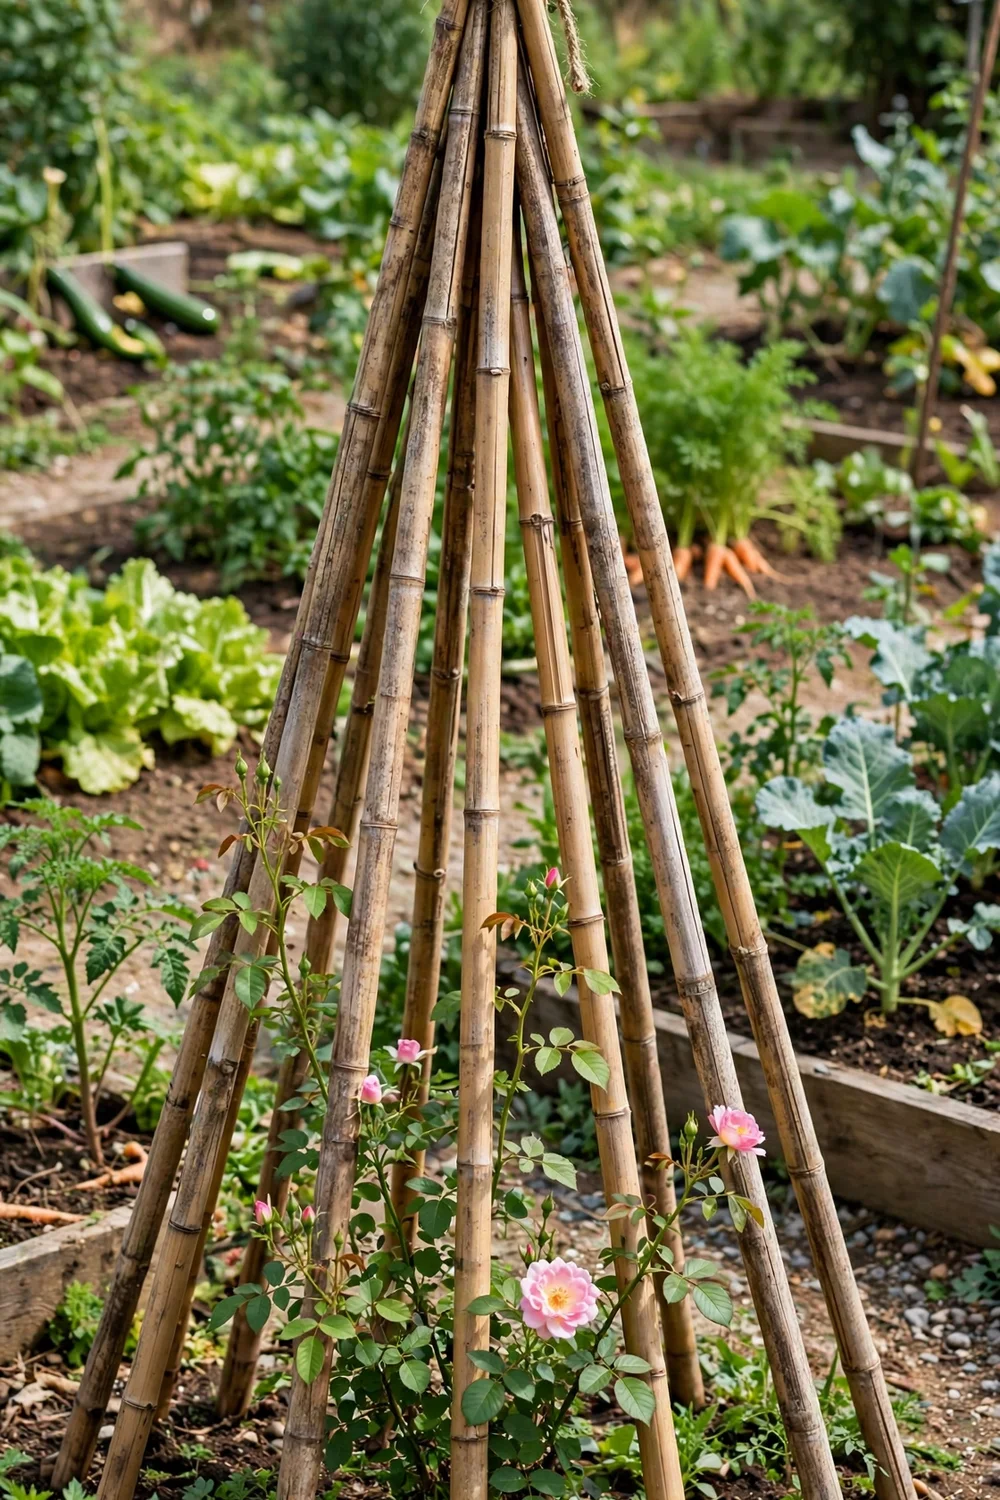
Seven tall bamboo canes tied at the top make a quick teepee for a young climbing rose. It costs almost nothing, builds in 20 minutes, and gives the rose its first two seasons of support while you decide on something permanent. Push the canes 12 inches into the soil in a 3-foot circle and lash the top firmly with twine. This is a starter support, not a forever home, so plan the upgrade before the rose outgrows it.
Cost: $$· Skill: beginner · Time: 30 minutes
Try this: wrap twine in a spiral between canes for extra tie points as the young canes lengthen.
17. Diamond wire wall trellis
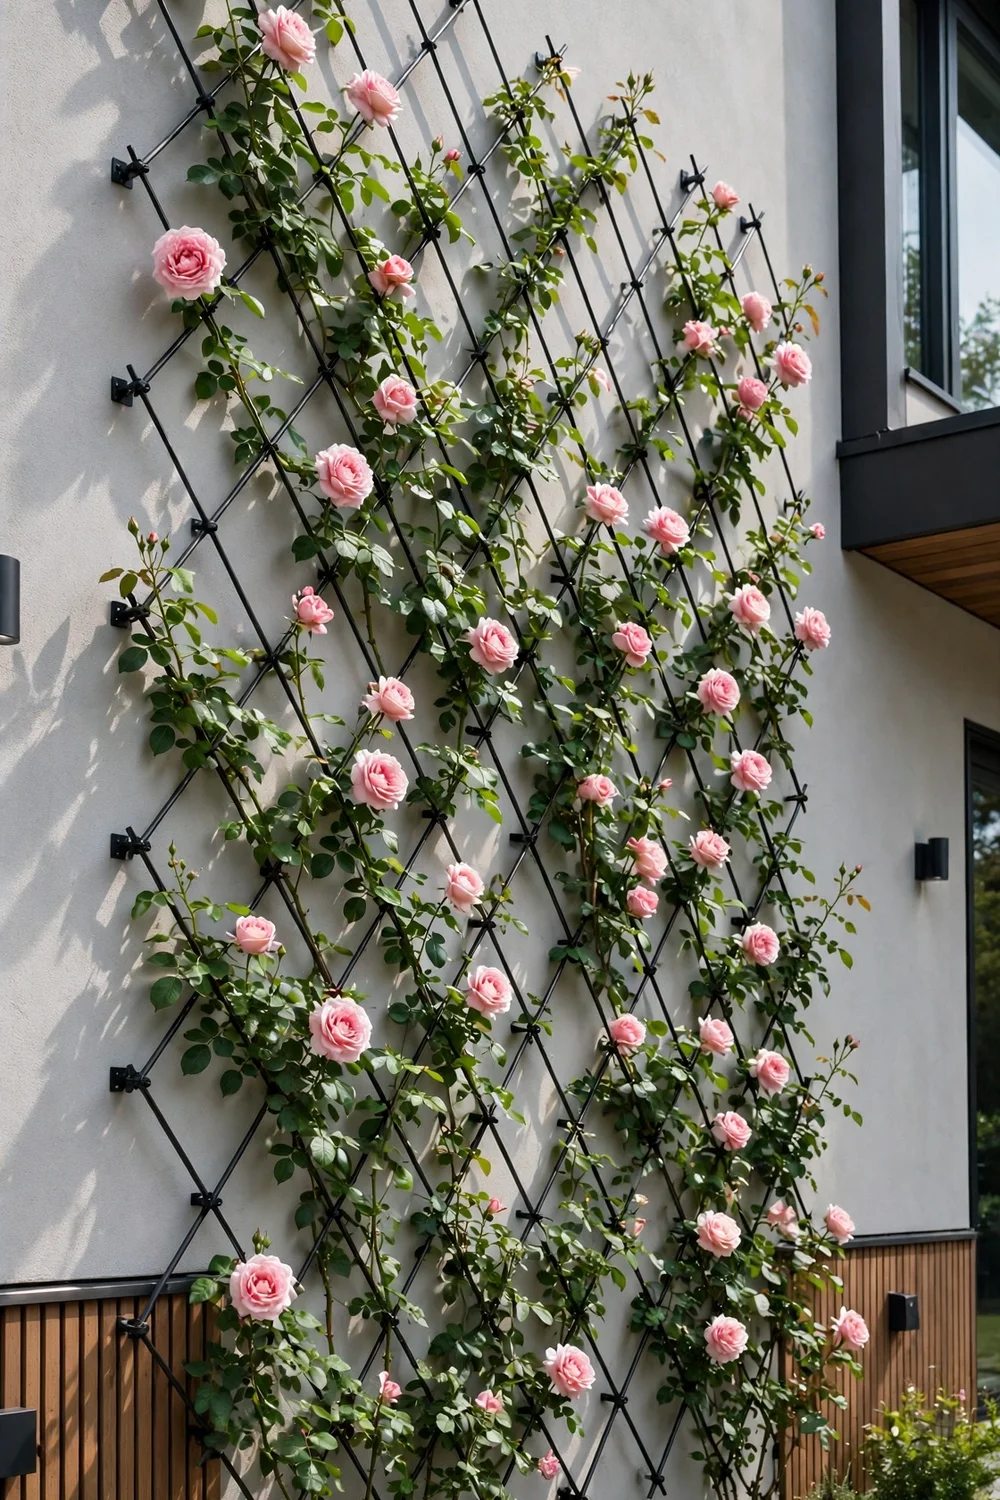
A diamond-pattern wire trellis adds a decorative grid to a plain house wall. The diagonal wires guide canes naturally outward and make tying straightforward, since every crossing is a tie point. Mount it on standoff brackets for the important air gap behind the plant. This suits modern and transitional homes where a wooden lattice would feel too rustic. Galvanized or powder-coated wire lasts years with no maintenance beyond checking the mounts.
Cost: $$· Skill: beginner · Time: 2 hours
Try this: plant the rose 12 to 18 inches out from the wall so the root zone stays out of the rain shadow.
18. A-frame trellis
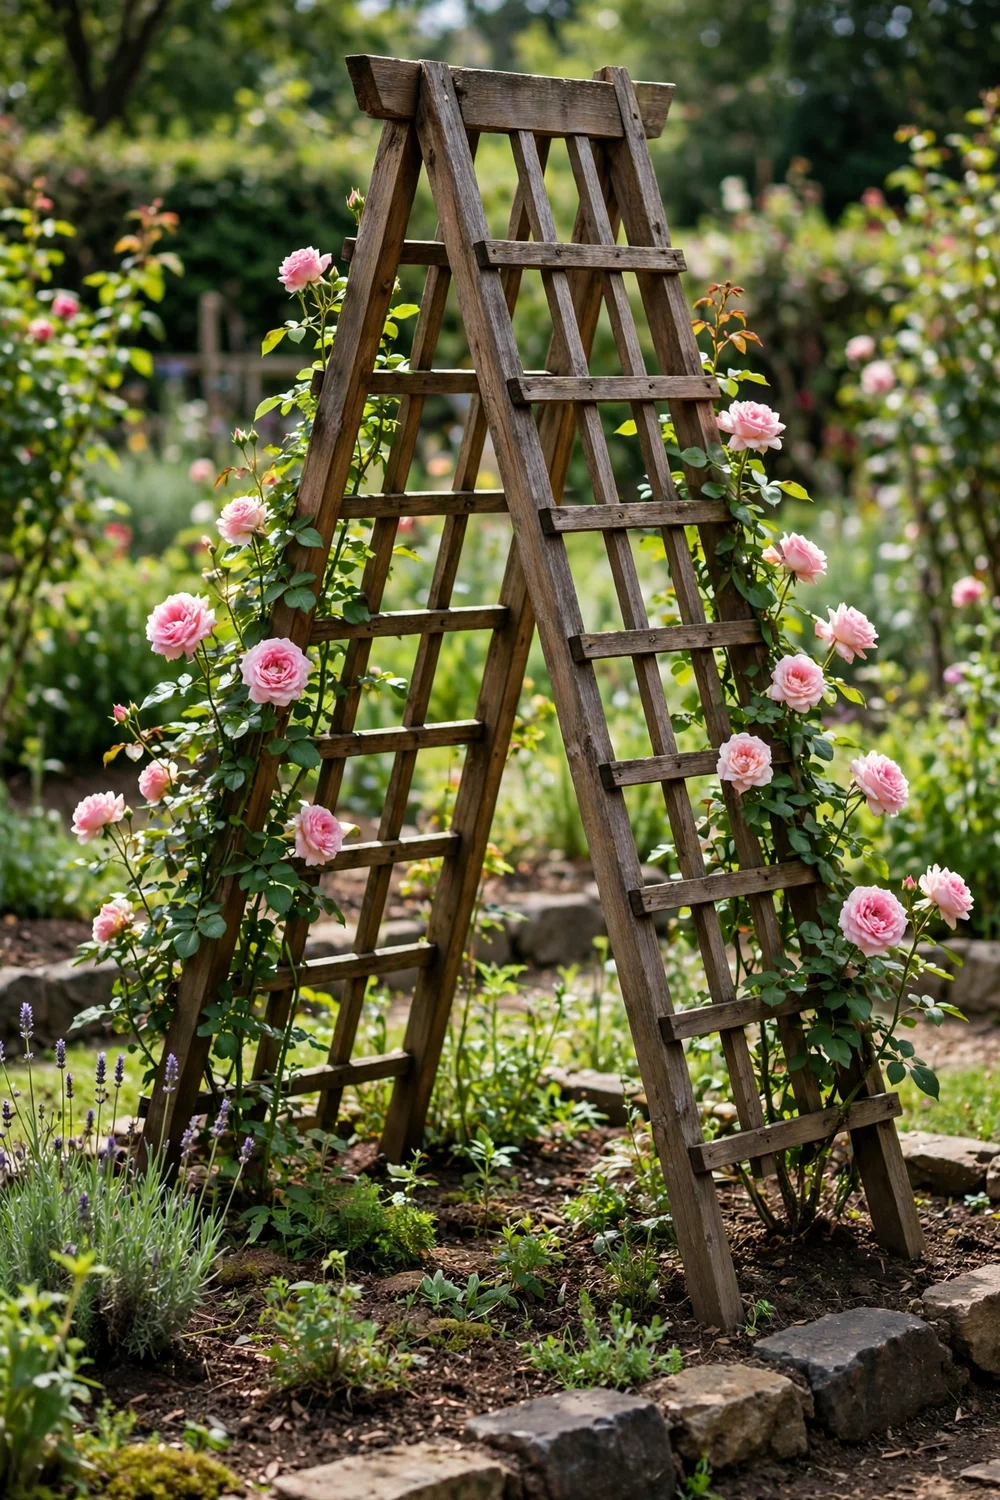
An A-frame trellis stands on its own in the middle of a bed, giving roses support on both faces. The sloped sides shed rain and the wide base is naturally stable. Build it from cedar 2x2s with horizontal rungs, and hinge the top so it folds flat for winter storage if you like. This suits informal beds and doubles as a screen between garden areas. Plant roses on both sides for a full, two-faced display by year three.
Cost: $$· Skill: intermediate · Time: half a day
Try this: train one side’s canes slightly more horizontal than the other’s and compare the bloom difference.
19. Gazebo side panels
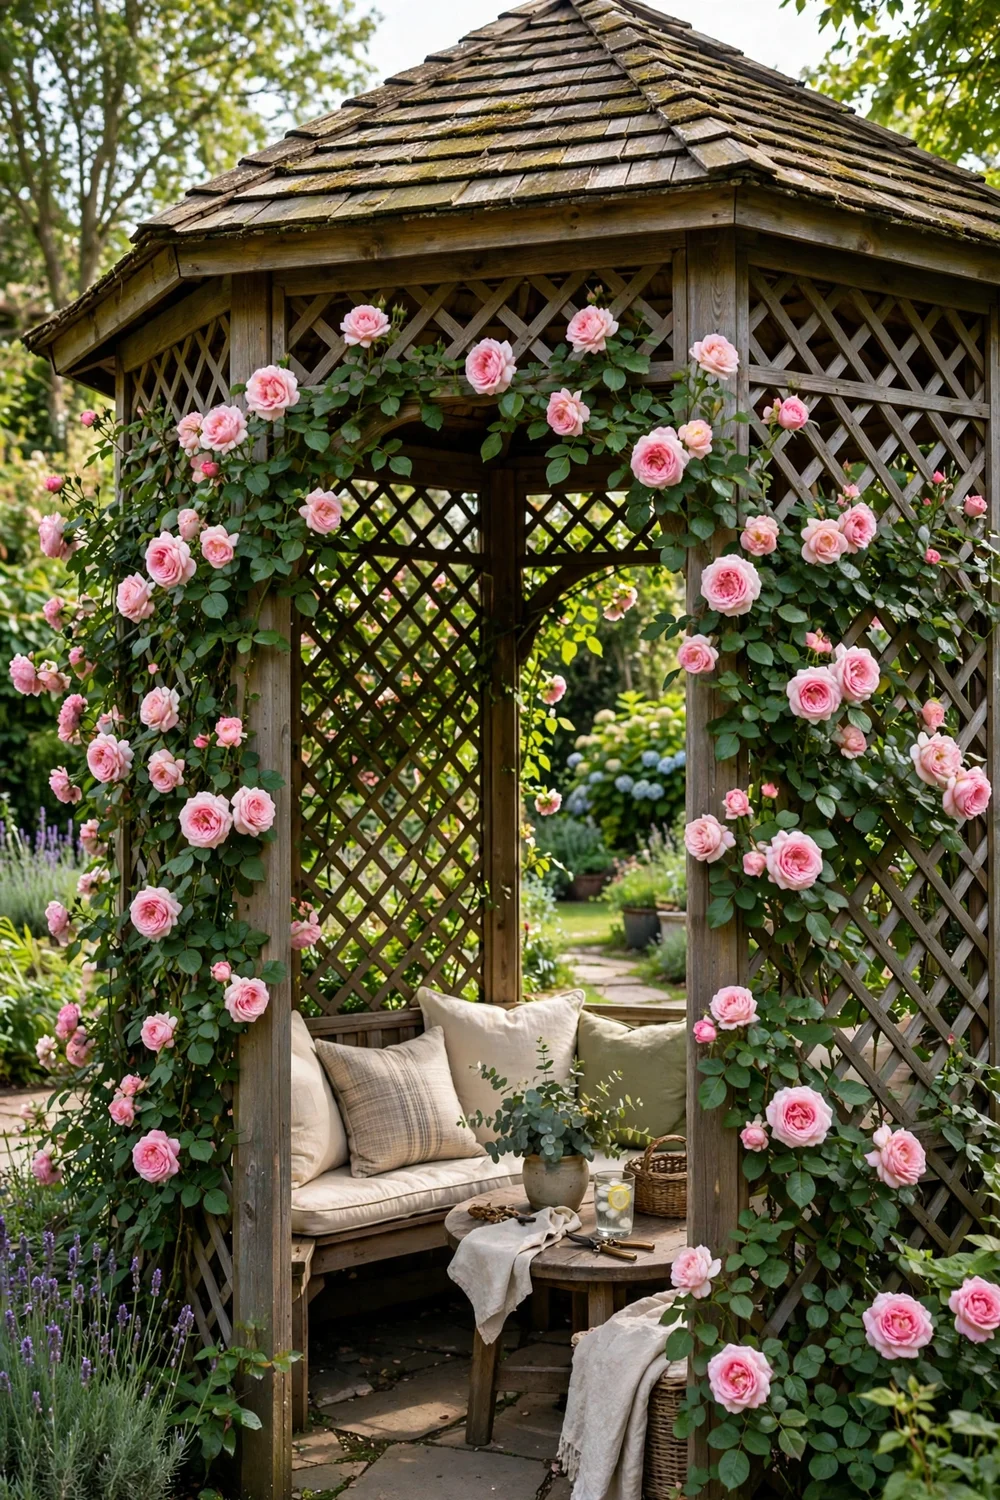
The open sides of a gazebo are ready-made for rose panels. Add lattice or wire grids between the posts and train climbers up each one, leaving the entry clear. The roses turn the gazebo into a fragrant hideaway and give the seating area dappled shade. This needs a sturdy gazebo, since several mature roses add real weight and wind load. Prune the entry side harder each year so the doorway never closes in.
Cost: $$$· Skill: intermediate · Time: one weekend
Try this: choose lightly scented varieties near seating. Strong fragrance in an enclosed space can overwhelm.
20. Curved willow tunnel
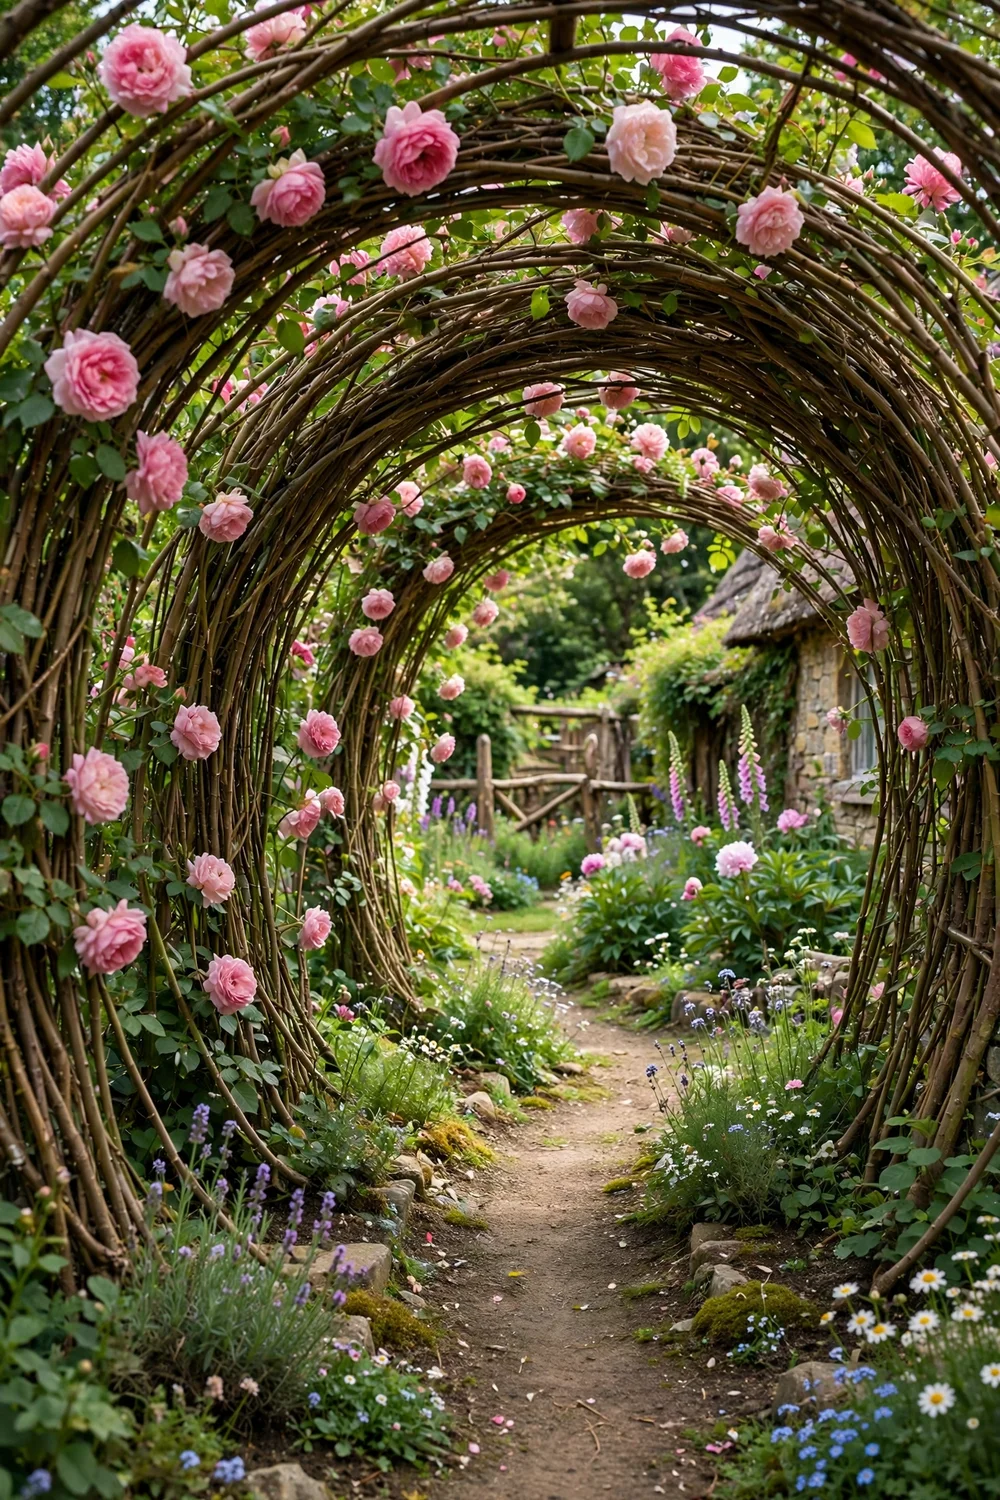
Living or cut willow woven into a tunnel makes the most magical rose walk of all. For a cut-willow version, arch thick willow rods between two rows of posts and lash them into a tunnel, then plant roses at the base of each post. The structure itself is beautiful while the roses establish. This suits cottage and natural gardens with room for a 6 to 8-foot walk. Keep the tunnel pruned so the path stays walkable as everything grows.
Cost: $$· Skill: advanced · Time: one weekend
Try this: plant the roses on the outside of the tunnel posts so tying stays easy as the canes thicken.
Trellis types at a glance
How to choose a trellis for climbing roses
Match the trellis to the rose’s mature size first and your garden style second. Most climbing roses reach 8 to 12 feet, so the support should be 6 to 8 feet tall minimum and strong enough to hold 50 pounds or more of woody growth. Metal lasts longest, cedar looks best in cottage gardens, and wire systems disappear behind the plant. Whatever you pick, install it before planting, anchor it against wind, and leave that 3 to 4-inch air gap off walls.
Training and tying basics
Climbing roses do not climb on their own. You have to tie them. In year one, let the canes grow up and tie them loosely to the support. In year two, start bending the strongest canes toward horizontal and tie them in a fan shape, spacing canes evenly. Horizontal canes push out flowering laterals along their whole length, which is where the big bloom display comes from. Use soft ties or strips of cloth, and leave slack so the ties never cut into growing canes.
Rose trellis safety notes
Thorns are the main hazard. Wear thick gloves and long sleeves when training and pruning, and keep thorny canes tied back from paths, play areas, and seating. Anchor every freestanding trellis well, since a rose-covered structure catches serious wind. If you pair roses with clematis, know that clematis is toxic to dogs and cats if chewed, so keep the planting out of pet play zones or skip the pairing.
For more salvaged-support ideas, browse these brilliant recycled garden trellis ideas that pair well with roses. To fill the beds around your trellis, these easy cottage garden flowers bloom alongside climbers. For season-long color at the base, see these long-blooming perennials. And if an arbor or pergola is your pick, this DIY pergola walkthrough covers the build step by step.
Washington State University Extension’s climbing roses guide (PDF) covers training, tying, and pruning in detail. If pets share your garden, check the ASPCA’s toxic and non-toxic plant list before choosing companion plantings.
Frequently asked questions
What is the best trellis for climbing roses?
The best trellis is 6 to 8 feet tall, strong enough to hold a mature rose, and open enough for tying and pruning access. Cedar fan trellises suit walls, iron arches suit paths, and obelisks suit open beds. Match the material to your climate: metal where rot is a problem, cedar where you want a natural look.
How tall should a climbing rose trellis be?
Plan for 6 to 8 feet of support height. Most climbing roses reach 8 to 12 feet at maturity, and a short trellis gets outgrown in two seasons. Taller is better than shorter, since you can always train canes sideways across extra width, but you cannot add height to a trellis the rose has already topped.
How far from the wall should a rose trellis sit?
Keep the trellis 3 to 4 inches off the wall for airflow. Good air circulation behind the canes reduces fungal disease, and the gap lets you reach behind for tying and pruning. Plant the rose itself 12 to 18 inches out from the wall so the roots escape the dry rain shadow at the base.
How do you attach climbing roses to a trellis?
Tie canes loosely to the support with soft garden ties, twine, or strips of cloth. Loop the tie around the support first, then loosely around the cane with room to spare, so the tie never cuts into growing wood. Tie every 8 to 12 inches along each cane, and retie each spring as growth thickens.
When should I prune a climbing rose on a trellis?
Do minimal pruning the first two years beyond removing dead or damaged wood, since the plant needs those canes for training. After establishment, prune in late winter: remove a few of the oldest canes at the base, shorten the flowering laterals, and keep the fan shape open. Never cut main canes back to bare stubs expecting regrowth.
Will my trellis hold a mature climbing rose?
Only if it was built for the mature weight. A full-grown climber can weigh 50 pounds or more and catches wind like a sail. Anchor posts 2 feet deep or in concrete, use rot-resistant or metal materials, and check ties and mounts every spring. If a trellis wobbles empty, it will fail full.
The trellis you choose shapes your roses for a decade, so pick for the mature plant, not the one in the nursery pot. Install it before planting, train the canes wide and low, and tie with a light hand. Do that, and the roses will do the rest. Choose your favorite structure above and give your climbers something worthy to grow on.


