
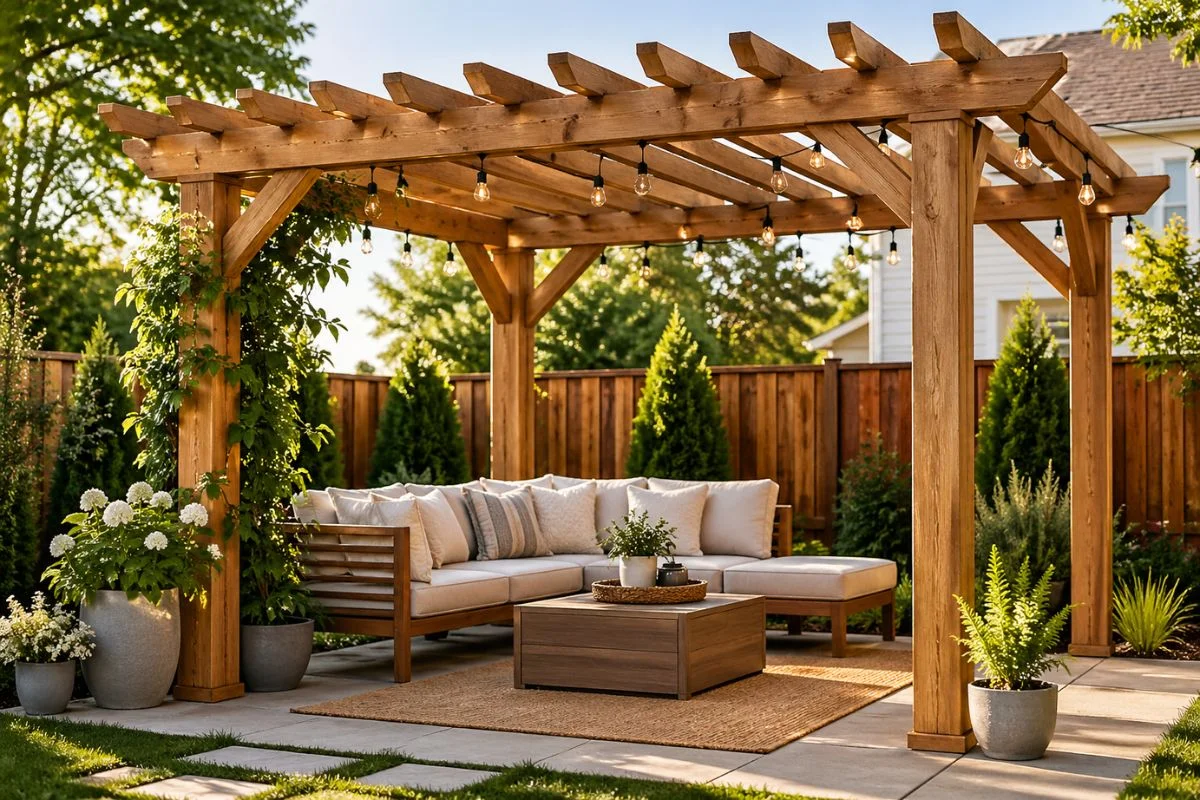
Does your backyard feel empty or unused? That was my situation not long ago. I wanted a cozy outdoor corner, but everything felt too expensive or too complicated to build. I kept seeing beautiful pergolas online and assuming they were for experienced builders only — I had no big tools, no woodworking experience, and no idea where to begin.
The building is not the hard part — the confusion is. Most guides skip the small details a beginner needs: hole depth, which screws to buy, concrete curing time. Once I followed a simple plan that covered everything, the project felt doable. This guide is that plan: 8 steps to build your own DIY pergola, with the materials, tools, costs, and safety tips I wish I’d had on day one. If you can measure, dig, and drill, you can do this.
Quick Takeaways
- Plan for an 8×8 ft pergola to start — it is the most beginner-friendly size and fits a small patio or seating set.
- Dig post holes at least 2 feet deep (or below your frost line) and let the concrete cure 24–48 hours before building upward.
- Use ground-contact pressure-treated 4×4 posts, 2×6 beams, and 2×4 rafters spaced 12–16 inches apart.
- Fasten the frame with carriage bolts and exterior screws — nails alone are not enough for an outdoor structure.
- Finish with an exterior wood stain plus sealant, and re-coat every 2–3 years to keep your pergola looking new.
What You Need Before You Start
Before touching a single tool, gather everything in one go. Running to the hardware store mid-project breaks your rhythm, and buying lumber all at once lets you pick matching, straight boards. This list covers a standard 8×8 ft freestanding pergola — the size I recommend for a first build.
Wood
- 4 posts — 4×4 ground-contact pressure-treated lumber, 10 ft long (2 ft goes underground, 8 ft stands above)
- 4 beams — 2×6 pressure-treated lumber, 10 ft long (two beams per side, sandwiched around the posts, with a 1 ft overhang on each end)
- 8 rafters — 2×4 pressure-treated lumber, 10 ft long (spaced across the top with about a 1 ft overhang)
When you are at the lumber yard, sight down the length of every board before loading it. Reject anything twisted, bowed, or badly cracked — straight lumber makes every step easier, from drilling to keeping things level. If you want a richer look and your budget allows, cedar or redwood are beautiful alternatives, but pressure-treated pine is the most affordable and widely available option for a first pergola.
Hardware and Finishing
- 8–10 bags of 60 lb concrete mix (about 2 bags per post hole)
- Gravel — one small bag per hole for drainage at the base
- 8 carriage bolts, 3/8×7 in., with washers and nuts (for attaching beams to posts)
- Exterior wood screws, 3 in. and 2½ in. (one box each)
- Exterior wood stain and a clear wood sealant (or a stain-plus-sealant combo)
Tools
- Measuring tape, pencil, and a speed square
- Post hole digger and a shovel
- 4 ft level (and a small torpedo level for tight spots)
- Cordless drill/driver with drill bits
- Circular saw or miter saw, plus a jigsaw for decorative cuts
- Wheelbarrow or a large bucket for mixing concrete
- Sturdy ladder, clamps, and a roll of mason’s string
- Safety gear: gloves, safety glasses, and hearing protection
Step-by-Step DIY Pergola Guide
Step 1: Plan Your Pergola
Start by picking the right spot. Choose a flat, well-drained area — water should never pool where your posts will sit. Think about sun direction too: a pergola facing the afternoon sun gives you that lovely filtered shade, while one tucked against a fence line can double as a privacy screen. Check your property lines, and if you have an HOA, glance at its rules before you get attached to a location. Many neighborhoods have setback requirements for structures.
Next, decide on size. An 8×8 ft footprint is ideal for beginners: big enough for a small seating set or a swing, small enough to keep lumber costs down and the framing simple. Measure your chosen area and sketch it on paper, marking where each of the four posts will go. An 8 ft square means your post centers sit 8 ft apart on each side. Walk around the space and picture yourself sitting under it — if it feels cramped or oversized, adjust now, because changes get expensive once holes are dug.
Step 2: Mark the Area
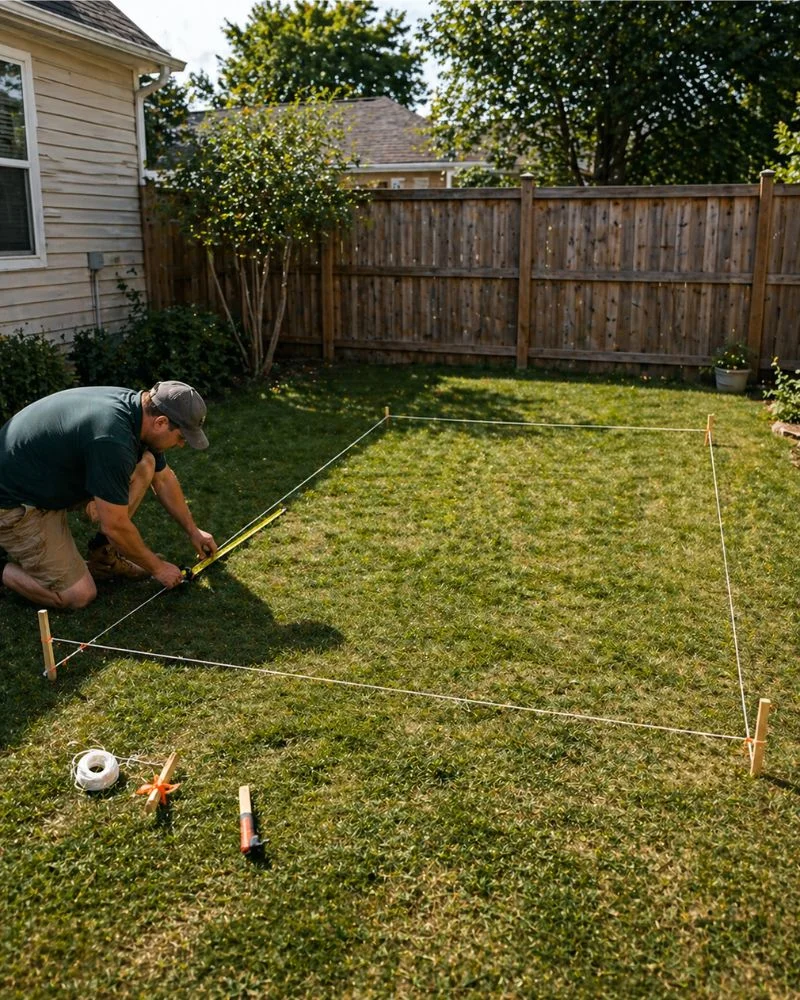
Drive a wooden stake into the ground at each corner of your 8×8 ft layout, then run mason’s string tightly between the stakes so you can see your square clearly. The trick to a straight pergola is the diagonal check: measure from one corner to the opposite corner, then measure the other diagonal. If both numbers match, your layout is square. If they don’t, nudge the stakes until they do — this five-minute step saves you from a crooked frame later.
Once the outline is square, mark the exact center of each post with a dab of spray paint or a small flag. Double-check that each mark sits on the string line and that the distances between marks are equal. Take a step back and look at the marked area from your back door or patio — this is your last easy chance to shift the whole layout a foot in any direction if the view or walkway feels off.
Step 3: Dig the Holes
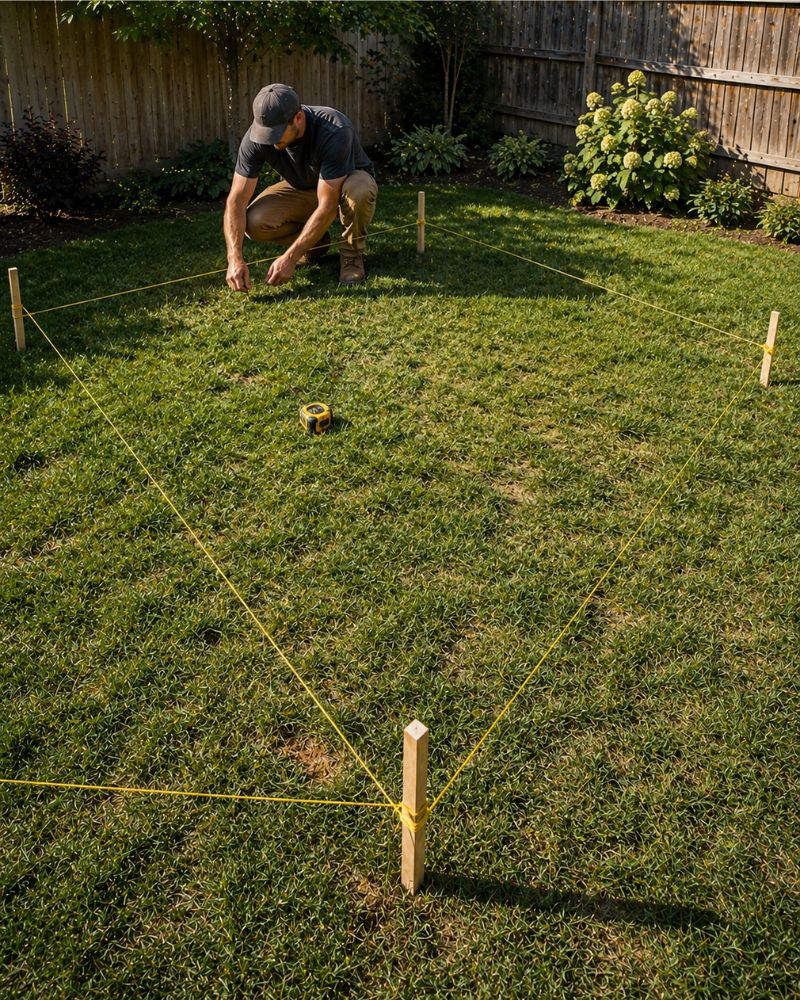
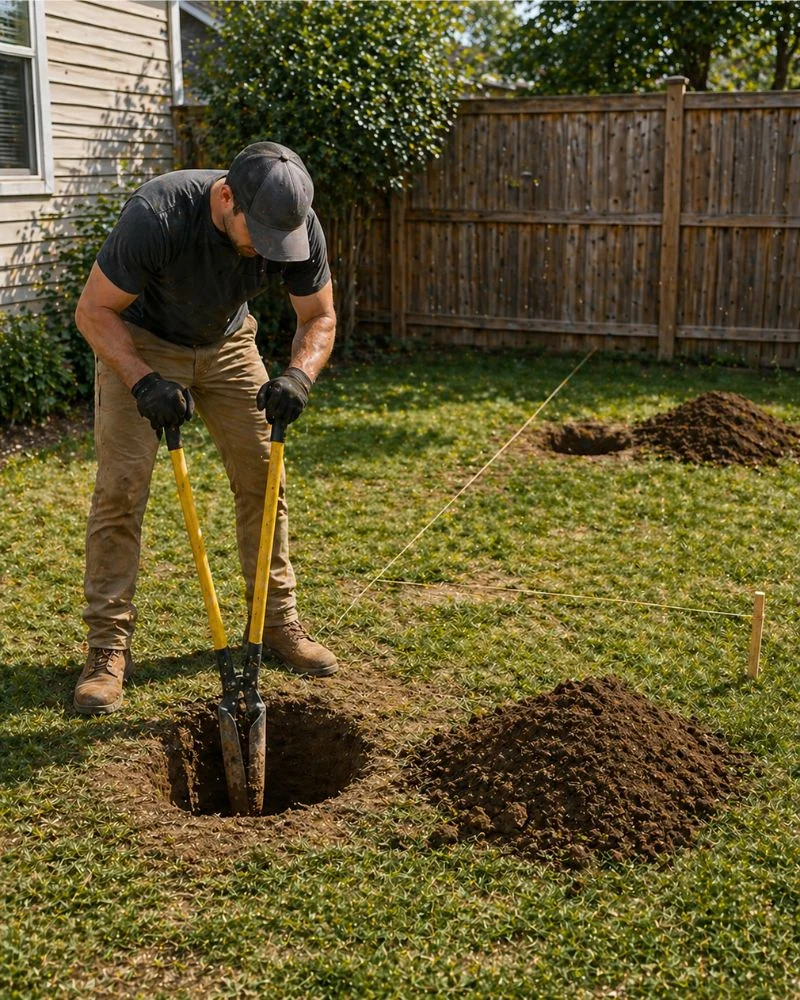
Dig one hole at each marked post position. Each hole should be at least 2 feet deep — deeper if you live somewhere with a frost line, because the bottom of the post needs to sit below it so freeze-thaw cycles don’t push your pergola upward. Make each hole about 10–12 inches wide, which gives the concrete enough grip without wasting bags of mix.
A post hole digger does most of the work, but a shovel helps you clean out the bottom and widen the base slightly. Pour a few inches of gravel into each hole before the post goes in — this lets water drain away from the wood instead of sitting against it, which is the number one reason posts rot early. Before you dig anywhere in your yard, there is one call you should always make first — and This Old House explains the whole footing process, including checking for underground utility lines, in their detailed pergola build guide.
Step 4: Set the Posts
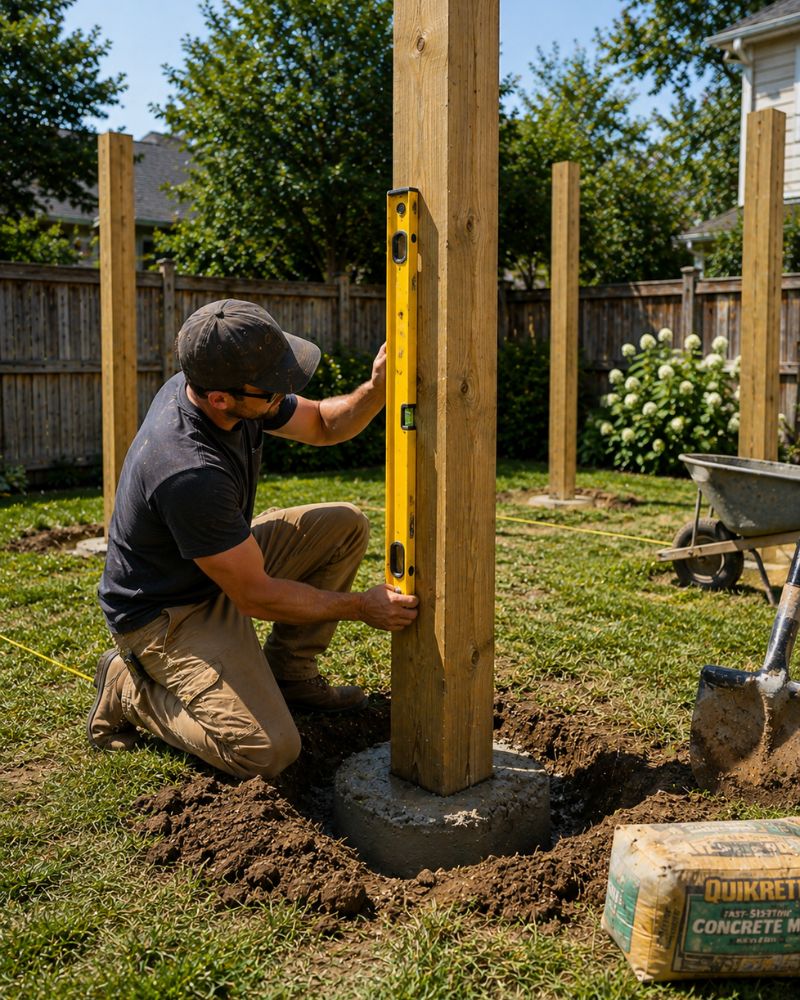
Drop a 4×4 post into each hole on top of the gravel bed. Have someone hold the post upright while you check it with a level on two adjacent sides — a post can look straight from the front and lean from the side, so always check both. To hold posts plumb while the concrete sets, nail temporary 2×4 braces from the post to stakes driven into the ground on two sides. This is a step where a helper genuinely earns their snacks.
Mix your concrete in a wheelbarrow or bucket following the bag’s directions — it should be the consistency of thick oatmeal, not soup. Pour it around each post up to a couple of inches below ground level, poking it with a stick or shovel as you go to release trapped air bubbles. Trowel the top into a slight slope away from the post so rainwater runs off instead of pooling against the wood. Then walk away: the concrete needs 24–48 hours to cure properly. This is the one part of the build you cannot rush, because every beam and rafter above depends on posts that don’t move.
Step 5: Attach the Beams
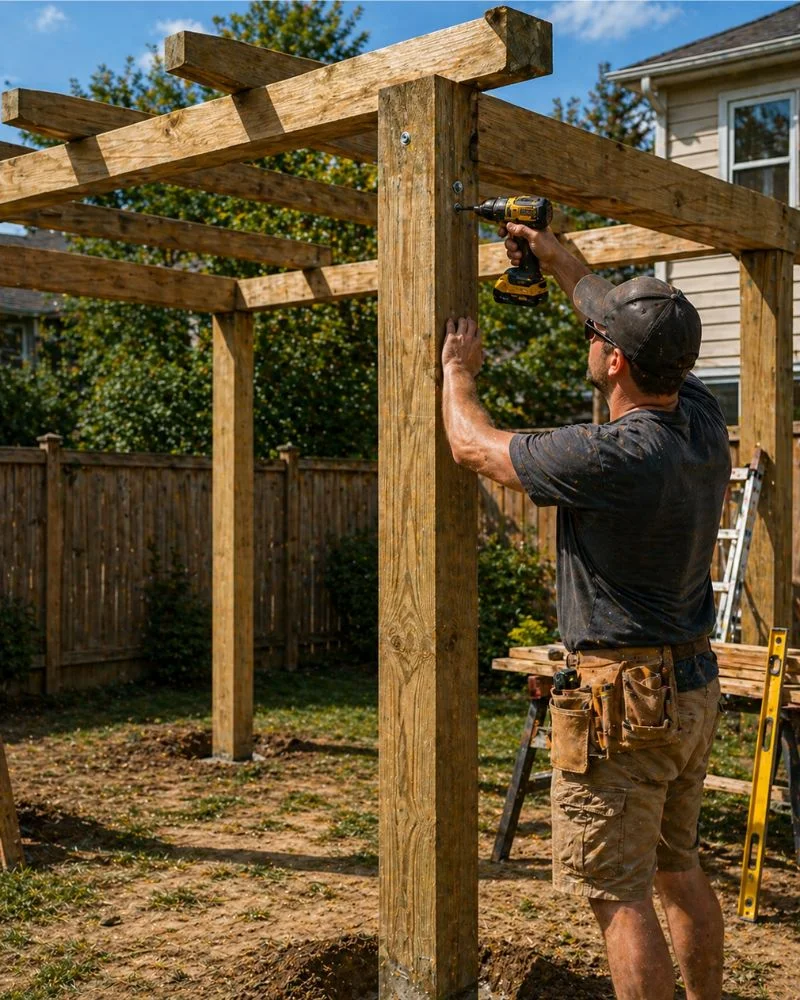
Once the concrete is fully cured, it is time for the beams — the horizontal boards that sit on top of the posts and carry the whole roof frame. On each of the two long sides, sandwich one post between two 2×6 beams (one on each face of the post). This doubled-beam method is stronger than a single beam and looks more finished. Let each beam overhang the outer posts by about a foot on both ends for that classic pergola silhouette.
Clamp the beams in place, check they are level across the posts, then drill straight through the beam, post, and second beam with a long 3/8 in. drill bit. Drive a 3/8×7 in. carriage bolt through from the outside, add a washer and nut, and tighten firmly — two bolts per post is ideal. Carriage bolts are the right choice here because their smooth round heads look clean and their square necks grip the wood so they don’t spin while you tighten. If you want to compare cut lists and fastening techniques from professional carpenters, Family Handyman’s complete pergola project guide is a great second reference to keep open while you work.
Step 6: Add the Rafters
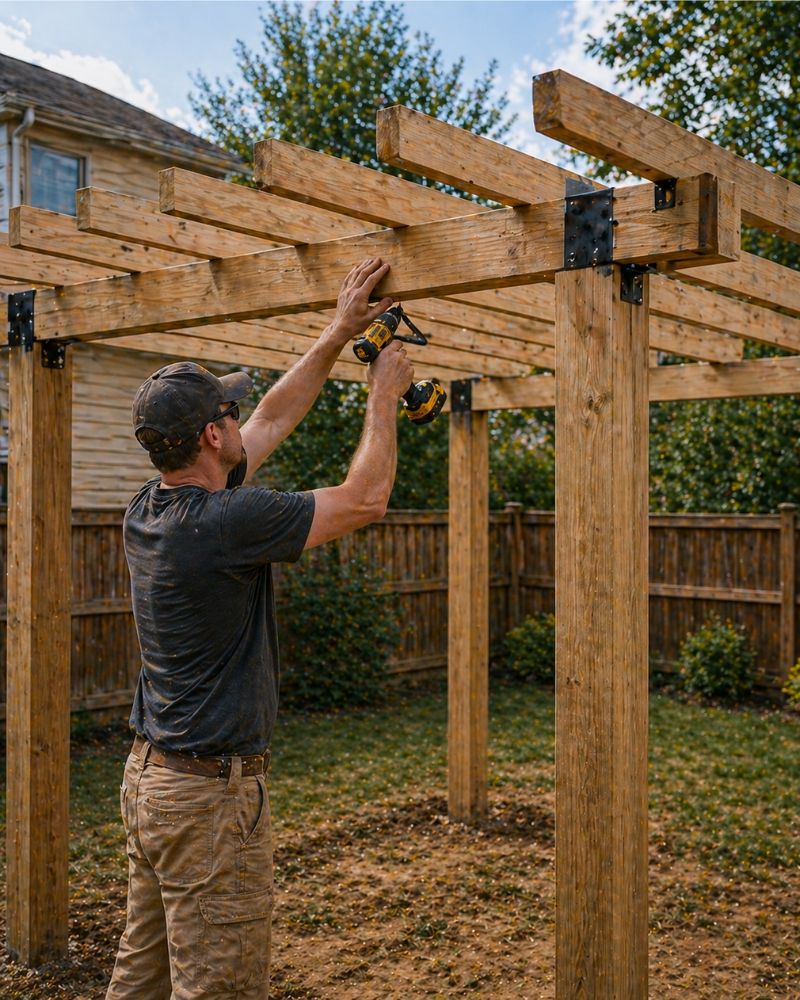
Rafters — the 2×4 boards running across the top — are what give a pergola its signature striped shade. Lay them on edge (tall side up) across the beams, perpendicular to the beams, with about a foot of overhang on each end. Space them 12–16 inches apart, measured center to center. For an 8 ft span, seven or eight rafters looks balanced and gives lovely dappled light.
Mark the rafter positions on the beams with a pencil first so the spacing stays even all the way across — uneven rafters are the first thing the eye catches on a finished pergola. Secure each rafter with two 3 in. exterior screws driven down into the beam at each crossing, or use hurricane ties if your area gets strong winds. Pre-drilling pilot holes near the ends of the boards prevents splitting, especially in pressure-treated pine.
Step 7: Add a Simple Decorative Finish
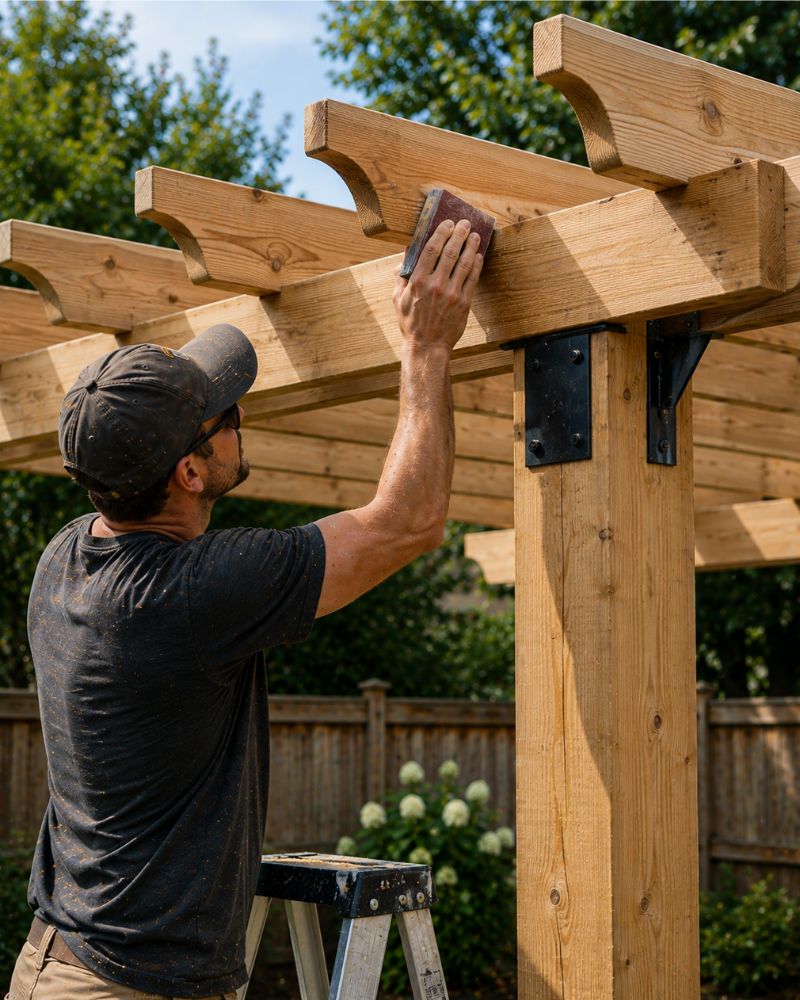
This is where a plain wooden frame turns into something that looks genuinely crafted. The classic pergola detail is a decorative cut on the exposed ends of the rafters — a simple 45-degree angle cut takes seconds per board with a circular saw and instantly looks intentional. If you are feeling a little more ambitious, draw a gentle curve on a piece of cardboard, cut it out as a template, trace it onto each rafter end, and cut along the line with a jigsaw. Repeat the same angled or curved cut on the beam ends for a matched look.
Sand every cut edge with 120-grit sandpaper until it is smooth to the touch — this is both a looks thing and a safety thing, since splintered edges snag clothes and scratch little hands. Wipe off the dust with a damp cloth afterward so the stain goes on evenly. This one step adds maybe an hour to the build but makes the finished pergola look like it cost twice as much.
Step 8: Paint or Stain Your Pergola
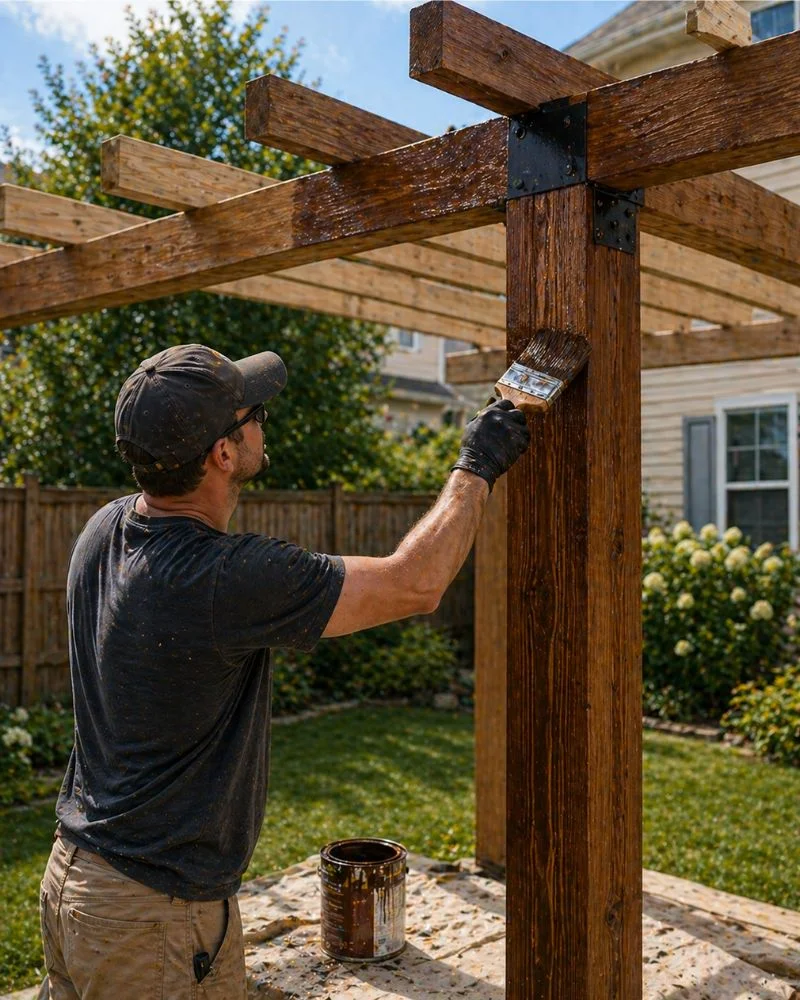
The final step protects everything you just built. Pressure-treated lumber often arrives still damp from the treatment process, so if the wood feels wet or heavy, let it dry out for a few weeks before staining — stain won’t absorb properly into wet wood. When it’s ready, give the whole structure a quick scrub with a deck cleaner or a mix of water and mild detergent, rinse it, and let it dry for a day.
Apply an exterior semi-transparent wood stain with a brush, working with the grain, and do two thin coats rather than one thick one — thin coats soak in evenly and don’t peel. Follow it with a clear water-repellent sealant if your stain doesn’t already include one. The color is entirely your call: a warm cedar tone feels classic, white paint looks crisp against a green lawn, and a dark walnut stain gives a modern edge. Plan to re-coat every two to three years, and your pergola will look great for well over a decade.
Make Your Pergola Look Amazing
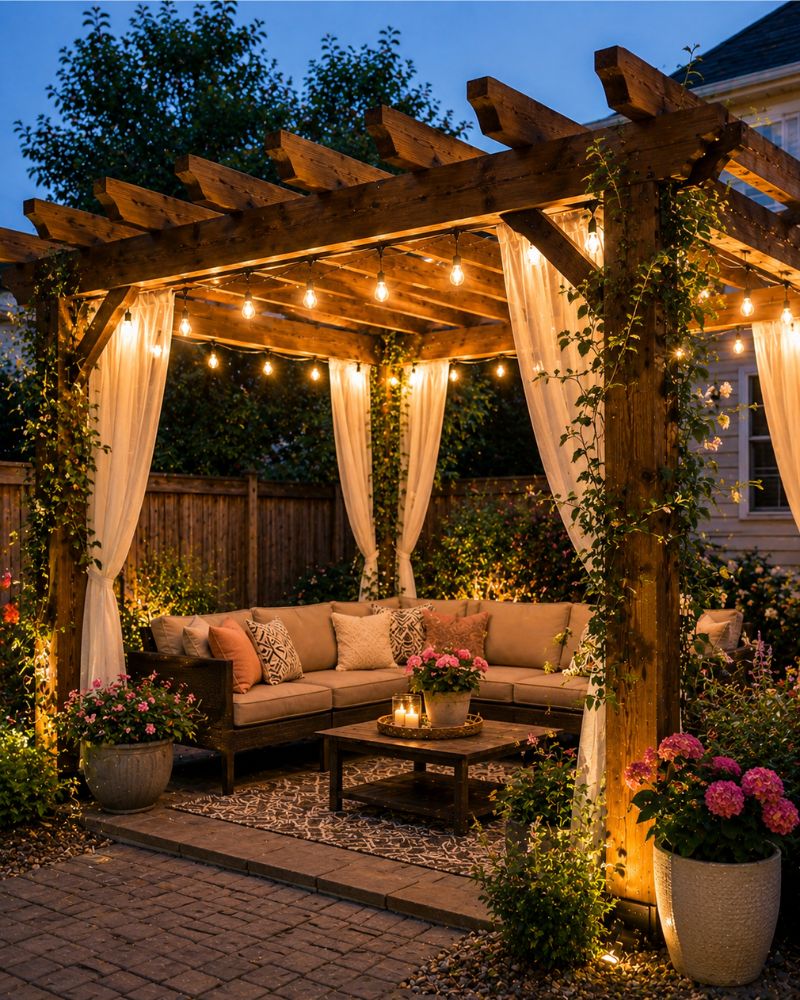
The frame is up — now make it yours. A pergola is basically an outdoor room without walls, so decorate it the way you would any favorite space. String warm-white fairy lights along the rafters for evenings; solar-powered strings mean no extension cords and no electrician. Train climbing plants like roses, clematis, or jasmine up the posts — in a season or two they turn plain lumber into a living, fragrant canopy.
For shade, hang outdoor curtains on a simple wire or rod across one or two sides; they soften the look and block the low evening sun. A couple of weatherproof chairs or a hanging swing underneath makes it the default spot for morning coffee. I hung a small outdoor rug under ours, and it sounds silly, but that one rectangle of pattern is what made the whole thing feel like a room instead of a structure.
How Long It Takes
- Planning and marking: 1–2 hours
- Digging holes and setting posts: 3–4 hours (plus 24–48 hours of concrete curing time)
- Beams, rafters, and decorative cuts: 3–4 hours
- Staining and sealing: 2–3 hours
You can finish the hands-on work in a single weekend: dig and set the posts on Saturday morning, then build the frame and stain on Sunday once the concrete has cured overnight.
Estimated Cost
- Small pergola (8×8 ft): $150–$250
- Medium pergola (10×10 ft): $250–$400
- Large pergola (12×12 ft): $400–$500+
Costs depend on lumber prices in your area and whether you choose pine, cedar, or redwood. Buying all your lumber in one trip and borrowing a circular saw from a neighbor can shave a surprising amount off the total.
Safety Tips
- Wear gloves, safety glasses, and hearing protection whenever you are cutting or drilling.
- Check each post with a level on two sides before the concrete sets — a leaning post is almost impossible to fix later.
- Keep tools, screws, and power cords away from children and pets while you work.
- Never rush the concrete curing time; building on green concrete can shift the whole frame.
- Use a stable ladder and have someone hold it when you are working on the beams and rafters overhead.
Popular Pergola Sizes
- 8×8 ft — small patios and first-time builders
- 10×10 ft — family seating sets and dining tables
- 12×12 ft — larger backyards and entertaining areas
If this is your first build, start small. An 8×8 pergola teaches you every skill you need, and you can always build a bigger one next summer once you know the drill — literally.
More Backyard Projects to Try
Once your pergola is standing, the rest of the yard starts looking like a blank canvas. If you want a bigger covered structure with real weather protection, these outdoor pavilion with fireplace ideas show how to take the same concept up a level with roofs, fireplaces, and full outdoor rooms.
A pergola and a fire pit are the classic backyard pair. This fire pit landscaping guide walks through another beginner-friendly weekend build that turns the area next to your pergola into a proper gathering spot.
Not sure about building from scratch? If you would rather buy than build, browse these cheap small backyard gazebo ideas for ready-made kits and budget options that go up even faster.
And when the structure is done, it is time to plan the space around it. These aesthetic backyard ideas will help you pull together paths, plants, and seating so the whole yard feels finished, not just the pergola corner.
FAQs
Can I build a pergola without concrete?
Yes, you can. If you are building on an existing patio or deck, metal post anchors bolted into the concrete or wood surface work well and skip the digging entirely. For soft ground, though, concrete footings are still the most stable option — a pergola catches a lot of wind, and you don’t want it shifting over time.
What wood is best for a DIY pergola?
Ground-contact pressure-treated pine is the best choice for most beginners: it is affordable, available everywhere, and rated to resist rot and insects. Cedar and redwood look beautiful and last longer naturally, but they cost two to three times more. Whatever you choose, make sure the posts are rated for ground contact, not just above-ground use.
Do I need a permit to build a pergola?
It depends on where you live. Many areas don’t require a permit for a small freestanding pergola, but some do once it passes a certain size or height. Call your local building department before you buy lumber — it takes five minutes and saves you from having to tear down a finished structure that violates a setback rule.
How much does a DIY pergola cost?
A basic 8×8 ft pergola built from pressure-treated pine typically costs between $150 and $250 in materials. A 10×10 ft version runs $250–$400, and a 12×12 ft build can reach $400–$500 or more. Lumber prices swing quite a bit by region, so price out your cut list at the store before committing to a size.
How long will my DIY pergola last?
A pressure-treated pine pergola that is stained, sealed, and re-coated every two to three years can easily last 12–15 years, often longer. The posts are the weak point, so gravel drainage at the base of each hole and sloping the concrete away from the wood make a real difference. Cedar builds can stretch to 20 years or more with the same care.
Final Thoughts
Building this pergola turned out to be much easier than I expected, and it completely changed how my backyard looks and feels. At first I was unsure — I kept picturing all the ways I could mess it up — but once the posts were plumb and the first beam went on, my confidence grew with every bolt. Now it is the place where we sit with our evening chai, where the kids read in the shade, and where friends end up gathering without anyone planning it. Knowing I built it myself makes every sunset under it a little sweeter. If you follow these steps, take your time with the concrete, and don’t skip the level checks, you can build one too — and you will wonder why you waited so long.