



A bare patch of dirt behind the back door, or a cracked concrete slab that puddles every time it rains, can make the whole yard feel unfinished. Pavers fix that without pouring a new slab, and they give you choices a slab never will: pattern, color, material, and layout. Our back door opened onto patchy grass that turned to mud every spring, so a paver patio was the first real upgrade we made.
This guide covers 12 paver patio ideas for backyards of every size, from herringbone brick and basketweave to large-format slabs and permeable pavers. Each idea includes a realistic cost range, a difficulty label, and a tip you can use during planning. You will also find how to pick the right pattern, what a proper base looks like, and the mistakes that cause patios to shift and sink.
Quick takeaways
- Pattern sets the mood: herringbone and basketweave read traditional, while grids and large slabs read modern.
- The base decides how long the patio lasts, more than the pattern does.
- Slope the surface 1/4 inch per foot away from the house so water runs off instead of pooling.
- Dark pavers hold heat in summer; light tones stay cooler under bare feet.
- Permeable joints need gravel fill, and edge restraint keeps the whole paver field from spreading.
1. Classic herringbone brick patio
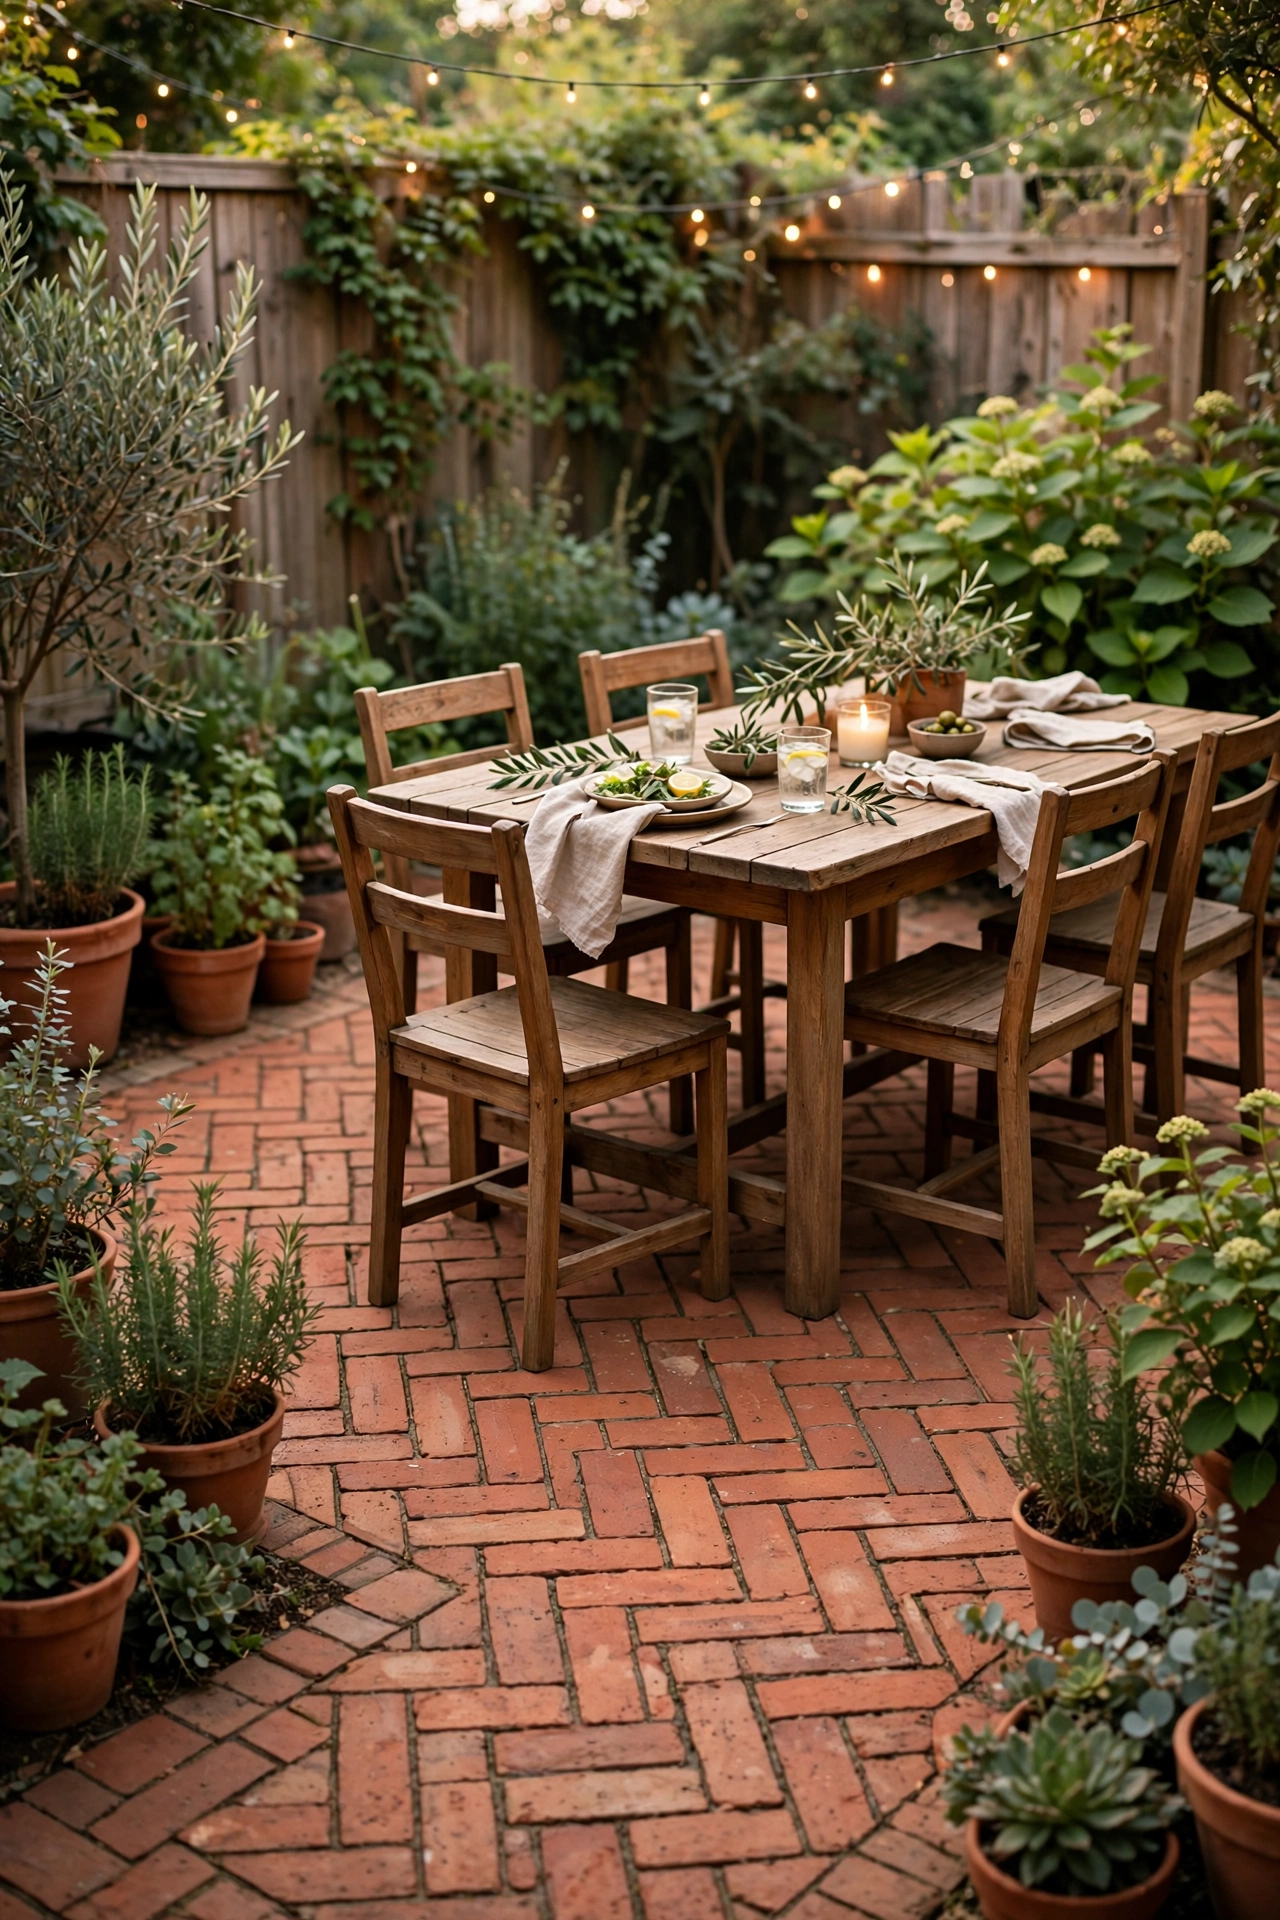
Herringbone lays rectangular pavers in interlocking zig-zag rows at 45 or 90 degrees, and the geometry locks each unit against its neighbors. Standard 4 by 8 inch brick pavers fit this pattern tightly, which is why it holds up so well under dining tables and daily foot traffic. Warm red and brown blends suit traditional and farmhouse homes, and a 45 degree run adds energy while a straight run reads more formal. Expect to pay for extra cutting at the edges, since every border row needs angled cuts.
Try this: Run the pattern at 45 degrees on a small patio so the zig-zag pulls the eye outward.
Difficulty: Moderate. Cost: $$
2. Basketweave cottage patio
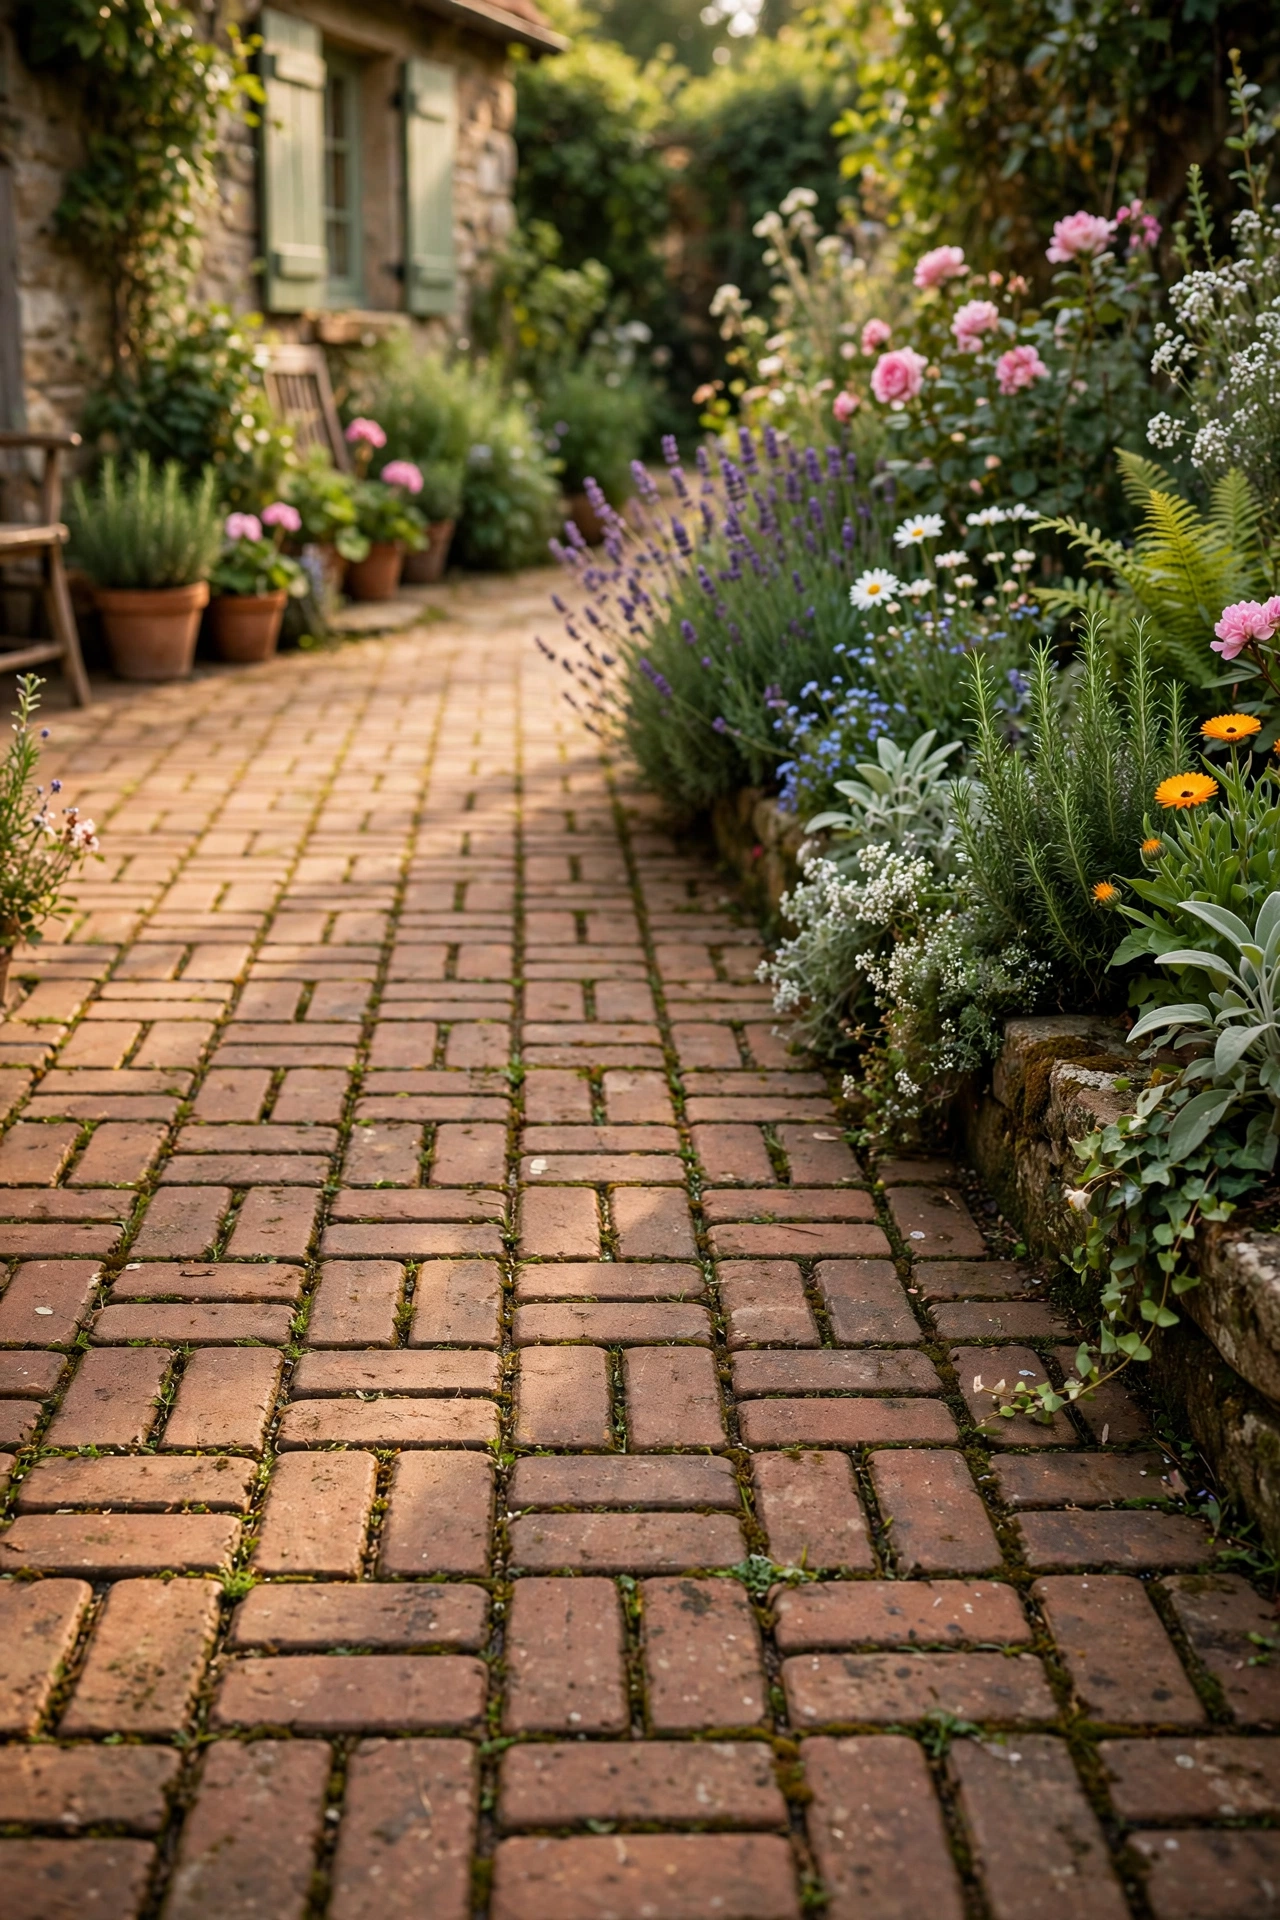
Basketweave pairs two pavers laid horizontally with two laid vertically, repeating across the surface like a woven mat. The result feels relaxed and settled, with none of the directional push of herringbone or running bond. Square or short rectangular pavers work best, and the pattern suits cottage-style and traditional homes with planted borders close by. Because the units repeat in a simple grid, cutting stays low and the layout goes down fast. Keep the color palette to one or two tones so the woven texture stays readable.
Try this: Frame the basketweave field with a darker soldier course border to give the soft pattern a crisp edge.
Difficulty: Easy to moderate. Cost: $$
3. Running bond gray concrete patio
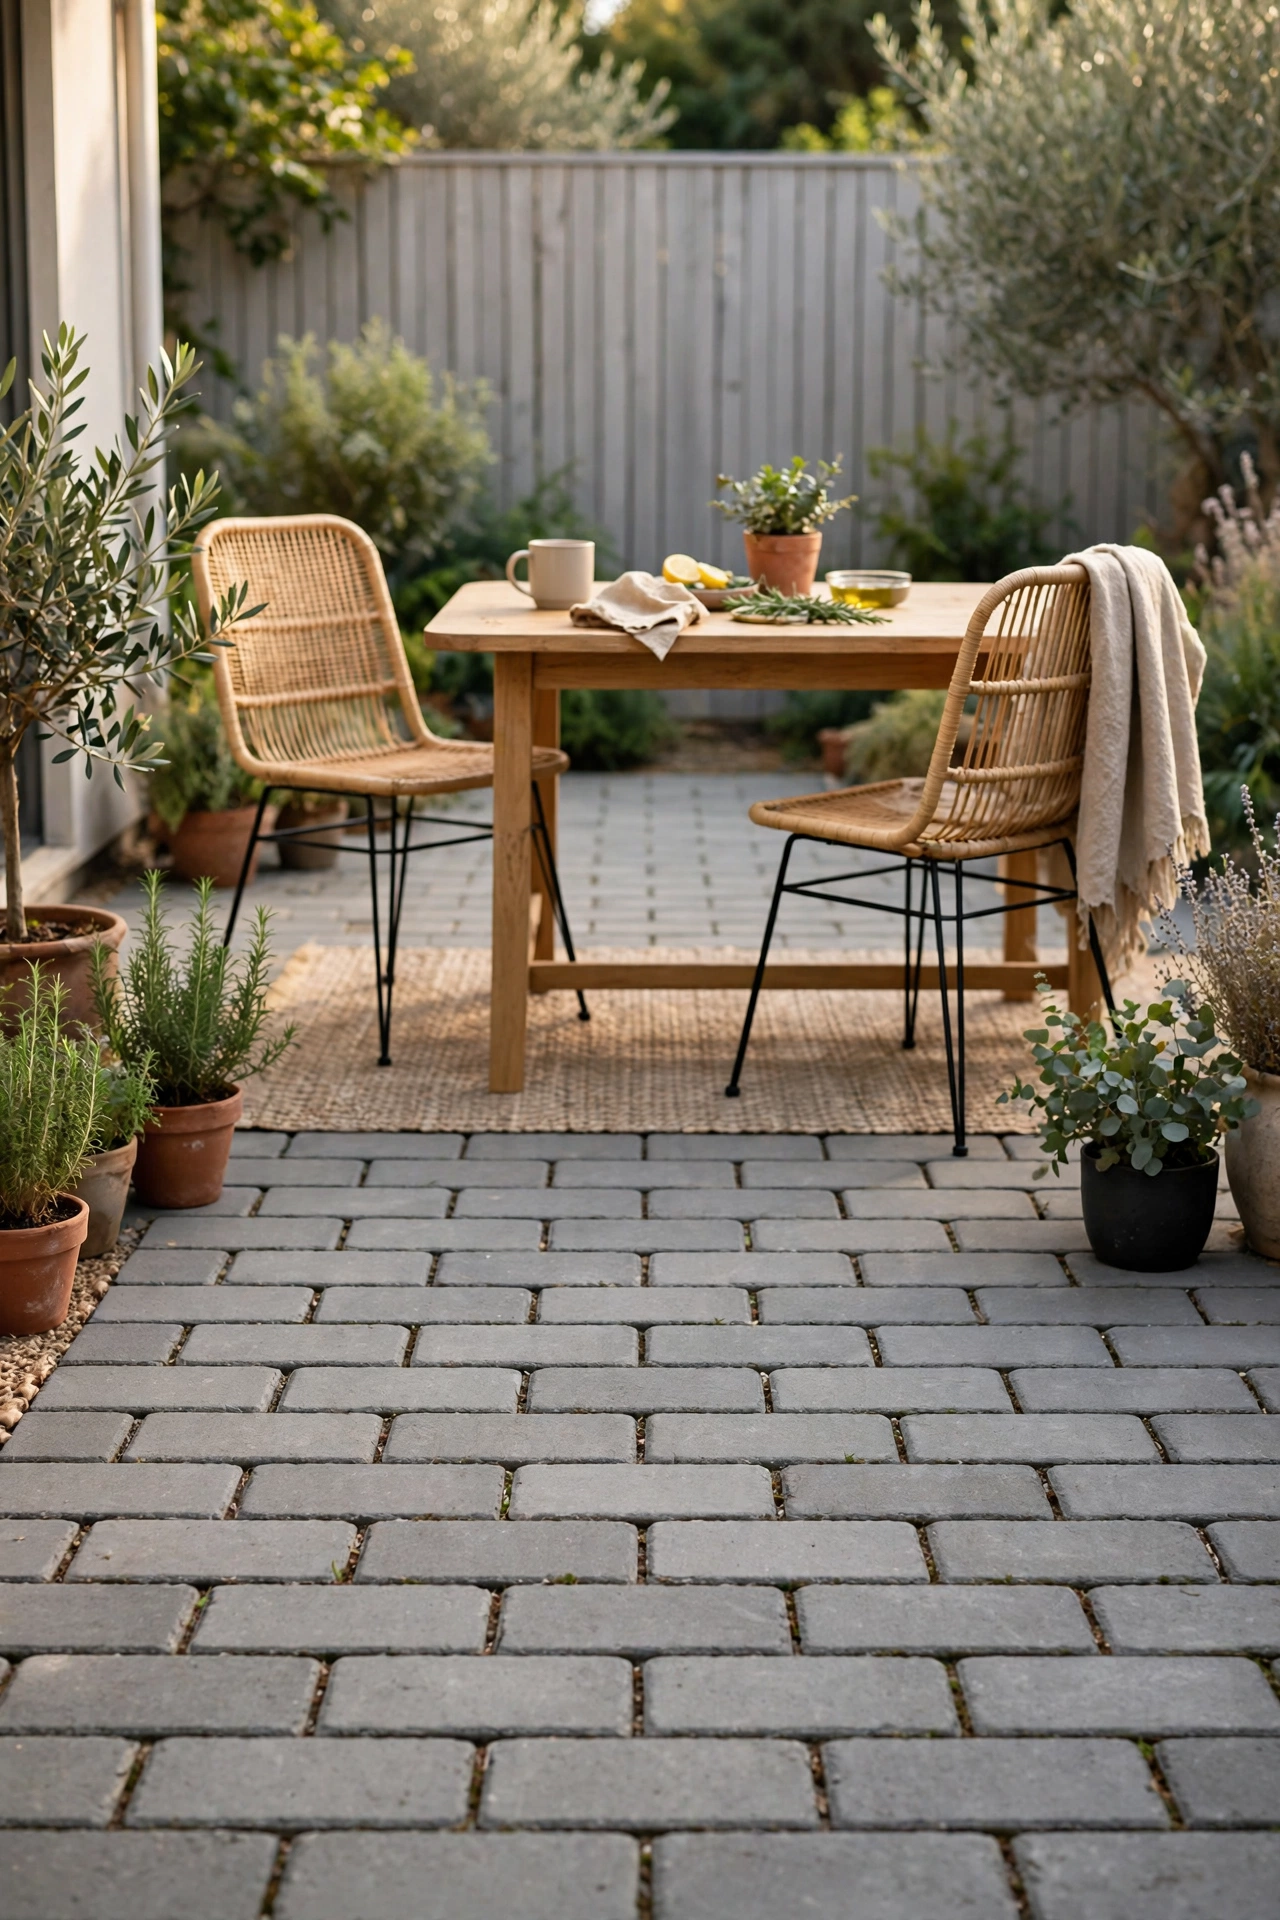
Running bond staggers each row by half a paver, the same offset used in traditional brick walls. It generates the fewest cuts of any pattern and lays faster than herringbone or basketweave, which keeps labor costs down. Gray concrete pavers in this layout give a clean, linear look that fits modern and transitional homes without demanding attention. The straight rows also make narrow patios feel longer, since the eye follows the lines away from the house. Add a contrasting border if the field starts to look plain.
Try this: Lay the rows diagonally instead of parallel to the house for a subtle lift on a plain rectangular patio.
Difficulty: Easy. Cost: $$
4. Large-format slab grid patio

Large-format slabs, 24 by 24 inches and up, laid in a stack bond grid give a patio a calm, nearly continuous surface. Fewer joints mean fewer places for weeds to sprout and sand to shift, and the big units make a mid-size yard feel larger. Neutral gray, beige, and soft charcoal tones suit contemporary homes, and a single-tone field keeps the look quiet. Large slabs need a flat, well-compacted base more than small pavers do, since any dip shows across a wide unit. Handle the weight with two people and a suction lifter.
Try this: Match the slab tone to your interior floor for a patio that reads as an extension of the living room.
Difficulty: Moderate. Cost: $$
5. Circular medallion patio

A circular medallion lays pavers in radiating arcs around a center point, turning the patio surface into its own focal point. A contrasting border color makes the circle read clearly from the house and the yard, and the shape anchors a round dining table or a garden statue without extra furniture. The arcs need careful cutting at the outer edge, so this pattern costs more in labor than a straight grid. Keep the rest of the yard simple so the medallion stays the star of the space.
Try this: Center the medallion on a view from the back door so the circle greets you the moment you step outside.
Difficulty: Moderate to hard. Cost: $$
6. Fan pattern entry patio

Fan pattern sets pavers in sweeping arcs that radiate from a single point, usually the back steps or a garden gate. The arcs draw the eye inward and give a small entry patio a sense of arrival that a straight grid cannot match. It works best as a defined zone, such as the landing outside a door, rather than across a huge open field. Expect plenty of angled cuts along the outer arc, and plan the center point before any paver goes down. Two tones along the arcs add depth without complicating the layout.
Try this: Start the fan at the door threshold so every arc flows outward into the yard.
Difficulty: Hard. Cost: $$
7. Pinwheel accent patio
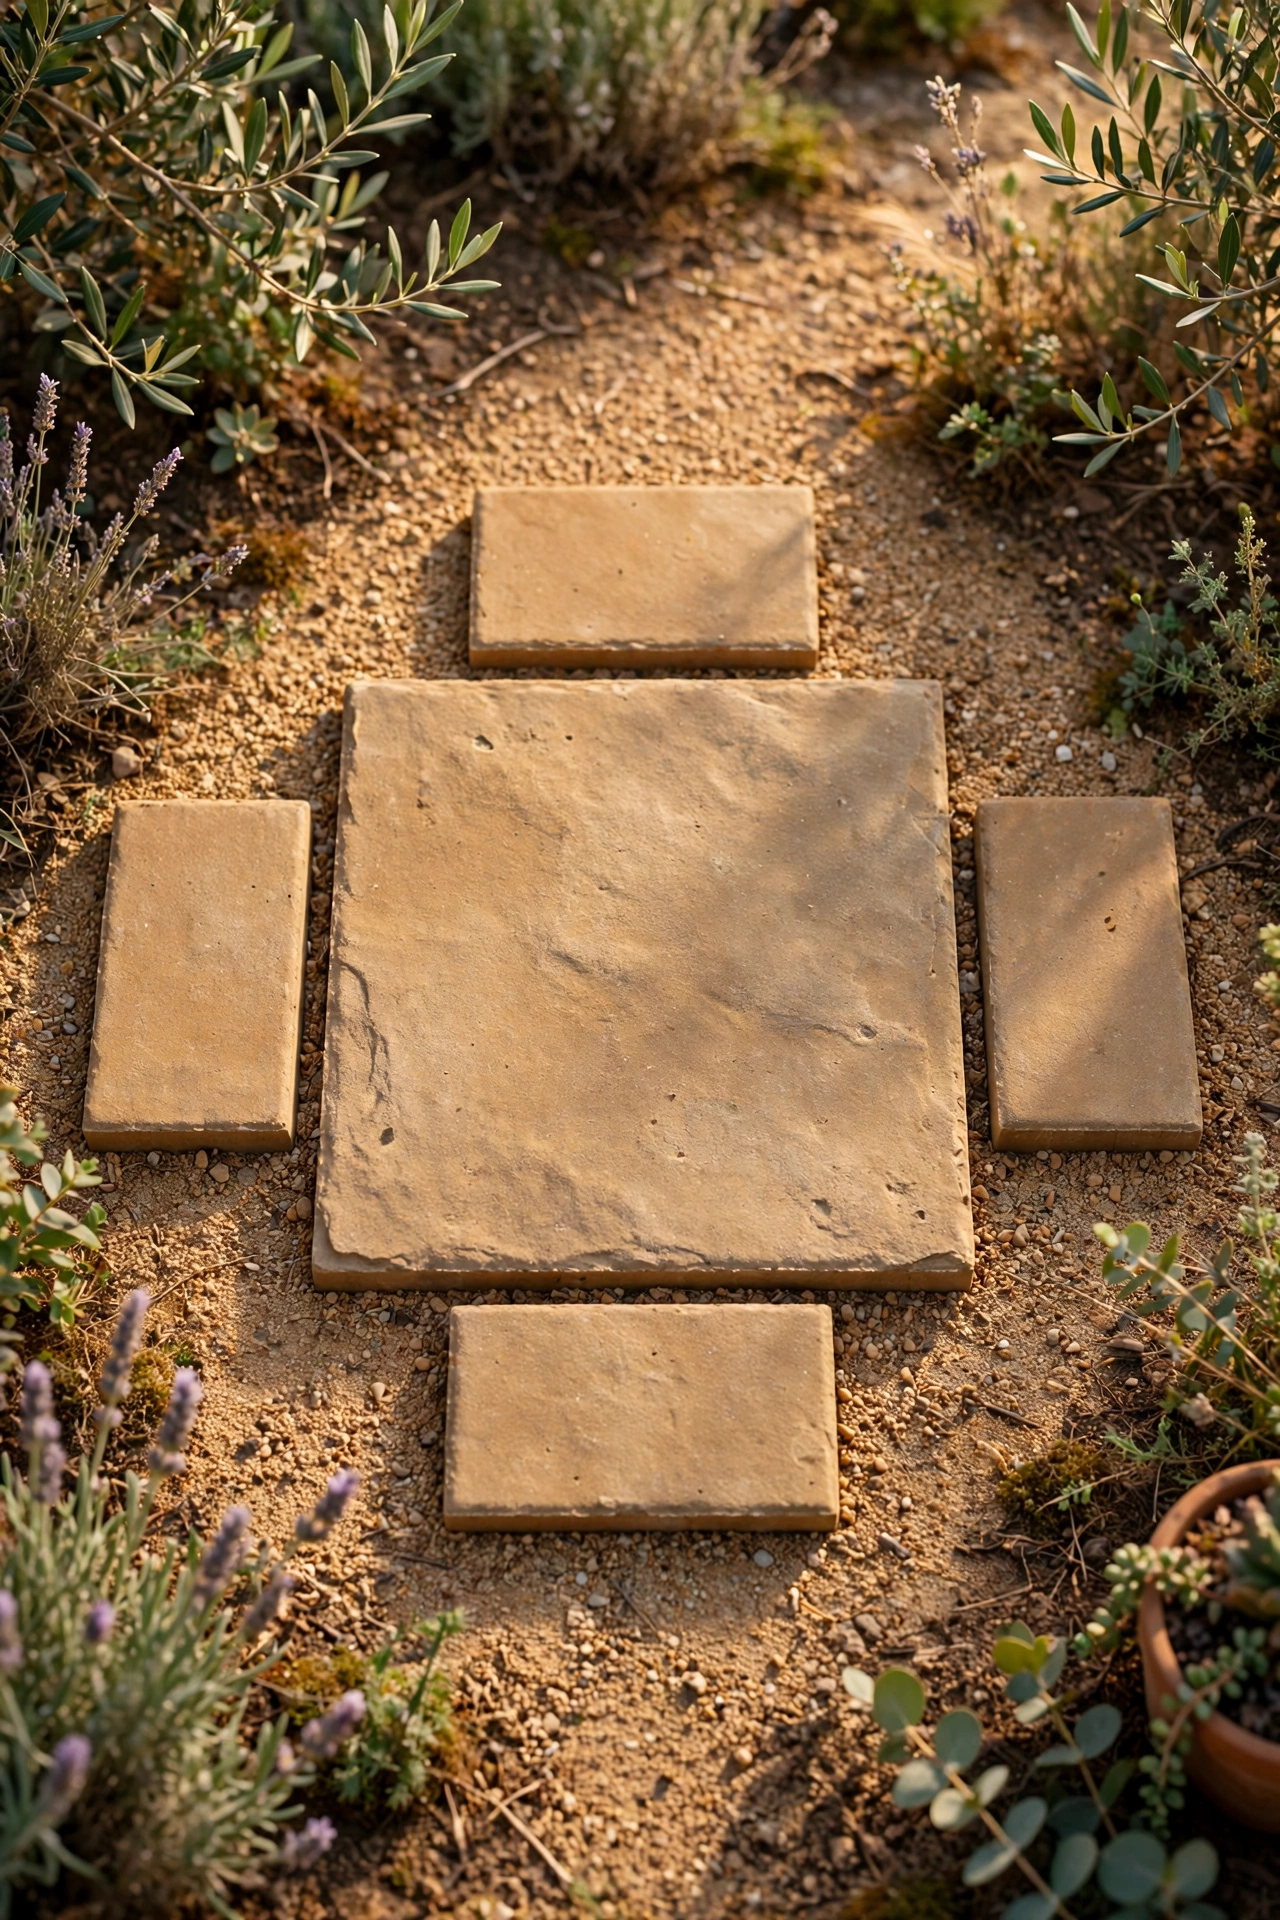
Pinwheel sets one large square paver in the center with four smaller rectangles rotated around it, repeating across the surface. The layout looks playful from above, yet it needs no custom cutting when you use standard paver sizes. That makes it a smart pick for a small seating pad, a garden nook, or an accent square inside a larger running bond field. One tone keeps it calm; two tones make the pinwheels pop. The pattern reads best from a slightly raised viewpoint, like a deck or a second-story window.
Try this: Use pinwheel as a rug-sized accent under a bistro set inside a simpler paver field.
Difficulty: Moderate. Cost: $$
8. Cobblestone old-world patio

Cobblestone uses rounded or irregular pavers in a flowing layout that recalls a European village square. The uneven texture and warm, mixed tones pair well with lush plantings, climbing roses, and Mediterranean or cottage gardens. Gaps between the rounded units take more joint sand than a tight grid, and the bumpy surface suits lounge chairs better than a formal dining set with thin legs. Tumbled finishes soften the edges further and hide scuffs from years of use. Budget for extra sand and a good compacting pass.
Try this: Let thyme or moss settle into the wider joints at the patio edges for a soft, aged finish.
Difficulty: Moderate. Cost: $$
9. Two-tone modular pattern patio

Two-tone modular patios mix rectangular pavers of different sizes in two complementary shades, laid without a strict repeating unit. The size changes add depth and movement, while the two colors keep the surface from looking random. This approach bridges indoor and outdoor spaces well: pull one shade from your interior floor and the other from your roof or trim. Because the layout is not a fixed pattern, installers can work around trees, curves, and odd corners without awkward cuts. Keep the two tones close in value for a calm result.
Try this: Use the darker tone as a band through the middle of the patio to mark a walkway from the door to the garden.
Difficulty: Moderate. Cost: $$
10. Permeable pavers with gravel joints

Permeable pavers sit with wider joints filled with small gravel, so rainwater drains through the surface into a stone reservoir below instead of running off toward the street. The system needs an open-graded crushed stone base rather than a standard compacted sand base, and that base depth depends on your soil and rainfall. Gravel is the standard joint fill for these systems, and it keeps the joints open season after season. The U.S. EPA notes that permeable pavements reduce runoff and filter pollutants as water passes through the layers below. EPA guidance on permeable pavement explains how these systems handle stormwater.
Try this: Skip the polymeric sand on this patio, since sealed joints would block the drainage the design depends on.
Difficulty: Moderate. Cost: $$
11. Pavers with ground cover insets
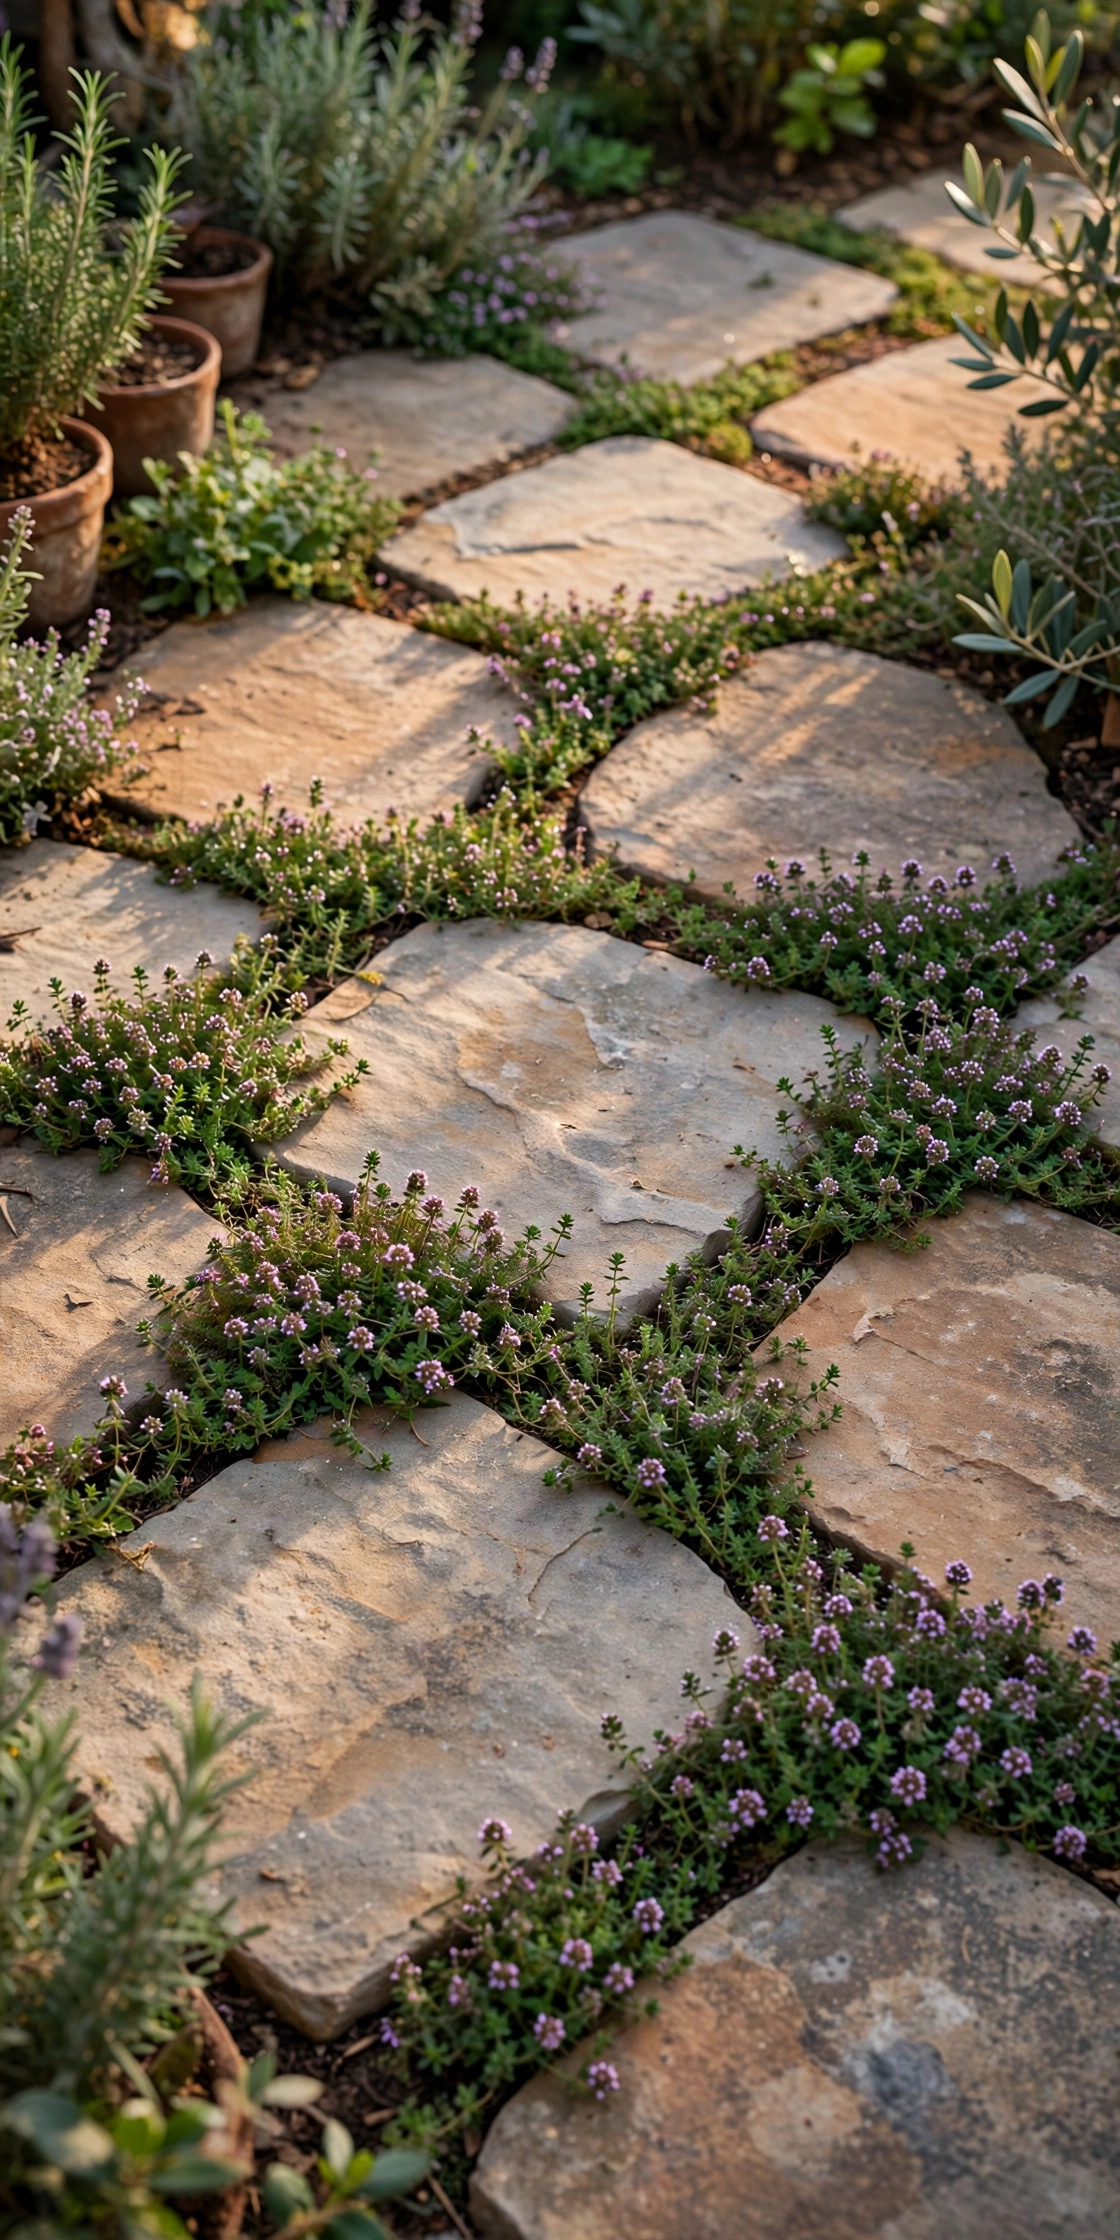
Ground cover insets leave deliberate gaps between large pavers and plant them with low growers like creeping thyme or dymondia. The green seams soften the hardscape and make the patio read as part of the garden rather than a slab dropped on top of it. Creeping thyme releases scent when stepped on, while dymondia handles full sun and regular foot traffic once established. Both need water until their roots take hold, and the gaps need weeding until the cover fills in. This is a garden look first, so pair it with planting beds at the patio edge.
Try this: Keep the gaps at least 2 inches wide so the plants have room to spread without crowding the paver edges.
Difficulty: Easy to moderate. Cost: $$
12. Two-level paver patio with steps

A two-level patio splits the space into an upper dining terrace and a lower lounge area, joined by wide stone steps. The split gives a sloped yard a natural structure and lets each zone keep its own furniture without crowding. Use the same paver across both levels so the design stays unified, and build the step risers from matching wall block with a capstone for a finished edge. Retaining edges need a proper gravel footing and drainage behind them, or water pressure will push them out over time. This is the priciest layout here because of the walls and steps.
Try this: Put the dining level near the kitchen door and the lounge level closer to the garden view.
Difficulty: Hard. Cost: $$
How to choose the right paver patio
Match the pattern to your house first. Traditional and craftsman homes pair well with herringbone, basketweave, and cobblestone, while contemporary builds suit large-format grids and stack bond. Mediterranean and Spanish-style homes sit naturally with flagstone-style irregular layouts and warm earthy tones. When in doubt, pull a color from your exterior, such as roof tile or window trim, and pick a paver blend that echoes it without matching it exactly.
Size and slope shape the rest of the decision. Small patios look best with simple patterns and larger units, since busy layouts feel crowded in a tight space. Slope the finished surface 1/4 inch per foot away from the house so water drains off, and plan for a base of 4 to 6 inches of compacted gravel topped with about 1 inch of bedding sand. Call 811 before you dig, since a patio excavation can cross gas, electric, and water lines. Call 811 before any digging project to get buried lines marked for free. Dark pavers absorb more summer heat, so save charcoal tones for shaded spots and pick light tones for sunny, barefoot areas.
Paver patio ideas at a glance
| Idea | Cost per sq ft installed | Difficulty | Best for |
|---|---|---|---|
| Herringbone brick | $12 to $25 | Moderate | High-traffic dining areas |
| Basketweave cottage | $10 to $20 | Easy to moderate | Cottage and traditional homes |
| Running bond gray concrete | $10 to $18 | Easy | Budget builds and narrow patios |
| Large-format slab grid | $18 to $30 | Moderate | Modern homes, mid-size yards |
| Circular medallion | $15 to $28 | Moderate to hard | Focal points and round tables |
| Fan pattern entry | $15 to $27 | Hard | Door landings and entries |
| Pinwheel accent | $12 to $22 | Moderate | Small pads and accent zones |
| Cobblestone old-world | $18 to $32 | Moderate | Garden settings, lounge seating |
| Two-tone modular | $14 to $26 | Moderate | Odd shapes and indoor-outdoor flow |
| Permeable gravel joints | $15 to $25 | Moderate | Drainage trouble spots |
| Ground cover insets | $12 to $22 | Easy to moderate | Garden patios, soft looks |
| Two-level with steps | $20 to $35 | Hard | Sloped yards, zoned living |
Common mistakes to avoid
A thin base is the most common reason patios sink. A couple of inches of gravel under pavers will shift within a season or two, while a compacted 4 to 6 inch gravel base with edge restraint holds its shape for decades. Skipping edge restraint is just as costly: without a firm border, the outer rows creep outward and the joints open up. Slope matters too, since a flat patio ponds water against the house wall and grows algae in the joints.
Other mistakes are easier to fix but just as common. Sealing is optional, yet unsealed joints lose sand to rain and sweeping, so top up polymeric sand when gaps appear. Dark pavers in full sun get hot enough to hurt bare feet, and polished stone turns slick when wet, so pick textured finishes for sunny or damp spots. Wet-cutting pavers creates silica dust, so cut wet and wear a respirator. Never dig without calling 811 first, and never assume grass joints make a patio permeable: gravel is the standard joint fill for drainage systems.
More patio and backyard ideas
If your patio sits beside a pool, the edge and surround need their own plan. See these pool patio ideas for layouts built around water, loungers, and wet feet.
For a tighter budget, the same paver skills stretch further with cheaper surfaces. These inexpensive patio floor ideas cover gravel, budget concrete pavers, and other low-cost floors.
Once the pavers are down, shade decides how much you actually use the space. These patio shade ideas show sails, pergolas, and umbrellas that fit over a paver field.
A roof changes a patio from a fair-weather spot into a three-season room. These covered outdoor patio ideas cover solid roofs, pergola covers, and screened options.
Finally, turn the finished patio into a full retreat with seating, light, and planting. These DIY backyard oasis ideas show how to style the space around your new pavers.
Frequently asked questions
How much does a paver patio cost?
Most installed paver patios run $10 to $35 per square foot, depending on material, pattern, and site work. Simple running bond concrete sits at the low end, while large-format stone, cobblestone, and two-level builds with walls sit at the high end. Slope, access, and drainage work can shift the total more than the paver choice itself, so get itemized quotes before you commit.
What paver pattern is strongest?
Herringbone is the strongest common pattern because the interlocking zig-zag spreads loads sideways and resists shifting. That strength matters most on driveways, but it also keeps high-traffic patio zones tight over time. Running bond and stack bond are fine for patios, since foot traffic loads are far lighter than vehicle loads.
Can I install a paver patio myself?
A small, flat patio is a realistic DIY project if you can handle the base work: excavation, 4 to 6 inches of compacted gravel, bedding sand, and edge restraint. Large patios, sloped sites, and two-level builds are better left to a contractor, since grading and wall footings decide whether the patio lasts. Either way, call 811 before you dig.
Do paver patios need sealing?
Sealing is optional but useful. A sealer deepens color, resists stains from food and leaves, and helps joint sand stay put. Reapply when water stops beading on the surface or the color starts to look washed out, and skip sealer entirely on permeable patios, where sealed joints would block drainage.
How do I stop weeds between pavers?
Polymeric sand is the main defense: it hardens in the joints and blocks weed roots better than loose sand. Sweep the joints clean, fill them fully, mist to activate, and top up any gaps that settle after the first few rains. Pull the odd weed early, since a rooted weed widens the joint it grows in.
Final thoughts
Pick the pattern that fits your house, spend the effort on the base, and let the border and color do the decorating. Our muddy patch became the spot where we eat dinner most summer nights, and a paver patio earns that kind of daily use when the layout suits the yard instead of fighting it.
For the narrow side yard path specifically, see our guide to 10 Narrow Side Pathway Ideas for a Side Yard That Finally Works for a running bond paver path, a brick herringbone runner, flagstone steppers, permeable pavers, and a cedar boardwalk.


