



A blank wall stares back at you every time you step outside, and buying a full garden setup feels like too much money and too much work. Wall planters fix both problems at once: they turn fences, shed sides, and balcony walls into growing space for the price of a pizza.
This list rounds up 20 DIY wall planter builds you can finish in a weekend or less. Most use cheap or salvaged materials, and every idea includes a cost estimate, a difficulty rating, and a concrete tip so you know exactly what you are getting into before you pick up a drill.
Quick takeaways
- Wall planters work on fences, shed walls, balcony railings, and even indoor walls near a bright window.
- Always mount into studs or use rated masonry anchors. A planted, watered planter weighs far more than the empty build.
- Herbs, succulents, strawberries, and trailing pothos are the most forgiving first plants.
- Drainage holes plus a small saucer or drip tray keep walls dry and plants alive.
- Most builds on this list cost under $30 and take 1 to 3 hours.
1. Reclaimed pallet herb wall
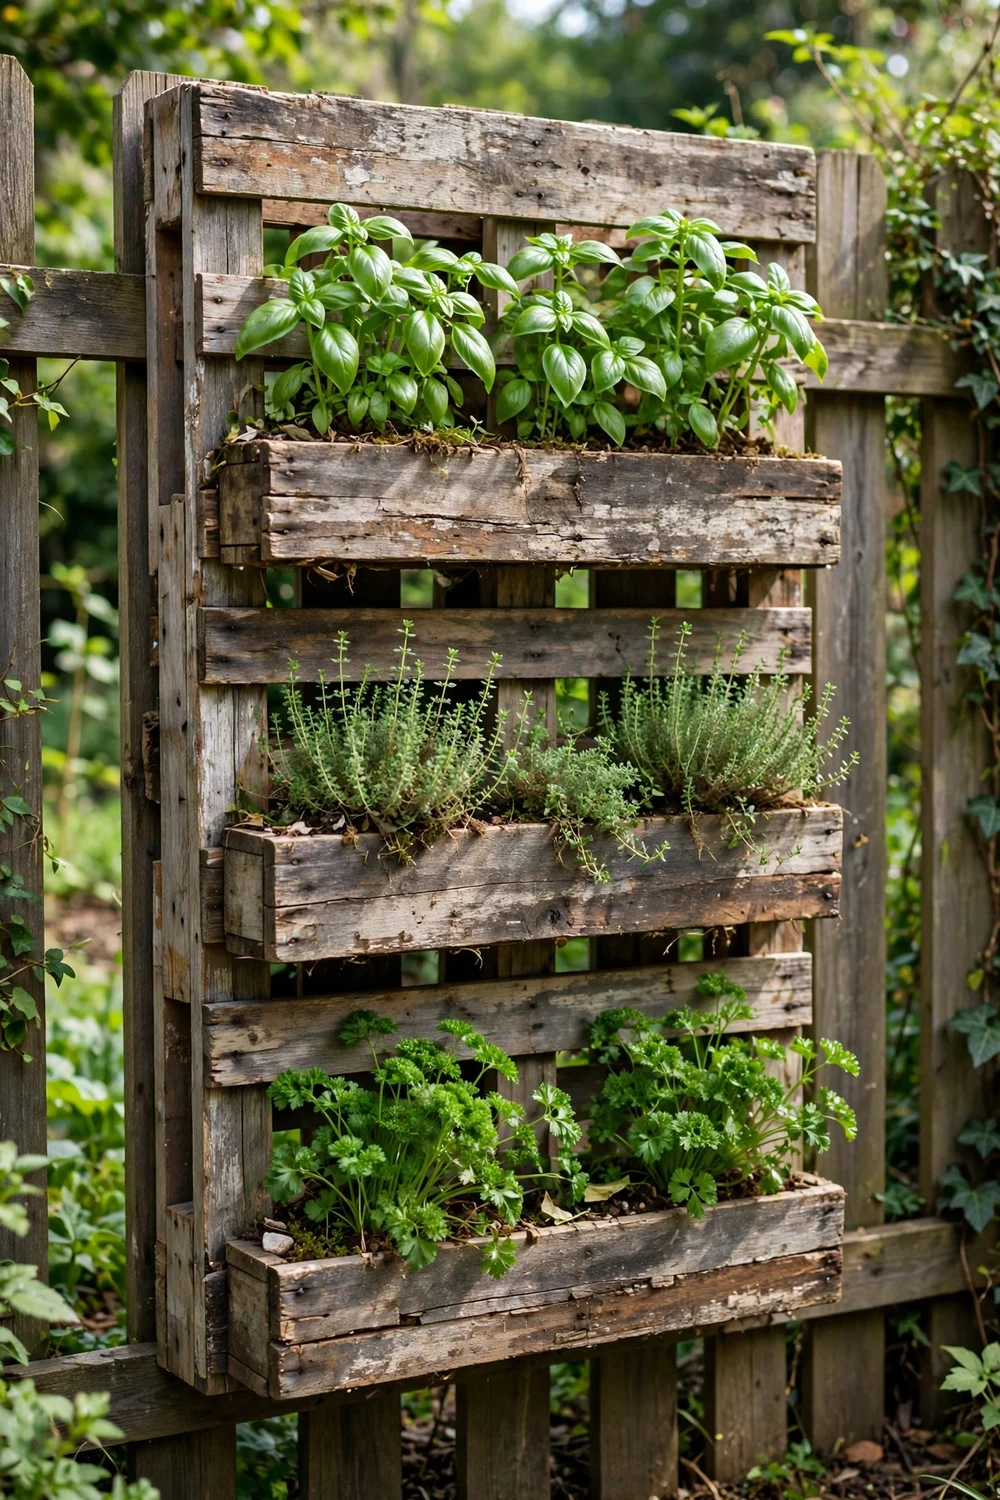
One shipping pallet, a staple gun, and landscape fabric become a full herb wall in an afternoon. Stand the pallet upright, staple fabric across the back and bottom of each slat opening to form pockets, fill with potting mix, and tuck in basil, thyme, parsley, and chives. Lean it against a sunny fence or bolt it flat to the wall with two L-brackets. Pallet wood is rough, so sand the front edges before planting to avoid splinters.
Try this: plant mint in its own top pocket so it cannot crowd out the slower herbs below.
Cost: $$· Difficulty: easy · Time: 2 hours
2. Galvanized rain gutter planter
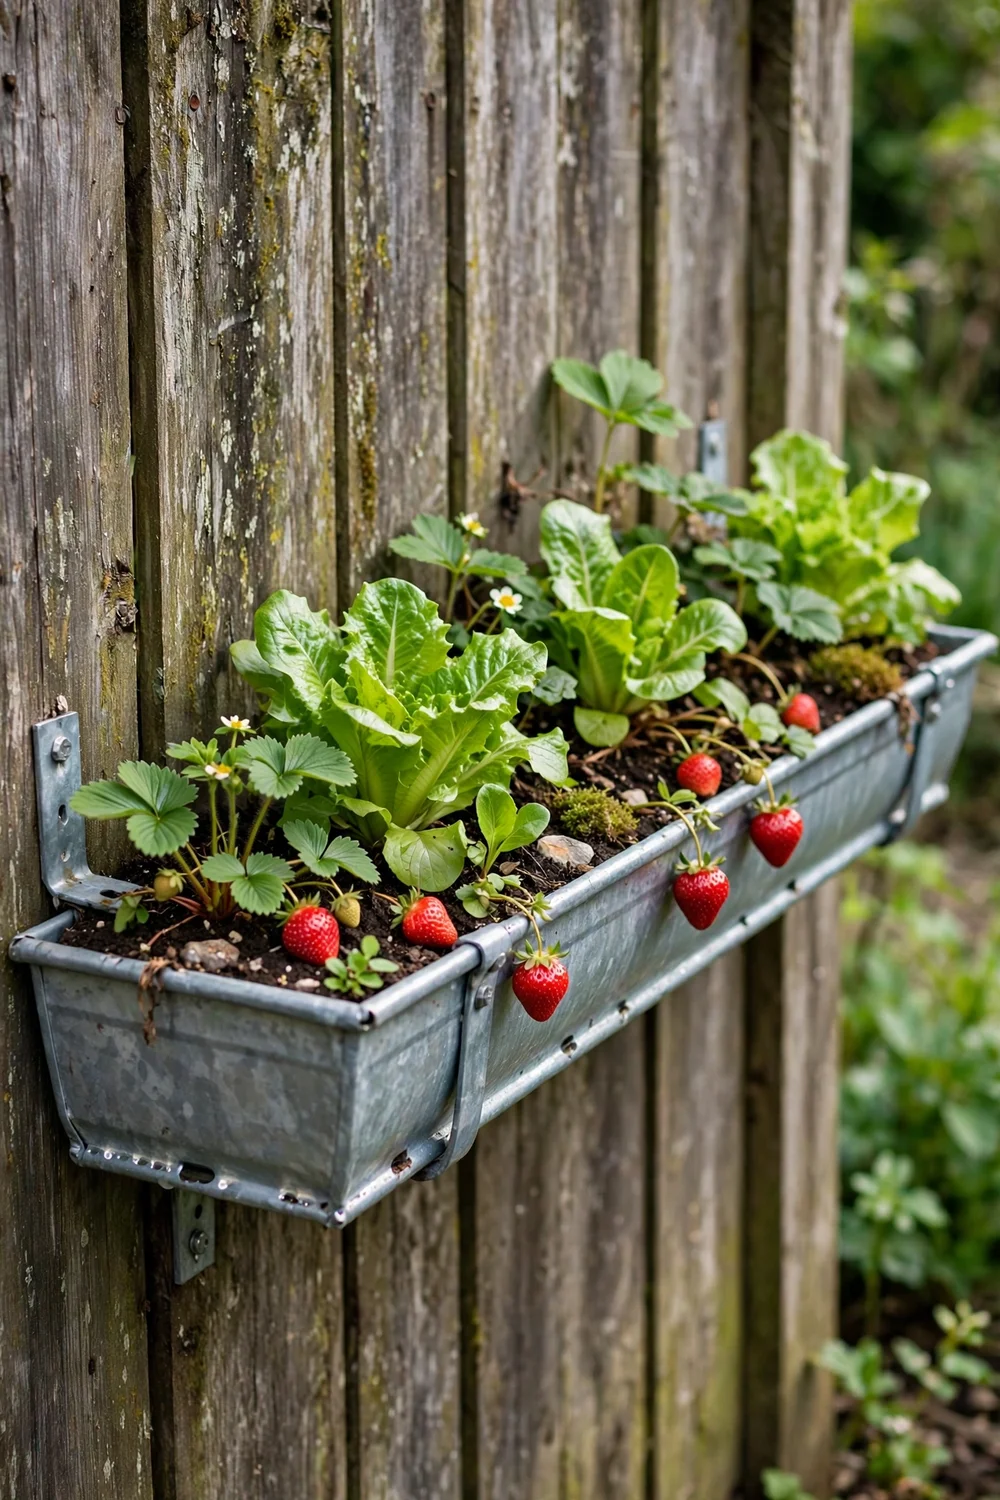
A 10-foot vinyl or metal gutter cut into two 5-foot lengths gives you instant shallow planters for lettuce, spinach, and strawberries. Cap the ends, drill a drainage hole every 12 inches, and mount the sections on fence rails with gutter brackets spaced 24 inches apart. Shallow roots love the 4-inch depth, and the long trough shape waters evenly. Paint the outside with exterior acrylic if the bare metal clashes with your fence.
Try this: tilt each gutter 1/4 inch toward one end so excess water runs out instead of pooling.
Cost: $$· Difficulty: easy · Time: 1 hour
3. Felt pocket fabric planter

Fabric pocket planters hang from a single row of hooks and hold a dozen plants in two square feet. The breathable felt air-prunes roots, which keeps herbs compact and healthy. Fill each pocket two-thirds with potting mix, plant, then water slowly until the felt darkens all over. Hang it where you can reach every pocket with a watering can, because the top row dries first. Expect to replace the fabric every 2 to 3 seasons outdoors.
Try this: slip a plastic saucer behind the bottom row to catch drips on a balcony.
Cost: $$· Difficulty: easy · Time: 30 minutes
4. Mason jar herb row on a board
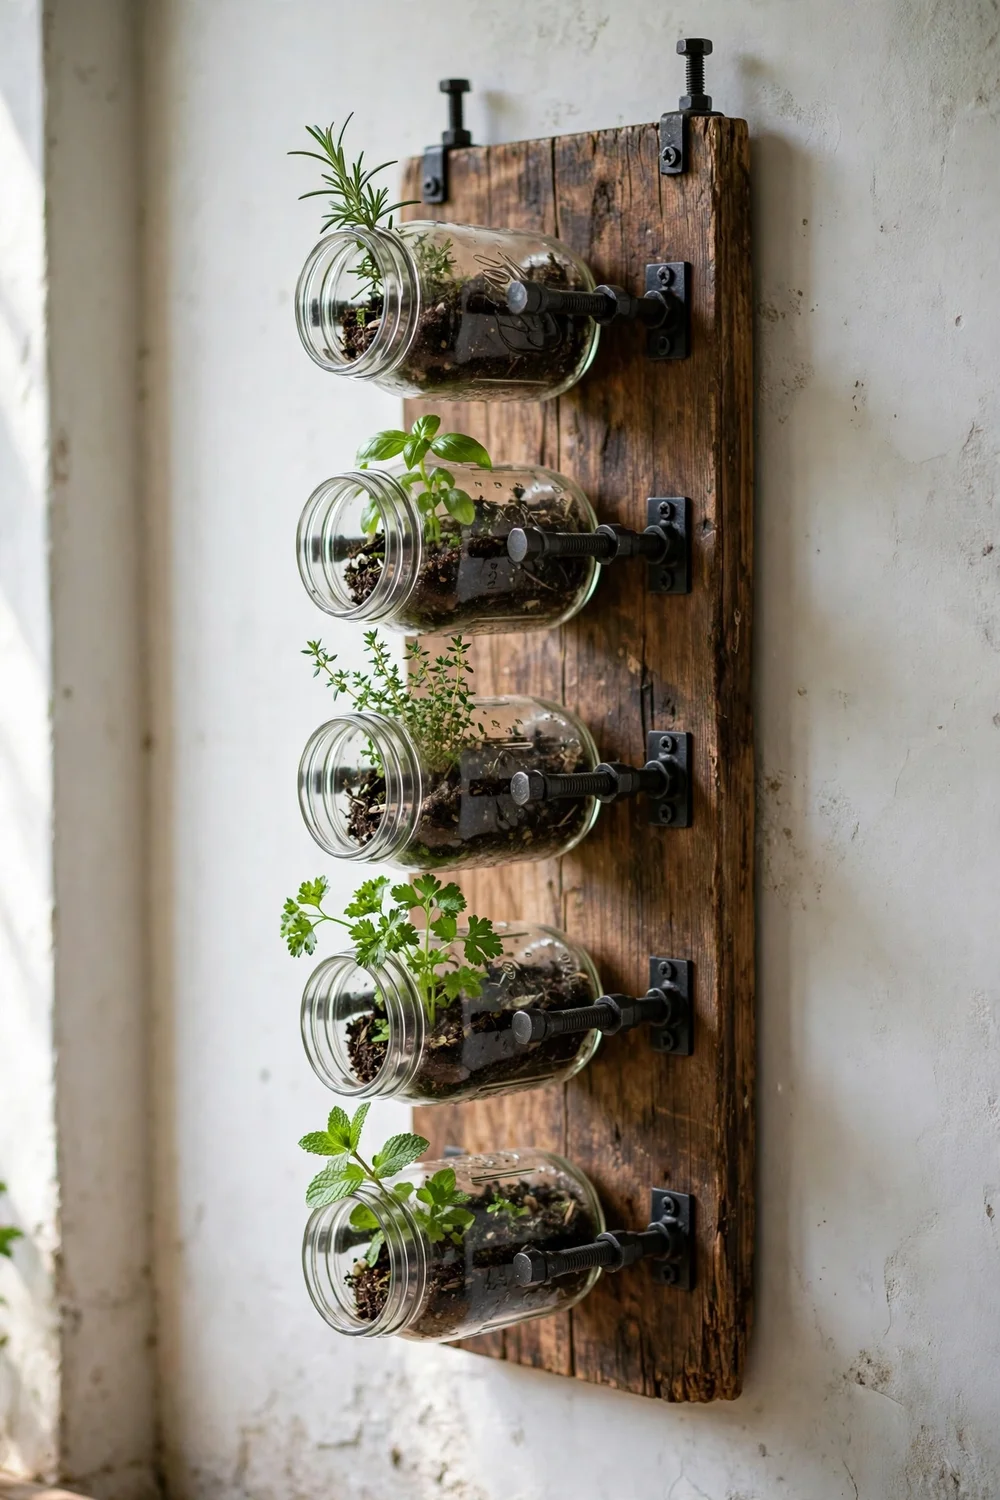
Hose clamps screw mason jars to a stained 1×6 board, and the board screws to the wall. The glass shows off the roots and the soil level, which makes it obvious when plants need water. Drill two small drainage holes in each lid, flip the lids upside down as saucers, and keep jars to herbs with small root balls like chives and oregano. A 4-foot board holds six quart jars comfortably.
Try this: add a 1/2-inch layer of pebbles under the soil so roots never sit in standing water.
Cost: $$· Difficulty: easy · Time: 1 hour
5. Painted tin can trio

Three large coffee or tomato cans, spray-painted in one color family, look far better than the price suggests. Punch drainage holes with a nail, fill with mix, and hang them from a horizontal 2×2 with S-hooks through punched holes near the rim. Group cans of the same height so watering is even across the row. Rust shows up after a season or two outdoors, so spray a clear outdoor sealer over the paint.
Try this: plant one can with trailing sweet potato vine to soften the straight lines.
Cost: $· Difficulty: easy · Time: 45 minutes
6. Shoe organizer succulent wall

A clear over-the-door shoe organizer turns into a 24-pocket succulent grid with zero tools. Poke drainage slits in each pocket bottom with scissors, fill with cactus mix, and tuck in echeveria, sedum, and haworthia cuttings. Hang it on a fence post or a sunny wall hook. Succulents tolerate the small pockets better than thirsty plants, and the clear vinyl lets you see soil moisture at a glance.
Try this: water with a turkey baster to aim each pocket without soaking its neighbors.
Cost: $$· Difficulty: easy · Time: 30 minutes
7. Cedar box planters on cleats
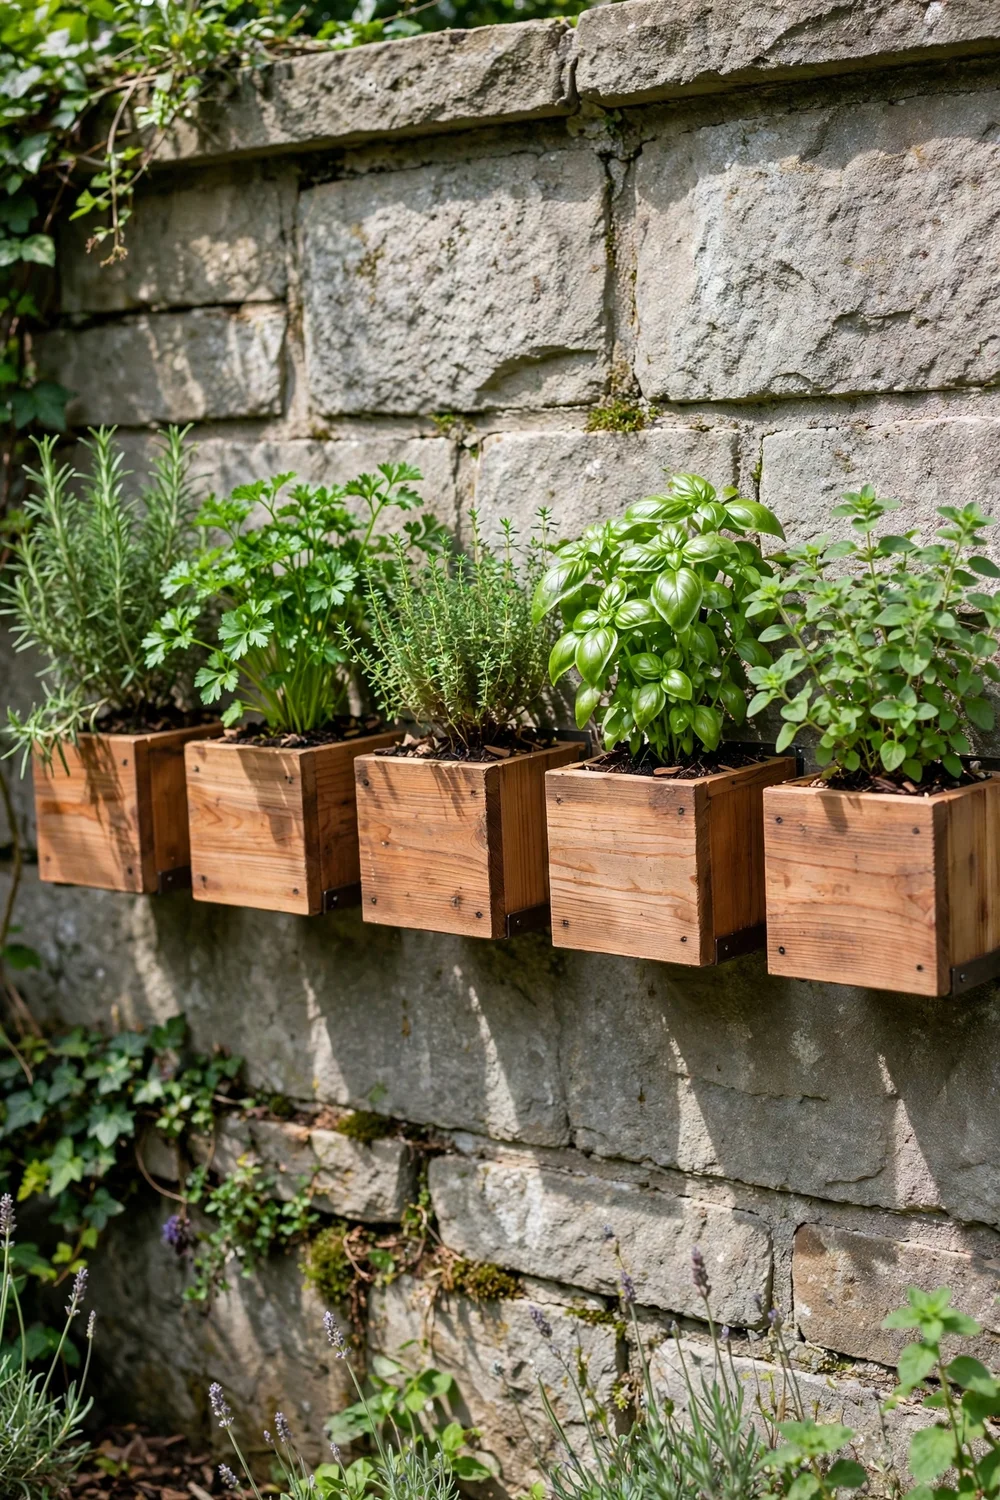
Simple open-top cedar boxes, 12 inches long and 6 inches deep, hook onto a wall-mounted French cleat so you can lift them off for replanting. Cedar resists rot without treatment, which matters for boxes that stay damp. Space the boxes 8 inches apart vertically so lower plants still get light. A dab of wood glue plus screws at the corners keeps each box square under the weight of wet soil.
Try this: line the inside with landscape fabric to hold soil in while letting water drain.
Cost: $$· Difficulty: moderate · Time: 3 hours
8. Galvanized bucket planters
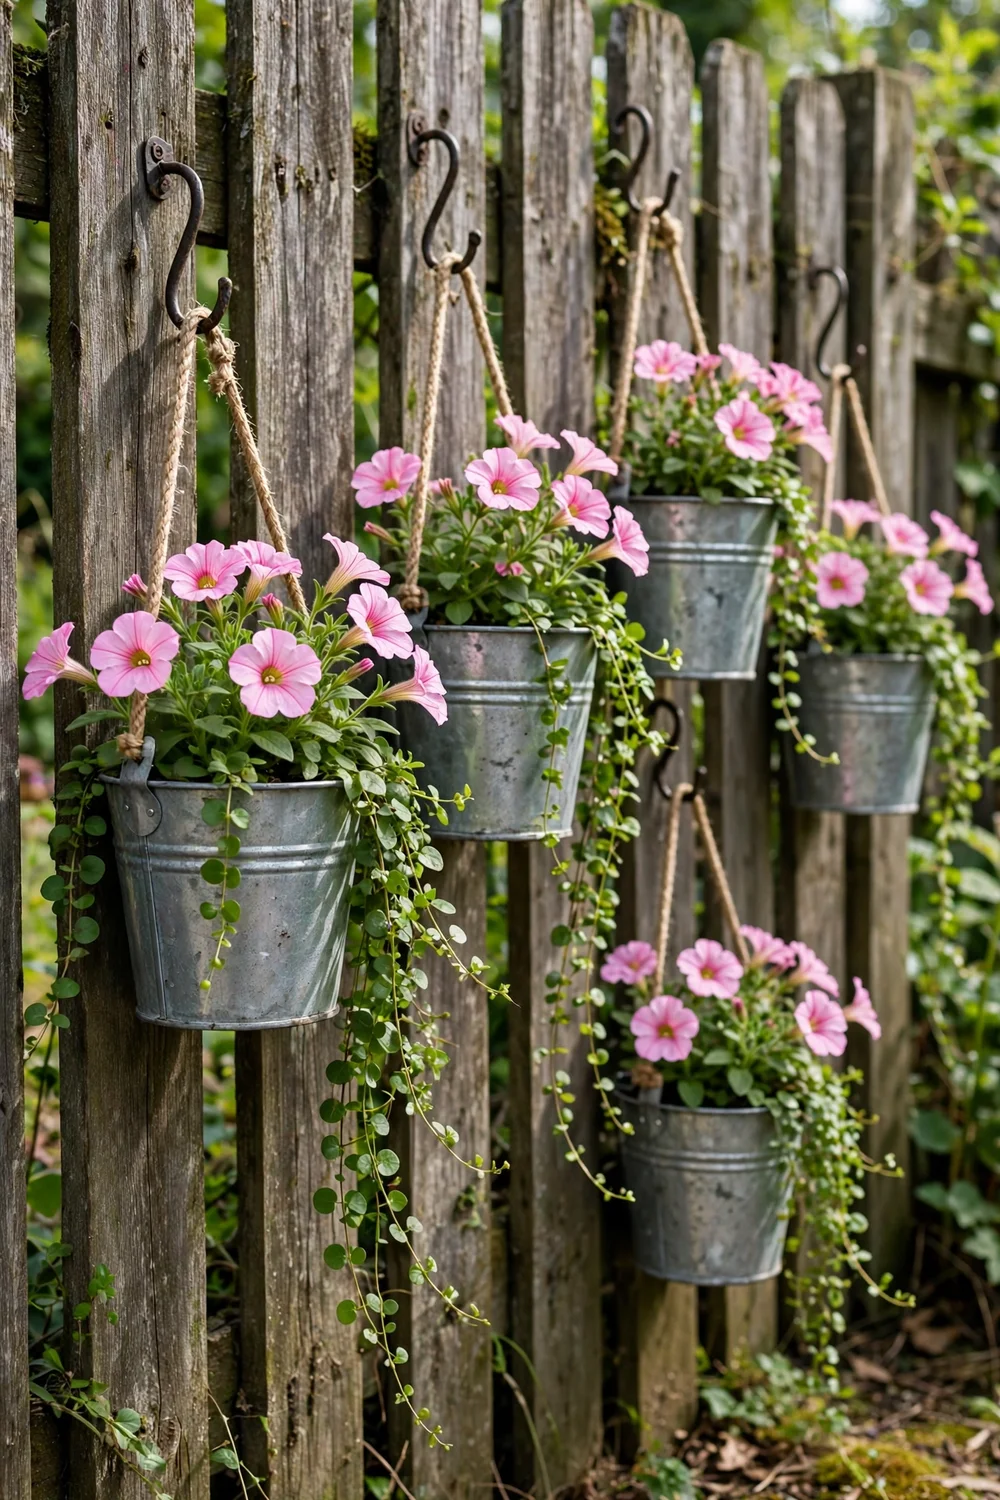
Small galvanized pails with rope handles hang from wall hooks and bring a farmhouse feel to a plain fence. Drill three drainage holes in each bottom, add an inch of gravel, then fill with mix and plant marigolds, petunias, or trailing lobelia. Two-gallon pails are the sweet spot: big enough for real root growth, light enough to hang from a standard hook. Space them 18 inches apart so flowers have room to spill.
Try this: thread the rope handle through the hook twice so wind cannot swing the pail off.
Cost: $$· Difficulty: easy · Time: 45 minutes
9. Wooden trellis with hanging pots
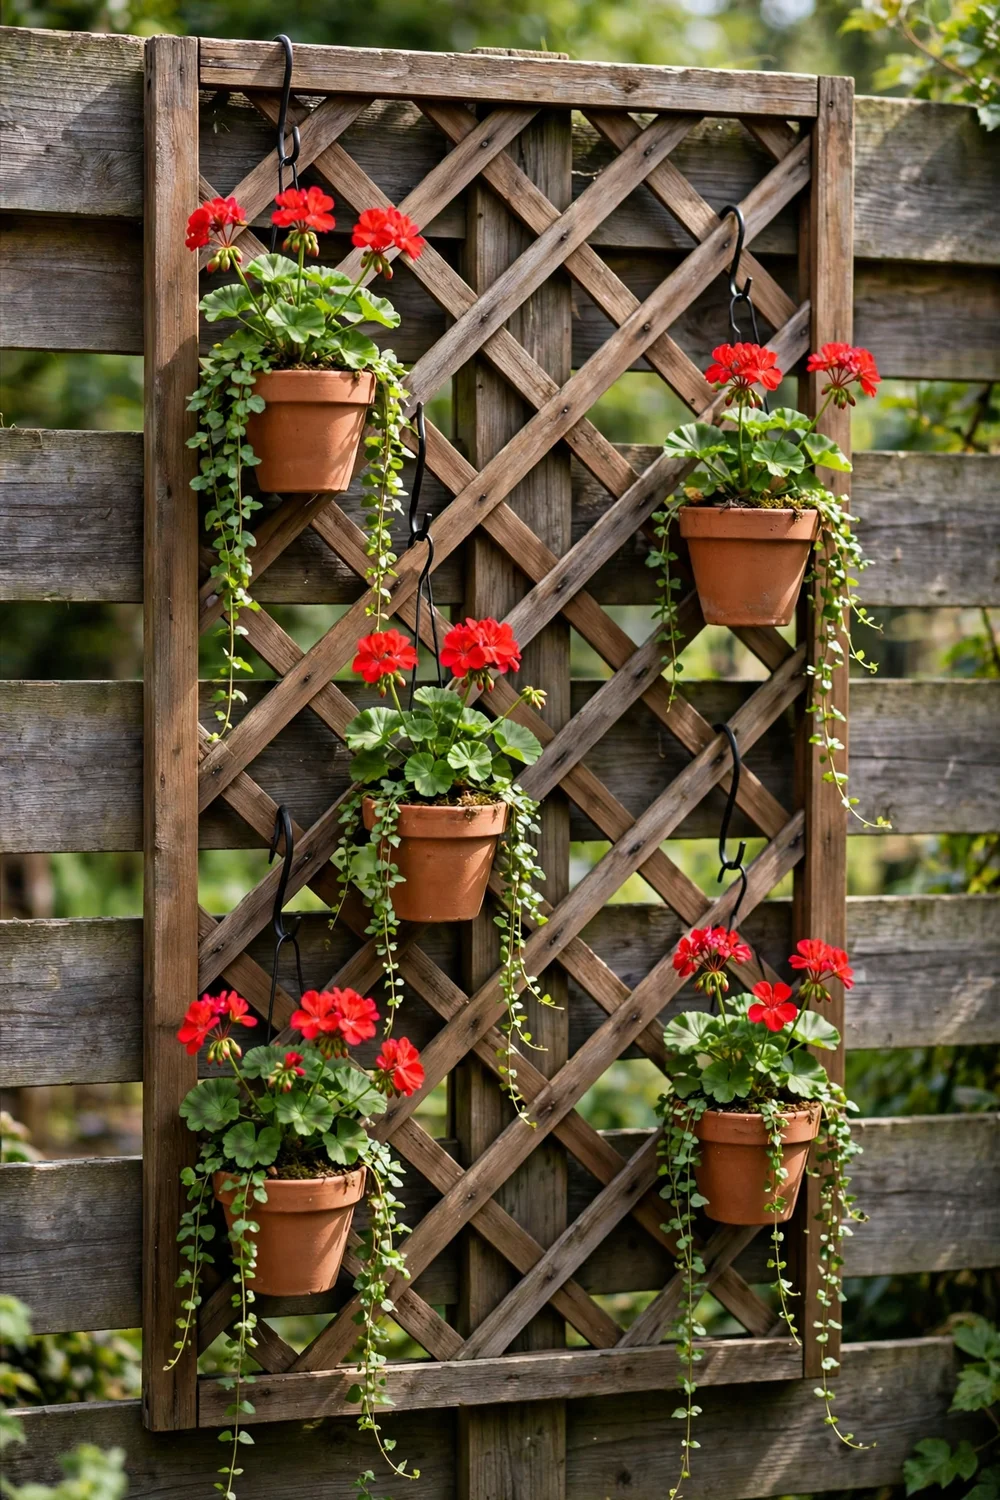
A cedar lattice panel screwed to fence posts doubles as a trellis and a pot rack. Hang 6-inch terracotta pots from the lattice with curved plant hooks, alternating heights for a staggered look. The open grid lets air move behind the pots, which slows mildew on shaded walls. Plant each pot with one thriller and one trailer, like a geranium with creeping jenny, for instant fullness.
Try this: wire each hook closed with a twist tie so pots stay put in storms.
Cost: $$· Difficulty: easy · Time: 2 hours
10. Rope-suspended shelf planters
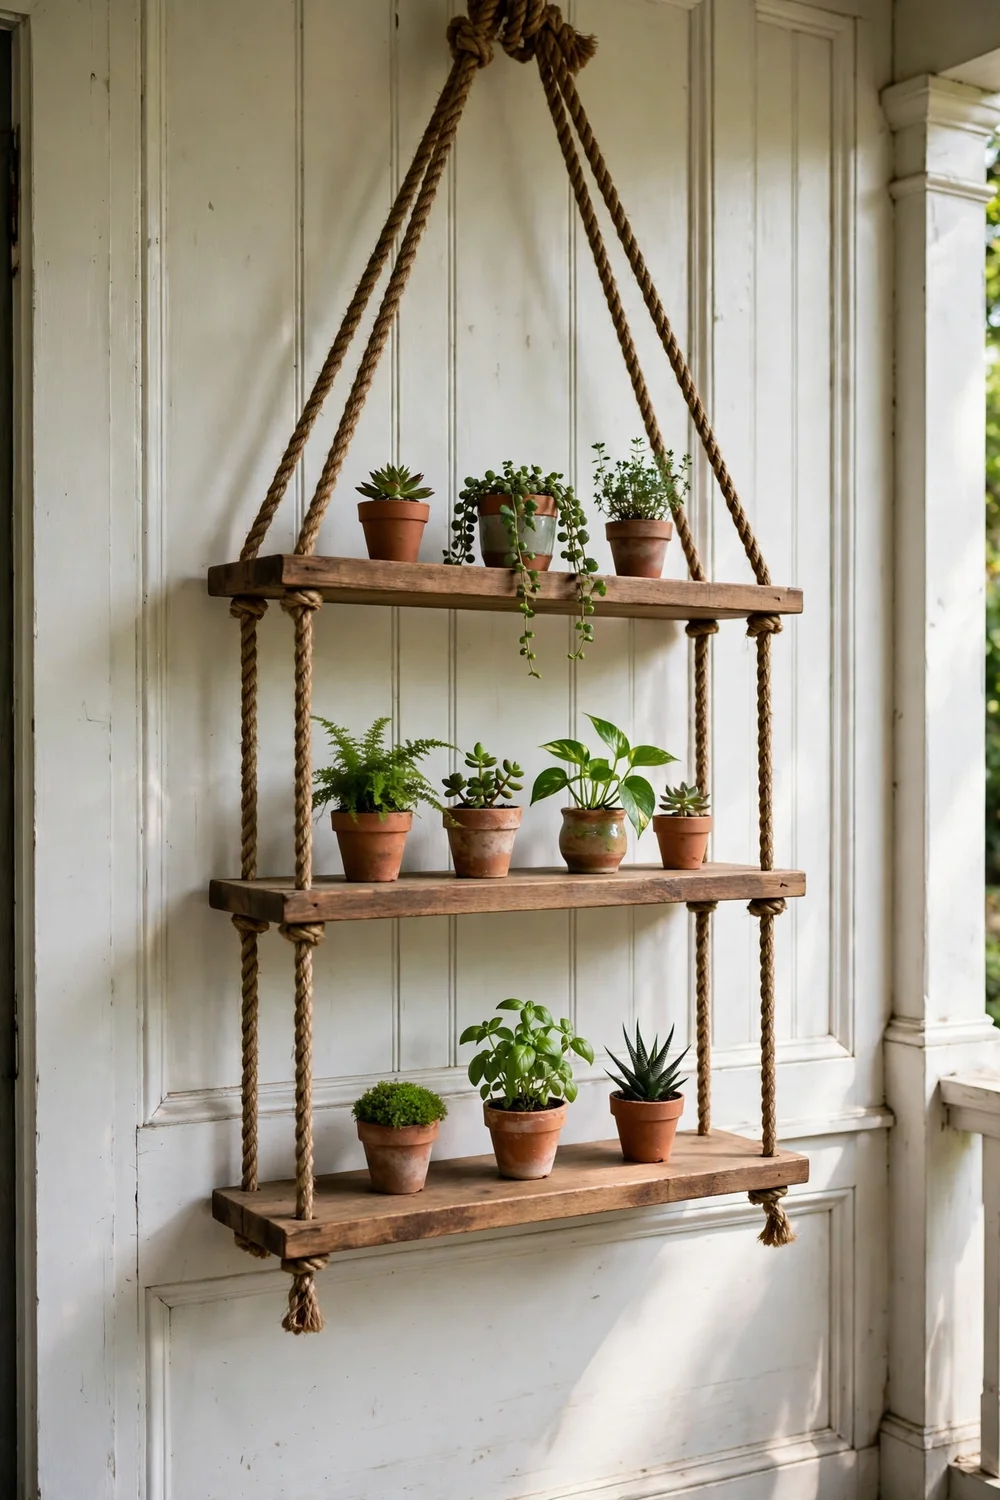
Two or three short pine shelves hang from thick cotton rope knotted through drilled corner holes, making a swing-style planter for a porch wall. The rope levels itself, so shelves stay flat even on uneven siding. Keep pots small, 4 to 6 inches, and cluster them toward the center of each shelf to avoid tipping. Anchor the top rope to a joist or a heavy-duty wall hook rated for 50 pounds.
Try this: dab clear nail polish on the rope knots to stop them loosening over time.
Cost: $$· Difficulty: moderate · Time: 2 hours
11. Leaning ladder planter
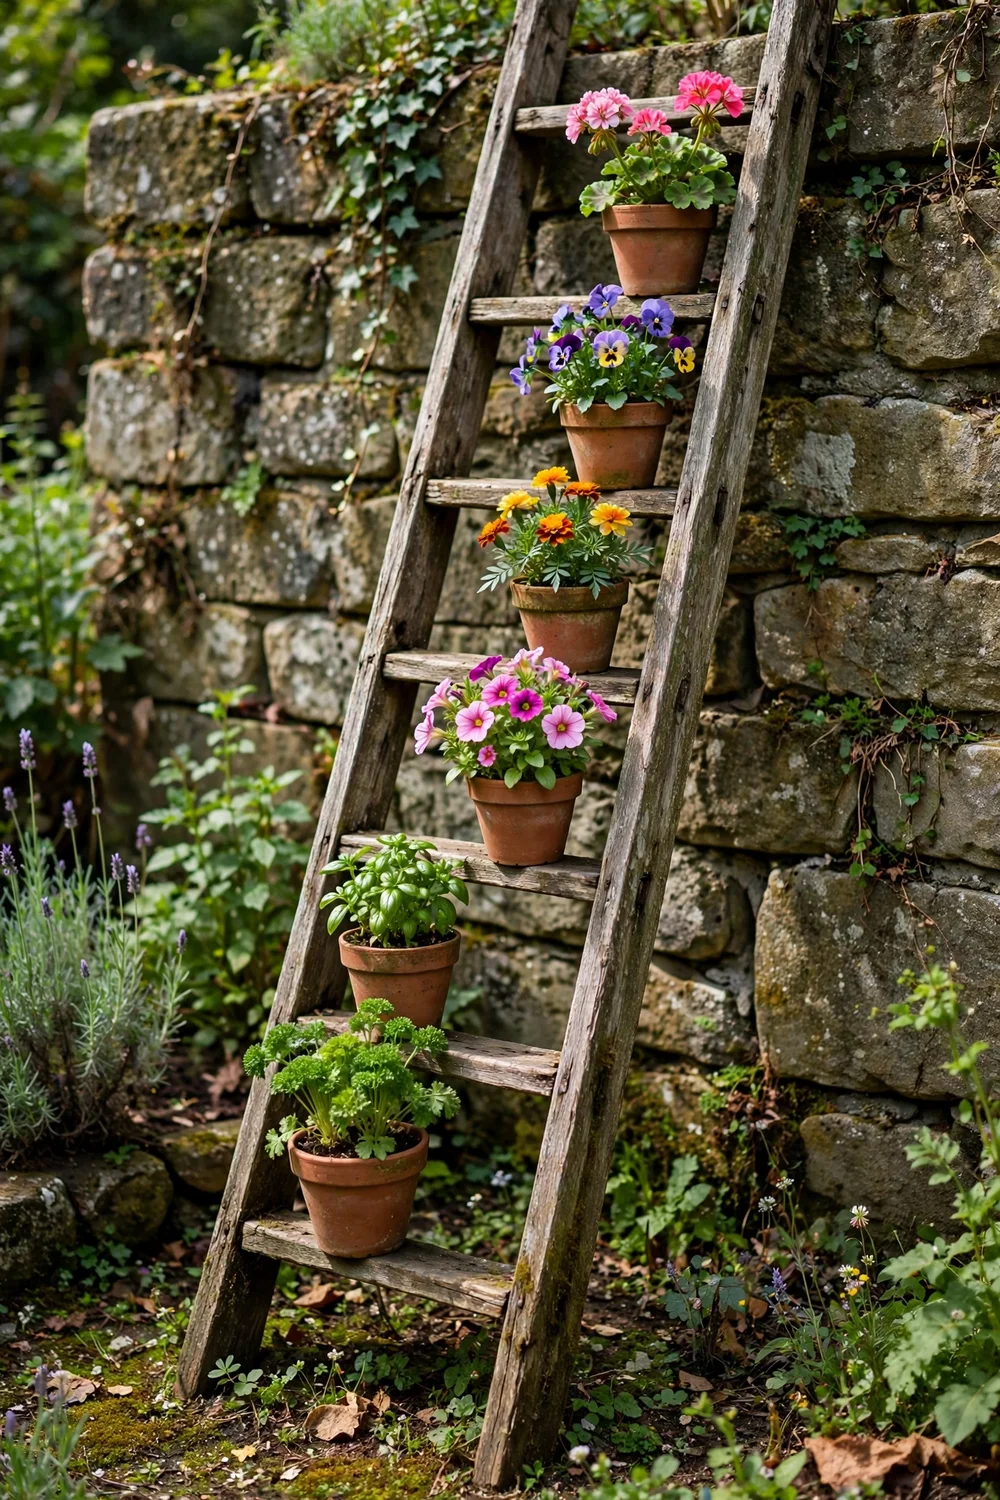
An old wooden ladder leaned against a wall at a slight angle holds a pot on every rung. Secure the top to the wall with an L-bracket so it cannot slide, and keep the base 12 inches out from the wall for stability. Sand and seal the wood with outdoor polyurethane, then set one 8-inch pot per rung. Alternate leafy plants and flowering ones so the eye travels up the whole ladder.
Try this: put the heaviest pots on the bottom two rungs to keep the center of gravity low.
Cost: $· Difficulty: easy · Time: 1 hour
12. Wooden crate wall garden

Wine or apple crates screwed directly to a fence make deep, rustic planters that hold full-size pepper and tomato starts. Line each crate with landscape fabric, staple it to the inside edges, and drill four drainage holes through the crate bottom and fabric. Mount crates with two 3-inch exterior screws into the fence rail, not just the pickets. One crate per plant gives roots the depth vegetables need.
Try this: stain crates with one coat of exterior wood stain to double their outdoor life.
Cost: $· Difficulty: easy · Time: 1.5 hours
13. Wire grid panel with S-hooks
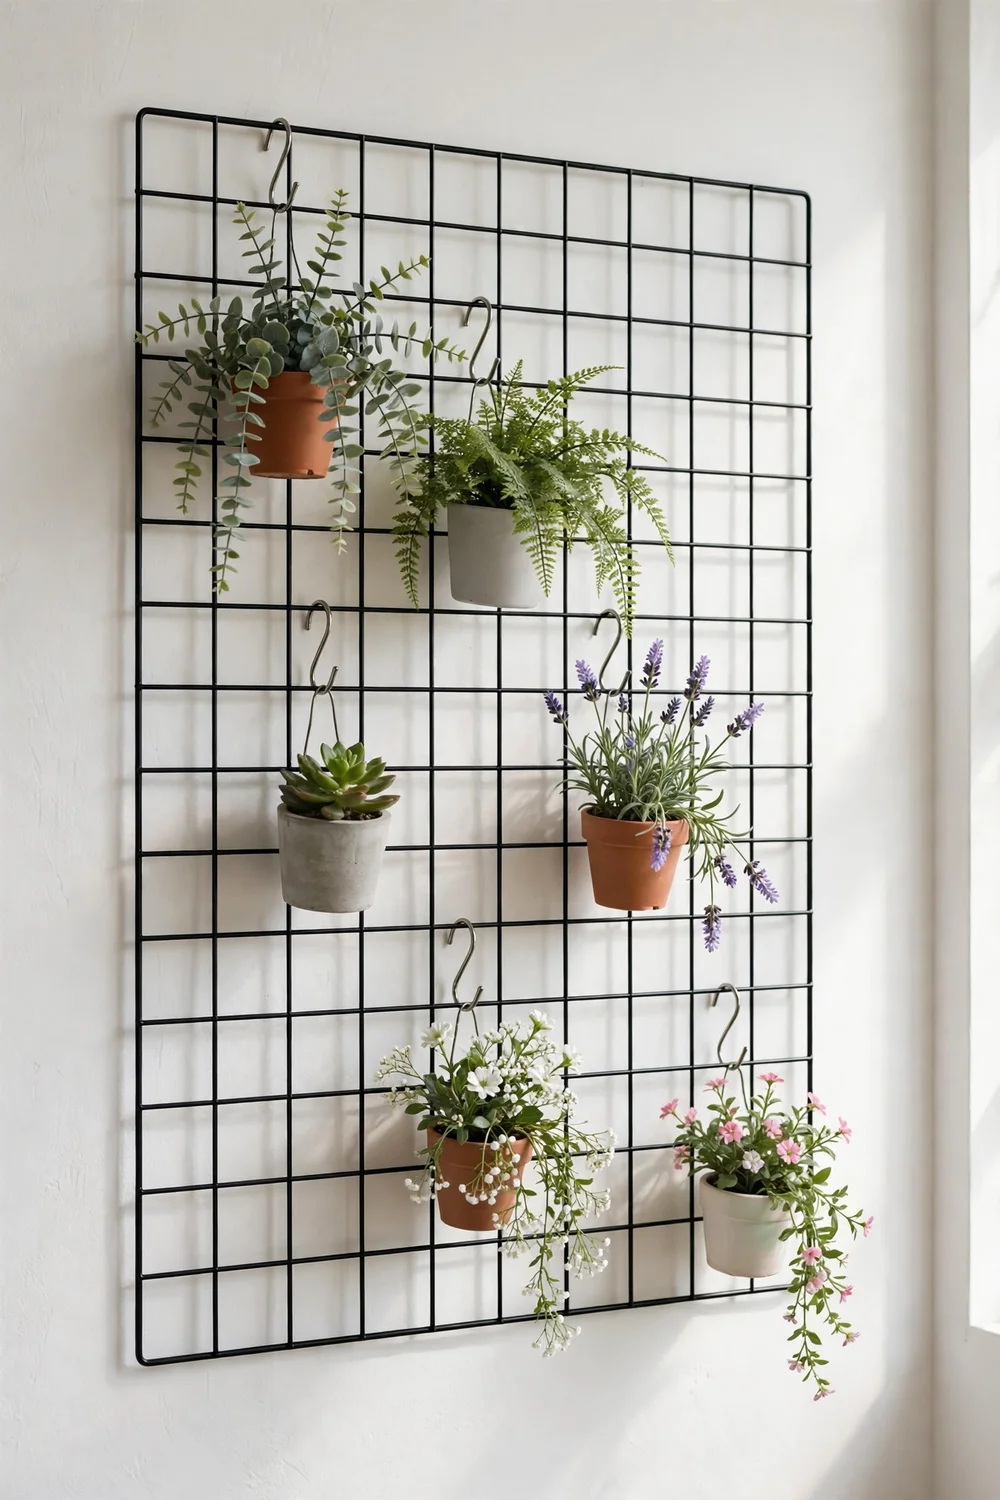
A 2×4-foot wire memo grid, the kind sold for home offices, mounts to a wall with standoff screws and holds small pots on S-hooks anywhere on the grid. The layout is endlessly rearrangeable: move pots as plants grow or as the seasons change. Use 4-inch pots with built-in hanger rims so they sit securely in the hooks. The open wire keeps the whole display feeling light on a small balcony.
Try this: hang a small mister bottle from one corner so watering tools live where you use them.
Cost: $$· Difficulty: easy · Time: 30 minutes
14. Hollowed log section planters
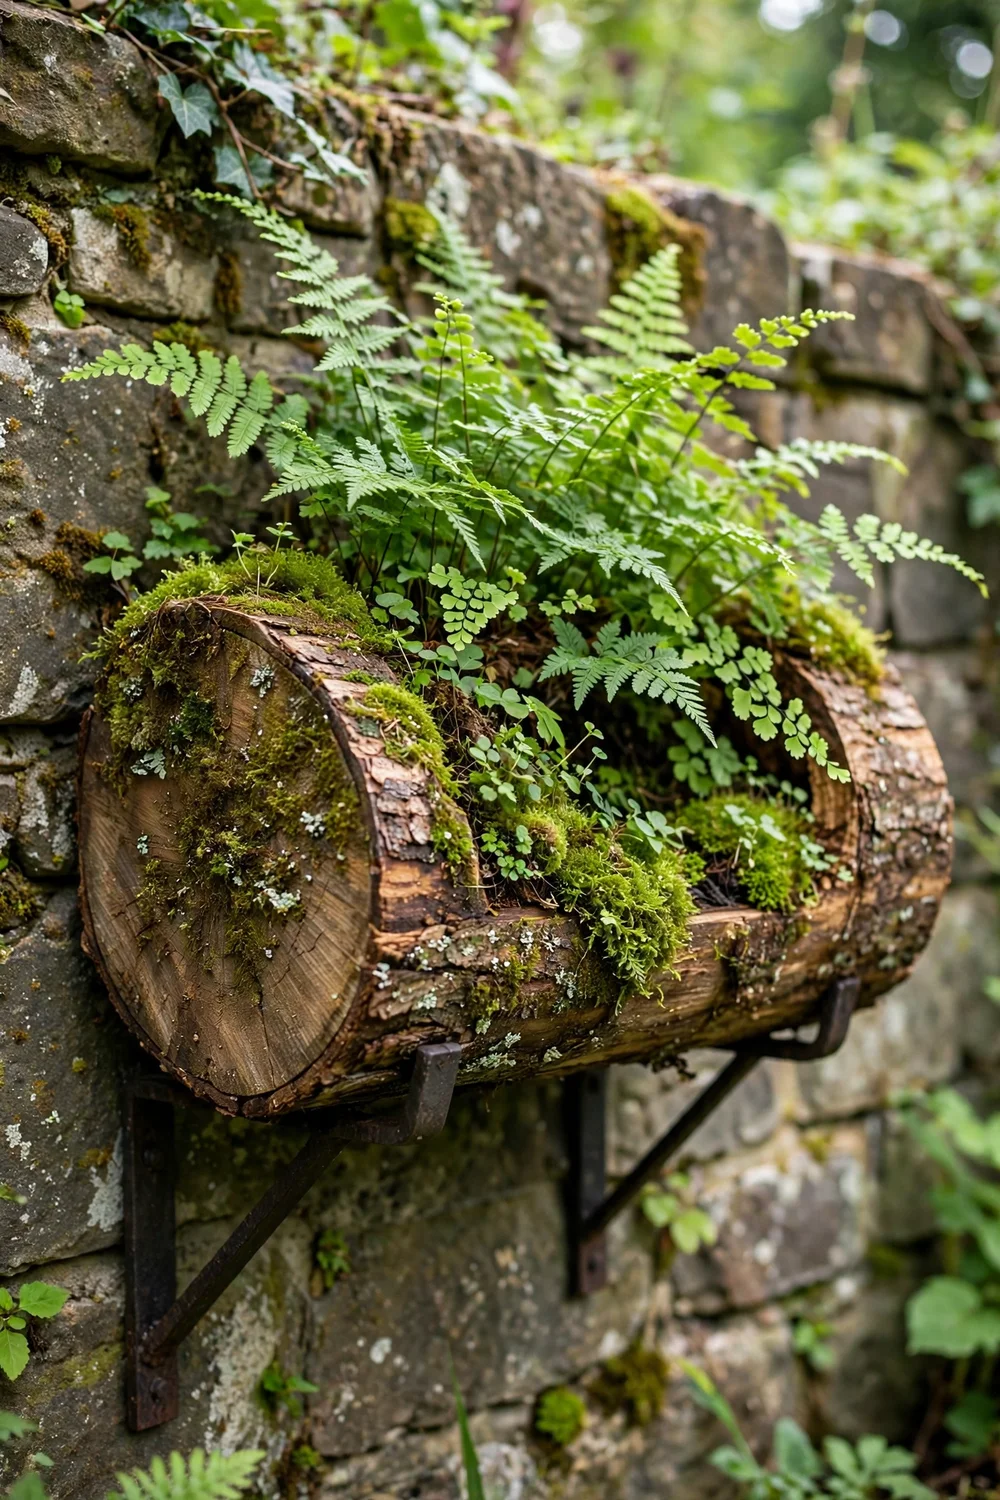
A 12-inch section of fallen log, hollowed with a drill and chisel, becomes a planter with real woodland character. Leave the bark on for texture, drill drainage holes through the bottom, and mount it on two heavy brackets or set it on a wall shelf. Fill with shade lovers like ferns and moss if the wall faces north. The thick wood insulates roots against temperature swings better than thin metal.
Try this: char the inside lightly with a torch to slow rot before adding soil.
Cost: $· Difficulty: moderate · Time: 2 hours
15. PVC pipe vertical planter
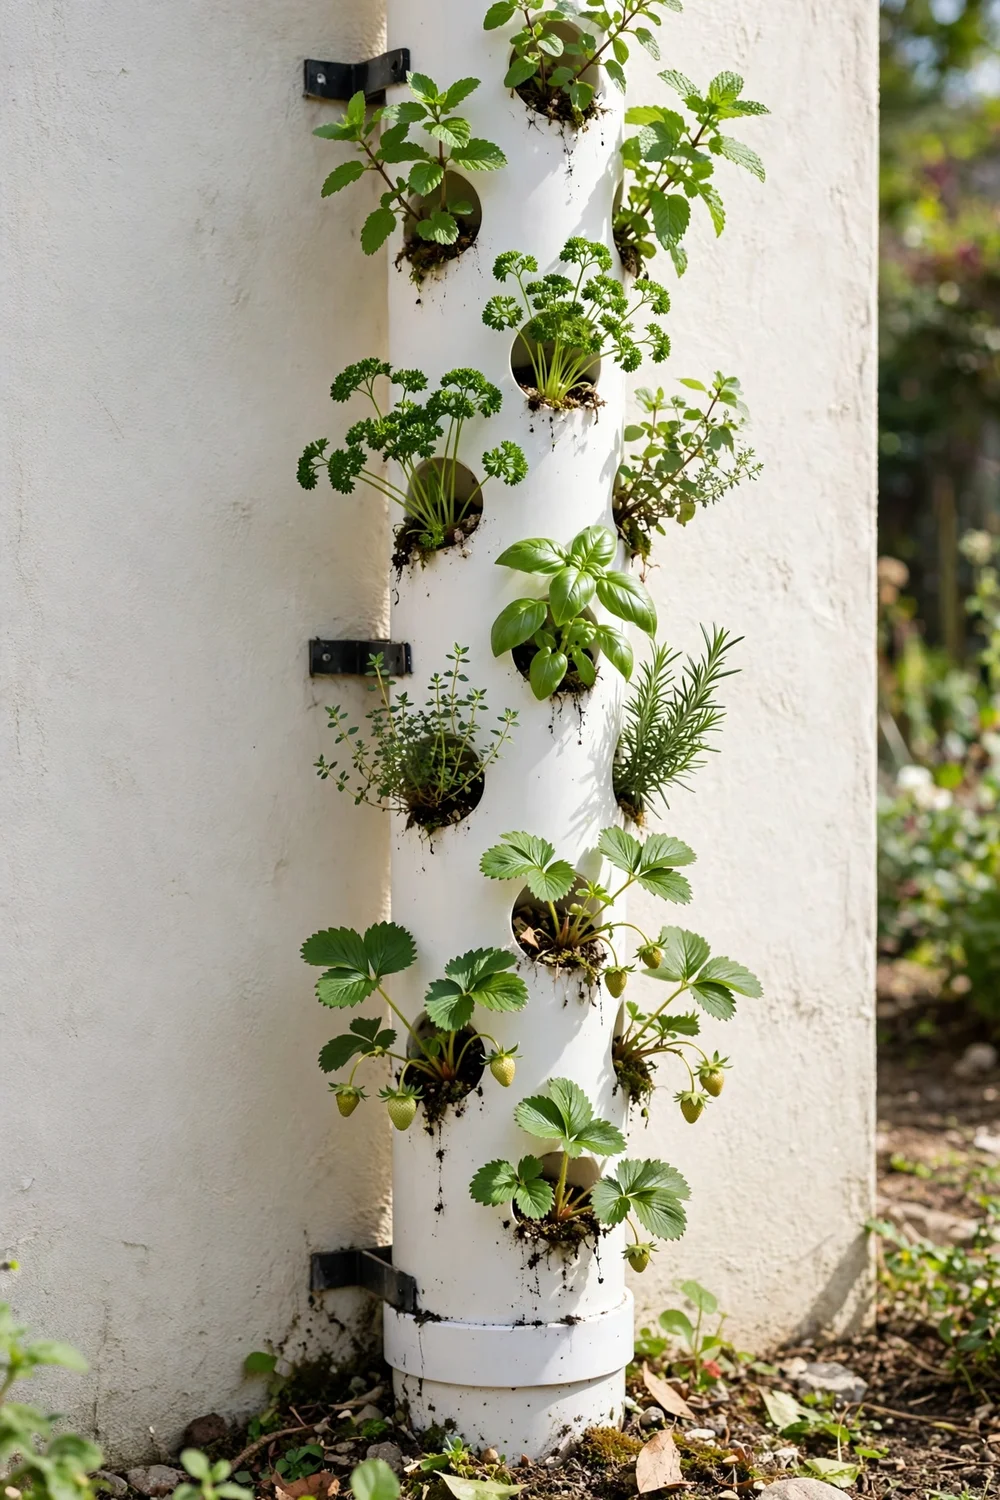
A 4-inch PVC pipe drilled with 2-inch planting holes becomes a slim tower that fits beside a door or on a narrow balcony wall. Cap the bottom, add gravel for drainage, fill with mix, and tuck strawberry or herb starts into each hole. Mount it with two pipe straps screwed into a stud. Water from the top and let gravity distribute moisture down the column. A 5-foot pipe holds 12 to 15 plants in one square foot of floor space.
Try this: paint the pipe with plastic-bonding spray paint in a matte color before drilling.
Cost: $$· Difficulty: moderate · Time: 2 hours
16. Tiered hanging basket cluster
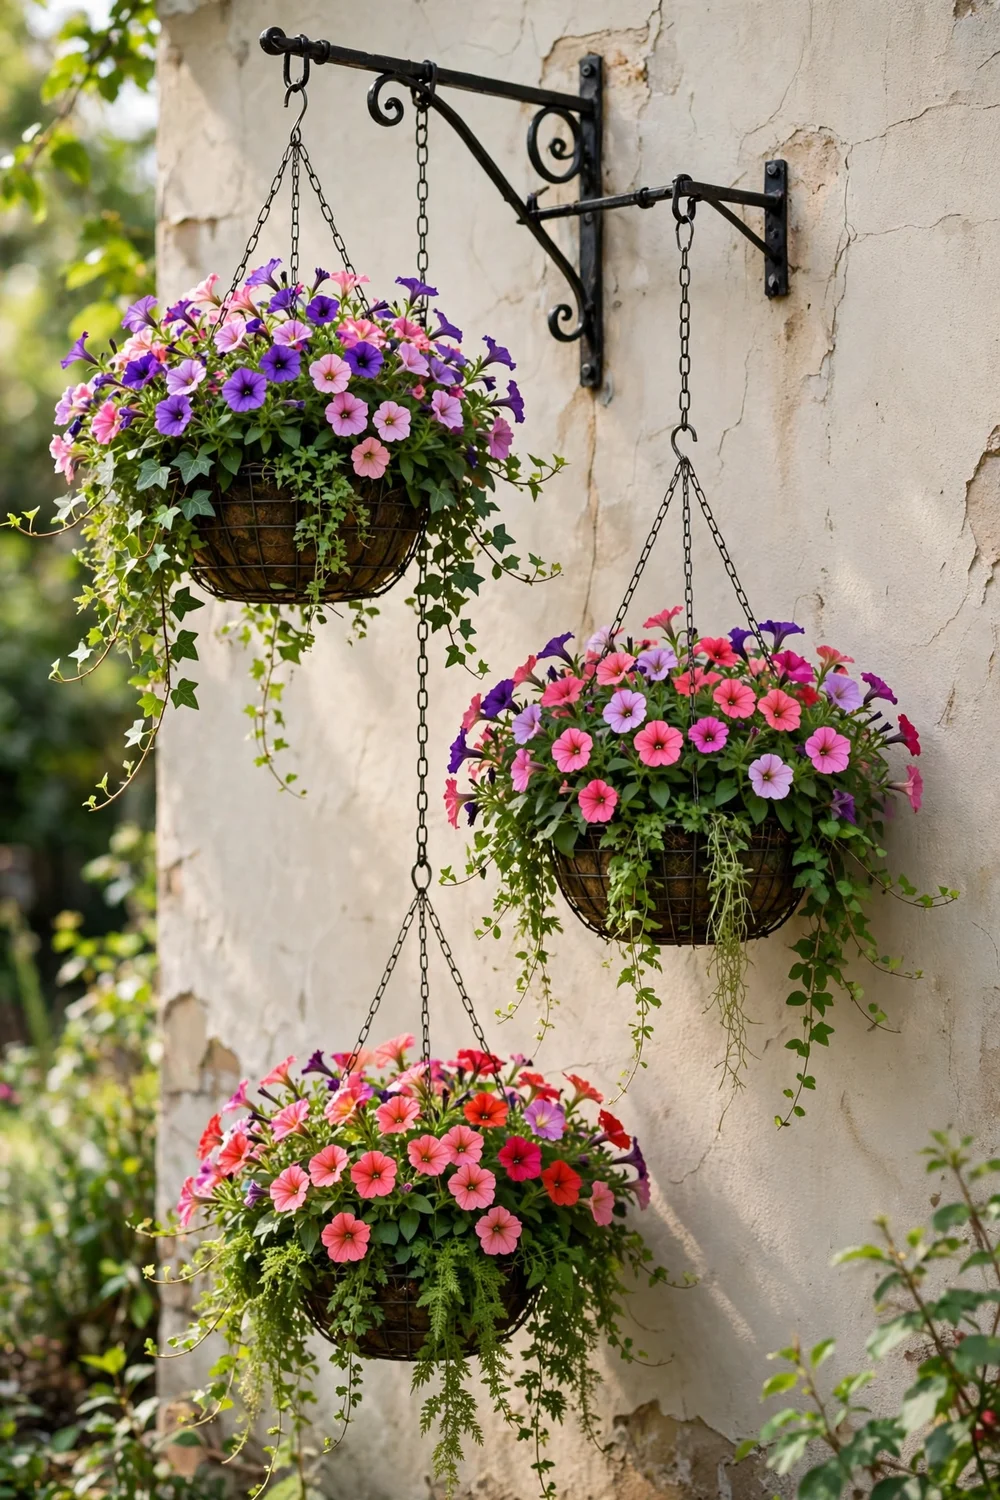
Three hanging baskets chained at different heights from one heavy wall bracket create a cascading column of color. Use 12-inch wire baskets lined with coco fiber, plant each with a mix of upright and trailing flowers, and hang the lowest basket at chest height for easy watering. One strong bracket into a stud carries all three baskets safely. Rotate the baskets a quarter turn each week so every side gets sun.
Try this: slip a small plastic saucer inside each liner to slow water loss on hot days.
Cost: $$· Difficulty: easy · Time: 1 hour
17. Recycled plastic bottle planters

Two-liter bottles cut lengthwise and screwed to a board make free planters for lettuce, radishes, and herbs. Cut a wide opening on one side, poke drainage holes in the bottom curve, and screw each bottle to the board through the cap end with a washer. Paint the outside white to reflect heat and keep roots cool. This is a solid classroom or scout project: 10 bottles fill a 4-foot board.
Try this: replace bottles every season, since UV makes the plastic brittle.
Cost: $· Difficulty: easy · Time: 1 hour
18. Picture frame succulent planter
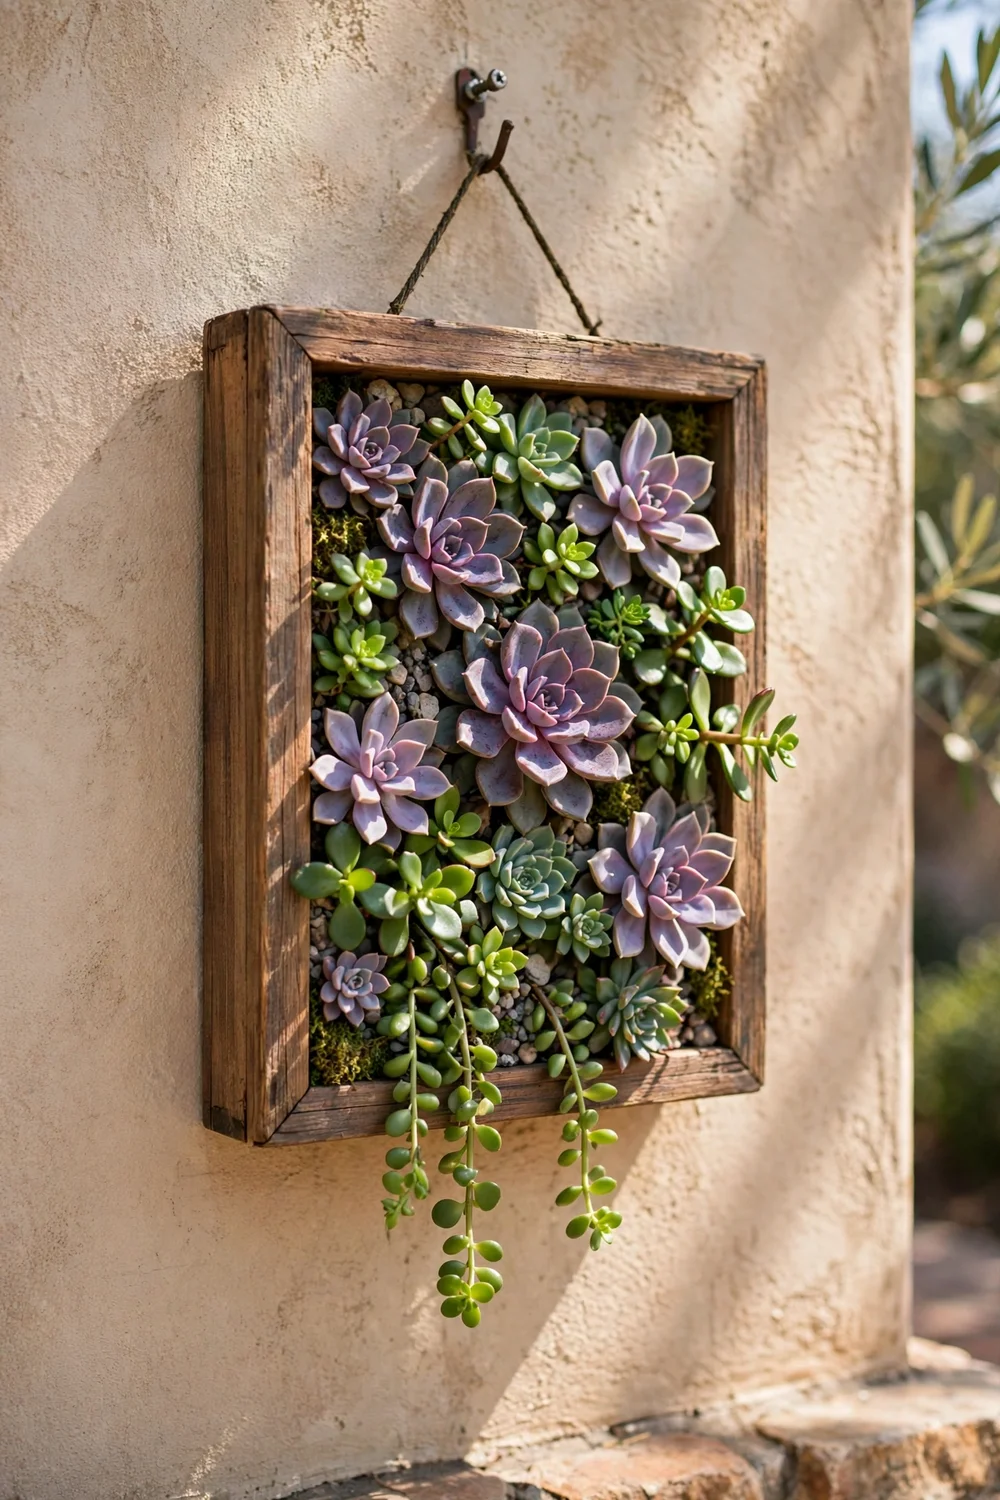
A deep shadow-box frame backed with hardware cloth becomes living wall art for a covered patio. Fill the 2-inch-deep box with cactus mix, pin chicken wire over the front, and poke succulent cuttings through the mesh. Hang it flat for 4 to 6 weeks so roots anchor, then mount it on the wall like art. Mist lightly; the shallow box dries fast and succulents prefer it that way.
Try this: use a frame at least 16×20 inches so the planting reads as art, not clutter.
Cost: $$· Difficulty: moderate · Time: 2 hours
19. Terracotta wall pot tower
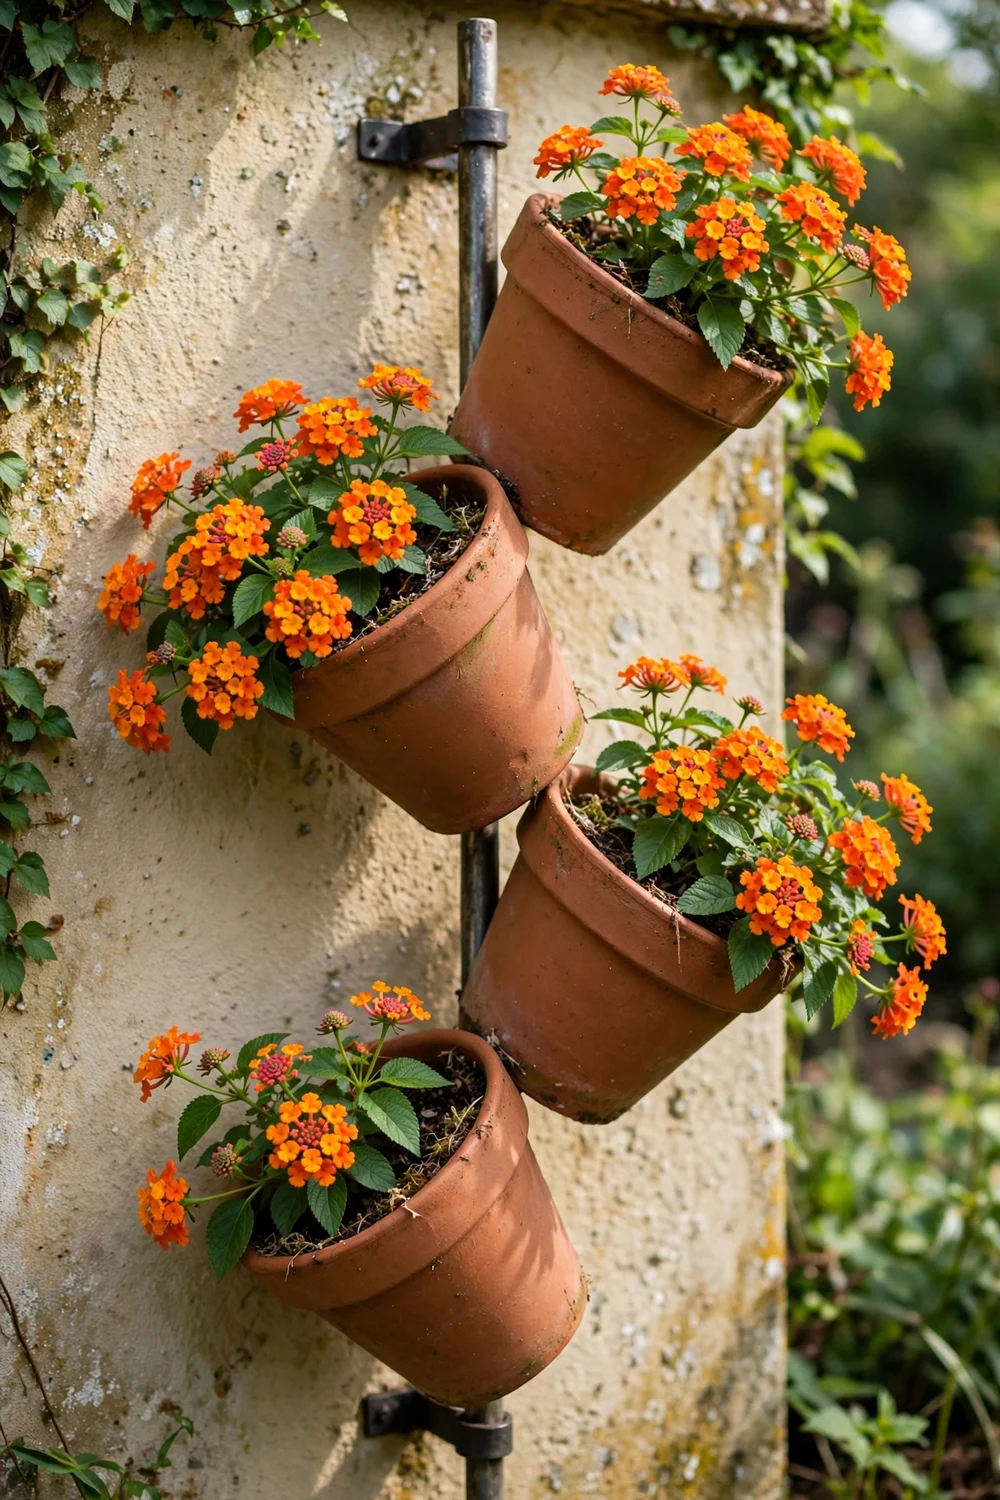
A vertical metal rod through stacked terracotta pots, each tilted slightly outward, builds a flowering tower on a wall bracket. Thread the pots onto a 4-foot steel rod set in a heavy base bracket, alternating pot sizes from 8 inches at the bottom to 5 at the top. The tilt lets each pot catch rain and sun. Plant heat lovers like lantana and verbena, which thrive in the warm clay.
Try this: run a drip line down the rod so one watering feeds every pot.
Cost: $$· Difficulty: moderate · Time: 2 hours
20. Chalkboard-labeled cedar boxes
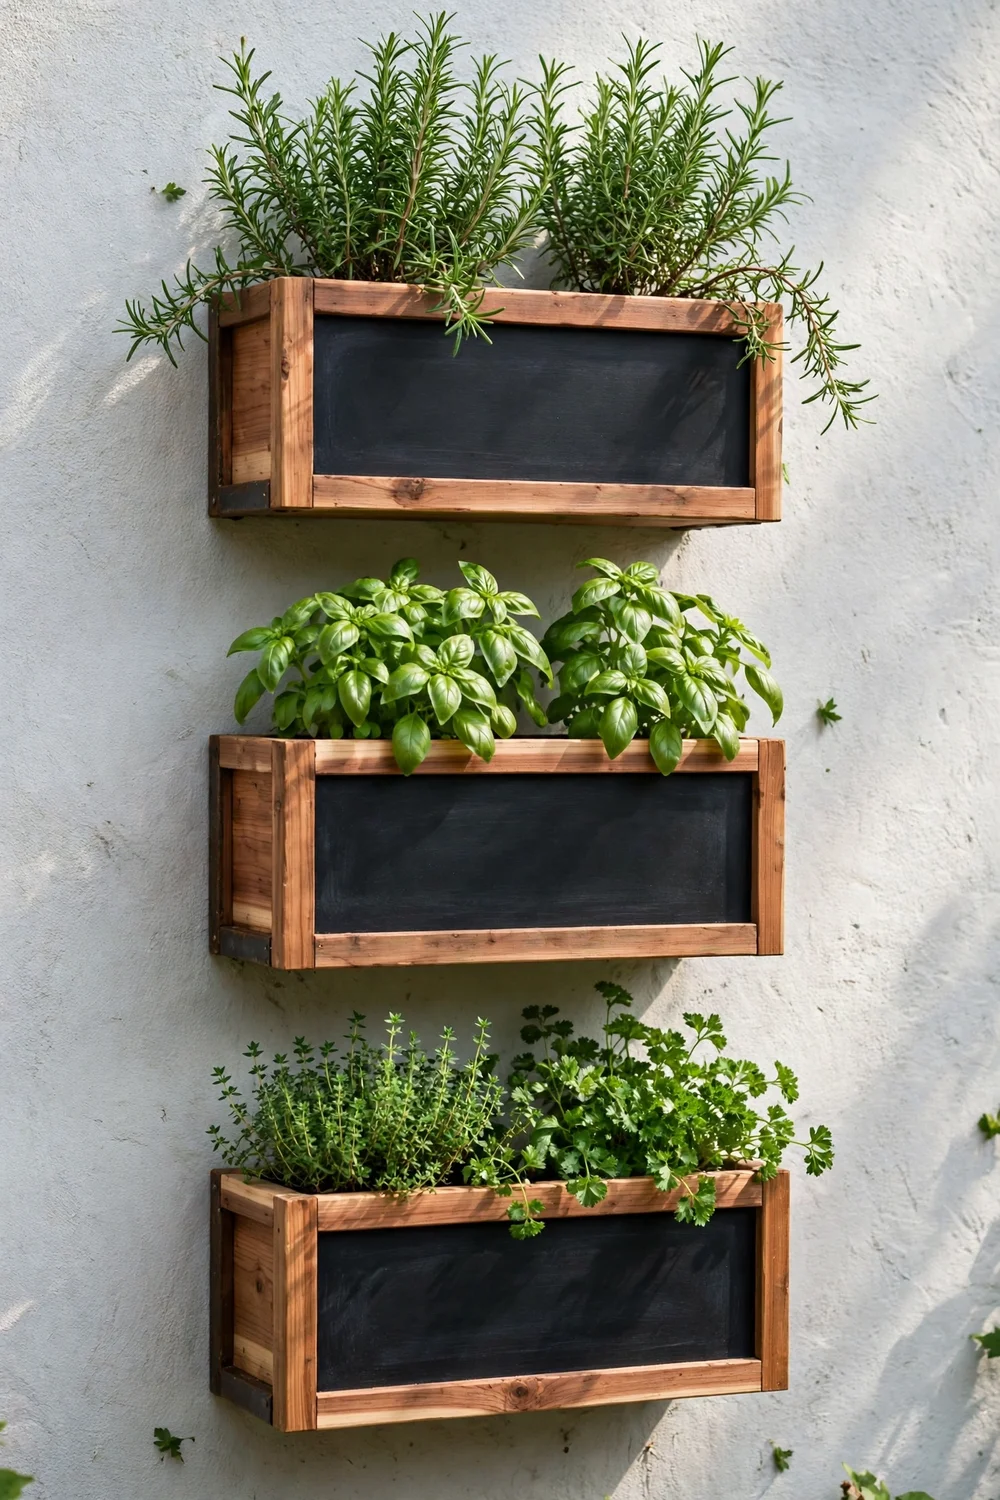
Small cedar boxes with a chalkboard-painted front panel keep a wall herb garden organized and good-looking. Build or buy 10-inch boxes, paint the front face with chalkboard paint, and mount them on a French cleat at eye level near the kitchen door. Label each box in chalk: basil, mint, cilantro, dill. The labels wipe clean when you rotate crops each season, and cedar weathers to a soft gray.
Try this: mount the cleat where the boxes get morning sun and afternoon shade.
Cost: $$· Difficulty: moderate · Time: 3 hours
How to pick the right wall planter for your space
Start with the wall itself. A sturdy fence or masonry wall carries heavy soil-filled boxes; vinyl siding and drywall need lightweight fabric or small pots mounted into studs. Next, check the sun: south and west walls suit herbs and vegetables, north walls suit ferns and shade plants. Finally, be honest about watering. Thirsty vegetables in small pockets need daily attention in summer, while succulents in a frame forgive a week of neglect. Match the planter to the wall, the light, and your routine, in that order.
Mistakes to avoid with wall planters
The most common failure is skipping drainage. Soil that stays soggy rots roots in days and stains the wall behind it. Drill holes in every container, even store-bought ones that claim to drain. The second mistake is overloading the mount: wet potting mix weighs roughly 40 to 50 pounds per cubic foot, so a 2-foot box can top 60 pounds after watering. The third is planting mint or other spreaders beside delicate herbs; give aggressive growers their own container. If you are growing vegetables or fruit in a new spot and plan to dig post holes or footings for supports, call 811 a few days ahead so buried utilities get marked first. Learn more at Call 811.
Wall planter safety notes
Mount every planter into a wall stud, a solid fence rail, or a masonry anchor rated for at least twice the loaded weight. Never hang heavy planters from drywall anchors alone. When working above shoulder height, use a stable step ladder on level ground and keep one hand free; do not lean ladders against gutters. Choose pet-safe plants if cats or dogs can reach the wall: pothos, philodendron, peace lily, and eucalyptus are all toxic to pets when chewed. The ASPCA keeps a searchable list at ASPCA toxic and non-toxic plants. For watering guidance that keeps plants healthy without waste, the EPA WaterSense program covers outdoor watering basics at EPA WaterSense.
Wall planter builds compared
Want more vertical growing ideas? These vertical vegetable garden ideas pair well with a wall planter setup. If you are starting from seed, this guide to beginner friendly raised vegetable garden ideas covers the basics. And for flowering vines to dress up the fence behind your planters, see these climbing rose trellis ideas.
Frequently asked questions
How do you hang a wall planter without damaging the wall?
Use a freestanding lean-to frame, an over-the-railing hook, or adhesive outdoor hooks rated for the loaded weight. For permanent mounts, drill into mortar joints rather than brick faces on masonry, and always hit studs on wood siding. Remove planters once a year to check for trapped moisture behind them.
What plants grow best in wall planters?
Herbs (basil, thyme, oregano, chives), succulents, strawberries, lettuce, and trailing plants like creeping jenny do best because they tolerate shallow soil. Avoid deep-rooted vegetables like carrots and large shrubs. Match the plant to your wall’s sun: full-sun walls suit herbs and succulents, shaded walls suit ferns and hostas.
How do you water wall planters without making a mess?
Water slowly with a narrow-spout can so soil absorbs moisture instead of shedding it. Add saucers, drip trays, or a strip of gutter below the lowest planter to catch runoff. Self-watering inserts and drip lines on a timer remove the daily chore entirely for larger walls.
How much weight can a wall planter hold?
It depends on the mount, not the planter. A lag bolt into a stud typically holds 50-plus pounds; masonry sleeve anchors hold similar loads. Wet potting mix is heavy, so weigh one planted container on a bathroom scale, multiply by the number of containers, and choose hardware rated for at least double that total.
Can wall planters stay outside in winter?
It depends on the material and your climate. Cedar, metal, and PVC handle freeze-thaw cycles well; thin plastic and unsealed terracotta can crack. Perennial plants in wall planters need extra mulch and shelter since their roots are more exposed than in-ground plants. In hard-freeze zones, move tender plants indoors.
Do wall planters need drainage holes?
Yes, every wall planter needs drainage. Without holes, water collects at the bottom, roots rot, and the wall behind the planter stays damp. Drill at least one 1/4-inch hole per 6 inches of container width, and place a saucer or drip edge where runoff would stain siding or decking.
Start with one wall and one weekend. A single pallet or gutter planter teaches you how fast wall soil dries, how much weight your wall carries, and which plants love your light. Once that first build thrives, the rest of the blank wall starts looking like opportunity instead of an eyesore.
For hanging plants perfect for apartments, see these hanging plants perfect for apartments.
More ideas you’ll love: 11 DIY Strawberry Planter Ideas for Big Harvests in Small Spaces, and 17 Rooftop Deck Ideas for Small Urban Spaces.


