


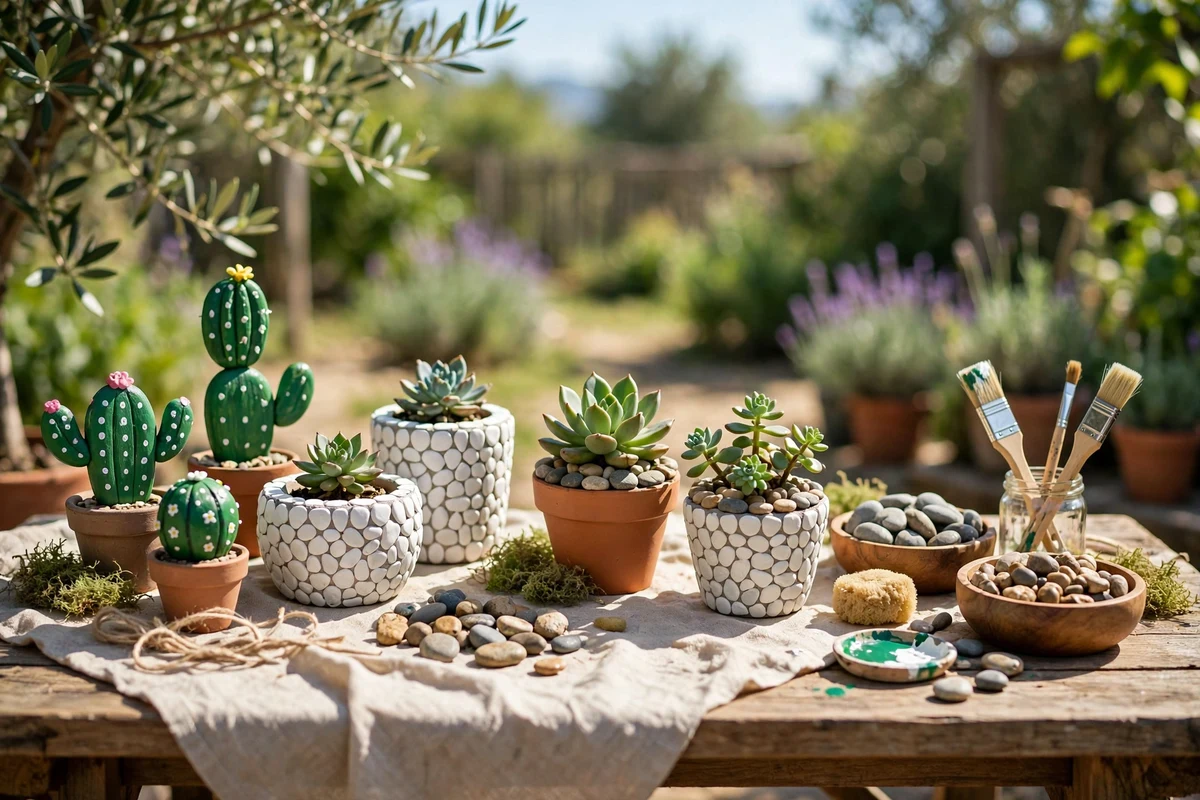
Pebble pots are the rare craft that looks expensive and costs almost nothing. A bag of river pebbles, a plain pot, and some glue or paint turn into planters that sell for $30 at craft fairs. Kids can make the simple versions, adults get hooked on the mosaics, and every one is different because no two pebbles match.
These 15 creative DIY pebble pot ideas range from 20-minute painted projects to weekend mosaics. Each one lists what you need, a real cost, and a difficulty level, plus the sealing and safety tips that keep your pebble pots looking good outdoors.
Quick takeaways
- A 20-pound bag of river pebbles ($8 to $15) covers 3 to 5 medium pots.
- Use exterior construction adhesive or tile mortar for pebbles that stay put outdoors.
- Seal painted pebbles with clear outdoor sealer so colors survive rain and sun.
- Small pebbles are a choking hazard: keep them away from children under 3.
- Always keep drainage holes open; pebbles decorate the pot, they do not replace drainage.
1. Painted pebble cactus garden
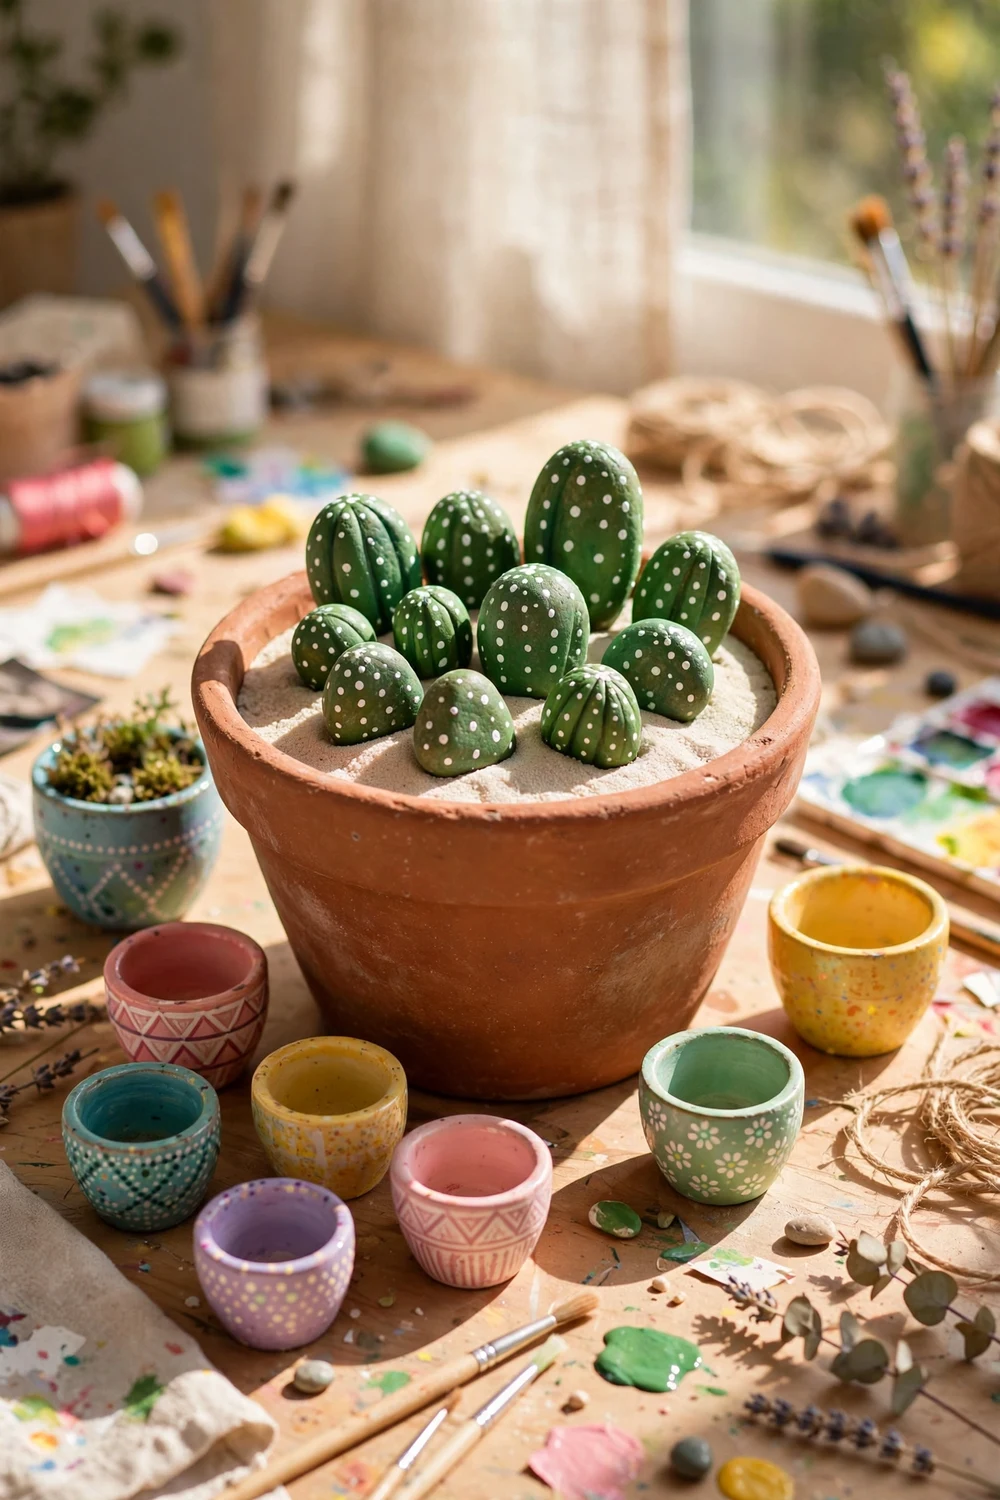
Paint oval pebbles green, add white dots or stripes for spines, and stand them upright in a pot of sand to make a cactus garden that never needs water. Use outdoor acrylic paint and finish with two coats of clear sealer. Kids love this one: give each child three pebbles and let them design their own cactus shapes.
Try this: mix a drop of yellow into the green for each pebble. Slightly different greens look far more natural than one flat color.
Cost: $$. Difficulty: easy.
2. White pebble mosaic pot
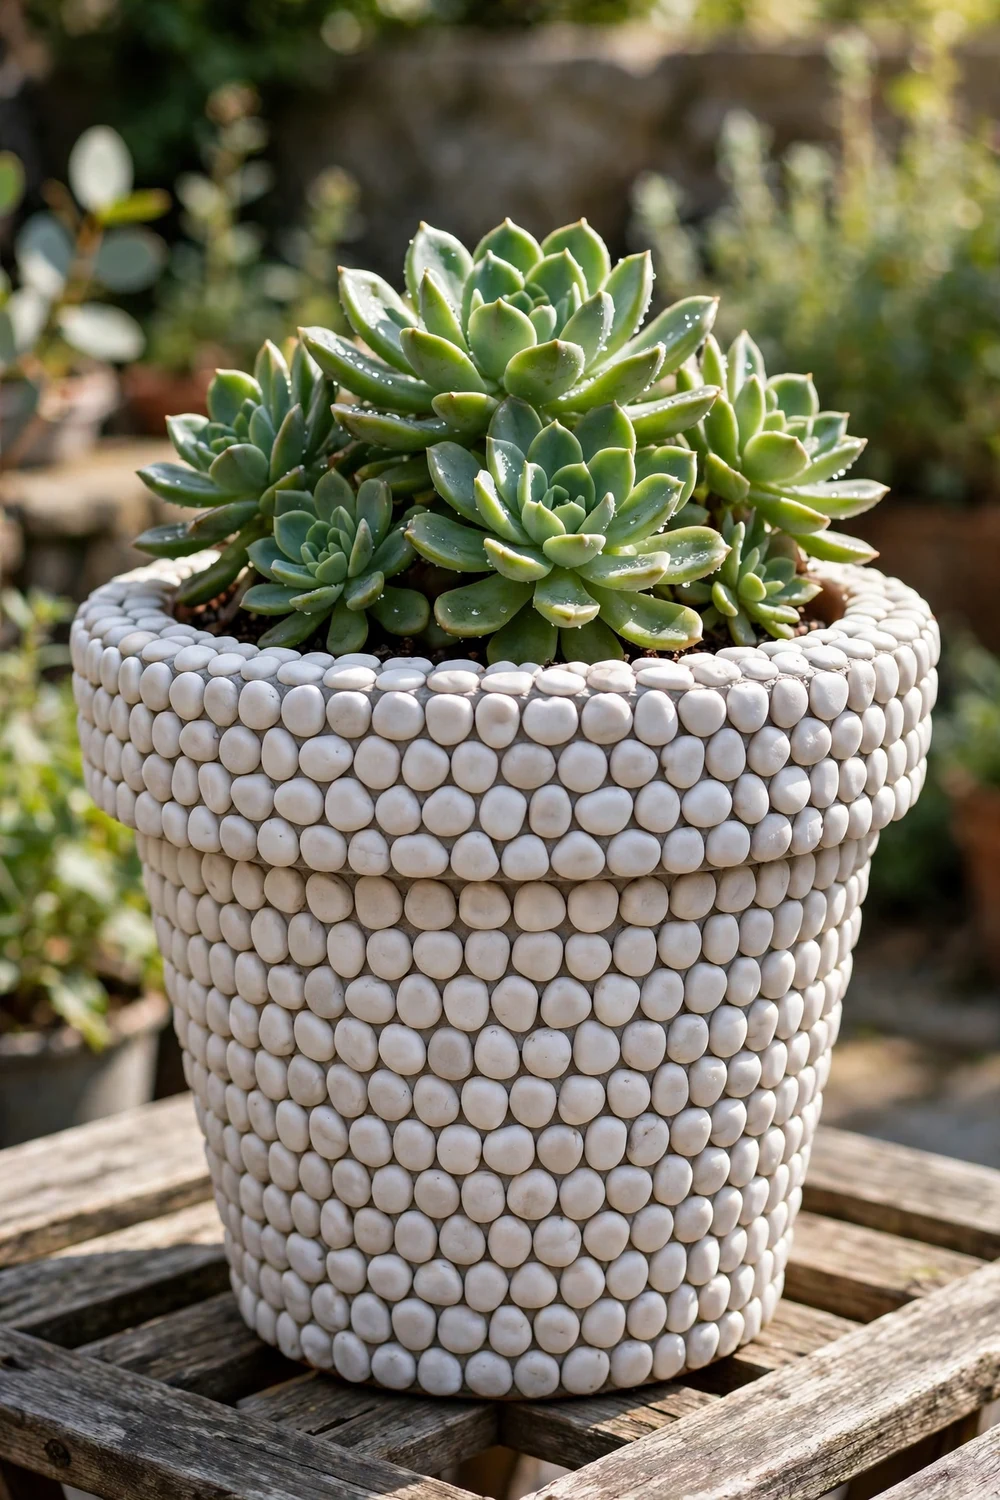
Glue smooth white pebbles in tight rows around a terracotta pot for a mosaic that looks like carved stone. Work in small sections with exterior construction adhesive, press each pebble firmly, and let each section set before rotating the pot. A 6-inch pot takes about an hour; a 12-inch pot is a weekend project.
Try this: sort pebbles by size first and use the flattest ones. Flat pebbles sit tighter and the mosaic looks far more even.
Cost: $$. Difficulty: moderate.
3. Succulent pots with pebble toppers
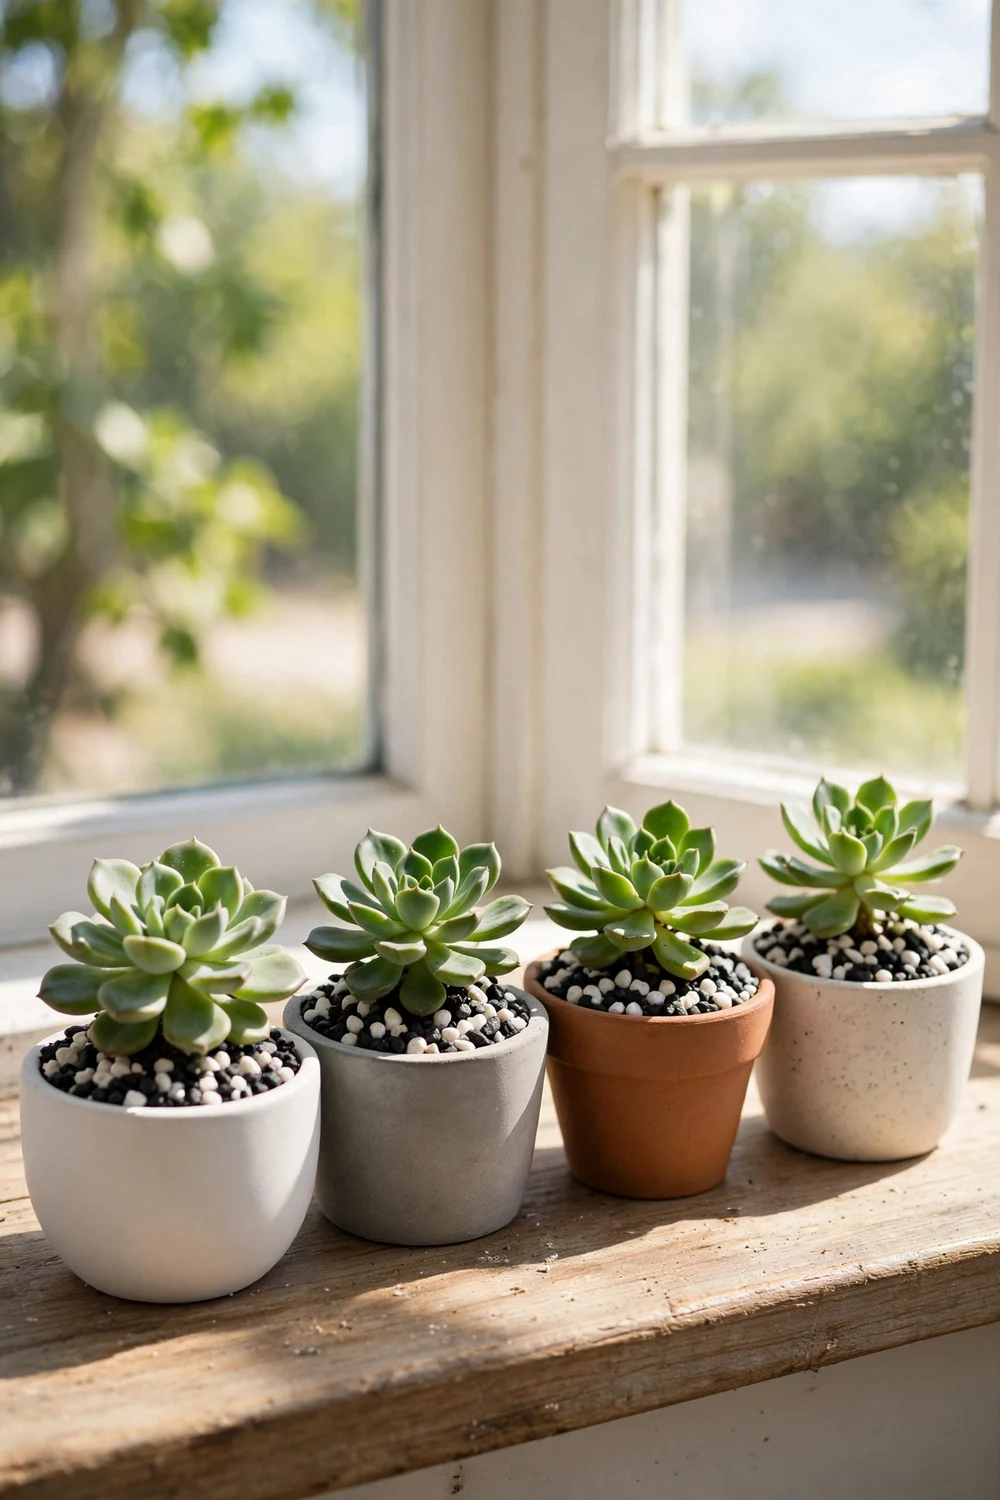
Top the soil of any succulent pot with a 1-inch layer of small pebbles. The stones keep soil from splashing onto leaves when you water, hold moisture in the pot longer, and give the arrangement a finished, professional look. Use contrasting pebble colors: black pebbles under green echeveria, white under purple sedum.
Try this: water from the bottom by setting the pot in a shallow dish. Top watering through pebbles works fine too, just water slowly.
Cost: $$. Difficulty: easy.
4. Pebble herb markers
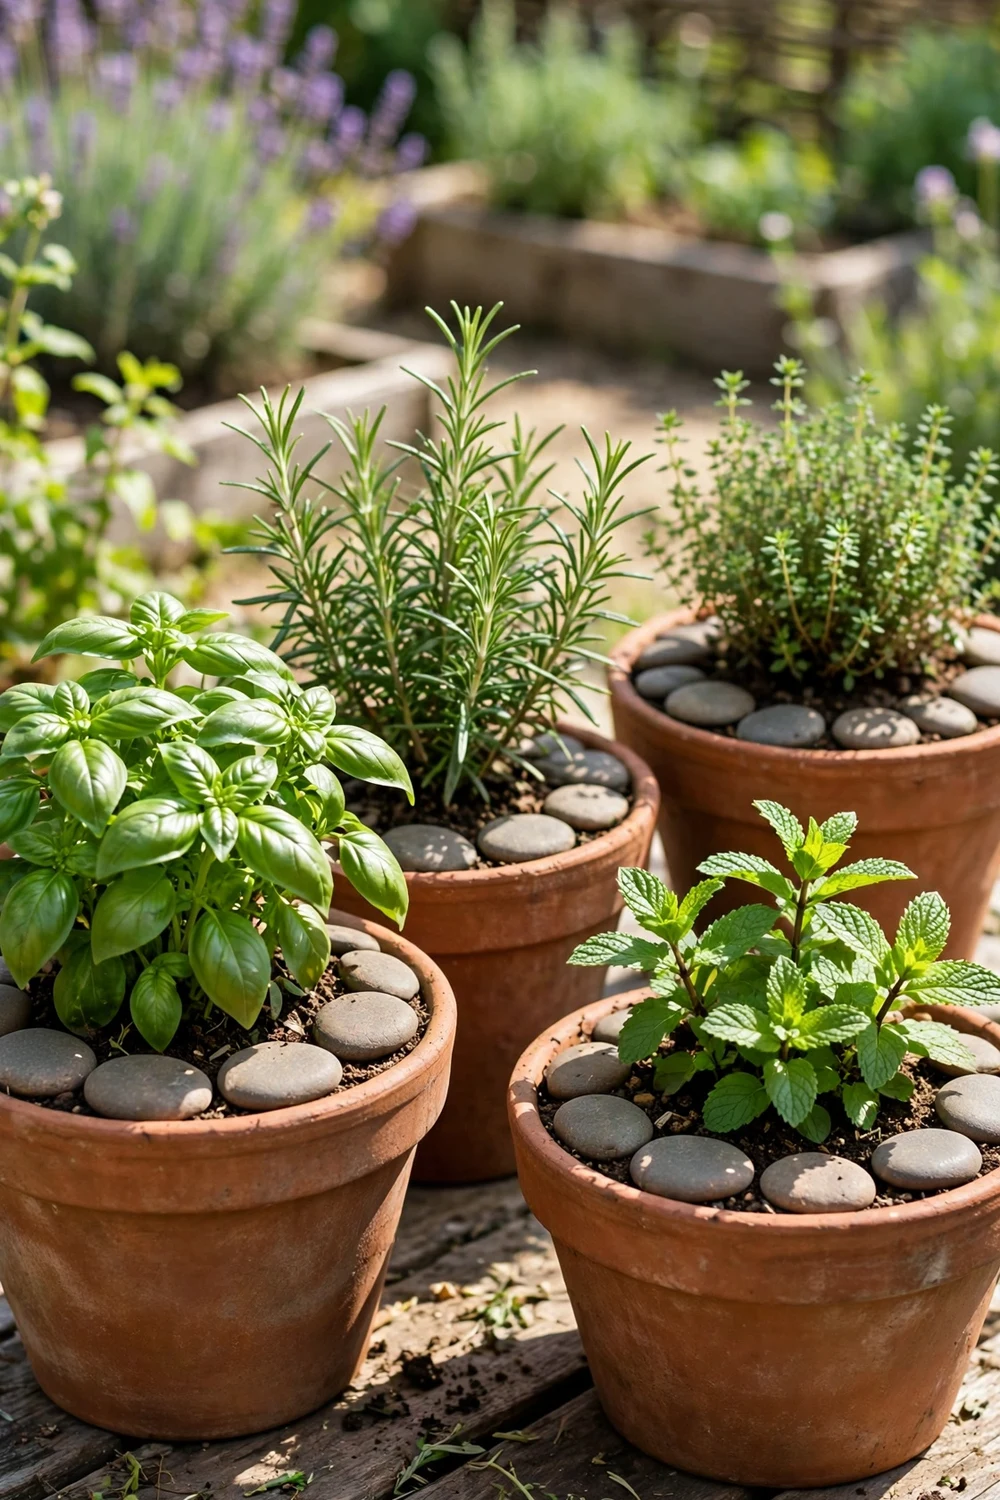
Write herb names on flat pebbles with an oil-based paint pen and push them into the soil at the pot’s edge. The markers never fade like plastic tags and never blow away like wooden ones. Seal the writing with clear nail polish or outdoor sealer so it survives the watering can. Make a full set for a kitchen herb garden in one sitting.
Try this: draw a tiny picture of the herb next to its name. Guests can identify the plants without reading.
Cost: $. Difficulty: easy.
5. Pebble humidity tray
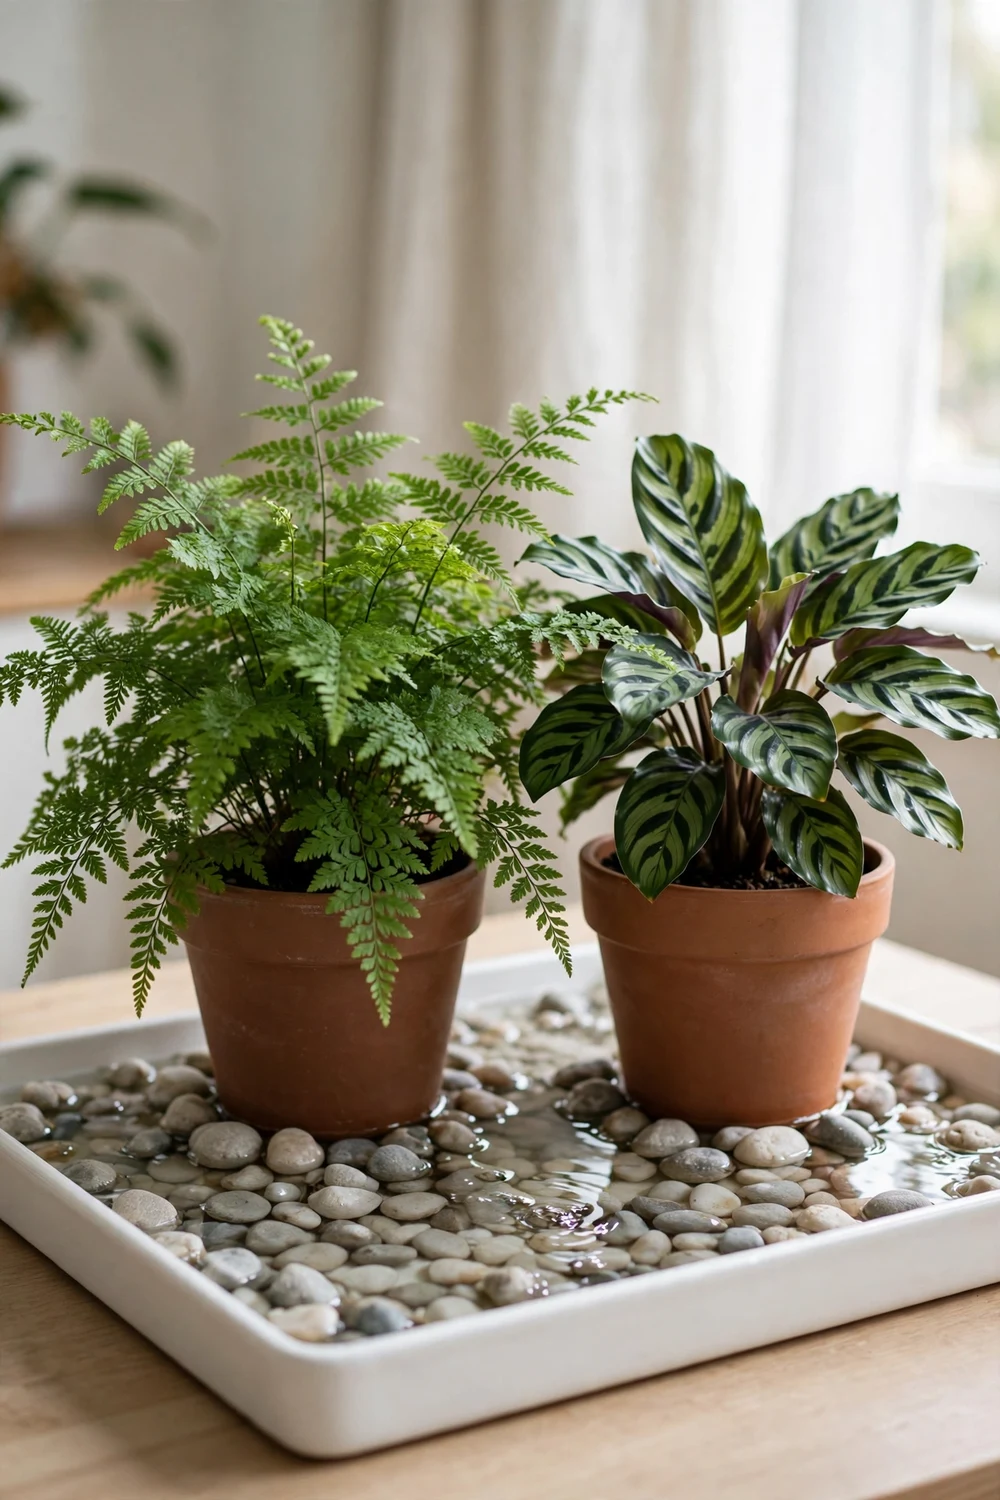
Set humidity-loving houseplants on a shallow tray filled with pebbles and water to raise the moisture around their leaves. Fill the tray with 2 inches of pebbles, add water to just below the pebble tops, and set the pot on top so it never sits in water. Ferns, calatheas, and orchids all perk up noticeably within a week.
Try this: rinse the pebbles and change the water every two weeks. Stagnant trays attract fungus gnats fast.
Cost: $$. Difficulty: easy.
6. Pebble-trimmed candle holder pots
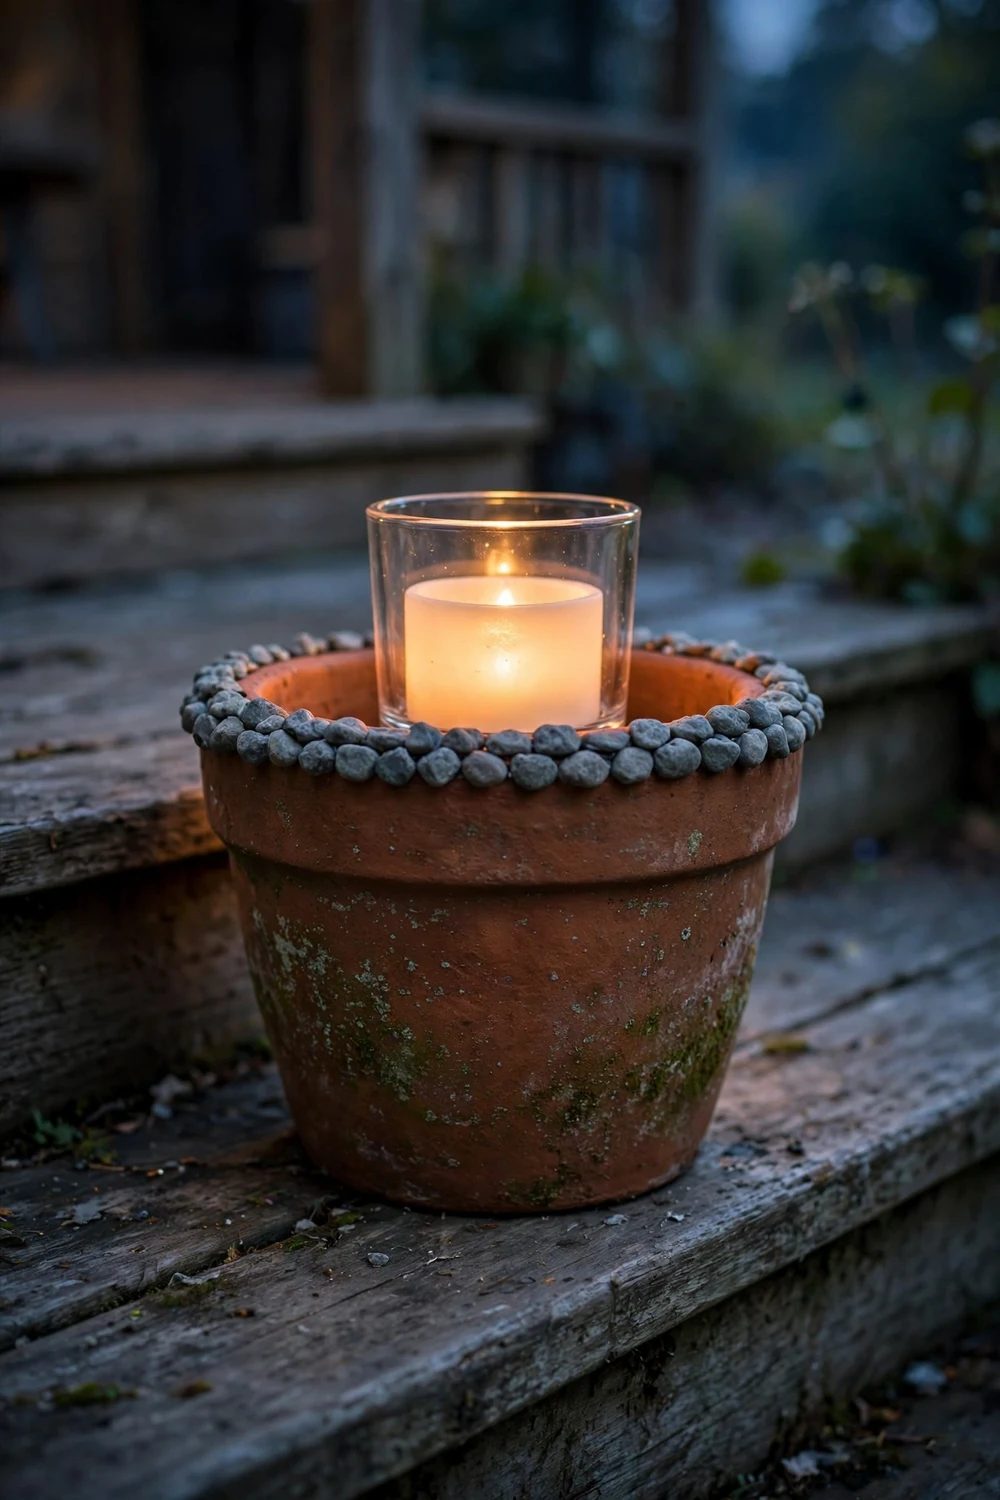
Glue a single ring of small pebbles around the rim of a squat terracotta pot, drop in a glass votive holder, and you have a candle lantern with a stone collar. Use LED candles only: real flames and glued pebbles are a bad mix, and the heat can crack the adhesive. These look wonderful lining porch steps after dark.
Try this: use a flickering LED tea light, not a steady one. The flicker through the pebble gaps reads as real flame.
Cost: $$. Difficulty: easy.
7. Fairy garden pot with pebble path
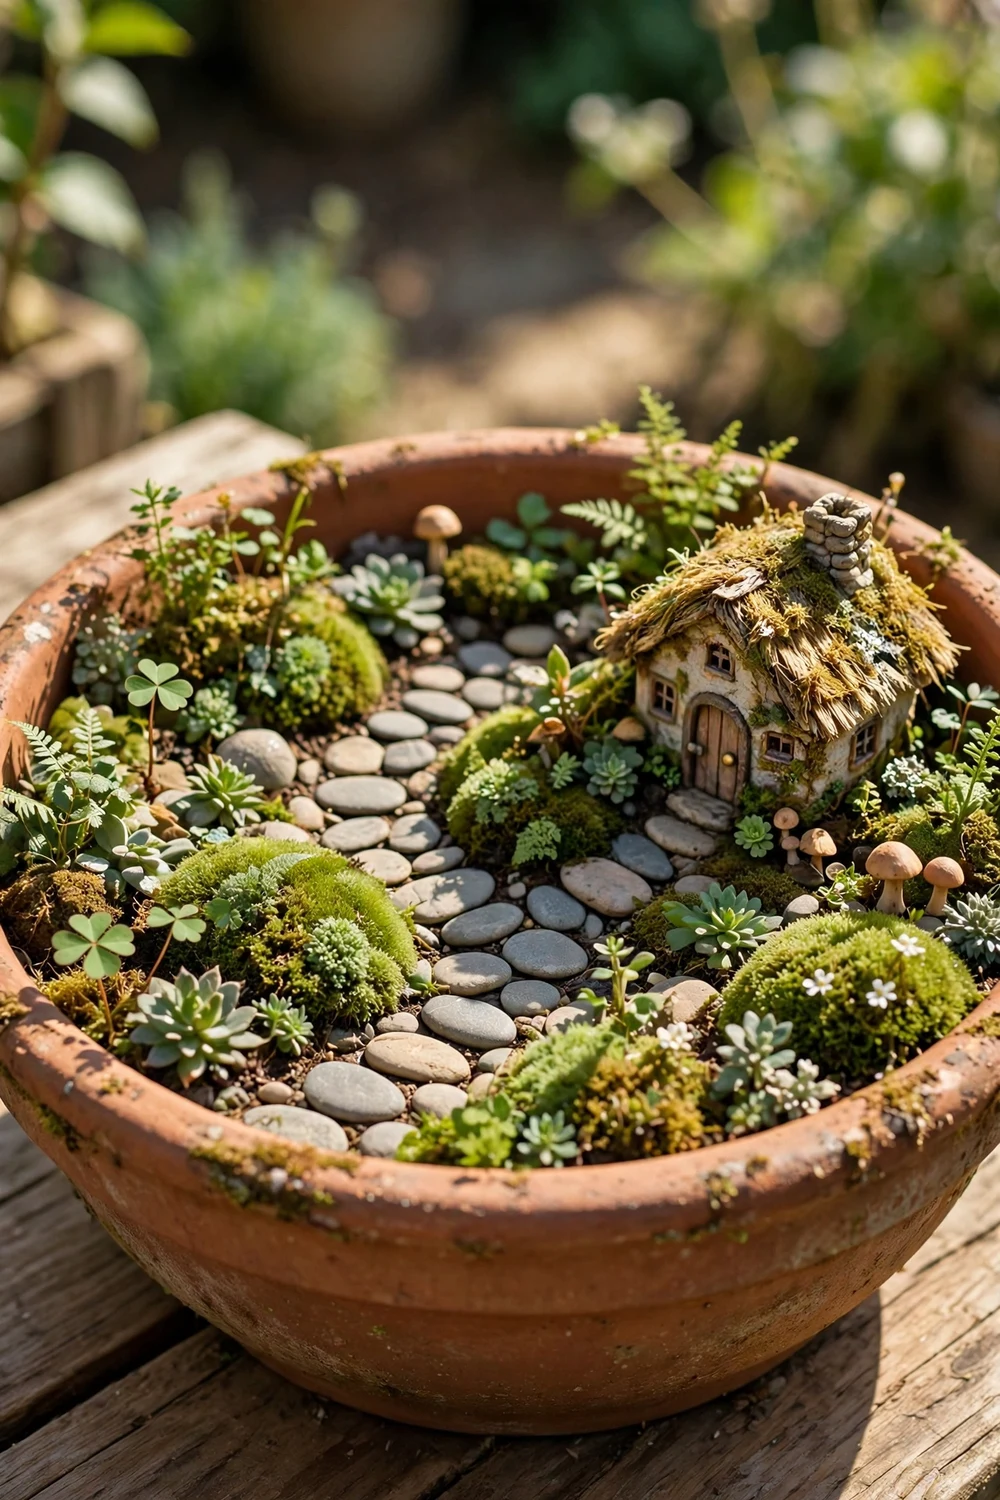
Build a tiny world in a wide shallow pot: a pebble path winding between moss mounds, a miniature house or door against a twig, and tiny plants as trees. Lay the path first with flat pebbles pressed into the soil, then build the scene around it. Kids will rearrange it endlessly, which is exactly the point.
Try this: use a shade-loving moss and keep the pot out of direct afternoon sun. Fairy gardens dry out fast in full sun.
Cost: $$. Difficulty: easy.
8. Pebble drainage layer planter
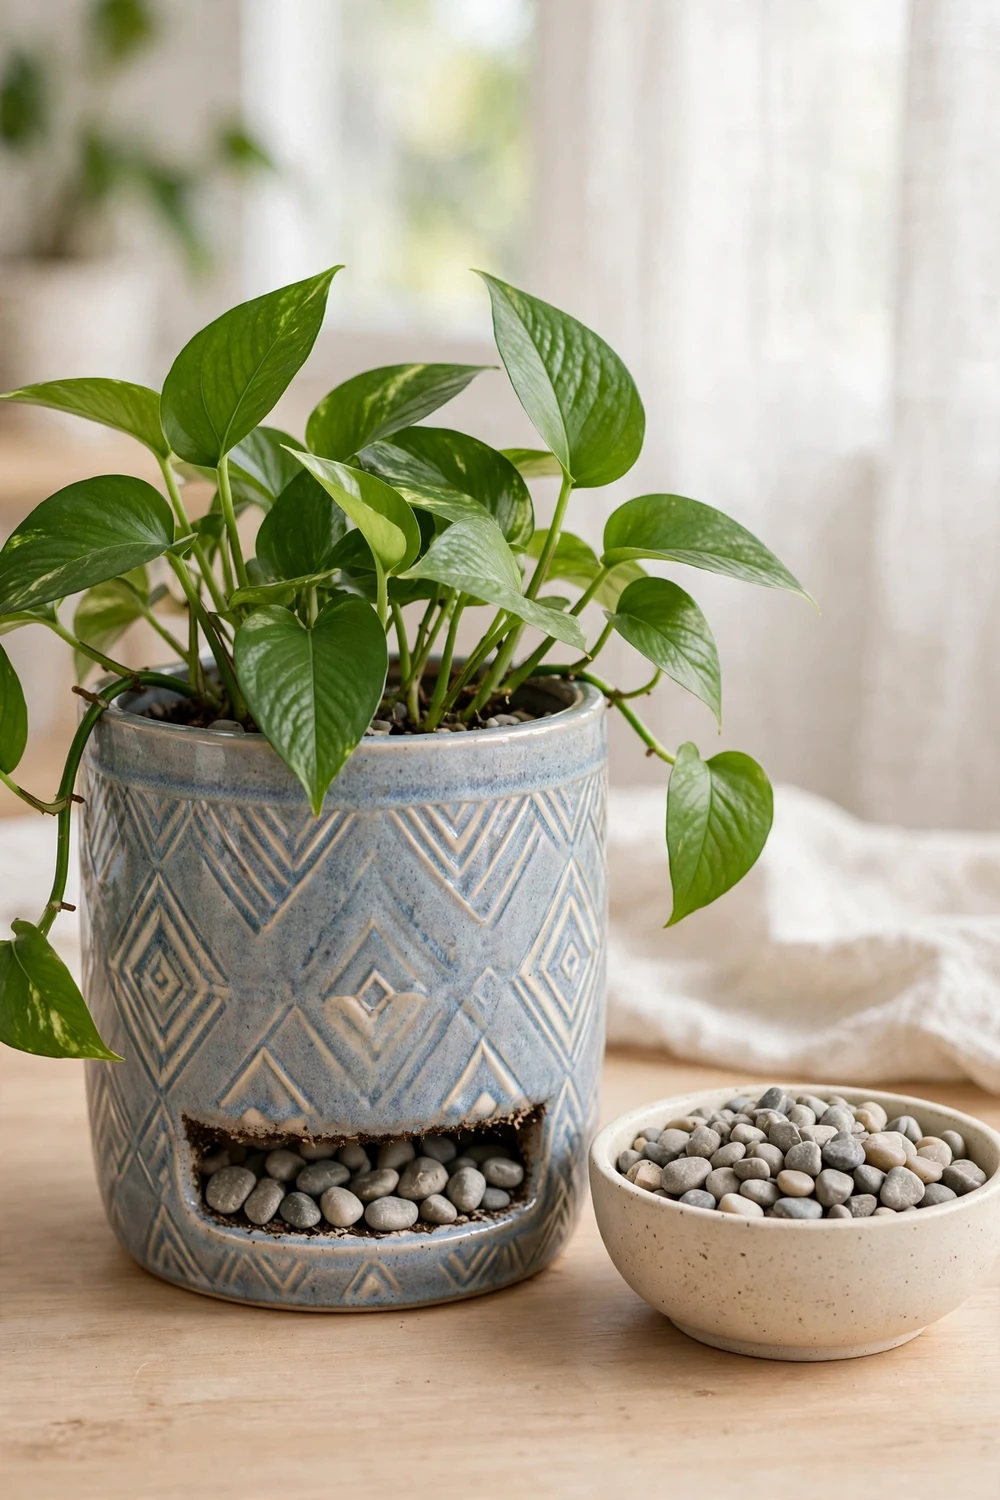
A 1-inch layer of pebbles at the bottom of a pot without drainage holes gives excess water somewhere to go besides the roots. This is a backup, not a fix: always drill drainage holes when you can. But for a decorative pot you cannot drill (grandma’s ceramic), the pebble layer plus careful watering keeps plants alive.
Try this: add a layer of activated charcoal over the pebbles. It absorbs odors and keeps the reservoir layer fresher.
Cost: $. Difficulty: easy.
9. Painted ladybug pebbles
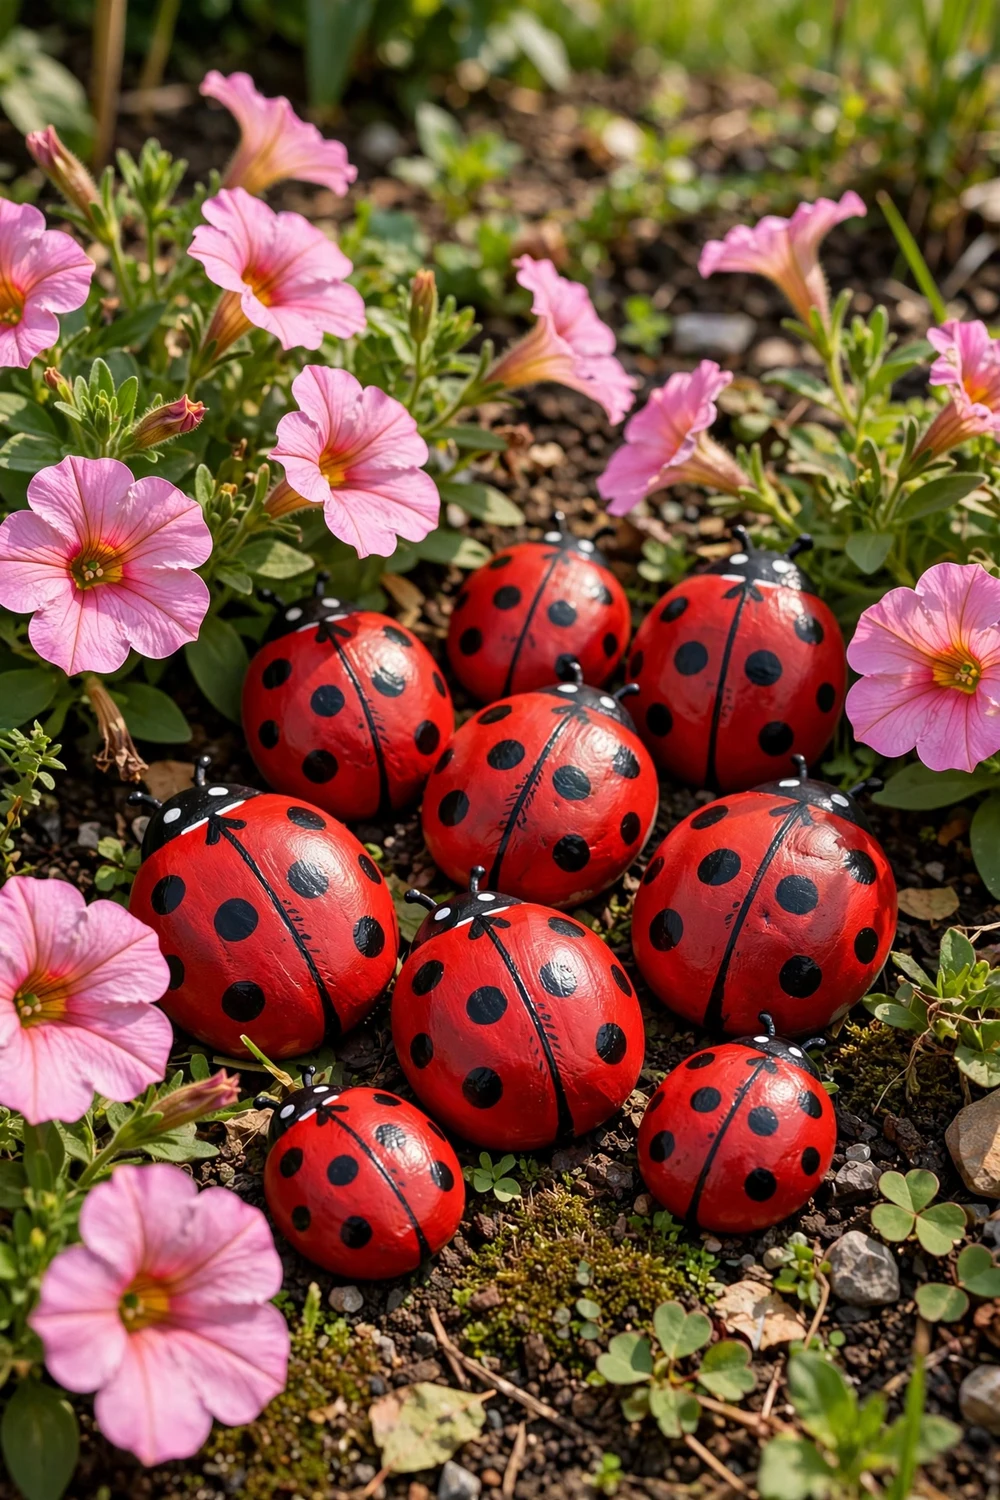
Paint round pebbles red, add a black head and white-dotted wings, and nestle the ladybugs among your flower pots. Seal them well and they survive seasons outdoors. Scatter five or six through a bed rather than clustering them: a ladybug “discovered” in the petunias delights kids more than a row of them.
Try this: paint the dots with the end of a pencil eraser. It makes perfect circles every time.
Cost: $. Difficulty: easy.
10. Tiered succulent tower with pebble trim
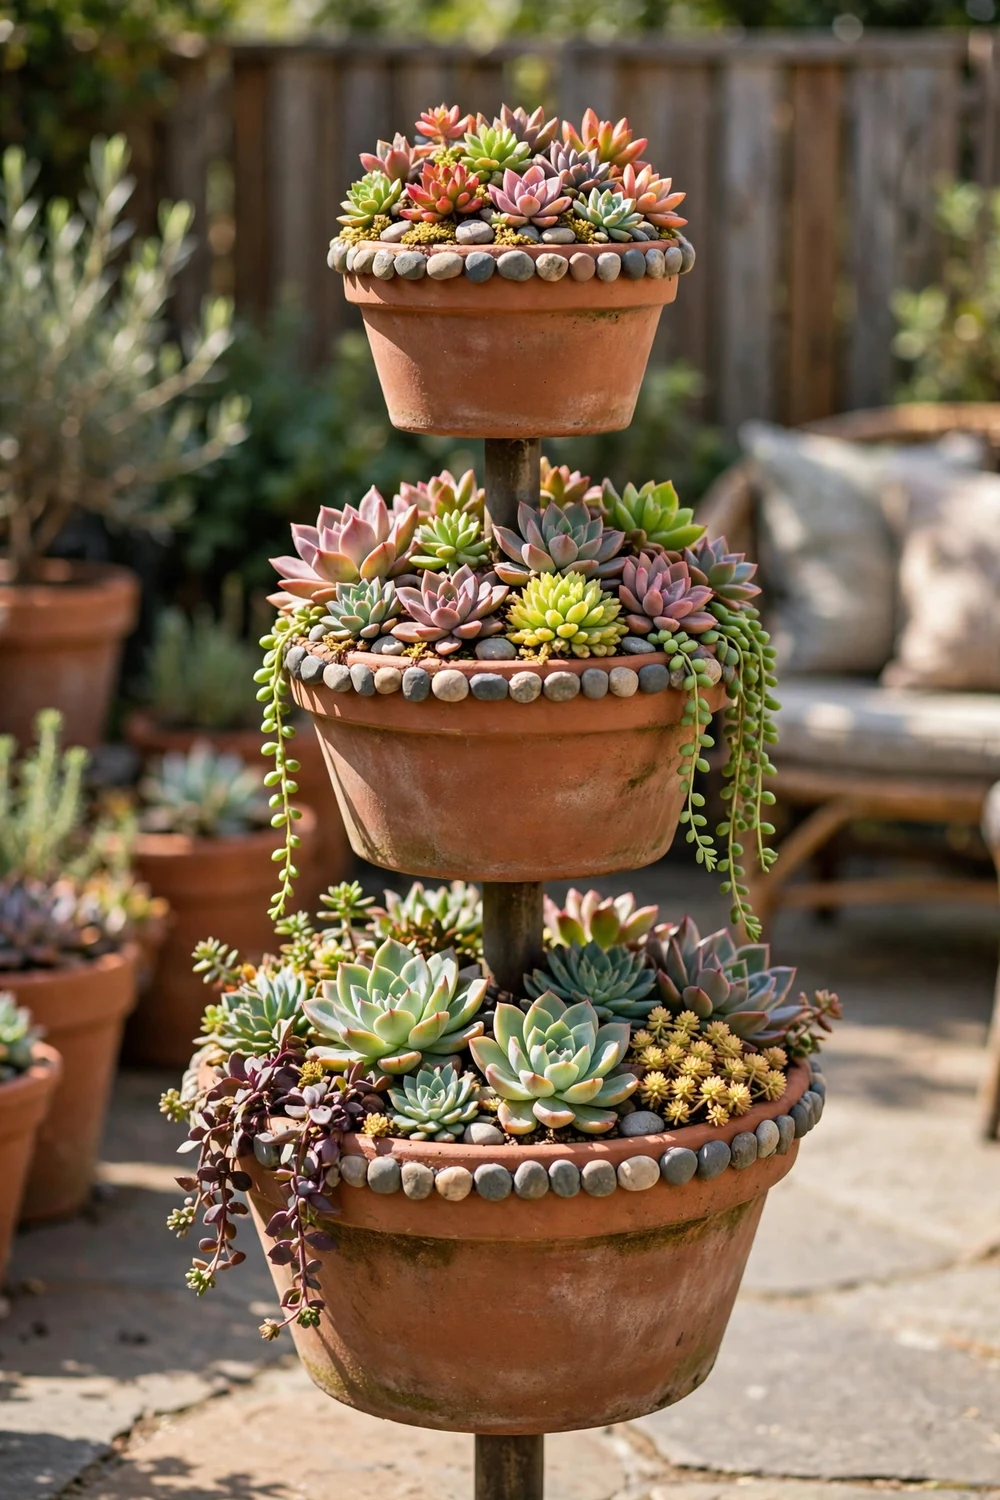
Stack three graduated terracotta pots (large, medium, small) on a central rebar or wooden dowel, plant succulents in each tier, and glue a pebble border around every rim. The tower holds a dozen plants in one square foot of patio. Thread the pots onto the support before adding soil, and water the top tier first so excess drains down.
Try this: use the same pebble color on all three rims. The repetition ties the tower together visually.
Cost: $$. Difficulty: moderate.
11. Mandala pebble mosaic top
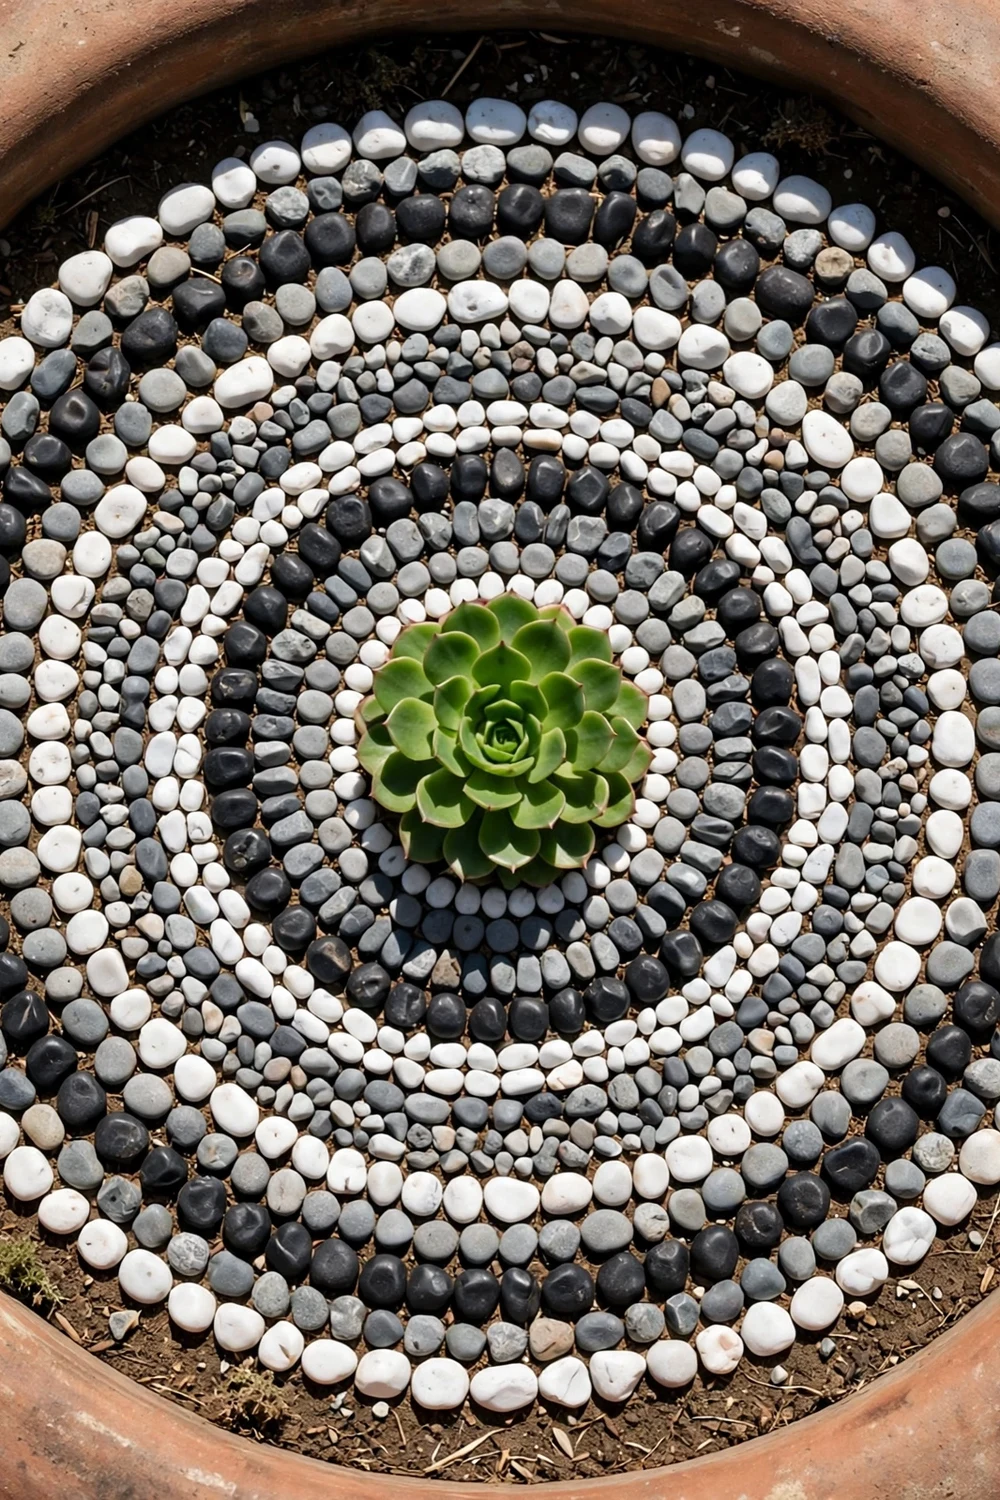
Arrange pebbles in a mandala pattern on the soil surface of a large pot: concentric rings of white, gray, and black stones radiating from the center plant. No glue needed; the pebbles sit on the soil and lift off for watering and replanting. Photograph it from above: mandala pots are made for sharing.
Try this: sketch the rings lightly in the soil with a stick first. Guidelines keep the circles even as you work outward.
Cost: $$. Difficulty: easy.
12. Sea glass and pebble coastal pot
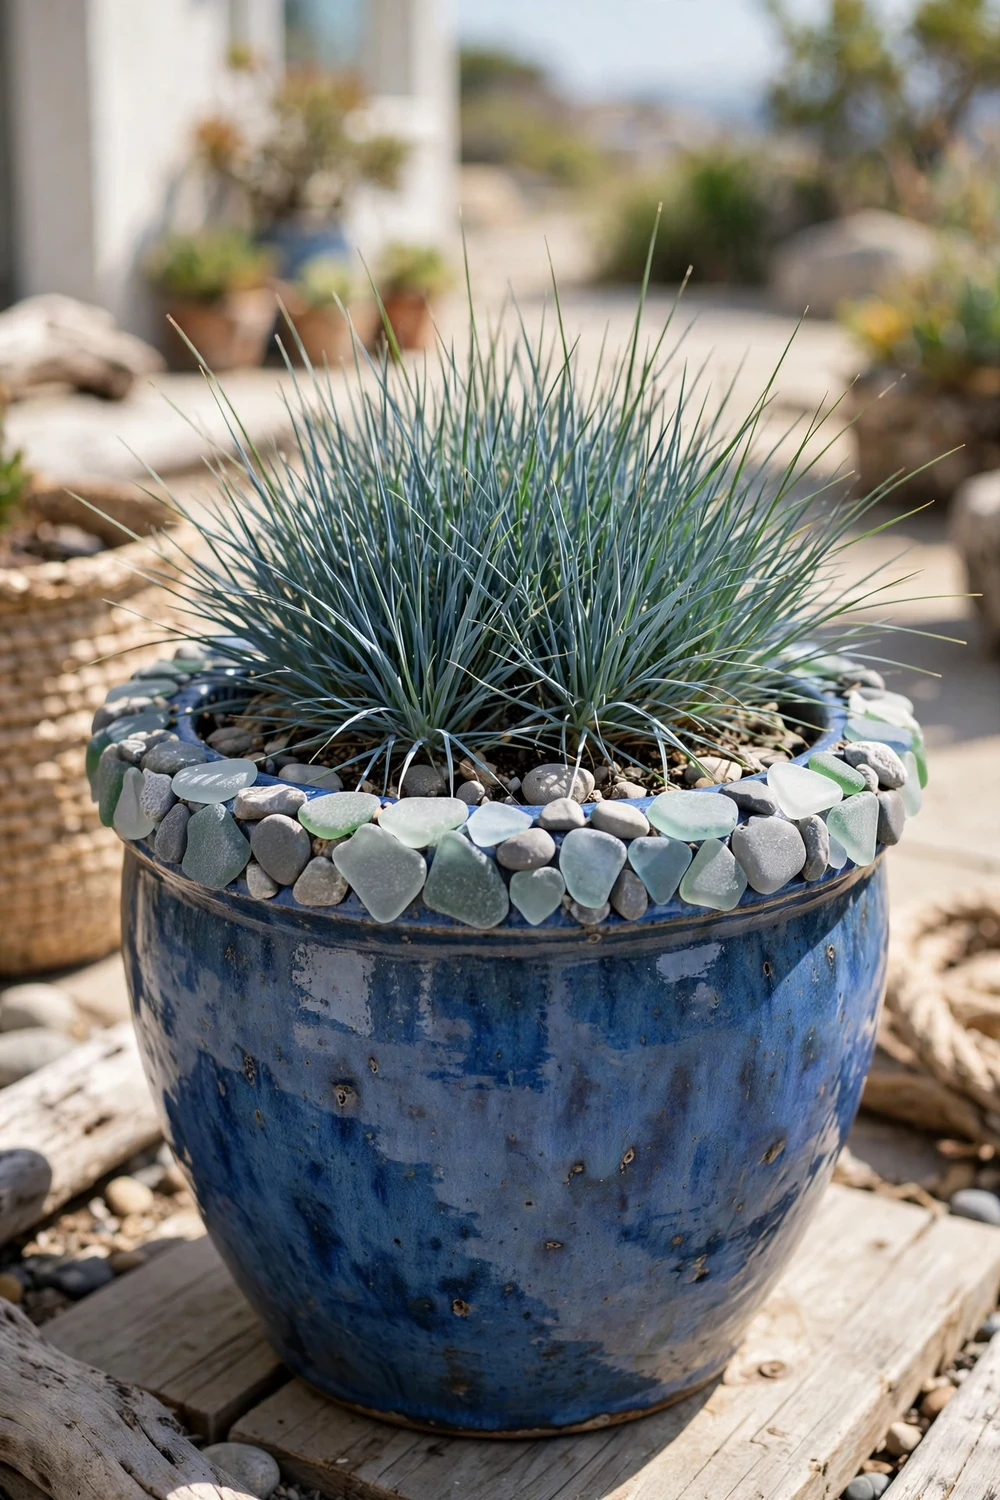
Mix frosted sea glass pieces with smooth gray pebbles as a topper or glued band for a coastal planter. The sea glass catches light in a way plain stone never does. Glue a single band of sea glass around the rim of a blue-glazed pot, plant it with blue fescue grass, and the whole thing reads as the shoreline.
Try this: buy tumbled glass from a craft store rather than collecting. Real beach glass is increasingly protected, and craft glass is already smooth.
Cost: $$. Difficulty: easy.
13. Kids painted pet-rock planters
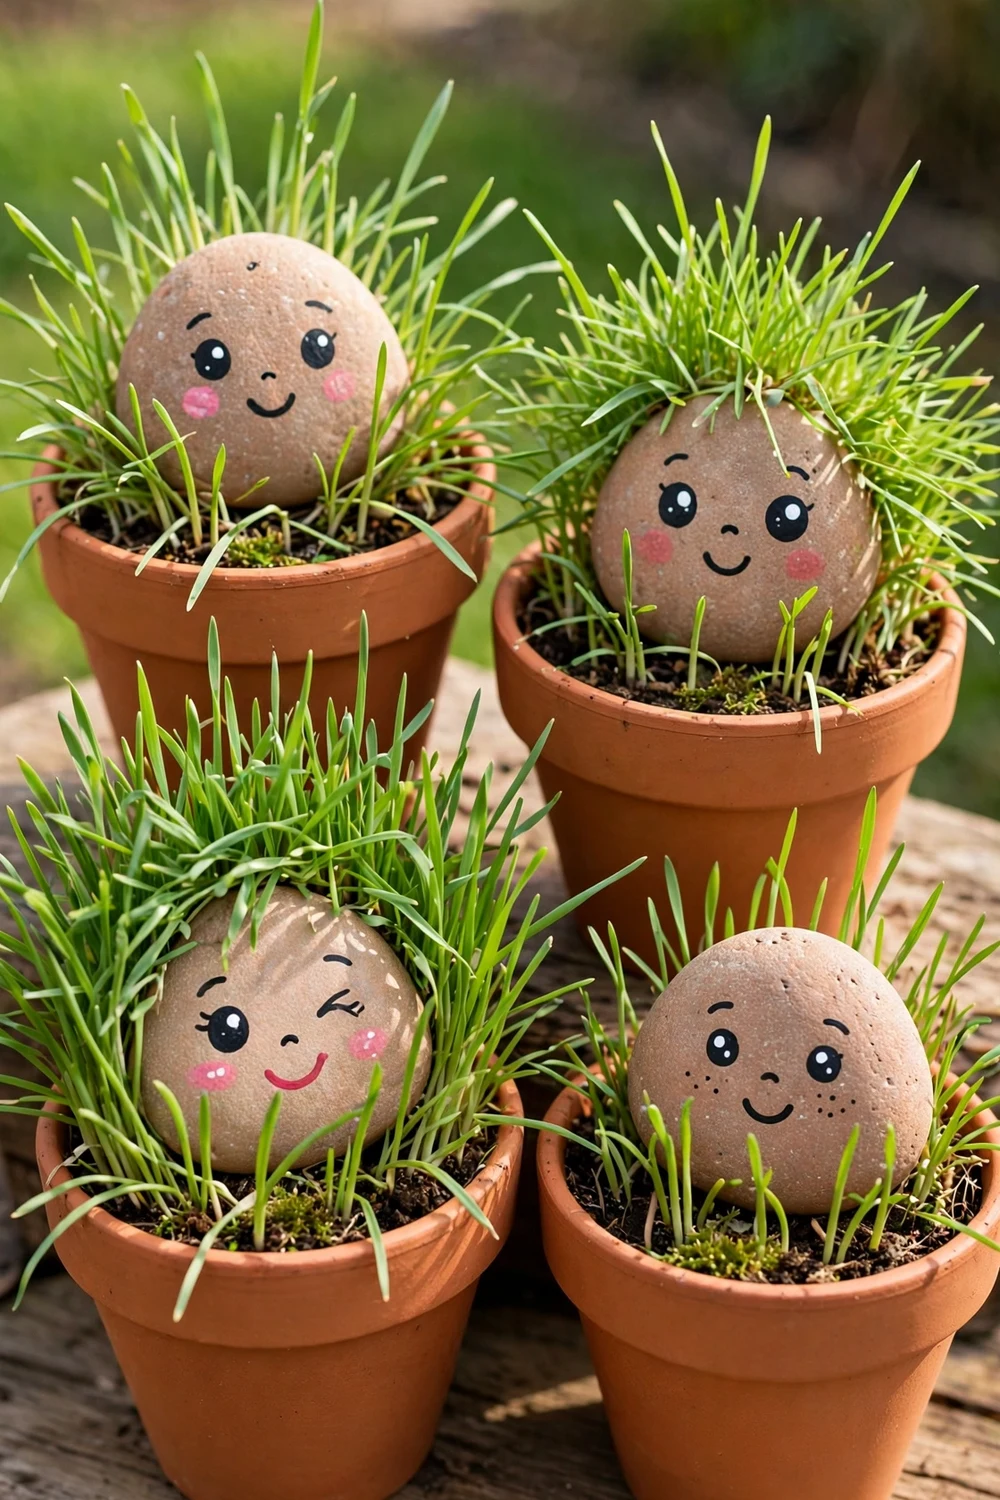
Let kids paint faces on large smooth pebbles, then “plant” each pet rock in its own small pot of soil with grass seed sprinkled around it. The grass grows into hair within two weeks. It is the classic classroom project for a reason: cheap, fast, and every kid’s rock looks different. Use washable paint and smocks for the under-6 crowd.
Try this: write the planting date on the bottom of each rock. Kids love checking how many days their grass took.
Cost: $$. Difficulty: easy.
14. Mini zen garden pot

Fill a wide shallow bowl with fine sand, rake simple wave patterns with a fork, and place three to five smooth pebbles as islands. A drop of essential oil in the sand adds scent. Keep it on a desk or entry table and re-rake whenever you need a minute of calm. Mist the sand lightly first so the patterns hold.
Try this: use dark sand with light pebbles (or the reverse). High contrast makes the patterns pop.
Cost: $$. Difficulty: easy.
15. Hanging air plant holder with pebble accents
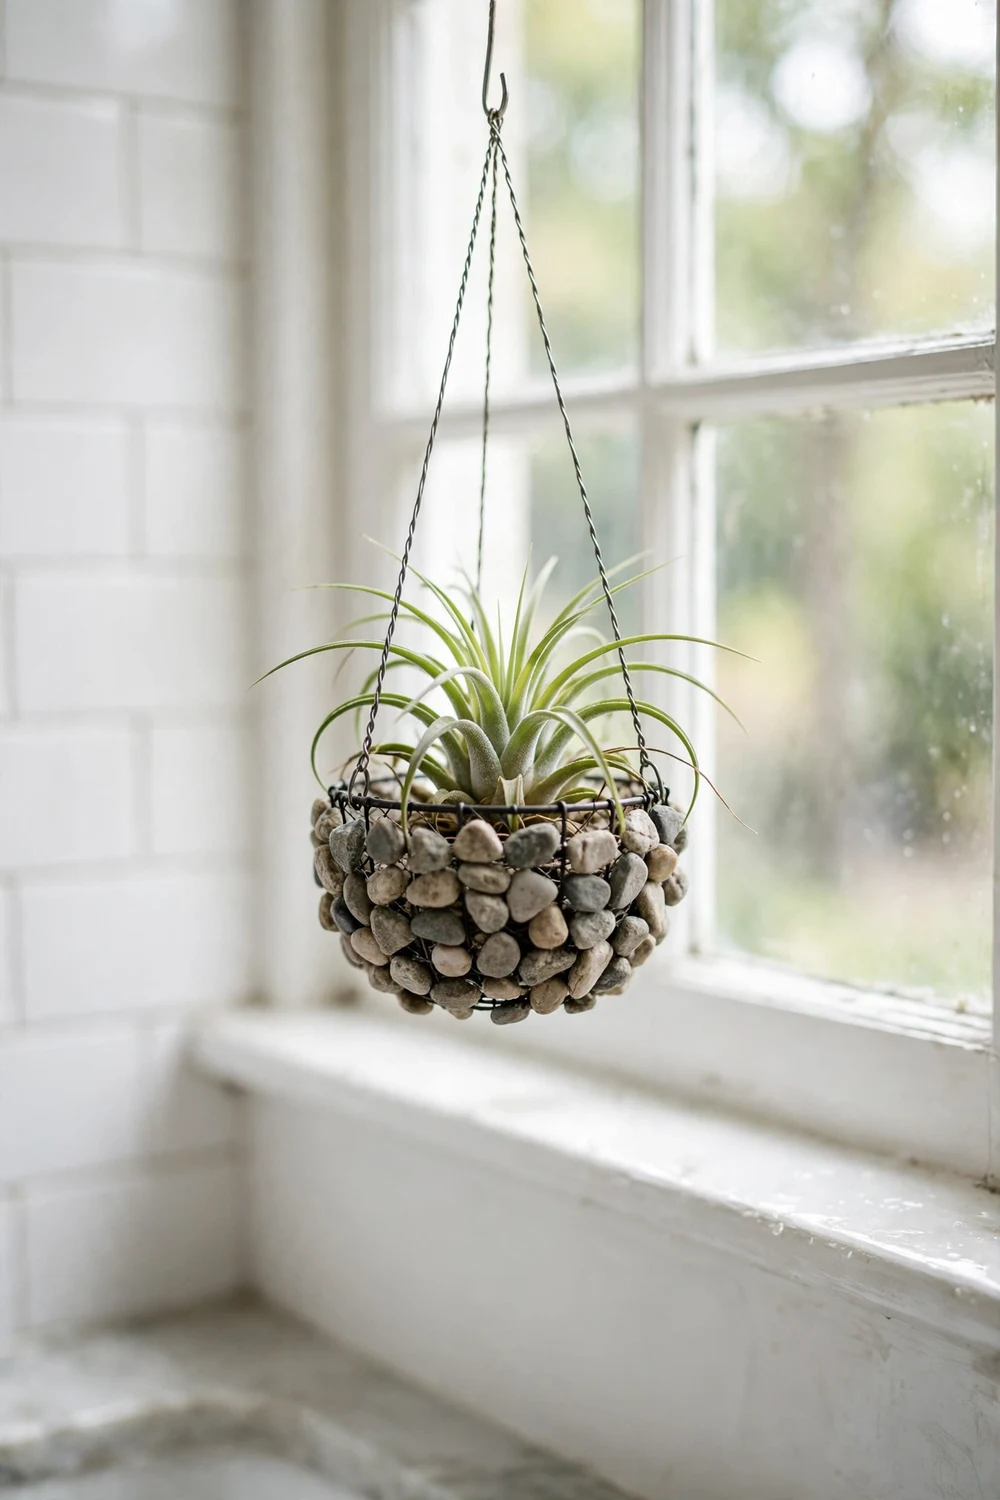
Glue small pebbles around the outside of a tiny wire or wooden hanging basket, nestle an air plant (tillandsia) inside with no soil at all, and hang it in bright indirect light. Mist the plant twice a week or soak it for 20 minutes weekly. The pebbles add weight and texture to a plant that otherwise floats visually.
Try this: hang three at different heights in a bathroom window. The humidity from showers keeps air plants happiest there.
Cost: $$. Difficulty: easy.
Pebble pot project guide
How to choose pebbles and pots
Match the pebble to the job. Smooth river pebbles glue best and paint smoothest; rough stones grip adhesive better but look rustic. For toppers and trays, 1/2 to 1 inch pebbles work; smaller gravel disappears into soil and larger stones overwhelm small pots. A 20-pound bag covers 3 to 5 medium pots as a topper.
For the pots themselves, terracotta is the classic base: cheap, porous, and the glue grips it well. Glazed ceramic needs a light sanding first or pebbles pop off. If you want more planter craft ideas, this driftwood craft collection uses the same glue-and-seal skills on beach wood.
Mistakes to avoid
Do not use a hot glue gun for anything that lives outdoors. Hot glue softens in summer sun and pebbles rain off by August. Use exterior construction adhesive or tile mortar instead, and give it a full 24 hours to cure before moving the pot.
Do not skip the sealer on painted pebbles. Unsealed acrylic paint chalks and flakes within one season outside. Two thin coats of clear outdoor sealer beat one thick coat every time. And do not glue over the drainage hole: pebbles decorate the pot, they never replace drainage.
Pebble pot safety notes
Small pebbles are a choking hazard for children under 3, so keep loose pebbles and small finished pieces out of reach of toddlers, and supervise craft time closely. Hot glue guns burn: low-temp guns and adult help for kids under 10. When painting, choose paints labeled non-toxic and work in a ventilated space.
Collect stones responsibly: many beaches, parks, and nature reserves prohibit removing rocks, so buy bagged pebbles instead of pocketing them from protected places. The Leave No Trace Center for Outdoor Ethics explains why even small collecting adds up. For plant care basics in your finished pots, the Clemson Cooperative Extension garden resources cover watering and soil. More kid-safe garden crafts live in these easy DIY decor ideas and 3D wall art ideas for rainy days.
DIY pebble pot FAQs
What glue works best for pebbles on pots?
Exterior construction adhesive or tile mortar for anything outdoors; both survive rain, sun, and freeze-thaw cycles. Hot glue works only for indoor pieces that never get warm. Whatever you use, let it cure a full 24 hours before handling the pot.
How do I seal painted pebbles for outdoor use?
Apply two thin coats of clear outdoor sealer (spray or brush-on) after the paint dries fully, covering all sides. Thin coats dry harder and clearer than one thick coat. Reapply once a year on pieces in full sun.
Can I use pebbles instead of drainage holes?
No. A pebble layer at the bottom helps a hole-less pot survive, but it does not replace drainage. Drill holes whenever the pot allows it; use the pebble-layer trick only for decorative pots you cannot drill.
Are pebble crafts safe for toddlers?
Not the small pieces. Pebbles under 1.25 inches are a choking hazard for children under 3. Toddlers can watch and help with large, glued-down pieces, but keep loose pebbles out of reach and save small-pebble projects for older kids.
Where can I buy pebbles for crafts?
Garden centers, home improvement stores, dollar stores, and craft stores all sell bagged river pebbles in 2 to 20 pound bags. Aquarium gravel works for tiny projects. Avoid collecting from beaches and parks, where removing stones is often prohibited.
Will glued pebbles survive winter outside?
Yes, if you used exterior adhesive and the pot itself is frost-proof. Terracotta cracks in hard freezes, so move terracotta pebble pots into a garage or shed for winter in cold climates. The pebbles and glue handle the cold fine.
Start with one bag of pebbles and one plain pot this weekend. By the second project you will be sorting stones by color without thinking about it, and by the fifth your porch will look like a craft fair booth in the best way.


