


My first pinch pot looked lopsided, and I kept it anyway. A ball of clay, a thumbprint in the middle, and ten minutes of turning it between my hands gave me a small pot that held my rings for years, wobble and all.
This guide covers 14 creative ceramic pinch pot ideas for beginners and casual makers, from animal face pots to a pumpkin pot and a snowman stack. Every project starts the same way, with one ball of clay pinched into shape by hand, and each one lists its cost, difficulty, and time so you can pick a project that fits your evening.
Quick takeaways
- Every idea starts with one ball of clay and your thumbs, no wheel and no molds.
- Keep walls about 1/4 inch thick so pots dry without cracking.
- Air-dry clay suits decorative pieces; kiln-fired clay with food-safe glaze suits anything that touches food.
- Dry pots slowly, away from heat and direct sun, and turn them once so the base dries evenly.
- Most projects here cost under $10 and take under an hour of hands-on time.
How to pinch a pot that holds its shape
Start with a smooth ball of clay about the size of a tennis ball for a small pot, and press out any air pockets by kneading it for a minute. Push your thumb into the center until it sits about half an inch from the bottom, then pinch the walls between your thumb inside and your fingers outside, turning the ball a little after each pinch.
Work from the bottom up, and keep the walls even as you go. Thick bases with paper-thin rims crack most often, so check the thickness with your fingers as you shape. Smooth the outside with a damp sponge, flatten the base on the table so the pot sits level, and let it dry slowly under a loose plastic cover for the first day.
1. Thumbprint owl pot

Pinch a short, wide pot, then press two round discs of clay onto the front for eyes and add tiny clay dots for pupils. Carve short feather lines around the body with a toothpick, and pinch two small triangles on the rim for ears. A matte brown or sage glaze keeps the owl calm and woodland-like on a shelf.
Try this: press the eye discs on while the pot is still soft so they bond well.
Cost: $ | Difficulty: Easy | Time: 45 minutes plus drying.
2. Cat face pot
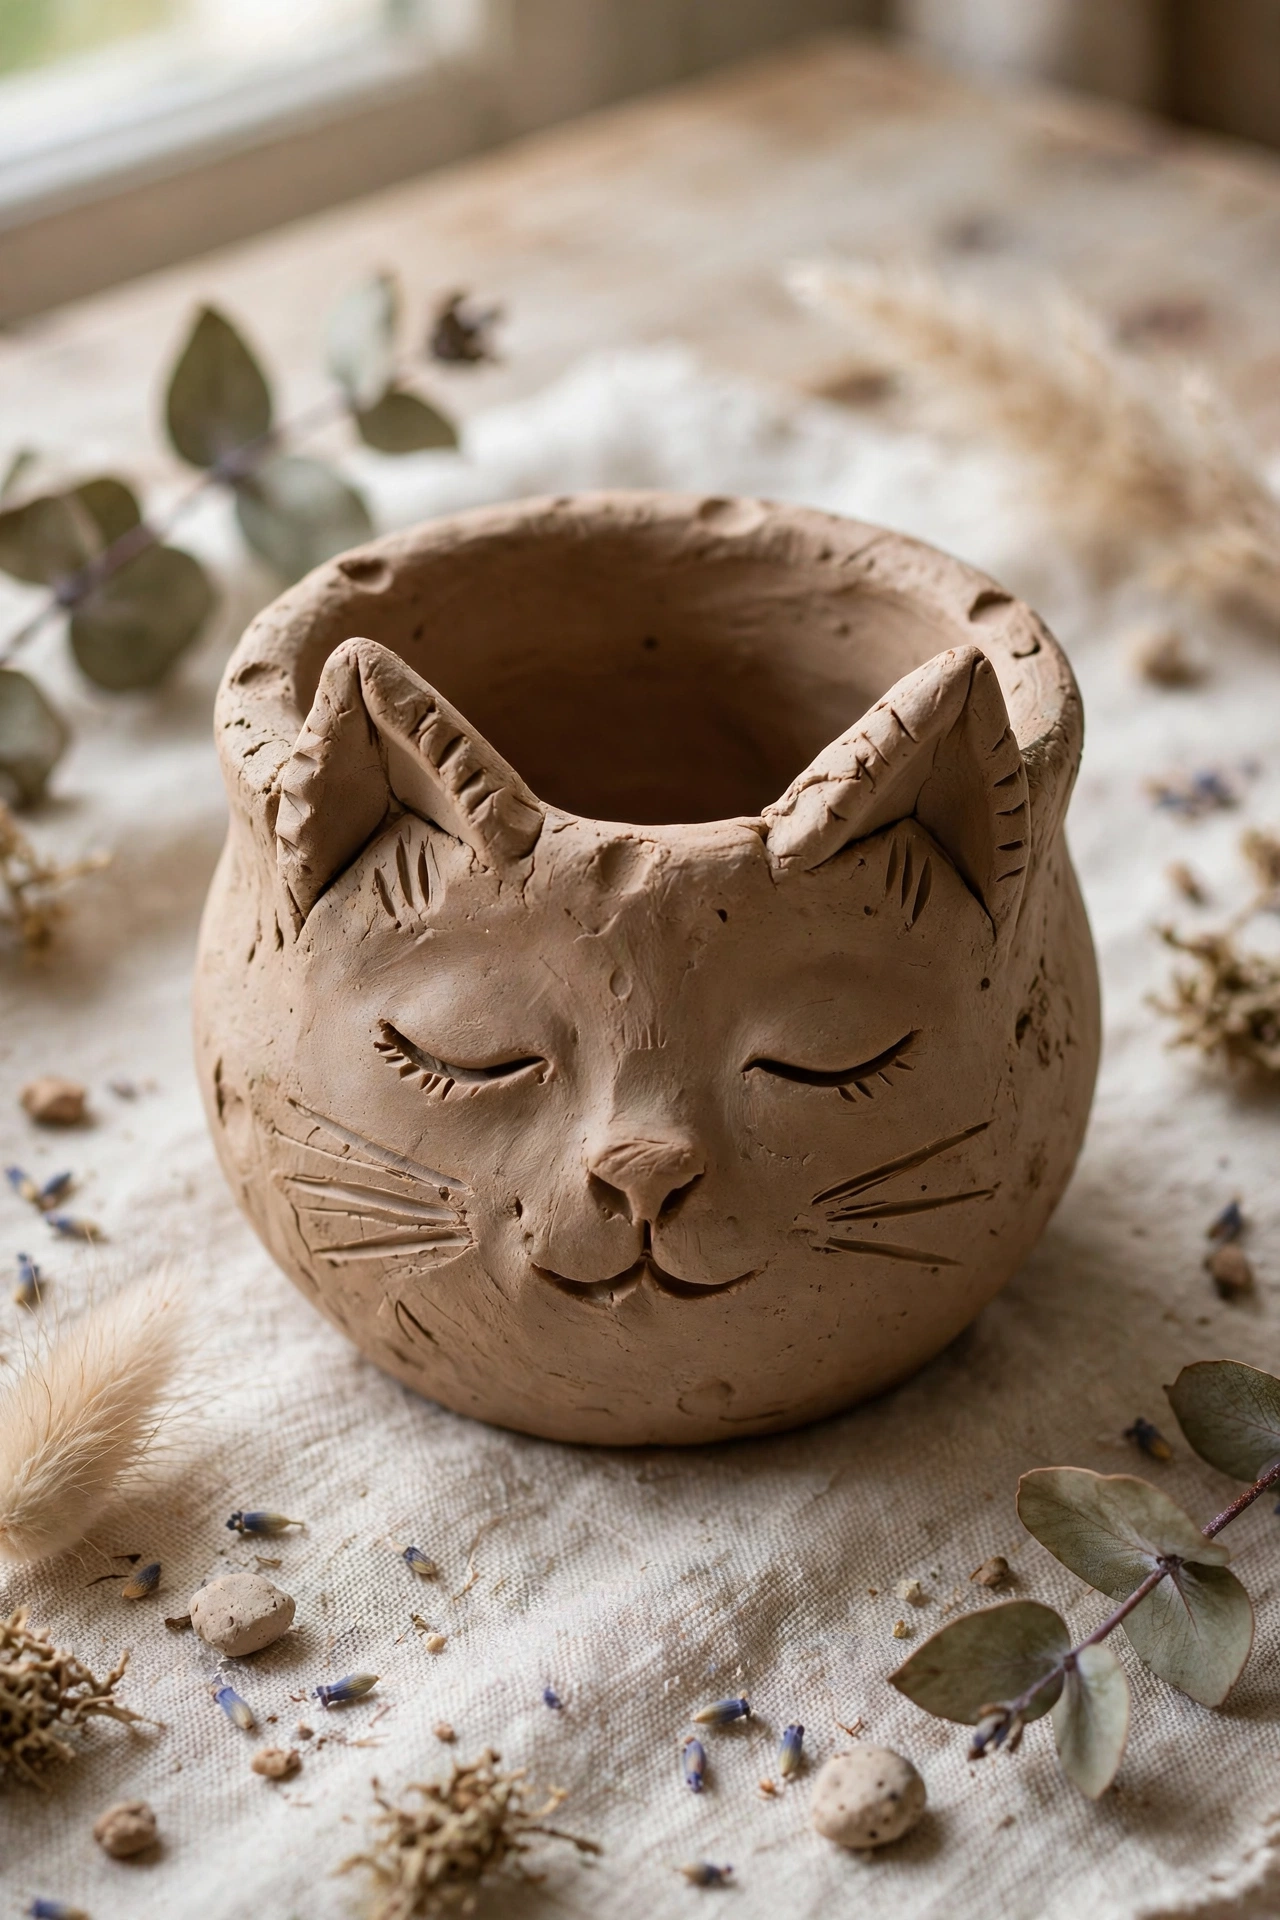
Shape a round pot first, then attach two clay triangles to the rim for ears and carve three short whisker lines on each side with a needle tool. Paint soft gray or calico patches after firing, or leave the clay natural for a quieter look. This pot works well for paper clips, coins, or a single pair of earrings.
Try this: score both the ears and the rim before joining so the ears stay put.
Cost: $ | Difficulty: Easy | Time: 40 minutes plus drying.
3. Turtle shell pot

Pinch a dome-shaped pot, flip it over, and use it as the shell. Add a small head, four short legs, and a tail from rolled clay, then carve a hexagon pattern into the shell with a skewer. Green glaze with darker spots reads clearly as a turtle, and the finished piece suits a desk or a kids room shelf.
Try this: keep the legs short and thick so they carry the shell without snapping.
Cost: $ | Difficulty: Medium | Time: 1 hour plus drying.
4. Fox face pot

Pull one side of a round pot’s rim forward into a pointed muzzle, then add two triangle ears on top. Orange glaze on the face with a white chest patch and a black nose gives the fox its read at a glance. Use it for pens on a desk or as a small plant pot for a succulent cutting.
Try this: shape the muzzle before the clay firms up, since stiff clay resists pulling.
Cost: $ | Difficulty: Easy | Time: 45 minutes plus drying.
5. Bunny face pot

Pinch a tallish pot, then attach two long, flat ears to the rim and paint a small pink nose in the center of the face. A cream or pale gray glaze keeps the bunny soft-looking, and the pot holds wrapped candy, cotton balls, or small hair ties.
Try this: support each ear from behind with a finger while you attach it so it does not flop.
Cost: $ | Difficulty: Easy | Time: 40 minutes plus drying.
6. Monster face pot
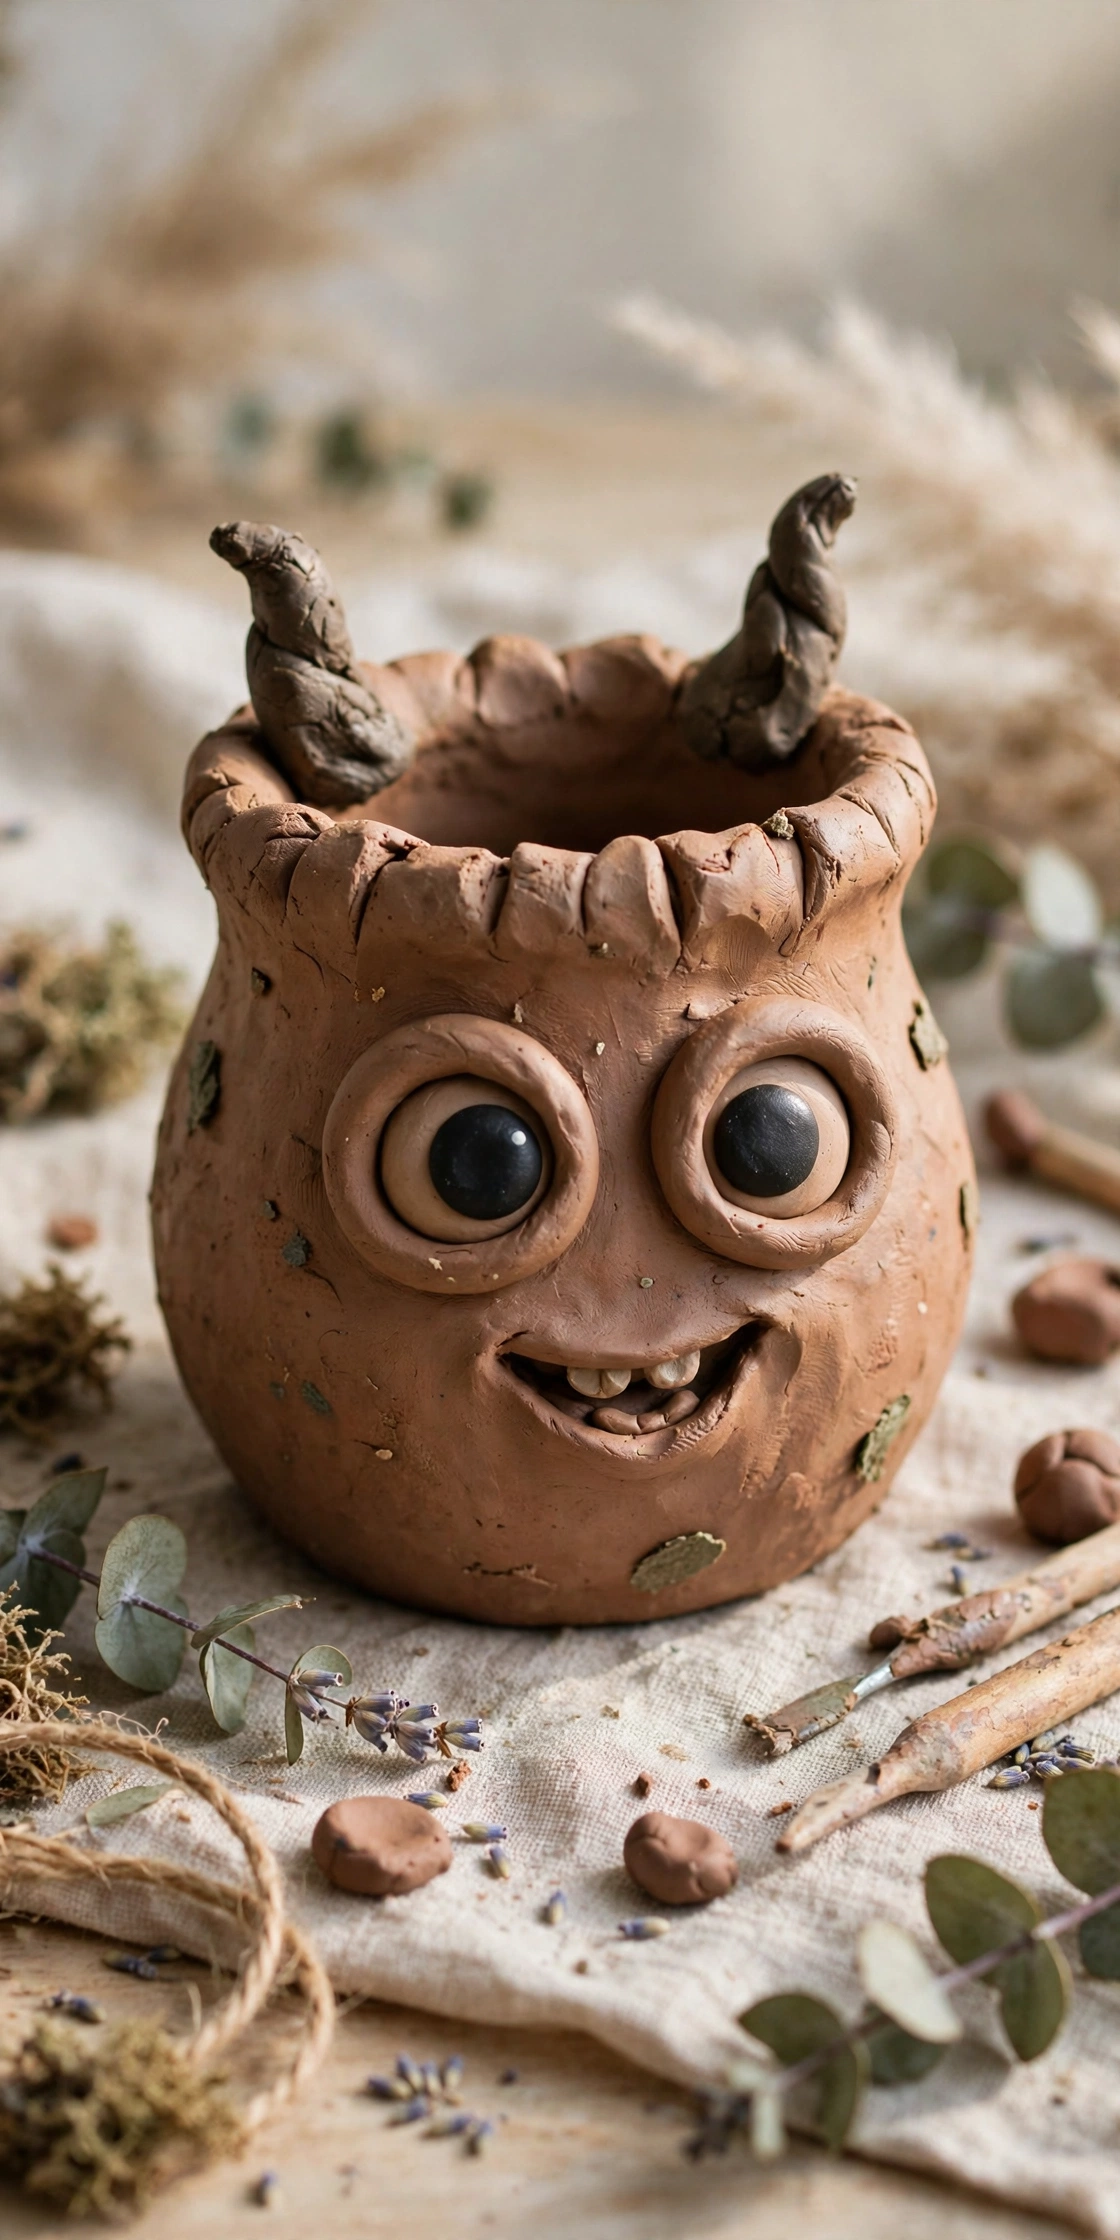
Pinch a wide-mouth pot, then add clay horns in mixed sizes, two or three eyes of different sizes, and a wide open mouth with small teeth. Bright underglaze colors suit this pot, and nothing about it needs to match, which makes it a good first project for kids.
Try this: let kids place the parts themselves and only help with scoring and slipping the joints.
Cost: $ | Difficulty: Easy | Time: 45 minutes plus drying.
7. Heart-shaped pinch dish

Form a round pot, then press two lobes into the top rim and pinch the bottom into a point to form a heart outline. Pink, red, or blush glaze with a glossy finish suits a Valentine gift, and the dish holds a pair of earrings or a single ring.
Try this: shape the heart while the clay is soft, then check the symmetry from above before it firms.
Cost: $ | Difficulty: Easy | Time: 35 minutes plus drying.
8. Star-shaped pinch dish

Pinch a shallow dish, then pull the rim outward into five points and smooth each point to a soft tip. Gold, silver, or white glaze with a speckled finish gives the dish a night-sky feel, and it works for birthday gifts or holiday table settings.
Try this: mark five even points around the rim with a toothpick before pulling so the star stays balanced.
Cost: $ | Difficulty: Easy | Time: 40 minutes plus drying.
9. Cloud-shaped pinch dish

Shape a shallow dish, then push the rim into soft, rounded bumps all the way around to form a cloud edge. Pearl white, pale blue, or soft gray glaze keeps the piece calm, and the dish suits a bedside table for small jewelry.
Try this: round each bump with a wet fingertip so the edge reads as cloud, not as lumps.
Cost: $ | Difficulty: Easy | Time: 35 minutes plus drying.
10. Lace-textured pinch dish

Form a shallow dish, then press a lace doily or a piece of burlap firmly into the outside surface and peel it away to leave the pattern. A pastel glaze or a chalky matte finish shows the texture well without hiding it.
Try this: press the fabric once, straight down, and do not shift it, since a second press blurs the pattern.
Cost: $ | Difficulty: Easy | Time: 35 minutes plus drying.
11. Emoji face pot
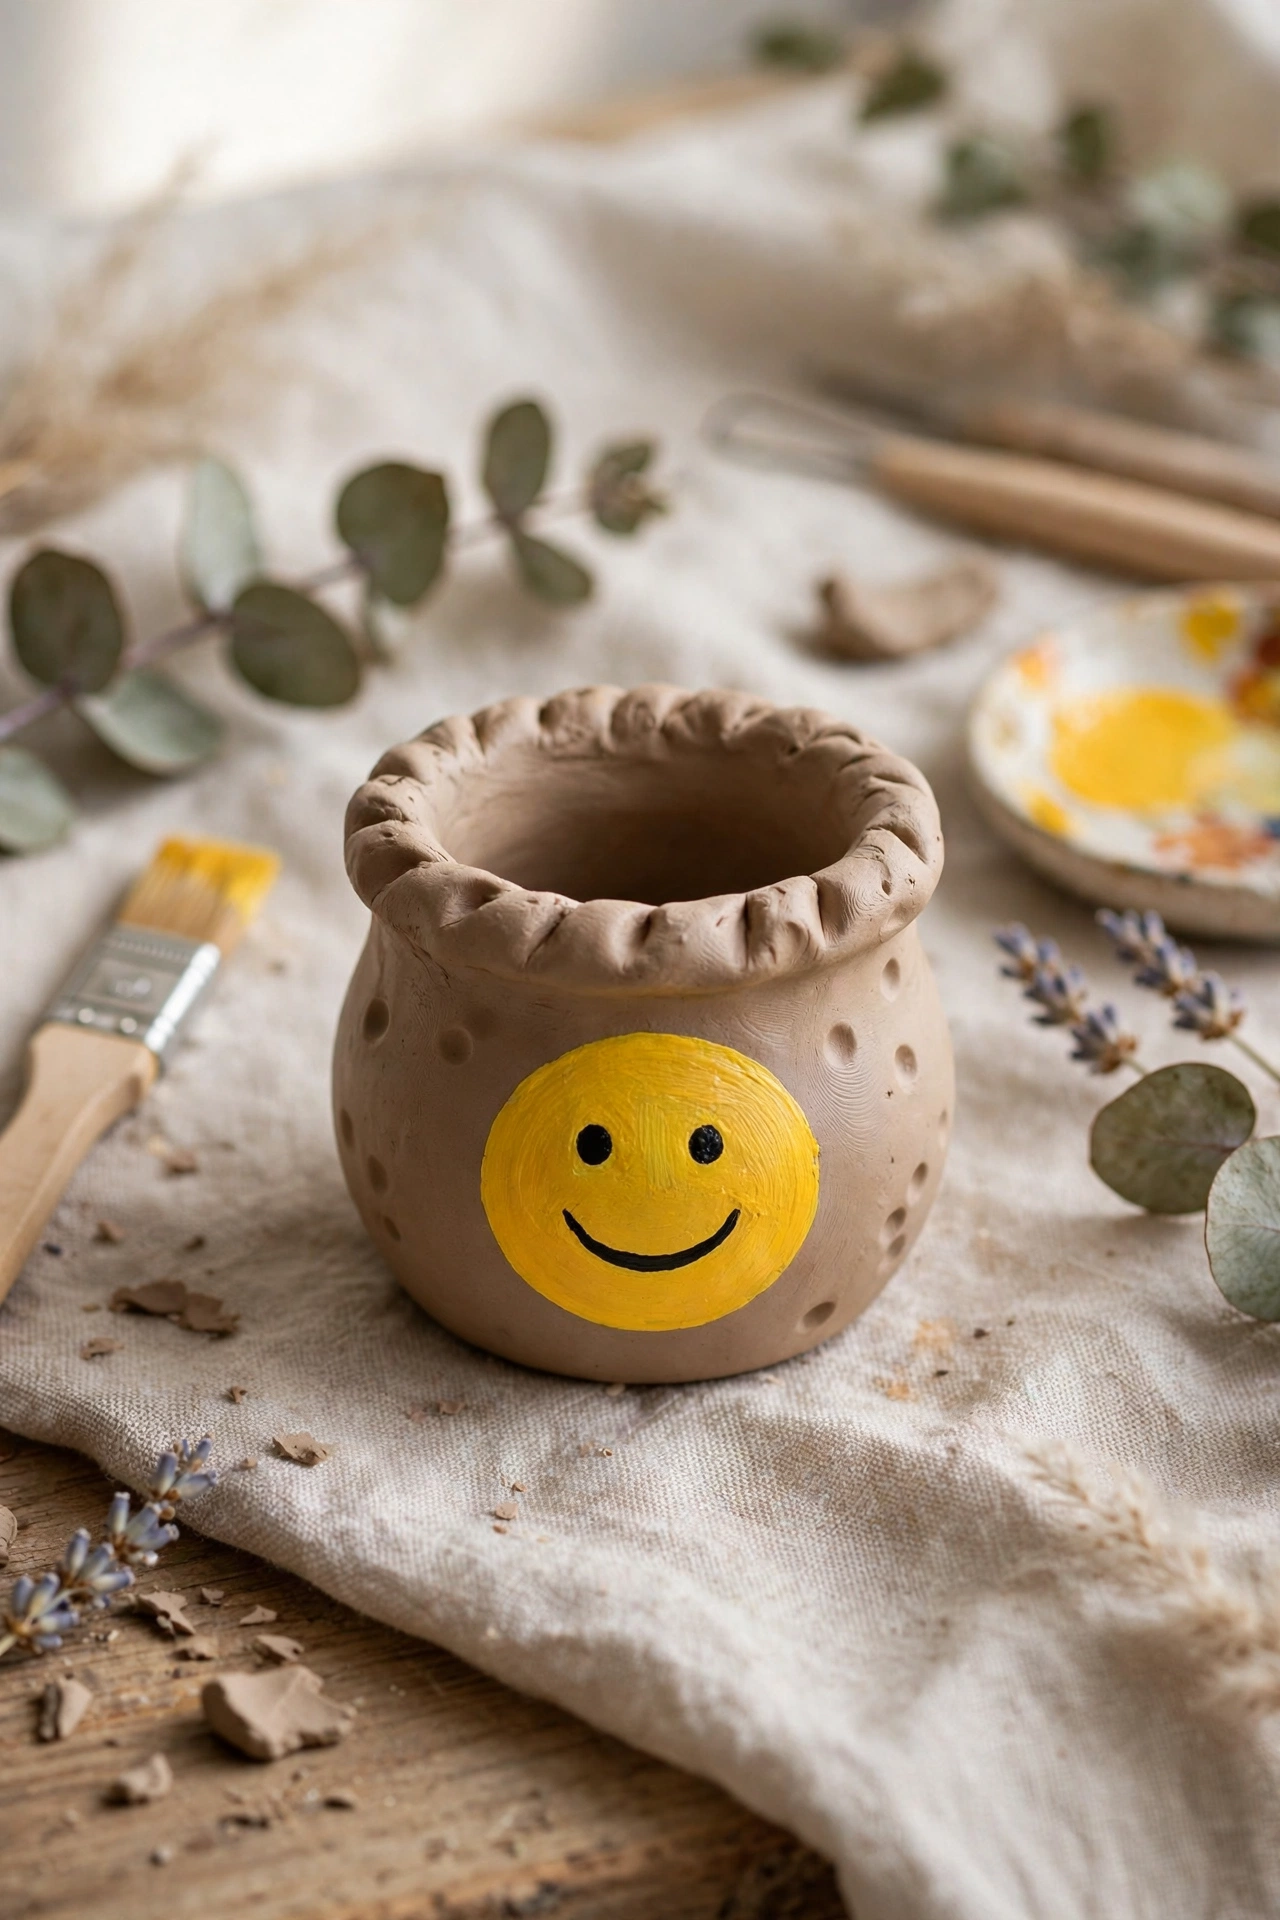
Make a round pot, then carve or paint a single emoji face on the front, such as heart eyes, a wide smile, or a grin with its tongue out. One face, painted boldly, reads better than a crowded design, and the pot adds personality to a desk with little effort.
Try this: sketch the face lightly with a pencil at the leather-hard stage so paint stays inside the lines.
Cost: $ | Difficulty: Easy | Time: 40 minutes plus drying.
12. Snowman pinch pot stack

Pinch two pots, one larger for the body and one smaller for the head, and join them rim to rim after both reach the leather-hard stage. Paint the stack white or cream, add a colorful scarf and button dots, and use it as a winter decoration or a holiday gift.
Try this: score both joining rims well and let the joined piece dry slowly so the seam does not split.
Cost: $$ | Difficulty: Medium | Time: 1 hour 30 minutes plus drying.
13. Pumpkin pinch pot

Roll a ball of clay into a round pot, then carve vertical grooves from top to bottom with a wooden tool and attach a short green stem on top. Orange glaze with a darker groove wash gives the pumpkin depth, and the piece suits fall shelves from September through October.
Try this: carve the grooves shallowly so the walls stay strong, and deepen them only after the first pass dries slightly.
Cost: $$ | Difficulty: Medium | Time: 1 hour plus drying.
14. Flower petal pinch bowl

Pinch a wide bowl, then pull the rim outward into five or six rounded petals and smooth each petal edge with a damp sponge. Soft pink, lavender, or yellow glaze suits the flower shape, and the bowl holds wrapped candy or small trinkets.
Try this: pull each petal to the same length by measuring against your thumb so the flower looks even.
Cost: $ | Difficulty: Easy | Time: 50 minutes plus drying.
Pinch pot comparison table
| Project | Cost | Difficulty | Hands-on time | Best for |
|---|---|---|---|---|
| Thumbprint owl pot | $ | Easy | 45 minutes | Desk or shelf decor |
| Cat face pot | $ | Easy | 40 minutes | Small storage |
| Turtle shell pot | $ | Medium | 1 hour | Kids room shelf |
| Fox face pot | $ | Easy | 45 minutes | Desk pen holder |
| Bunny face pot | $ | Easy | 40 minutes | Candy or cotton balls |
| Monster face pot | $ | Easy | 45 minutes | Kids first project |
| Heart-shaped pinch dish | $ | Easy | 35 minutes | Valentine gift |
| Star-shaped pinch dish | $ | Easy | 40 minutes | Holiday gifts |
| Cloud-shaped pinch dish | $ | Easy | 35 minutes | Bedside jewelry |
| Lace-textured pinch dish | $ | Easy | 35 minutes | Texture practice |
| Emoji face pot | $ | Easy | 40 minutes | Desk personality |
| Snowman pinch pot stack | $$ | Medium | 1 hour 30 minutes | Winter decoration |
| Pumpkin pinch pot | $$ | Medium | 1 hour | Fall shelves |
| Flower petal pinch bowl | $ | Easy | 50 minutes | Candy or trinkets |
Cost key: $ means $1 to $10, $$ means $11 to $99, $$$ means $100 to $999, $$$$ means $1,000 and up.
Mistakes to avoid
Pinching only the top of the walls leaves a thick, heavy base that dries slower than the rim, and the gap in drying speed cracks the pot. Pinch from the bottom up, and check the base thickness with your fingers before you stop. Drying a pot near a heater or in direct sun causes the outside to shrink faster than the inside, which also cracks it, so dry pots at room temperature and cover them loosely for the first day.
Attaching ears, heads, or stems without scoring both surfaces gives joints that pop off during drying or firing. Score both sides with a needle tool, add a little slip, press the pieces together, and smooth the seam with a wet finger. Thick solid lumps of clay trap air and can burst in a kiln, so keep every attached piece small and hollow where you can, and poke a tiny vent hole in any closed form.
Safety notes for pinch pottery
Keep needle tools, skewers, and other sharp trimming tools away from small children, and let an adult handle carving steps for young makers. Wash your hands after handling clay and glazes, and wipe work surfaces clean so clay dust does not spread through the house. Air-dry clay pots are decorative only unless sealed for their use, so do not serve food or water from an unsealed air-dry piece. Food pieces need kiln-fired clay with a food-safe glaze, and kiln firing should follow the clay maker and the kiln operator’s guidance. For background on how hand-built pottery developed, see the National Park Service guide to ceramics at Aztec Ruins, and for the living Pueblo pottery tradition, see the Smithsonian account of the enduring Pueblo pot.
Related reading
If you want to try the other classic hand-building method, rolled coils instead of pinched balls, see our guide to 17 Stunning Coil Pot Pottery Ideas, From Ribbed Bowls to Tapered Vases for ribbed serving bowls, tapered vases, and lidded jars built coil by coil.
For more clay projects around the house, including a clay flower mirror frame, see our guide to Creative DIY Home Decor Ideas for 30 budget-friendly decor projects.
If these pinch pots are heading out as gifts, our guide to Amazing DIY Birthday Gifts for Friends Ideas has stamped clay magnets and a clay bead bracelet that pair well with a small handmade dish.
For clay pots used outdoors instead of shaped by hand, see our guide to Stunning DIY Yard Art Crafts Ideas for a clay pot mushroom cluster made from bought pots.
For more pot-based characters and tiny houses, see our guide to Fairy House DIY Ideas for a terracotta pot mushroom house and a stacked clay pot fairy village.
Frequently asked questions
Do I need a kiln for pinch pots?
No. Air-dry clay hardens at room temperature over 24 to 72 hours and suits decorative pieces, while kiln-fired clay needs access to a kiln or a studio firing service and gives a harder, longer-lasting finish. Pick air-dry clay for a first project, and move to kiln-fired clay once you want pieces that hold up to daily use.
What clay works best for beginners?
Low-fire earthenware clay is the easiest kiln-fired choice because it stays soft and forgiving while you pinch, and air-dry clay is the easiest choice with no kiln at all. Both come in small bags for under $10, and both take paint or glaze well. Avoid polymer clay for pots meant to hold anything, since it stays soft and light compared with ceramic clay.
Why do pinch pots crack while drying?
Most cracks come from uneven wall thickness or fast drying. A thick base with thin walls dries at two speeds, and the stress splits the pot, so pinch from the bottom up and keep walls near 1/4 inch thick. Dry pots at room temperature, away from heaters and direct sun, and cover them loosely with plastic for the first day so moisture leaves slowly.
Can I use a pinch pot for food?
Only if the pot is kiln-fired clay finished with a food-safe glaze. Air-dry clay and unsealed painted pieces are decorative only and should not hold food or water. When a glaze label does not state food safety clearly, treat the piece as decorative and use it for dry items such as jewelry or keys.
How thick should pinch pot walls be?
About 1/4 inch, or 6 to 8 millimeters, works for most small pinch pots. Thinner walls feel light but break easily at the rim, while walls much thicker than 1/4 inch dry slowly and add weight without adding strength. Check thickness by pinching gently between your fingers as you shape, and thin any thick spots before the clay firms up.
Final thoughts
Start with one ball of clay and one simple face pot, and let the second project be the one where you try a texture or a stack. Pinch pots reward slow hands and even walls more than fancy tools, and the small wobbles are part of why each piece looks handmade.


