


By Emma Wilson · Updated October 12, 2026
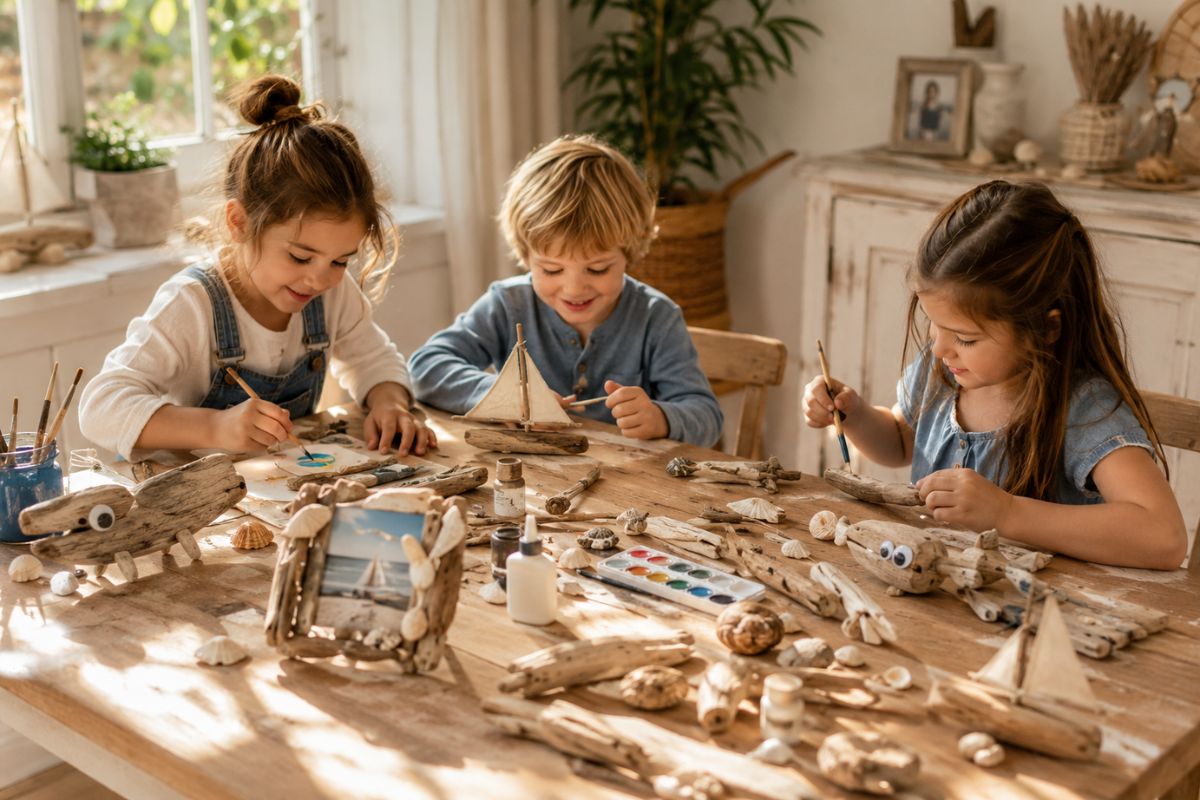
Kids come home from the beach with pockets full of sticks and shells, and within a week those treasures end up in the trash. It feels wasteful, because driftwood is one of the best free craft supplies there is: smooth, light, and already shaped by the water into interesting forms. The problem is knowing what to actually make with it before the novelty wears off.
This guide gives you 15 driftwood crafts for kids, from 25-minute builds to hour-long projects, each with a difficulty and cost label so you can pick what fits your afternoon. After a beach weekend last spring, my entryway looked like a driftwood gift shop, which is how I learned which of these projects kids actually finish. Every idea below uses simple supplies, and the grown-up-only steps (drills, hot glue) are clearly marked.
Quick takeaways
- Driftwood is free, light, and kid-friendly once it is cleaned and fully dried.
- Most of these crafts cost under $5, and every project takes an hour or less.
- Adults handle drills, hot glue guns, and saws; kids do the collecting, painting, gluing with tacky glue, and decorating.
- Clean every piece before crafting: rinse, scrub, soak in vinegar water, then dry in the sun.
- New to driftwood crafts? Start with the picture frame, the sailboat, or the star wand.
Getting your driftwood ready
Collect driftwood at beaches, lakeshores, and riverbanks, especially after storms wash new pieces in. Check local rules before you gather: many parks and protected shorelines prohibit collecting, and national parks ban it outright. The Leave No Trace Center explains why leaving what you find matters in protected areas, so collect only where it is allowed.
Clean every piece before crafting. Rinse off sand under running water, scrub with a stiff brush, then soak for a few hours in a mix of one part white vinegar to one part water. Rinse again and dry the wood fully in the sun; damp wood can grow mold in storage. Sand any rough spots with 120-grit sandpaper so little hands don’t catch splinters.
1. Driftwood Picture Frame

Grab four straight pieces of driftwood and you have a frame. Lay them in a rectangle around a 5×7 photo, snap or trim the ends so the corners meet, and glue the joints with tacky glue. Press the frame onto a piece of cardboard cut slightly larger than the photo, then glue the photo in the center. Kids can decorate the wood with small shells, sea glass, or dots of acrylic paint before assembly. A clothespin glued to the back turns it into a stand.
Try this: paint the cardboard backing sage green or dusty blue so it peeks through the gaps between sticks.
Easy · Under $5 · 30 minutes
2. Driftwood Sailboat Craft

Every kid who has floated a leaf in a puddle will love this one. Pick a flat, wide piece of driftwood about 6 inches long for the hull and a straight stick about 8 inches long for the mast. An adult drills a small hole in the hull and wedges the mast in with a drop of wood glue. Cut a triangle sail from cotton fabric or heavy paper, decorate it with markers, and tie it to the mast with twine. Test it in the bathtub before the big launch.
Try this: rub a white candle along the bottom of the hull so water beads off and the boat floats longer.
Easy · Under $5 · 25 minutes
3. Driftwood Animal Art

Some driftwood pieces already look like animals if you squint. Spread the collection on white paper and let kids hunt for shapes: a curved piece becomes a whale, a forked stick becomes antlers, a round knot becomes an owl’s face. Glue the chosen pieces onto cardstock, add 12mm googly eyes and painted details like stripes or spots, and frame the best ones. This is the craft that keeps going, because every new beach trip adds new animals to the collection.
Try this: photograph each finished animal before it goes on the wall; the gallery grows fast.
Easy · Under $5 · 40 minutes
4. Driftwood Wind Chime

Pick a sturdy horizontal branch, 12 to 18 inches long, as the top bar. Cut four or five pieces of twine to 8 to 10 inches, and tie a mix of small driftwood bits, wooden beads, and shells along each strand. An adult attaches the strands to the bar with small eye hooks twisted into the wood, then adds a hanging loop of jute at each end. Hang it from a porch hook where the breeze catches it.
Try this: hang the chime where you can see it from the kitchen window so kids notice it moving.
Medium · Under $10 · 45 minutes
5. Driftwood Fairy House

Stack flat driftwood pieces to build four walls on a 6-inch square base of cardboard. Overlap the corners for strength and glue each layer with tacky glue, leaving a small doorway gap in the front wall. A piece of bark or a flat stone makes a roof, and moss, pebbles, and a twig fence finish the yard. Kids can arrange the pebbles as a winding path to the door. Slip a flameless tea light inside at dusk and the windows glow.
Try this: build the house on a foil-covered tray so it can move from table to garden without falling apart.
Medium · Under $10 · 1 hour
6. Driftwood Name Sign

Line up five to seven short, straight pieces side by side and glue them onto two horizontal twine rails, top and bottom, to make a little plank sign. Once dry, kids paint their name across the planks with a 1-inch flat brush and acrylic paint, one letter per piece. Add a hanging loop of twine at each top corner. These look great on bedroom doors, and they make sweet gifts for grandparents.
Try this: paint the letters white first, then add a color on top once dry; the color pops more.
Easy · Under $5 · 30 minutes
7. Driftwood Nature Mobile

Find one strong branch, 18 to 24 inches long, to serve as the hanger. Tie three strands of fishing line or twine to it at different lengths, 12 to 24 inches, and thread each with a mix of driftwood pieces, feathers, shells, and sea glass. Tie a small bead at the bottom of each strand as a stopper. Hang the branch from a curtain rod and slide the strands until the whole thing balances.
Try this: assemble the mobile over a table, not the floor, so dropped beads don’t roll away.
Medium · Under $10 · 50 minutes
8. Driftwood Garden Markers

Choose flat pieces about 6 to 8 inches long with at least one smooth face. Kids write plant names on the smooth side with a white or black paint pen, then push the marker 2 inches into the soil next to the matching plant. A quick spray of clear acrylic sealer (adult job, outdoors) keeps the names readable through rain. These turn a vegetable patch into a labeled garden kids feel responsible for.
Try this: write the name on both sides so it reads from any direction in the bed.
Easy · Under $5 · 30 minutes
9. Driftwood Pencil Holder

Bundle eight to ten straight driftwood sticks upright around an empty tin can and secure them with two wraps of twine, top and bottom. Run a line of tacky glue where each stick meets the can so nothing slides. Trim the tops even with garden shears (adult job) or leave them uneven for a rustic look. A standard soup can holds about 15 pencils and pens. Let the glue cure for an hour before loading it with supplies.
Try this: glue a circle of felt inside the bottom of the can so pencils land quietly.
Easy · Under $5 · 25 minutes
10. Driftwood Wall Art

Cut a simple shape, a fish, a star, or a 12-inch circle, from sturdy cardboard and paint it light blue, sage, or pink. Glue small driftwood pieces edge to edge across the shape, trimming pieces to fit the outline. The painted cardboard shows through the gaps and reads as background color. Mount with two removable adhesive strips. If layered wall pieces are your kid’s thing, these easy DIY 3D wall art ideas use the same build-up technique on a bigger scale.
Try this: start gluing from the outside edge inward; the border sets the shape and the middle fills itself.
Easy · Under $5 · 45 minutes
11. Driftwood Heart Wall Art

Trace a 10-inch heart onto cardboard and cut it out. Starting at the outer edge, glue short driftwood pieces in neat rows, working toward the center and snapping pieces shorter as the heart narrows. Keep the pieces tight so barely any cardboard shows. This one earns its spot as a Valentine’s or Mother’s Day gift, and it looks far harder than it is. For grown-up walls, these DIY boho wall decor ideas use the same layered driftwood look.
Try this: sort pieces into short, medium, and long piles first; the rows go twice as fast.
Easy · Under $5 · 40 minutes
12. Driftwood Bead Garland

Cut driftwood into 3-inch pieces and drill a small hole through the center of each (adult job), or use pieces with natural holes. Alternate two or three wood pieces with one painted wooden bead on a long length of twine, knotting between pieces if you want them spaced out. A 4-foot garland needs about 20 to 25 wood pieces. Hang it swagged across a doorway or along a party table.
Try this: paint the beads the night before so they are fully dry on stringing day.
Easy · Under $10 · 40 minutes
13. Mini Driftwood Christmas Tree

For a tree that never drops needles, gather eight to ten driftwood sticks in graduating lengths, longest at the bottom, and tie them to a central twine spine with simple knots. The tree stands about 14 inches tall on a small wood slice base. Kids tuck in tiny pinecones and tie on a wooden star for the top. It packs flat in a box after the holidays. For more seasonal making, these Thanksgiving crafts for kids keep the nature-craft streak going into fall.
Try this: lay the sticks out in order on the table before tying anything; adjusting later is fiddly.
Medium · Under $10 · 1 hour
14. Driftwood Raft for Toy Sailors

Lay six to eight straight sticks side by side to make an 8-inch square deck and lash them together with twine at both ends, wrapping the twine in a figure-eight between sticks. Poke a short mast stick upright through the middle lashing and tie on a paper sail. It floats well and carries two or three small toy figures through many sink voyages. A drop of wood glue on each lashing keeps the knots from working loose in water.
Try this: give each kid their own sail color so there is no arguing over whose raft is whose.
Easy · Under $5 · 30 minutes
15. Driftwood Star Wand

Pick the straightest stick you can find, about 10 to 12 inches long, and sand it smooth. Glue a 3-inch wooden star to the top with wood glue and let it cure overnight. Kids paint the star gold or silver with acrylic paint, then add dots of glitter glue while the paint is tacky. Wrap the handle in ribbon or yarn for a better grip. This is the fastest project on the list and the one most likely to be carried around for a week.
Try this: paint two stars and glue them back to back so the wand looks finished from every angle.
Easy · Under $5 · 25 minutes
Which craft fits your child’s age?
Use this quick guide to match a project to your kid. Ages are a starting point; a crafty 5-year-old can tackle a “7+” build with an adult beside them.
| Craft | Best ages | Time | Cost |
|---|---|---|---|
| Picture frame | 4+ | 30 minutes | Under $5 |
| Sailboat | 5+ | 25 minutes | Under $5 |
| Animal art | 4+ | 40 minutes | Under $5 |
| Wind chime | 7+ | 45 minutes | Under $10 |
| Fairy house | 6+ | 1 hour | Under $10 |
| Name sign | 5+ | 30 minutes | Under $5 |
| Nature mobile | 7+ | 50 minutes | Under $10 |
| Garden markers | 4+ | 30 minutes | Under $5 |
| Pencil holder | 6+ | 25 minutes | Under $5 |
| Wall art | 5+ | 45 minutes | Under $5 |
| Heart wall art | 5+ | 40 minutes | Under $5 |
| Bead garland | 6+ | 40 minutes | Under $10 |
| Mini Christmas tree | 7+ | 1 hour | Under $10 |
| Toy raft | 4+ | 30 minutes | Under $5 |
| Star wand | 3+ | 25 minutes | Under $5 |
Easy tips for better driftwood crafts
- Sort pieces by size and shape before anyone picks up glue; building goes twice as fast.
- Lay out each design dry first, then glue. Moving a glued piece usually breaks it.
- Paint pieces before assembling for cleaner edges and less mess on the table.
- Keep a damp cloth nearby for tacky-glue drips; it wipes off easily while wet.
- Store leftover driftwood in a dry bin or paper bag, not sealed plastic, so trapped moisture can’t grow mold.
- Small-parts rule: keep beads, googly eyes, and small shells away from children under 3; they are choking hazards.
Turn the collecting trip into part of the fun: run this chalk obstacle course for kids at the park on the way to the shore. And for rainy days when the beach is off the table, these easy paper crafts for kids need nothing but the junk drawer.
Frequently asked questions
Is driftwood safe for kids to use?
Yes, once it is cleaned and fully dried. Rinse each piece under running water, scrub off sand and debris with a stiff brush, soak for a few hours in a mix of one part white vinegar to one part water, then dry completely in the sun. Sand any rough spots with 120-grit sandpaper to prevent splinters. Keep the tool jobs with adults: drilling, sawing, and hot glue guns are not kid tasks.
Where can you find driftwood?
Check beaches, lakeshores, and riverbanks, especially after storms. You don’t need the ocean; lakes and rivers produce plenty of smooth, worn wood. Always check local rules first, since many parks limit or ban collecting, and never take wood from national or state parks.
What age is best for driftwood crafts?
Kids ages 3 and up can join in with supervision. Ages 3 to 5 do best with sorting, painting, and simple gluing. Ages 6 to 10 can handle full assembly with tacky glue and basic knot tying. Ages 11 and up can take on complex builds, with an adult still handling any drilling or cutting.
Can kids paint driftwood?
Yes. Acrylic craft paint sticks well to clean, dry driftwood and comes in small inexpensive bottles. For toddlers, washable tempera is the easier cleanup. Whatever you buy, look for the AP (Approved Product) seal from the Art and Creative Materials Institute, which certifies art supplies as nontoxic.
What is the best glue for driftwood crafts?
Tacky craft glue handles most kid projects and dries clear. Use wood glue for joints that carry weight, like the mast on the sailboat, and let it cure overnight. Hot glue is fast and strong, but the gun should stay in adult hands; young kids can place pieces while an adult applies the glue.
Final thoughts
Fifteen crafts, one bucket of beach finds, and a free afternoon is all it takes to turn driftwood from clutter into keepsakes. Start with one easy build, let the kids lead the design, and save the extras for the next rainy day. That entryway gift shop of mine is finally down to one shelf, and the driftwood heart hangs in the hallway.


