


That old stump in the yard is not a problem to solve. It is free raw material sitting right where you need it, and it can hold plants, hold drinks, hold a candle, or hold a whole fairy village. Most of these projects need a saw, a drill, sandpaper, and one free afternoon.
This guide covers 20 stump projects for the yard and the porch, from a hollowed flower planter to a chess table, a bug hotel, and a carved welcome sign. Every idea lists a real cost range and a difficulty level, so you can start with the easy wins and save the chainsaw work for a weekend.
Quick takeaways
- Check a stump for soft rot and insects before you build with it, and let fresh cuts dry before sealing.
- Drill drainage holes in every stump planter, or roots will sit in water and rot.
- Keep treated wood away from herbs and vegetables you plan to eat.
- Start with the no-saw projects (plant stands, candle holders, slice paths) and save hollowed builds for later.
- Seal outdoor stumps once a year to slow weather damage.
How to pick the right stump
Hardwood stumps (oak, maple, walnut) last longer outdoors than soft pine, which rots faster in damp soil. Pick a stump that feels solid when you knock on it, with no soft spots, mushroom growth, or ant trails. A stump still rooted in the ground works for planters, bird baths, and fairy gardens with no moving at all. A loose stump under 18 inches across is easy to carry, sand, and seal on a workbench. Cut stumps need 6 to 12 months of drying before you seal them, or trapped moisture will crack the finish from inside.
1. Hollowed stump flower planter
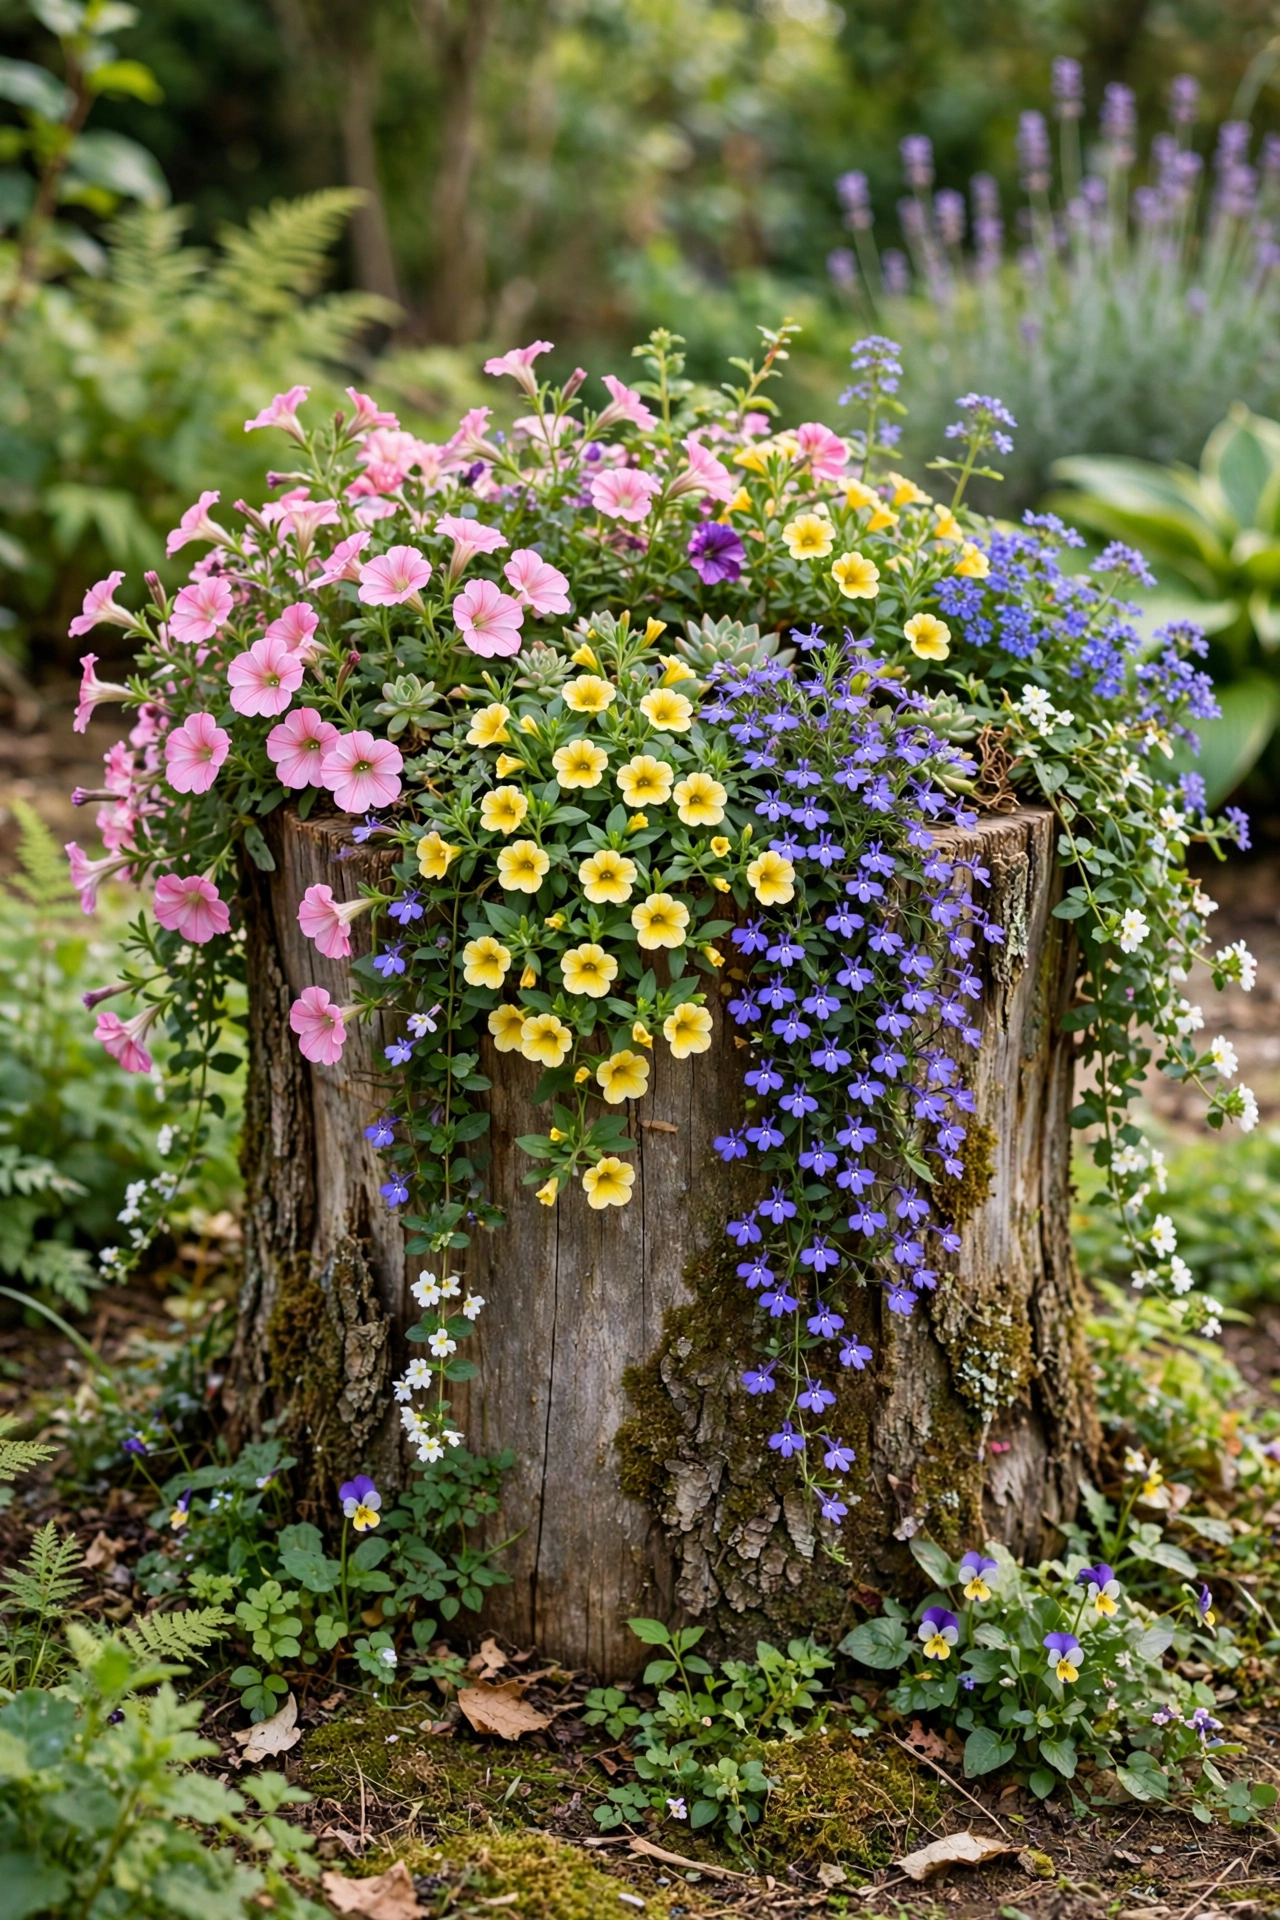
Drill a ring of holes inside a circle on the stump top with a 2 inch Forstner bit, then chisel out the middle to a depth of 6 to 8 inches. Drill two side holes near the base so water drains out instead of pooling. Line the hollow with landscape fabric, add potting mix, and plant trailing petunias, creeping thyme, or succulents that spill over the bark edge. A stump 14 to 20 inches across gives roots enough room without weakening the walls. Leave at least 2 inches of wood around the hollow so the rim stays solid.
Try this: Plant one tall thriller in the center, like a spike dracaena, and let trailers soften the rim.
Cost: $ | Difficulty: Easy
2. Mosaic tile stump side table

Sand a flat-topped stump smooth, then glue broken ceramic tiles or glass mosaic pieces across the top in a simple ring pattern and grout the gaps. The tile top shrugs off coffee rings and rain in a way bare wood never does, and it turns a plain stump into a piece guests ask about. Seal the grout with an outdoor grout sealer so it survives wet weather. Keep the stump 16 to 20 inches tall for a side table beside a porch chair. For more scrap-wood table builds, see our 25 Creative DIY Wooden Side Table Ideas for crate, slab, and spool tables that pair well with a stump base.
Try this: Use one accent color from your porch cushions in the mosaic so the table ties the seating together.
Cost: $$ | Difficulty: Moderate
3. Stump drink cooler for gatherings

Hollow a wide stump the same way as a planter, but drop a galvanized metal bucket into the cavity instead of soil. Fill the bucket with ice and bottles for a garden party, and the thick wood walls keep drinks cold longer than a thin tub. The bucket lifts out for cleaning, and the stump stays put as a side table between parties. Pick a stump at least 20 inches across so a standard 5 gallon bucket fits with room to spare. Drill a small drain hole in the bottom of the cavity so rainwater never pools under the bucket.
Try this: Set the cooler stump near the grill, not the seating, so guests walk past it on the way to food.
Cost: $ | Difficulty: Easy
4. Fairy garden on a stump top

A flat stump top is a ready-made stage for a miniature garden. Glue a tiny wooden door and two windows to the side, press moss into the cracks, and add miniature furniture, a pebble path, and a few small succulents or creeping thyme plants. Kids can rearrange the scene every season without any tools. Use outdoor glue so rain does not wash the door off. A stump near a tree or fence reads as a woodland cottage corner. For more small-scale yard projects, see our 25 Stunning DIY Yard Art Crafts Ideas for a Garden With Personality for painted rocks, tin lanterns, and fairy gardens in broken pots.
Try this: Add one battery fairy light string under the moss for a glow after dark.
Cost: $ | Difficulty: Easy
5. Carved stump bird bath

Carve a shallow bowl into the top of a sturdy stump with a chainsaw and chisel, about 2 inches deep and 12 inches across, then sand the bowl smooth so birds can grip the rim. Birds prefer shallow water, and a stump bath sits at a natural height for them to hop onto from nearby shrubs. Seal the bowl with a food-safe waterproof sealant and refresh the water every few days to keep mosquitoes out. Place the bath 10 feet from dense shrubs so cats cannot hide right beside it. A stump still rooted in the ground makes the most stable bird bath of all.
Try this: Drop two flat stones in the bowl as perches so small birds can stand in the water safely.
Cost: $ | Difficulty: Moderate
6. Drilled stump candle holders

Cut a stump into short sections 4 to 6 inches tall, then drill a hole in the center of each one sized for a pillar candle or a tea light cup. Group three holders of different heights on a table for a centerpiece that costs almost nothing. Use battery candles outdoors near dried leaves or fabric, since real flames and dry material do not mix. Sand the tops smooth and seal with clear outdoor finish so wax wipes off easily. These holders also work indoors on a mantel, where the bark edge adds texture against smooth pottery and glass.
Try this: Drill the hole slightly wider than the candle so you can lift it out to replace it.
Cost: $ | Difficulty: Easy
7. Stump slice garden path steps

Slice a log into rounds 2 to 3 inches thick and lay them as stepping stones through a bed or along a side yard. The rounds give a woodland path look for the price of a saw, and you can replace a single rotted round without redoing the whole path. Set each round on a 2 inch gravel base, and leave 4 to 6 inches between rounds for a natural stride. Seal the tops each spring. For more path and bed ideas, see our 21 Genius DIY Garden Landscape Ideas for Any Budget for paver paths, rock borders, and gravel pads that work beside stump steps.
Try this: Mix one wide round as a landing stone where the path turns, so walkers have a clear place to pause.
Cost: $ | Difficulty: Easy
8. Stacked stump succulent tower
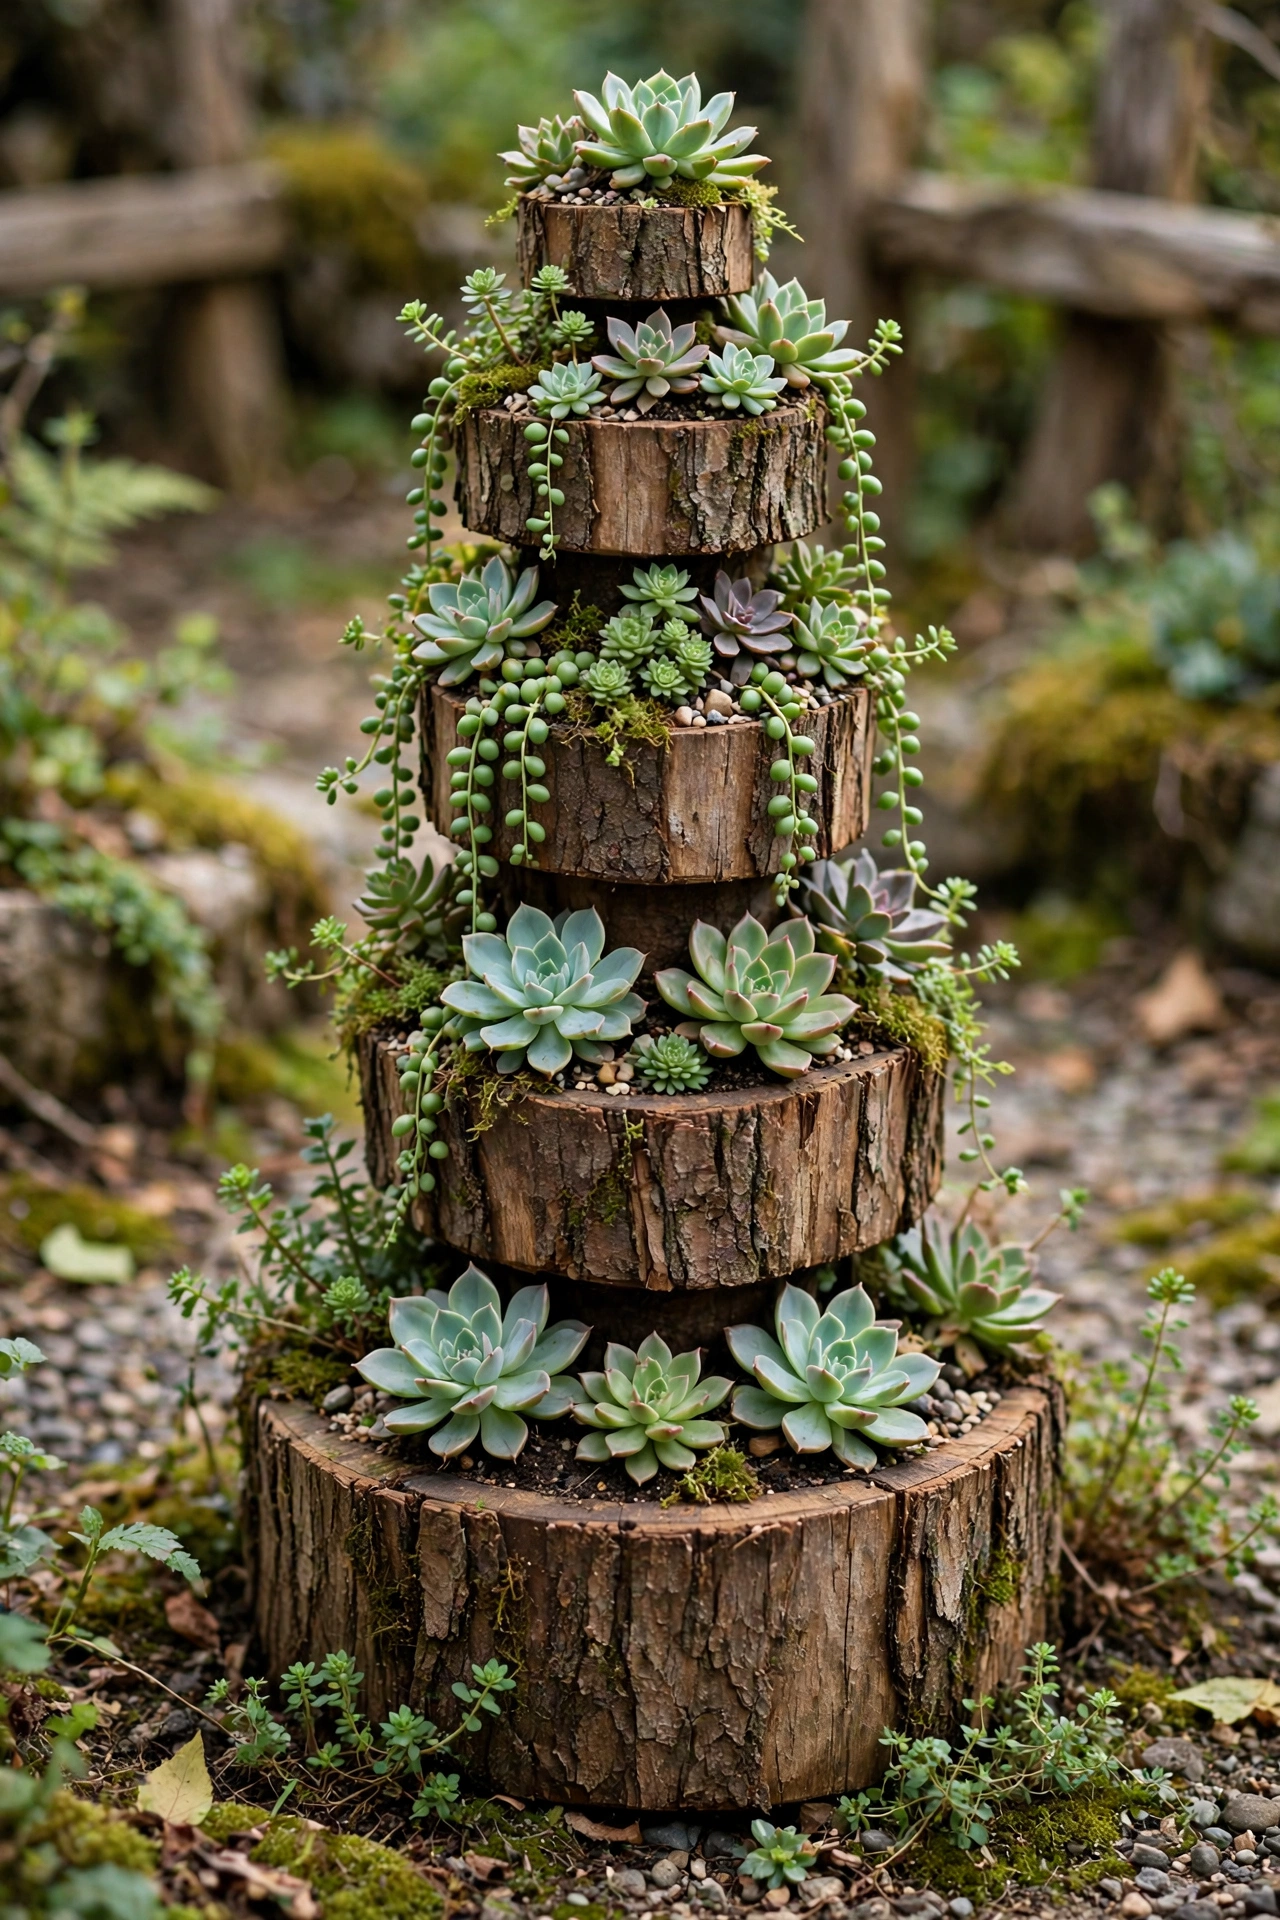
Stack three stump sections of decreasing size, hollow a shallow pocket in the top of each one, and plant a different succulent in every tier. The tower gives vertical planting in a corner too small for a bed, and succulents need so little water that the wood stays dry. Drill a drain hole through each tier so water never sits in the pockets. Anchor the stack with a metal rod driven through the centers if kids or wind could topple it. Hens and chicks, sedum, and echeveria handle sun and neglect, which suits a tower you water once a week.
Try this: Face the largest rosette outward on each tier so the tower reads full from the path.
Cost: $ | Difficulty: Moderate
9. Stump birdhouse post
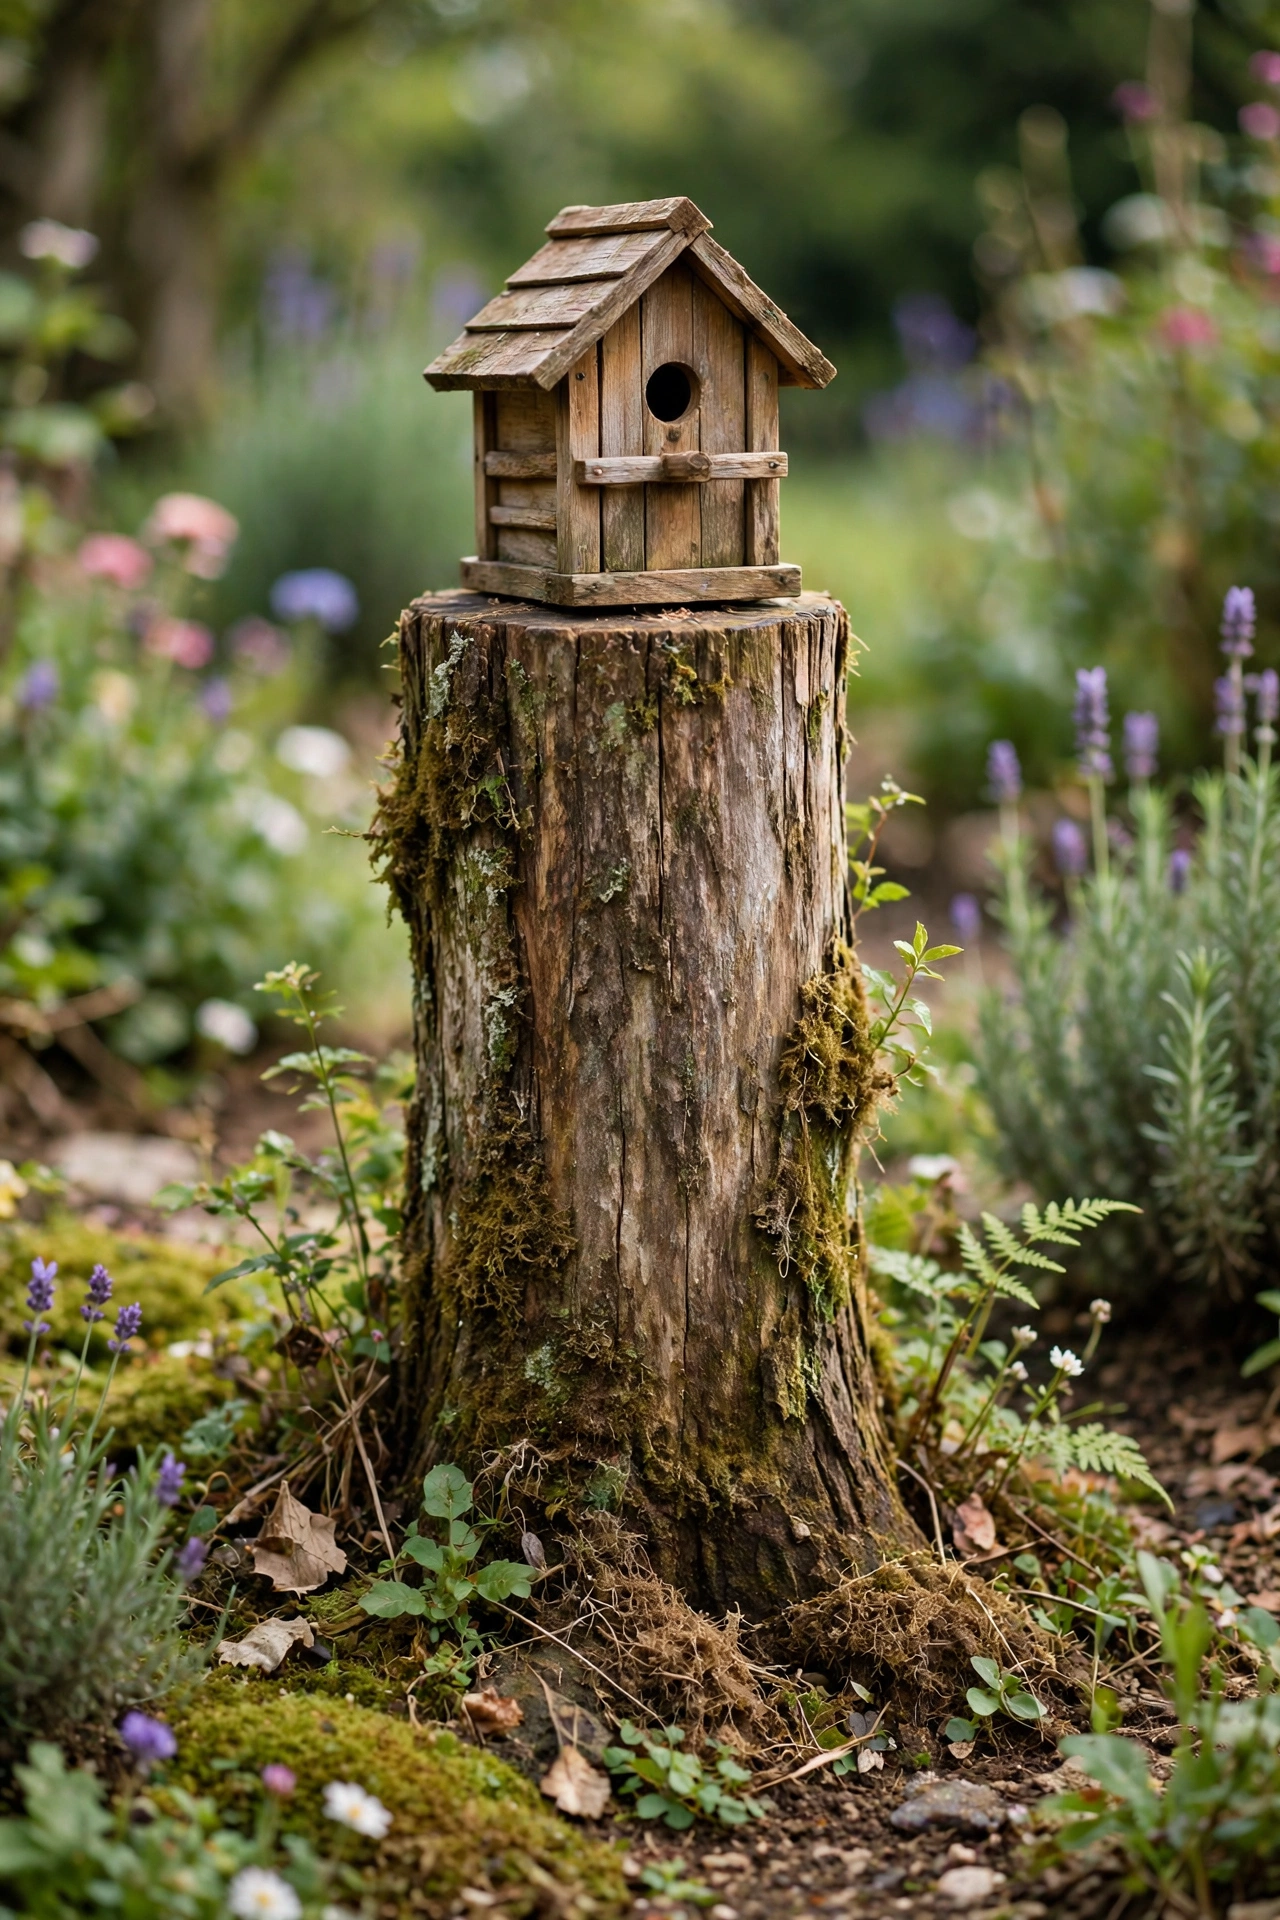
Mount a simple wooden birdhouse on a tall stump instead of a metal pole, and the whole thing reads as one piece of garden woodwork. Screw the birdhouse to a flat cap board on the stump top so you can lift it off for autumn cleaning. Face the entrance away from prevailing wind and 5 to 10 feet above the ground, which keeps most ground predators out. Use untreated wood for the birdhouse itself, since treated lumber can harm nestlings. A stump post near shrubs gives fledglings cover on their first flights.
Try this: Skip the perch peg by the entrance hole, since it helps sparrows and starlings more than songbirds.
Cost: $ | Difficulty: Easy
10. Solar light stump stand

Set a solar lantern or a solar path light stake on a low stump beside a walkway, and the stump lifts the light above low plants that would block it. Solar lights charge all day and switch on at dusk with no wiring, which makes this a five minute project. Pick a stump in a spot that gets at least 6 hours of direct sun, or the light will fade by midnight. Seal the stump top so rain does not soften the wood under the lantern base. Line three stump stands along a path for a rhythm of light that guides guests after dark.
Try this: Use warm white solar lights, since cool white light looks harsh against wood tones.
Cost: $ | Difficulty: Easy
11. Stump bug hotel

Drill holes of different sizes into the side of a stump, from 1/8 inch to 3/8 inch, and pack a few bamboo tubes and pine cones into a hollowed section. Solitary bees, ladybugs, and lacewings move into the holes, and those insects pollinate flowers and eat aphids in return. Place the hotel in a quiet, sunny corner facing south or southeast, and keep it dry under a small roof board or eave overhang. Do not move the hotel once insects settle in, since shifting it can break the sealed nest cells. Leave the hotel up over winter so the insects can finish their cycle.
Try this: Cut bamboo tubes to the same length as the stump depth so the ends sit flush and dry.
Cost: $ | Difficulty: Easy
12. Painted stump chess table

Paint a chess board grid on a wide, flat stump top with outdoor acrylic paint, seal it with clear outdoor polyurethane, and store the pieces in a lidded box beside it. A stump chess table turns a dead corner of the yard into a game spot kids and adults both use, and the board never blows away in wind. Use a stump 24 inches across or wider so the 8 by 8 grid has squares big enough for standard pieces. Paint the squares in two tones that match your patio furniture, like charcoal and cream. Two stump stools beside the table finish the set.
Try this: Paint the grid with a stencil or painter’s tape so the lines stay crisp.
Cost: $ | Difficulty: Moderate
13. Stump patio umbrella base
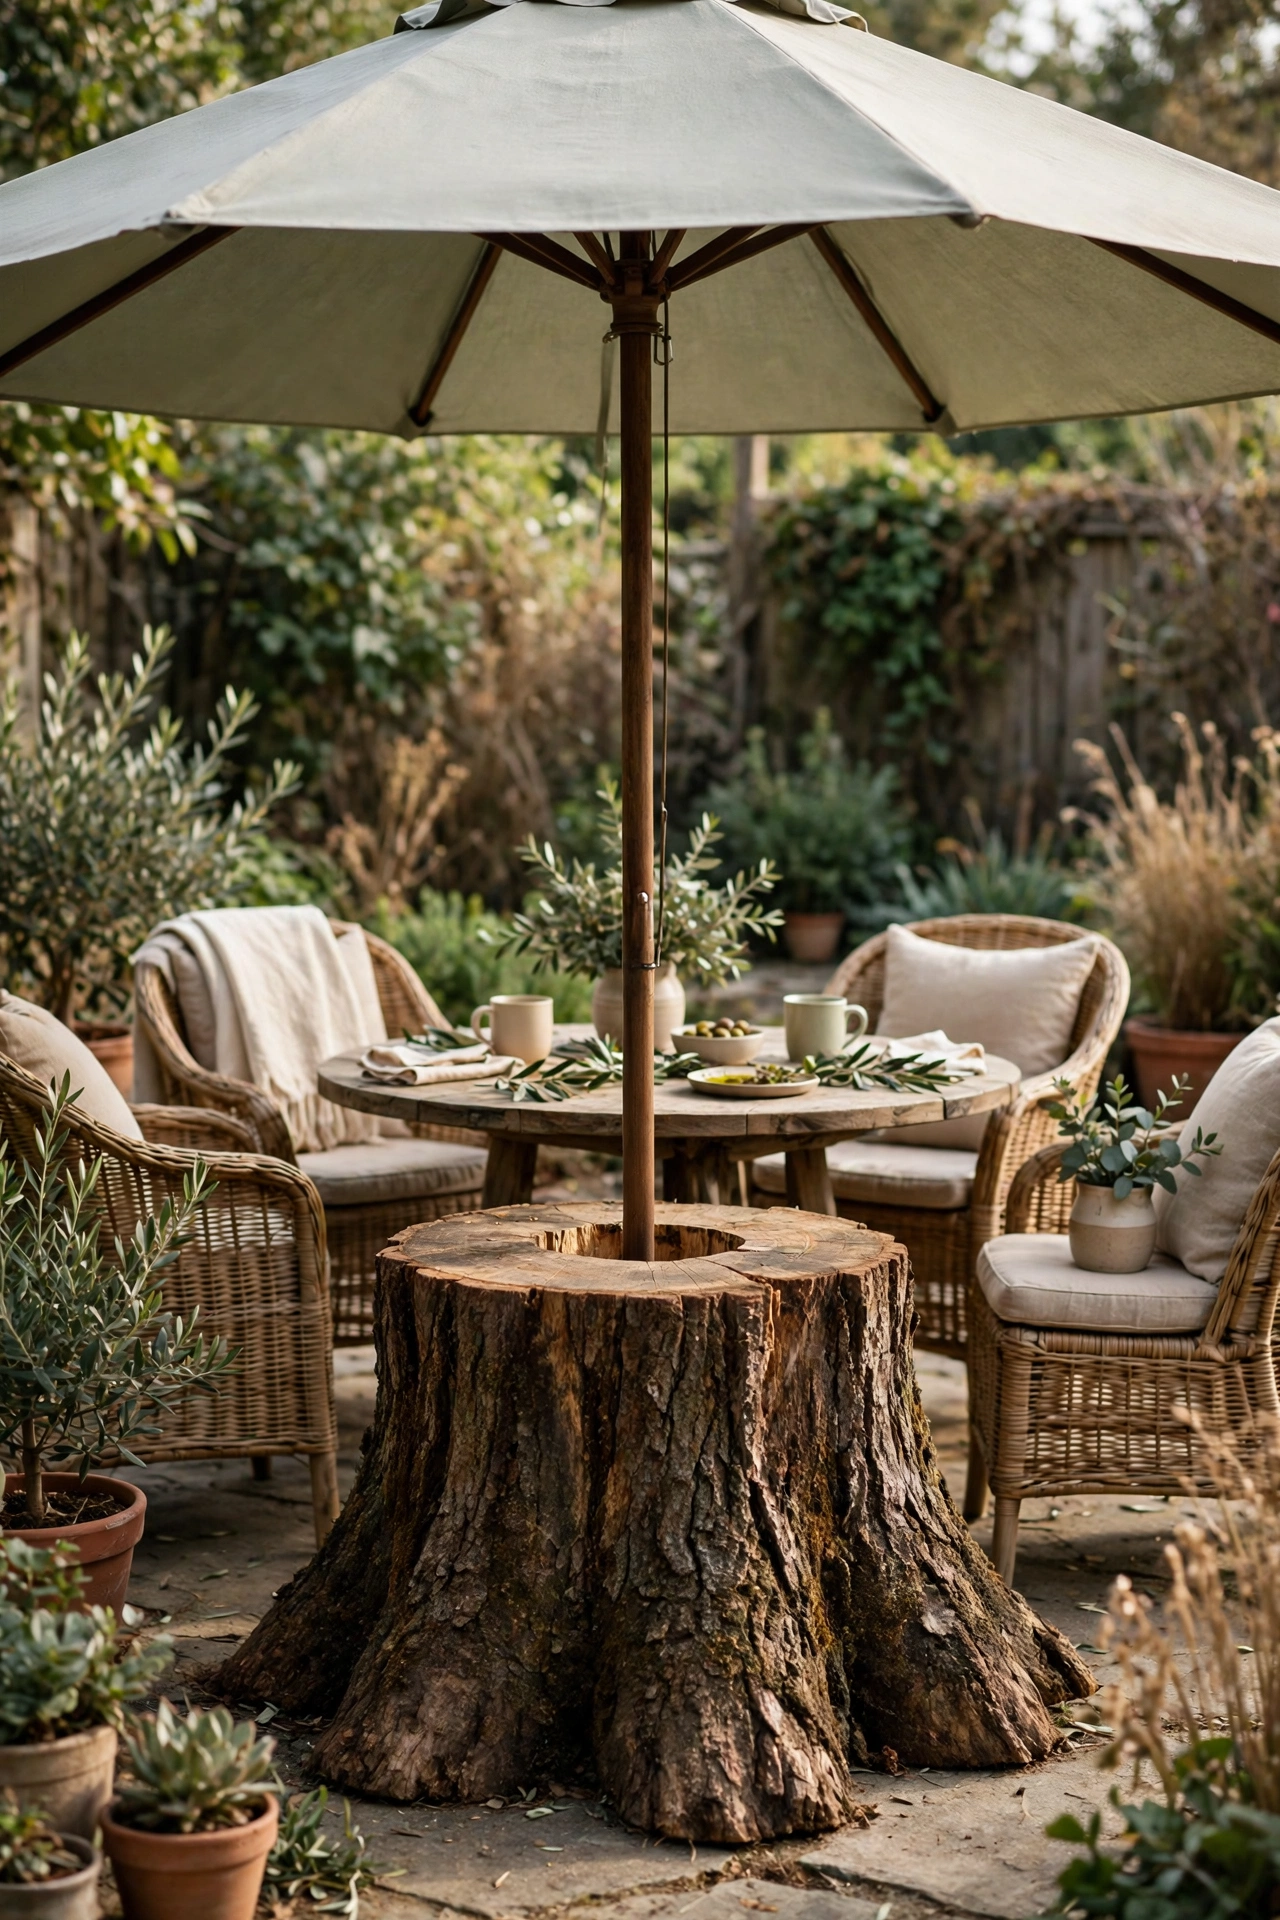
A heavy stump makes a better umbrella base than a light plastic one, since it will not tip in a gust. Drill a hole through the center sized for your umbrella pole, set the pole in, and wedge it tight with a rubber shim or a wrap of rope. A stump 18 inches across and 12 inches tall weighs enough to hold a 9 foot umbrella in normal wind, but bring the umbrella down in a storm like you would with any base. Seal the stump so the pole hole does not hold rainwater and rot from inside.
Try this: Bolt a metal umbrella sleeve into the hole so the pole slides in and out without wearing the wood.
Cost: $ | Difficulty: Moderate
14. Stump herb garden
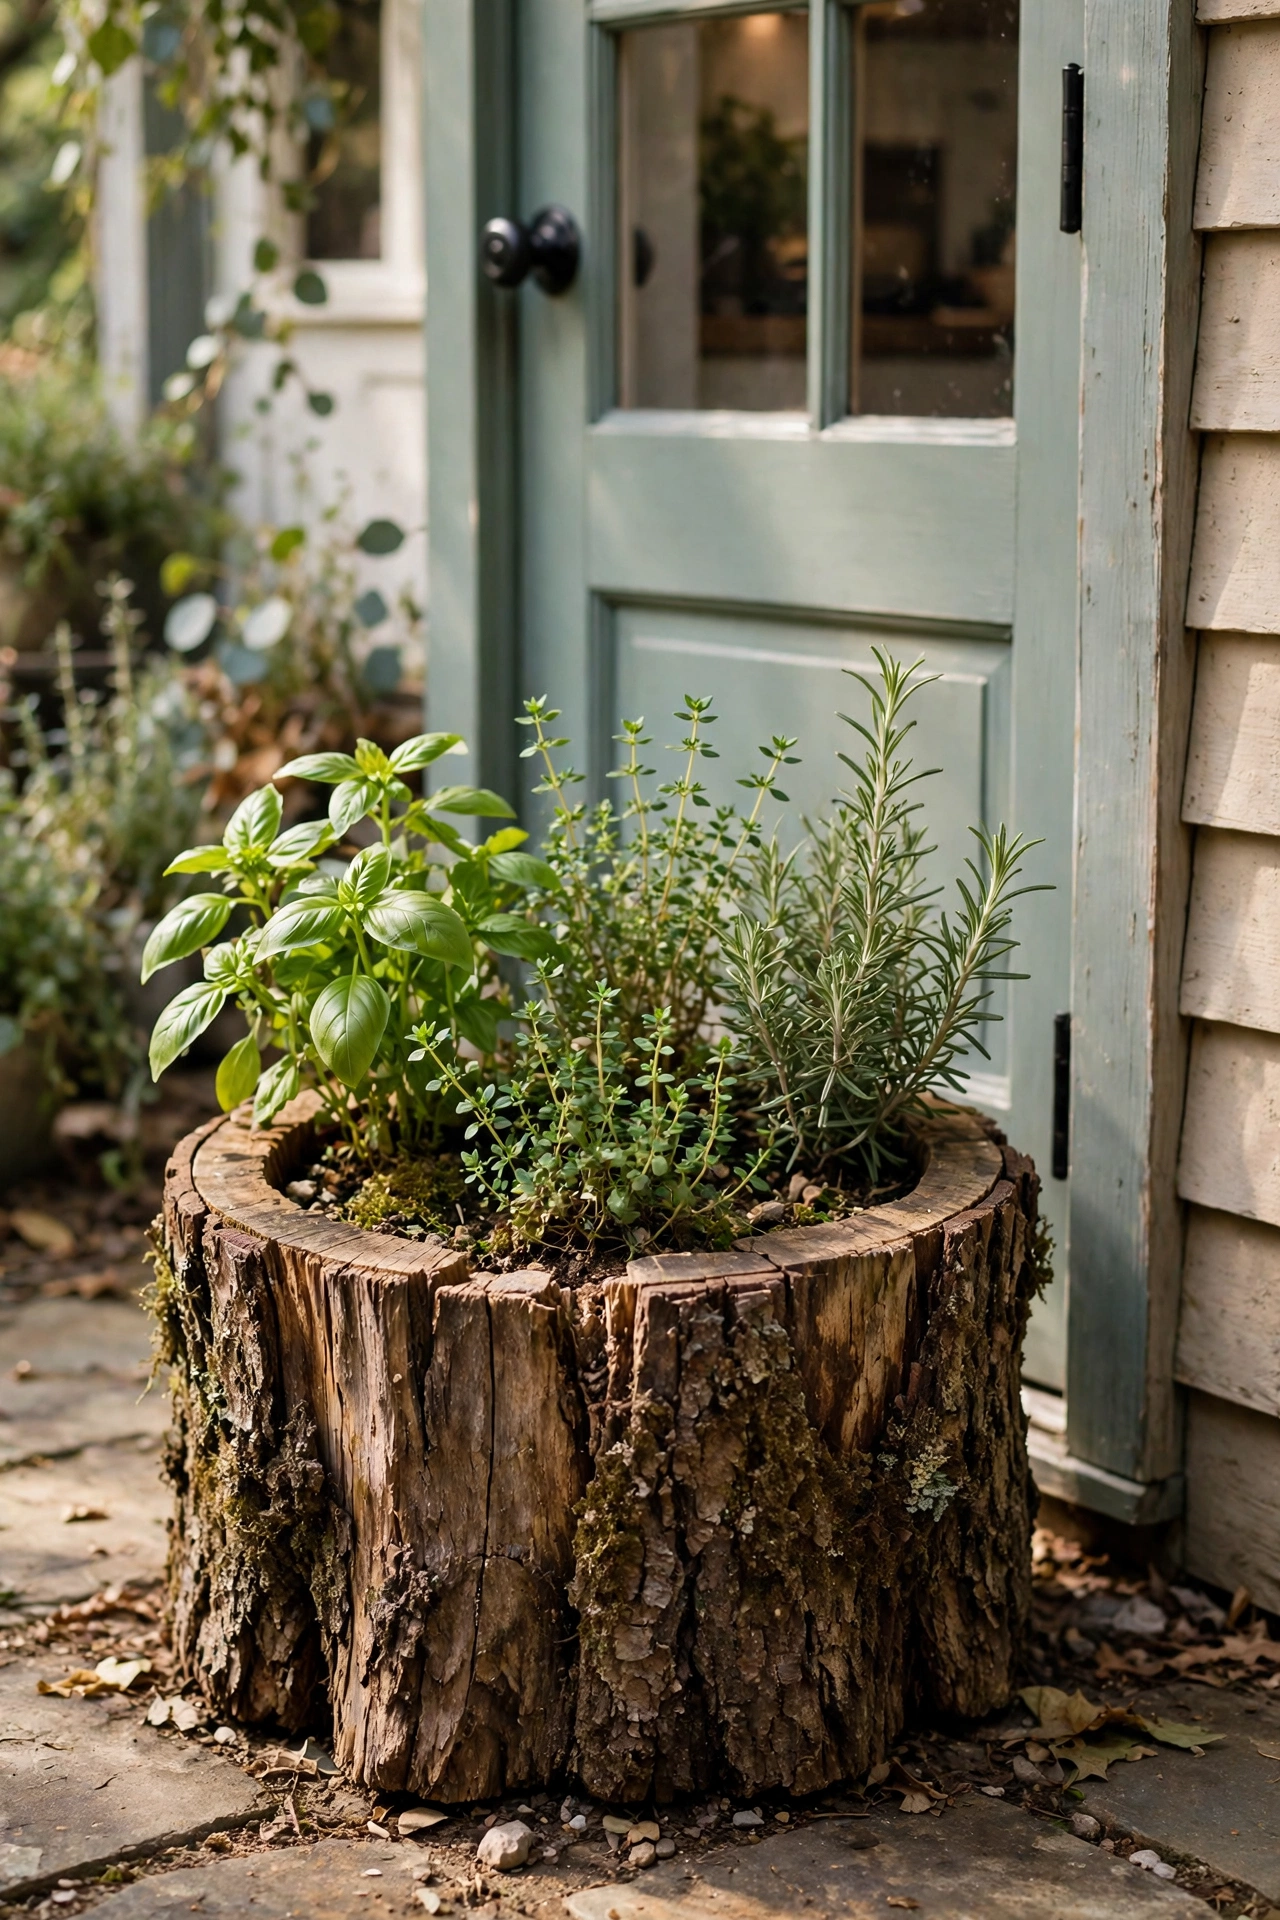
Hollow a stump near the kitchen door and plant basil, thyme, rosemary, and chives in it for a herb garden you can reach while cooking. Herbs like the shallow soil of a stump hollow, and the wood walls warm up in sun, which suits Mediterranean herbs. Keep treated wood out of this project entirely, since chemicals can leach into soil around food plants. Water herbs when the top inch of soil feels dry, and cut them often so they stay bushy instead of woody. One stump by the door beats a whole herb bed you have to walk to.
Try this: Plant mint in its own small pot sunk into the hollow, since mint spreads and takes over.
Cost: $ | Difficulty: Easy
15. Stump slice table centerpiece
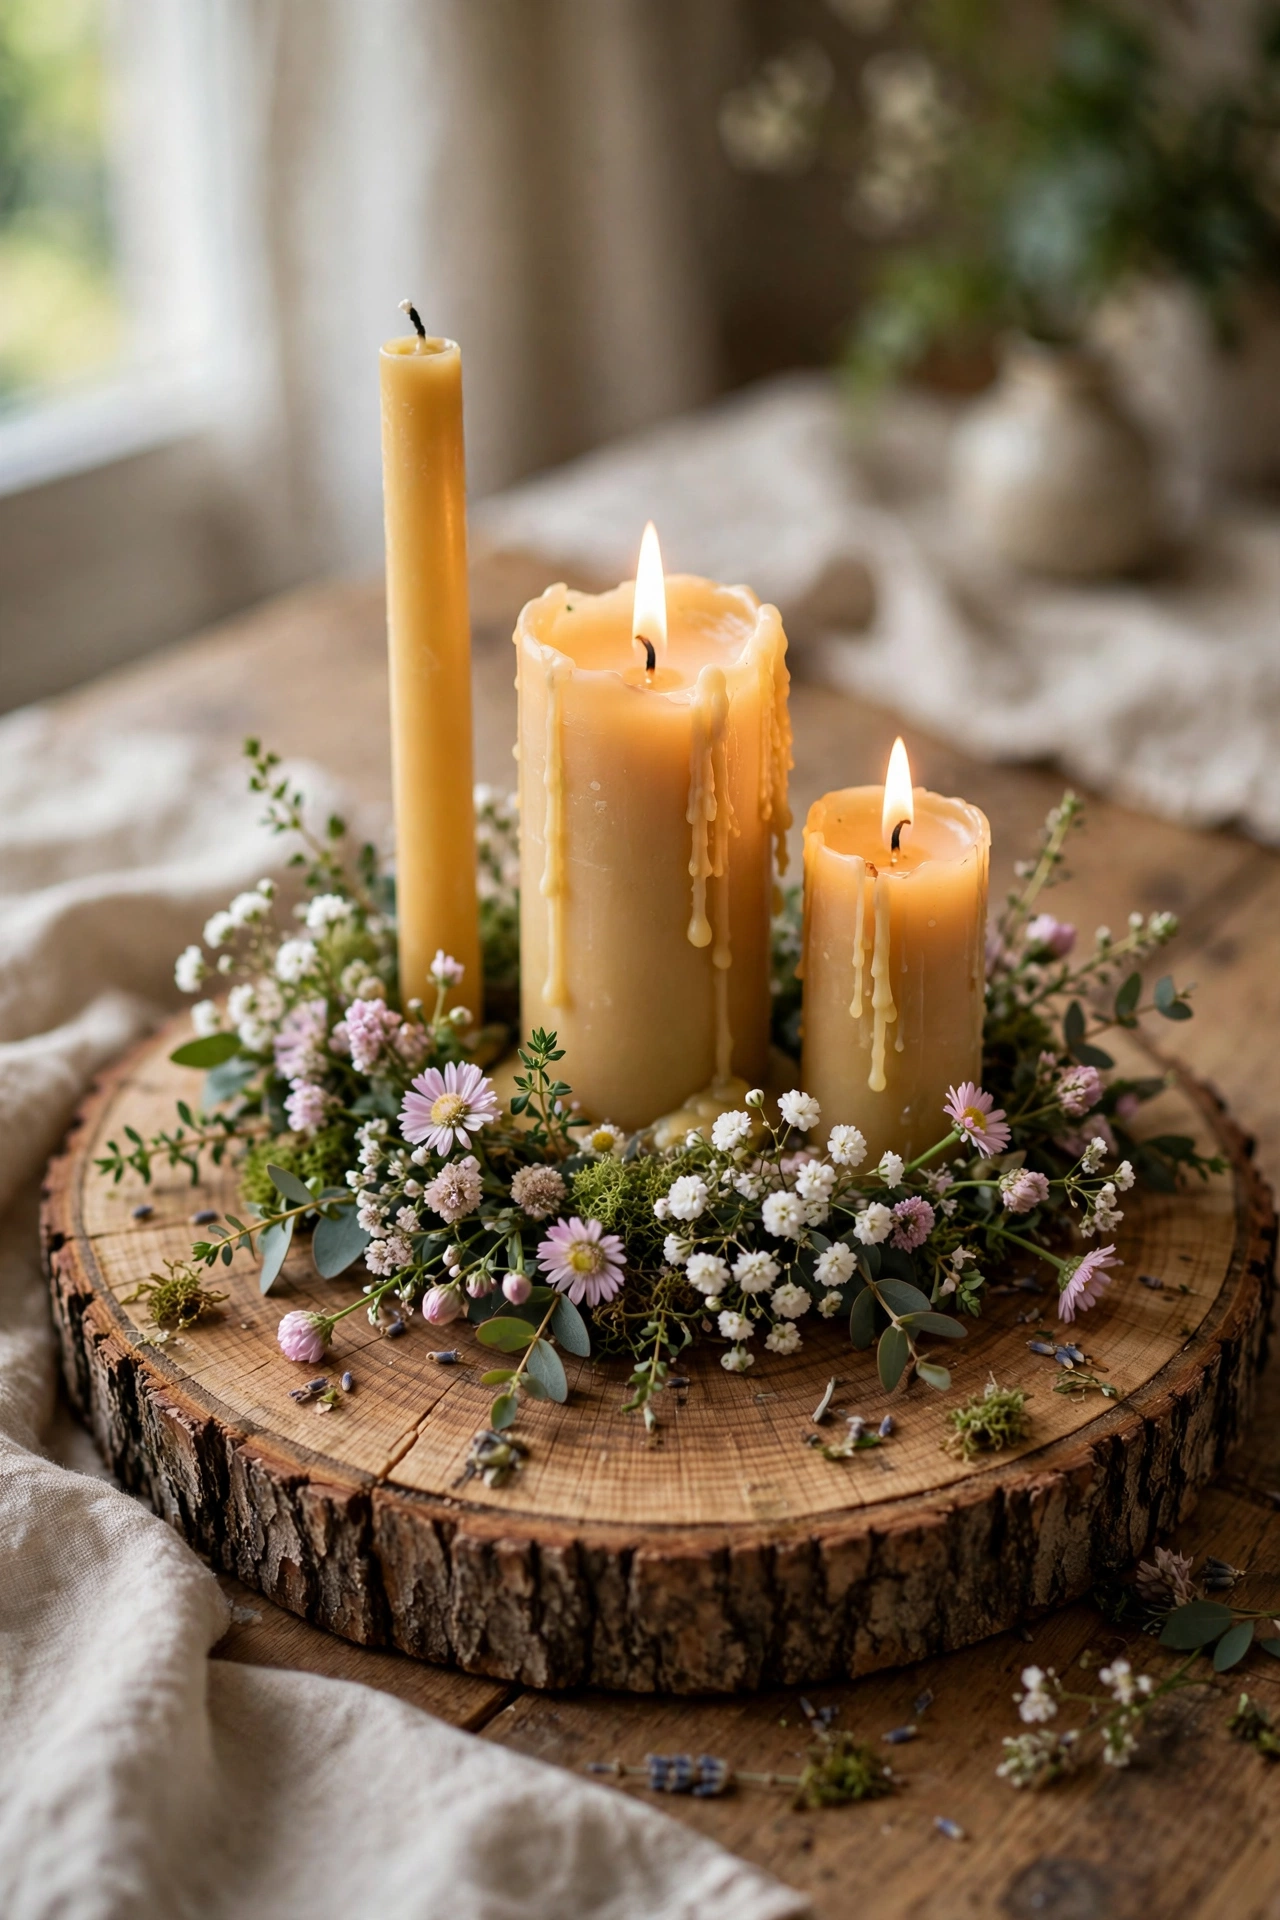
A single stump slice 1 to 2 inches thick, sanded and sealed, makes a centerpiece base for a dining table or porch table. Set a small vase, two battery candles, and a few sprigs of greenery on it, and the wood rings become the decoration. The slice protects the table from candle wax and vase rings, and you can swap the top dressing every season without buying a new base. Pick a slice 12 to 16 inches across so it holds a vase and candles without crowding the table. Sand both faces smooth so it sits flat and does not wobble.
Try this: Use slices from the same log for matching place settings at a holiday table.
Cost: $ | Difficulty: Easy
16. Stump slice wall shelf

Cut a stump slice 2 to 3 inches thick, cut one edge flat so it sits flush against the wall, and mount it on two heavy brackets into wall studs. The live bark edge faces the room while the flat back hugs the wall, which gives a shelf no store shelf can copy. Keep the load light (small plants, books, a candle) and check the brackets are rated above the weight you plan to put on them. Sand the top smooth and seal the bark edge so it does not shed. One slice shelf above a desk or entry table adds wood warmth to a plain wall.
Try this: Mount two slices at staggered heights for a pair of shelves that looks planned, not random.
Cost: $$ | Difficulty: Moderate
17. Stump slice wall clock
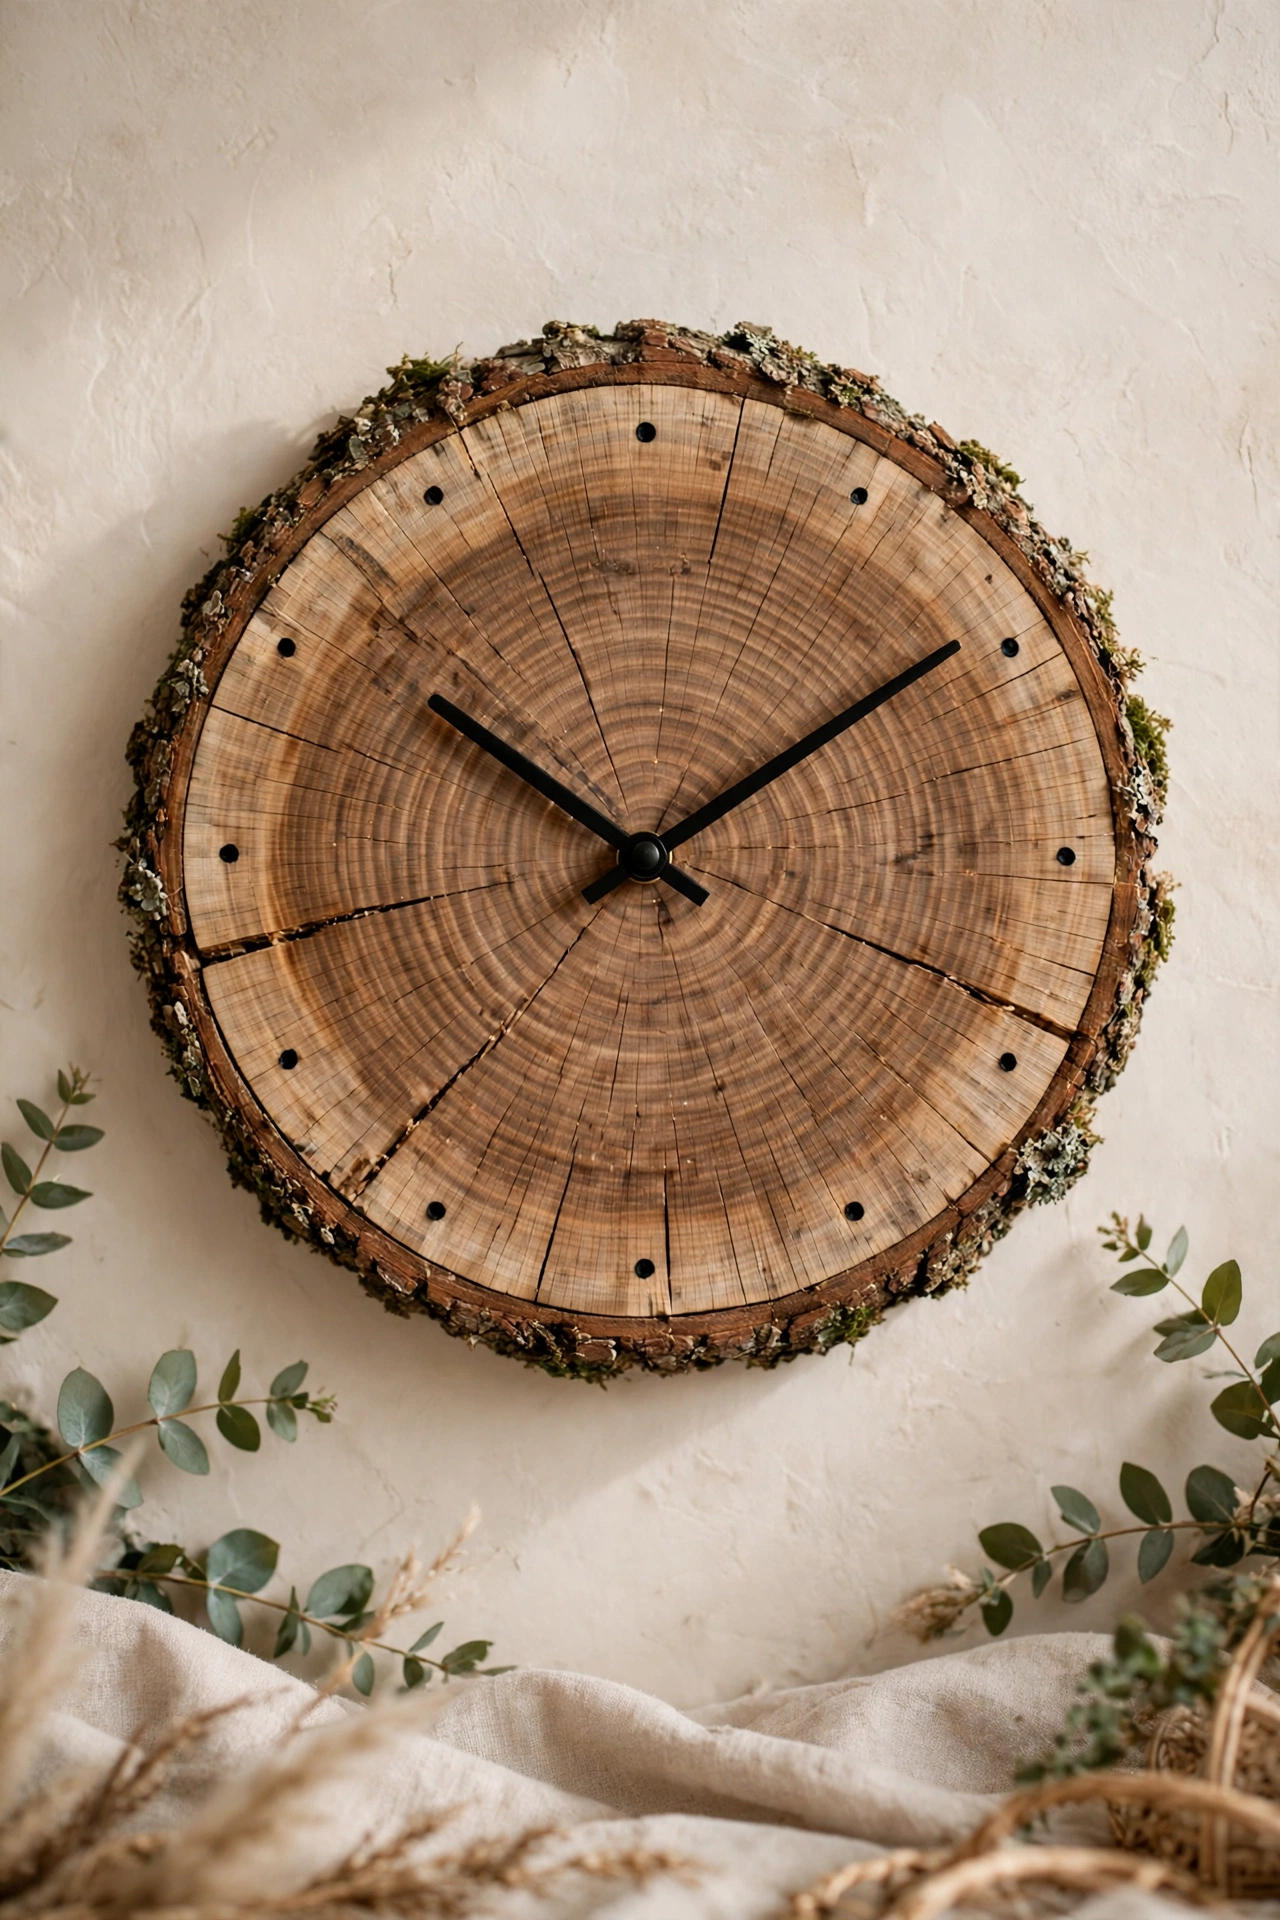
Drill a center hole in a sanded stump slice, fit a clock movement kit through it, and add simple hour markers with paint or small nails. The wood rings act as the clock face, so every clock looks different. A slice 12 to 14 inches across suits a kitchen or hallway wall, and a battery movement kit costs under $15 at most craft stores. Hang the clock on a wall anchor rated above its weight, since a thick slice is heavier than it looks. Seal the slice so it does not crack as indoor humidity changes through the year.
Try this: Use black metal hands against pale wood so the time reads clearly from across the room.
Cost: $ | Difficulty: Easy
18. Carved stump garden chair
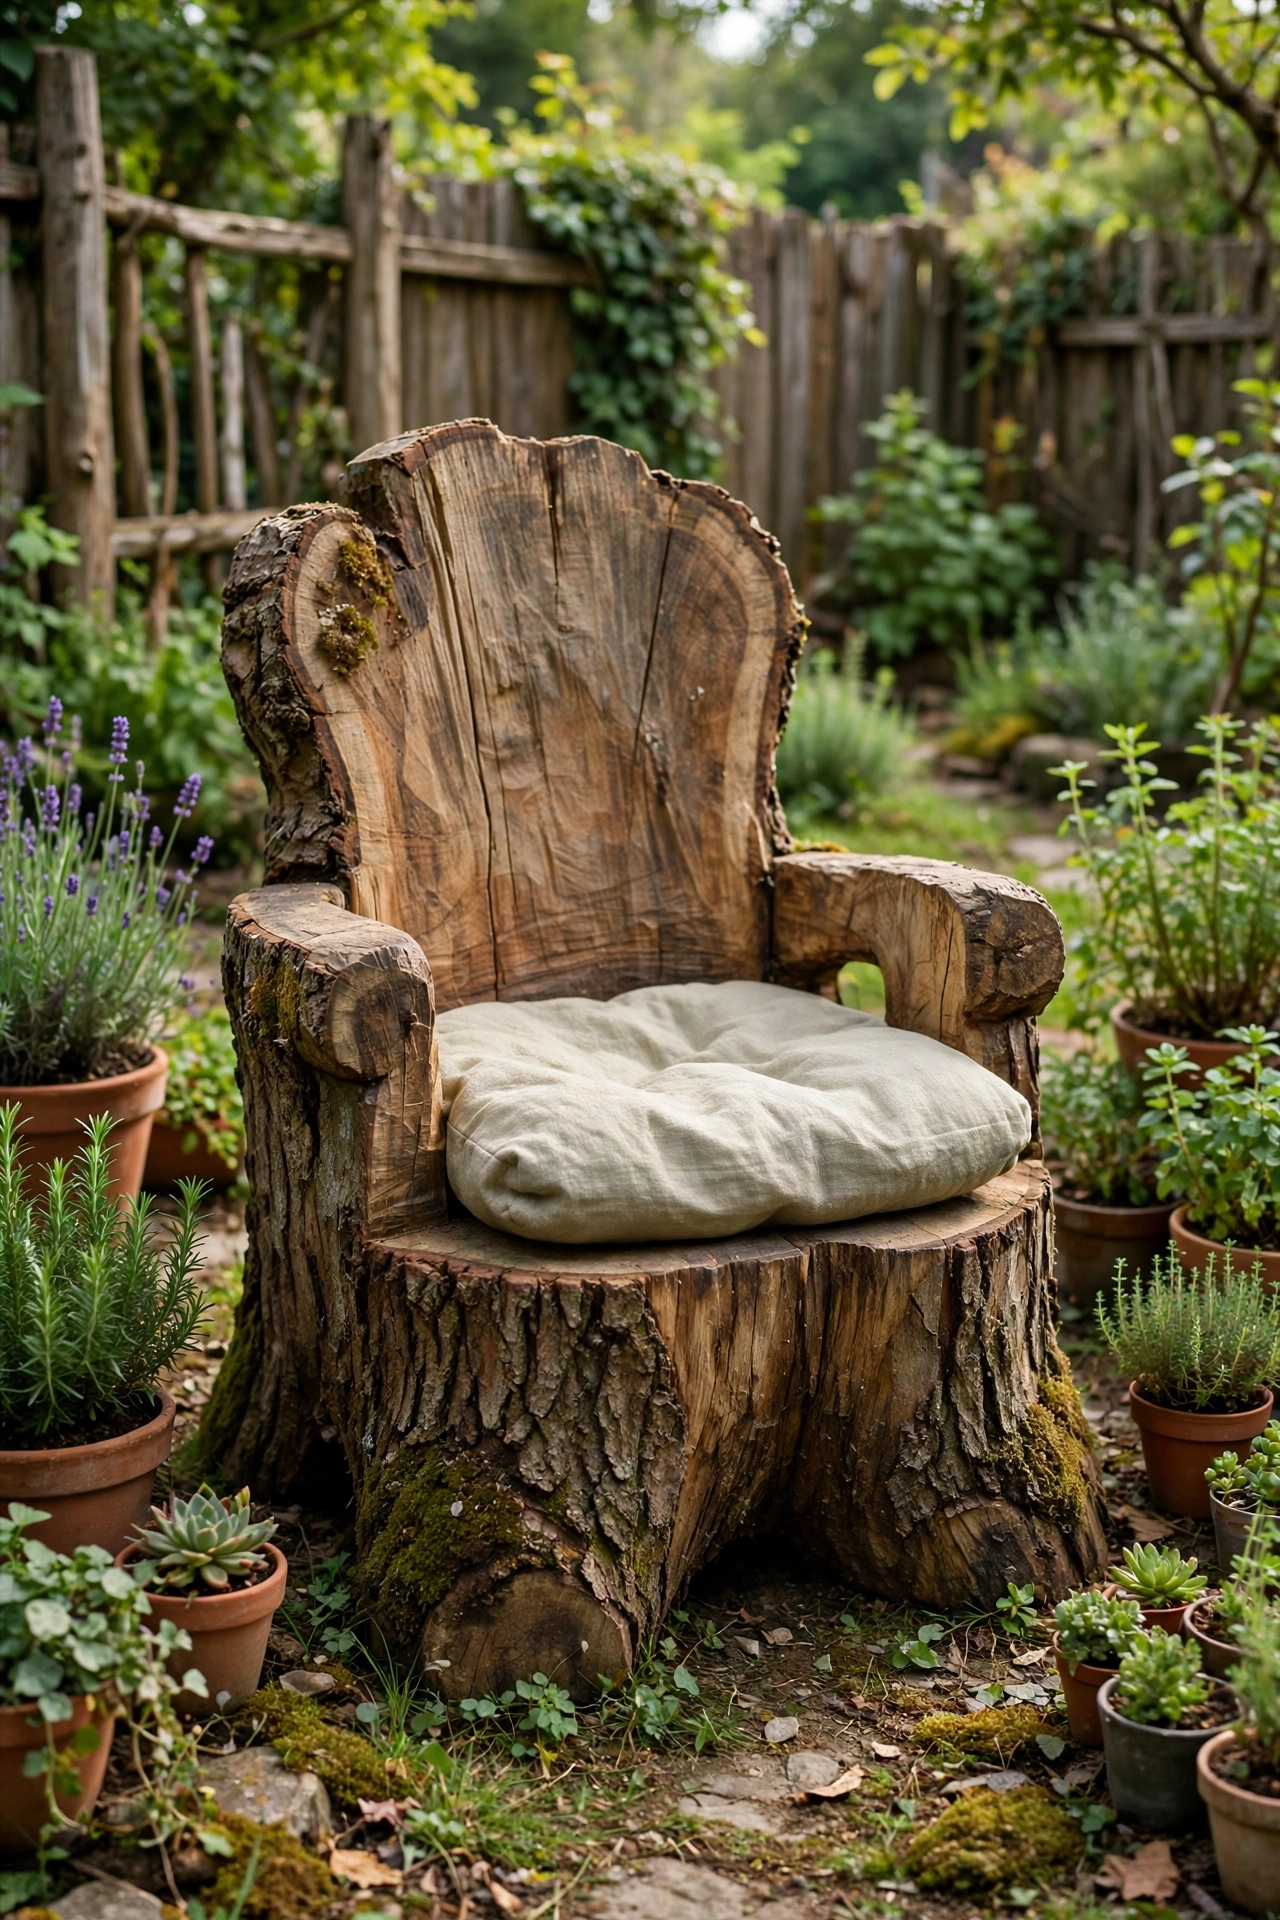
Carve a seat hollow and a backrest into a large stump with a chainsaw, then sand every surface smooth and add an outdoor cushion. A carved stump chair becomes the favorite seat in a garden nook, since it sits low, solid, and close to the ground. Pick a stump at least 24 inches across so the seat is wide enough, and leave the backrest thick so it cannot snap under weight. Seal the whole chair with outdoor finish and store the cushion indoors over winter. For more seating ideas, see our 25 Beautiful Garden Nook Seating Ideas for benches, hammocks, and nook layouts that pair with a stump chair.
Try this: Carve the seat with a slight tilt back so the chair feels relaxed instead of flat.
Cost: $$ | Difficulty: Hard
19. Stump planter stand trio

Group three stumps of different heights (12, 18, and 24 inches) and set a potted plant on each one for a tiered display by a door or fence. The varying heights make a plain row of pots look arranged, and you can move the whole group in minutes when you rearrange the porch. Use pots with saucers so water never sits on the stump tops and rots them. For a porch display, see our 20 Rustic Porch Decor Ideas on a Budget for crate tables, lanterns, and rocking chairs that sit well beside stump stands. Keep the tallest stump at the back so every plant stays visible from the path.
Try this: Put the trailing plant on the tallest stump so its vines fall past the shorter pots.
Cost: $ | Difficulty: Easy
20. Carved stump welcome sign
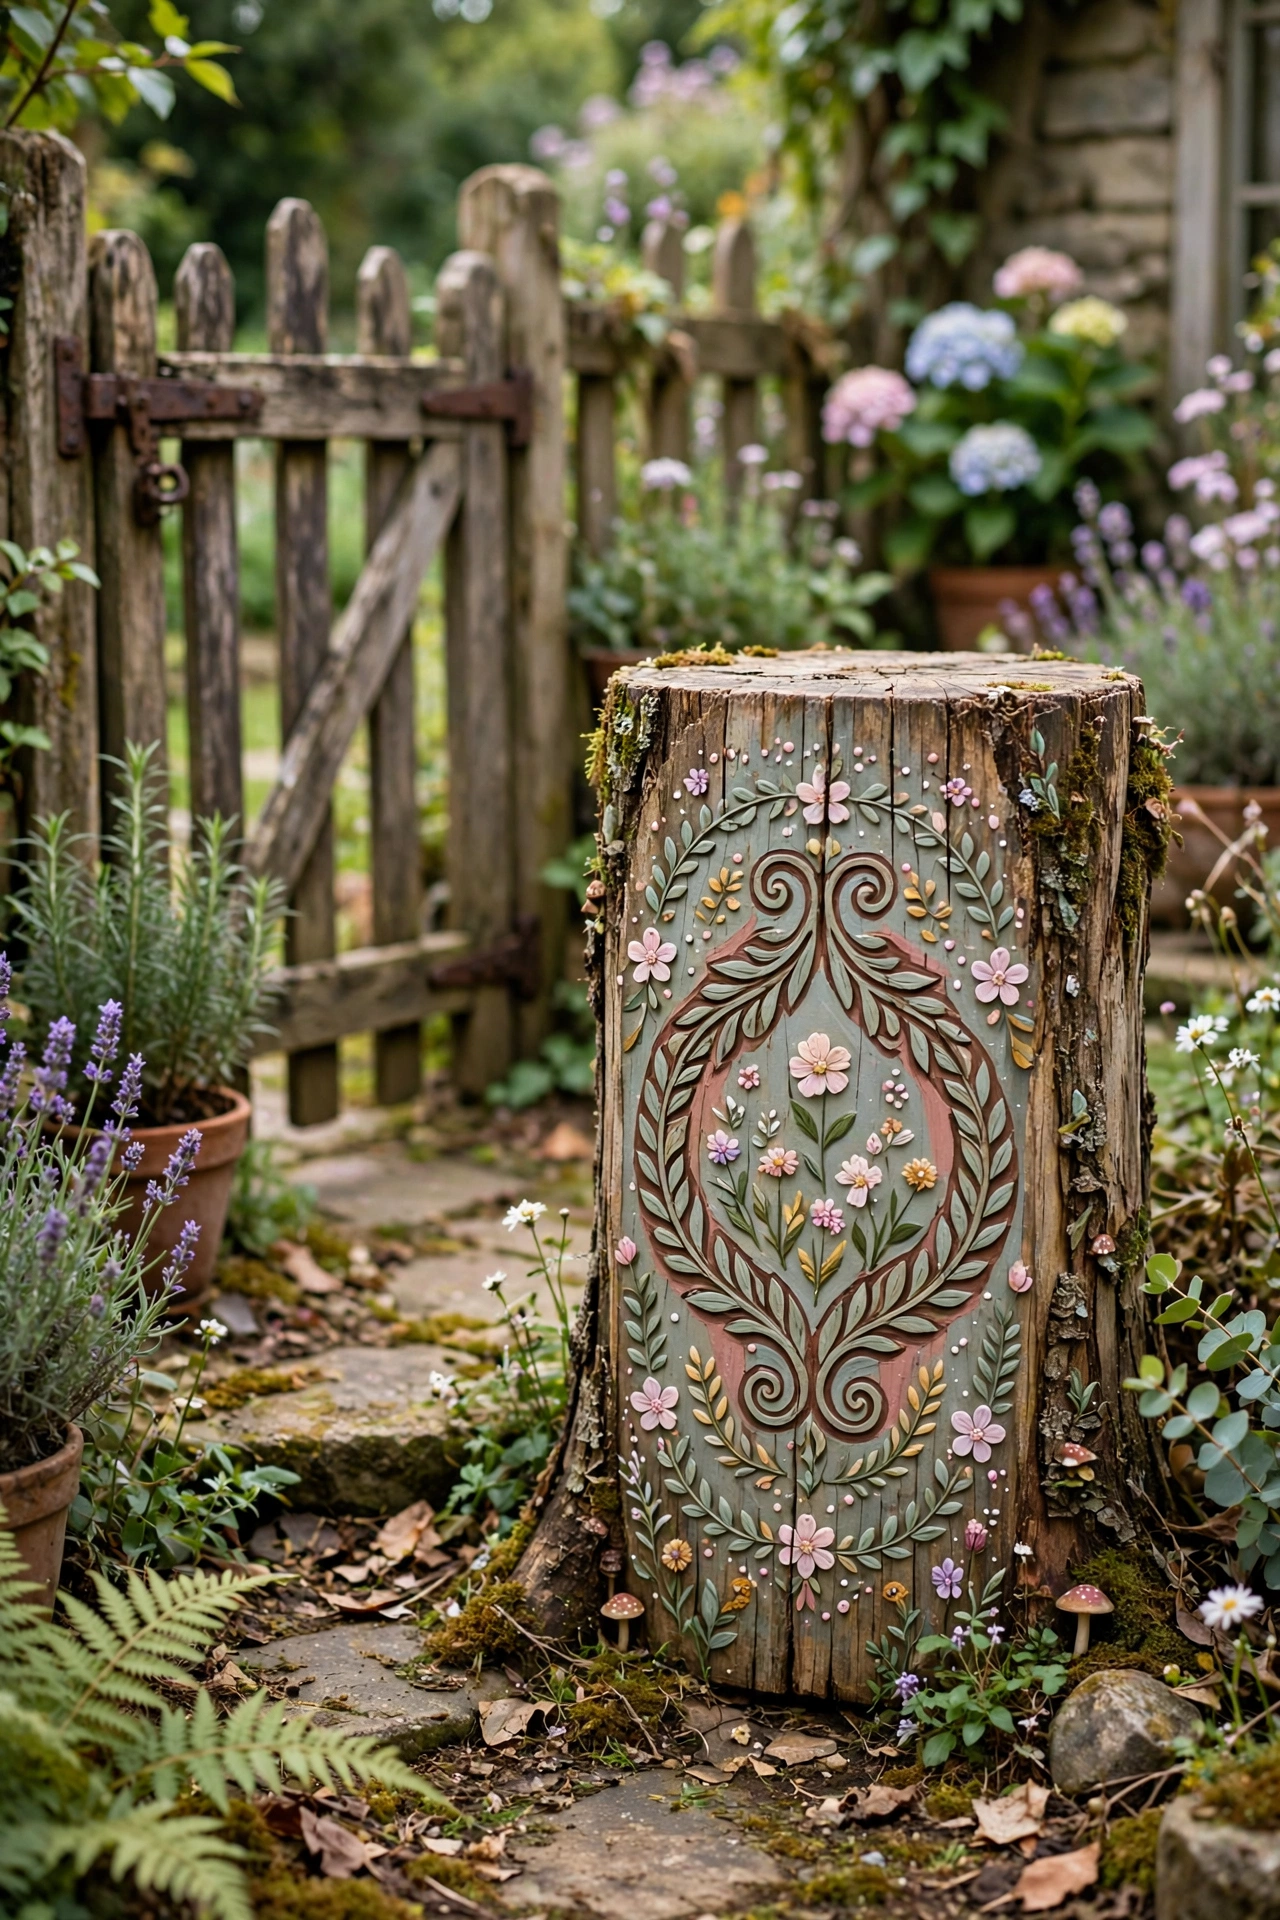
Stand a stump upright by the garden gate, carve or paint a welcome word into the flat top face, and seal it against weather. A stump sign reads warmer than a store-bought board, and it costs nothing if the stump came from your own yard. Use a router or wood-burning tool for crisp letters, and paint them in a color that stands out against bark, like cream or sage green. Anchor the stump in a shallow gravel footing so it stays upright through storms. Refresh the paint once a year to keep the letters readable.
Try this: Add your house number under the welcome word so delivery drivers find you faster.
Cost: $ | Difficulty: Moderate
Comparison table: all 20 tree stump decor DIY ideas at a glance
| Idea | Cost | Difficulty | Best for |
|---|---|---|---|
| Hollowed stump flower planter | $ | Easy | Garden color |
| Mosaic tile stump side table | $$ | Moderate | Porch seating |
| Stump drink cooler | $ | Easy | Parties |
| Fairy garden on a stump | $ | Easy | Kids and whimsy |
| Carved stump bird bath | $ | Moderate | Wildlife |
| Drilled stump candle holders | $ | Easy | Table decor |
| Stump slice garden path steps | $ | Easy | Walkways |
| Stacked stump succulent tower | $ | Moderate | Small corners |
| Stump birdhouse post | $ | Easy | Birds |
| Solar light stump stand | $ | Easy | Path lighting |
| Stump bug hotel | $ | Easy | Pollinators |
| Painted stump chess table | $ | Moderate | Games |
| Stump patio umbrella base | $ | Moderate | Shade |
| Stump herb garden | $ | Easy | Cooking |
| Stump slice table centerpiece | $ | Easy | Dining tables |
| Stump slice wall shelf | $$ | Moderate | Indoor display |
| Stump slice wall clock | $ | Easy | Wall decor |
| Carved stump garden chair | $$ | Hard | Seating |
| Stump planter stand trio | $ | Easy | Porch displays |
| Carved stump welcome sign | $ | Moderate | Entryways |
Cost key: $ means $1 to $10, $$ means $11 to $99, $$$ means $100 to $999, $$$$ means $1,000 and up.
Mistakes to avoid with tree stump decor
Sealing a fresh, wet stump is the most common mistake, since trapped moisture cracks the finish and rots the wood from inside. Give cut stumps 6 to 12 months to dry first. Skipping drainage holes is the second mistake: a planter with no drain becomes a swamp that kills plants and softens wood. The third mistake is using treated lumber stumps for food plants, since treatment chemicals can leach into soil. The fourth is picking a rotted stump that looks solid on the outside but crumbles under a chair or table leg. Knock on the wood, press it with a screwdriver, and reject anything soft.
Safety notes
Wear safety glasses, hearing protection, gloves, and a dust mask when cutting or sanding wood, and keep hands clear of chainsaw kickback zones. Check every stump for rot, ant nests, and termite damage before building, and discard wood that crumbles. Call 811 before digging to set a stump post or footing, so you do not hit a buried utility line. Keep treated wood away from herbs and vegetables, and see the EPA guidance on chromated copper arsenate (CCA) treated wood before reusing old treated lumber. Use battery candles near dried moss, fairy pieces, and fabric, and keep real flames away from dry material. Anchor wall shelves into studs with hardware rated above the load, and hire a licensed electrician for any wired outdoor lighting. Lift heavy stumps with two people and bent knees, and keep cords and hoses off walkways.
Frequently asked questions
How long does a stump planter last outdoors?
A hardwood stump planter lasts 3 to 5 years outdoors with annual sealing and good drainage. Soft pine lasts 1 to 2 years in damp soil. When the walls soften, lift out the plants, move them to a new stump, and compost the old one.
Do I need to seal a tree stump before using it?
Seal outdoor stumps with 2 to 3 coats of outdoor wood sealant after the wood dries fully, which takes 6 to 12 months for fresh cuts. Sealing slows rain damage and cracking. Indoor slices need only one coat of oil or polyurethane.
What kind of wood makes the best stump projects?
Oak, maple, and walnut last longest outdoors and hold screws well. Cedar resists rot naturally but is softer, so it suits planters and light stands more than chairs. Avoid wood with soft spots, mushroom growth, or insect tunnels.
How do I stop bugs from moving into my stump furniture?
Strip loose bark, sand the surface, and seal every face including the bottom. Store finished pieces off bare soil on feet or a gravel pad. If you find active termites or carpenter ants, discard the stump instead of bringing it indoors.
Can I use a stump that is still in the ground?
Yes, a rooted stump is the easiest base for planters, bird baths, fairy gardens, and umbrella stands, since it cannot tip and needs no moving. Hollow the top in place, drill drainage holes, and seal the cut surfaces.
Final thoughts
Start with one stump and one easy project, like a planter or a candle holder, and see how the wood behaves in your yard before you commit to a carved chair. The stump was free, the tools are basic, and the worst case is a planter that becomes compost in a few years.
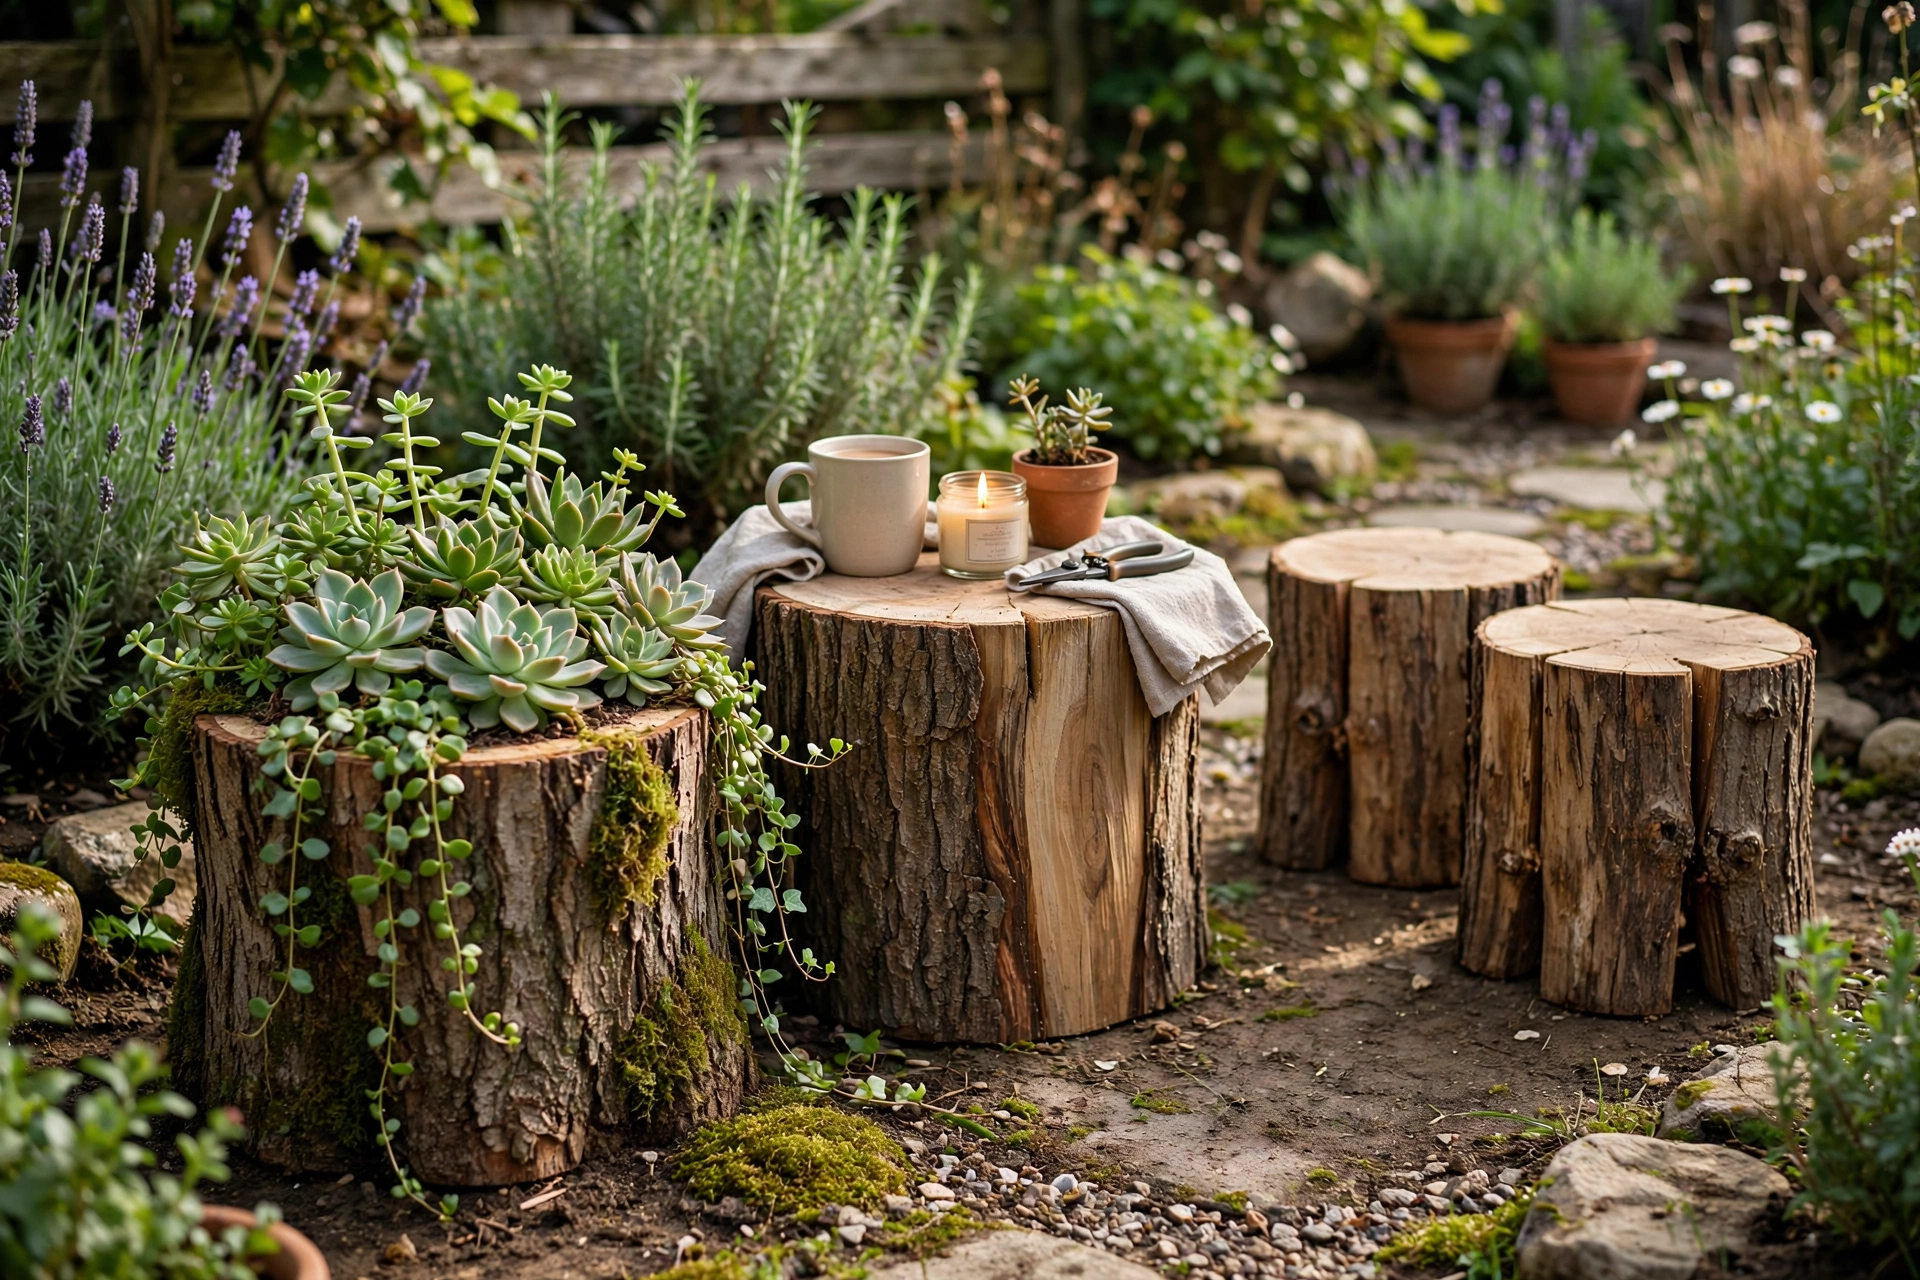
For fairy houses as their own topic, see our guide to 20 Fairy House DIY Ideas for a Garden Corner That Finally Feels Alive for a twig log cabin, a birdhouse cottage, a terracotta mushroom house, a river stone cottage, a teacup house, and a solar glow house.
If you enjoyed this, you’ll love our 25 Creative Country Yard Decor Ideas.


