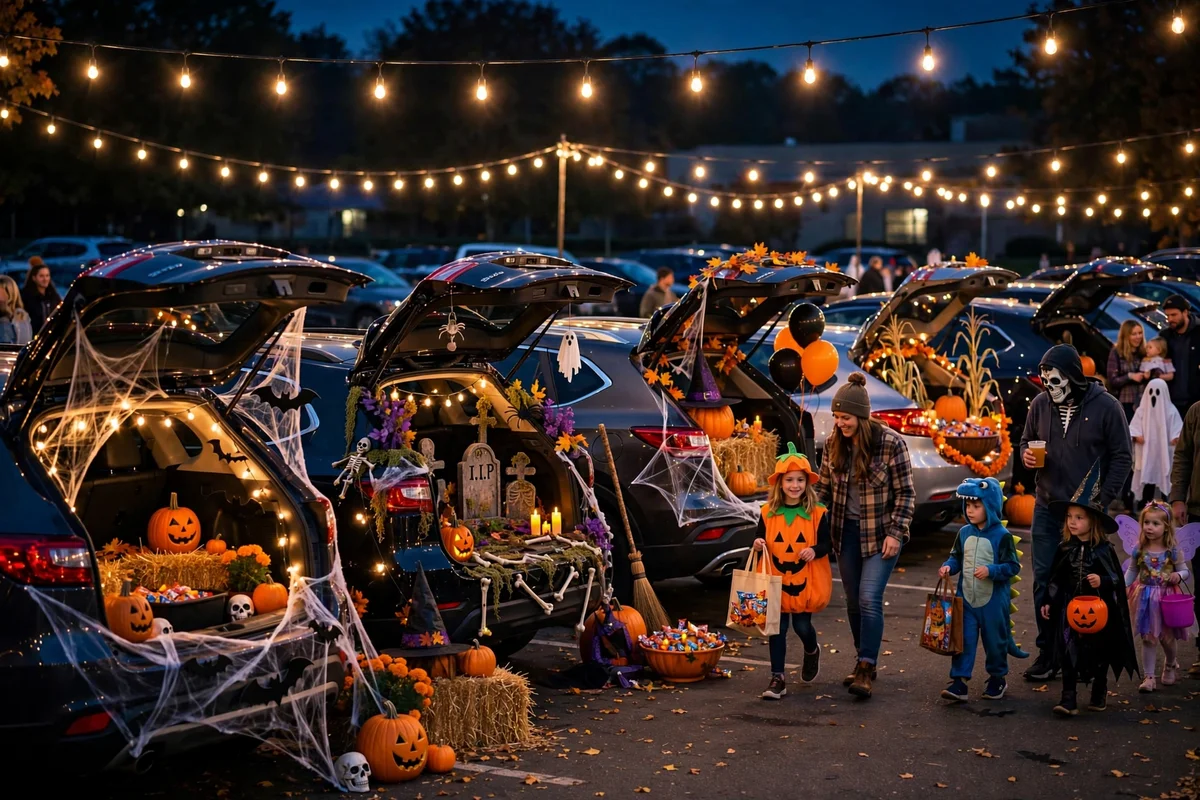
You signed up for trunk or treat, and now the parking lot is full of pirate ships while you are staring at an empty trunk. Nobody wants to be the car with a sad plastic bowl on the bumper. The good news is that the best trunks are not the most expensive ones; they are the ones with one strong idea carried all the way through.
These 20 Halloween trunk or treat ideas give you that one strong idea, with real costs, setup times, and difficulty labels. Most build in an afternoon for under $40 using dollar-store supplies and things already in your garage. Pick a theme, commit to it, and your car becomes the stop kids talk about on the way home.
- One committed theme beats five scattered decorations every time.
- Treat the open trunk as a small stage: backdrop, props at different depths, and lighting.
- Battery lights only. No open flames anywhere near cars, kids, or costumes.
- Budget 150 to 200 pieces of candy per car for a typical 90-minute event.
- Use painter’s tape on paint and keep kids from climbing into the vehicle.
1. Monster mouth trunk
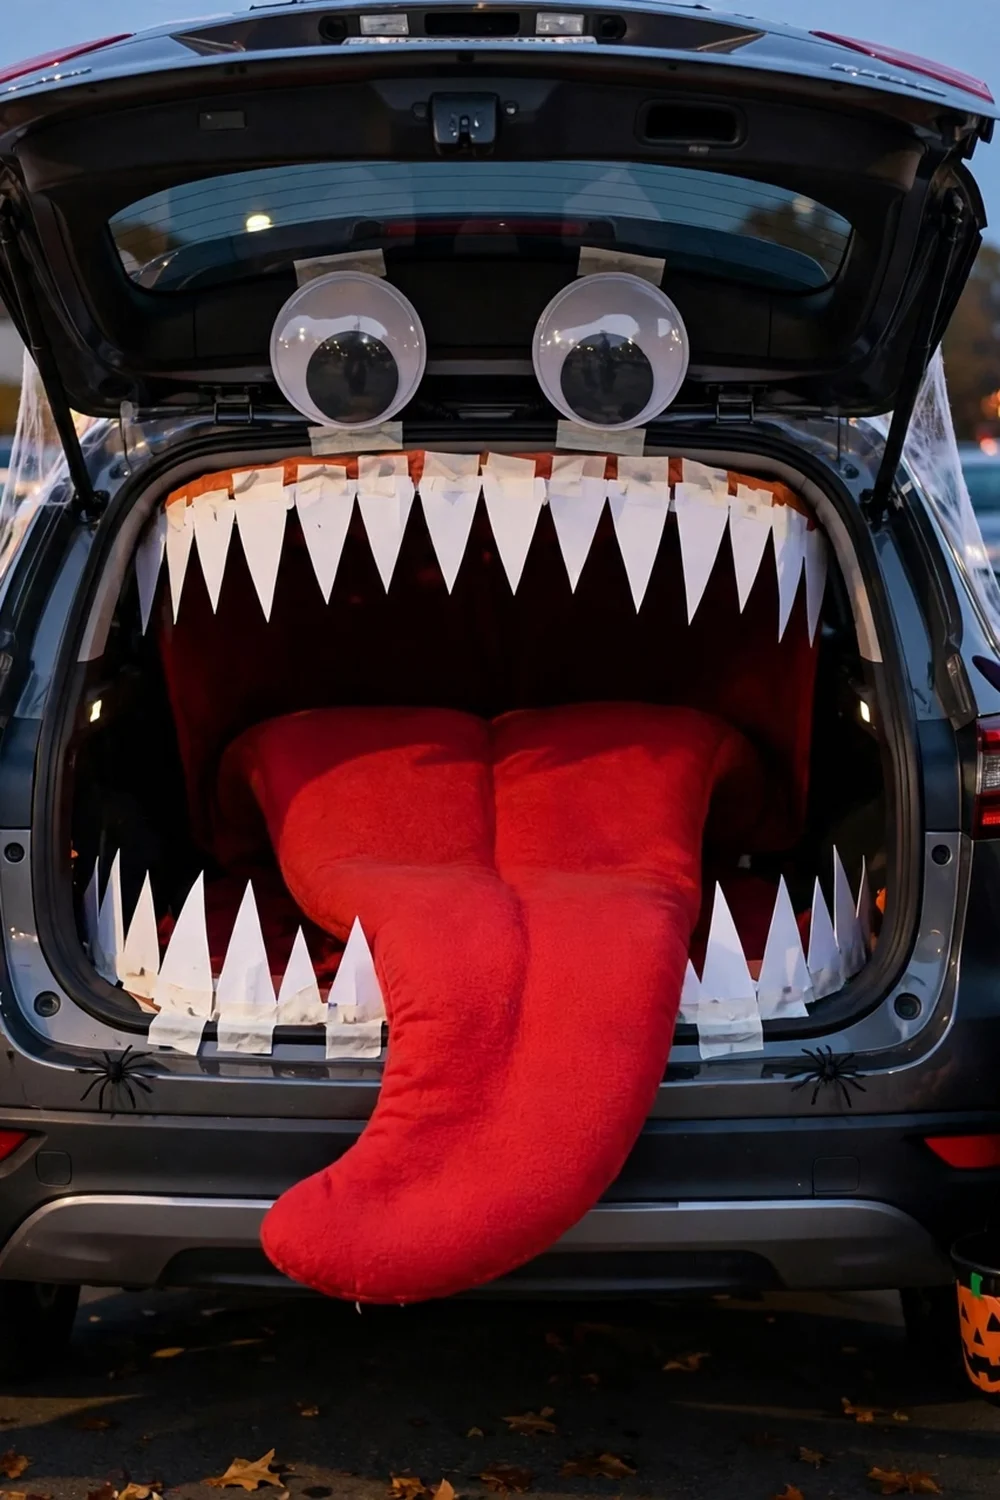
Tape white paper teeth along the top of the open trunk pointing down and along the bottom pointing up, add a red felt tongue, and stick two big paper eyes above. Kids reach into the mouth to grab candy, which never gets old. Cut the teeth from poster board and attach everything with painter’s tape so your paint stays perfect. Drape a black tablecloth inside the trunk to keep the illusion dark. Total build time is under an hour, and it photographs better than trunks that cost ten times more.
Try this: Make the tongue from a red plastic tablecloth so it unfurls all the way to the ground.
Cost: $$| Difficulty: Easy | Time: 45 minutes
2. Graveyard scene
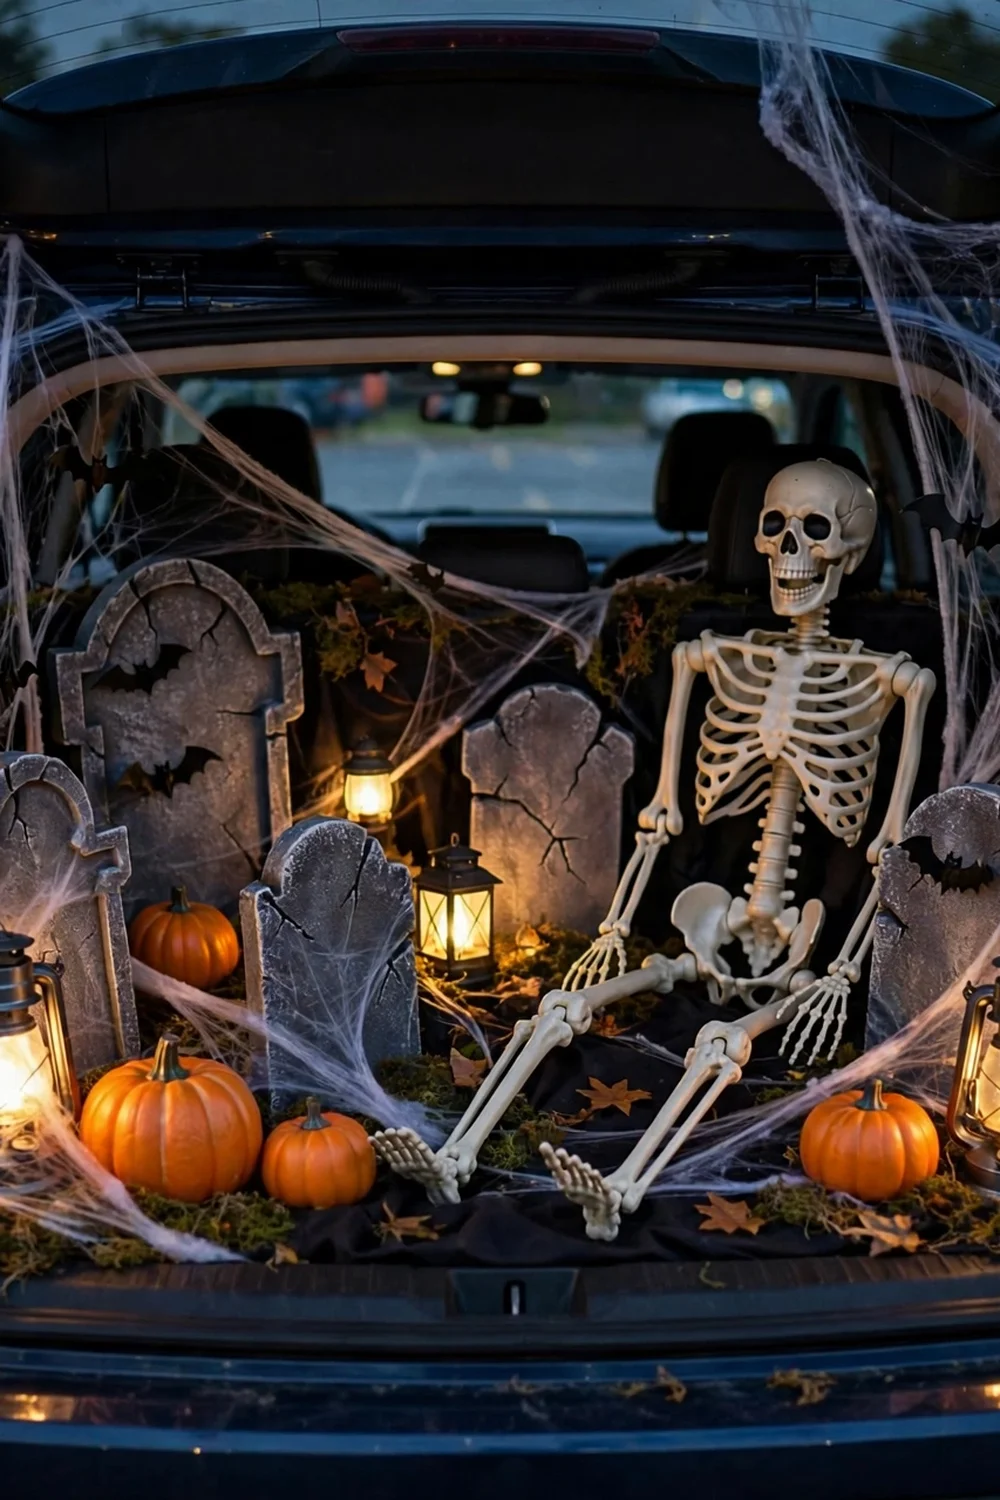
Line the trunk with black fabric, stand up two or three foam tombstones, add a skeleton, and stretch cotton webbing across the opening. Battery lanterns inside give it a haunted glow after dark. Cut tombstones from foam board, paint them gray, and letter them with silly names like “Barry M. Deep.” Keep the display inside the trunk footprint so the walking lane stays clear. This is the classic for a reason: every supply is reusable next year.
Try this: Hide a small Bluetooth speaker behind a tombstone playing distant thunder.
Cost: $$| Difficulty: Easy | Time: 1 hour
3. Under-the-sea trunk
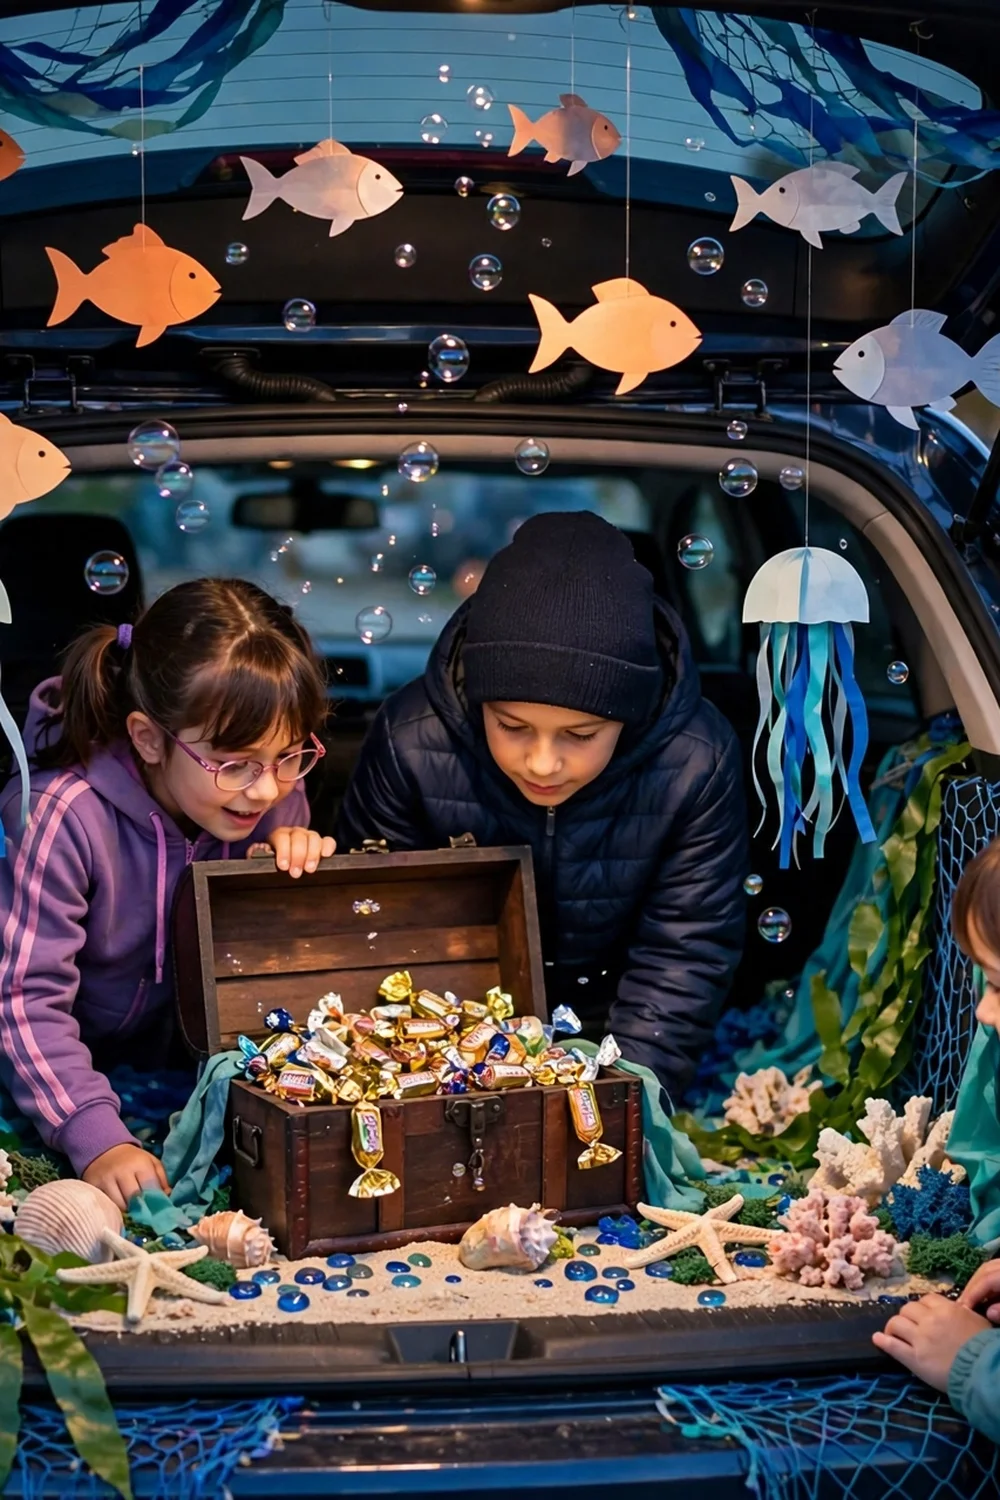
Hang blue streamers from the open hatch, tape paper fish to the trunk walls, and set a treasure chest of candy in the middle. A $10 bubble machine on the ground in front makes it the most popular stop for small kids. This theme is ideal if you want zero scary: nothing here frightens a toddler. Blue plastic tablecloths make a fast ocean backdrop, and the whole thing packs flat afterward. Dress the family as pirates or mermaids to complete it.
Try this: String clear fishing line with paper bubbles across the trunk opening.
Cost: $$| Difficulty: Easy | Time: 1 hour
4. Candy Land trunk
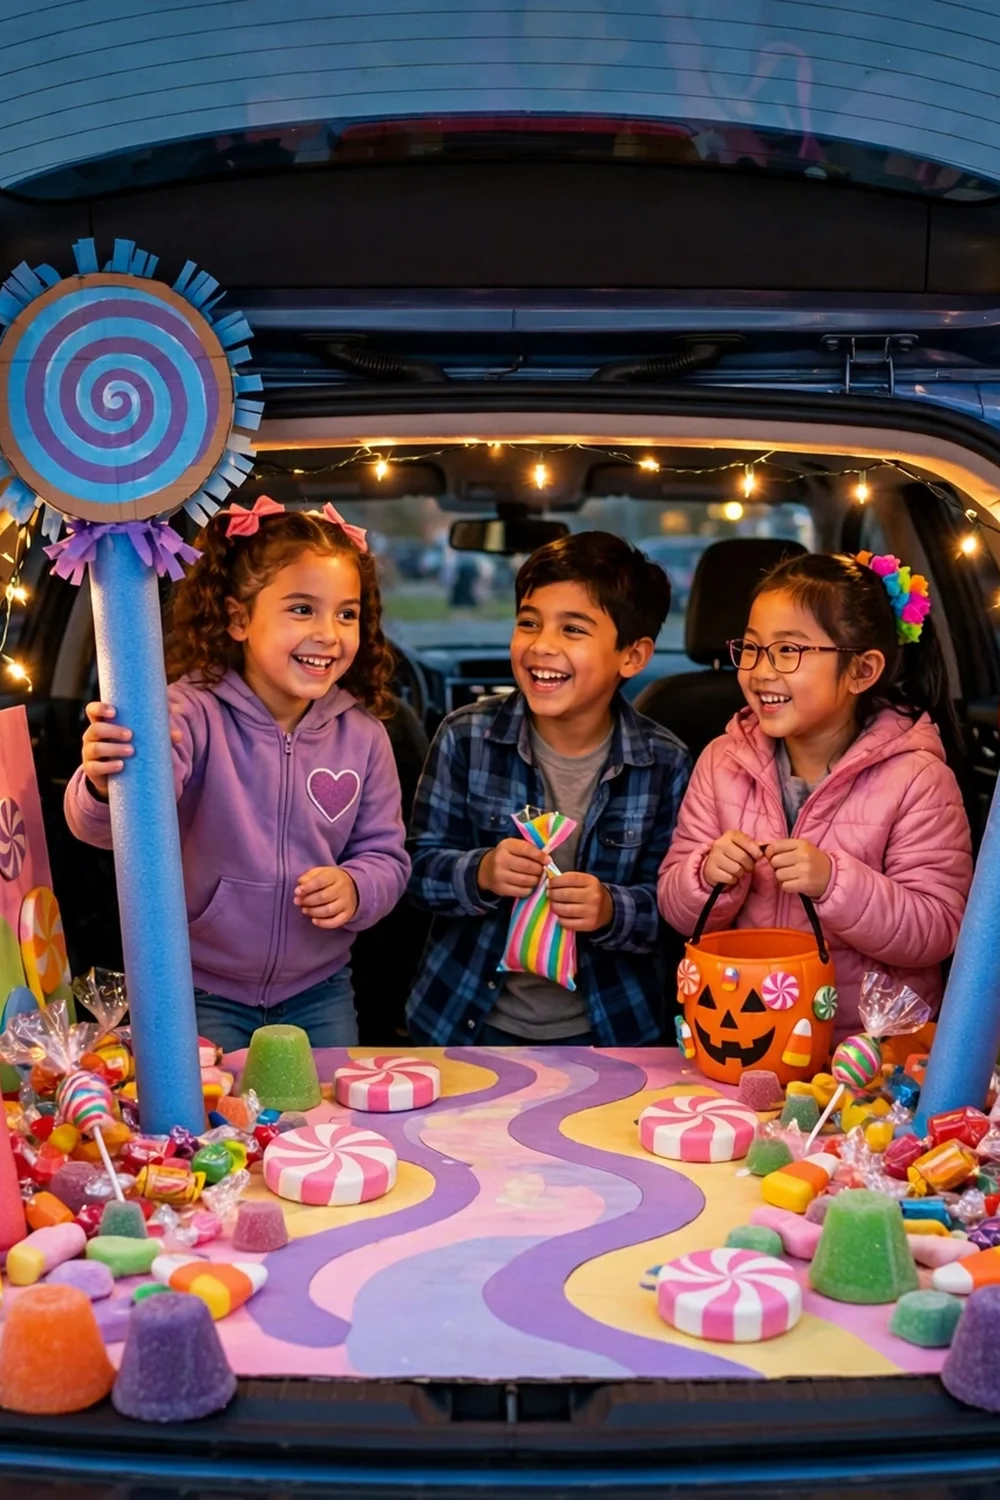
Build oversized lollipops from pool noodles and cardboard circles, scatter giant wrapped “candies” made from paper and tape, and go full rainbow. Pool noodles cost $1 each and become lollipop sticks with a cardboard circle hot-glued on top. Bright colors photograph beautifully at dusk and stand out in a lot full of black and orange. Keep one adult handing out real candy from behind the display so the props stay put. Kids can pose with the giant lollipops for photos.
Try this: Paint the cardboard circles in swirls with two shades of the same color for a real candy look.
Cost: $$| Difficulty: Easy | Time: 1 hour
5. Pirate ship trunk
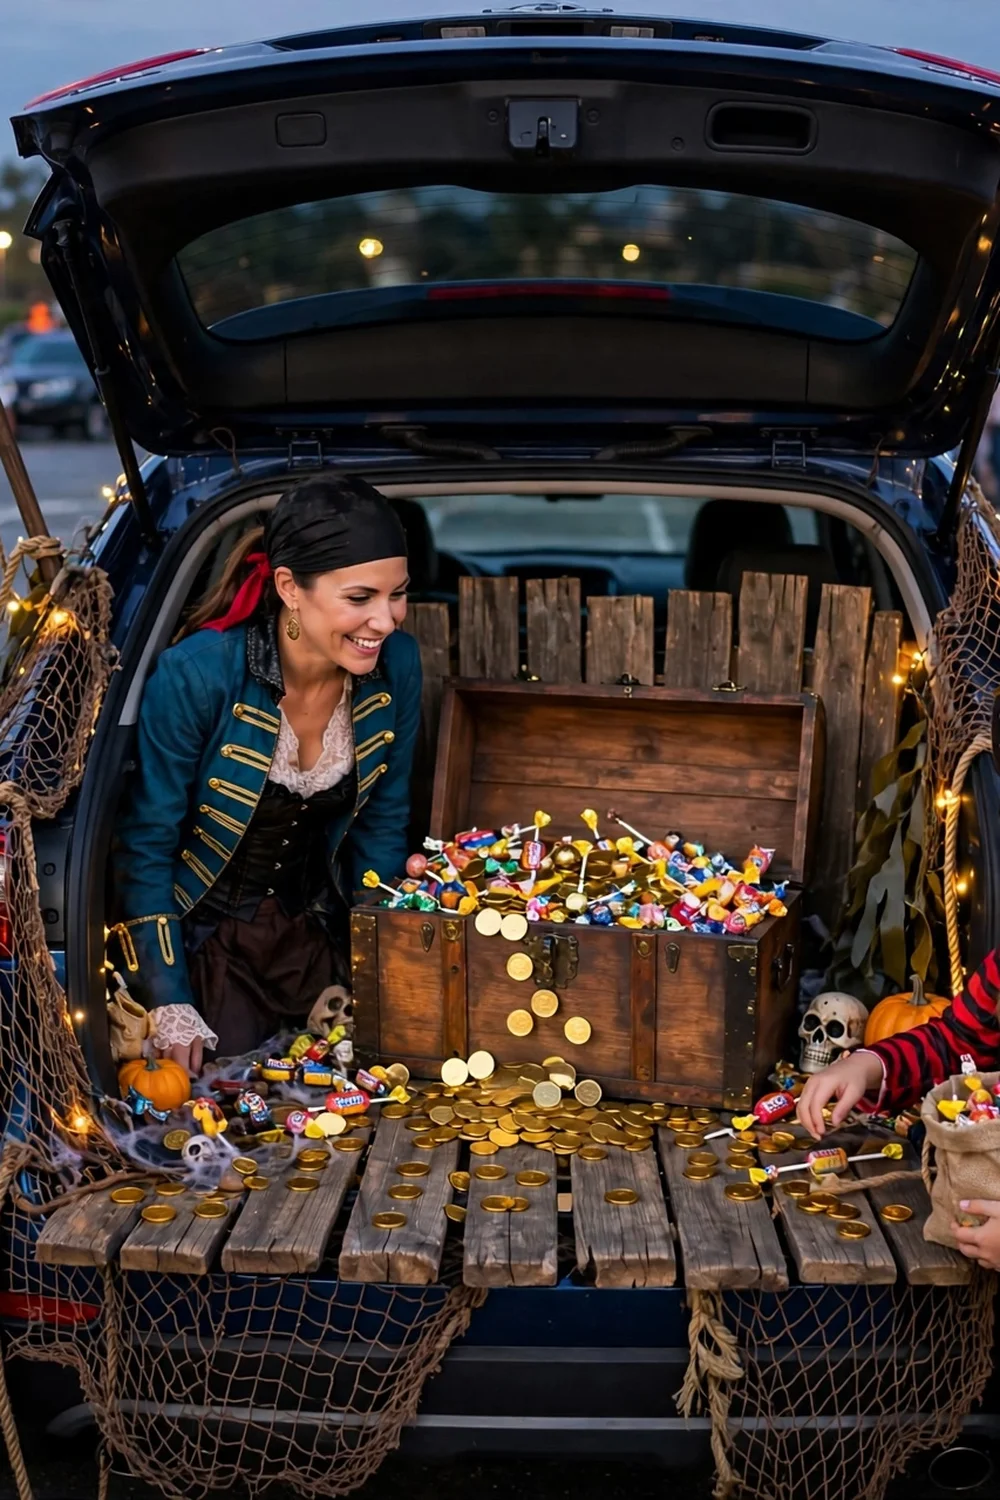
Turn the trunk into a treasure chest of candy with gold coins, netting, and a pirate flag on the hatch. Fill a cardboard chest with chocolate coins and let kids dig for their treat. A striped tablecloth becomes a sail if you rig it to the open hatch with dowels. The whole family in pirate costumes sells it completely. This theme scales well: a simple version needs only the chest and the flag, while an elaborate one adds a plank the kids walk to reach the candy.
Try this: Stamp each kid’s hand with a washable skull stamp as they leave your ship.
Cost: $$| Difficulty: Medium | Time: 1.5 hours
6. Dinosaur dig trunk
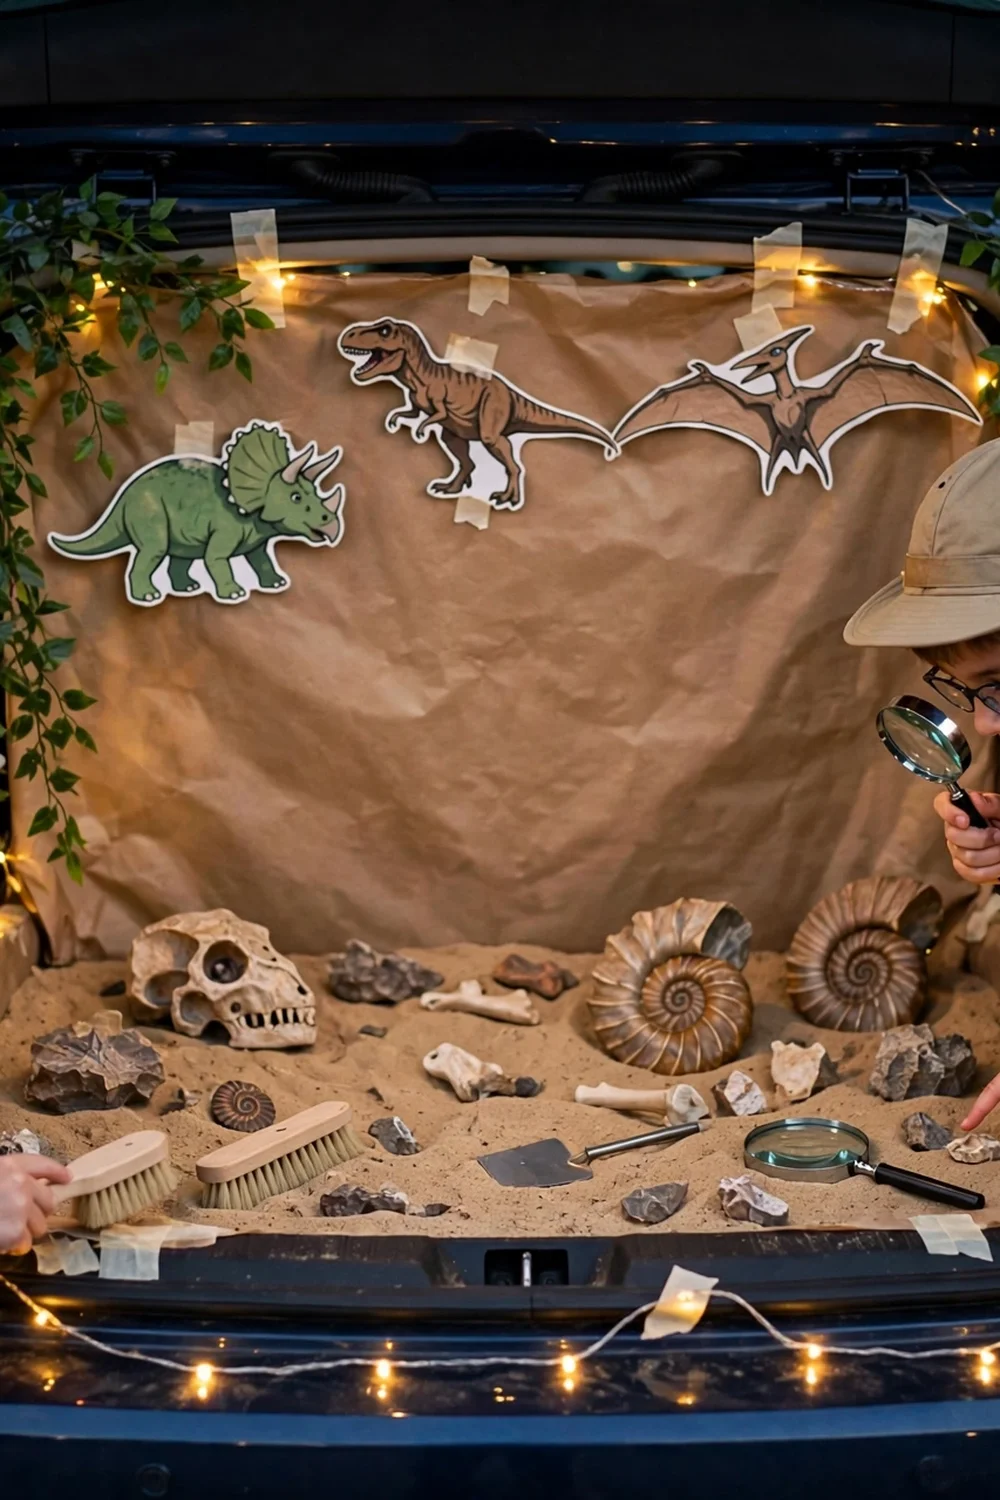
Cover the trunk in brown kraft paper, add dinosaur cutouts, and set out a tray of sand with toy fossils for kids to uncover. A bag of play sand costs $5 and the fossils can be dollar-store dinosaur skeletons half-buried. Print “DANGER: DINOSAURS” signs for the trunk walls. This is catnip for the 4-to-8 crowd and needs no scary elements at all. Hand each kid a small brush so they can “excavate” before taking candy.
Try this: Bury a few wrapped candies in the sand as bonus fossil finds.
Cost: $$| Difficulty: Easy | Time: 1 hour
7. Witch’s kitchen trunk

Set a cauldron in the trunk surrounded by potion bottles, hanging herbs, and a broomstick strapped to the hatch. Purple and green LED string lights give it a bubbling-potion glow. Label the bottles with spooky names and fill them with colored water. A witch costume for the candy-giver completes the scene; stir the cauldron dramatically as kids approach. Dry ice in a separate bowl (never where kids reach) adds fog for the full effect.
Try this: Serve apple cider from the cauldron with a ladle for a treat kids remember.
Cost: $$| Difficulty: Medium | Time: 1 hour
8. Mummy wagon
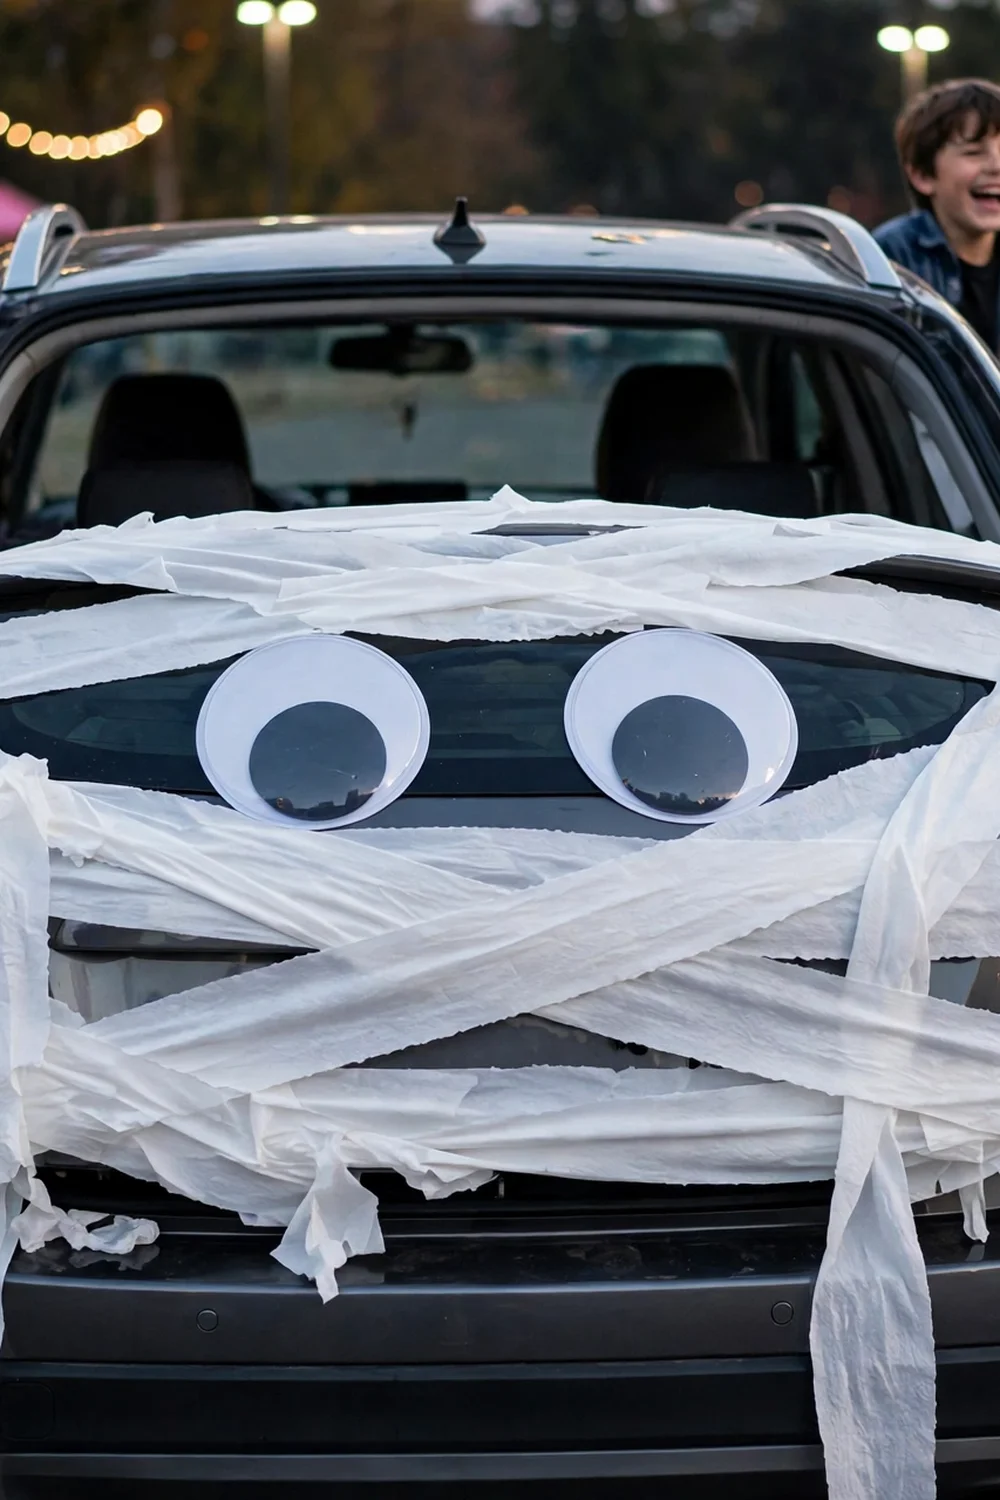
Wrap the open trunk and tailgate in white streamers or toilet paper, then stick giant googly eyes on the trunk lid peeking through the wraps. It is goofy, cheap, and takes 30 minutes. The eyes do all the work, so buy the biggest ones you can find. Add spider webbing over the wraps for texture. This is the best last-minute option on the list: if you signed up yesterday, start here. Everything removes in minutes with no residue.
Try this: Leave one eye slightly crooked; it makes the mummy look surprised and kids laugh harder.
Cost: $$| Difficulty: Easy | Time: 30 minutes
9. Spider lair trunk

Stretch a giant web across the open trunk and perch an oversized spider in the middle so kids walk up to a lair. Black fabric behind the web makes it pop, and a dozen small plastic spiders scattered around add detail. Purple LED lights make the web glow after dark. Keep the web high enough that small kids do not walk face-first into it; waist height on a kindergartner is the minimum. This is high impact for about $20.
Try this: Hang the big spider on fishing line so it bounces when the wind hits it.
Cost: $$| Difficulty: Easy | Time: 45 minutes
10. Ghost garage trunk
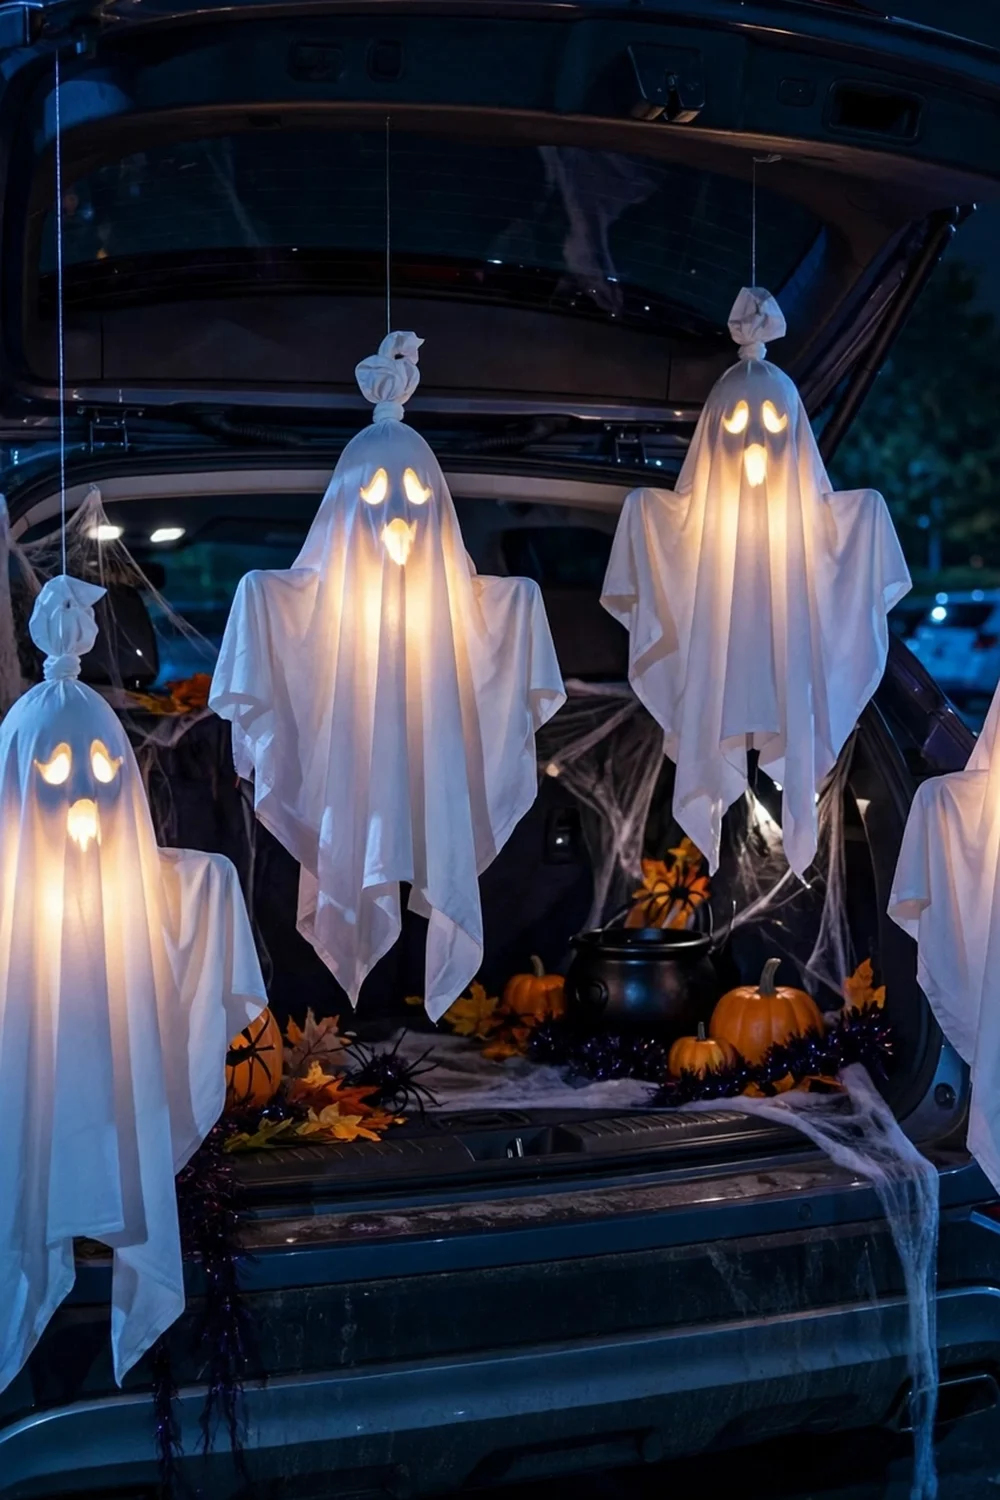
Hang white sheet ghosts from the open hatch on fishing line at different heights, backlit with blue LED lights. The ghosts sway in the breeze and glow after dark, which looks genuinely magical. Make each ghost from a white pillowcase over a foam ball with drawn faces. Five to seven ghosts fill a standard SUV hatch. This needs no scary elements, so it suits events with lots of toddlers. Take the ghosts down if rain starts; wet sheets get heavy.
Try this: Put the bluest light behind the ghosts, not in front, for the best glow.
Cost: $$| Difficulty: Easy | Time: 45 minutes
11. Pumpkin patch trunk
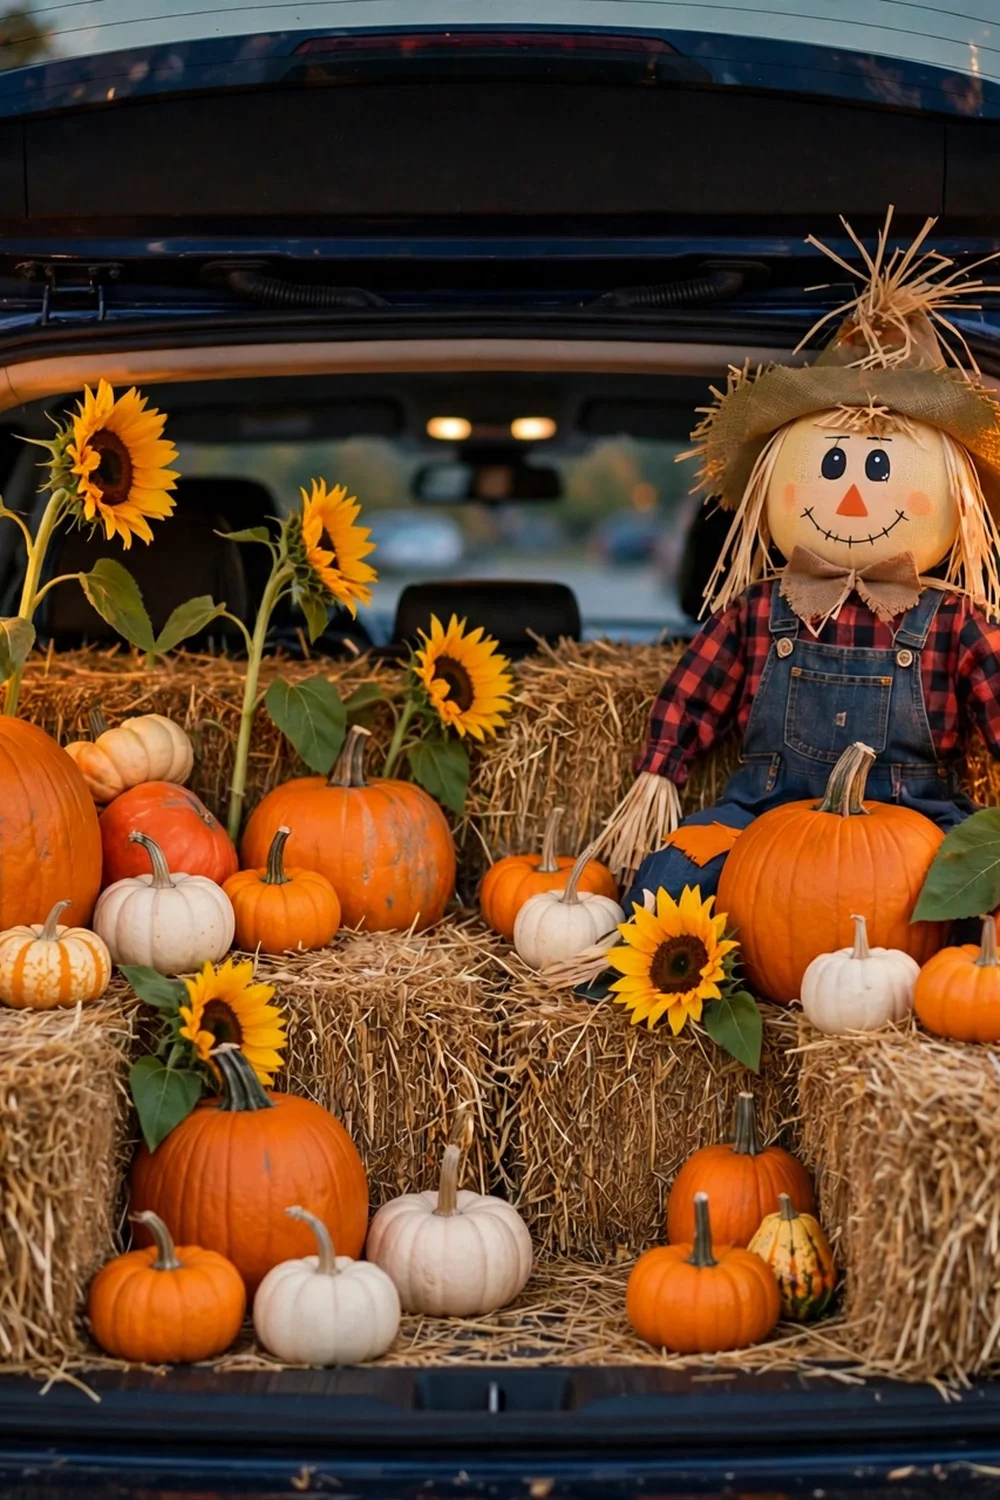
Fill the trunk with hay bales, pumpkins of every size, and a scarecrow, and you have a pumpkin patch with zero scary. This is the theme for events that skew young or for anyone who finds ghosts overdone. Straw bales cost about $8 each and the pumpkins do the rest. Add sunflowers and a gingham tablecloth for harvest warmth. Hand out candy from a hollowed foam pumpkin. Everything here gets reused for Thanksgiving, which spreads the cost across two holidays.
Try this: Let kids pick their pumpkin from the patch instead of just taking candy.
Cost: $$| Difficulty: Easy | Time: 45 minutes
12. Carnival trunk with games
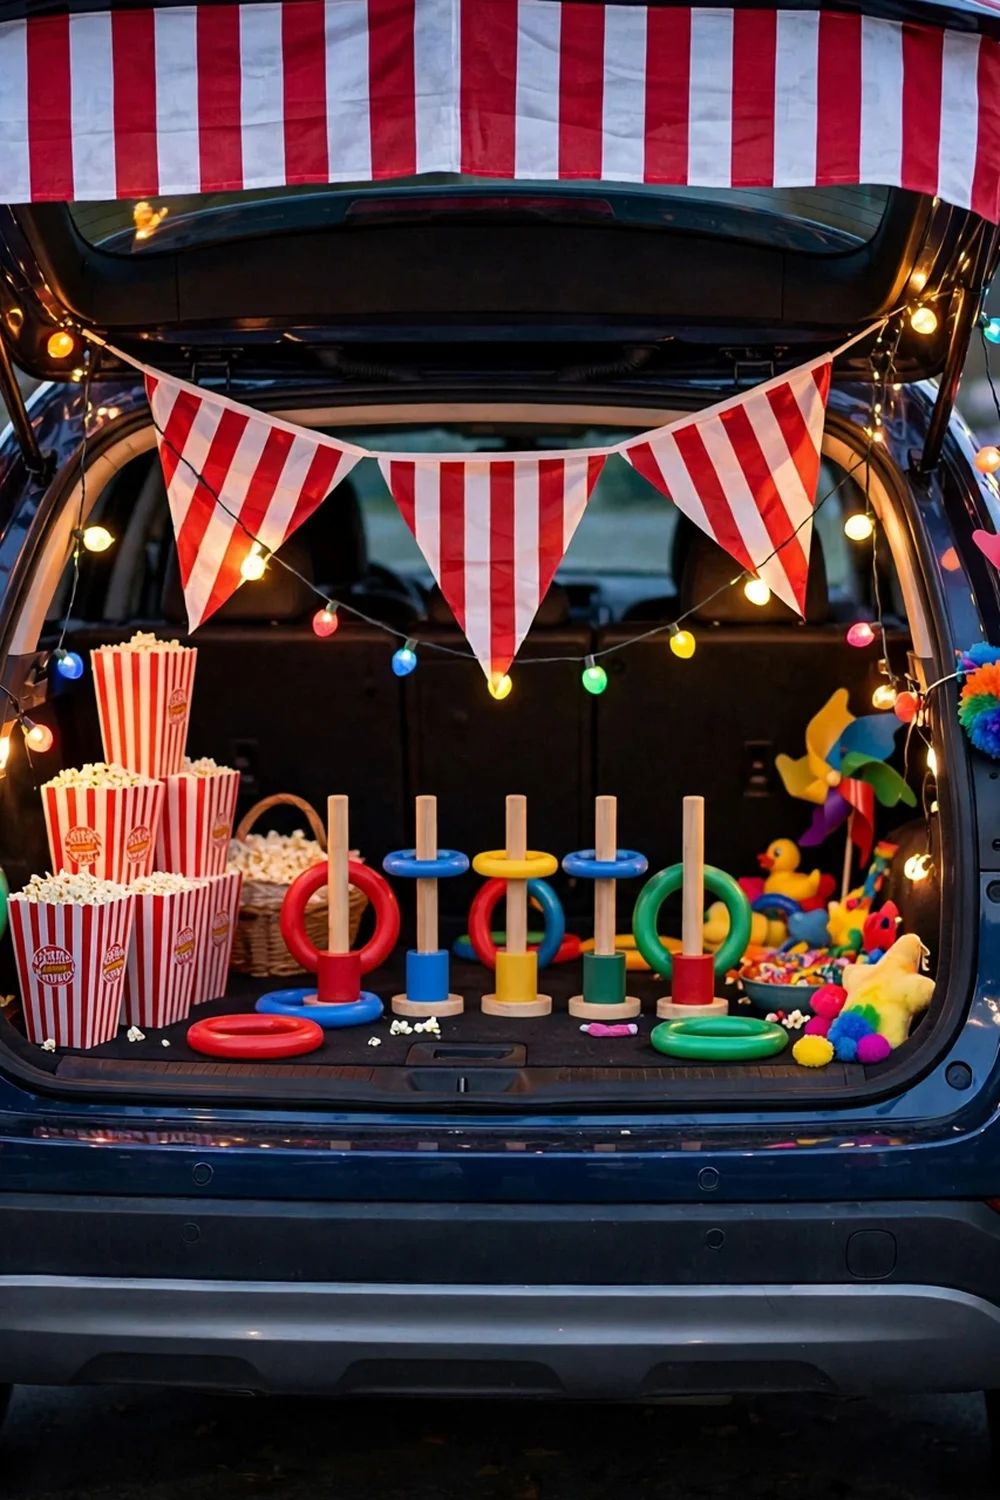
Hang a red-and-white striped banner, set out popcorn boxes, and run a ring toss game right in front of your trunk. Interactive trunks win because kids remember playing, not just receiving. A ring toss set costs $10 and survives the whole event. Give every player a small prize plus their candy so nobody leaves empty-handed. Keep the game simple enough for a 4-year-old to win sometimes. This needs one extra adult to run the game while the other hands out candy.
Try this: Use glow necklaces as game prizes; kids wear them all night and advertise your trunk.
Cost: $$| Difficulty: Medium | Time: 1.5 hours
13. Mad scientist lab trunk

Line the trunk with beakers of colored water, put a skeleton in a lab coat behind them, and light it all green. The skeleton-as-scientist is funny rather than scary, which keeps it family-friendly. Label beakers with joke formulas like “H2O + sugar.” A white lab coat from the thrift store costs $5 and fits the skeleton with the arms tucked. Add bubbling sounds from a phone speaker hidden behind the beakers. Kids who love science will camp at your car.
Try this: Drop effervescent vitamin tablets in the beakers for real fizzing during the event.
Cost: $$| Difficulty: Medium | Time: 1 hour
14. Bat cave trunk
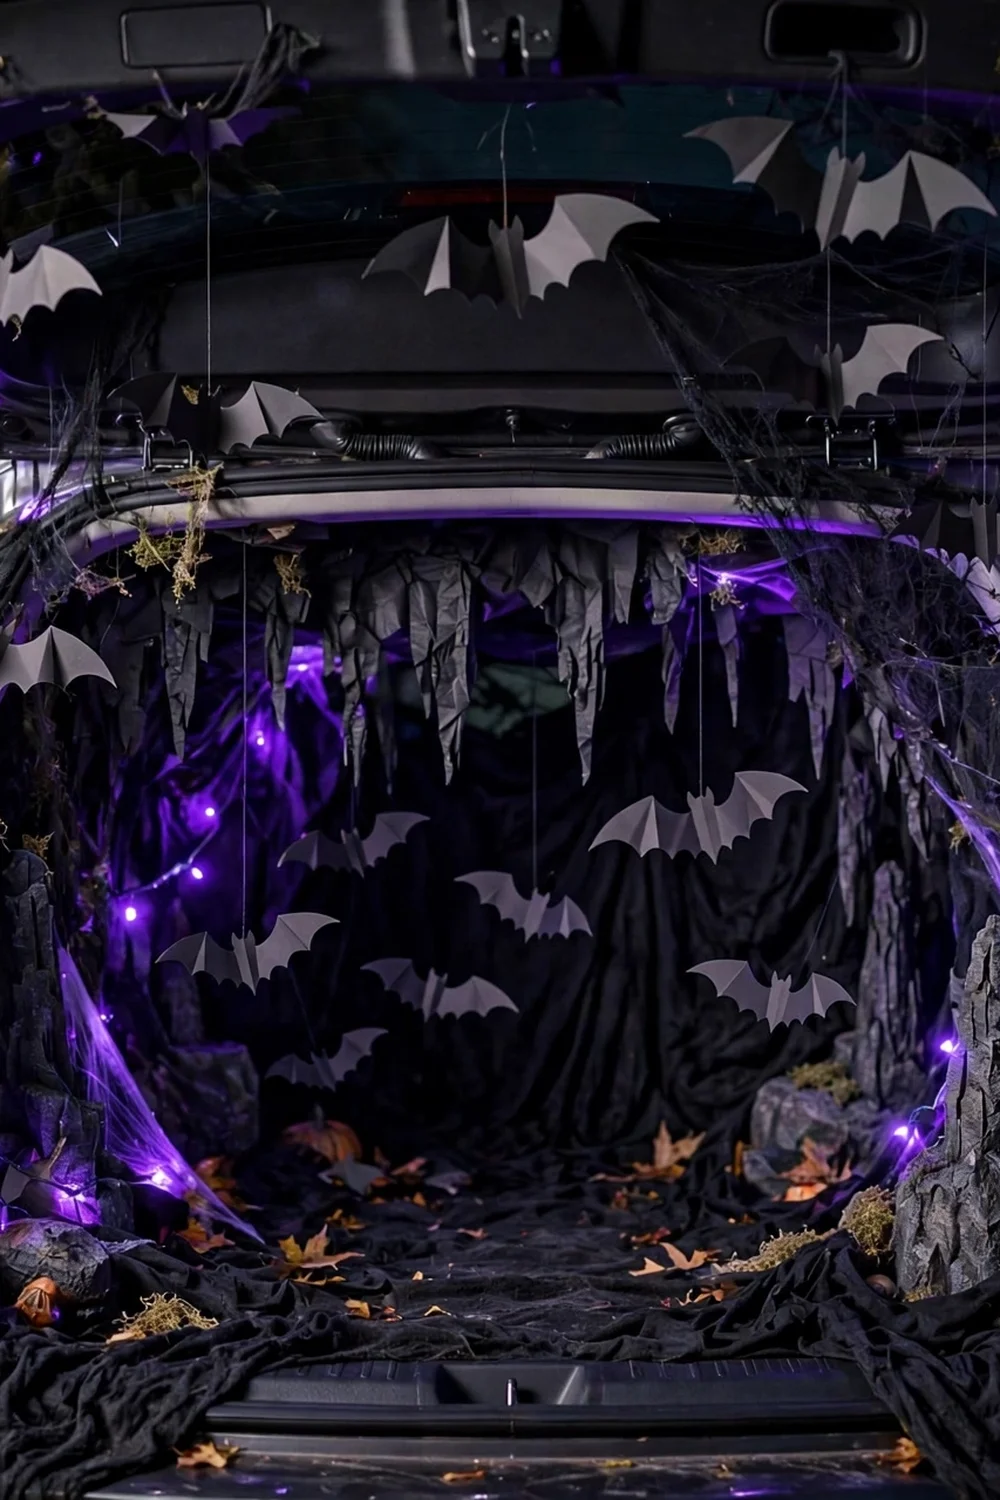
Cover the trunk interior in black fabric and tape dozens of black paper bats across the open hatch like a swarm flying out. Cut the bats in three sizes from black cardstock; fifty bats take about 30 minutes with a simple template. Purple uplighting inside the trunk makes the bats’ silhouettes sharp. This is one of the cheapest dramatic looks on the list because paper and tape do everything. Keep the bats clear of the hatch hinges so they do not jam the mechanism.
Try this: Angle the bats outward from the center like they are bursting from the cave.
Cost: $$| Difficulty: Easy | Time: 1 hour
15. Haunted hearse trunk
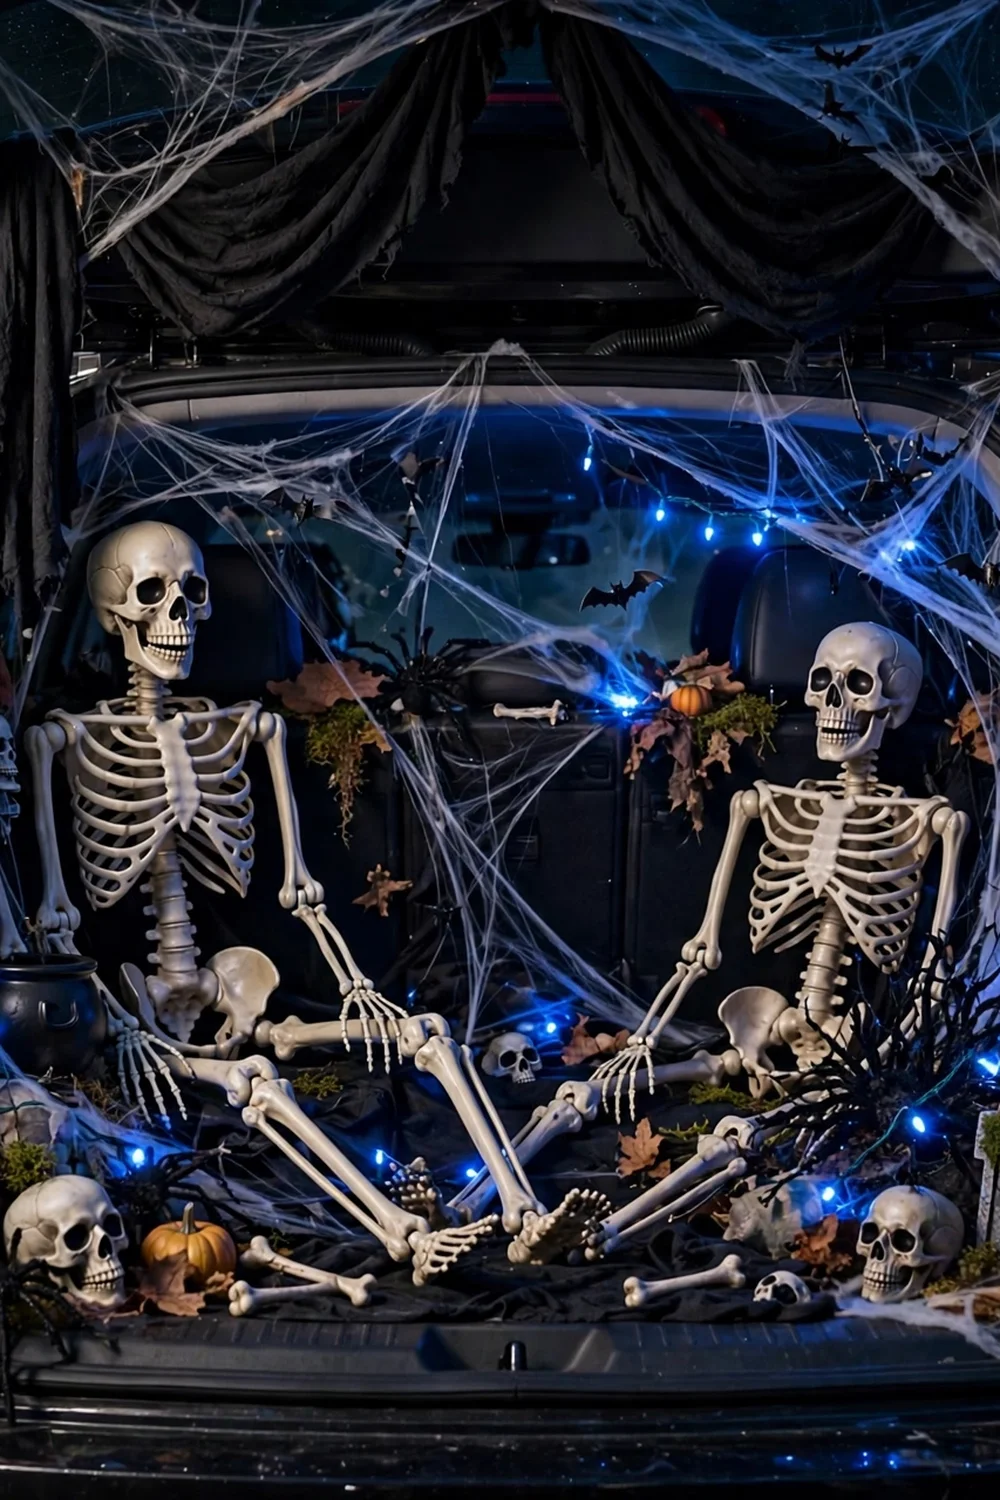
Drape the trunk in black fabric, add skeletons peeking from behind the seats, and stretch webbing across the opening for a hearse look. Eerie blue battery lights complete the mood. This skews older-kid scary, so check your event’s vibe before committing; some school events ask for not-too-spooky. A “HEARSE” sign on the hatch in dripping letters sells it. Keep one skeleton posed handing out the candy for a memorable interaction.
Try this: Play a low heartbeat sound from a hidden speaker for atmosphere.
Cost: $$| Difficulty: Medium | Time: 1 hour
16. Candy corn car
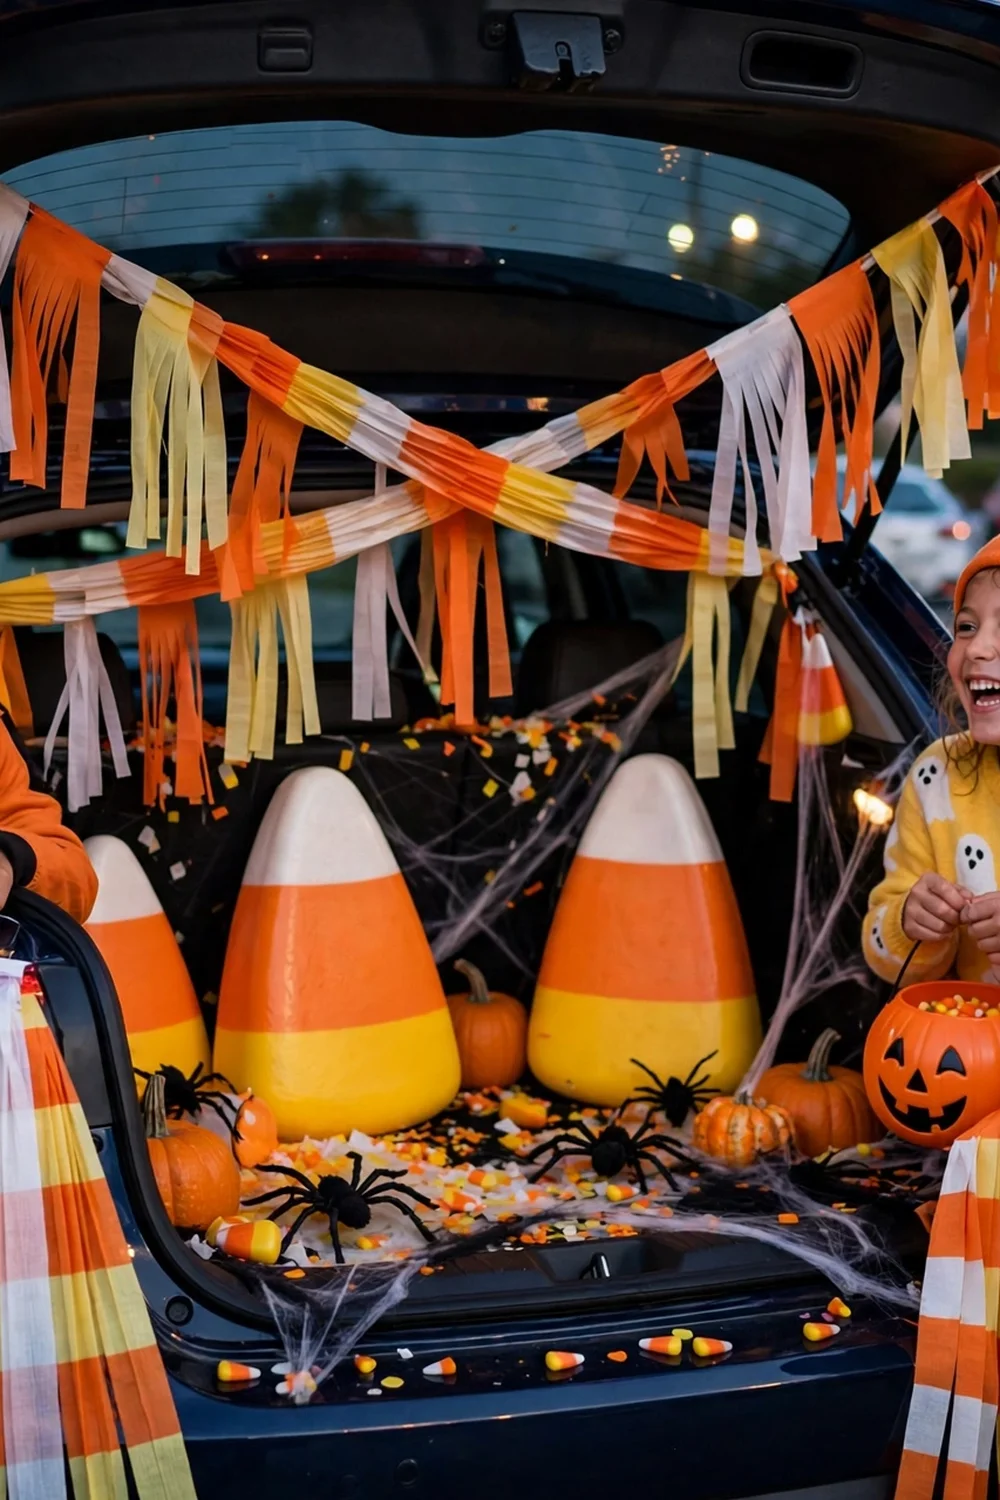
Wrap the trunk in three horizontal bands of orange, yellow, and white streamers for a giant candy corn. That is the entire build, and it reads instantly from across the parking lot. Use plastic streamers, not crepe paper, so evening dew does not melt them. Add a giant candy corn cutout on the hatch as the exclamation point. This is cheerful, cheap, and impossible to mess up. Pair it with candy corn printed shirts for the family.
Try this: Run the white band slightly narrower than the others, like the real candy’s tip.
Cost: $$| Difficulty: Easy | Time: 45 minutes
17. Zombie apocalypse car
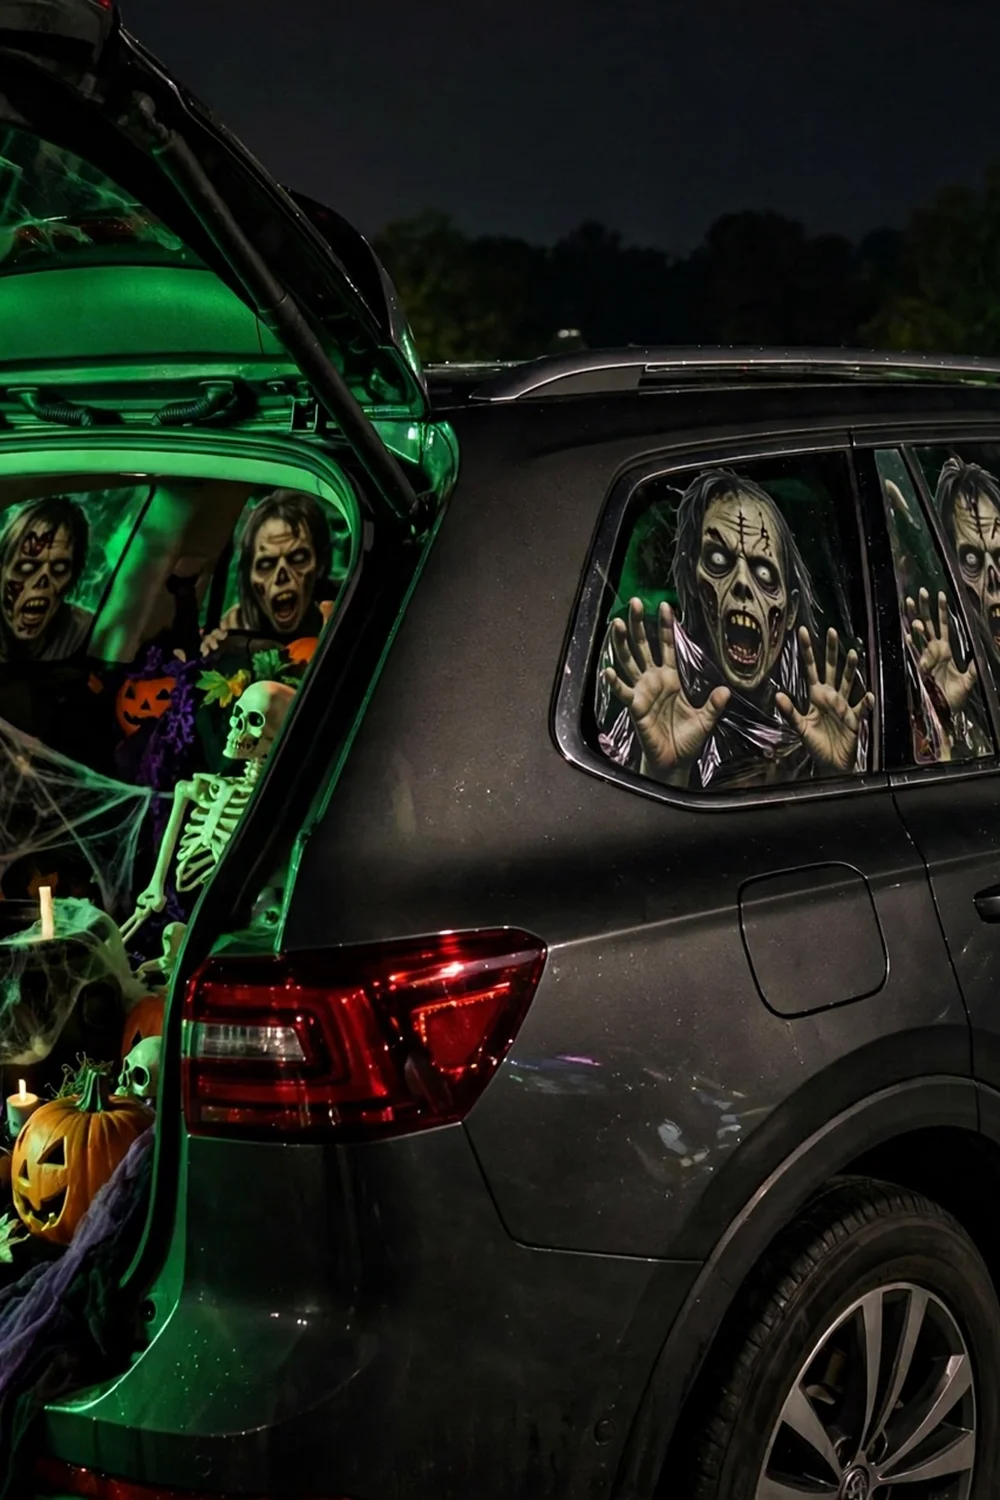
Stick removable zombie window clings on the car glass so it looks like zombies are pressing against the windows from inside. Add fake bloody handprints (washable) on the trunk for extra fright. The clings cost about $10, apply in minutes, and peel off cleanly. Green uplighting under the car sells the apocalypse after dark. This works best on minivans and SUVs with big windows. Keep the windshield and driver windows clear if the car needs to move during the event.
Try this: Put one zombie cling on the inside of the trunk lid so it reveals when you open it.
Cost: $$| Difficulty: Easy | Time: 30 minutes
18. Blue monster trunk
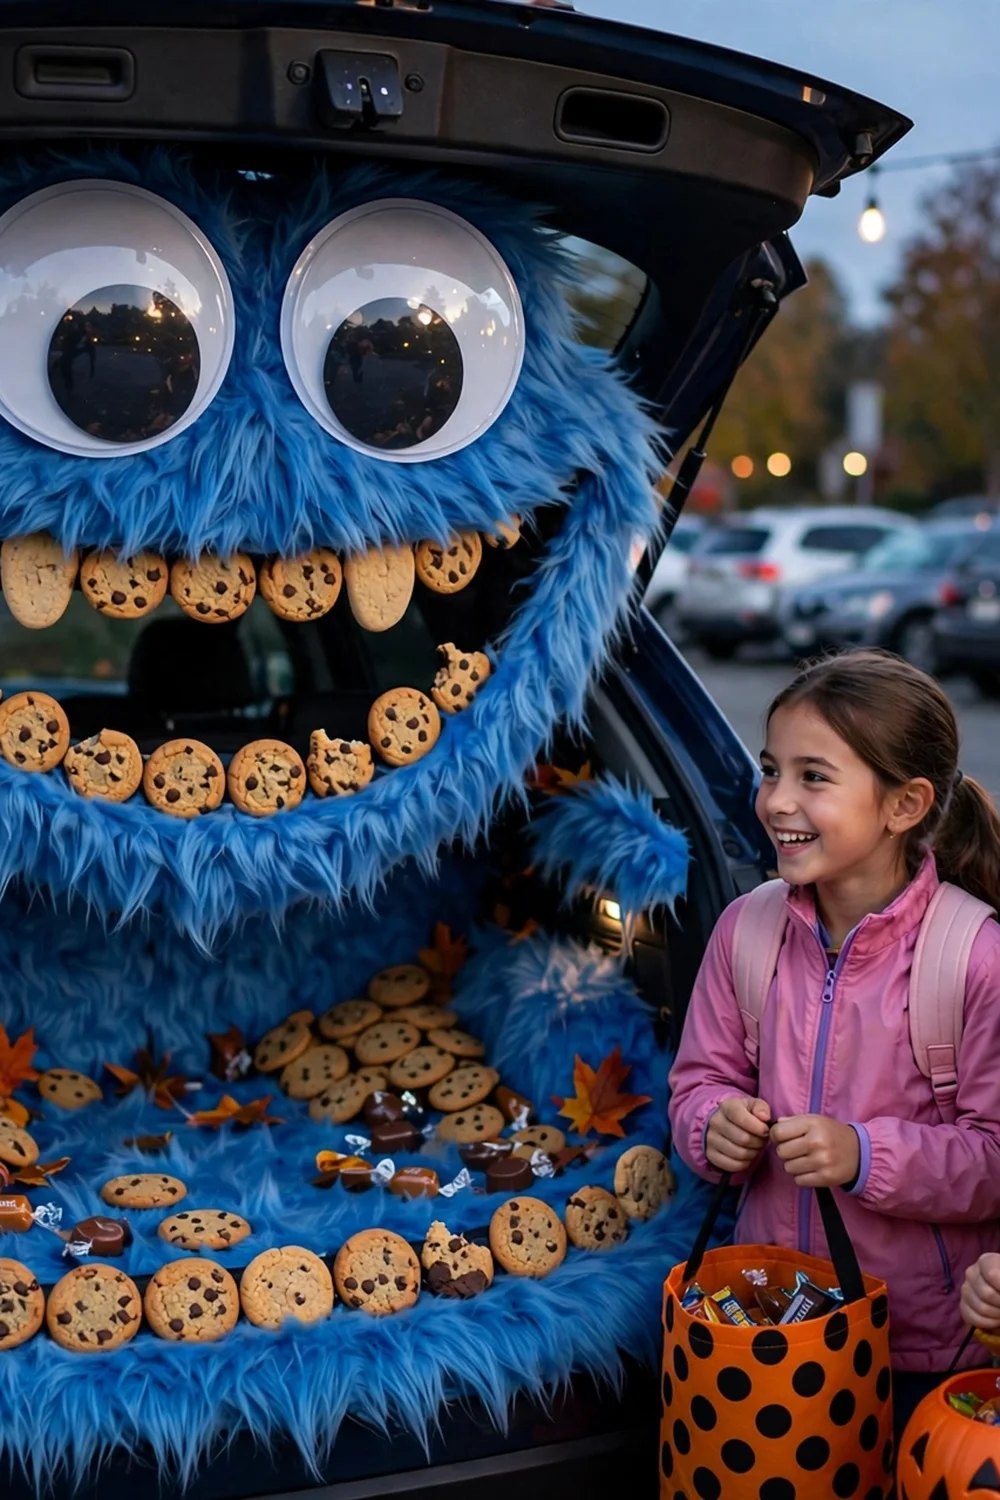
Cover the trunk in blue fur fabric, add giant googly eyes and a wide felt mouth, and hand out cookies alongside the candy. The friendly monster is a hit with toddlers who find skeletons scary. Blue faux fur costs about $12 a yard and one yard covers a trunk opening. The eyes should be enormous; dinner-plate size reads best from a distance. This is the theme to pick if your event is mostly under-6.
Try this: Make the monster “eat” the candy bowl: kids drop their hand into the mouth to grab treats.
Cost: $$| Difficulty: Easy | Time: 1 hour
19. Alien spaceship trunk
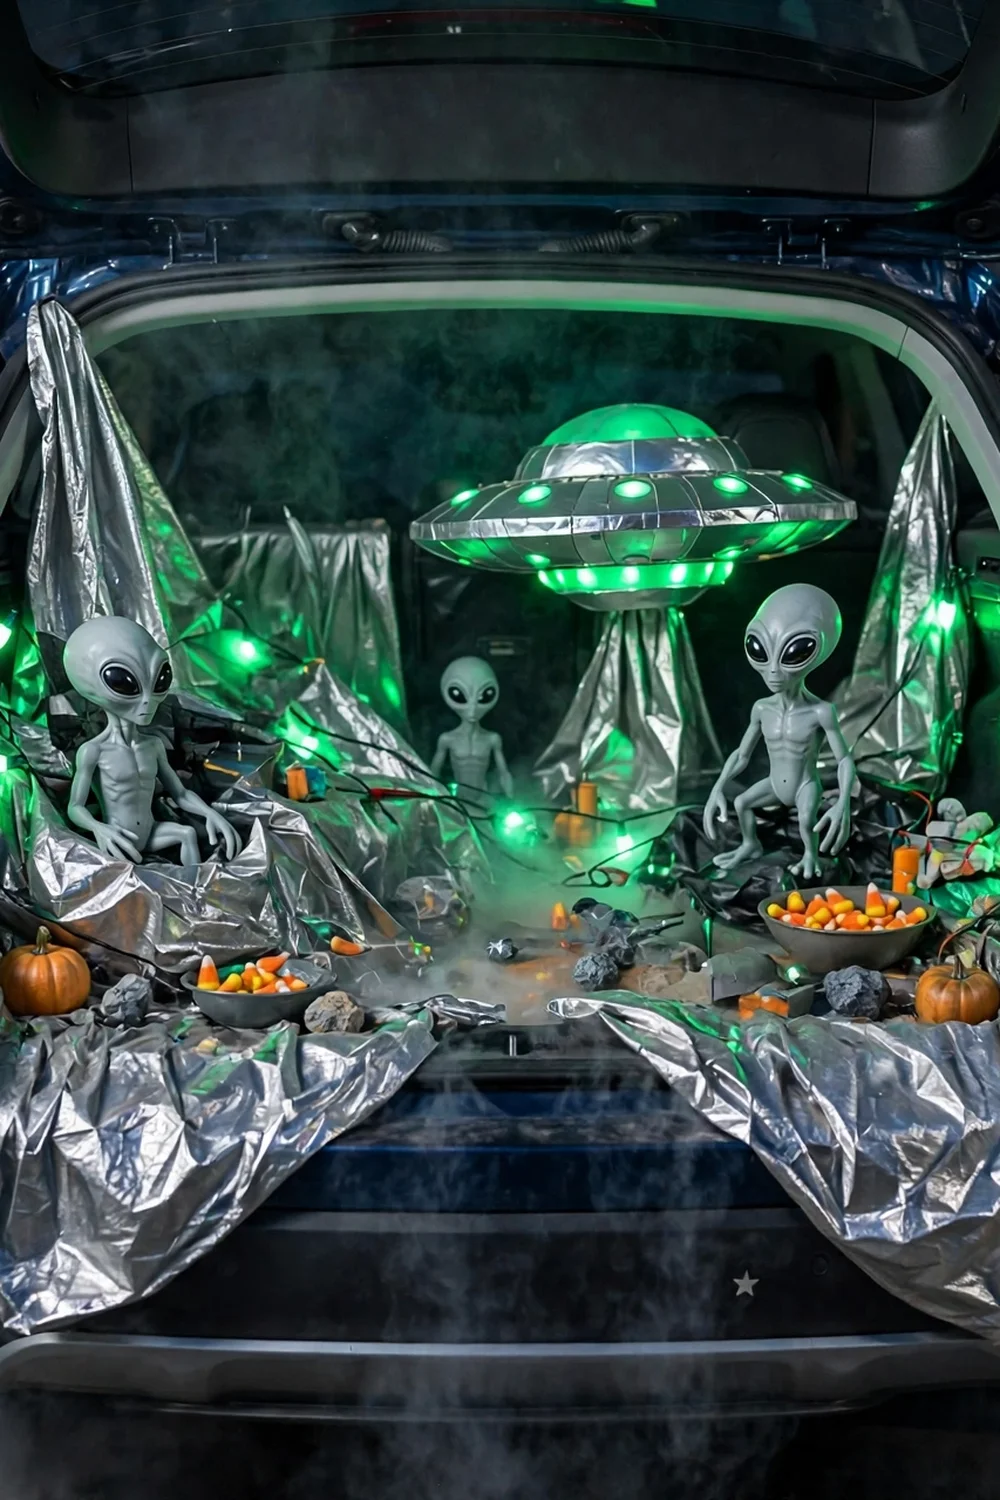
Drape the trunk in silver fabric, ring it with green LED lights, and land a couple of alien figures inside. A $15 fog machine on the ground behind the car makes the landing look real. Silver emergency blankets cost $2 each and cover the whole trunk with a crinkly spaceship texture. Add a “WELCOME EARTHLINGS” sign in glowing letters. This stands out because almost nobody does sci-fi at trunk or treat; you will be the only spaceship in the lot.
Try this: Play theremin-style sci-fi sounds from a phone speaker for full effect.
Cost: $$| Difficulty: Medium | Time: 1 hour
20. Enchanted forest trunk
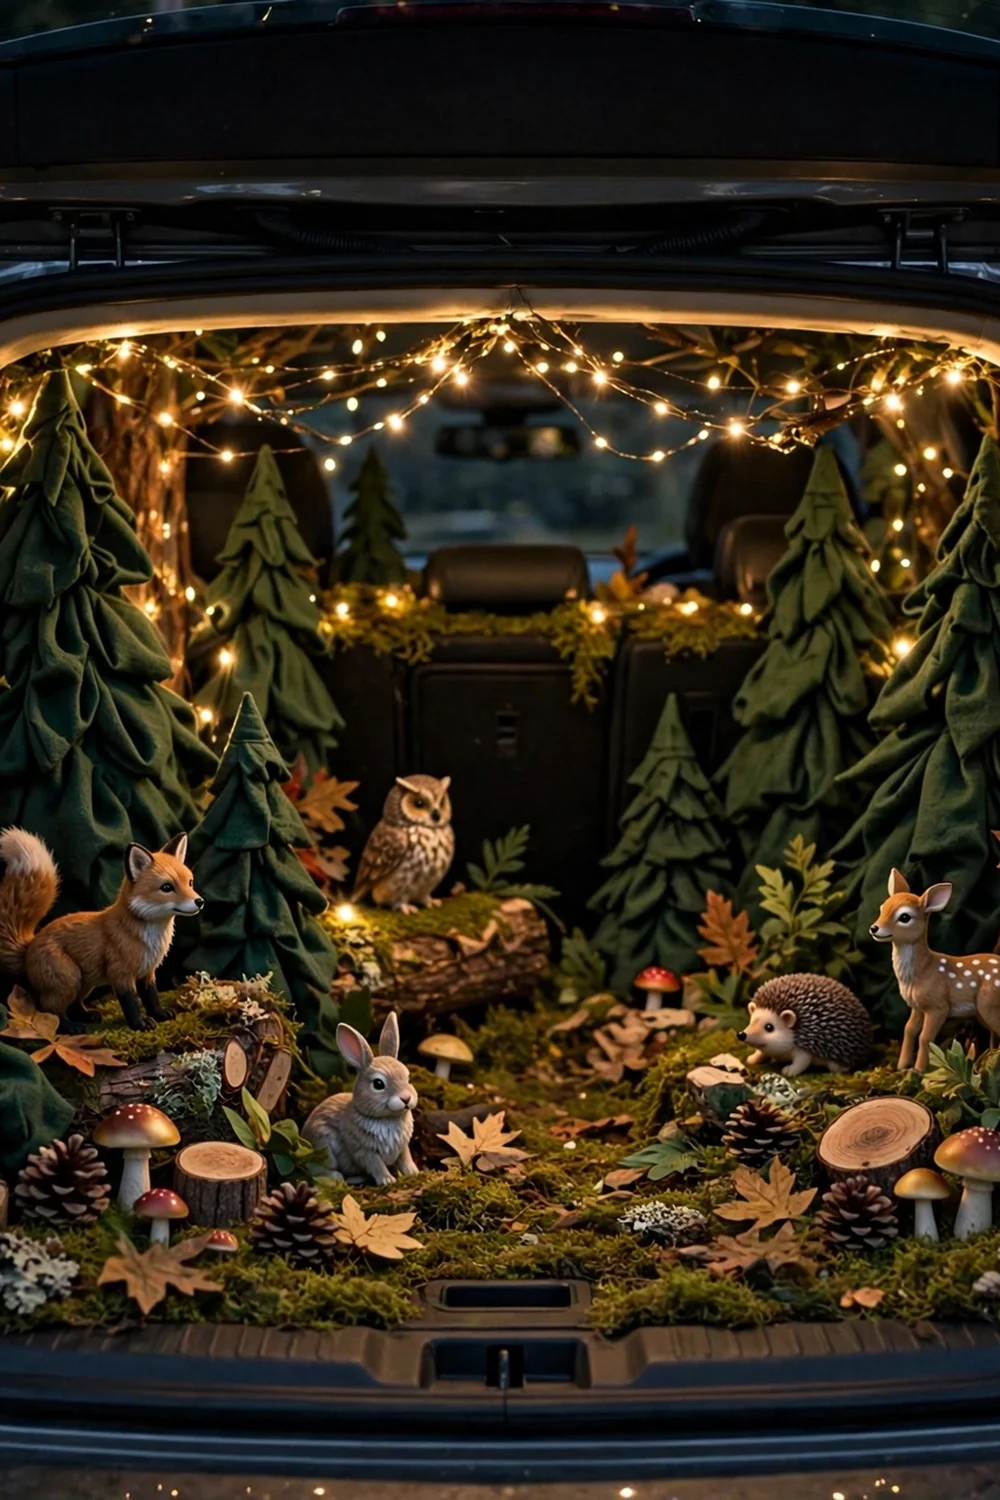
Line the trunk with dark green fabric, stand up cardboard trees, and weave warm fairy lights through everything for an enchanted forest. Woodland animal figures peek from behind the trees, and the lights make it magical after dark. This is the prettiest theme on the list and suits families who want wonder over fright. Cut tree silhouettes from dark green poster board; they store flat for next year. Hand out candy from a hollow log or wooden bowl.
Try this: Hang tiny paper lanterns from the hatch like fireflies.
Cost: $$| Difficulty: Medium | Time: 1.5 hours
Trunk or treat ideas at a glance
Match your timeline and budget to a row, then pick a theme from it.
Trunk or treat setup tips that most lists skip
Arrive early enough to build without rushing; most lots open an hour before the event. Park, then build outward from the trunk: backdrop first, big props second, lights last so you can aim them in the dark. Bring a power strip and extension cord if your event offers power, plus a backup battery pack. For more outdoor Halloween building ideas, see these DIY outdoor Halloween decorations, which cover the tombstones, webs, and lighting basics these trunks rely on.
Plan the candy math before you shop. A busy event burns through 150 to 200 pieces per car, so buy the big bags and keep a reserve box in the front seat. Put out a teal pumpkin or a small sign if you offer allergy-friendly non-candy treats; parents of kids with allergies will seek you out. And if the night needs more than a trunk, these kids Halloween party activities keep the fun going after the parking lot empties.
Trunk or treat safety: cars, kids, and candy
Cars and crowds need firm rules. Keep the engine off while kids are around the vehicle, and never let children climb into the trunk or sit on the tailgate; props shift and hatches close. Use painter’s tape on paint, keep all webbing and fabric clear of hinges, latches, and exhaust parts, and leave the walking lane completely open. Battery lanterns and LED string lights only: open flames have no place near cars, costumes, and dry October leaves.
Think about the kids, too. Keep scary levels matched to the event; school lots usually want fun over fright. The children’s health experts at Nemours remind parents to check every treat before kids eat it and to keep young children away from choking hazards; their Halloween safety tips are worth sharing with your group chat. The CPSC’s Halloween guidance adds the decoration rules: battery lights over candles and clear paths for little feet.
Frequently asked questions
How much candy do I need for trunk or treat?
Plan on 150 to 200 pieces per car for a typical 90-minute event. Buy the bulk bags and keep a reserve box in the front seat for the last half hour. If your event publishes an attendance estimate, divide by the number of cars and add a buffer.
How do I decorate my car without damaging the paint?
Use painter’s tape, magnetic decorations on steel panels, and suction cups on glass. Avoid duct tape, hot glue, or anything adhesive directly on paint. Drape fabric rather than taping large areas, and test any cling on a small spot first.
What is the easiest trunk or treat theme?
The mummy wagon: wrap the trunk in white streamers, add giant googly eyes, and you are done in 30 minutes for under $12. The candy corn car is nearly as fast. Both need no crafting skill and remove cleanly.
Can I use real candles in my trunk decorations?
No. Use battery-operated LED candles and lanterns only. Real flames near cars, costumes, dry leaves, and excited kids are a serious fire risk, and most organized events ban them outright.
How do I handle kids with food allergies at trunk or treat?
Offer non-candy treats like stickers, glow bracelets, or small toys, and mark your trunk with a teal pumpkin or sign so allergy families can spot you. Keep the non-candy treats in a separate bowl from the candy to avoid cross-contact.
What time should I arrive to set up?
Arrive when the lot opens, usually about an hour before the event starts. That gives you time to park, build, aim your lights after dark, and fix anything the drive over shook loose. Rushing the setup is how props end up crooked in every photo.
Trunk or treat is the rare Halloween event where showing off is the whole point, so commit to a theme and have fun with it. I did the monster mouth two years ago with poster board teeth and painter’s tape, and kids still detour to our car first. Pick one idea from this list, give it an afternoon, and bring extra candy. You will need it.