



There is a reason classic urns never go out of style. That footed, symmetrical shape makes even a simple bunch of branches look deliberate. I bought my first pair of cast-iron-look urns at a salvage shop years ago, and they have held every winter arrangement since, from plain pine boughs to full berry displays.
These 15 winter urn planter ideas focus on the urn itself: which vessel to choose, how to fill it for the classic formal look, and a few twists that keep the tradition fresh. Each idea names the urn style, the filling, a cost and difficulty label, and placement notes for the formal symmetry urns do best.
Quick takeaways
- Urns look best in matching pairs flanking a door or gate; symmetry is the whole point.
- Fill to about 1.5 times the urn’s height for balanced proportions.
- Fiberglass and resin urns give the cast-iron look at a fraction of the weight and price.
- Anchor tall arrangements with sand or gravel in the urn’s base so wind cannot topple them.
- Holly berries, ivy, and yew are toxic to pets; keep urn fillings out of reach.
1. The classic evergreen urn pair
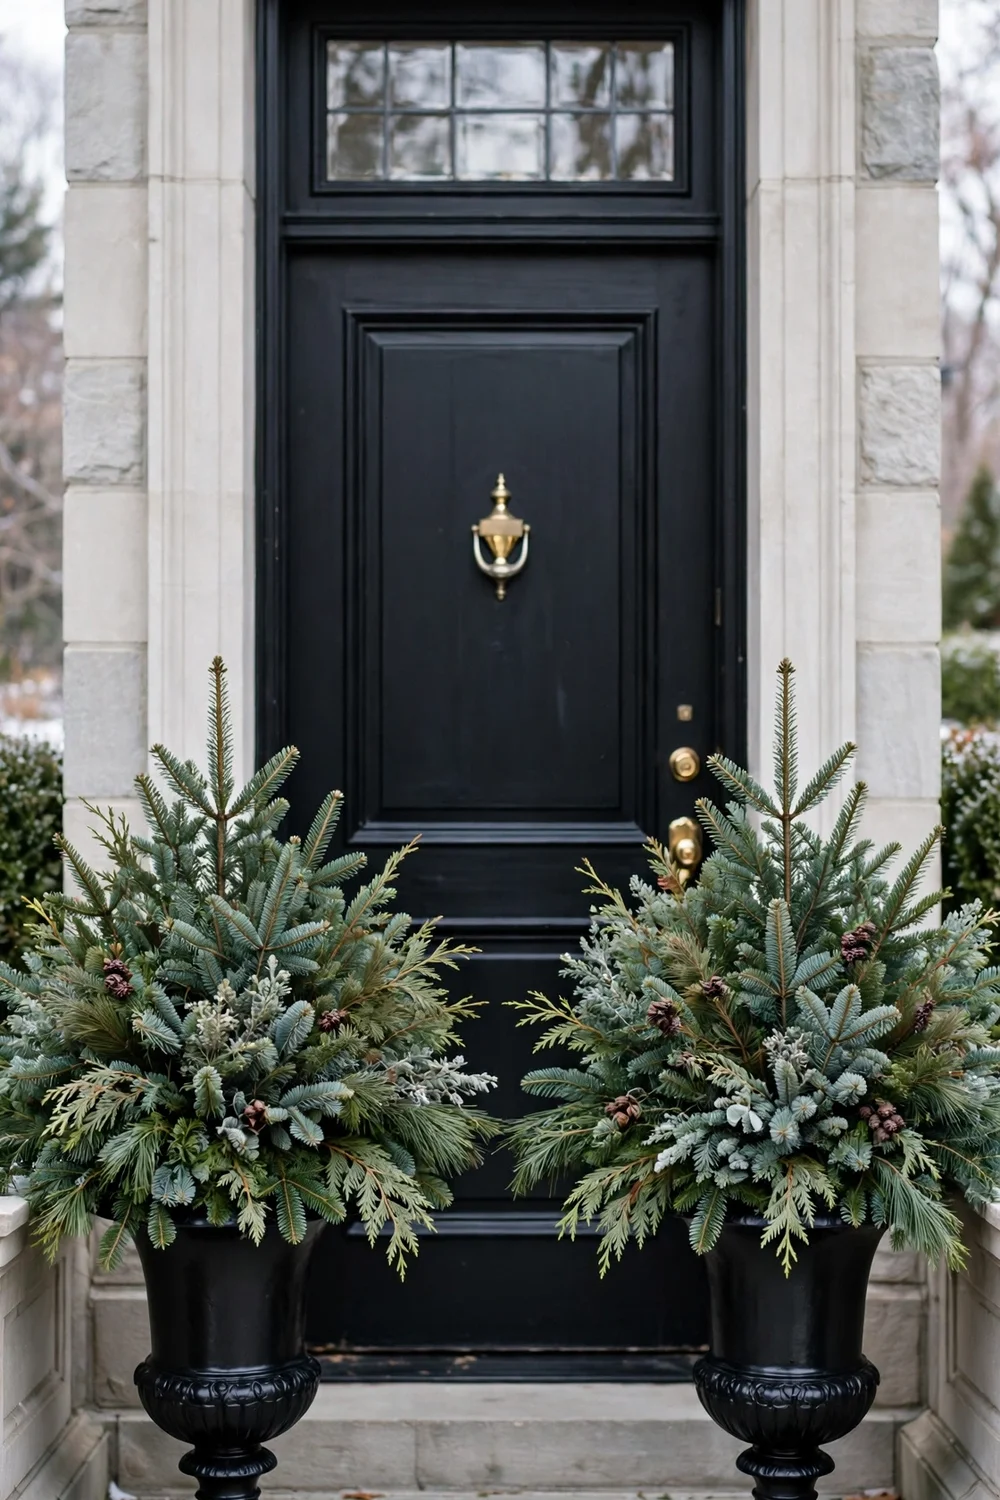
Two matching urns, two identical arrangements: this is the classic formal entry. Choose urns 20 to 24 inches tall so they hold their own beside the door. Fill each with the same recipe, fir at the back, spruce in the middle, cedar fanning forward, then finish both with the same number of pinecones. The discipline of matching is what makes it formal. Fiberglass urns in a cast-iron finish cost $60 to $90 each and weigh little enough to move alone.
Try this: build both urns side by side, adding one element to each in turn, so they truly match.
Cost: $$$ · Difficulty: Easy
2. Birch and pinecone urn

A weathered stone or concrete urn suits a woodland filling. Stand three birch poles (3 to 4 feet) in the center, pack pine boughs around the base, and press a dozen large pinecones into the greens at varying heights. The pale bark against gray stone is a quiet, natural combination that suits Craftsman and cottage houses. Concrete urns handle freeze-thaw well but are heavy; place them before filling.
Try this: set the birch poles into a half-buried brick inside the urn so they cannot shift in wind.
Cost: $$ · Difficulty: Easy
3. Red berry overflowing urn
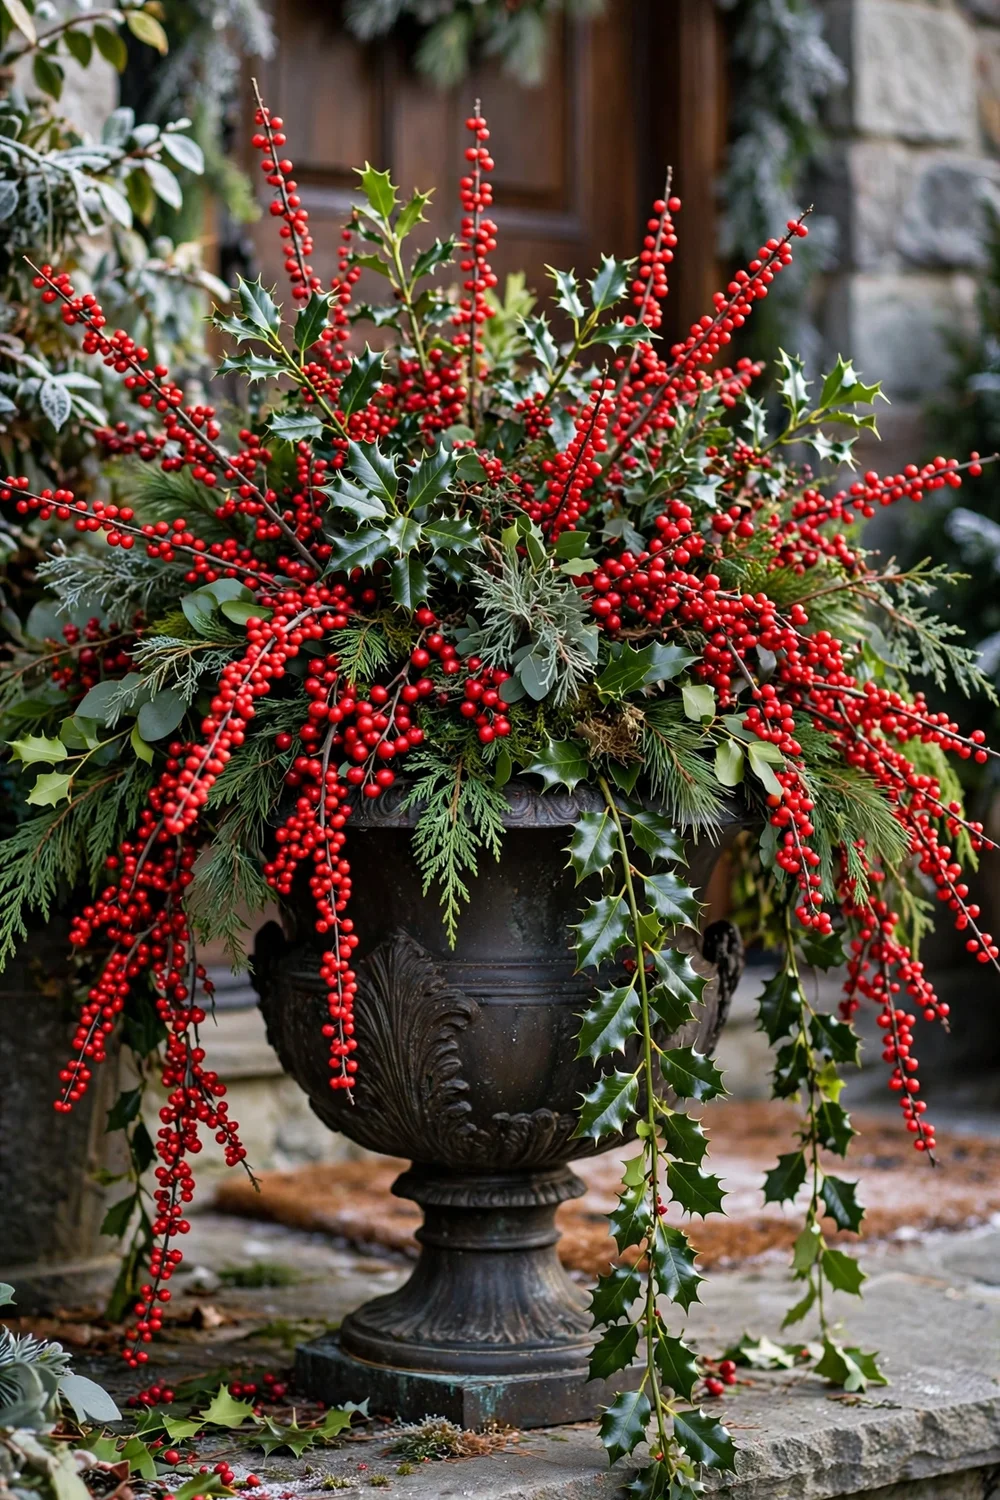
Let the urn run over. Pack the top with boxwood or yew boughs, then push in 15 to 20 stems of red winterberry and holly at outward angles so they cascade over the rim. The overflowing shape softens the urn’s formality just enough. A dark bronze or black urn makes the red read even brighter. This is a December showpiece; berries hold color about 6 weeks.
Try this: mist the berries lightly with water on dry windy days; desiccation dulls them faster than cold does.
Cost: $$ · Difficulty: Easy
Note: winterberry and holly berries are toxic to dogs and cats. The ASPCA toxic plant list covers both; keep berry-heavy urns where pets cannot reach fallen fruit.
4. Whitewashed winter urn
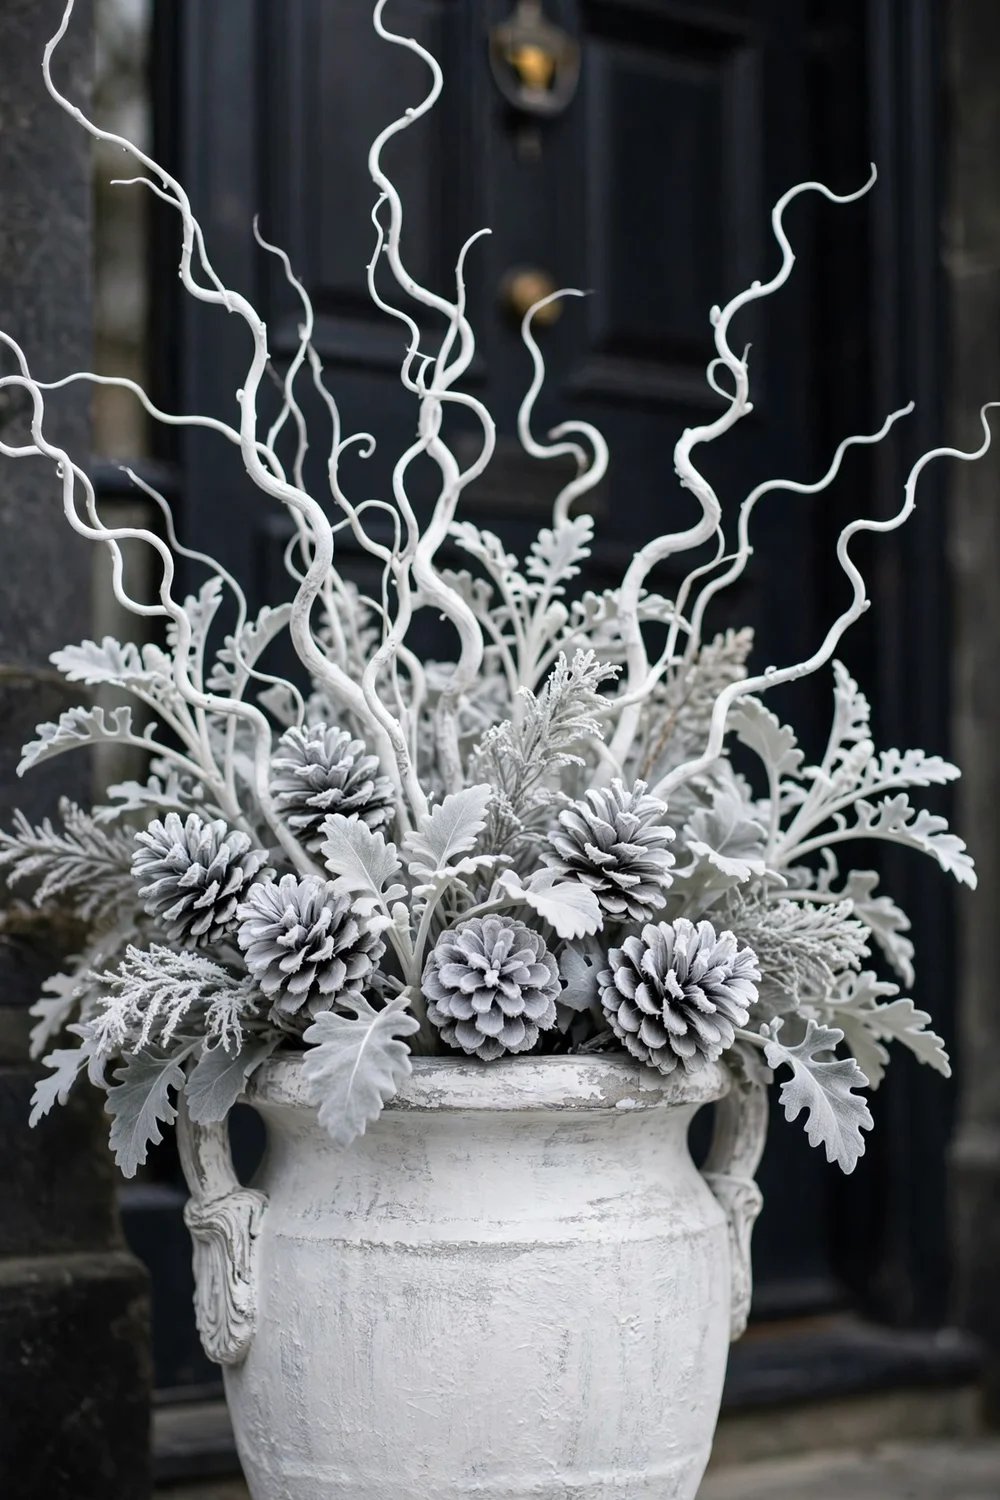
A whitewashed or chalk-painted urn with an all-white filling looks sculptural against dark siding or a black door. Combine white-painted curly willow, dusty miller, frosted pinecones, and a few stems of white berries. Everything in one pale palette hides fading and dust, so the urn stays crisp for months. Refresh the paint on the urn itself every few years; winter wet wears chalk paint faster.
Try this: dry-brush white paint over a dark urn instead of full coverage for a naturally aged finish.
Cost: $$ · Difficulty: Easy
5. Ornamental kale and cabbage urn

A wide-mouthed urn planted with ornamental kale and cabbage gives living color all winter. Plant 5 to 7 rosettes in a 16 to 18 inch urn in October, edging with ivy that trails over the rim. Frost deepens their pink and purple centers. Unlike cut arrangements, this one needs occasional water on thaw days, but it rewards you with four months of color.
Try this: choose fringed kale varieties for the edge and smooth cabbage types for the center; the texture contrast reads well.
Cost: $$ · Difficulty: Easy
6. Boxwood ball atop the urn
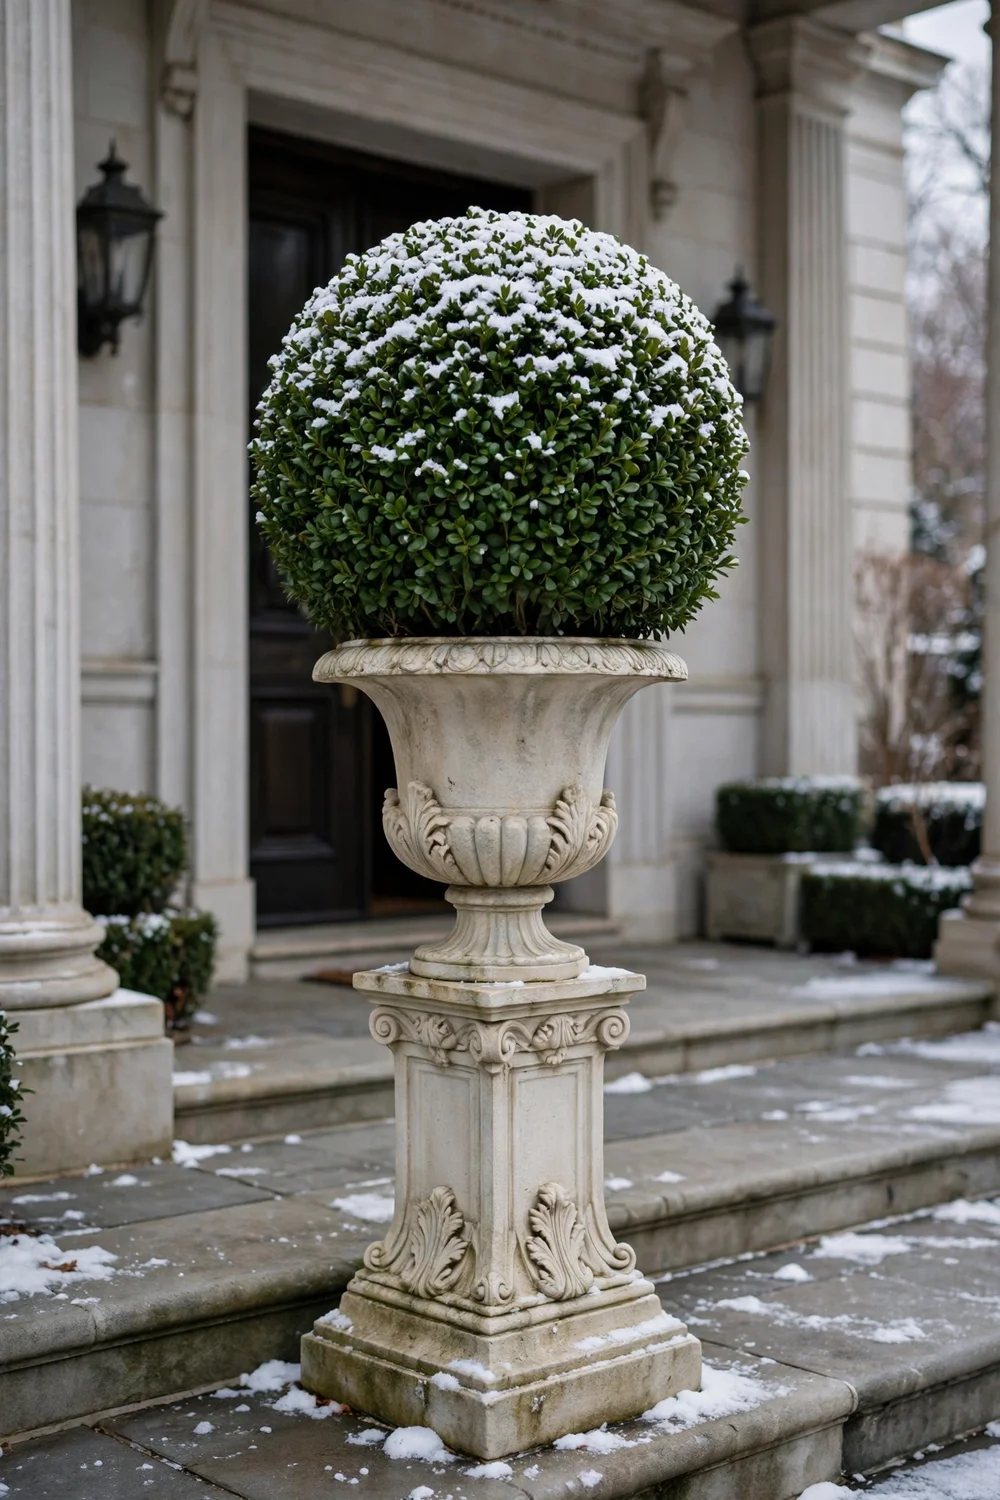
Set a clipped boxwood ball directly into the urn’s mouth for the most formal look of all. A 14 to 16 inch boxwood sphere on a 24 inch pedestal urn creates a lollipop silhouette that suits colonial and traditional houses. Buy nursery-clipped balls ($40 to $70) rather than shaping your own. Brush snow off after storms so the weight does not splay the branches.
Try this: underplant the ball’s base with sheet moss to hide the nursery pot rim completely.
Cost: $$$ · Difficulty: Easy
7. Lantern-topped urn
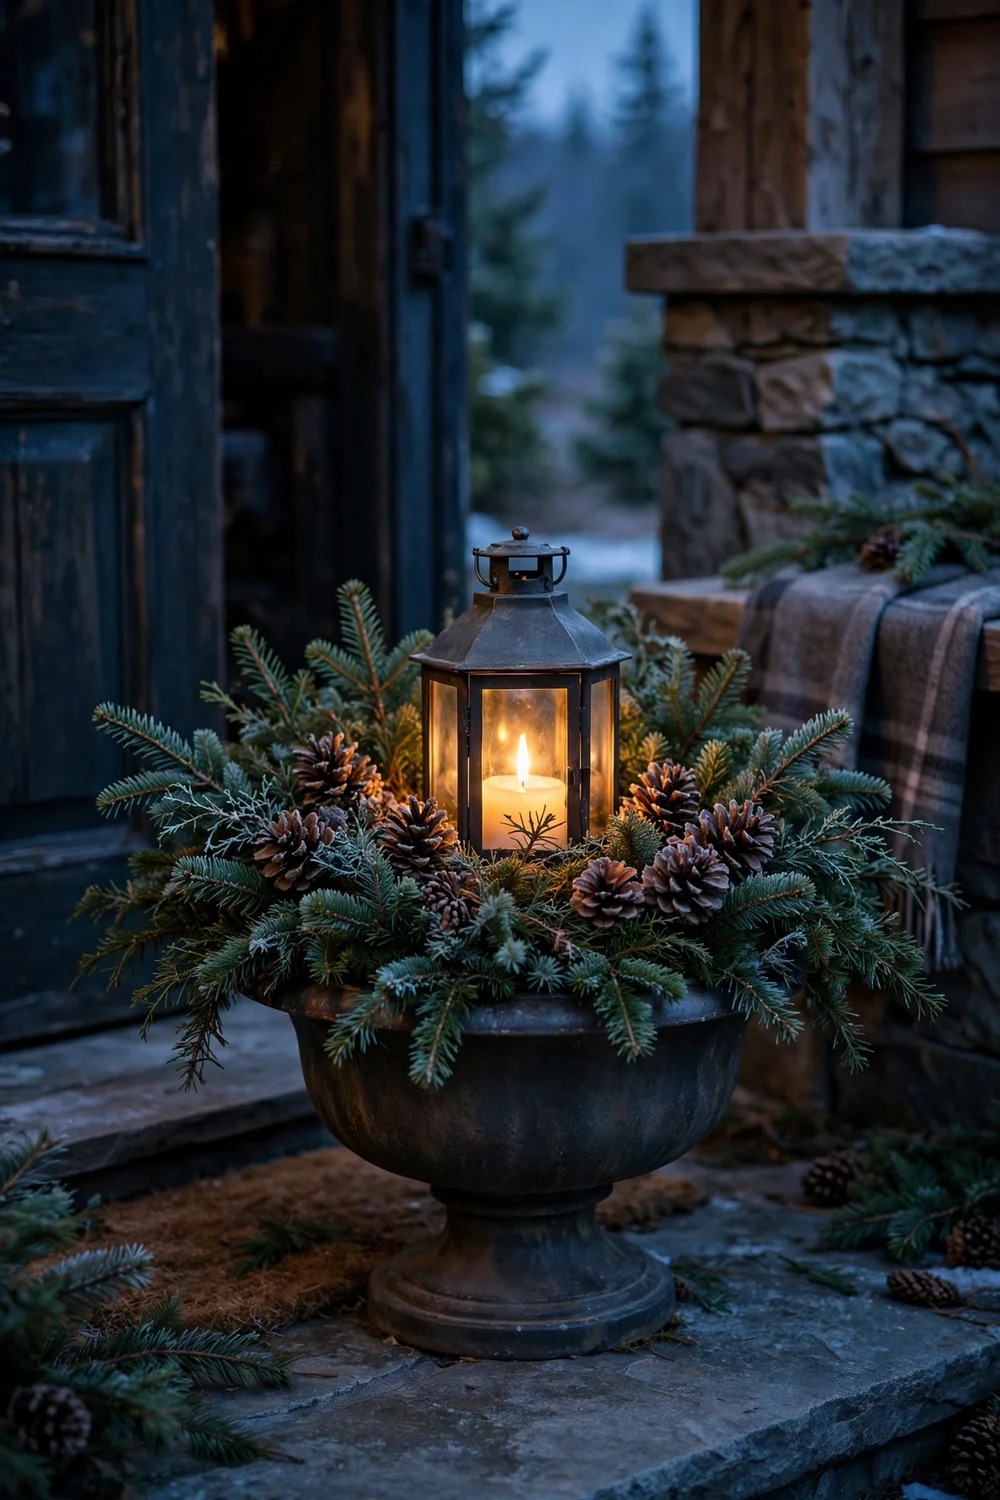
Turn the urn into a light feature. Fill it with low evergreens and pinecones, then nestle a metal lantern with a battery pillar candle into the center. At dusk the glow rises out of the greens. Use a timer candle so it lights itself daily. Keep the lantern’s glass clean; winter grime dims the effect faster than you would expect.
Try this: choose a lantern with a handle and hang it from a shepherd’s hook pushed into the urn for extra height.
Cost: $$ · Difficulty: Easy
8. Aged bronze urn with magnolia
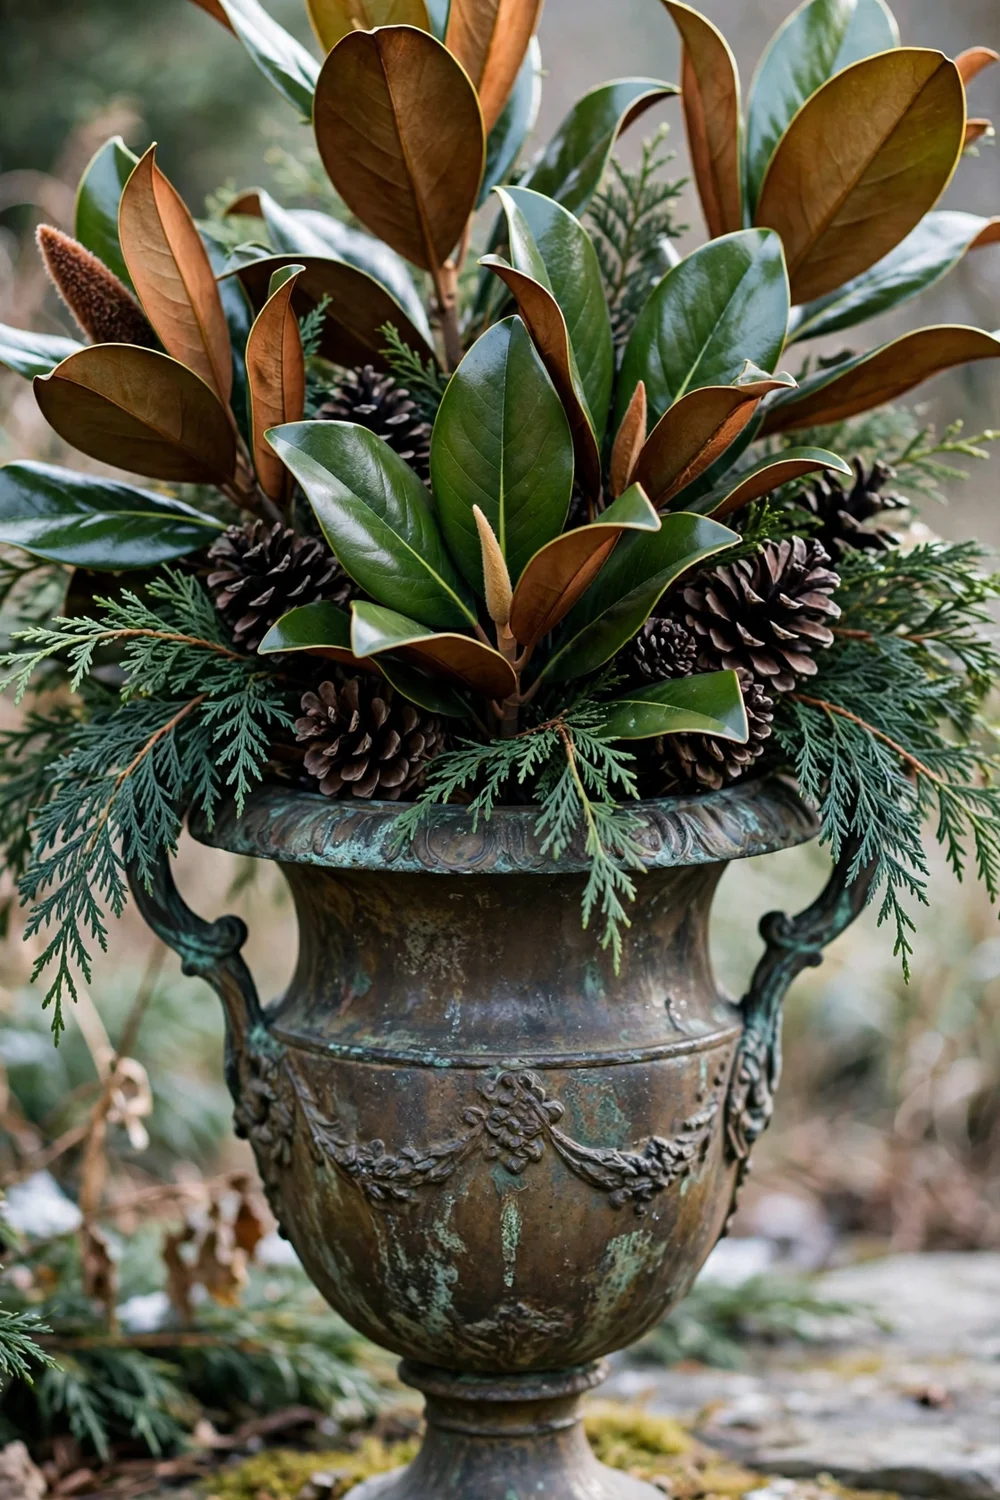
An aged-bronze or copper urn brings warmth that black and stone cannot. Fill it with glossy magnolia leaves, cedar, and dark pinecones for a rich, tonal arrangement. Magnolia’s bronze undersides echo the urn’s patina. Real bronze urns are an investment ($150+); fiberglass reproductions with a bronze finish cost a third and fool everyone from six feet away.
Try this: let a real bronze urn patina naturally; polishing it yearly is a losing battle outdoors.
Cost: $$$ · Difficulty: Easy
9. Red twig and white pine urn
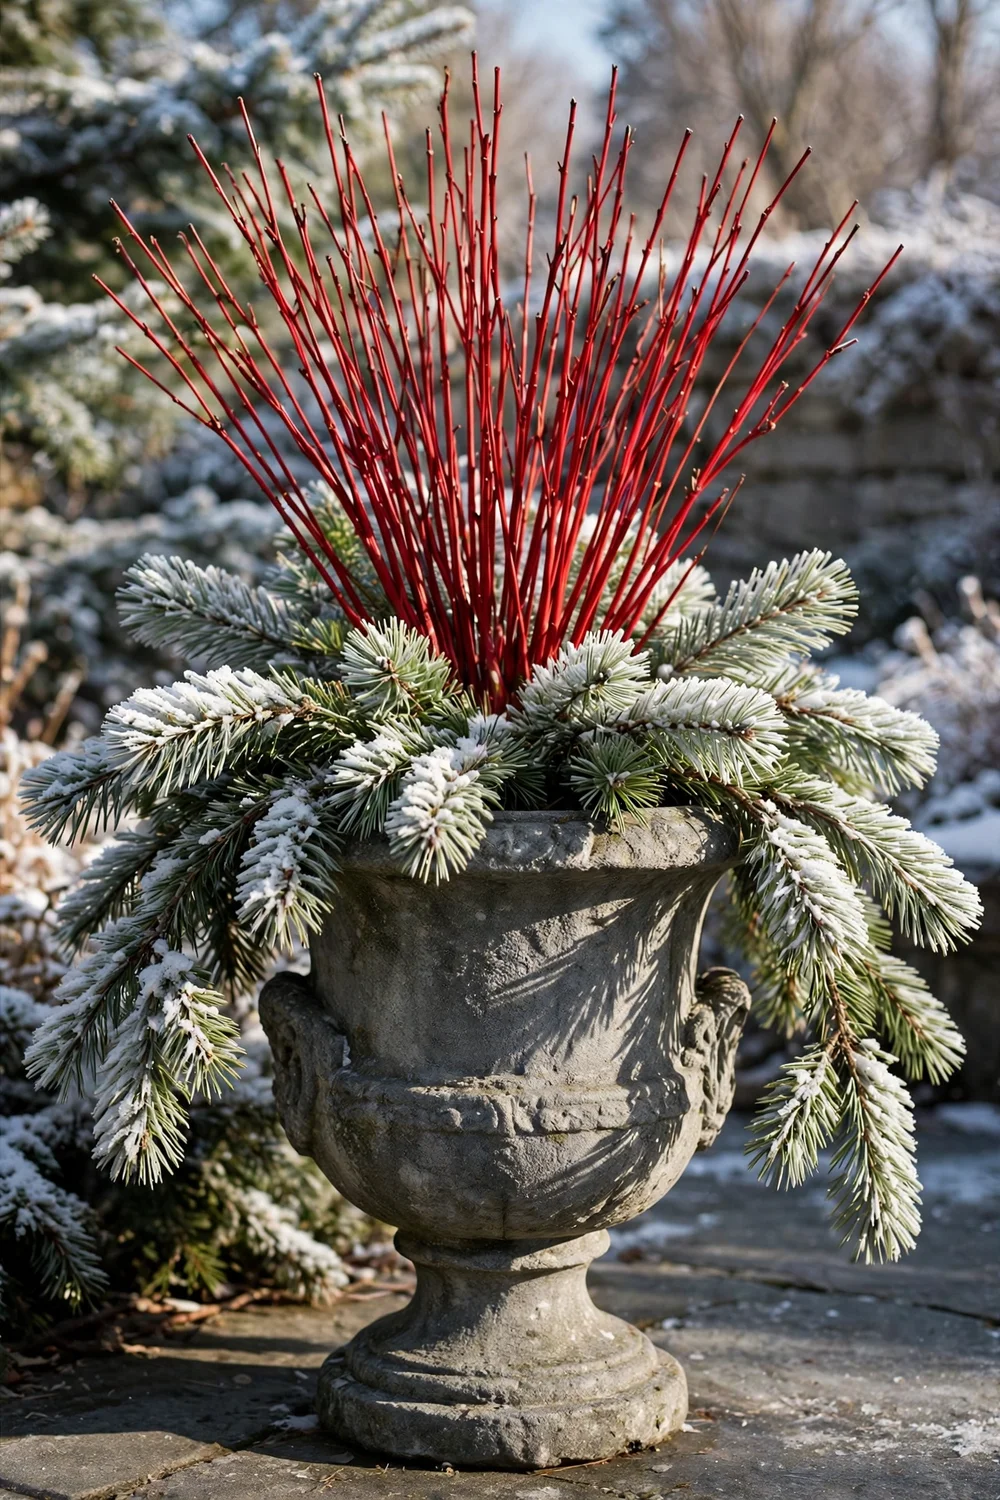
Red twig dogwood against white pine is the highest-contrast winter combination there is. Fill a gray stone or concrete urn with soft white pine boughs, then fan 10 to 12 red twig stems upward through the center. The stone’s cool tone makes both the red and the pale green pop. This arrangement needs no flowers and no ornaments; the color contrast carries it.
Try this: cut the twigs to three different heights for a natural fan instead of a flat top.
Cost: $ · Difficulty: Easy
10. Shatterproof ornament urn

For December, tuck shatterproof ornaments into the greens. Fill the urn with fir boughs, then nestle 12 to 15 large shatterproof baubles (3 to 4 inch) in red, gold, or silver among the branches. Wire a few to short sticks so they sit above the greens. After the holidays, lift the ornaments out and the urn continues as a plain winter arrangement into February.
Try this: use only shatterproof ornaments outdoors; glass breaks in freeze-thaw and leaves shards in the soil.
Cost: $$ · Difficulty: Easy
11. Moss and fern woodland urn

A woodland-floor look suits a rustic or mossy urn. Line the top with sheet moss, tuck in a few small evergreen ferns, add pinecones and short birch twigs, and finish with a sprinkle of red berries. Everything sits low, at or just above the urn’s rim, which suits the wide, shallow urn shapes. Mist the moss occasionally; it stays green longest in shade.
Try this: buy preserved sheet moss from a craft store; it needs no water and lasts all winter.
Cost: $ · Difficulty: Easy
12. Holly and ivy urn

Holly and ivy in an urn is as traditional as it gets. Plant ivy around the rim in fall so it trails down the pedestal by December, then push cut holly branches with berries into the center for height. The trailing ivy softens the urn’s hard lines. This suits shaded entries where flowering plants fail; ivy tolerates deep shade happily.
Try this: plant the ivy 6 weeks before you add the holly so the trails have length by the holidays.
Cost: $ · Difficulty: Easy
Note: holly berries and ivy are toxic to pets, so this traditional pairing belongs where animals cannot chew it.
13. Dried hydrangea urn
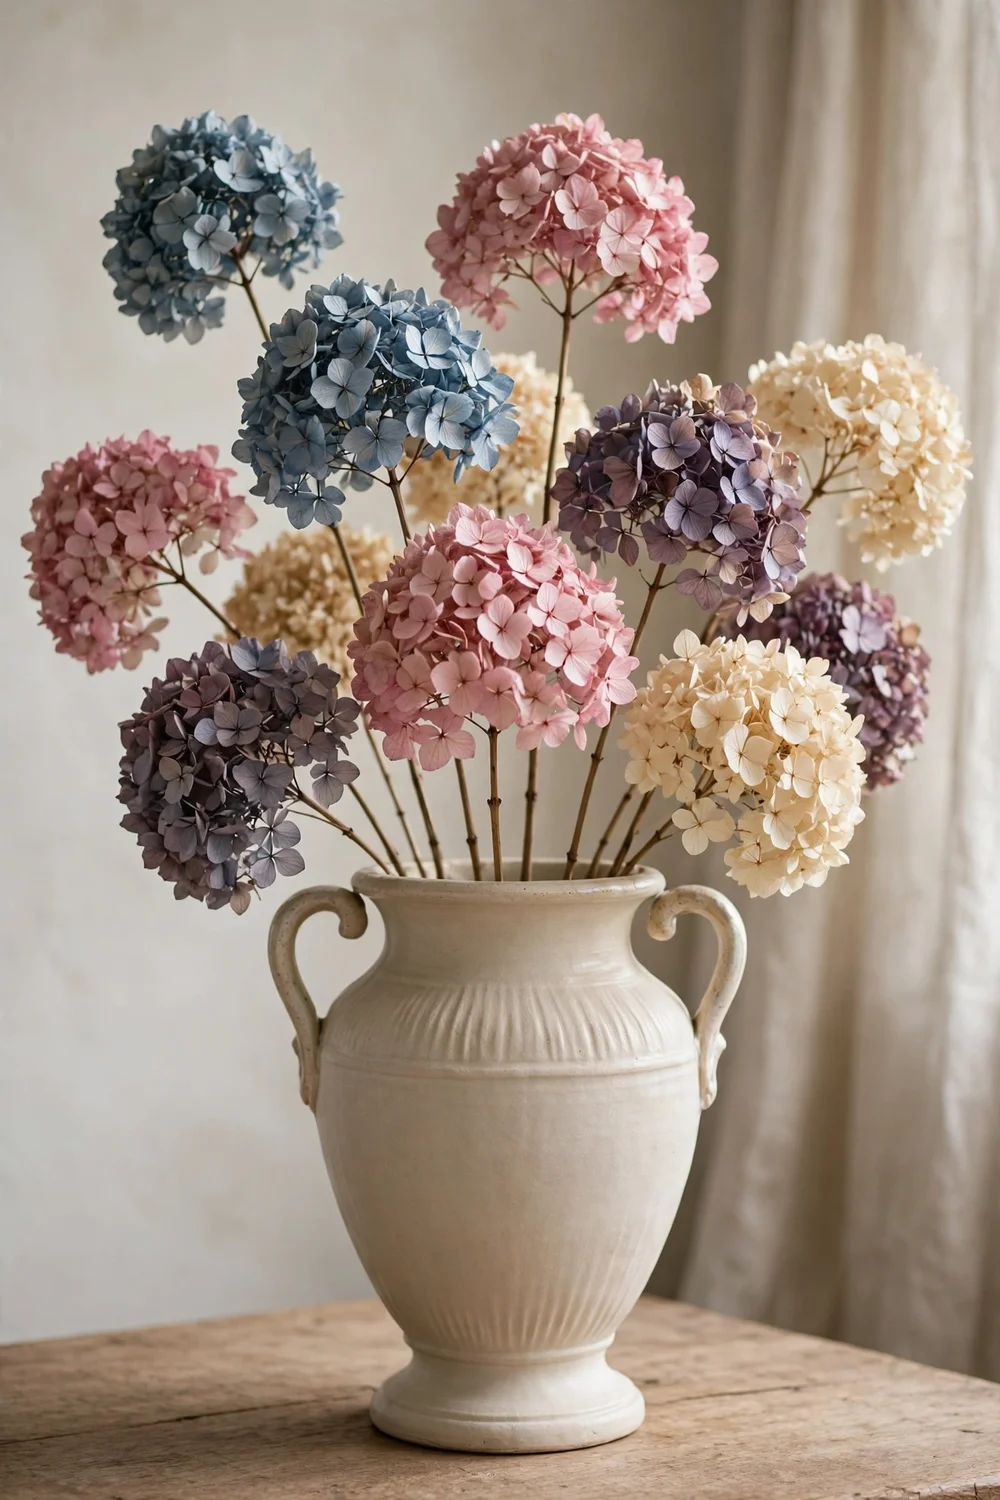
Dried hydrangea heads, left to age on the bush until late fall, turn dusty shades of blue, pink, mauve, and cream. Cut 10 to 12 large heads on 18 inch stems and arrange them in an urn over a base of dried grasses or bare branches. No greens needed; the papery blooms are the whole show. They last all winter untouched and cost nothing if you grow hydrangeas.
Try this: cut hydrangeas after two frosts when the petals feel papery; earlier cuts wilt instead of drying.
Cost: $ · Difficulty: Easy
14. Succulent-topped urn for covered entries

Under a covered entry, a low urn planted with hardy hens-and-chicks becomes a living sculpture. Fill with fast-draining cactus mix, plant the rosettes tightly, and top with gravel. The rosettes blush red and purple in the cold. This needs a roof overhead; without it, winter rain rots the crowns. One planting lasts for years with zero seasonal work.
Try this: tuck a few small pinecones between rosettes for winter texture without extra plants.
Cost: $$ · Difficulty: Easy
15. Cotton stem and cedar urn
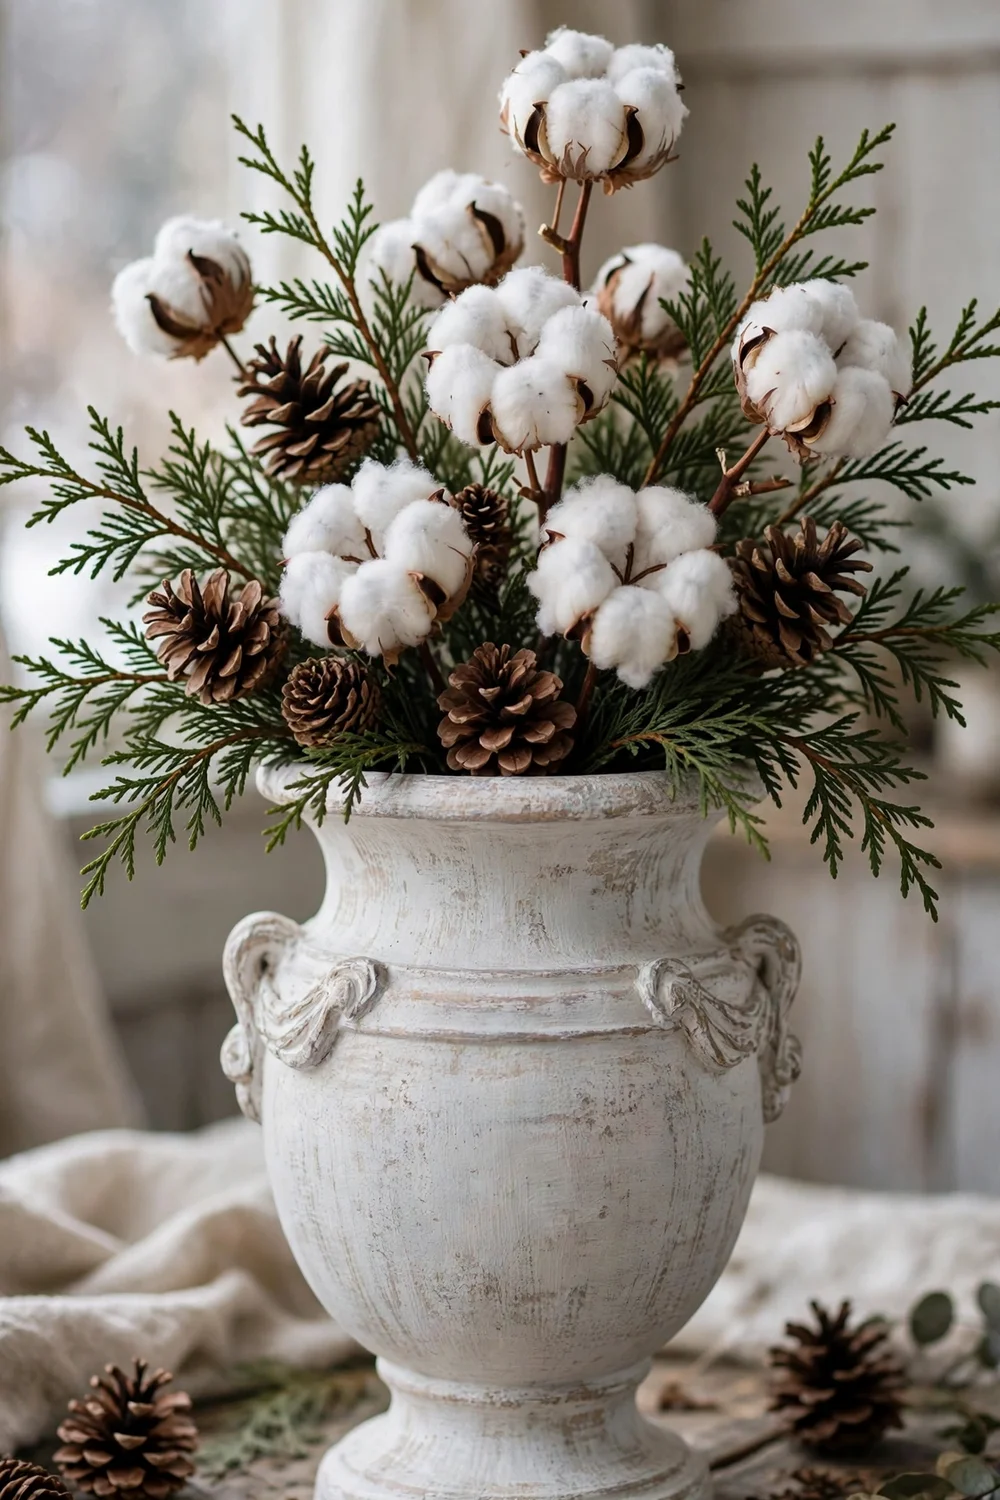
Fluffy cotton stems bring a soft, farmhouse texture to winter urns. Arrange 8 to 10 cotton stems (2 to 3 feet tall) among cedar boughs and pinecones in a galvanized or whitewashed urn. The white bolls read as snow from a distance. Keep the urn under cover or bring cotton stems inside during heavy rain; soaked bolls mat and gray.
Try this: buy cotton stems in fall when craft stores stock them; a bundle of 10 costs about $12.
Cost: $ · Difficulty: Easy
Urn materials compared
Choose the vessel before the filling. This table covers the common urn materials for winter use.
| Material | Freeze-thaw | Weight | Typical cost |
|---|---|---|---|
| Concrete / stone | Excellent | Very heavy | $80 to $200 |
| Fiberglass / resin | Excellent | Light | $50 to $120 |
| Metal (iron, steel) | Good; may rust | Heavy | $70 to $180 |
| Glazed ceramic | Good if thick and frost-rated | Medium | $60 to $150 |
| Terracotta | Poor; often cracks | Medium | $30 to $80 |
| Wood | Good; weathers over time | Medium | $40 to $100 |
How to fill an urn for the formal look
Formal urn design follows a simple proportion: the arrangement should rise about 1 to 1.5 times the urn’s height above the rim. Start with the tallest element in the center (branches, a small conifer, or a topiary ball), add mounding greens around it to hide the mechanics, then finish with accents (berries, pinecones, ornaments) pushed in last. Step back after every third element; urns are viewed from a distance, and balance matters more than detail.
Anchor everything. Urns are top-heavy by design, and a winter wind can tip a tall arrangement. Fill the bottom third of the urn with sand or gravel before adding soil or foam. For cut-branch arrangements, a block of dry floral foam wedged into the neck holds stems upright. In exposed spots, run a length of wire from the tallest branches down to the urn’s handles or rim.
Mistakes to avoid with winter urns
The classic mistake is a too-small urn. A dinky urn beside a grand door looks lost; when in doubt, go one size larger than feels right. Second, do not skip drainage. Urns without drain holes collect meltwater that freezes, expands, and cracks even concrete over time. Drill holes if yours lacks them. Third, avoid glass ornaments outdoors; only shatterproof survives freeze-thaw. Fourth, do not let soil sit waterlogged around living plants; winter wet kills more urn plantings than cold.
Pet safety: urn fillings to watch
Pet safety note: holly and winterberry berries, English ivy, yew boughs, and boxwood are all toxic to dogs and cats. Urns sit at nose height for many dogs, so place berry-heavy or ivy-trailing urns where pets cannot reach them, and sweep up fallen berries. Check the ASPCA toxic plant list before choosing fillings.
For more on keeping potted plants healthy through freezes, the University of Georgia Extension winter potted plant care guide covers drainage and container protection. If your entry needs styling beyond the urns, these small front porch decor ideas handle the whole porch. A vintage-leaning entry pairs well with these vintage porch decor ideas, and the house lawn design ideas extend the formal look to the yard.
Frequently asked questions
What is the difference between an urn and a planter?
An urn is a specific planter shape: a footed, pedestal-based vessel, usually symmetrical, wider at the top than the base. The classic form comes from ancient funerary vessels. In garden design, urns signal formality and are typically used in matching pairs, while “planter” covers any container.
How tall should a winter urn arrangement be?
Aim for the arrangement to rise about 1 to 1.5 times the urn’s height above the rim. A 24 inch urn wants 24 to 36 inches of plant material above it. Taller looks dramatic; shorter looks stubby. Step back and check from the street, which is where the arrangement will actually be seen.
What urn material is best for winter?
Fiberglass and resin urns handle freeze-thaw excellently, weigh little, and cost less than stone or metal. Concrete and stone are the most durable but very heavy. Avoid thin terracotta and non-frost-rated ceramic outdoors in freezing weather; they absorb water and crack.
How do I keep a tall urn from tipping in wind?
Fill the bottom third of the urn with sand or gravel for ballast before arranging. Wedge cut branches into dry floral foam set deep in the neck. In exposed spots, wire the tallest stems to the urn’s rim or handles. Wide-based, heavy urns (concrete, stone) resist tipping best.
Can I leave urns outside all winter?
Yes, if the material is frost-proof and the urn has drainage. Fiberglass, concrete, stone, wood, and metal urns stay out all winter. Empty non-frost-proof pots (thin terracotta, cheap ceramic) and store them upside down in a shed or garage to prevent cracking.
Are winter urn fillings safe for pets?
Some are not. Holly and winterberry berries, English ivy, yew, and boxwood are toxic to dogs and cats. Urns sit at nose height for many dogs, so site risky arrangements out of reach and sweep up fallen berries promptly.
My salvage-shop urns are on their eighth winter now, and the only thing that has changed is what goes inside them each December. Pick a vessel you love, anchor it well, and the fillings can be as simple or as dressed up as you like.


