


Every spring I opened my shed door and faced the same wall of stuff: a mower behind a wheelbarrow, pruners buried under a tarp, and a bag of potting mix split open on the floor. Finding one tool meant moving five others, so small jobs turned into an afternoon of digging.
This guide gives you 10 DIY shed organization ideas that sort tools, garden gear, and seasonal storage into zones you can keep. Each idea includes a real cost range and a difficulty label, so you can start with one wall this weekend and build from there.
Quick takeaways
- Map four zones before you buy anything.
- Get tools off the floor and onto walls, racks, and rafters.
- Use lidded, labeled bins so dust, damp, and mice stay out.
- Lock chemicals and fuel away from kids, pets, and food.
- Keep a clear walkway and a marked spot for the mower and the cart.
1. Map four zones on the floor first
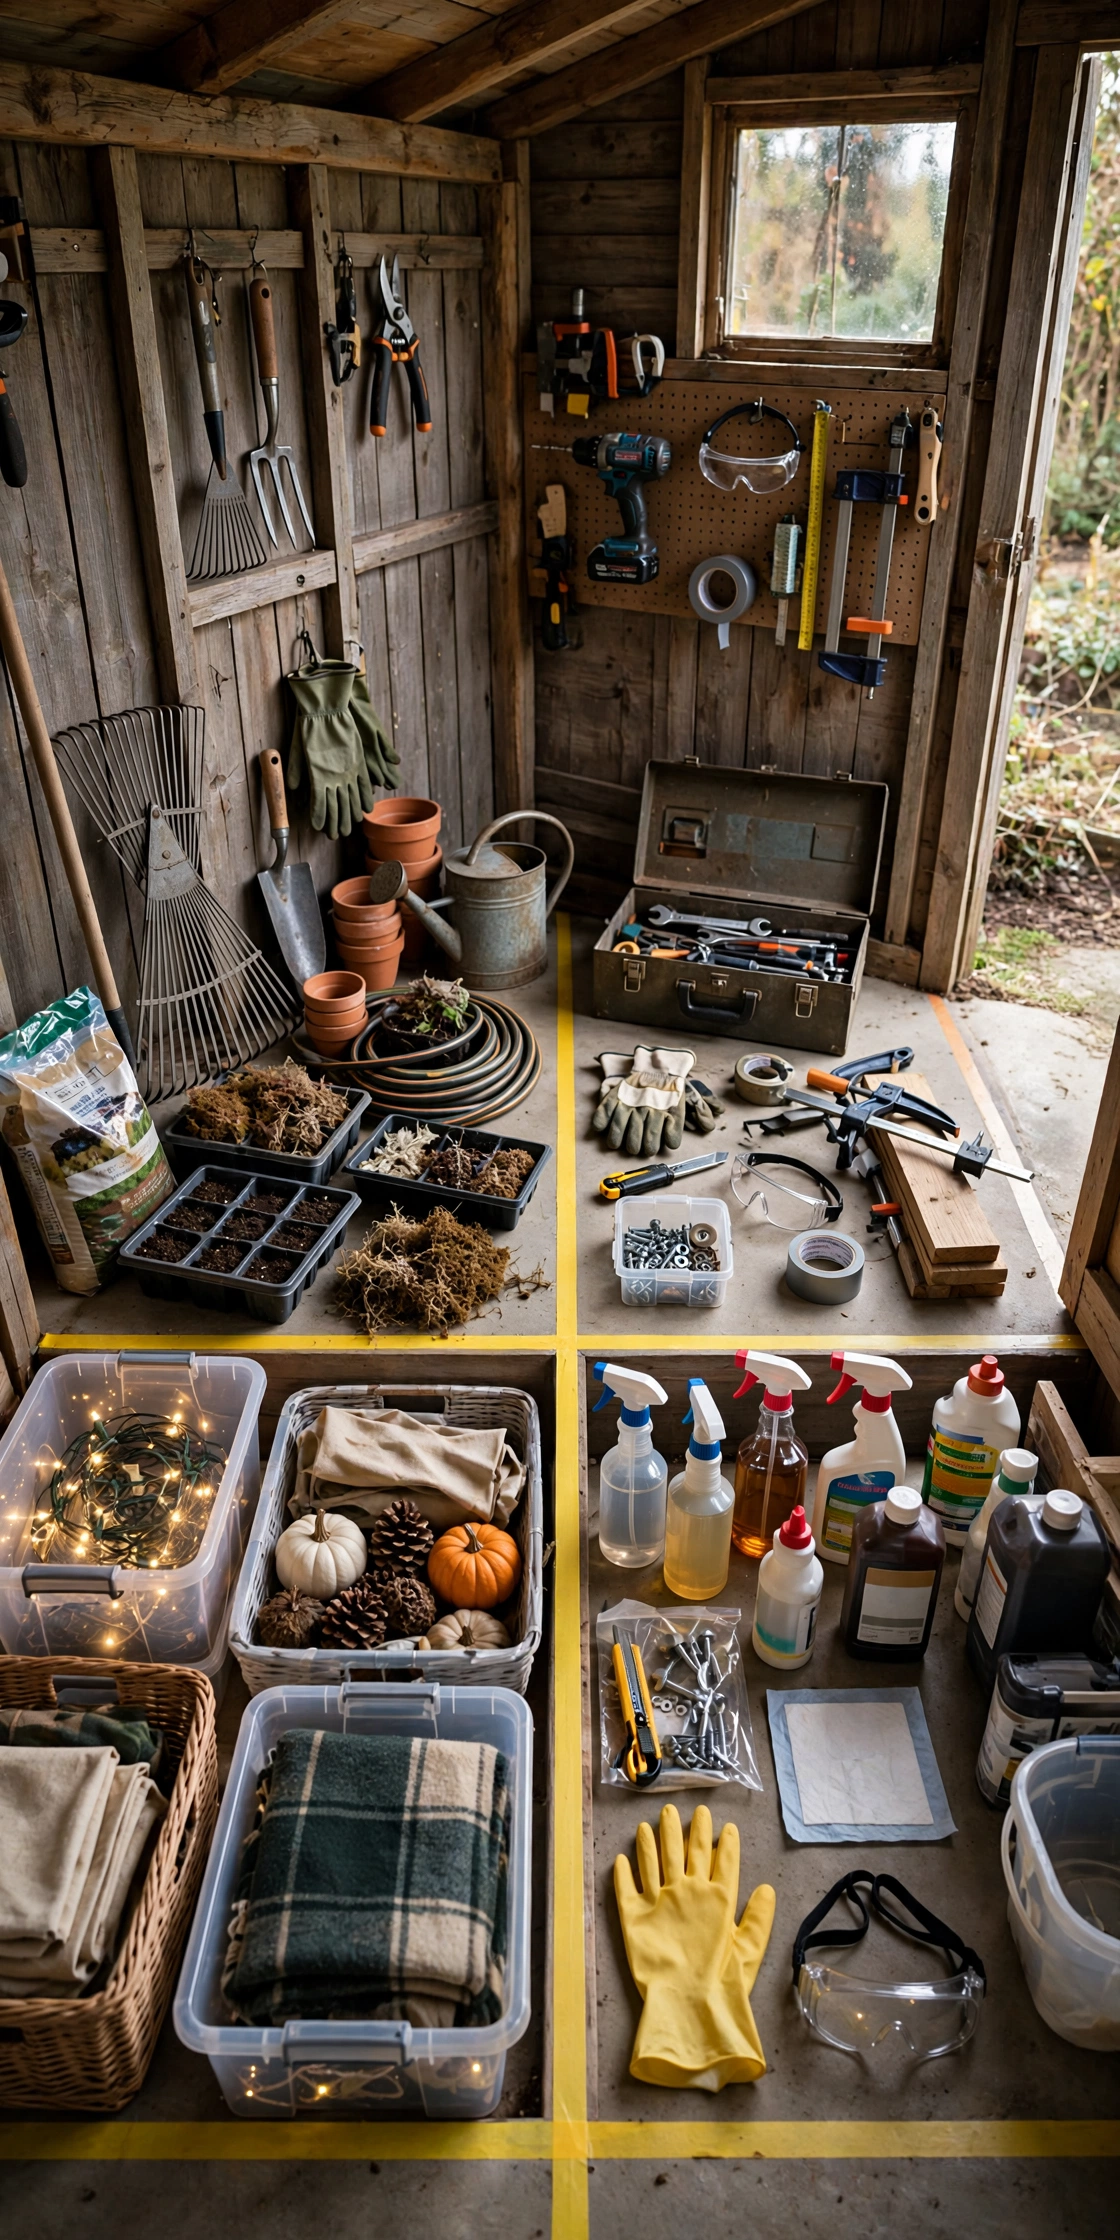
Walk into your shed and draw four zones before you buy a single hook. Put garden tools near the door, workshop tools along the back wall, seasonal gear up high or at the back, and chemicals in one locked spot away from everything else. Mark each zone on the floor with painter tape for a week and notice where you naturally reach. Move the zone lines until the daily tools sit within two steps of the door and nothing blocks the walkway. A zone map fixes the usual shed problem: everything mixed in every corner.
Try this: Tape the zones for one week before you screw anything to a wall.
Cost: $ | Difficulty: Easy
2. French cleat wall for hand tools

A French cleat wall turns a blank shed wall into tool storage you can rearrange without new holes. Screw two long beveled strips to the studs, then hang holders, bins, and small shelves from the top strip. Hang pruners, trowels, wrenches, and shears at eye level, with heavier items lower and sharp edges facing the wall. Trace each tool outline in chalk so a missing tool shows at a glance. When your tool set changes, slide holders along the strip instead of drilling again. The whole wall stays visible, dry, and off the floor, which keeps blades from rusting in damp corners.
Try this: Trace each tool in chalk so a missing tool shows right away.
Cost: $$ | Difficulty: Moderate
3. Slotted rack for long handle tools

Long handle tools cause most shed mess because they fall over in a corner pile. Fix them with a slotted rack on one wall: a horizontal board with U shaped slots, or a pallet stood on end with its slats as dividers. Slide each handle down into its own slot, heads up, with rakes grouped with rakes and shovels with shovels. Keep the rack near the door so you grab a tool without moving three others. Leave one empty slot for the next tool you buy. Heads stay off the damp floor, handles stay visible, and the pile never forms again.
Try this: Leave one empty slot for the next tool you buy.
Cost: $ | Difficulty: Easy
4. Adjustable metal shelving, heaviest low

Metal shelving beats wood shelving in a shed because it handles damp without swelling or sagging. Pick adjustable freestanding units with a rated load per shelf and anchor the top to the studs so a loaded unit cannot tip. Put the heaviest bins on the bottom shelf, daily gear at eye level, and light seasonal boxes on top. Leave a two inch gap behind the unit so air moves and condensation dries. Skip particle board shelves here: one damp winter turns them soft, and a soft shelf drops paint cans on everything below it.
Try this: Put a small level on each shelf so bins sit flat and never slide.
Cost: $$ | Difficulty: Easy
5. Overhead rafter loft for light seasonal gear

The space between your shed rafters is free storage for light gear you use twice a year. Lay plywood across two or three joists to make a shallow loft, add a front lip so bins cannot slide off, and keep the load under the joist rating. Store camping gear, holiday lights, and spare tarps up there, never paint cans or toolboxes. Reach it with a stable step stool, not a wobbly chair, and keep a clear landing spot below. The floor stays open for daily work while the seasonal pile lives overhead, out of the damp and out of the way.
Try this: Label the loft lip with the season inside, so you grab the right bin from the stool.
Cost: $ | Difficulty: Moderate
6. Small parts station with magnetic strip and labeled jars
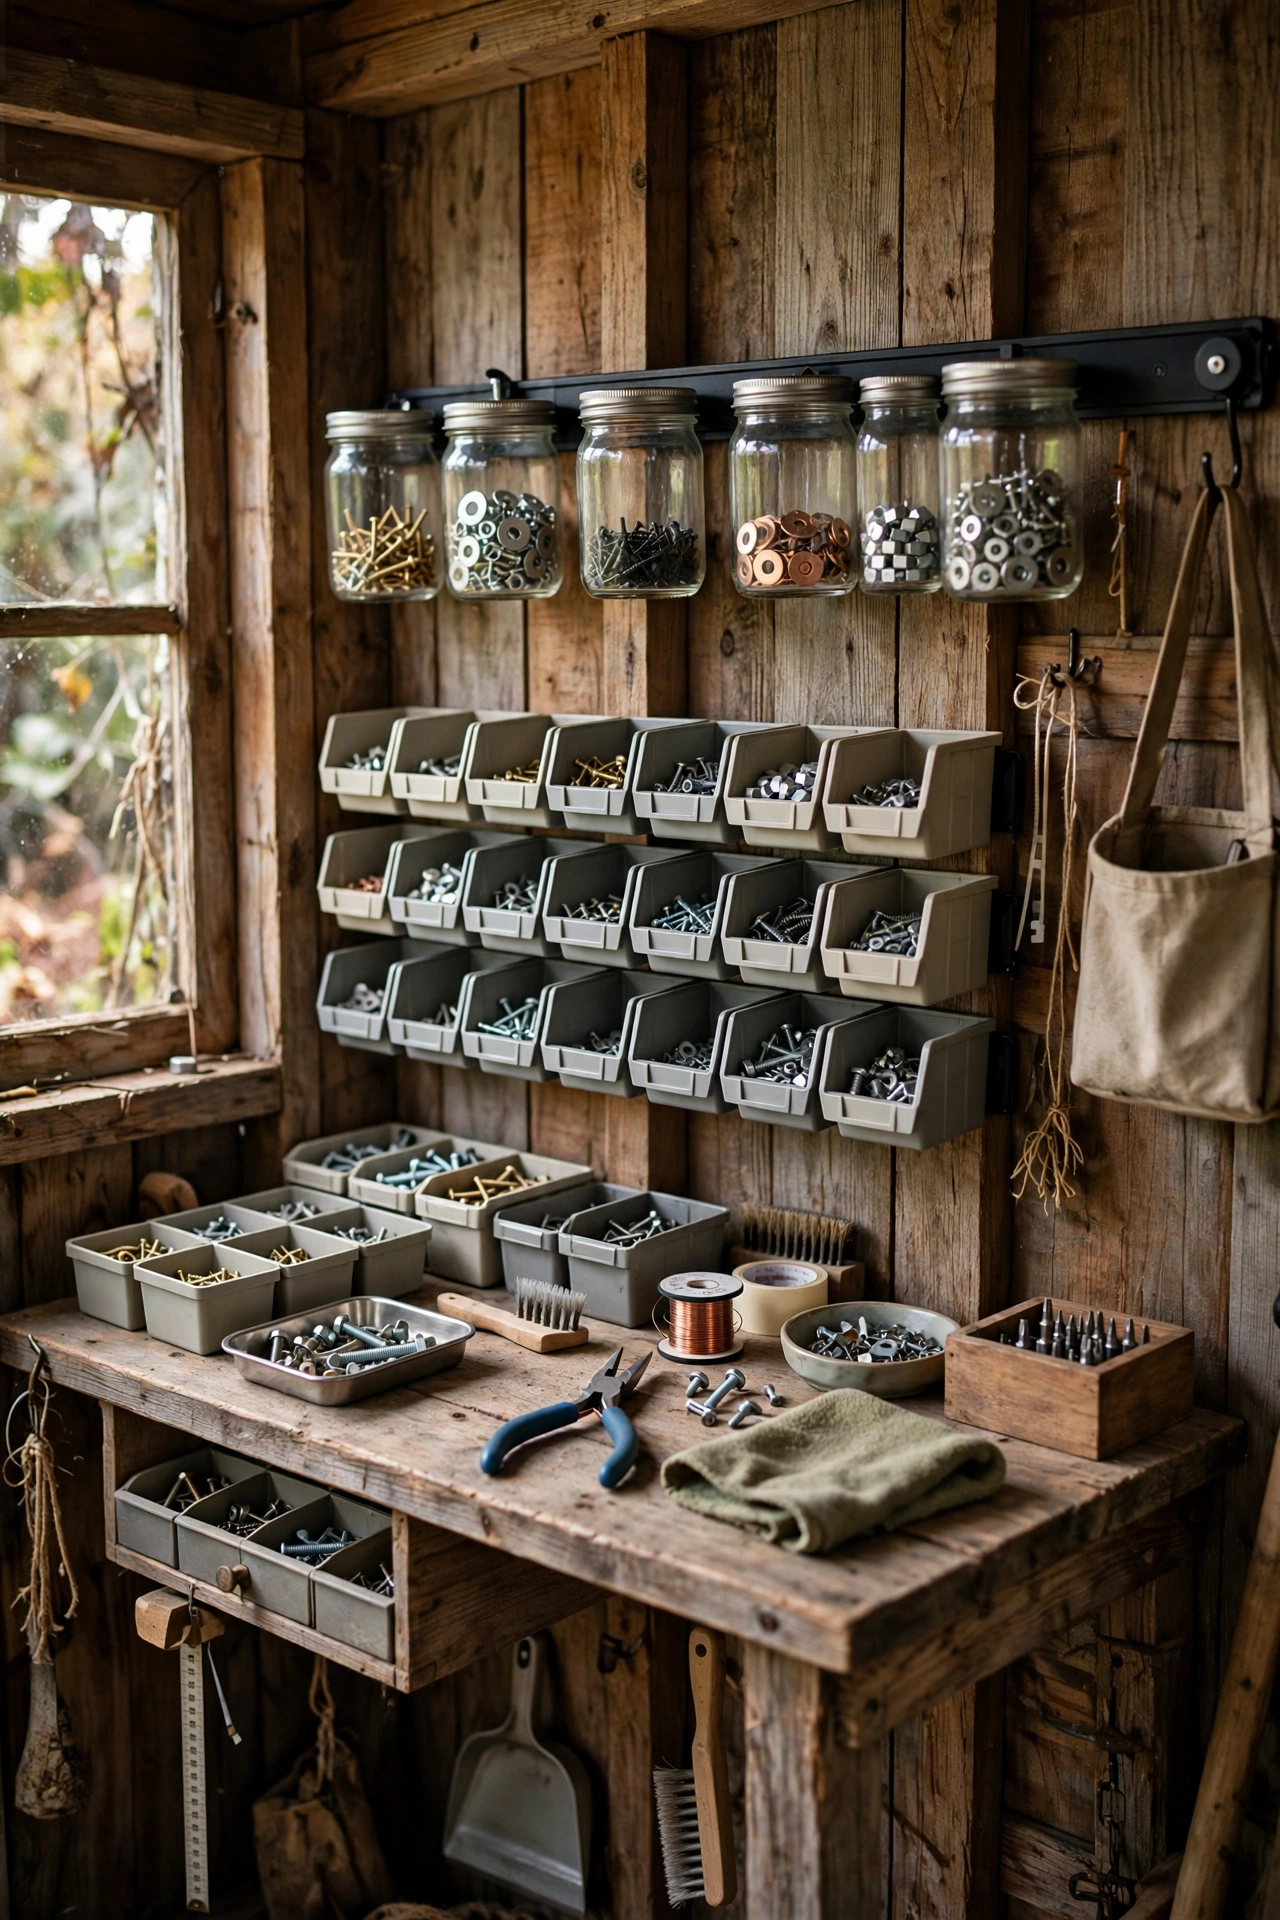
Small parts vanish in a shed because screws, seeds, and sprinkler heads share one junk drawer. Give them a station on one wall: a magnetic strip for screwdrivers, pliers, and metal bits, small labeled jars for screws and seeds, and one shallow bin for sprinkler parts and hose fittings. Screw jar lids under a shelf so jars hang where you can see them and twist off with one hand. Label every jar with a paint pen, not a paper tag that falls off in damp air. When a project breaks, you reach for one spot instead of digging through three boxes.
Try this: Screw one jar lid under the shelf tonight and test it with screws.
Cost: $ | Difficulty: Easy
7. Clear lidded bins with color coded zone labels
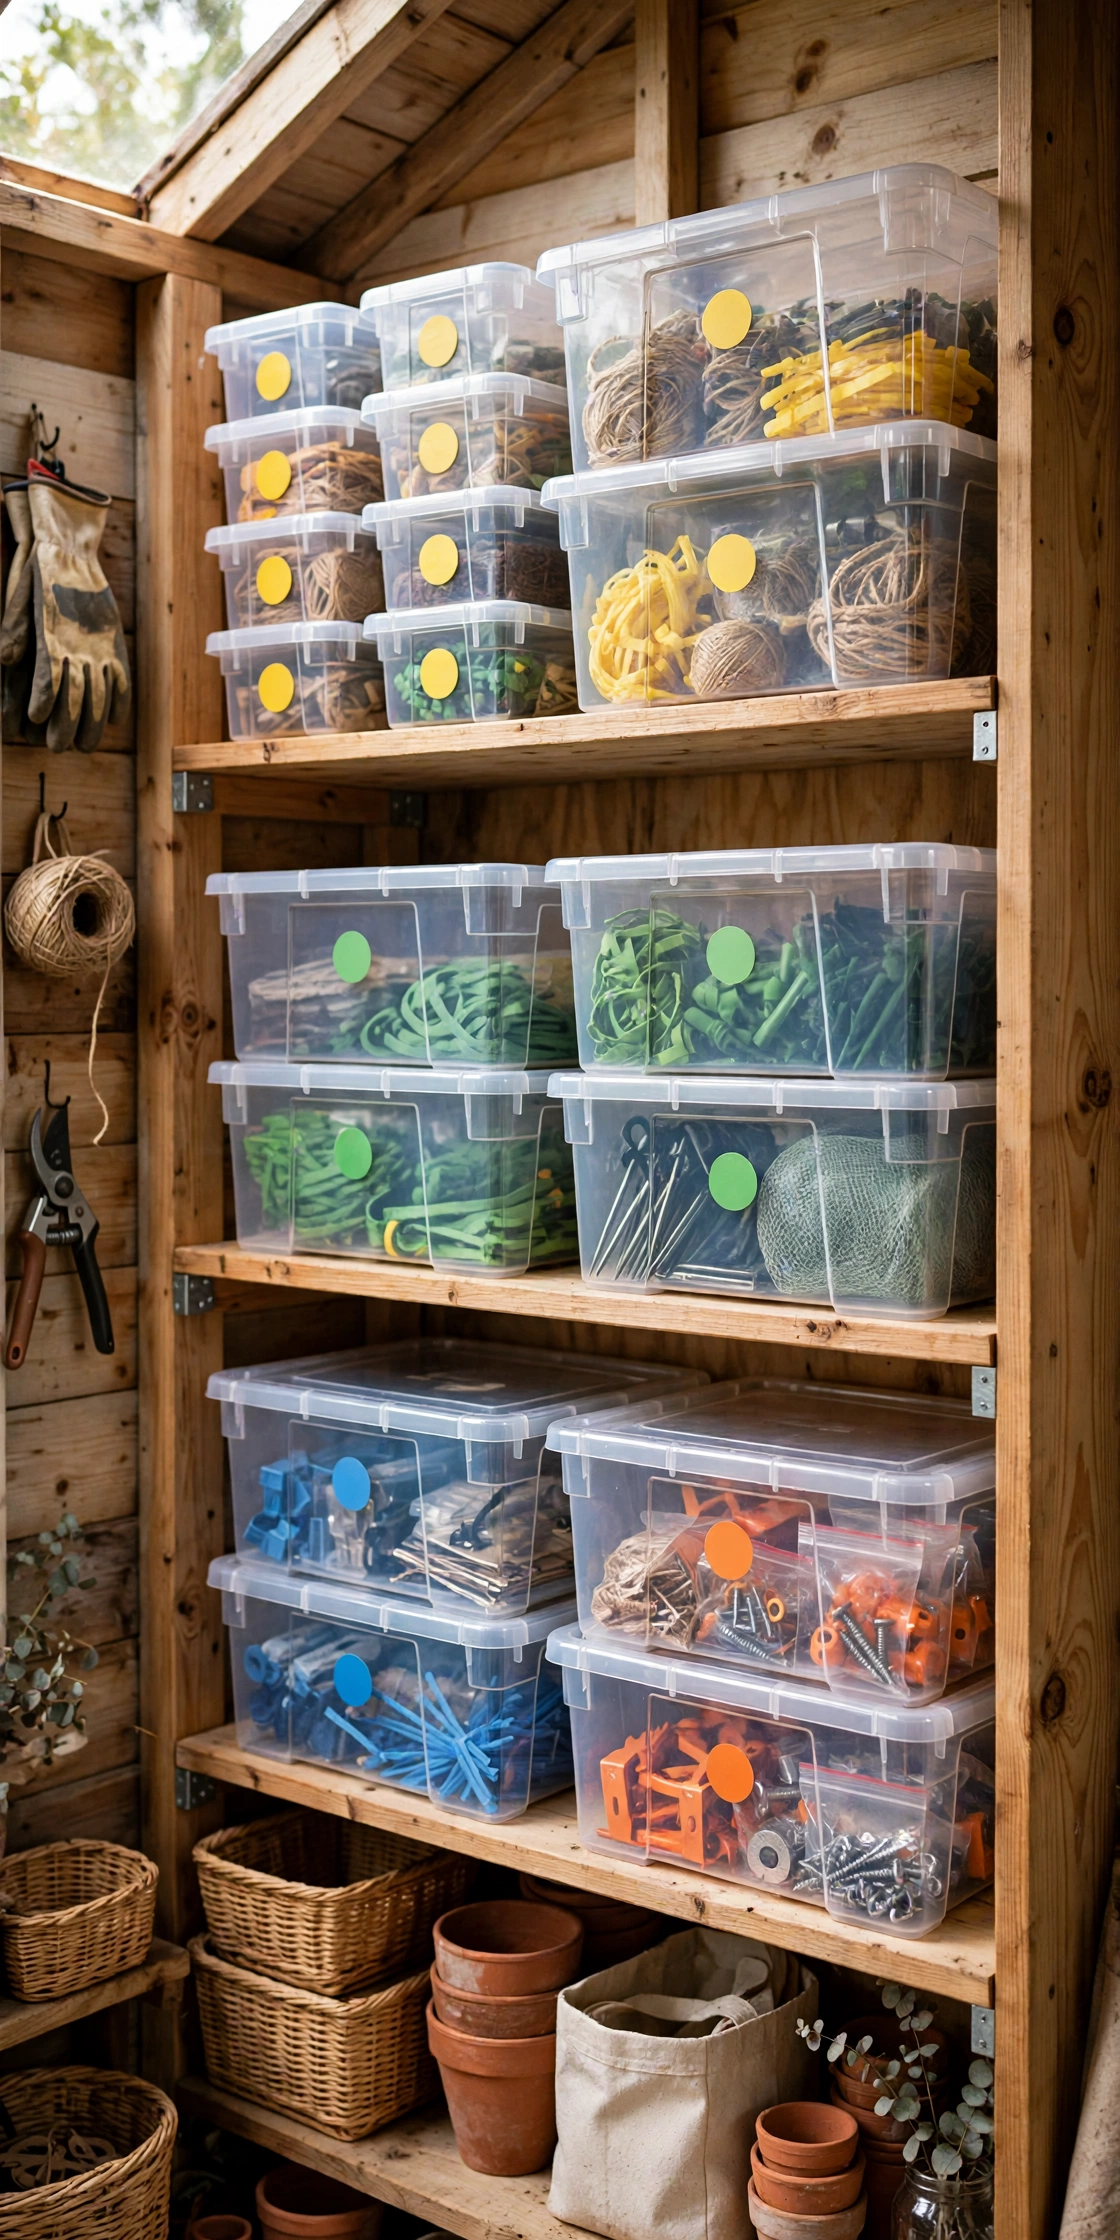
Clear bins with lids let you see what is inside from the door. Sort each zone into its own bins, snap lids on to block dust, spiders, and damp, and stack no more than three high so the bottom bin still opens. Add a color coded label per zone, green for garden, red for workshop, blue for seasonal, so anyone in the family puts things back in the right place. Write contents on two sides of each bin, because a bin turned sideways hides a single label. Skip cardboard boxes here: damp air softens them and mice chew through them in a season.
Try this: Write contents on two sides of every bin.
Cost: $ | Difficulty: Easy
8. Rolling workbench cart for potting and repairs

A rolling cart gives a small shed a workbench that moves out of the way. Load it with potting mix, seed trays, hand tools, and a repair kit, then roll it to the door for potting or to the yard for a fix. Pick a cart with locking casters so it stays put on a sloped shed floor, and keep its top clear for working. When the job ends, roll it back to its taped floor spot and lock the wheels. One cart replaces a fixed bench that would eat a full wall, and it carries the work to the light.
Try this: Park the cart in its taped spot after every job, wheels locked.
Cost: $$ | Difficulty: Easy
9. Locked ventilated cabinet for chemicals and fuel

Garden chemicals and fuel need a cabinet of their own, locked and up high. Use a metal cabinet with a latch, vent holes near the top, and a spill tray on the bottom shelf, mounted where kids and pets cannot reach. Keep pesticides, weed killer, and fuel cans upright with caps tight, and never store them beside food, pet feed, or seed you plan to eat from. Write the purchase date on each container and take leftovers to a household hazardous waste drop off instead of pouring them out back. A locked cabinet keeps a curious child, a pet, and a spill from turning a shed into a hazard.
Try this: Write the purchase date on each container with a paint pen.
Cost: $$ | Difficulty: Moderate
For safe disposal of leftover chemicals, see the EPA household hazardous waste guidance.
10. Door side hose and cord wall

A tangled hose eats floor space and trips everyone who walks in. Hang it on a wide wall hook or reel near the door, coiled loosely so kinks never set, with spray nozzles and washers in a small pouch beside it. Coil extension cords the same way on separate hooks, never draped over a tool or across the walkway. Keep cords dry and off the floor so a leak or a damp patch never reaches a plug. When the hose lives on the wall by the door, watering starts in ten seconds and the floor stays clear for the mower and the cart.
Try this: Coil the hose loosely after every use so kinks never set.
Cost: $ | Difficulty: Easy
How to choose the right shed system for your shed
Start with your shed size. A small shed needs walls and rafters doing the work: a cleat wall, a long handle rack, and one loft. A big shed can hold full shelving runs and a rolling cart without blocking the walkway. Next, check your climate. Damp sheds need metal shelves, lidded bins, and airflow gaps; dry sheds can use wood and open crates. Renters should pick freestanding units, rolling carts, and door hooks that leave no holes. Pick two systems this weekend, live with them for a month, then add the next one. Sheds stay organized when each system earns its wall.
Diy shed organization at a glance
Cost key: $ means $1 to $10, $$ means $11 to $99, $$$ means $100 to $999, $$$$ means $1,000 and up.
| Idea | Cost | Difficulty | Best for |
|---|---|---|---|
| Four-zone floor map | $ | Easy | Any shed, first step |
| French cleat wall | $$ | Moderate | Hand tool collections |
| Long-handle rack | $ | Easy | Garden tool heavy sheds |
| Adjustable metal shelving | $$ | Easy | Damp sheds, heavy bins |
| Overhead rafter loft | $ | Moderate | Small sheds, seasonal gear |
| Small-parts station | $ | Easy | Hardware, seeds, sprinkler parts |
| Clear lidded bins | $ | Easy | Dusty sheds, shared family sheds |
| Rolling workbench cart | $$ | Easy | Small sheds, potting and repairs |
| Locked chemical cabinet | $$ | Moderate | Homes with kids or pets |
| Hose and cord wall | $ | Easy | Every shed with a hose |
Common mistakes to avoid
- Buying bins and shelves before sorting: sort first, then buy for what you kept.
- Hanging heavy shelves on thin shed walls without hitting studs: use a stud finder and rated hardware, or go freestanding and anchor the top.
- Using cardboard boxes in a damp shed: they soften, sag, and invite mice.
- Overloading the rafter loft: light seasonal gear only, never paint cans or toolboxes.
- Blocking the door walkway with the mower or the cart: tape a parking spot and keep the path clear.
- Leaving bins unlabeled: an unlabeled bin is a junk box with a lid.
Safety notes
Anchor tall shelving, wall racks, and heavy wall panels into studs with hardware rated above the load, and keep the heaviest bins low so nothing tips. Keep chemicals, pesticides, and fuel locked away from children and pets, never beside food or pet feed, and keep flammables away from heaters, engines, and any ignition source. Keep walkways and the shed exit clear at all times. Test for lead paint and follow lead-safe rules before drilling or sanding any pre-1978 structure, and hire a licensed electrician for new outlets or hardwired lights in or near the shed. For anchoring guidance, see the CPSC Anchor It guidance, and for older structures, the EPA Renovation, Repair and Painting program.
More shed and storage ideas
If you are still choosing a shed style before you organize it, see 12 Cottage Garden Shed Ideas for colors, doors, and layouts that suit a backyard.
For the potting corner of your shed, 15 Potting Bench Ideas covers bench styles, sizes, and lumber choices.
The zone and label method in this guide works indoors too, as shown in 25 Genius Pantry Organization Ideas for a Pantry That Stays Tidy.
For adjustable shelving know-how that transfers straight to a shed wall, see 25 Smart Walk In Pantry Shelving Ideas for a Pantry You Can Actually Shop.
And for bin, divider, and label methods applied to a different room, 30 Genius Clothing Shelf Organization Ideas for Shelves That Stay Tidy shows the same system on closet shelves.
Frequently asked questions
How do I start organizing a shed that is completely full?
Pull everything out onto the lawn, then sort into three piles: keep, donate, and trash. Tape four zones on the empty floor, reload by zone with daily tools nearest the door, and stop when every item has a marked home. The full cleanout takes an afternoon, but it beats buying shelves for stuff you do not need.
What should never go in a shed?
Never store food or pet feed in a shed, since both draw mice and insects. Keep valuables, photos, and anything that cannot handle heat, cold, or damp out of the shed, and check paint and chemical labels for temperature limits before leaving them through a freezing winter or a hot summer.
How do I keep mice and damp out of shed bins?
Use hard plastic bins with snap lids, never cardboard, and keep bins off bare earth on shelves or pallets. Seal gaps around doors and eaves with caulk or mesh, leave an airflow gap behind shelving, and never store food inside. A dry, sealed bin is the simplest pest control a shed has.
Can I hang heavy shelves on thin shed walls?
Only if you hit studs with hardware rated above the shelf load. Thin shed siding alone will pull out under weight, so find the studs with a finder, anchor into them, and keep heavy bins low. If your shed walls have no studs you can trust, use freestanding metal units and anchor their tops to the frame instead.
How often should I redo the shed zones?
Do a seasonal swap twice a year, once in spring and once in fall, moving the current season gear to the door and the past season gear to the loft or back. Between swaps, a five minute reset after big projects keeps zones honest without another full cleanout.
Final thoughts
Start with the zone map and one wall this weekend. A shed that stays organized is not the one with the most shelves, it is the one where every tool has a marked home and the floor stays clear enough to walk in.
Dead space under the stairs? See these 25 built in storage under stairs ideas from pull-out drawers to a wine wall.


