



Potting on the ground gets old fast: the kneeling, the spilled soil, the lost trowel. A potting bench gives you a waist-high work surface, storage for pots and tools, and a place where the mess belongs. I built ours from cedar 2x4s in a weekend, and it is still the hardest-working thing in the garden.
These 15 potting bench ideas range from a $25 pallet build to a rolling island and a dresser conversion. Each one lists the materials, rough cost, and build time, plus the sizing and safety details that make a bench actually comfortable to use.
Quick takeaways
- Build the work surface 34 to 36 inches high for comfortable standing work.
- Cedar and redwood weather naturally; modern pressure-treated lumber is an option if you line soil contact areas.
- Slatted tops let soil and water fall through instead of pooling.
- Anchor tall benches to a wall or fence so they cannot tip.
- Wear eye protection and a dust mask when cutting and sanding lumber.
1. Classic cedar bench

The standard potting bench is a cedar 2×4 frame about 4 feet wide with a slatted work top at 36 inches, a lower shelf, and an upper shelf on tall back legs. Cedar resists rot for years without treatment, and the slat gaps let spilled soil fall through. Eleven 2x4s and a box of exterior screws build the whole thing in 4 to 6 hours with a miter saw and drill. It is the benchmark every other design on this list is measured against.
Try this: add S-hooks to the back legs for hanging trowels and twine.
Cost: $$$· Build time: 4 to 6 hours · Difficulty: beginner to intermediate
2. Rolling potting island

Put locking caster wheels on a compact potting bench and it becomes a rolling island you can push into the sun, under cover, or right up to the raised beds. Build it 2 feet deep so it fits through gates, and keep the total height under 40 inches for stability. Lock the casters before potting; a bench that rolls mid-pour is no fun. The mobility is worth the extra $25 for good casters.
Try this: roll it against the house wall as a serving station for parties.
Cost: $$$· Build time: 5 hours · Difficulty: intermediate
3. Grated top with soil crate

This clever design pairs a widely spaced slat top with a removable crate underneath: excess soil falls straight through the grate into the crate instead of scattering across the patio. Build the frame from 2x4s with pocket screws, top it with 1×2 slats spaced an inch apart, and size the crate to slide out for dumping. It keeps the work area clean and reclaims spilled mix automatically.
Try this: line the crate with landscape fabric to sift out fine mix.
Cost: $$$· Build time: 5 to 6 hours · Difficulty: intermediate
4. Pallet potting bench

Two disassembled pallets yield enough boards for a simple potting bench that costs about $25 in screws and sandpaper. Use heat-treated pallets (HT stamp) and pull every nail before cutting. The rustic, varied boards look charming, though you will spend extra time sanding to avoid splinters. Add a plywood or slatted top at counter height and a lower shelf from the remaining boards for pots. It is the cheapest way to get a real workstation.
Try this: whitewash the finished bench for a cottage look.
Cost: $$· Build time: 3 to 4 hours · Difficulty: beginner
5. Fold-down wall bench

For tiny patios and balconies, a hinged work surface folds down from the shed or fence when you need it and flat against the wall when you do not. Support the open position with folding brackets rated for at least 50 pounds, and add a small shelf above for pots. It takes up zero floor space when folded. This is the best potting solution for renters and apartment gardeners.
Try this: mount a magnetic strip above it for metal hand tools.
Cost: $$· Build time: 2 hours · Difficulty: beginner
6. Dresser conversion

An old dresser from a thrift store becomes a potting bench with drawers built in: remove the top drawers for open cubbies, seal the wood for outdoor use, and add a waterproof top surface. The drawers organize seed packets, labels, and twine better than any shelf. Check that the dresser is solid wood, not particle board, which swells and fails outdoors within a single season. A coat of exterior paint protects it for years.
Try this: paint it a bold color to make it a garden focal point.
Cost: $$· Build time: 2 to 3 hours · Difficulty: beginner
7. Lean-to bench

A lean-to bench uses the greenhouse, shed, or house wall as its back, which means fewer legs to build and a naturally sheltered work spot. Frame a slatted top at 36 inches between two side supports, add an upper shelf, and let the wall carry the back. Site it under an eave or overhang and you can pot in light rain. It is one of the sturdiest designs here because the wall anchors everything.
Try this: run a hose bib nearby for easy watering and cleanup.
Cost: $$$· Build time: 3 to 4 hours · Difficulty: beginner to intermediate
8. Corner L-shaped bench
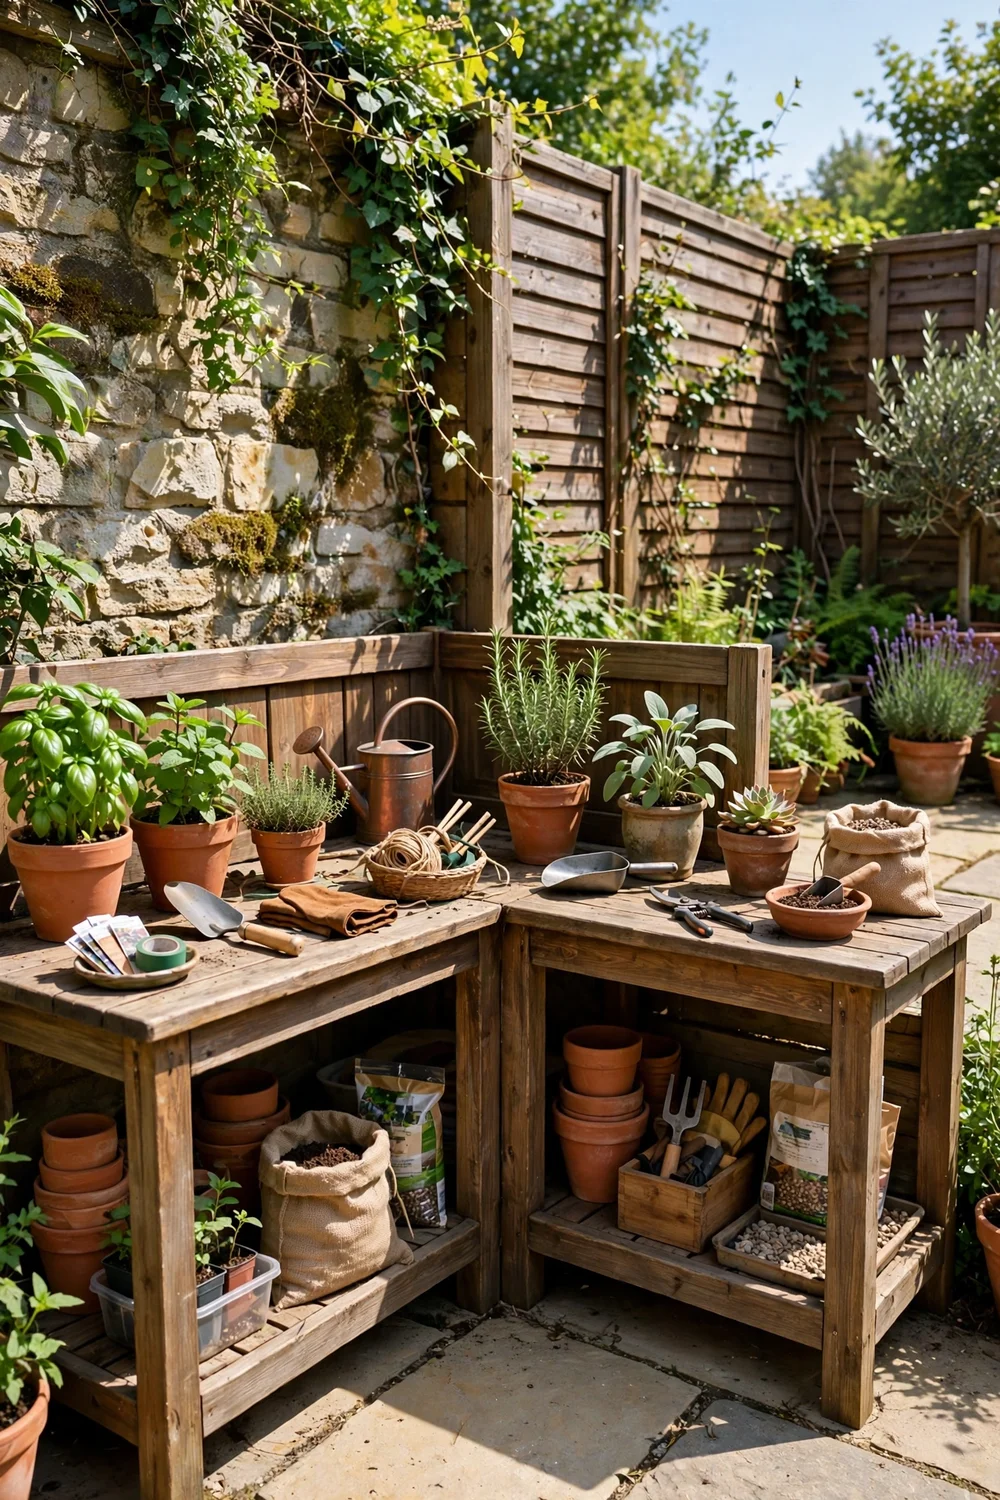
An L-shaped bench turns a dead corner into a potting station with two work surfaces: one for messy soil work, one for staging finished pots. Build two simple 2×4 frames at right angles and join them with a corner post. The design uses wall space efficiently and gives you room to spread out without a big footprint. Dedicate one wing to potting and the other to seed starting.
Try this: put the seed-starting wing where it gets morning sun.
Cost: $$$· Build time: 5 hours · Difficulty: intermediate
9. Metal workbench style
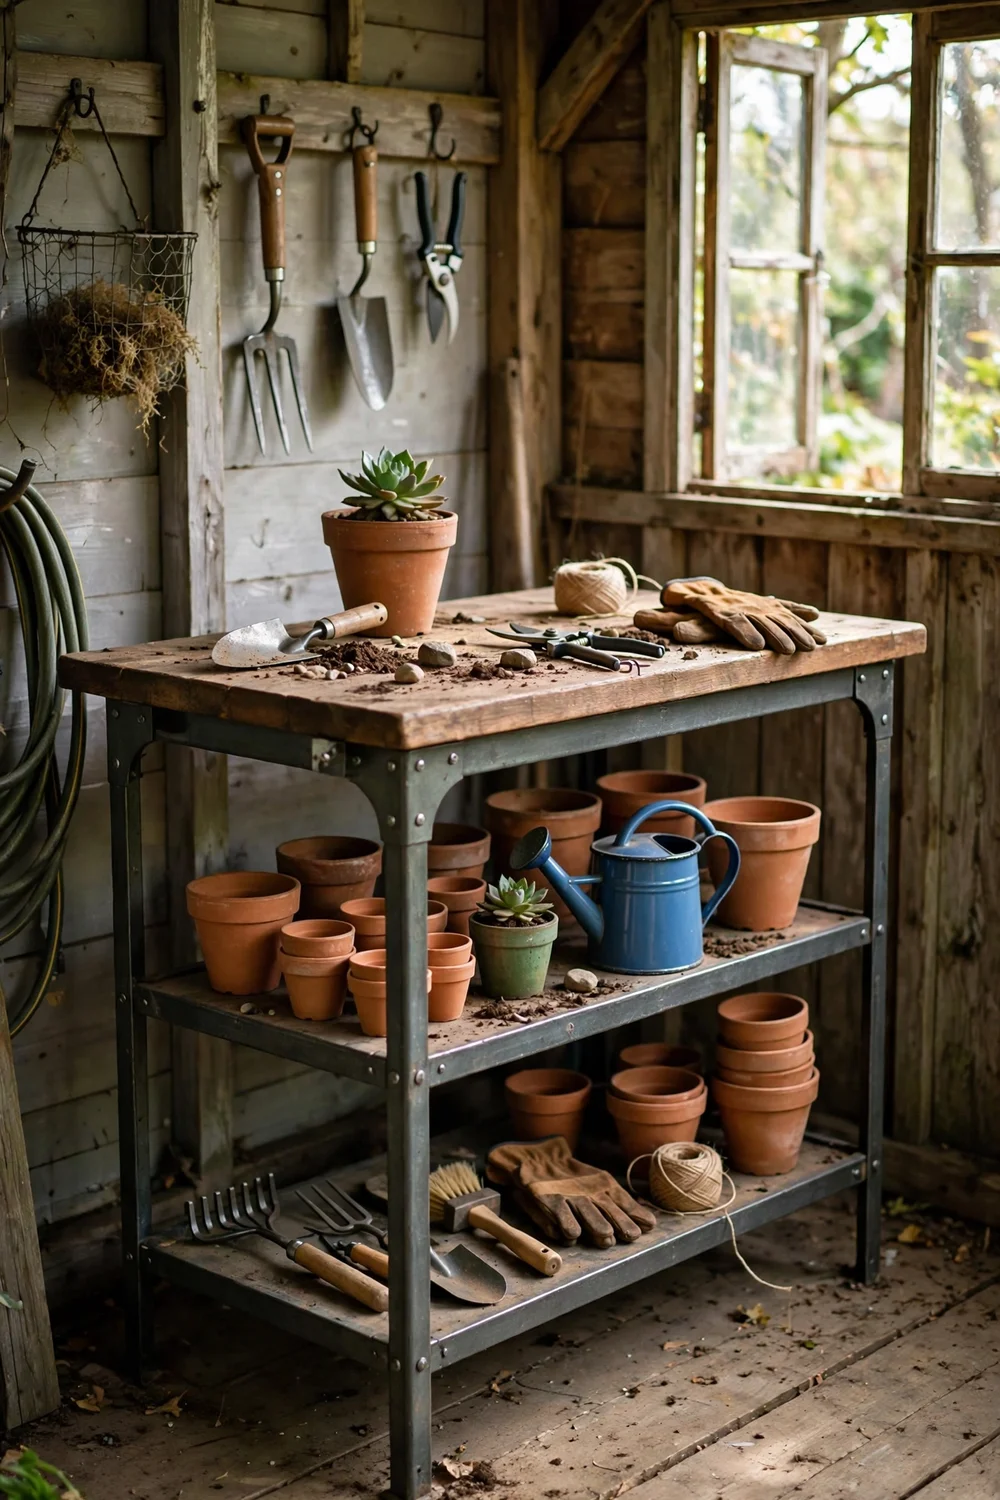
A steel workbench frame with a wood or butcher-block top makes an industrial potting bench that holds serious weight. Metal legs never rot, and adjustable feet level the bench on uneven ground. Top the frame with sealed 2×6 boards or a solid slab, and use the lower shelf for bagged soil. It is heavier to move than a wood bench, but it will outlast every wooden design here.
Try this: bolt it to a patio slab in windy, exposed sites.
Cost: $$$· Build time: 2 to 3 hours assembly · Difficulty: beginner
10. Rustic log bench

For a woodland or cottage garden, build the bench from peeled logs and branches: log legs, a split-log or slab top, and branch railings. No two look alike, and the materials can be nearly free if you have storm-felled wood. Peel the bark to slow decay and let the logs dry before building to prevent twisting. It will not be perfectly level, which is part of the charm.
Try this: chink the top with flat stones for a more stable work surface.
Cost: $$· Build time: 4 to 5 hours · Difficulty: intermediate
11. Bench with pegboard back

Adding a pegboard panel to the back of a standard bench puts every hand tool within arm’s reach: trowels, snips, dibbers, and twine all hang on hooks at eye level. Use exterior-rated pegboard or seal standard board thoroughly, and frame the panel between the tall back legs. The vertical storage frees the work surface completely, which makes potting faster and less cluttered. It is the best upgrade for an existing bench.
Try this: trace each tool’s outline so missing tools are obvious.
Cost: $$$· Build time: 4 to 5 hours · Difficulty: beginner to intermediate
12. Bench with cold frame top

Top a potting bench with a hinged glass cold frame and it does double duty: a work surface in summer and a seedling nursery in spring. Build a shallow glazed box that sits on the bench top, hinged at the back for venting on warm days. Start seeds weeks earlier than direct sowing, then lift the frame off when potting season peaks. Old windows make perfect lids.
Try this: add a thermometer inside to learn your frame’s temperature swings.
Cost: $$$· Build time: 5 hours · Difficulty: intermediate
13. Reclaimed door worktop

A solid wood door on sawhorse legs or a simple 2×4 base makes an instant 80-inch potting surface, the longest on this list. Seal the door thoroughly, especially the end grain, and avoid hollow-core doors, which cannot carry weight. The panels and moldings give it character no lumberyard build can match. Check salvage yards and demolition sites for doors with history, and bring help to carry it.
Try this: leave the original hardware on for vintage charm.
Cost: $$· Build time: 2 hours · Difficulty: beginner
14. Double-sided island bench

A double-sided island bench lets two people pot at once, or gives one gardener separate dirty and clean zones. Build it 3 feet wide with slatted tops on both faces and a shared lower shelf for soil bags. It needs a bigger footprint, about 6 by 3 feet, so it suits large gardens and community plots best. Anchor it well, since a loaded island is top-heavy and can tip.
Try this: face one side toward the sun for seedling work.
Cost: $$$· Build time: 6 to 8 hours · Difficulty: intermediate
15. Washtub workstation

Set a galvanized washtub into a cutout in the bench top and you get a contained soil-mixing station: blend potting mix right in the tub with zero spillover. Frame the cutout with 2x4s to carry the tub’s weight when full, and drill a drainage hole with a plug for easy rinsing. The tub lifts out for dumping spent mix into the compost. It is the tidiest potting setup on this list.
Try this: keep a second tub nested inside for pre-mixed seedling blend.
Cost: $$$· Build time: 4 to 5 hours · Difficulty: intermediate
Potting bench ideas at a glance
What size should a potting bench be?
Comfort comes down to three numbers. Set the work surface 34 to 36 inches high for standing work; lower if you will sit on a stool. Make the top at least 20 inches deep so a 10-inch pot sits with room to work in front. Four feet wide fits most gardens and holds a bag of mix plus a dozen pots. Keep the upper shelf shallow, 8 to 10 inches, so it does not shade the work surface or invite clutter.
Choosing lumber: cedar, treated, or reclaimed?
Cedar and redwood resist rot naturally and need no treatment, which is why they top most plans. Modern pressure-treated lumber (micronized copper azole, or MCA) is a budget option; if you use it, line any area that touches soil or potting mix with heavy plastic as a barrier. The University of Maine Extension’s guide on pressure-treated lumber in gardens and the University of Maryland Extension’s safety of building materials both cover the trade-offs. Never use old CCA-treated wood, creosote railroad ties, or painted lumber of unknown age.
Safety notes for building and using a potting bench
Wear safety glasses and a dust mask when cutting and sanding lumber, and keep the work area clear of trip hazards. Anchor tall benches to a wall, fence, or the ground; a loaded bench is top-heavy and can tip onto a child. If kids use the bench, round over sharp corners with sandpaper and store sharp tools up high. Keep bagged fertilizers and pesticides on a high shelf or locked cabinet, out of children’s reach.
More garden project ideas
A potting bench works best as part of an organized setup, and these garden tool organization ideas keep everything else in its place.
For the overflow that does not fit on the bench, these shed storage ideas handle soil bags, pots, and bulky gear.
If you like the reclaimed look, these rustic garden decor ideas show how to style the whole garden to match.
Frequently asked questions
How tall should a potting bench be?
Build the work surface 34 to 36 inches high for comfortable standing work. If you are shorter than average or plan to sit on a stool, drop it to 30 to 32 inches. Test the height against your own elbow: the surface should sit a few inches below it.
What is the best wood for a potting bench?
Cedar is the best all-around choice: naturally rot-resistant, light, and easy to work. Redwood is similar but pricier. Modern pressure-treated lumber works on a budget if you line soil-contact areas with plastic. Avoid old CCA-treated wood, railroad ties, and particle board outdoors.
Can I leave a potting bench outside year-round?
Yes, if it is built from cedar, redwood, or sealed lumber. Cover the top or move bagged soil and seed packets indoors for winter. Untreated pine benches last 2 to 3 years outdoors; cedar lasts a decade or more.
Do potting benches need a back?
Not necessarily, but a back adds an upper shelf and tool storage that keep the work surface clear. Freestanding island-style benches skip the back so two people can work from both sides. Choose based on your space and how you pot.
How deep should a potting bench be?
At least 20 inches deep so a 10-inch pot sits with working room in front. Twenty-four inches is more comfortable for mixing soil. Keep upper shelves shallow, 8 to 10 inches, so they do not shade your work.
What should I store on a potting bench?
Daily-use items: potting mix, a trowel and hand fork, pots in your common sizes, plant labels, twine, and a watering can. Store fertilizers and pesticides up high or locked away from kids, and keep seed packets dry indoors until sowing time.
A potting bench is one of those builds you wonder how you gardened without. Pick the design that fits your space and your budget, build it at the right height, and every repotting session gets easier from the first one. Ours took a single weekend, and three seasons later it is still the busiest square footage in the yard.
For organizing the whole shed around its work zones, see our guide to 10 Diy Shed Organization Ideas for a Shed You Can Actually Walk Into for four-zone floor maps, French cleat tool walls, rafter lofts, and rolling workbench carts.


