


A basement kitchen sounds simple until you stand in the space: the ceiling sits lower, the windows are small or missing, one wall feels damp after rain, and the drain line runs above your head instead of below the floor. Those limits change every choice, from cabinet height to flooring to where the sink can go.
This guide covers 27 basement kitchen ideas that work with those limits instead of fighting them. You will find one-wall kitchenettes, galley and L-shaped layouts, low-ceiling cabinet tricks, moisture-proof materials, and renter-friendly setups, each with a real cost range and a difficulty label so you can tell at a glance what fits your budget and your skills.
Quick takeaways
- Fix water first: no cabinet or floor survives a wall that still leaks.
- Low ceilings call for flat-panel cabinets, recessed lights, and shallow uppers.
- Put the sink near existing plumbing or budget for a pump system.
- Layered light beats one bright fixture in a windowless room.
- A kitchenette with a mini fridge and two burners covers most basement needs.
Before you build: basement checks that come first
Check local building codes before you buy anything. Some jurisdictions restrict full kitchens in basements unless the space qualifies as a legal dwelling unit, and rental units often carry extra rules for egress, ventilation, and smoke alarms. A quick call to your local permit office saves a teardown later.
Walk the walls after a heavy rain and look for damp spots, white mineral stains, and musty smells. Fix grading, downspouts, and foundation cracks before drywall goes up, since trapped moisture rots cabinet boxes and feeds mold behind finished walls. Run a dehumidifier for a week and check the reading: steady dampness means you need drainage work, not just a prettier finish.
Map the plumbing before you pick a layout. Basement drains often sit above the sewer line, so a sink or dishwasher far from the main stack may need an upflush pump system installed by a licensed plumber. Keep gas lines and water shutoffs accessible behind panels, never sealed inside a cabinet wall. For safety guidance on anchoring tall furniture and shelving, the U.S. Consumer Product Safety Commission publishes anchor-it advice worth reading before you mount anything heavy: CPSC Anchor It guidance.
If your home was built before 1978, test for lead paint before sanding or drilling old walls and trim. The EPA runs the Renovation, Repair and Painting program that sets lead-safe work rules for contractors and homeowners: EPA Renovation, Repair and Painting program. For damp-basement background, the EPA also explains how mold grows and what stops it: EPA mold guidance. Hire a licensed electrician for new circuits, GFCI outlets near the sink, and any hardwired lights, and anchor tall shelves and bookcases into studs with hardware rated above the load.
1. One-wall kitchenette under the stairs
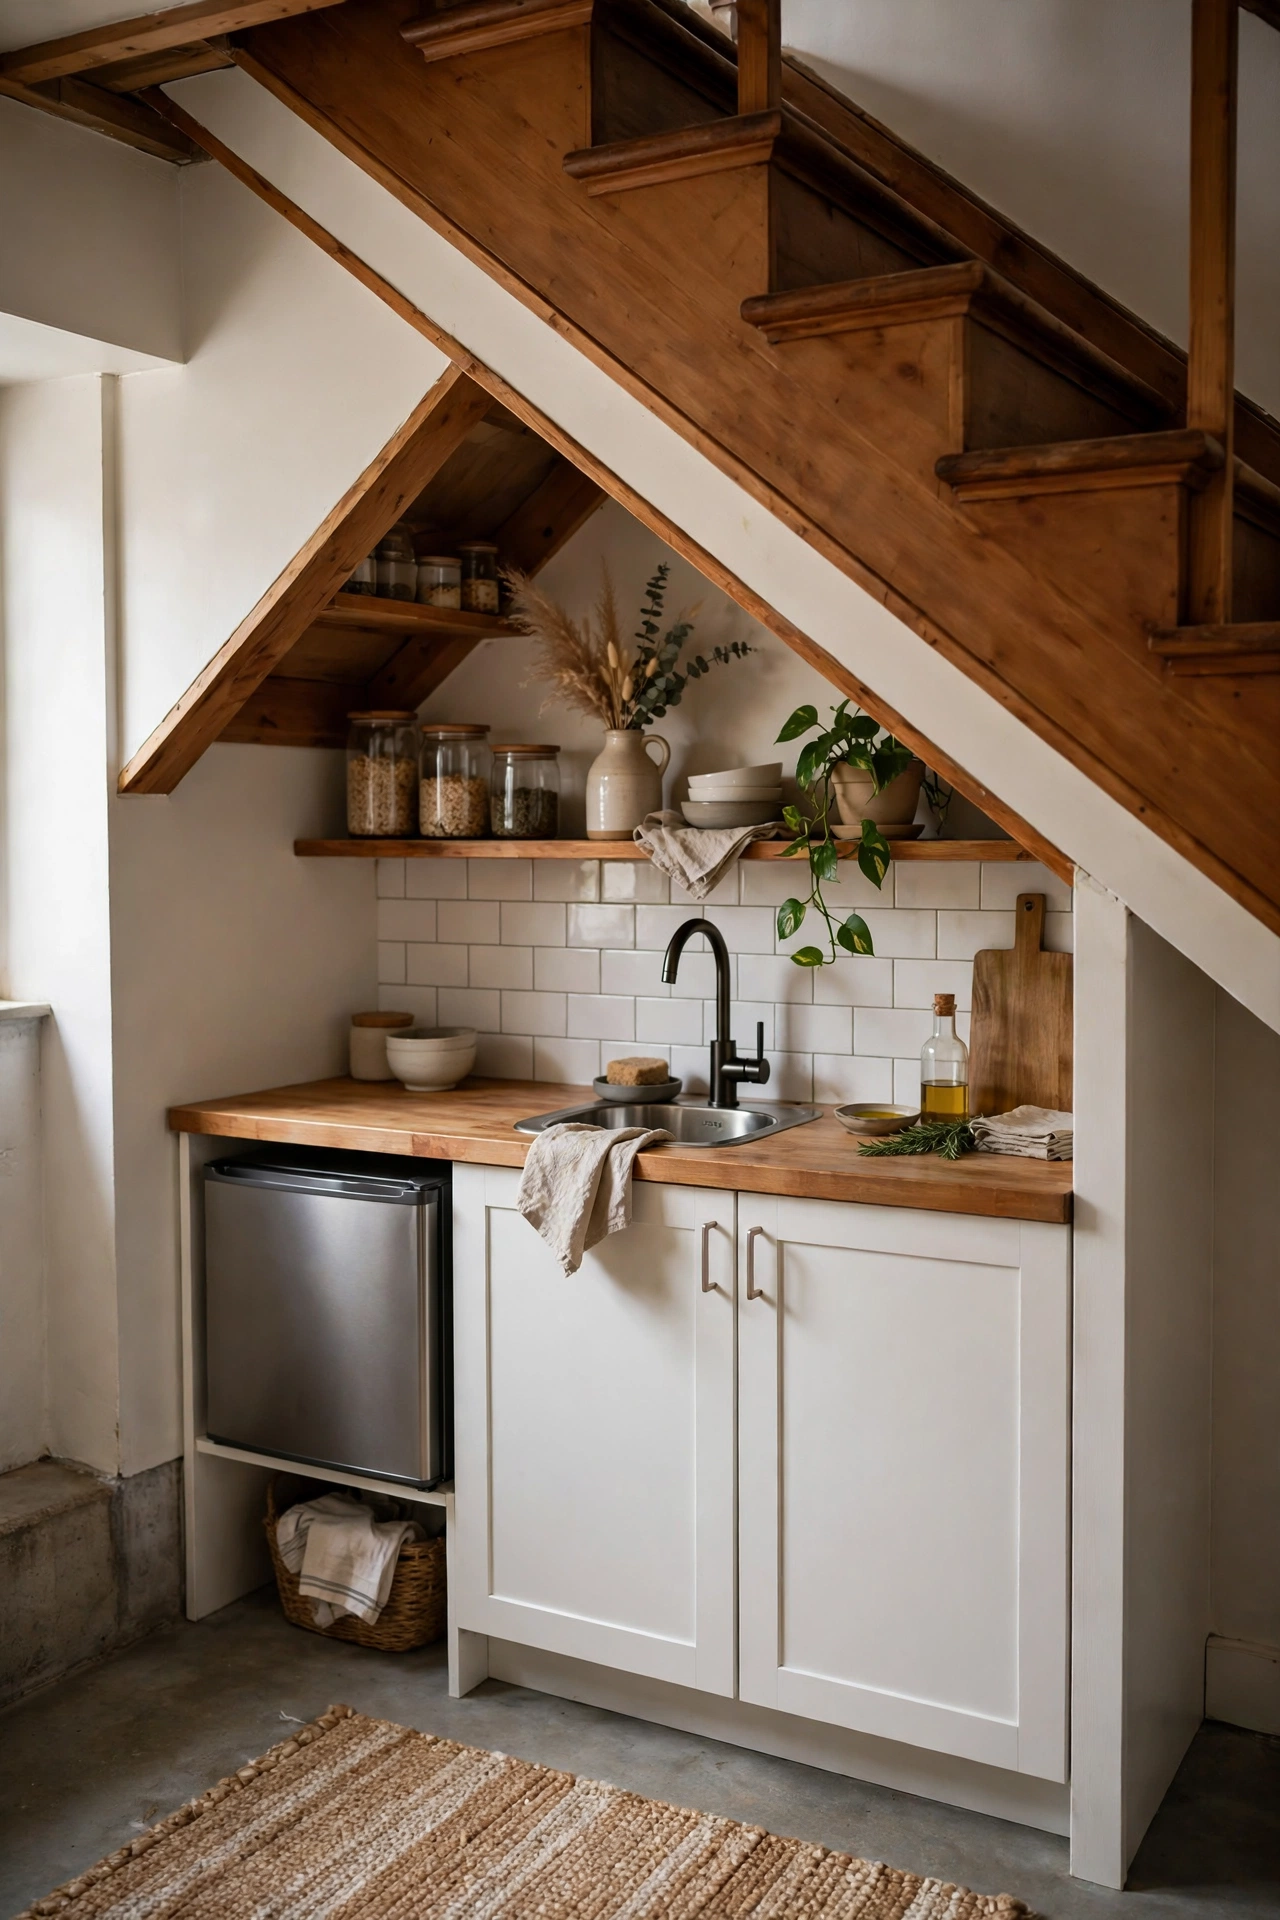
A single straight run of cabinets fits the wall under the stair slope, where headroom is lowest and a full kitchen would feel cramped. Keep the run to 8 to 10 feet: a small sink at one end, a two-burner cooktop in the middle, and an apartment-size fridge at the tall end where the ceiling rises. Shallow 24-inch-deep base cabinets leave a clear walkway, and one open shelf above the sink holds daily dishes.
Try this: measure headroom at the lowest point before ordering cabinets, and keep anything you reach for daily above 5 feet.
Cost: $$ | Difficulty: moderate.
2. Galley layout along the longest wall

Two parallel runs turn a narrow basement into a work lane with everything inside two steps. Put the sink and cooktop on one side and tall storage plus the fridge on the other, with at least 42 inches between counters so two people can pass without bumping. Skip upper cabinets on one side if the ceiling is under 7 feet, and use that wall for open shelves or a magnetic knife strip instead.
Try this: tape the layout on the floor first and walk it with a laundry basket to test the pinch points.
Cost: $$$ | Difficulty: hard.
3. L-shaped layout opening to the seating area
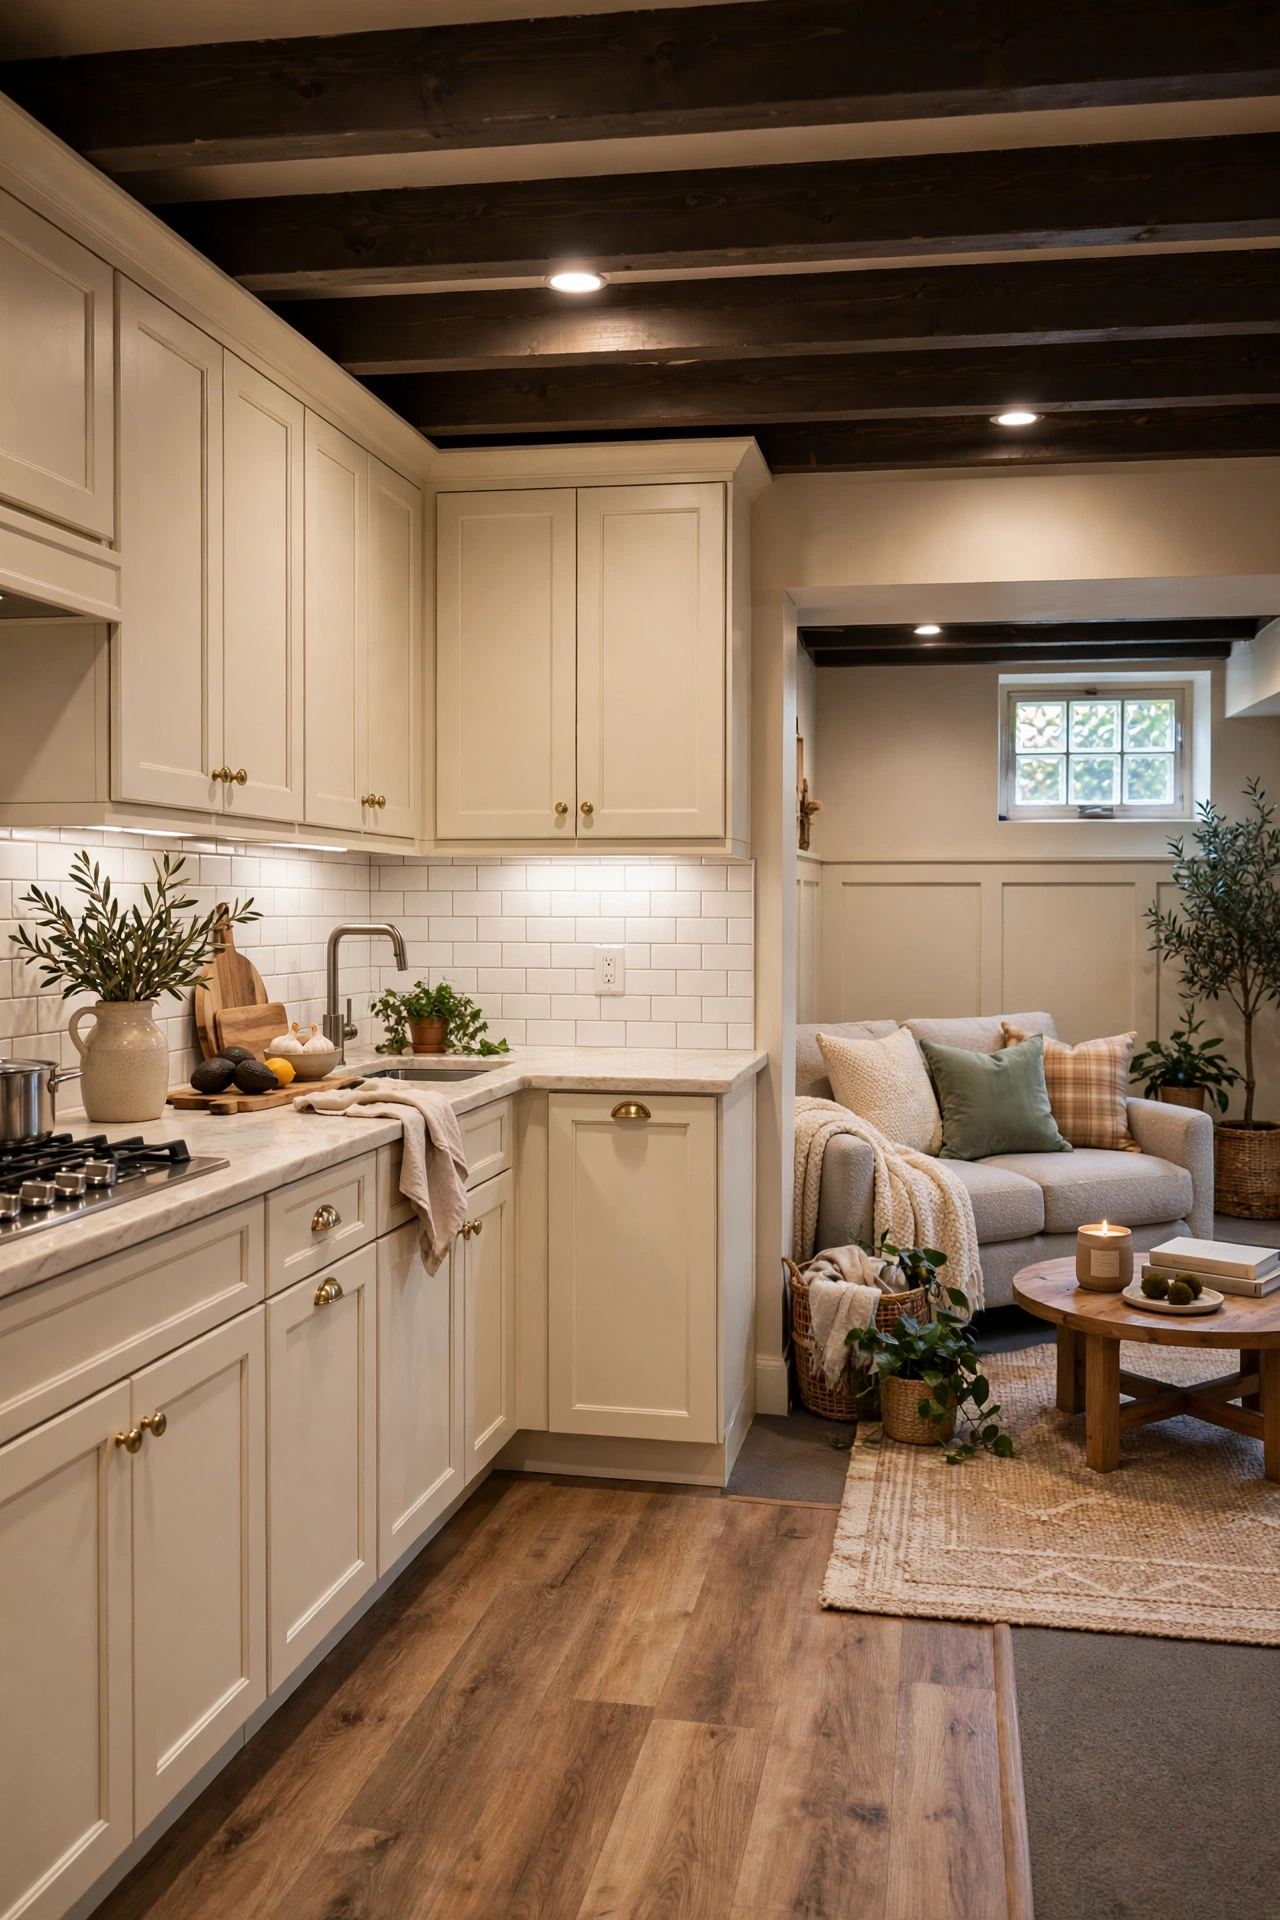
An L shape gives you a real work triangle without walling the kitchen off from the rest of the basement. Run the long leg along the driest wall and the short leg toward the seating area, so the cook faces guests instead of a wall. Leave the corner for a lazy Susan or deep drawer unit, since dark corner cabinets swallow pots in a windowless room.
Try this: put the sink on the short leg near the seating side, so dirty dishes stay out of the sightline from the sofa.
Cost: $$$ | Difficulty: hard.
4. Peninsula that doubles as a breakfast bar
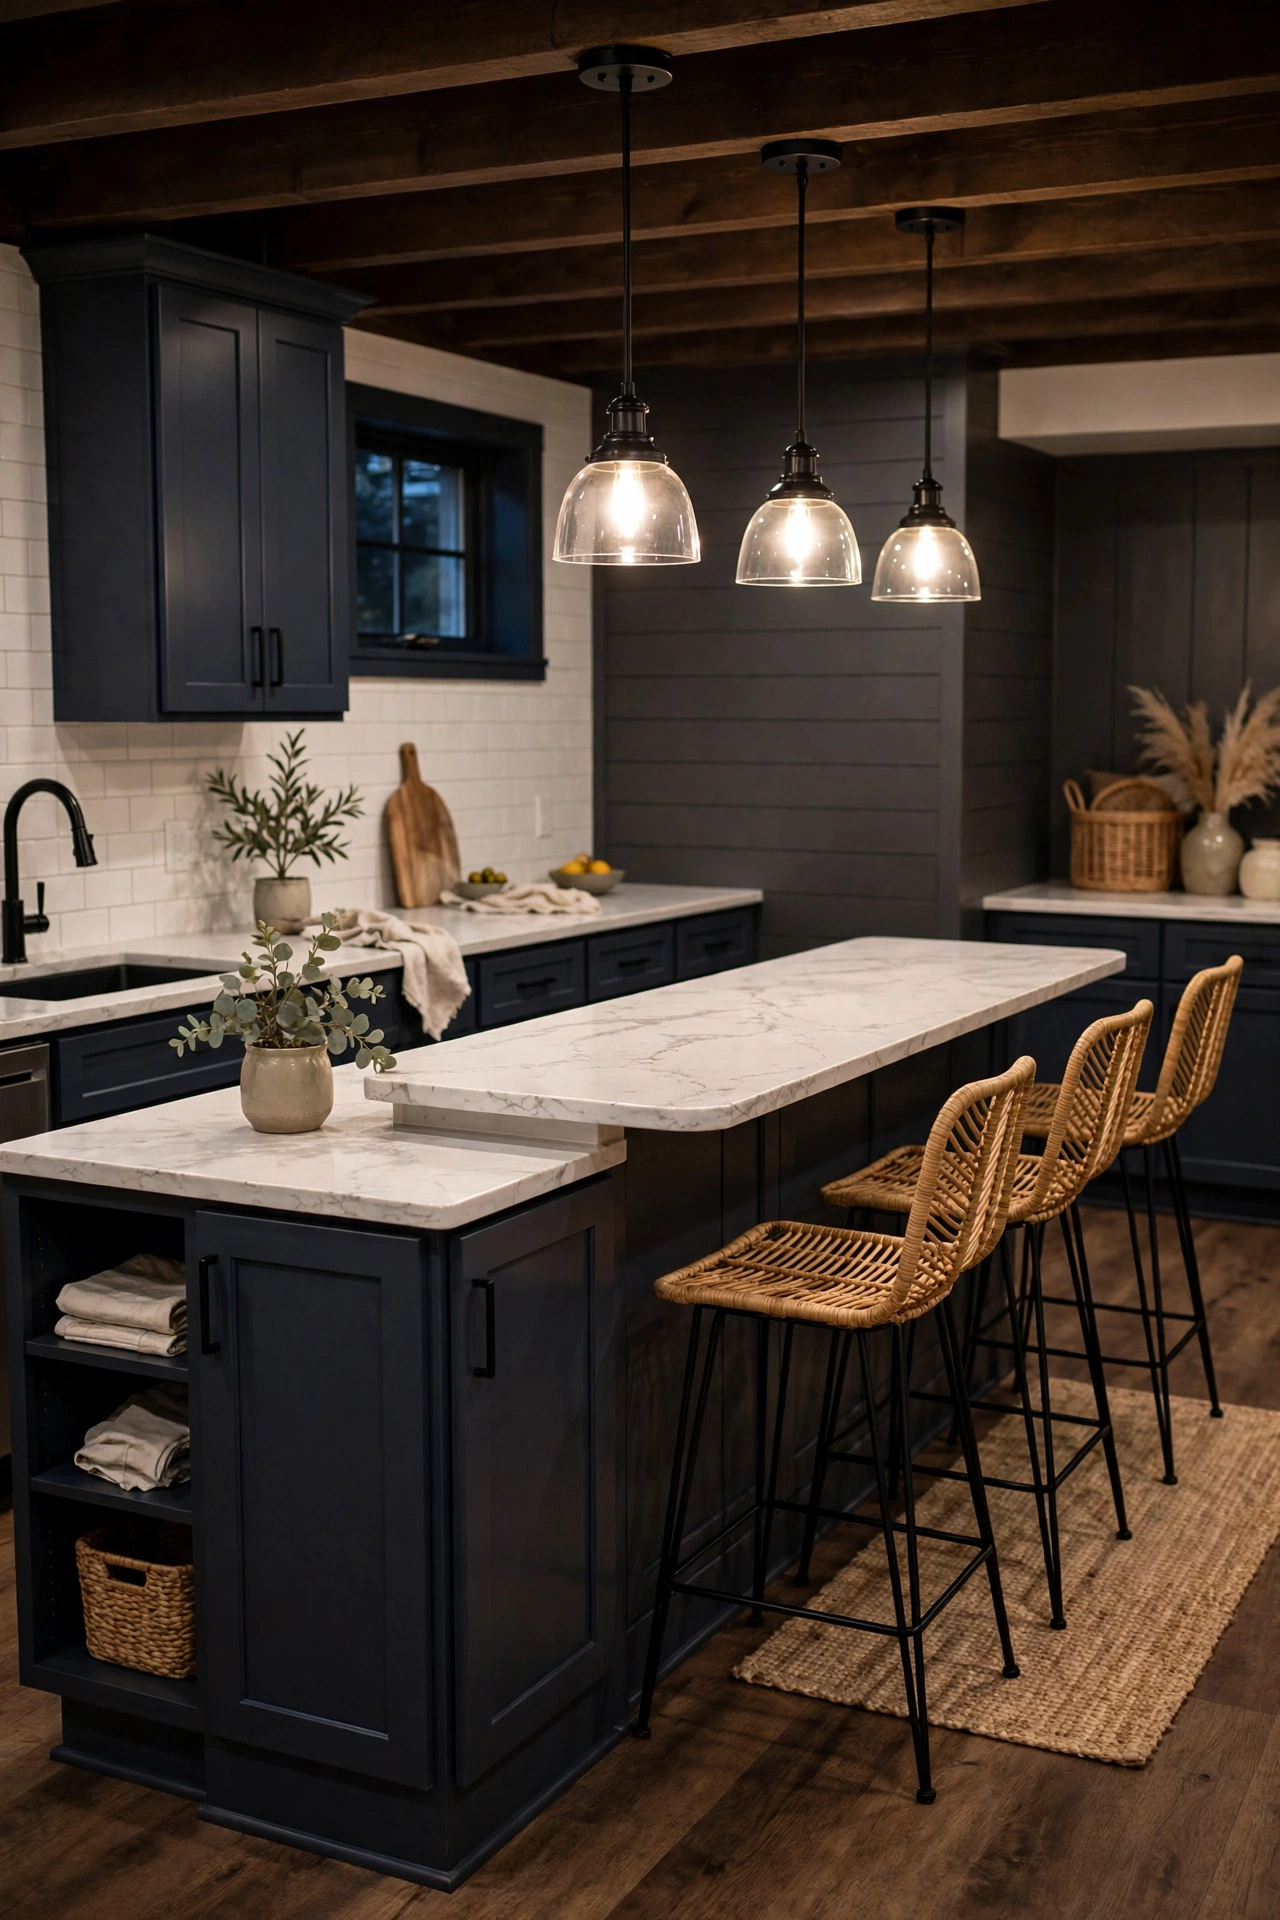
A peninsula adds counter space and seating without the floor area a full island demands. Extend one counter run 24 inches past the cabinets, add a 12-inch overhang for knees, and slide in two backless stools that tuck fully underneath. Hang two small pendants over the seating edge, but keep them slim and high so they do not steal headroom.
Try this: pick stools 10 inches shorter than the counter height, and test the knee clearance before you fix the overhang in place.
Cost: $$ | Difficulty: moderate.
5. Rolling island cart instead of a fixed island
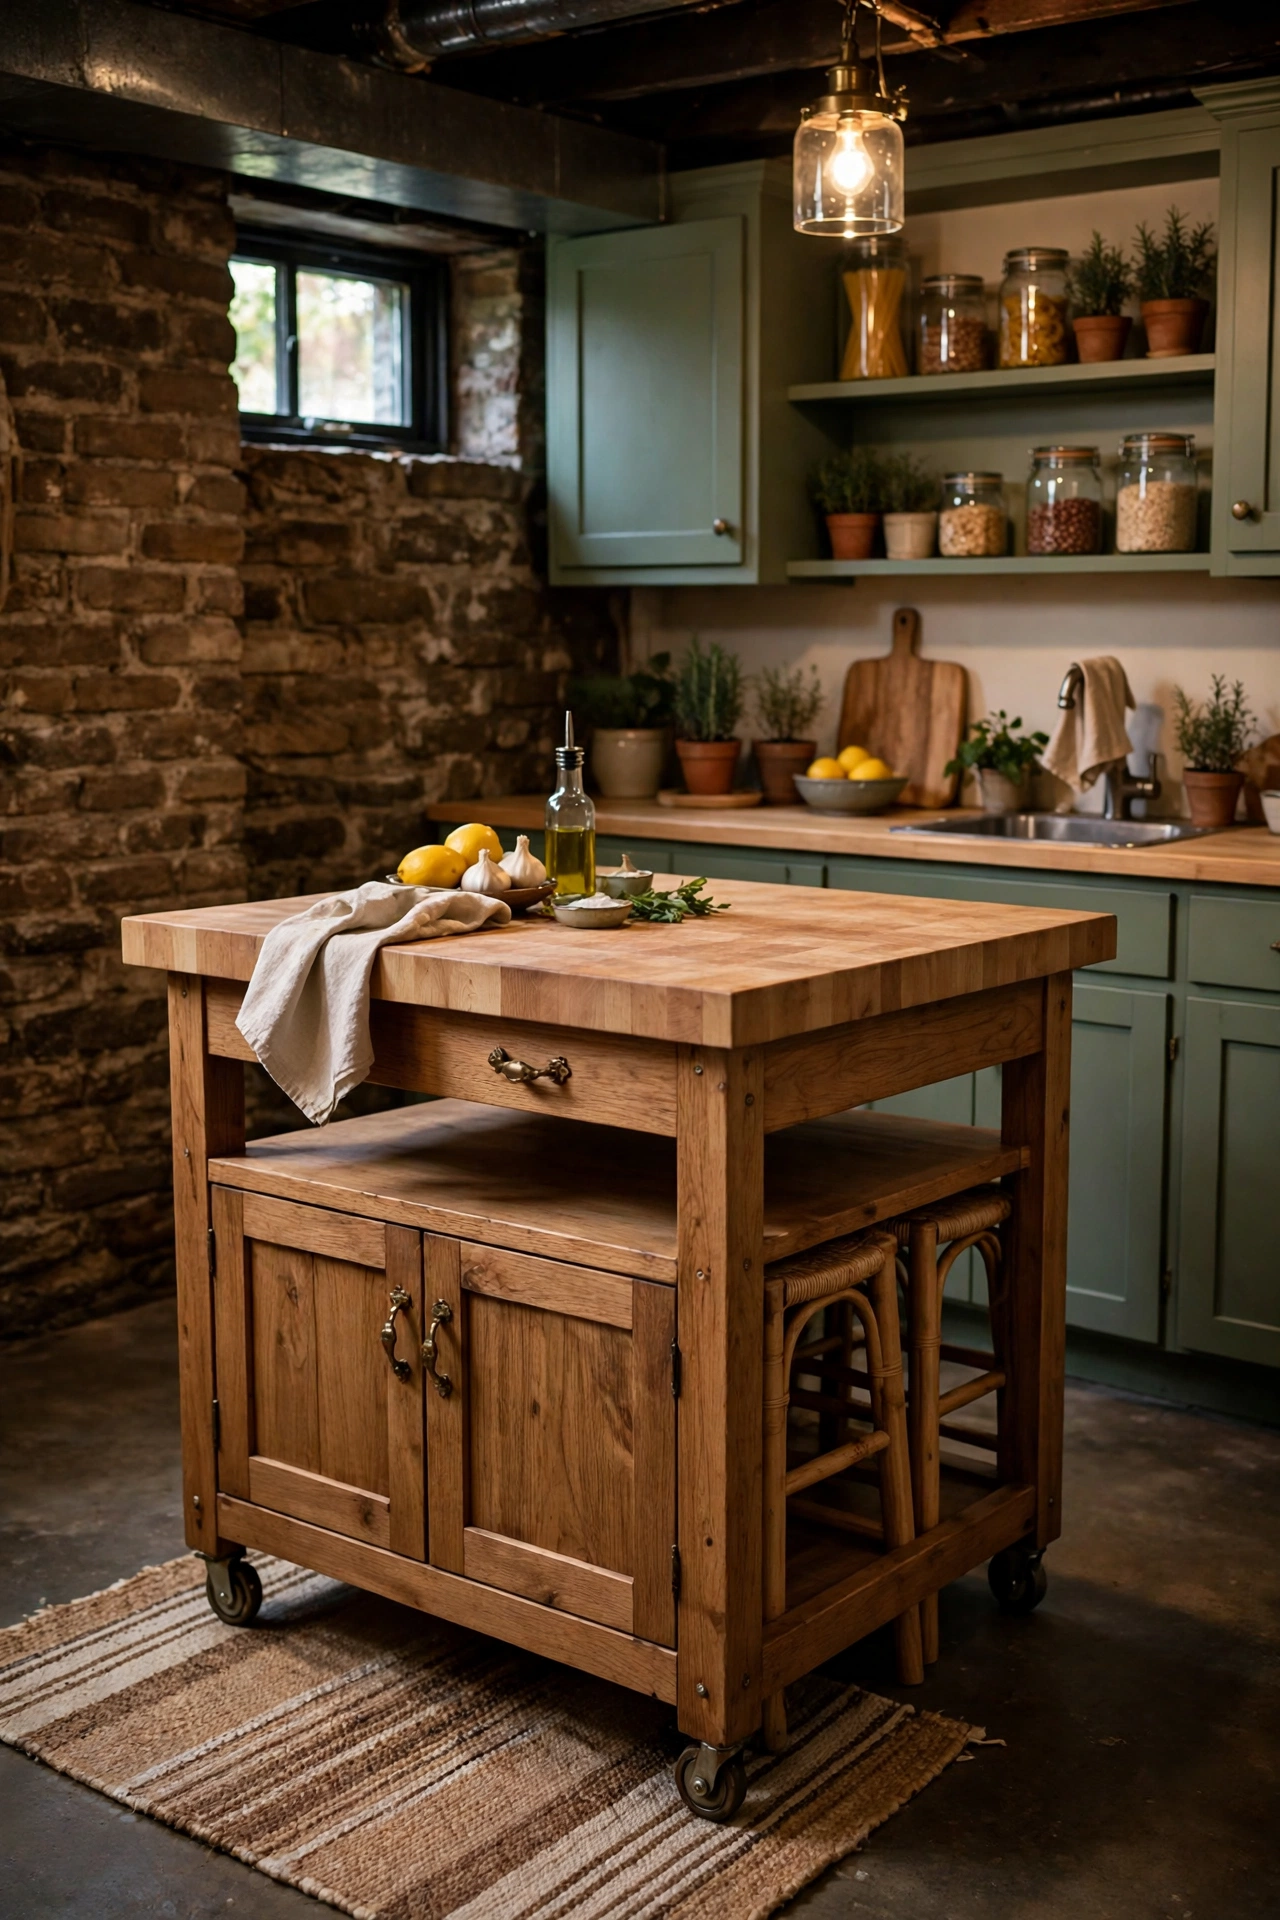
A rolling cart gives you prep space when you need it and floor space when you do not. Choose a cart with locking casters, a butcher block top, and at least one drawer for knives and towels, then roll it against the wall during movie nights or workouts. The top doubles as a serving station when guests gather downstairs.
Try this: lock the casters every time you chop, and keep the cart under 36 inches wide so it fits through the basement door.
Cost: $ | Difficulty: easy.
6. Flat-panel cabinets for low ceilings
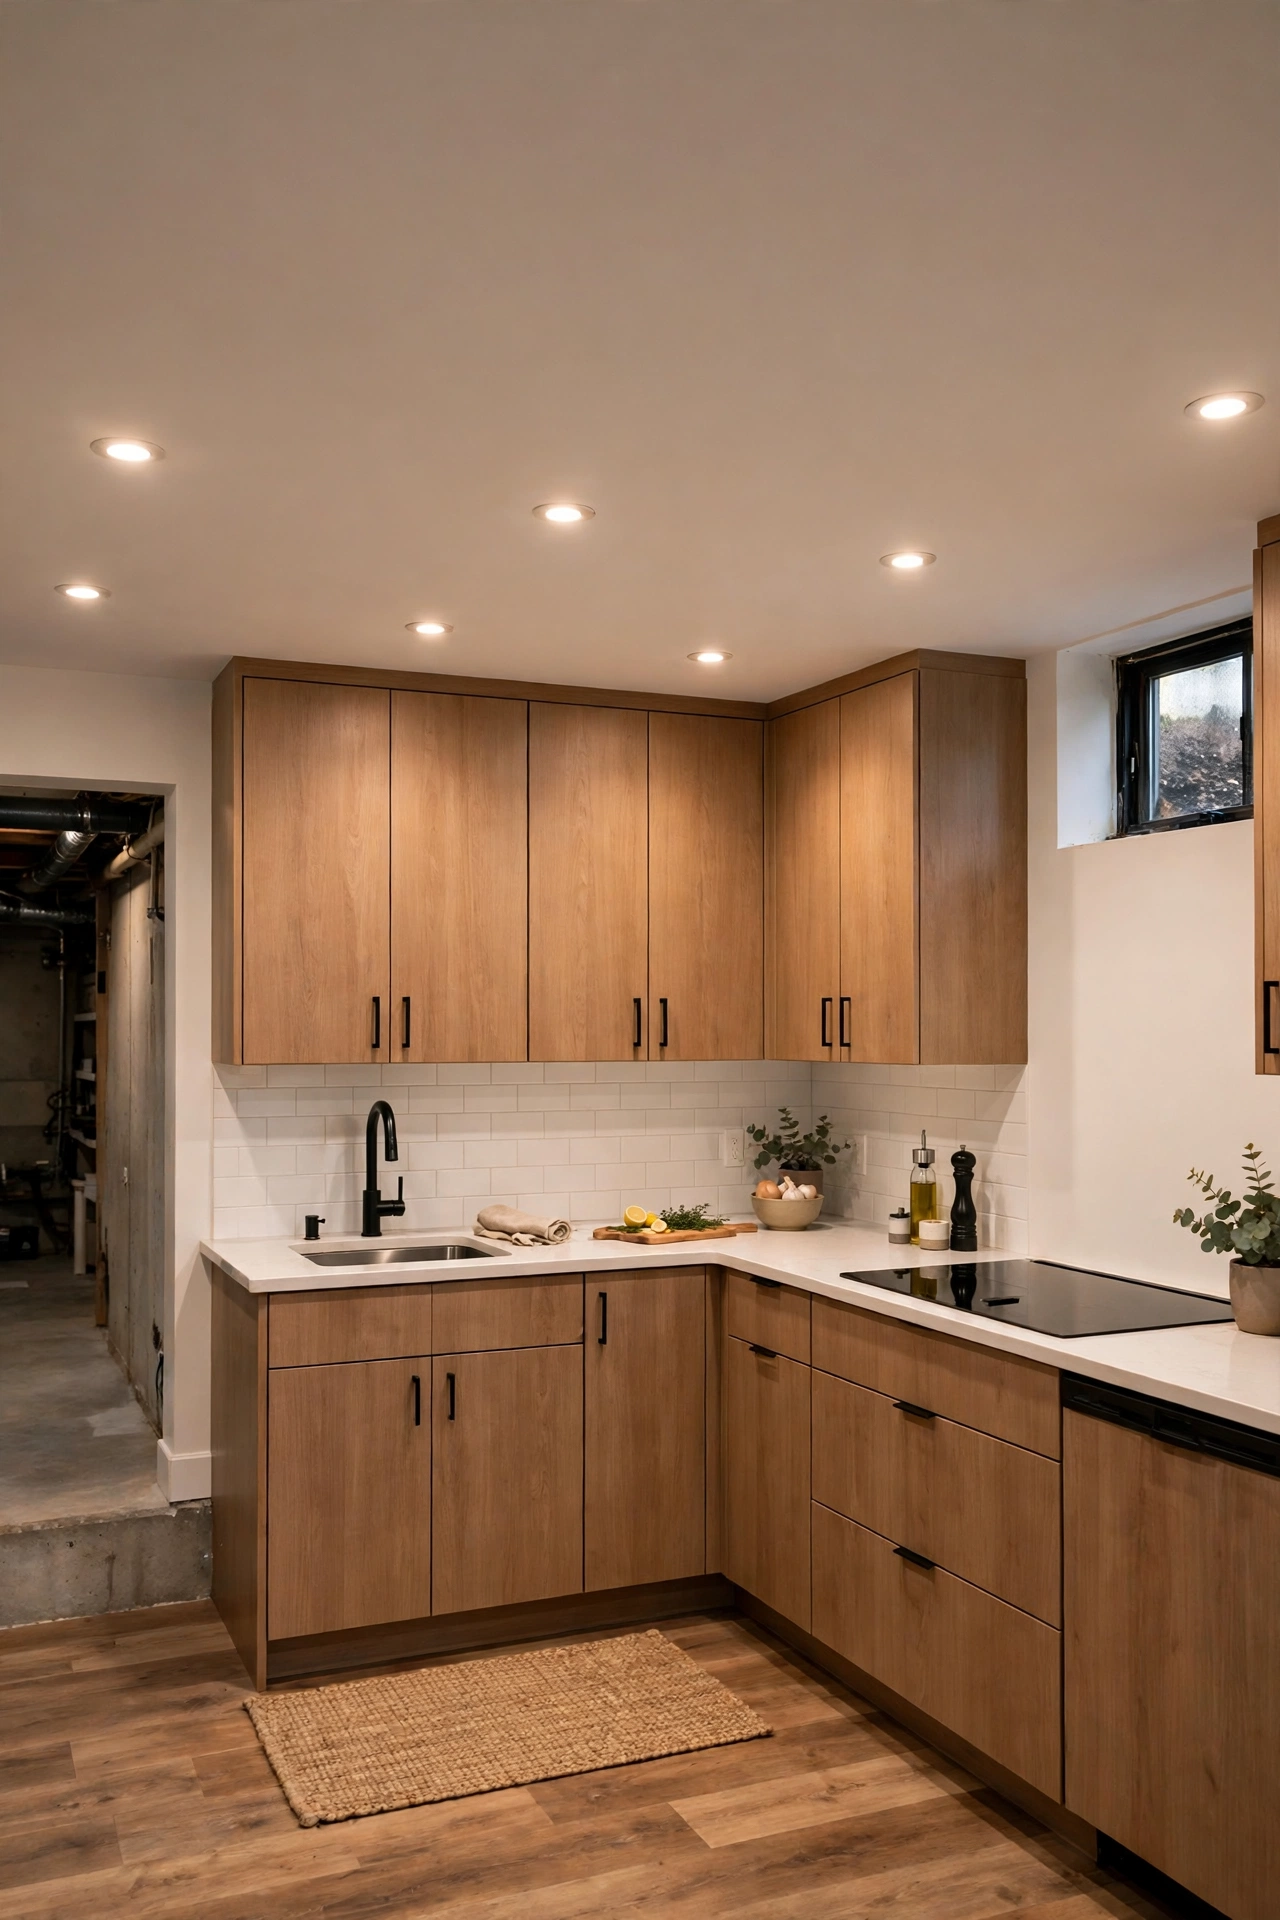
Flat-panel doors and a bare top rail keep a low ceiling from feeling lower. Skip crown molding and tall stacked uppers, which eat 12 to 15 inches of visual height, and run cabinets straight to a simple finished edge. Handle-free push latches or slim bar pulls keep the fronts quiet.
Try this: paint the cabinet tops the same color as the ceiling so the eye reads one continuous plane overhead.
Cost: $$ | Difficulty: moderate.
7. Shallow upper cabinets with glass fronts
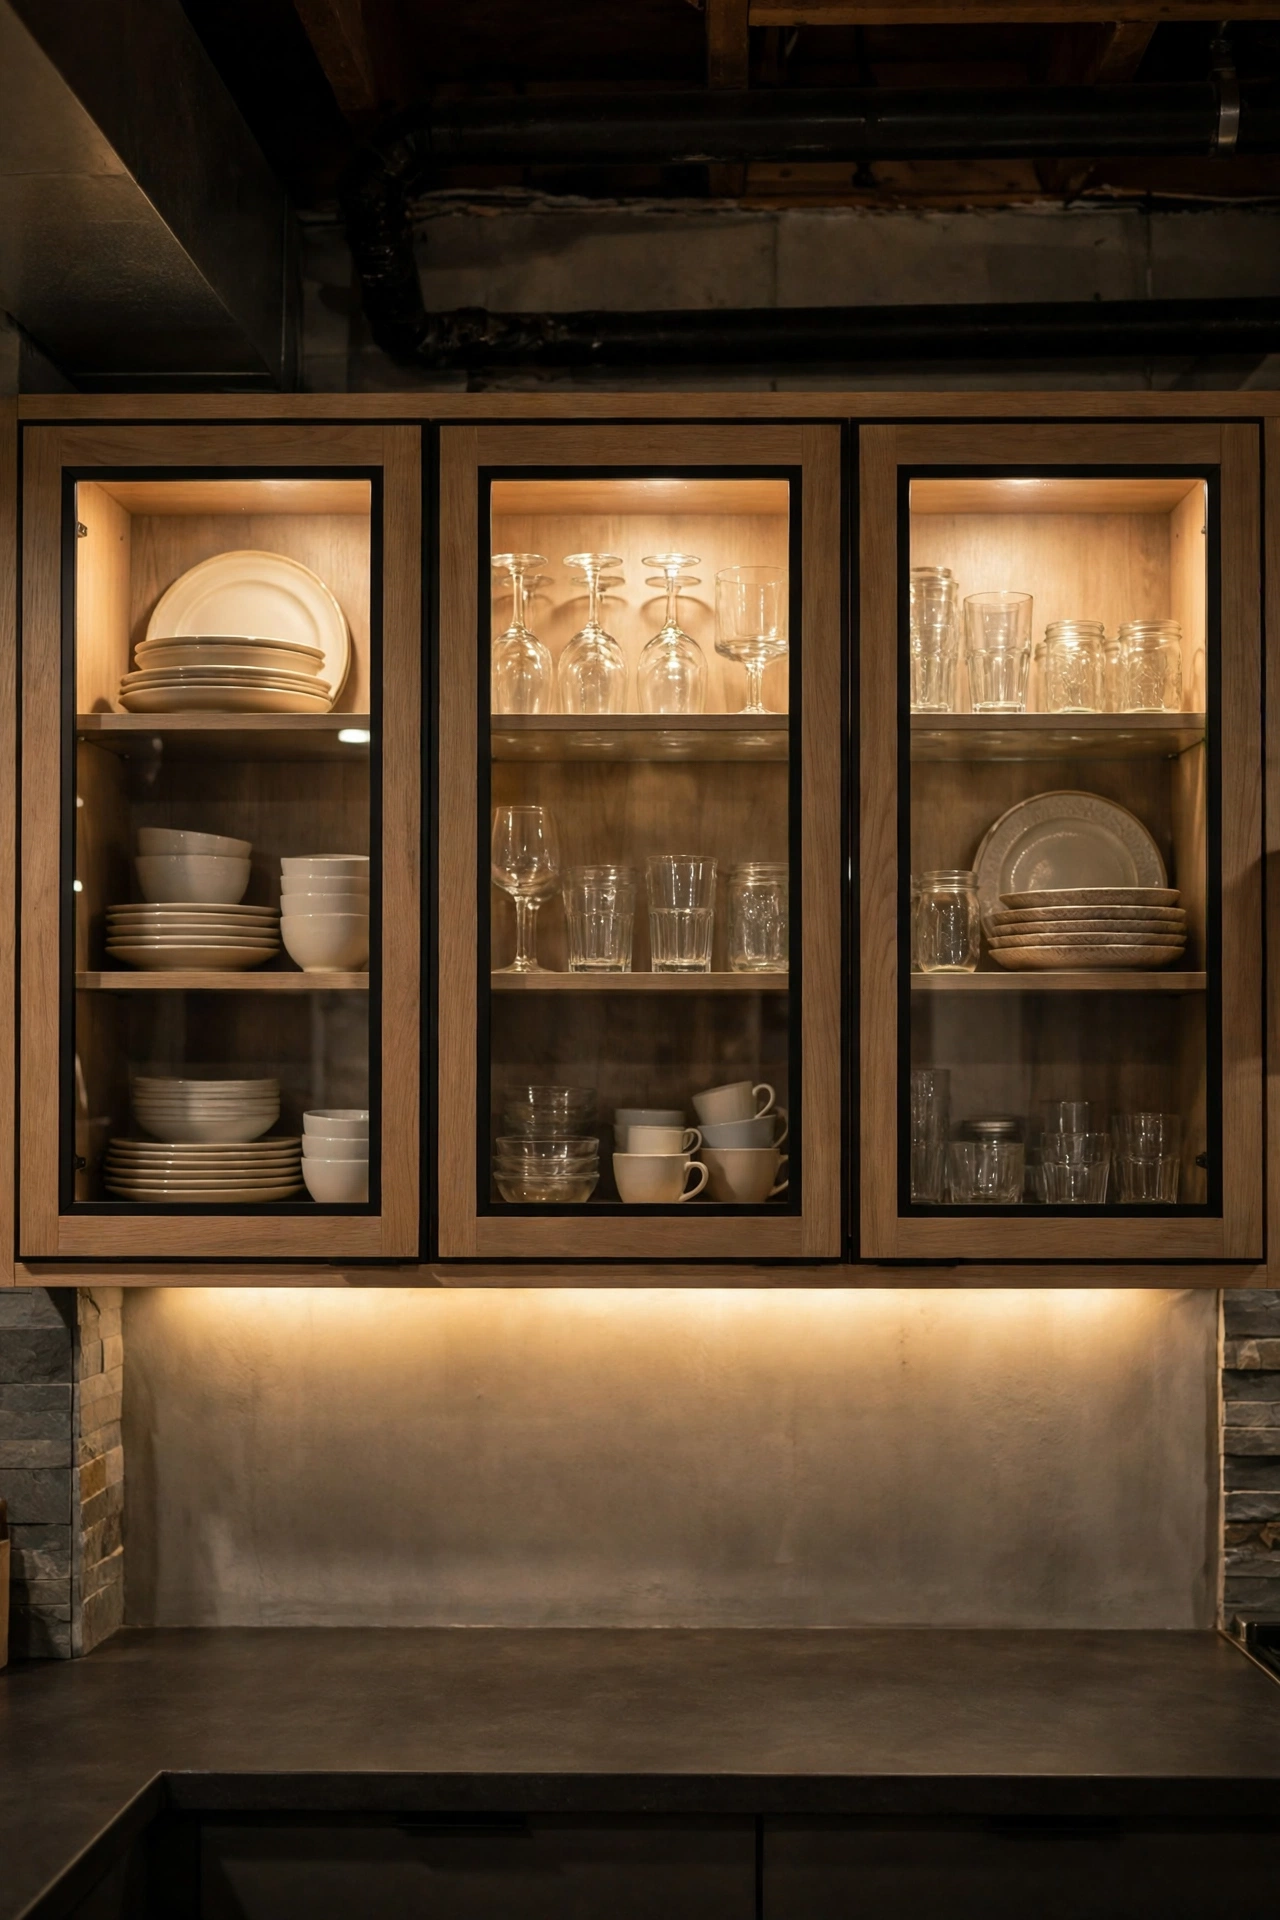
Twelve-inch-deep uppers with glass fronts hold daily dishes without jutting into your forehead space. The glass keeps the wall feeling open, and a single LED strip inside each cabinet turns the contents into a soft light source at night. Keep the glass for matching sets only, since mixed containers read as clutter behind clear doors.
Try this: put everyday plates and bowls in the glass cabinets and move rarely used items to a closed pantry.
Cost: $$ | Difficulty: moderate.
8. Light quartz counters with a mirrored backsplash
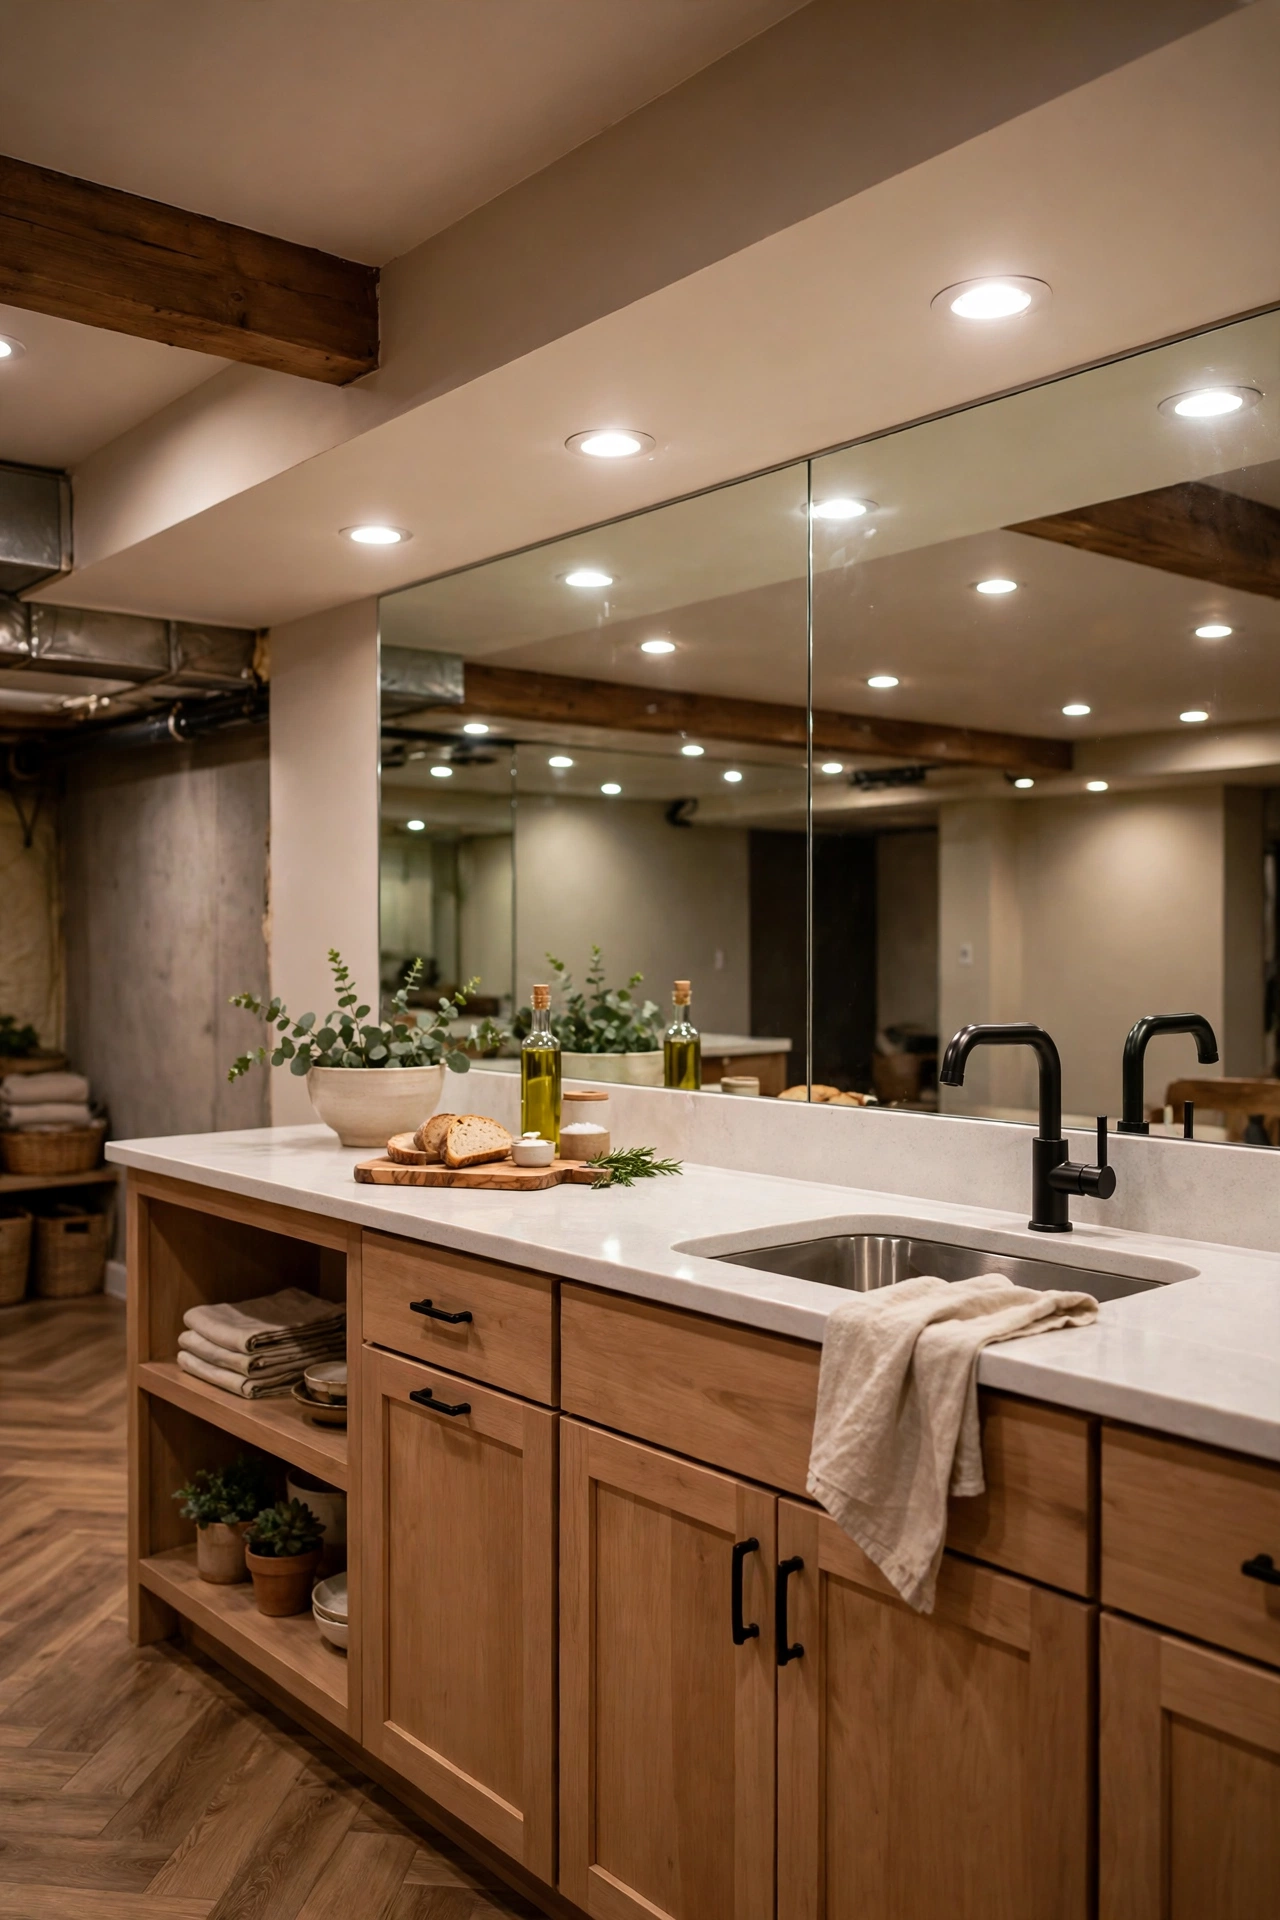
Pale quartz counters bounce light across the room, and a mirrored backsplash doubles whatever light exists. Use mirror panels only behind the cooktop or sink, not the full wall, so the reflection stays calm instead of busy. Pair the mirror with matte cabinets so the room does not turn harsh or cold.
Try this: clean the mirror with a streak-free cloth weekly, since grease shows fast near a cooktop.
Cost: $$ | Difficulty: moderate.
9. Layered recessed and under-cabinet lighting
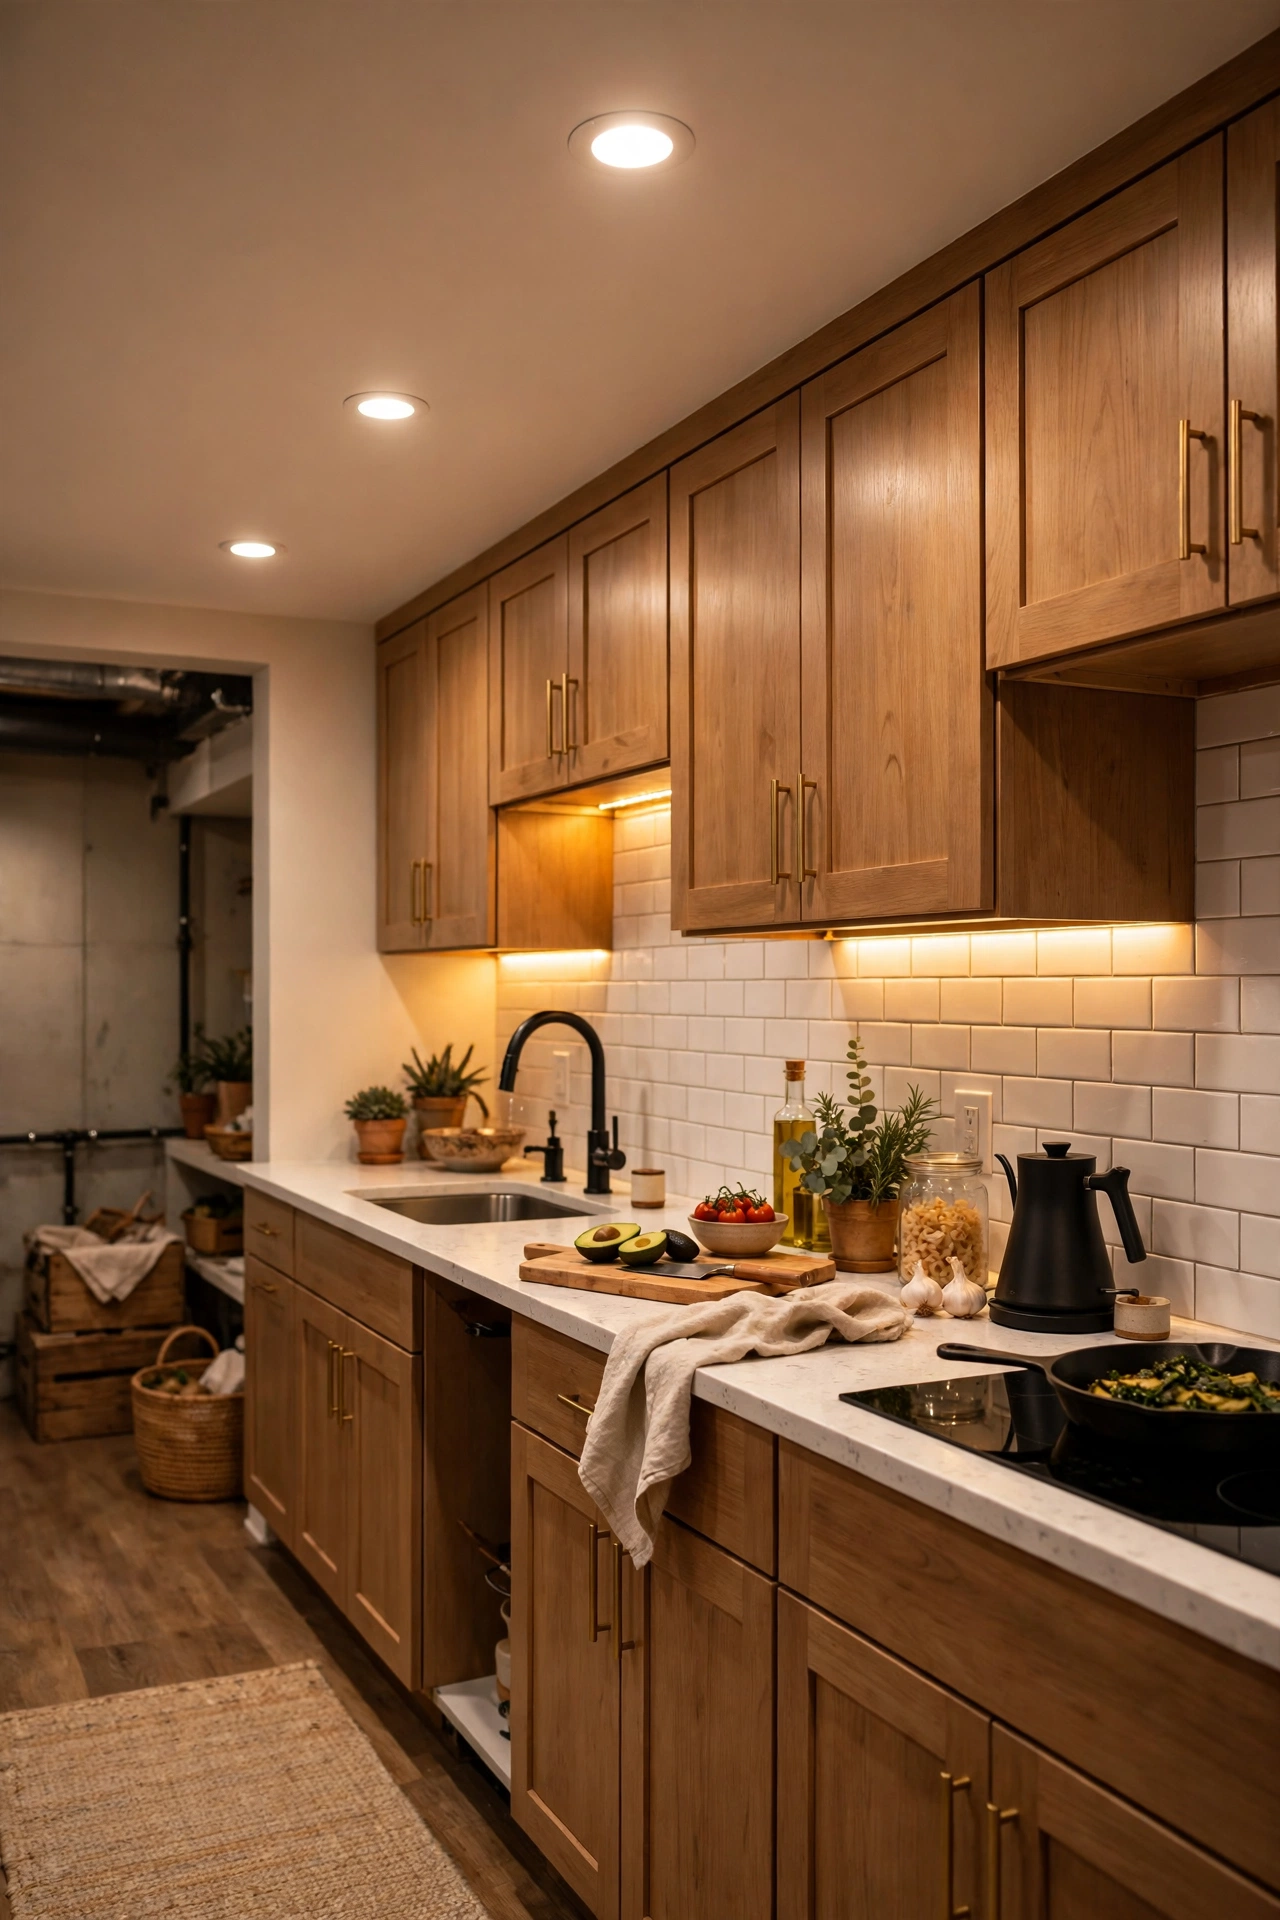
Three light layers beat one bright fixture in a room with no sun. Recessed cans handle general brightness without dropping the ceiling, LED strips under the uppers light the work surface, and one warm pendant over the seating area adds evening mood. Put the strips on a dimmer so the kitchen can shift from cooking to movie snacks.
Try this: aim for 3000K warm white bulbs, which flatter wood and skin better than cool daylight bulbs downstairs.
Cost: $$ | Difficulty: moderate.
10. Small egress window as the sink focal point
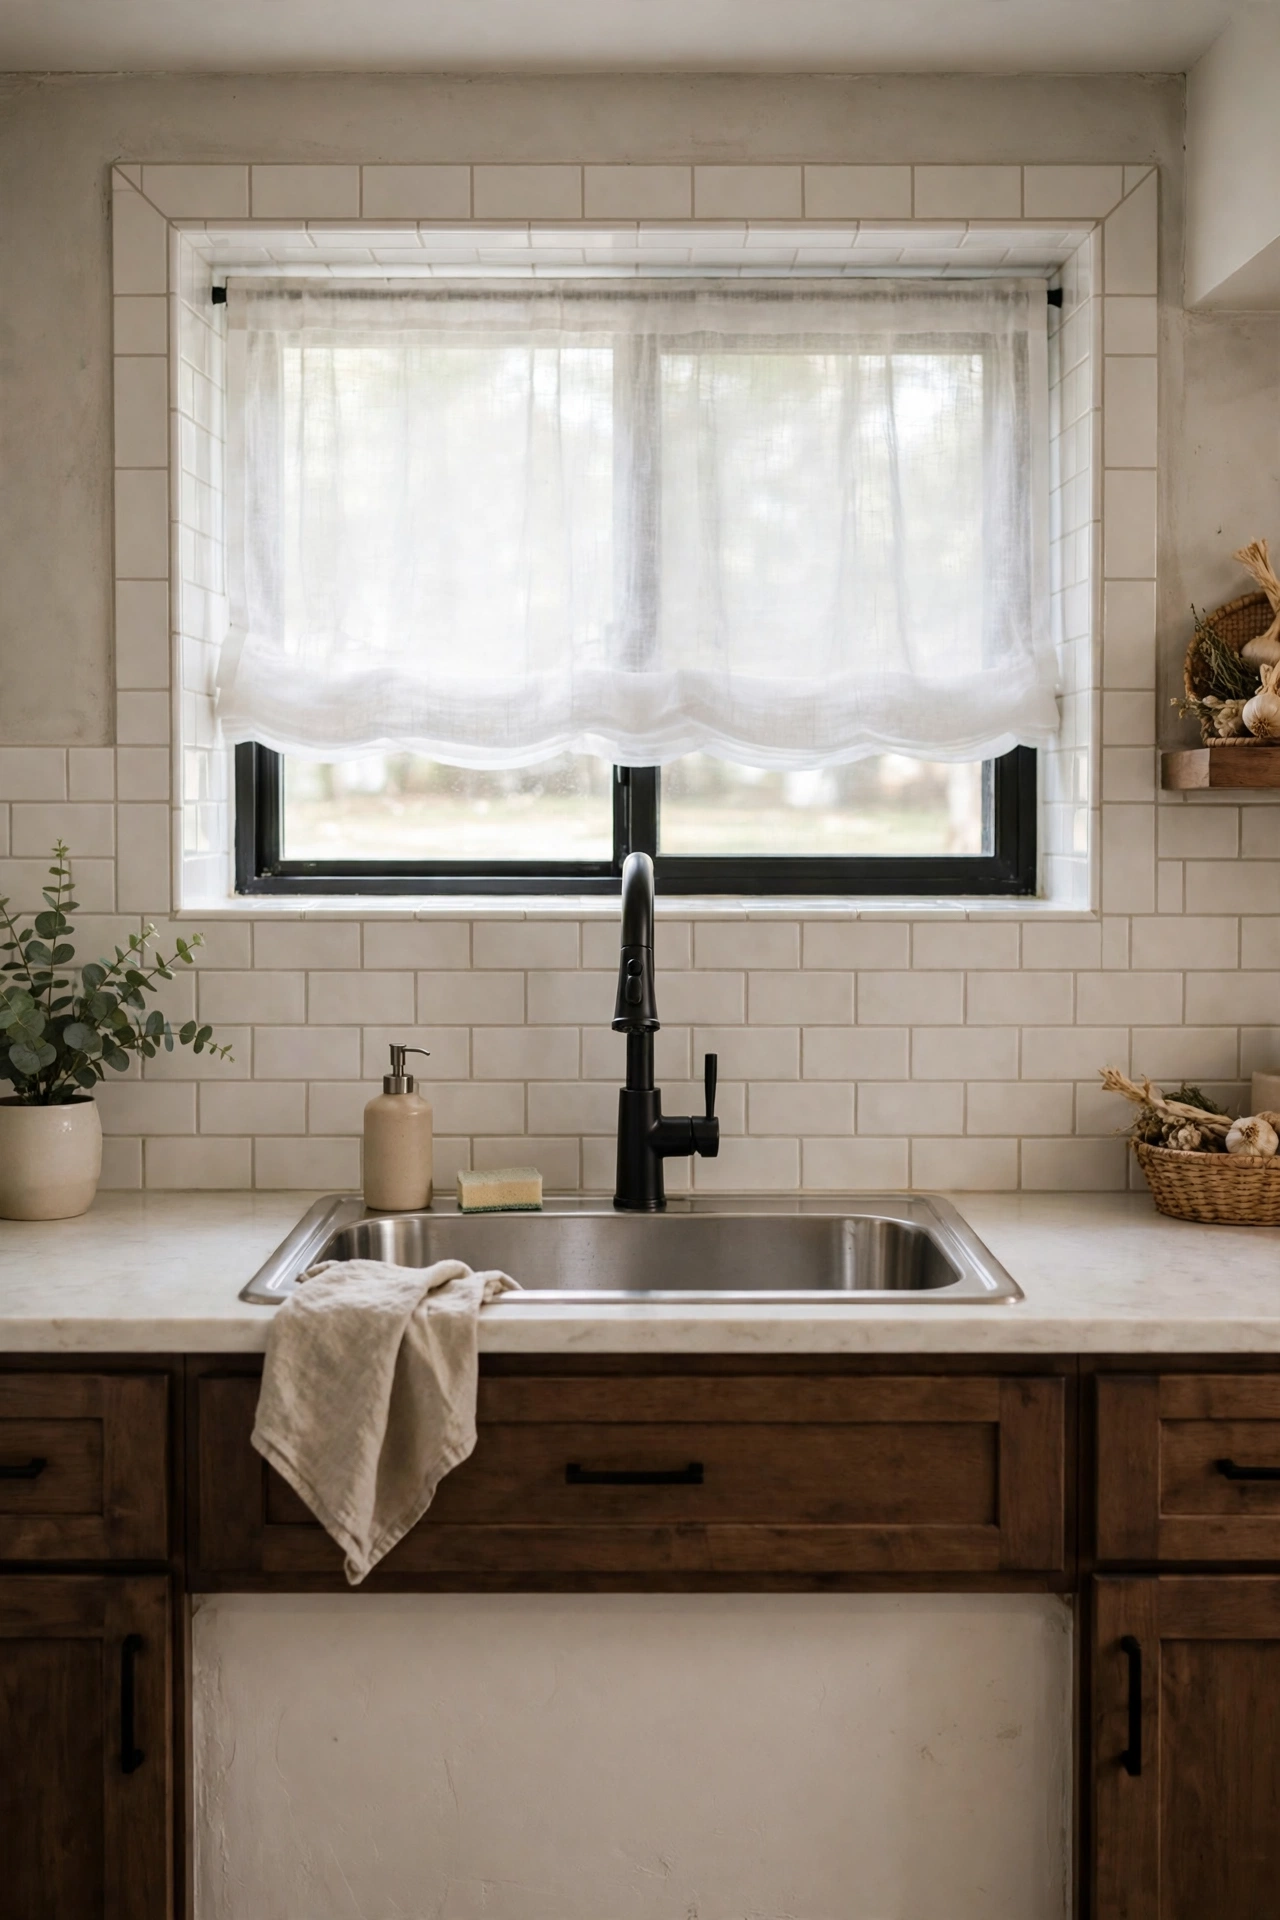
If the basement has even one small window, center the sink on it. Daylight on the work surface matters more than a view, and a sheer shade keeps privacy without blocking the light. Frame the window with light tile and a slim sill shelf for one plant that tolerates low light.
Try this: check the egress size with your local code before widening anything, since window wells have minimum dimensions for escape.
Cost: $$ | Difficulty: hard.
11. Boxed ductwork soffit turned into a shelf ledge
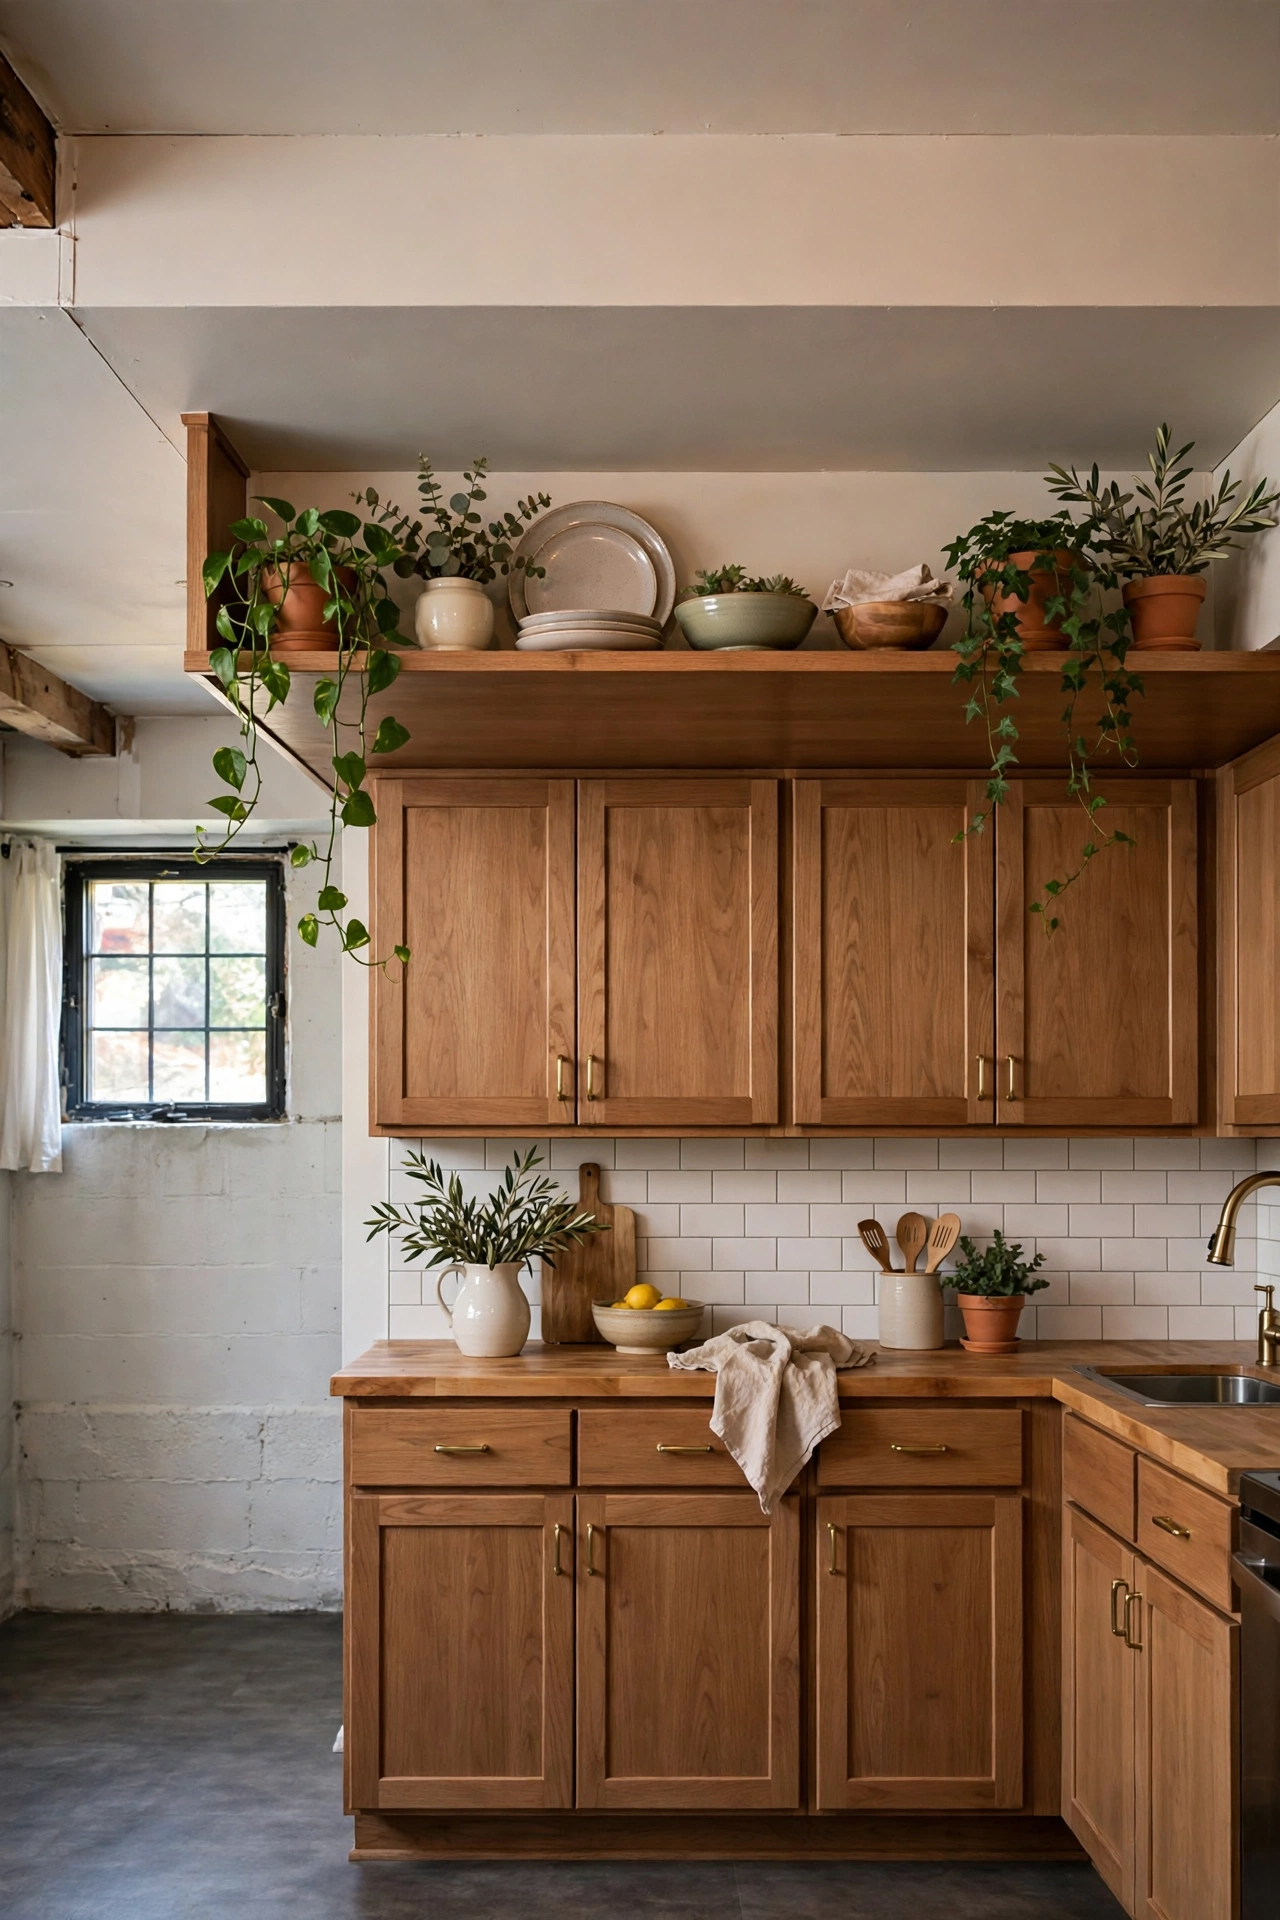
Exposed ducts steal headroom, but a clean box around them can earn it back as display space. Frame the soffit with drywall, paint it the wall color, and add a shallow ledge along the bottom edge for small plants, cookbooks, or daily bowls. Keep the ledge under 6 inches deep so nothing hangs over the counter below.
Try this: leave an access panel where the duct damper sits, so a technician can reach it without cutting drywall.
Cost: $ | Difficulty: easy.
12. Exposed painted joists with track lights
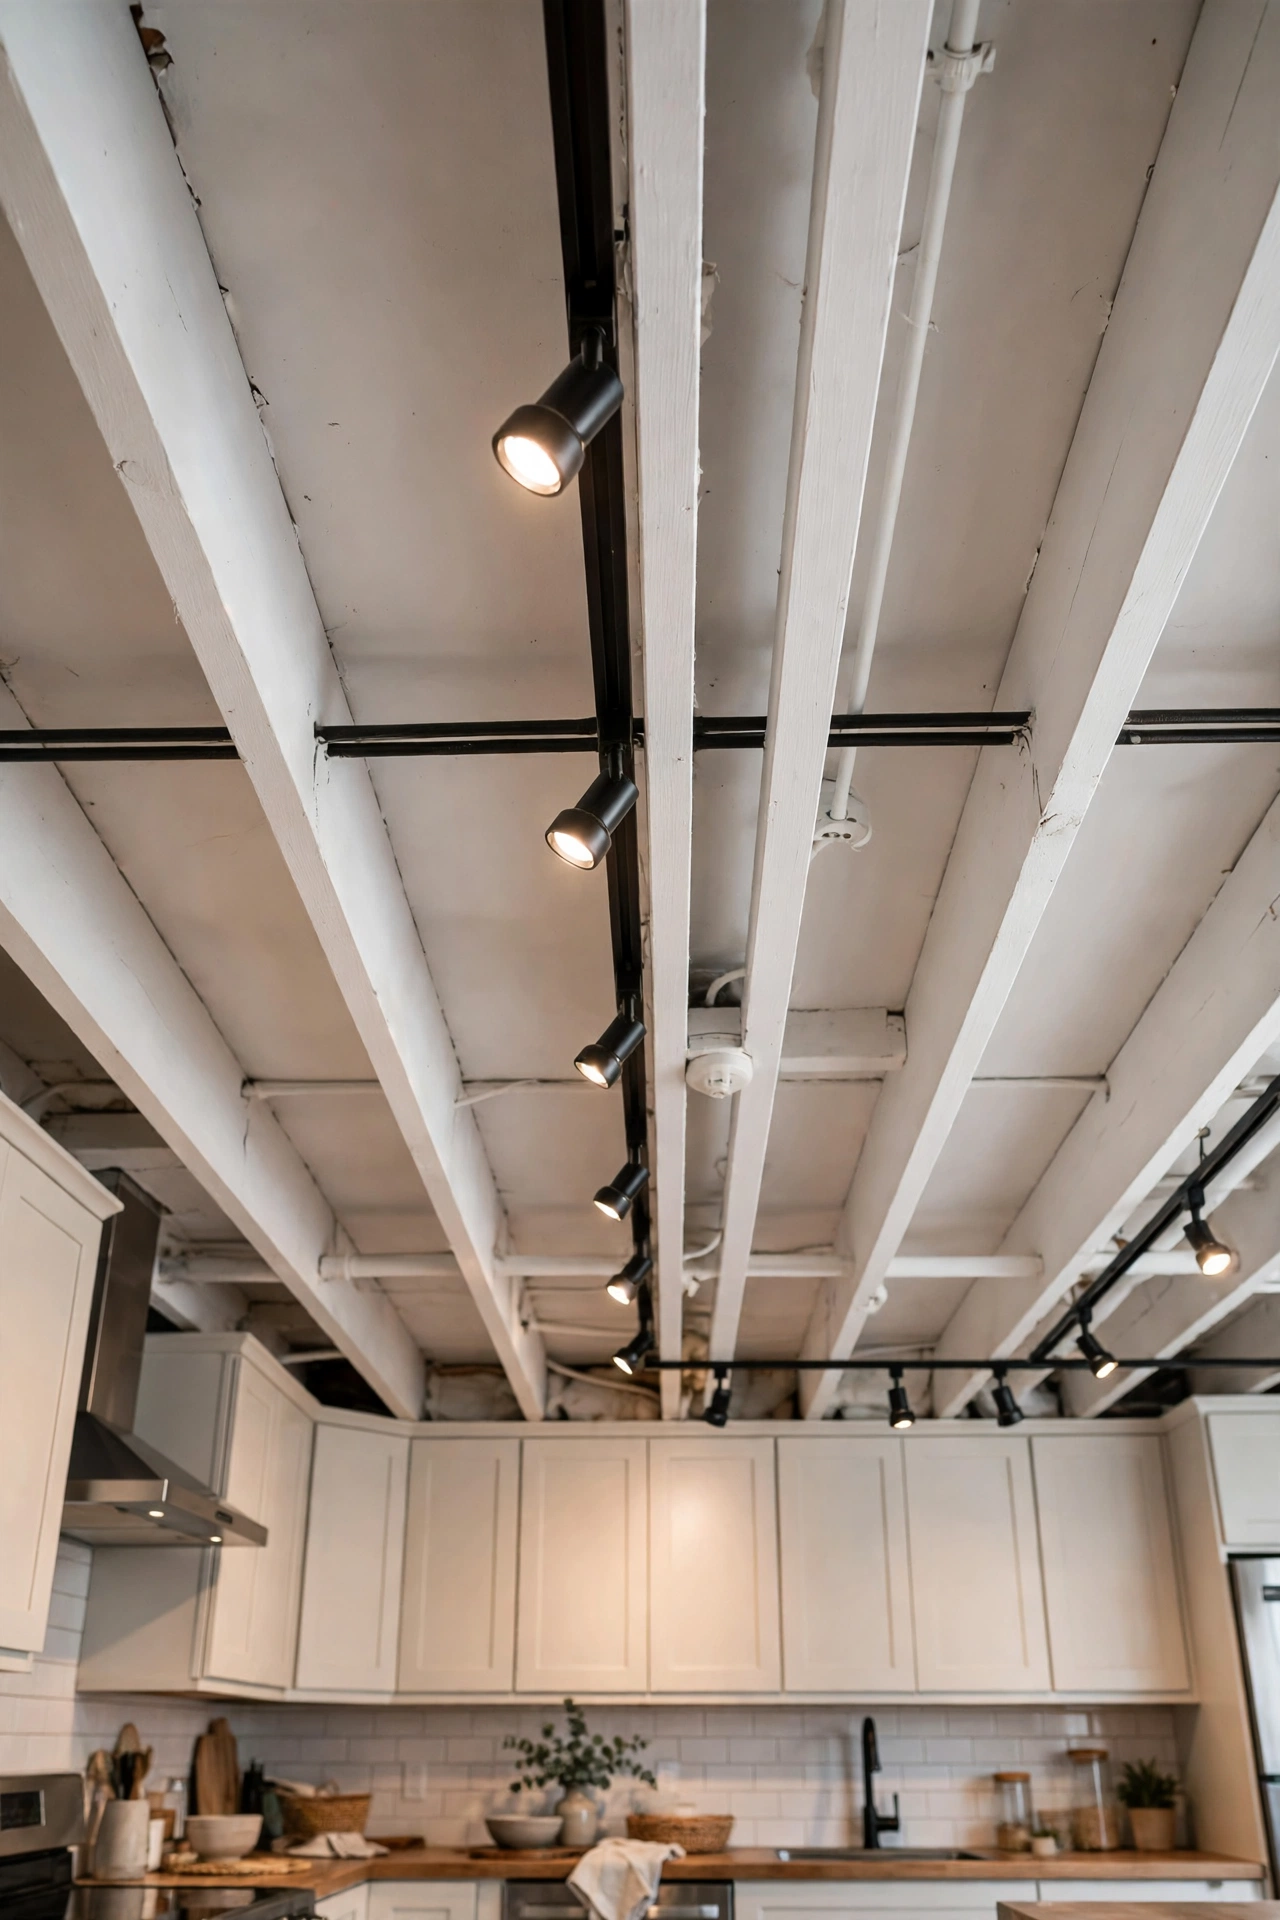
Painting the open joists white buys 6 to 8 inches of headroom compared with a dropped drywall ceiling. Run a track light line between two joists for adjustable task light, and paint pipes and wires the same white so they fade into the background. The look suits industrial and farmhouse styles alike.
Try this: spray the ceiling before cabinets go in, and mask the floor well, since overspray travels far in an open basement.
Cost: $ | Difficulty: easy.
13. Industrial pipes with matte black cabinets
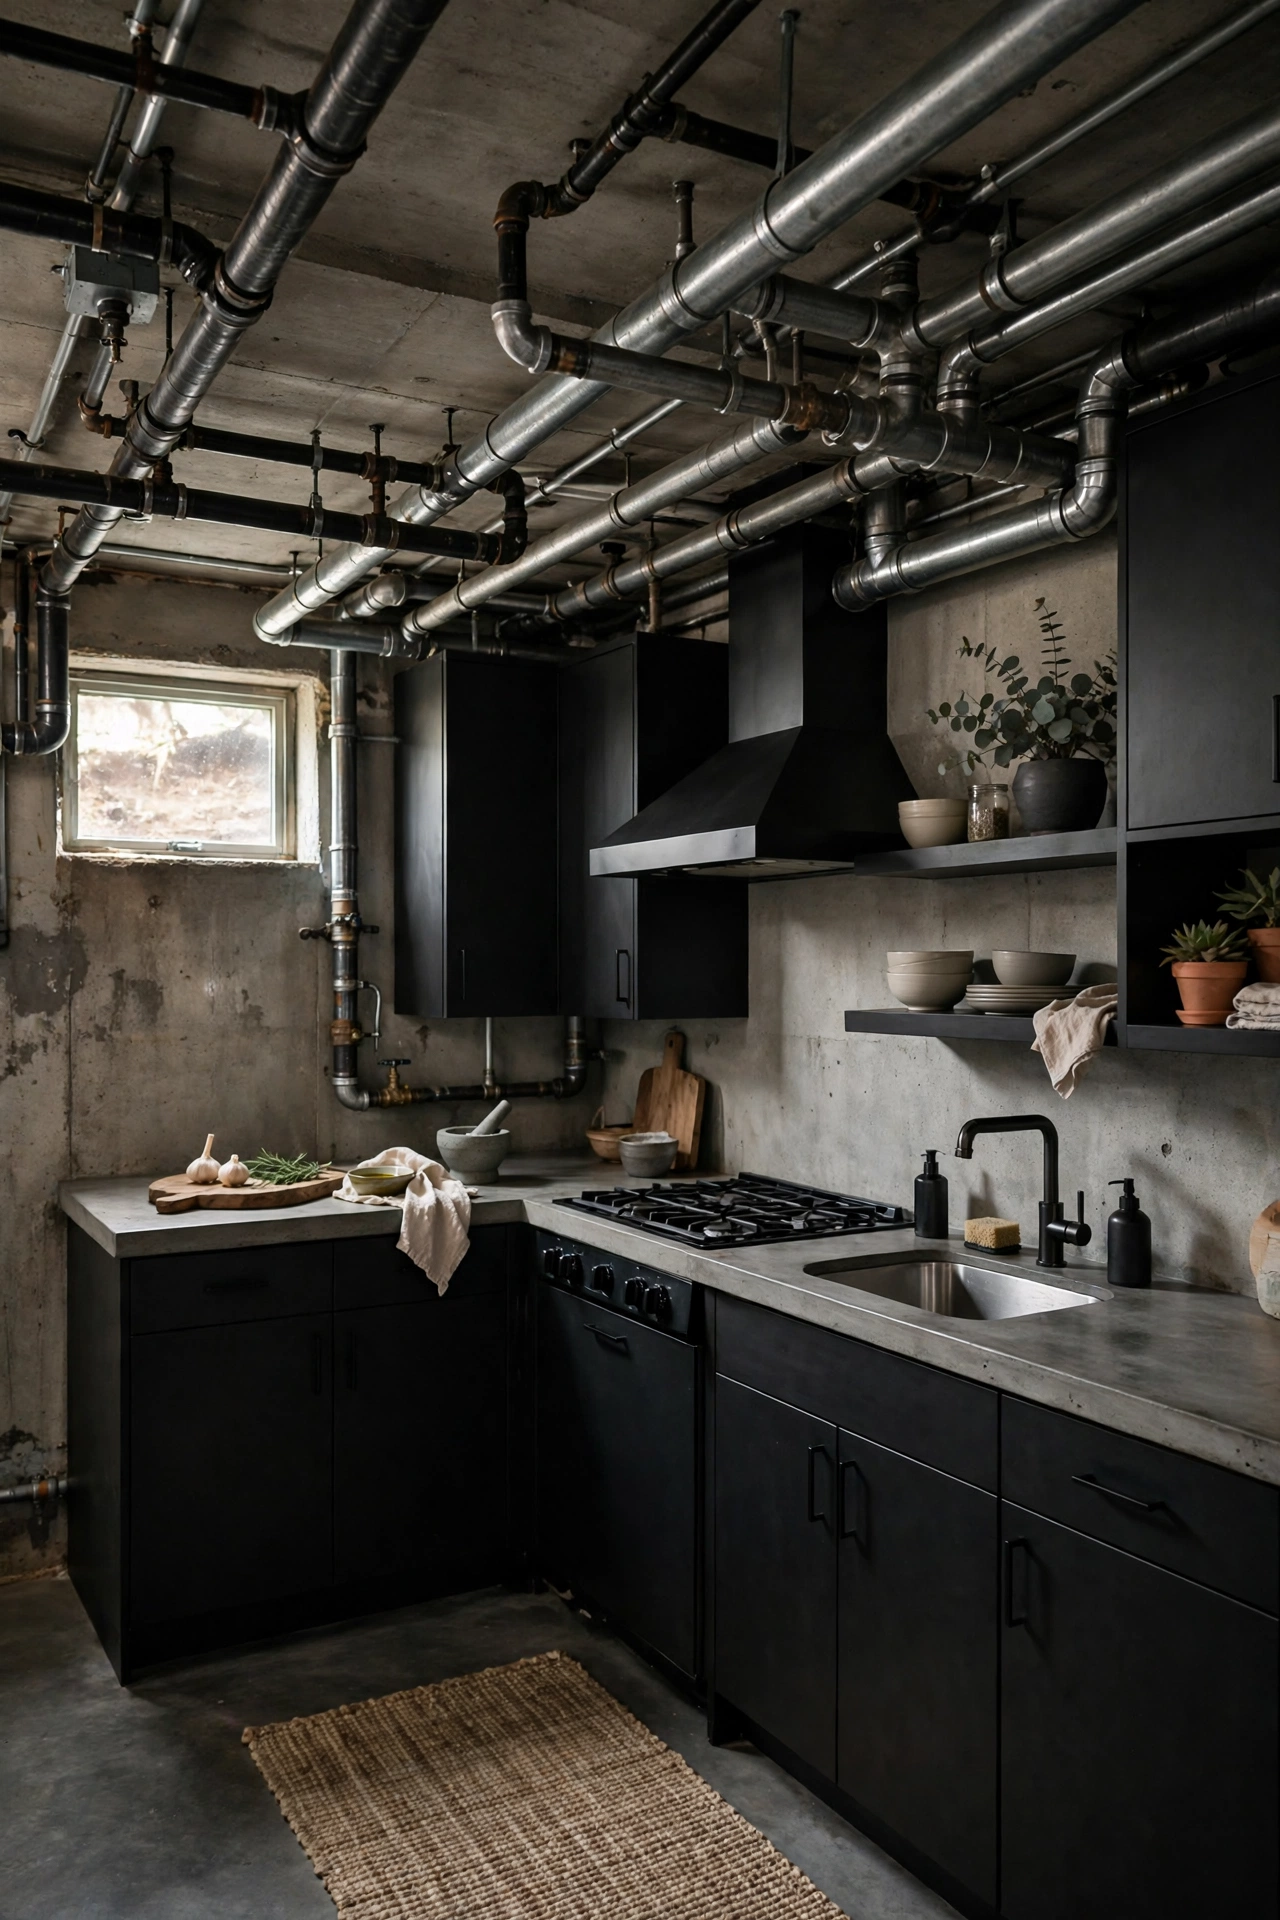
When pipes cannot hide, make them part of the design. Matte black cabinets, concrete-look counters, and open metal shelving turn exposed runs into an industrial feature instead of an eyesore. Add warm wood barstools to soften the metal, and keep the palette to two finishes so the room stays calm.
Try this: insulate any hot-water pipe before painting it, and label shutoff valves clearly on the finished wall.
Cost: $$$ | Difficulty: hard.
14. Brick accent wall with open wood shelves
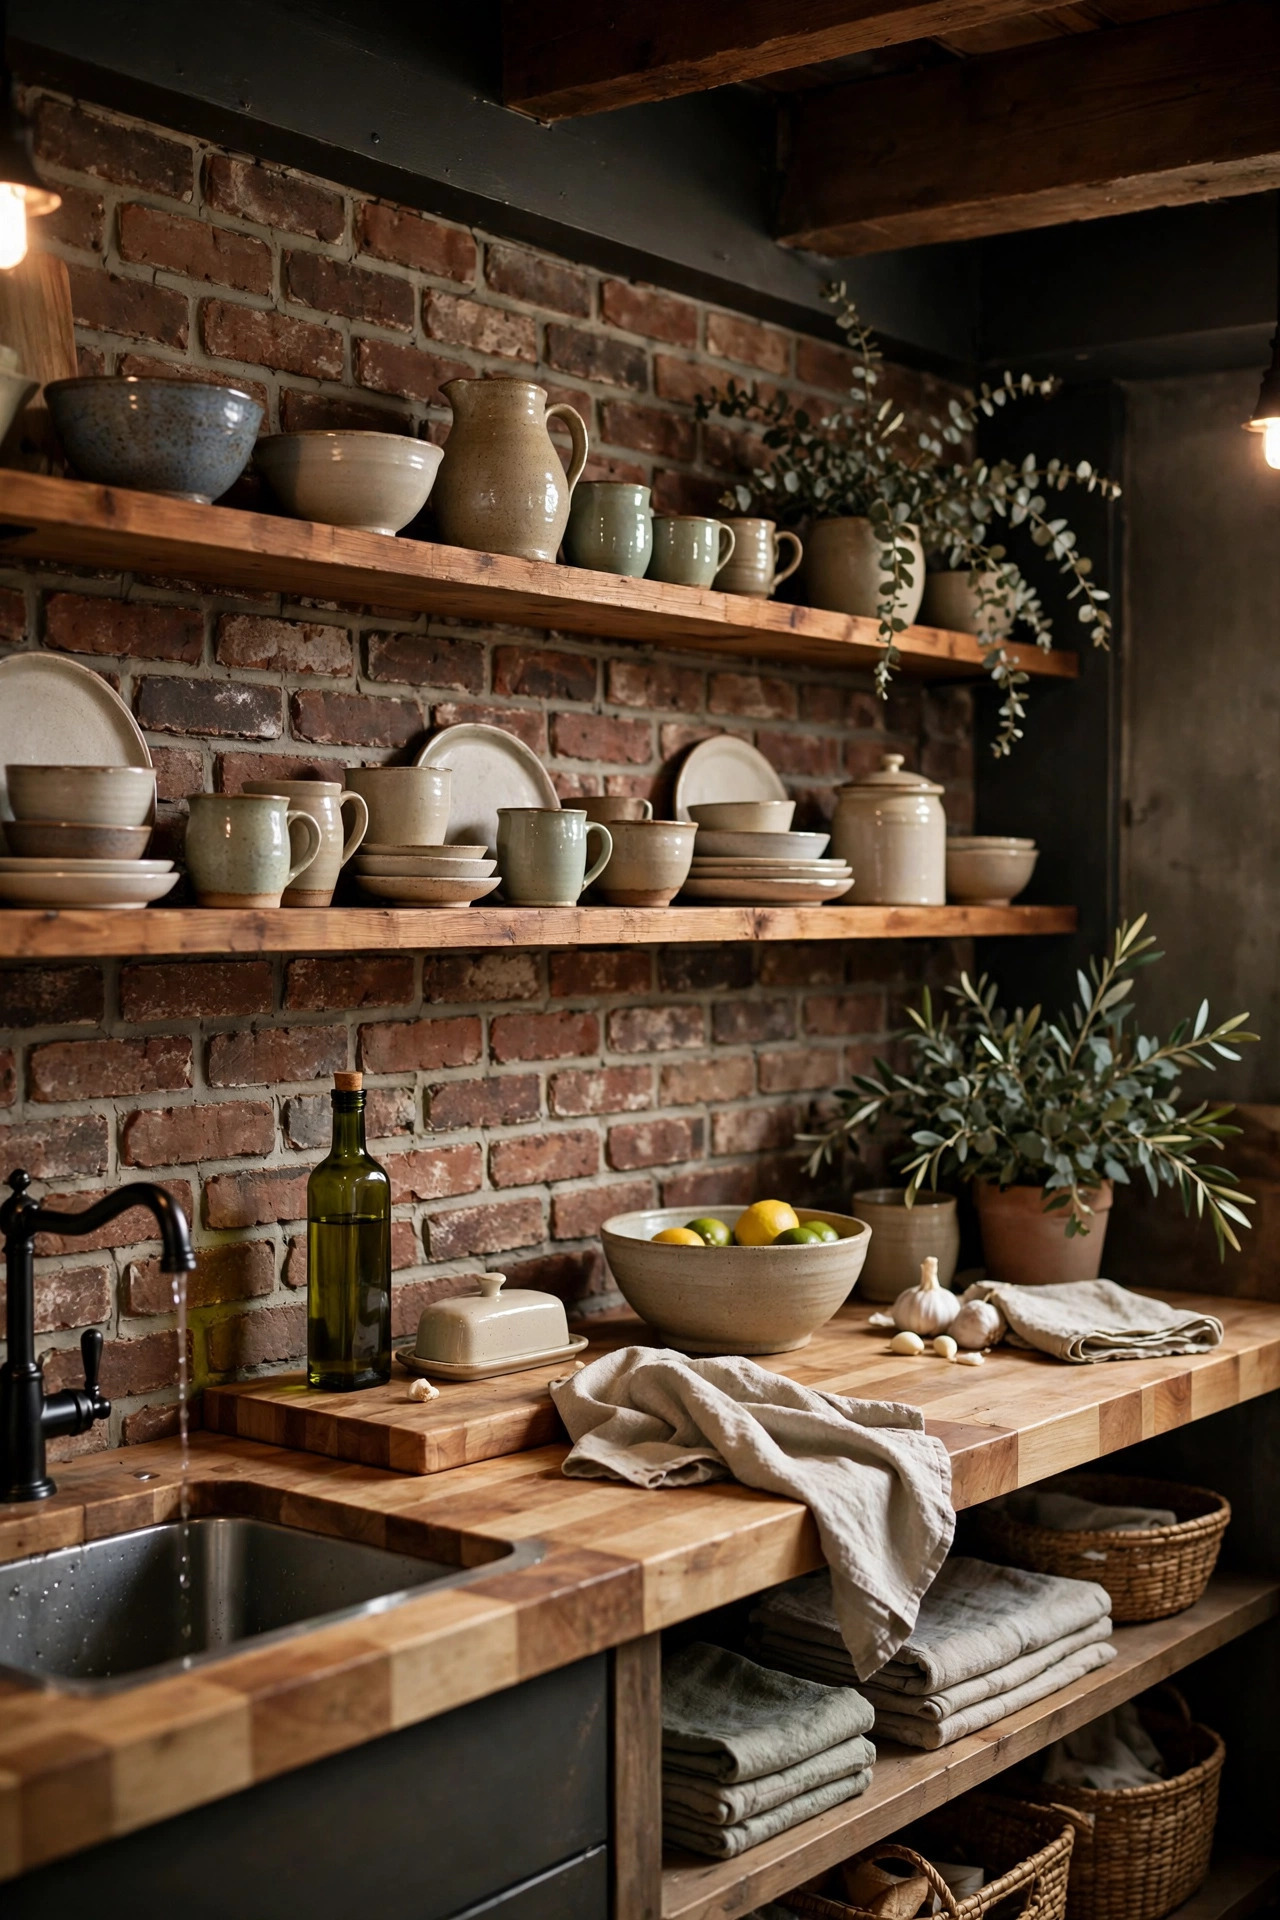
Original brick warms a basement faster than any paint color. Clean the brick, seal it against dust, and mount two open wood shelves for ceramics and glassware that you actually use. A light butcher block counter keeps the earthy tones from turning dark, and a small rail underneath the lower shelf holds mugs within reach.
Try this: test the sealer on one brick first, since some sealers darken the color more than expected.
Cost: $$ | Difficulty: moderate.
15. Butcher block counters with a farmhouse sink

Butcher block costs less than stone, cuts on site around awkward basement corners, and pairs naturally with a white apron sink. Seal the wood around the sink with food-safe oil every few months, and wipe standing water the same day to stop dark rings. Dark matte cabinets ground the warm wood without shrinking the room.
Try this: keep a small cutting board on the counter for daily chopping, so the countertop itself stays smooth longer.
Cost: $$ | Difficulty: moderate.
16. Two-tone cabinets, cream uppers and navy lowers

Cream uppers lift the eye while navy lowers anchor the room, a split that works well where ceilings are low. White quartz counters and a matching backsplash keep the middle bright, and brass pulls tie the two tones together. Keep the darker color on the bottom only, since navy uppers close a low room in fast.
Try this: order one door sample in each color and check them under your basement lights before committing.
Cost: $$$ | Difficulty: hard.
17. Corner pull-out pantry

Basement corners waste more storage than any other spot, and a pull-out pantry fixes that. A full-height pull-out unit on glides brings every can and box into reach without crouching into a dark corner. Fit it beside the fridge or at the end of a galley run, where a door would block the walkway.
Try this: measure the pull-out clearance with the unit fully extended, and keep heavy cans on the lowest shelves.
Cost: $$ | Difficulty: moderate.
18. Hidden pantry door in wall paneling

A pantry door that matches the wall paneling hides bulk storage without a second visual break. Use matching boards and a push latch, and light the inside with a battery puck light so the shelves stay useful. The trick works best on a flat wall without outlets or vents.
Try this: mark the door edge with a tiny brass pin so guests can find it, since a truly flush door frustrates everyone.
Cost: $$ | Difficulty: hard.
19. Drawer-based base cabinets instead of deep shelves

Deep drawers beat deep cabinets in a basement, where low light makes the back of a shelf disappear. Wide drawers on full-extension glides hold pots, lids, and small appliances at waist height, and dividers keep them from sliding. Swap at least the two cabinets beside the cooktop to drawers first, since those get opened most.
Try this: load the heaviest items in the bottom drawer and test the glide weight rating before you fill it.
Cost: $$ | Difficulty: moderate.
20. Apartment fridge with an 18-inch dishwasher

Scaled-down appliances fit basement proportions and budgets at once. A 24-inch-wide apartment fridge holds a week of basics for a second kitchen, and an 18-inch dishwasher handles daily dishes without demanding a full 24-inch bay. Both leave room for a trash pull-out beside the sink, which keeps the small work lane clear.
Try this: check the fridge door swing against the nearest wall before delivery, since basement corners trap doors fast.
Cost: $$ | Difficulty: moderate.
21. Two-burner induction cooktop for a kitchenette

A two-burner induction cooktop covers soups, pasta, and reheating without the venting demands of a full range. Induction stays cool to the touch around the pan, which matters in a tight basement where people brush past counters. Pair it with a compact microwave hood unit and a single-bowl sink for a complete mini kitchen.
Try this: check your pans with a magnet before buying, since induction only works with magnetic cookware.
Cost: $ | Difficulty: easy.
22. Wine bar with a built-in cooler
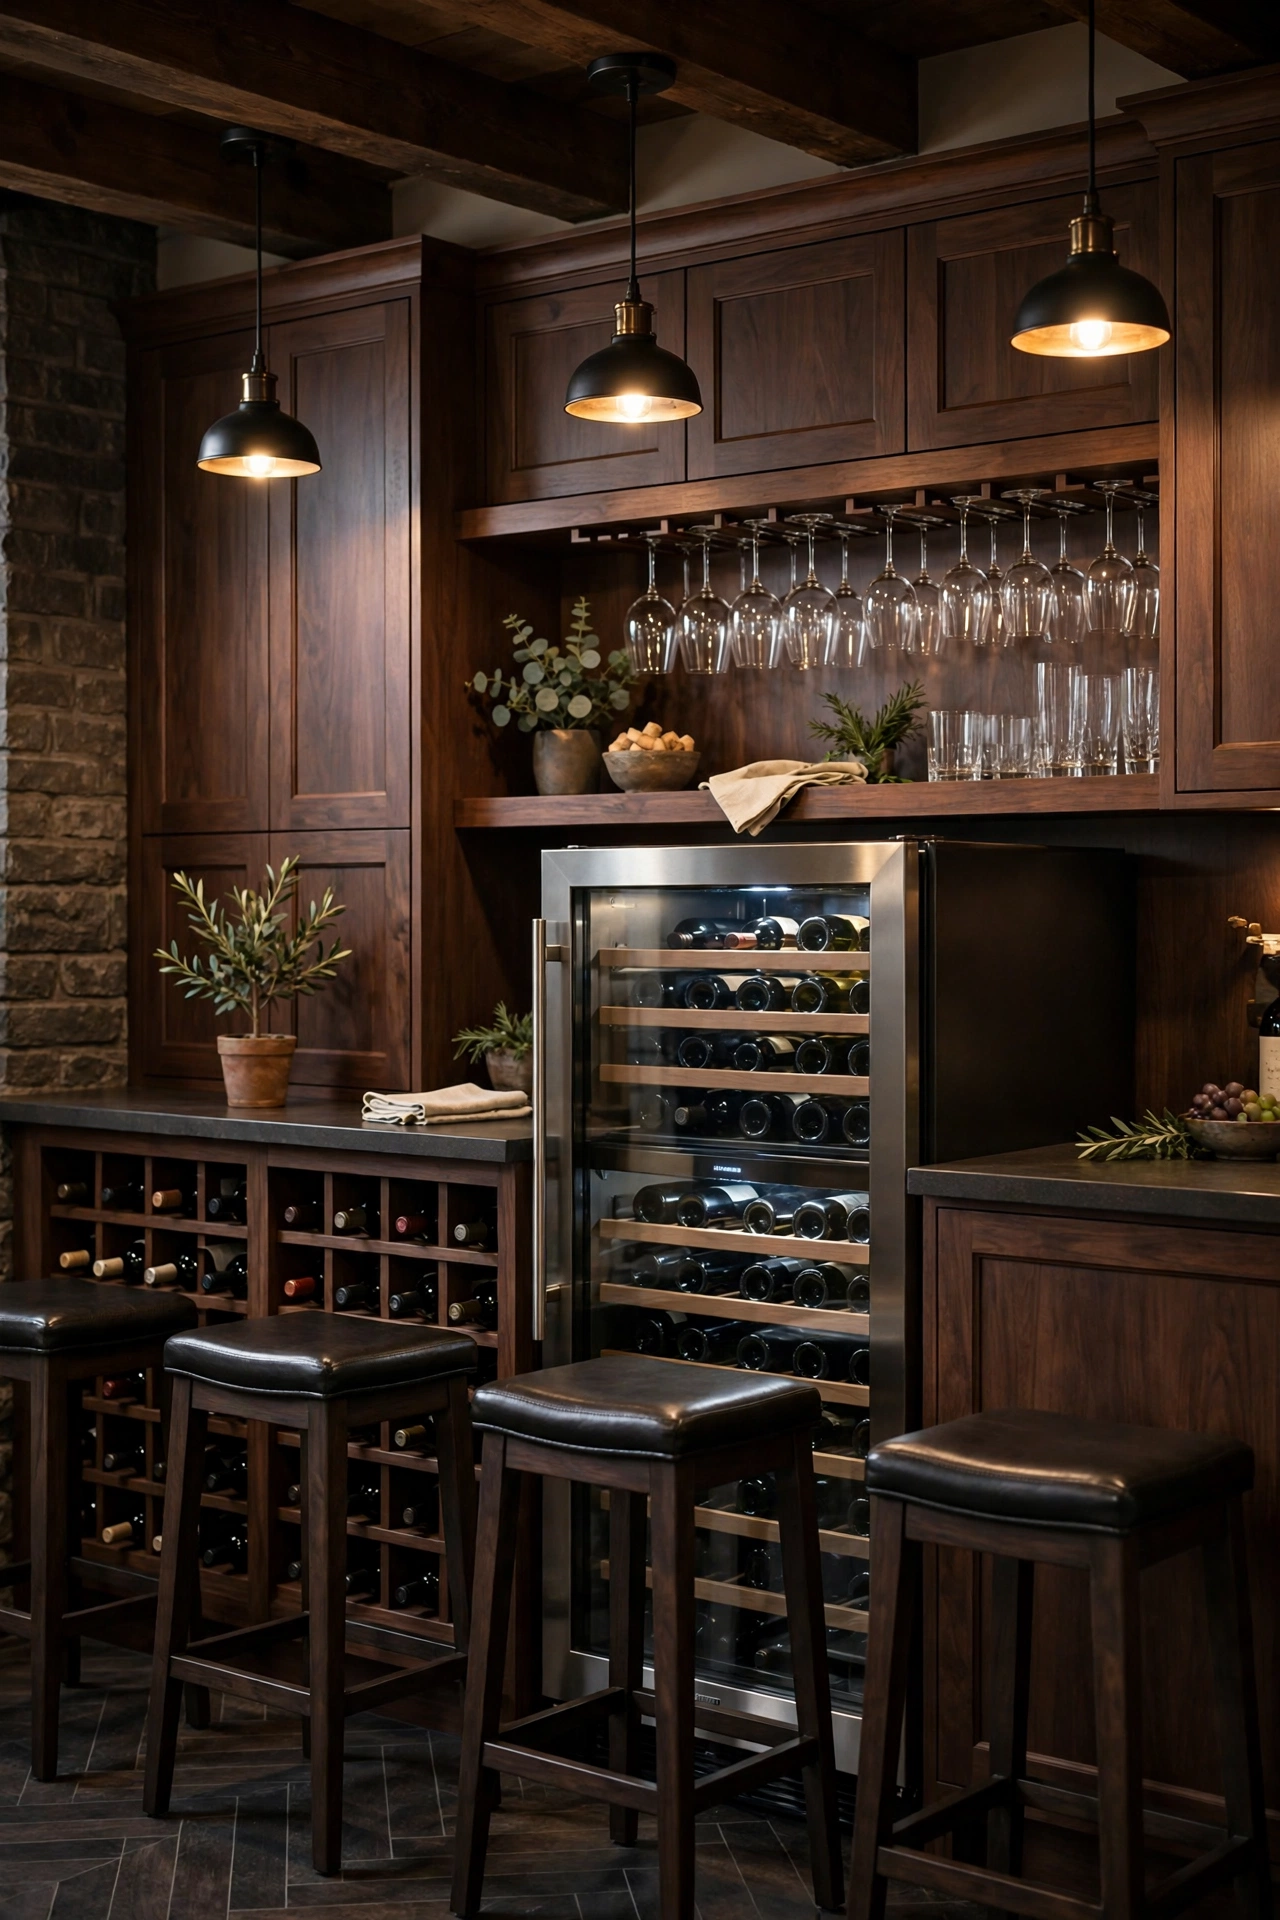
A basement stays naturally cool, which makes it a strong spot for a wine bar. Build a short counter with a 24-inch built-in cooler, open shelves for glasses, and a stone or quartz bar top for tasting nights. Keep the cooler vented per the maker instructions, since blocked vents shorten its life.
Try this: store everyday bottles at the front of the cooler and keep the back row for bottles you plan to age.
Cost: $$$ | Difficulty: hard.
23. Coffee bar nook beside the stairs
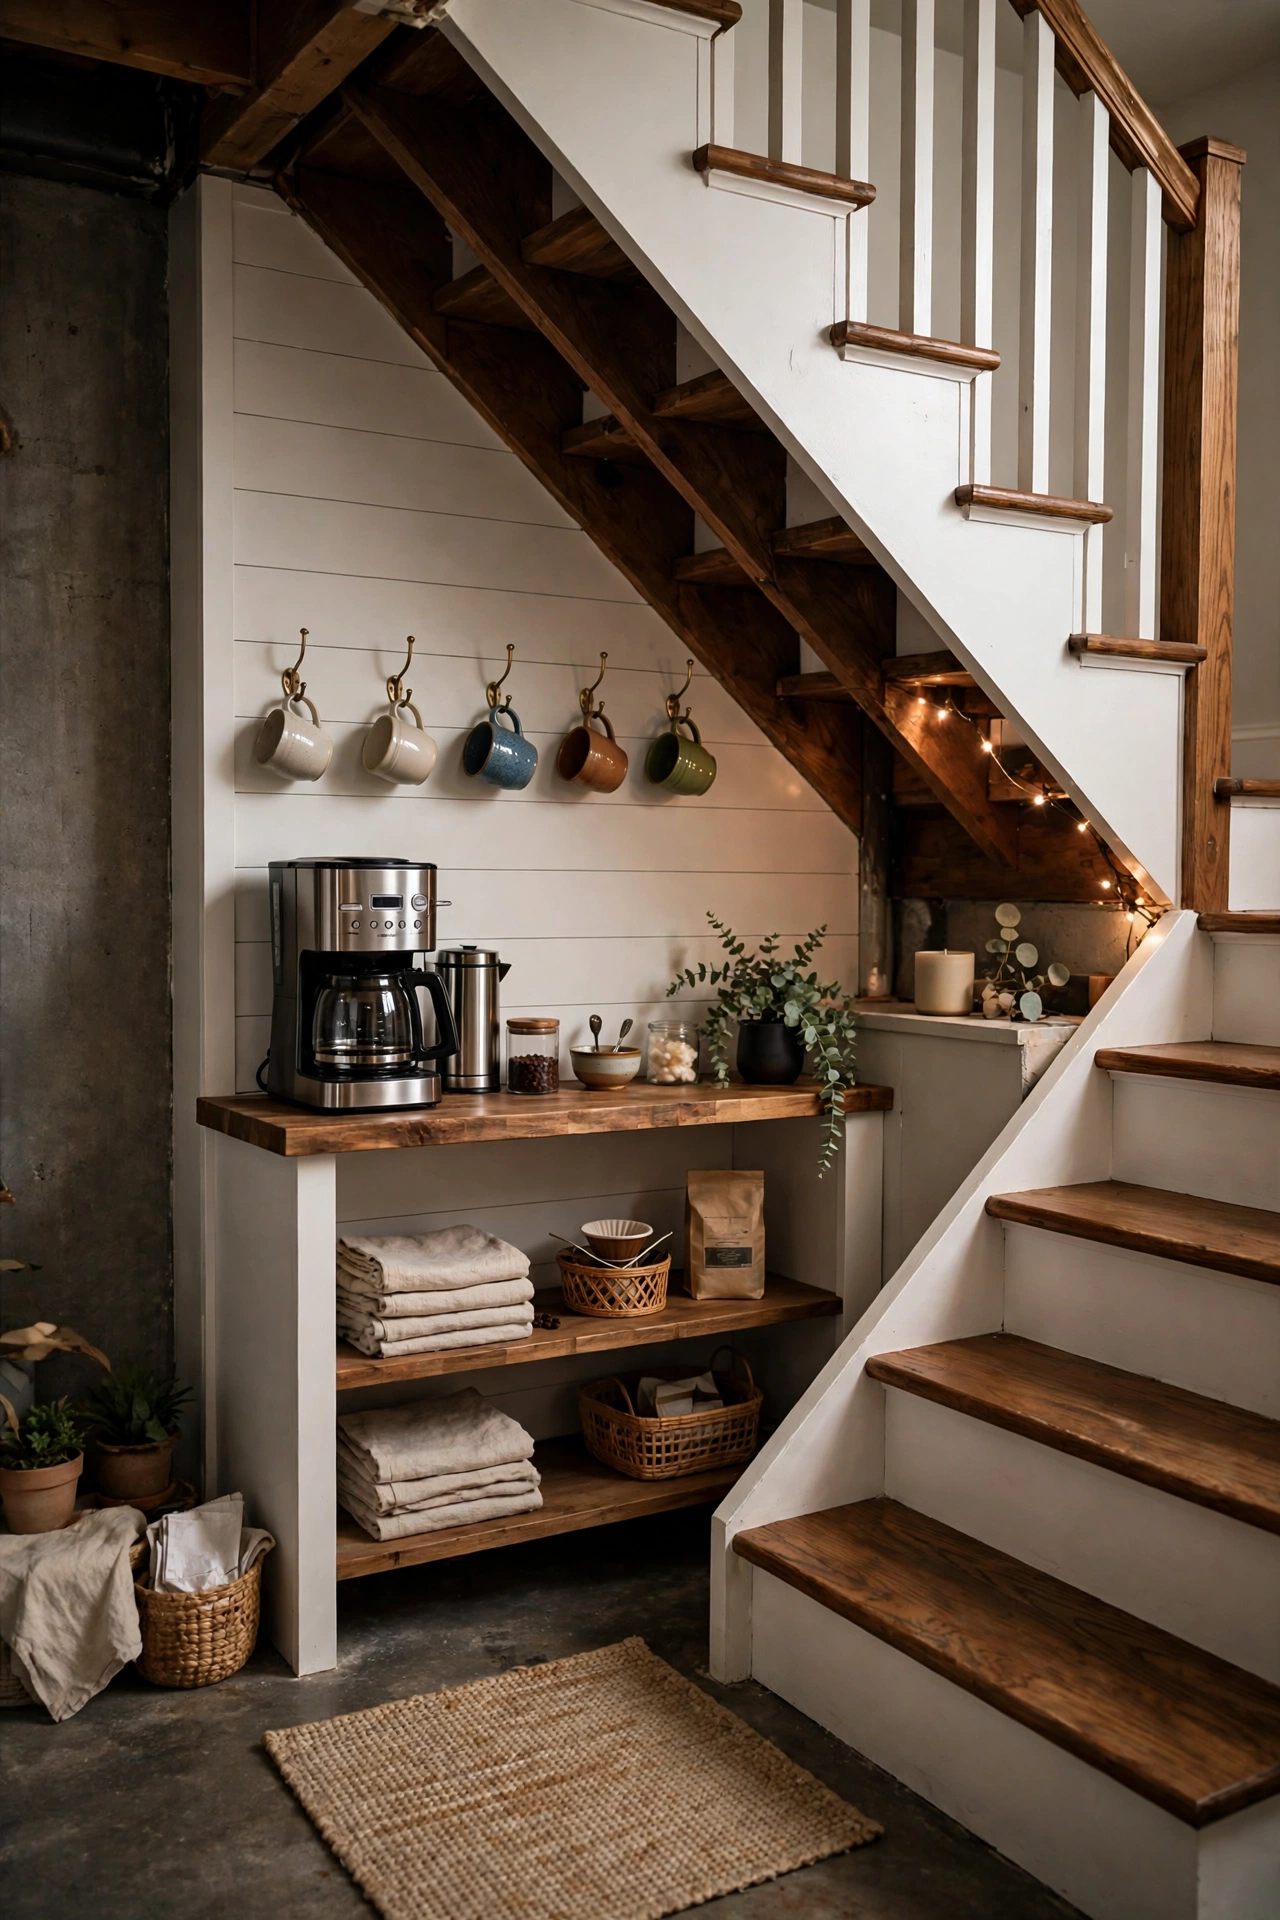
The dead space beside the basement stairs fits a coffee bar with room to spare. A narrow 18-inch-deep counter, a small sink or a refill jug, and hooks for mugs turn a pass-through into a morning stop. Add one shelf for beans and filters, and keep the machine near an outlet with GFCI protection.
Try this: put a small tray under the machine to catch drips, since basement floors show water stains fast.
Cost: $ | Difficulty: easy.
24. Banquette seating in a windowless corner
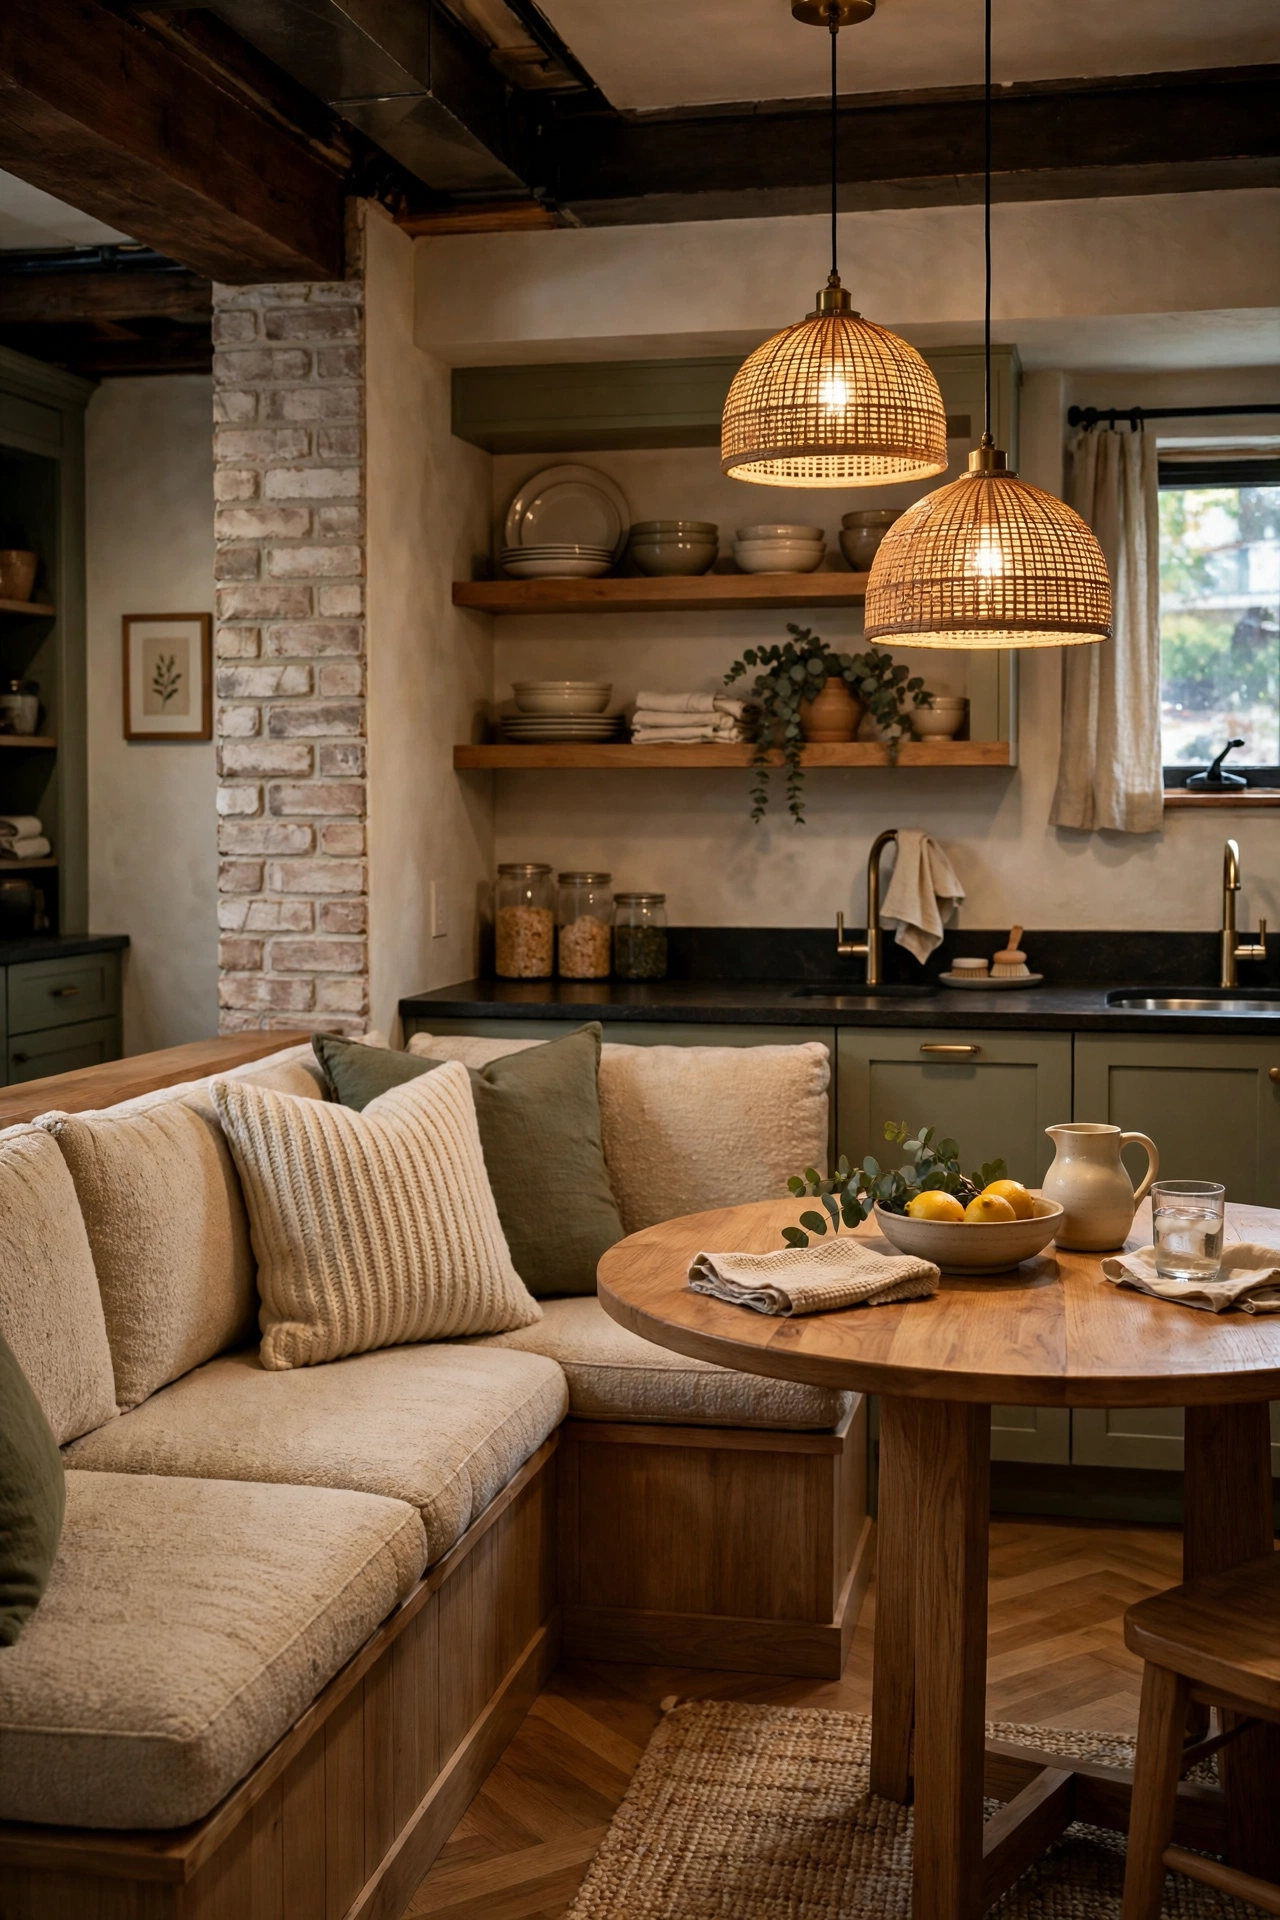
Built-in bench seating turns a dark corner into the coziest seat in the house. A plywood bench with lift-up storage, a round pedestal table, and two warm pendants overhead make a breakfast nook that seats four in a 5-foot square. Upholster the bench in a wipe-clean fabric, since basement seating collects dust faster than upstairs rooms.
Try this: leave a 2-inch gap behind the bench cushions for airflow against the wall.
Cost: $$ | Difficulty: moderate.
25. Waterproof luxury vinyl plank flooring

Waterproof vinyl plank handles the one thing basement floors always threaten: water. It clicks together over a level slab, shrugs off spills, and comes in wood tones that warm a concrete room. Leave expansion gaps at the walls and use a moisture barrier underlay if the slab shows dampness.
Try this: run the planks toward the longest sightline, and keep a few spare planks for repairs after a leak.
Cost: $$ | Difficulty: moderate.
26. Large-format porcelain tile backsplash

Big porcelain tiles mean fewer grout lines, and fewer grout lines mean less grime in a damp-prone room. A 12-by-24-inch tile in soft white brightens the wall behind the cooktop, and the porcelain surface wipes clean with a damp cloth. Set the tile in a stacked pattern for a calm look, or a running bond for subtle movement.
Try this: seal the grout once after install, even on porcelain, since basement humidity keeps grout damp longer.
Cost: $$ | Difficulty: moderate.
27. Freestanding renter-friendly kitchenette

Renters can still cook downstairs without touching plumbing or walls. A freestanding counter unit with a sink basin that drains to a jug, a portable induction burner, and a mini fridge covers daily needs, and everything moves out on moving day. Use a rolling cart for storage and adhesive hooks for utensils, so no holes go in the walls.
Try this: confirm with your landlord in writing that a portable setup is allowed, and never hardwire anything yourself.
Cost: $ | Difficulty: easy.
Compare: cost and difficulty at a glance
Cost key: $ means $1 to $10, $$ means $11 to $99, $$$ means $100 to $999, $$$$ means $1,000 and up. These are idea-level costs for the feature itself, not full remodel totals.
| Idea | Cost | Difficulty | Best for |
|---|---|---|---|
| One-wall kitchenette under the stairs | $$ | Moderate | Small basements |
| Galley layout along the longest wall | $$$ | Hard | Narrow basements |
| L-shaped layout opening to seating | $$$ | Hard | Open-plan basements |
| Peninsula as breakfast bar | $$ | Moderate | Entertaining |
| Rolling island cart | $ | Easy | Flexible space |
| Flat-panel cabinets for low ceilings | $$ | Moderate | Ceilings under 7 feet |
| Shallow glass-front uppers | $$ | Moderate | Low ceilings |
| Light quartz with mirrored backsplash | $$ | Moderate | Dark kitchens |
| Layered recessed and under-cabinet light | $$ | Moderate | Windowless rooms |
| Egress window as sink focal point | $$ | Hard | Basements with a window |
| Boxed soffit as shelf ledge | $ | Easy | Exposed ductwork |
| Painted joists with track lights | $ | Easy | Headroom gains |
| Industrial pipes with black cabinets | $$$ | Hard | Exposed pipes |
| Brick wall with wood shelves | $$ | Moderate | Original brick |
| Butcher block with farmhouse sink | $$ | Moderate | Warm rustic style |
| Two-tone cream and navy cabinets | $$$ | Hard | Low ceilings |
| Corner pull-out pantry | $$ | Moderate | Wasted corners |
| Hidden pantry door in paneling | $$ | Hard | Clean walls |
| Drawer-based base cabinets | $$ | Moderate | Dark storage |
| Apartment fridge and slim dishwasher | $$ | Moderate | Second kitchens |
| Two-burner induction cooktop | $ | Easy | Kitchenettes |
| Wine bar with built-in cooler | $$$ | Hard | Entertaining |
| Coffee bar nook by the stairs | $ | Easy | Dead space |
| Banquette seating in a corner | $$ | Moderate | Windowless corners |
| Waterproof vinyl plank flooring | $$ | Moderate | Damp slabs |
| Large-format porcelain tile backsplash | $$ | Moderate | Damp-prone walls |
| Freestanding renter kitchenette | $ | Easy | Renters |
Related reading
For general kitchen layouts that pair well with these basement plans, see our guide to inspiring kitchen design ideas: Inspiring Kitchen Design Ideas.
For storage that keeps a small basement kitchen stocked without clutter, our pantry shelving guide covers pull-outs and zones in detail: Smart Walk In Pantry Shelving Ideas.
For the organization systems that make a compact kitchen work day to day, the pantry organization guide is a useful companion: Genius Pantry Organization Ideas.
For the bigger remodel picture, including finished basement family rooms and guest suites that often sit beside a basement kitchen, see our room-by-room remodeling guide: Remodeling Projects That Will Transform Your Home.
For a small separate guest space with its own kitchenette, our mini cabin guide shows how a compact cooking corner serves overnight guests: Stunning Guest House Mini Cabin Ideas.
Frequently asked questions
Can you legally put a kitchen in a basement?
Usually yes, but local building codes and zoning rules vary, and rental units often carry extra requirements for egress, ventilation, and smoke alarms. Check with your local permit office before buying cabinets or appliances, since a space that fails code as a dwelling unit may only allow a wet bar or kitchenette.
What flooring works best in a basement kitchen?
Waterproof luxury vinyl plank and ceramic or porcelain tile perform best below grade, since both handle spills and damp slabs without warping. Skip solid hardwood and standard laminate downstairs, since both swell when moisture reaches them.
How do you keep a basement kitchen dry?
Fix water outside first: extend downspouts away from the foundation, improve grading, and repair foundation cracks. Inside, use a dehumidifier, vent the range hood outdoors, and choose moisture-resistant materials like quartz counters, vinyl plank, and mold-resistant drywall.
What if the basement has no windows?
Layer the light: recessed cans for general brightness, LED strips under the cabinets for work surfaces, and one warm pendant over seating for evening mood. Light counters, a mirrored backsplash section, and glass-front uppers all help a windowless room feel brighter.
Do basement kitchens need special plumbing?
Often yes. Basement drains frequently sit above the sewer line, so a sink or dishwasher far from the main stack may need an upflush pump system. Have a licensed plumber size the pump and check the venting before you finalize the layout.
Final thoughts
Start with the checks that cost nothing: the rain walk, the code call, and the plumbing map. Once those answers are in hand, pick the layout that fits your ceiling and your budget, and let light and moisture-proof materials do the rest. A basement kitchen built that way cooks, gathers, and lasts like any kitchen upstairs.

For exposed ceiling treatments, see our guide to 11 Ways to Make an Exposed Basement Ceiling Look Intentional for an all-black spray coat, a two-tone joist paint job, wood slats, corrugated metal, and a mixed exposed-and-finished layout.
For budget ceiling options, see our guide to 16 Budget Friendly Basement Ceiling Ideas That Cost Less Than You Think for a sprayed flat color, whitewash, foam tiles glued to joists, secondhand grids, and renter-friendly fabric, ranked by cost per square foot.
For concrete floor finishes, see our guide to 15 Painted and Stained Concrete Basement Floor Ideas for a Floor That Finally Looks Finished for a warm brown acid stain, a two-tone stain zone, epoxy flakes, a metallic swirl, and a stenciled tile pattern.


