Our basement floor stayed bare gray for two winters while we argued about carpet. The slab collected dust, showed every footprint, and made the whole room feel unfinished even after we painted the walls. A painted or stained concrete floor fixed that problem for the price of a few cans and one long weekend, and it held up to boots, dog paws, and a laundry cart without complaint.
This guide covers 15 painted and stained concrete basement floor ideas, from a warm brown acid stain to epoxy flakes and a stenciled tile pattern. You will also find a plain comparison of paint, stain, dye, and epoxy, a moisture test to run before you open a can, and a cost and difficulty label on every idea so you can pick one that fits your floor, your budget, and your weekend.
- Test moisture first: tape a plastic sheet to the floor for 24 hours and check for condensation before any coating goes on.
- Stain soaks into the concrete and shows its character; paint sits on top and hides flaws.
- Epoxy is the toughest choice for workshops, laundry zones, and rooms that take hard use.
- Sealer is not optional: it locks in color, blocks stains, and sets the final sheen.
- Anti-slip additive in the topcoat keeps a sealed floor safe when wet.
Paint, stain, dye, or epoxy: pick your finish first
Paint forms a film on top of the slab. It hides stains, patches, and old paint lines, and it comes in any color. It also shows wear first at doorways and chair legs, and it needs a full recoat when it peels. Stain soaks into the concrete and reacts with it, so the color becomes part of the slab instead of a layer on top. Acid stain gives variegated, stone-like tones that shift across the floor. Water-based stain gives a more even, predictable color and suits a first project.
Dye works like a strong tint that dries fast and gives vivid, even color, but it fades without a sealer on top, so dye always pairs with a clear topcoat. Epoxy is a two-part resin and hardener that cures into a hard, chemical-resistant shell. It costs more and needs careful mixing and ventilation, but it survives hot tires, dropped tools, and laundry chemicals better than paint or stain alone. Pick paint for a fast color change, stain for natural character, dye for bold even color, and epoxy for the hardest-working rooms.
Before you open a can: the moisture test and prep
Start with the plastic sheet test. Tape an 18-inch square of clear plastic tightly to the slab, seal all four edges, and leave it for 24 hours. Condensation under the plastic or a darkened patch means moisture is moving through the slab, and a standard paint or stain will bubble and peel. In that case, fix the water source first, or use a moisture-mitigating primer made for damp slabs, and give the floor extra drying time.
Next, clean the slab until it is dull and dust-free. Sweep, vacuum, and degrease oil spots, then patch cracks with concrete filler and let it cure fully. Test porosity with a water drop: water should soak in within a minute. If it beads, the slab still holds old sealer or a dense finish, and it needs etching or grinding to open the pores. Grinding gives the most even profile, especially on old sealed concrete. Rushing prep is the most common reason a basement floor coating fails.
1. Warm brown acid stain, marbled

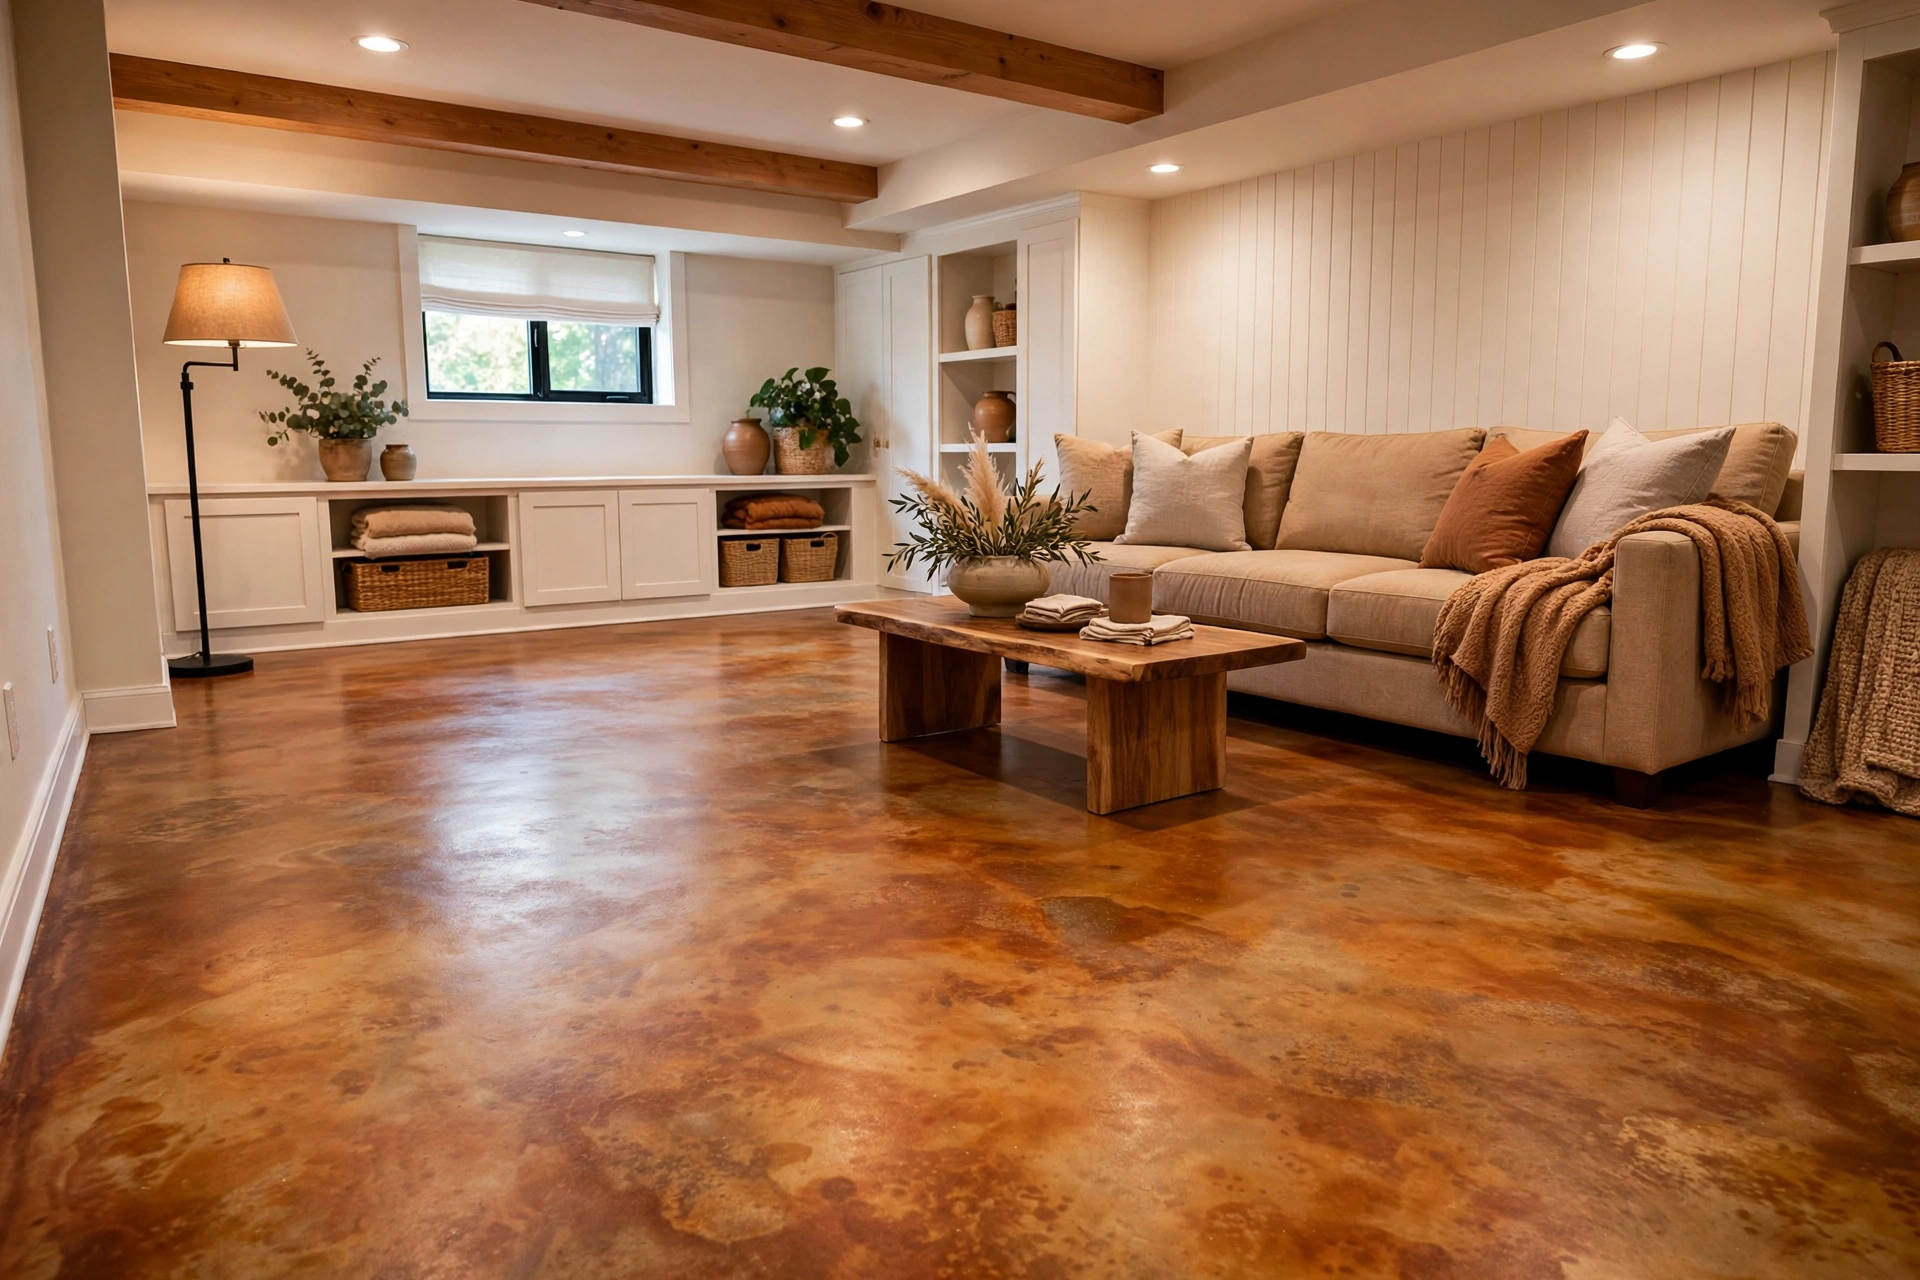
Acid stain reacts with the minerals in the slab, so no two floors come out alike. A warm brown stain settles into marbled bands of tan, umber, and soft gold, and the natural variation reads like stone rather than paint. Work in 4-foot sections with a pump sprayer, keep a wet edge, and let the stain react fully before neutralizing and rinsing. Two thin coats beat one heavy coat, since heavy stain pools in low spots and dries blotchy. Finish with a satin sealer to lock the color and add a soft glow that suits a lounge or guest room.
Try this: stain a test patch in a closet corner first, since the final tone depends on your slab age and porosity.
Cost: $$ | Difficulty: Moderate
2. Two-tone stain zones
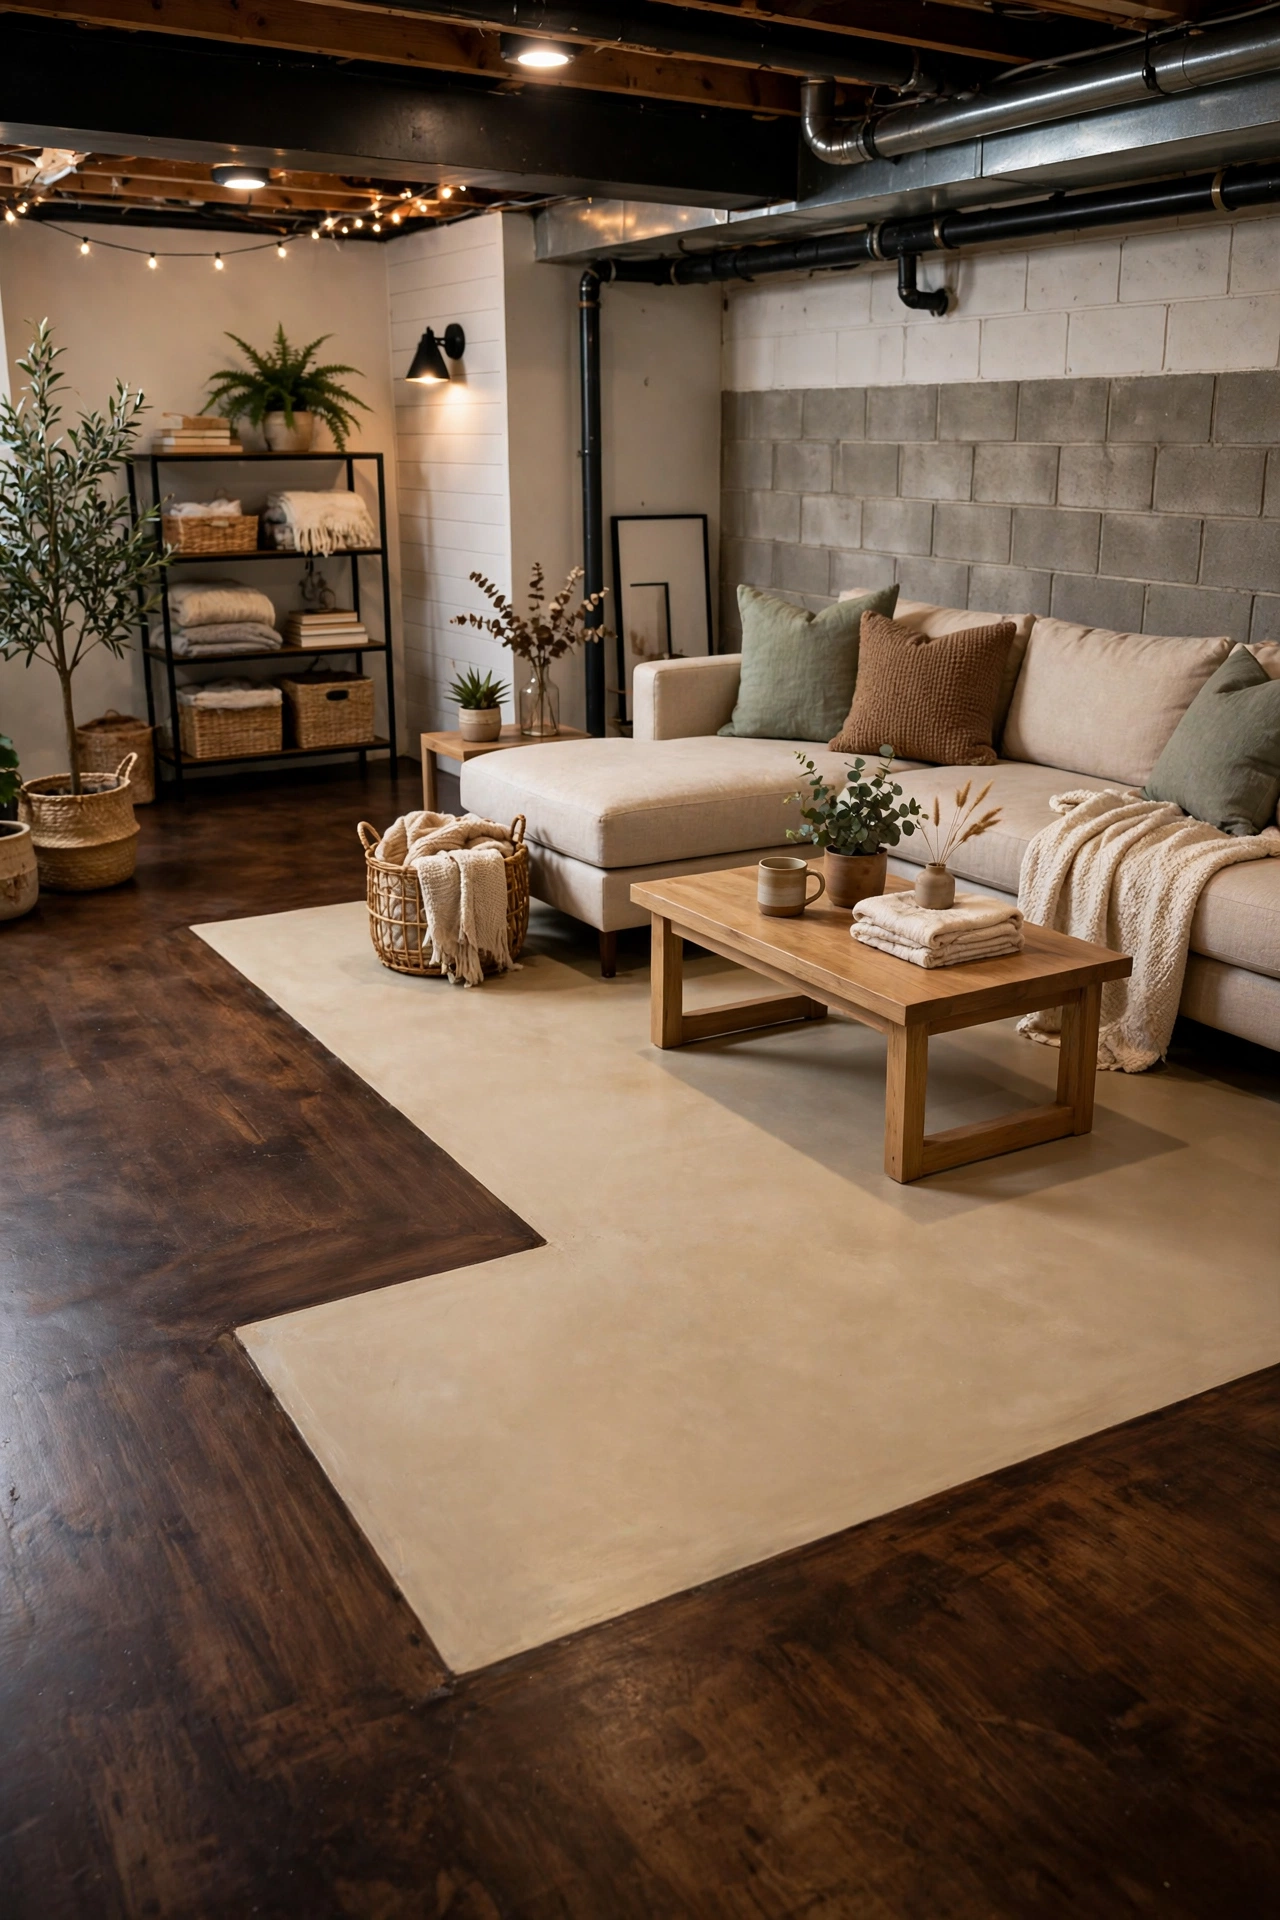
Two stain colors can mark zones without a single wall. Stain the main field a pale tan and the seating area a darker walnut, or run a dark border around the whole room with a lighter center. The contrast defines a lounge, a bar corner, or a play area, and it hides the line where an old slab was poured in two batches. Apply the lighter color first, let it dry fully, then tape the boundary and apply the darker color. Keep the boundary along a natural line, such as a beam above or a furniture edge, so the change reads as a plan.
Try this: mark the zone with tape on the floor and live with the outline for a day before staining.
Cost: $$ | Difficulty: Moderate
3. Soft gray water-based stain
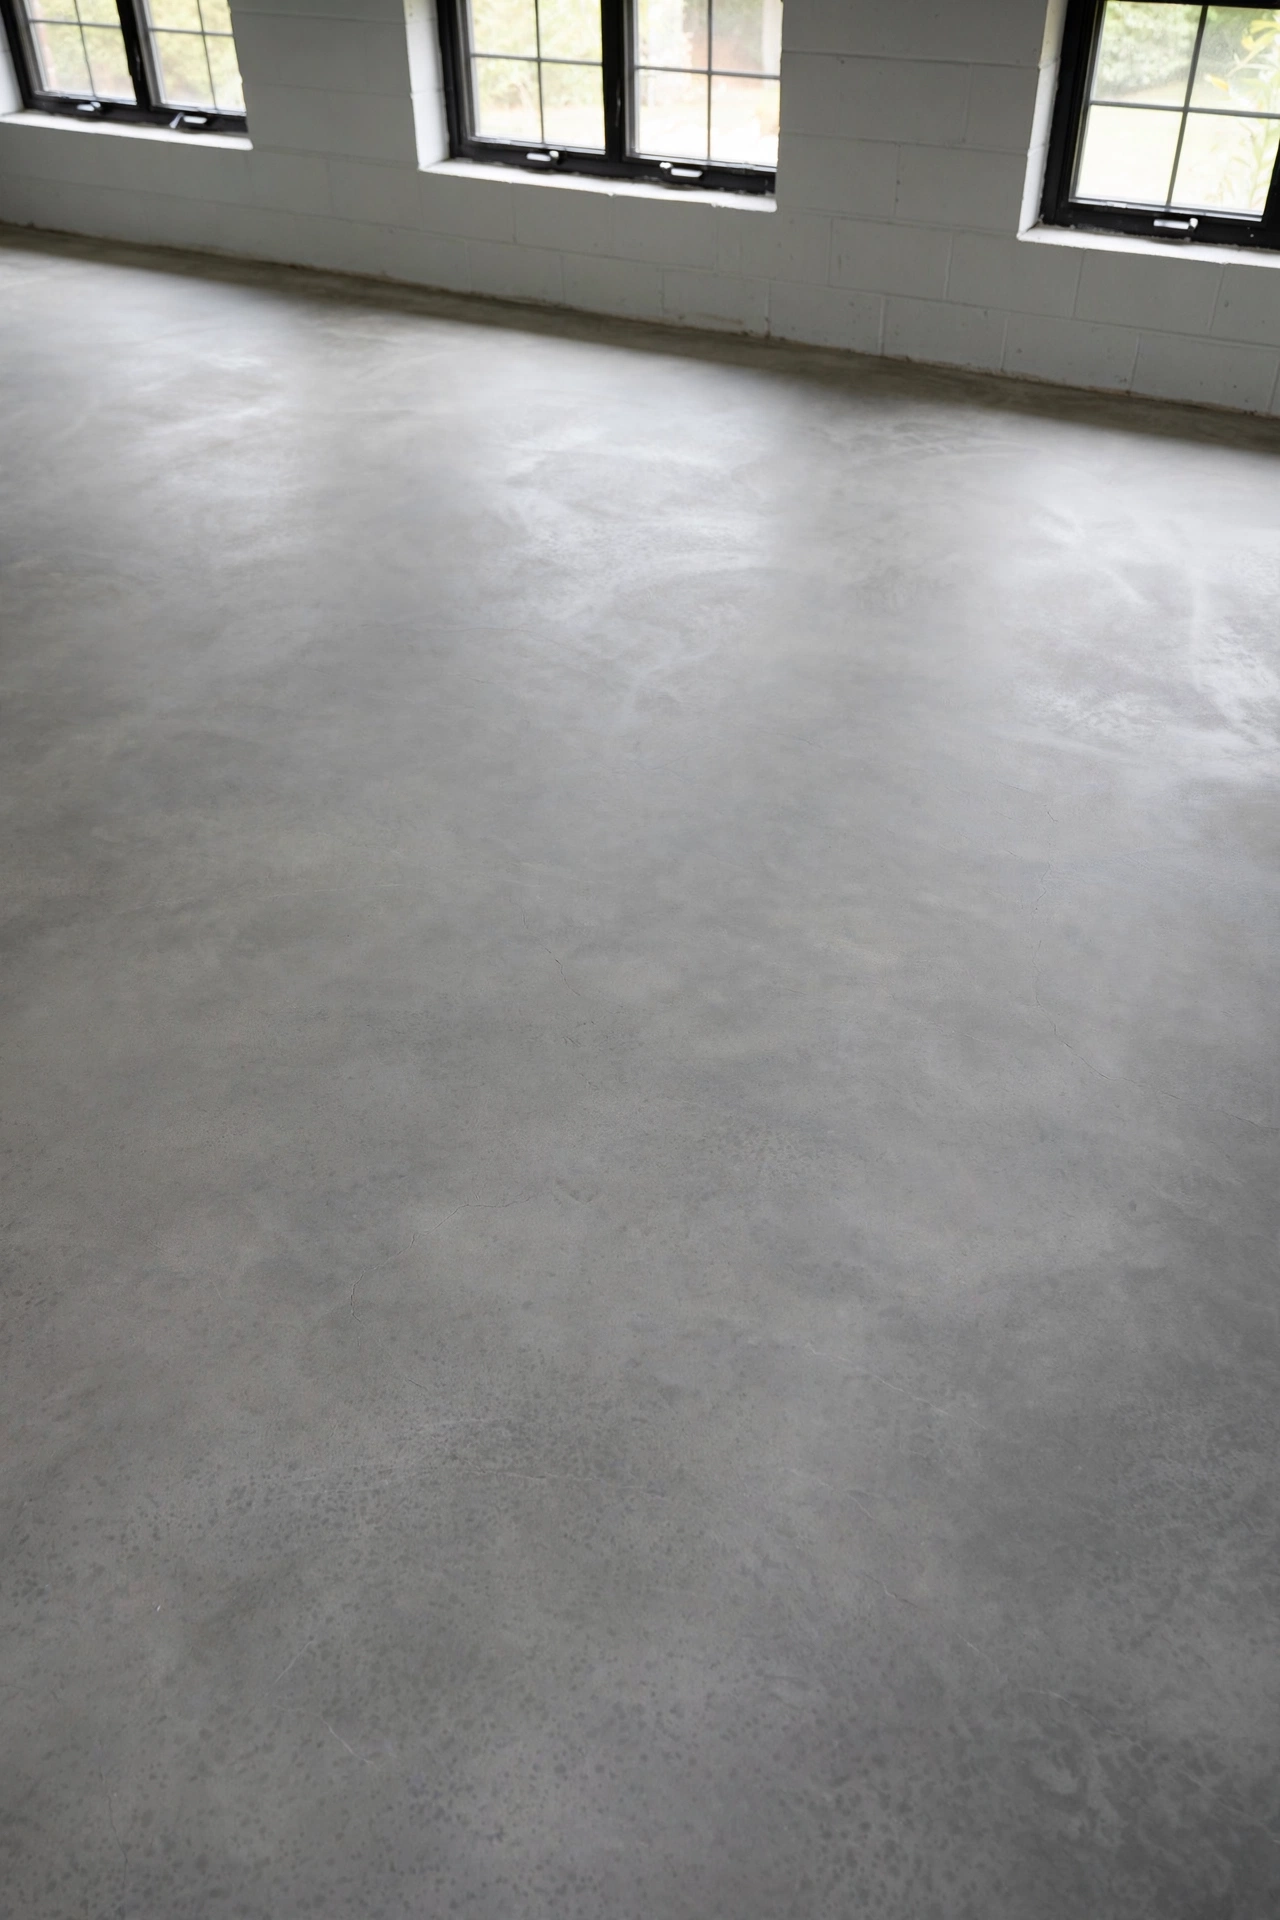
Water-based stain suits a first staining project because the color lands evenly and predictably. A soft gray cools a warm-toned basement, pairs with white walls and wood furniture, and brightens a room with small windows without the glare of white paint. Roll it on in thin coats with a microfiber applicator, and keep each coat light so lap marks stay invisible. Gray also hides dust better than white and shows fewer scuffs than black. Seal with a matte topcoat if you want a quiet floor, or a satin topcoat for a gentle sheen.
Try this: roll one coat, let it dry, then decide if you need a second coat before sealing.
Cost: $ | Difficulty: Easy
4. Charcoal and white concrete dye, marbled
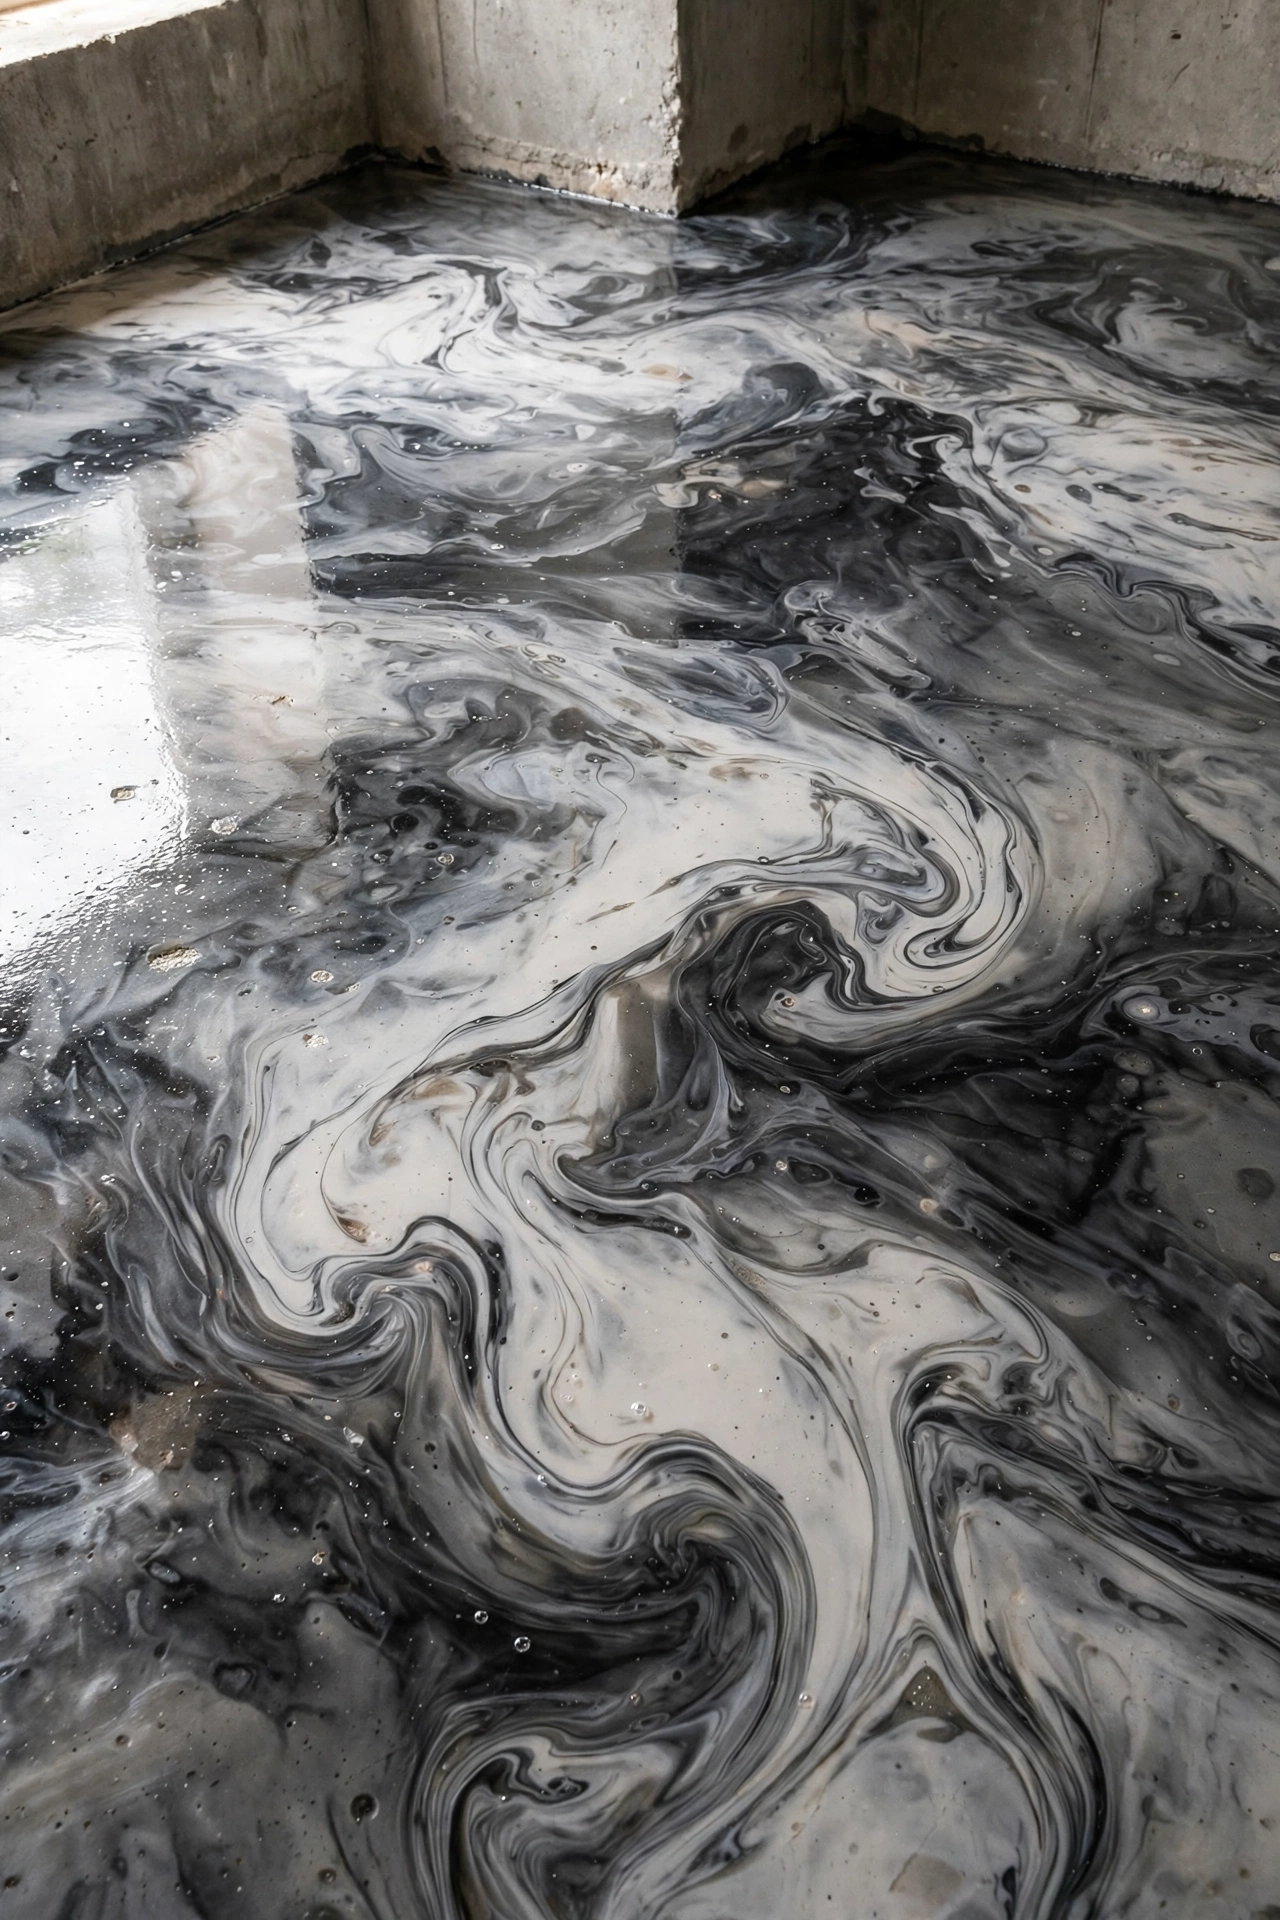
Concrete dye dries fast and gives strong, even color that acid stain cannot match. A charcoal dye swirled with white opens into a marbled floor that looks close to slate, and the fast dry time means you can seal the same day. Spray or roll the charcoal first, then mist white dye over it while the base is still tacky, and drag a rag lightly through the wet color to pull the marble veins. Dye alone fades under sun and wear, so a clear sealer is mandatory, not optional. Two coats of sealer protect the dye and set the sheen.
Try this: practice the swirl on a scrap board first, since dye sets fast and leaves little room to fix mistakes.
Cost: $$ | Difficulty: Moderate
5. Light gray epoxy paint
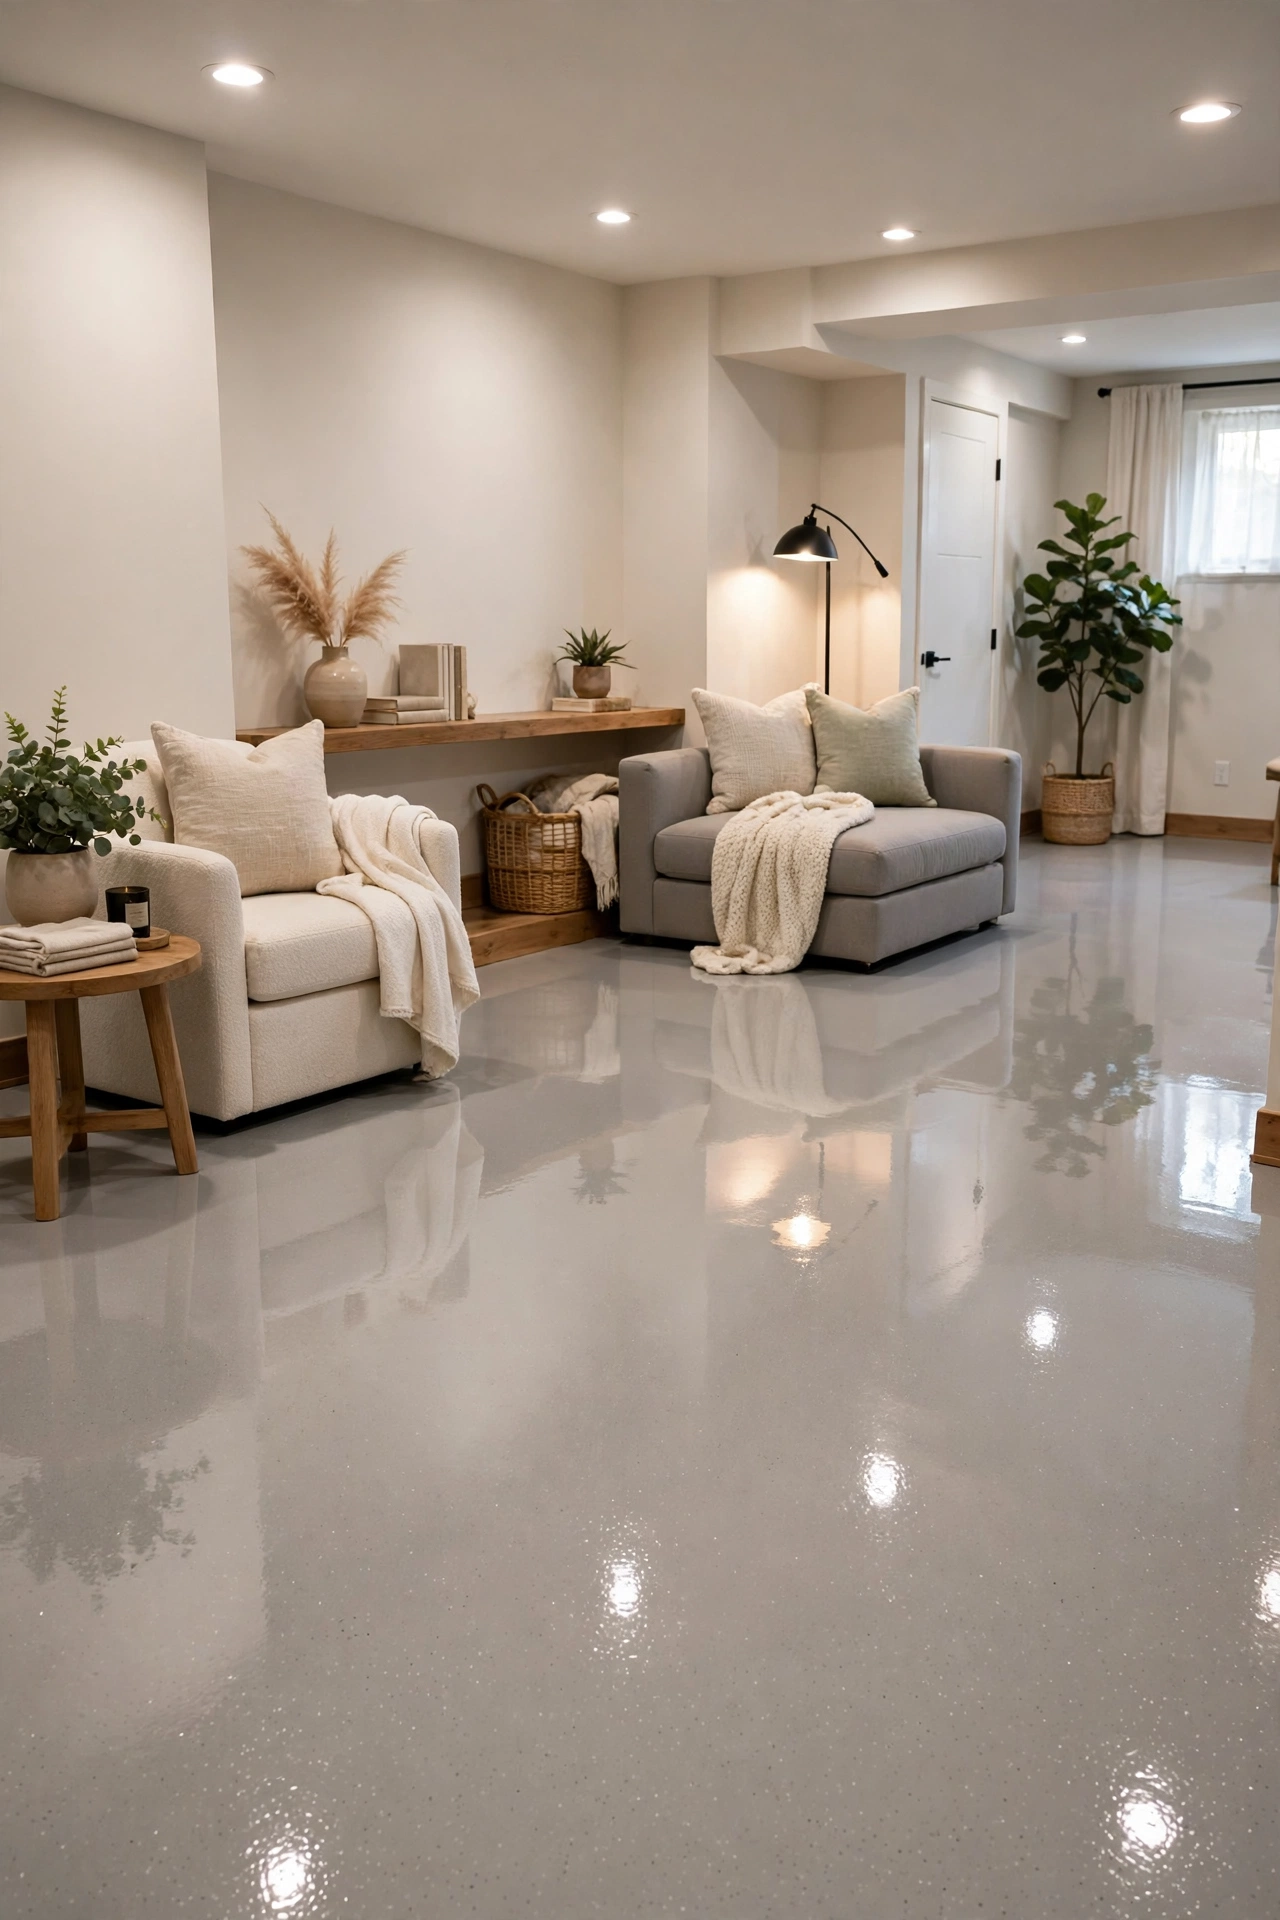
A single light gray epoxy coat is the fastest way to make a dark basement feel taller. The pale tone bounces light from small windows and ceiling fixtures back into the room, and the hard epoxy shell resists laundry chemicals, pet accidents, and dragged furniture. Mix the two parts exactly as the maker directs, cut in the edges with a brush, and roll in 4-foot sections with a short-nap roller. Two coats give full color and full film thickness. Expect light foot traffic in 24 to 72 hours and full cure in up to 30 days, so plan furniture moves around that window.
Try this: paint a test square near the stairs first to check the gray under your actual basement lighting.
Cost: $$ | Difficulty: Moderate
6. Epoxy with decorative flakes

Decorative flakes broadcast into wet epoxy give a speckled floor that hides dust, patch lines, and old stains better than any solid color. A light dusting keeps the base color visible, while a full broadcast reads like granite or terrazzo. Flakes also add grip underfoot, which matters near a laundry sink or an exterior door where wet shoes track in. Work in small sections, toss the flakes upward so they fall evenly, and let the base coat cure before scraping loose flakes and sealing. The clear topcoat locks the flakes down and sets the final gloss.
Try this: buy one extra bag of flakes, since a thin patch shows the base color through.
Cost: $$ | Difficulty: Moderate
7. Metallic epoxy swirl
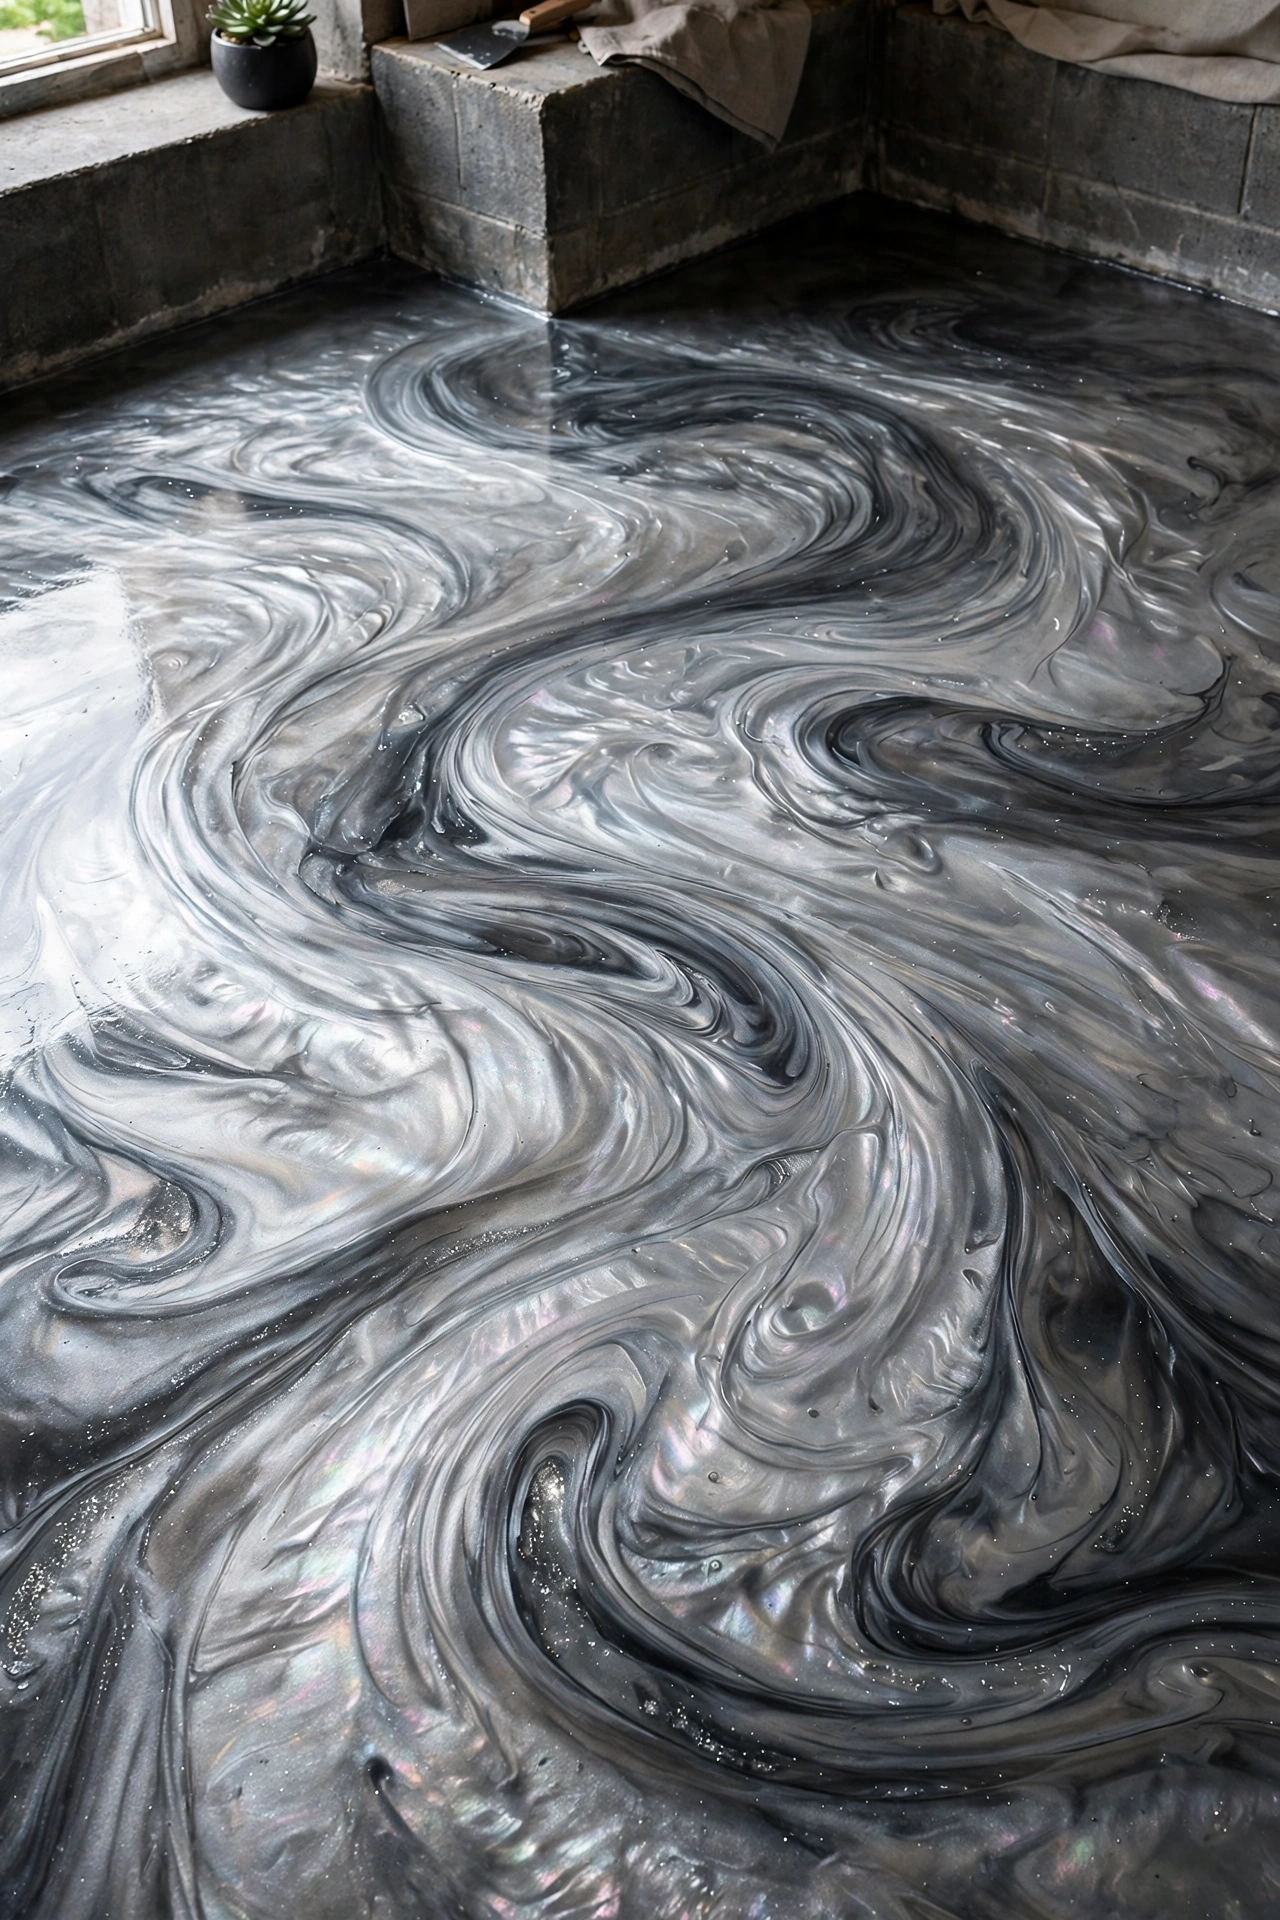
Metallic pigment stirred into clear epoxy creates a swirling, pearlescent floor that shifts as you walk across it. Silver over charcoal reads like polished stone, while champagne over warm gray suits a lounge or bar corner. Pour the pigmented epoxy in ribbons, drag a squeegee lightly through the wet coat to pull the swirls, and stop early, since overworking muddies the movement. This finish needs a dust-free room, steady temperature, and a full cure before furniture returns. The result is the most dramatic floor in this guide, and the least forgiving to fix.
Try this: pour a sample board first and check the swirl under night lighting before committing to the room.
Cost: $$$ | Difficulty: Hard
8. Stenciled tile pattern over paint
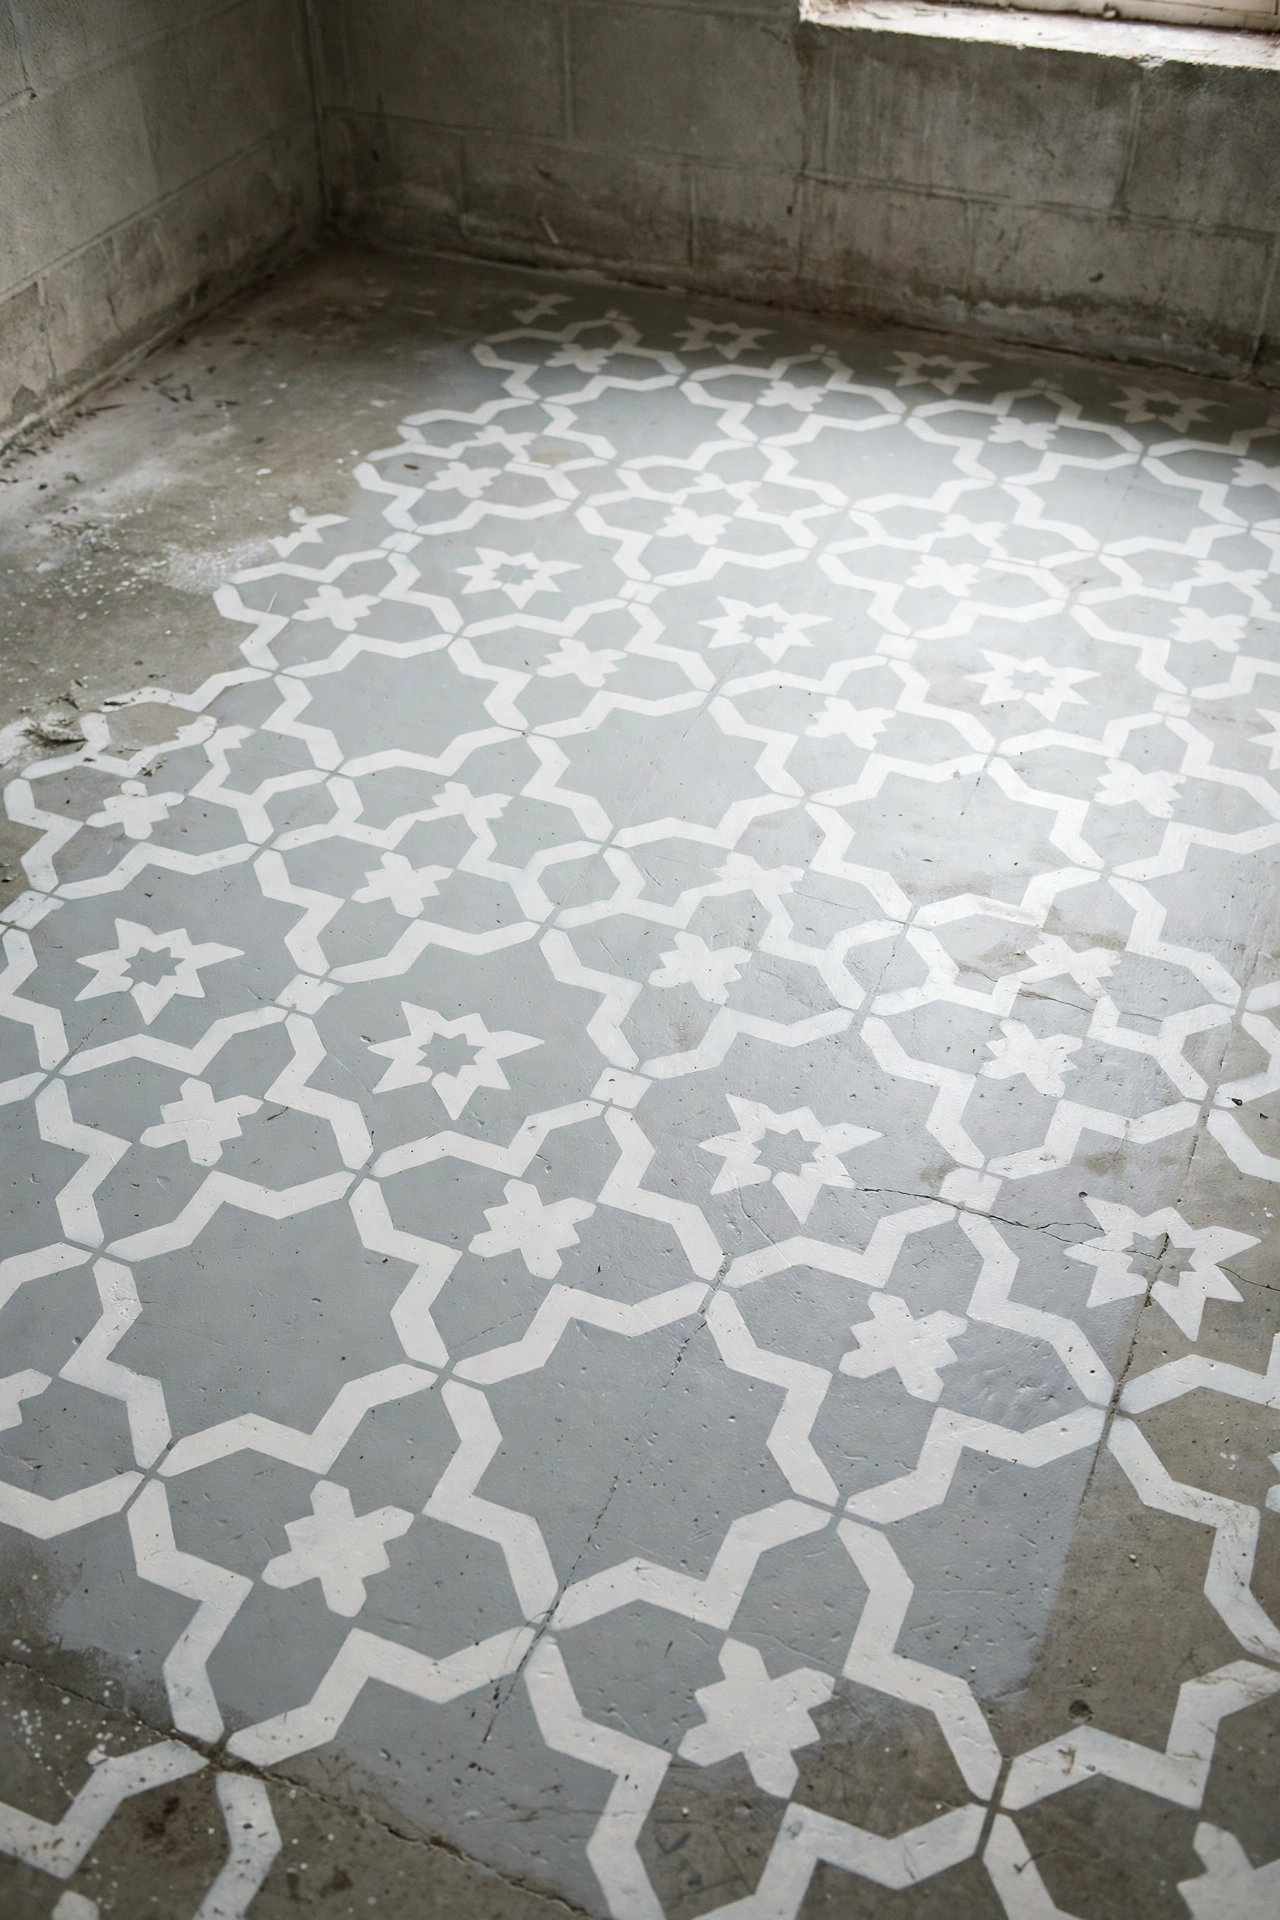
A large tile stencil turns a painted slab into a faux tile floor for the price of a quart of paint. Roll a solid base color, let it dry fully, then tape the stencil level and roll a contrasting color through it in thin passes. Two thin passes beat one heavy pass, since heavy paint bleeds under the stencil edge and blurs the lines. Re-tape the stencil at each repeat so the grid stays straight across the room. A clear matte sealer protects the pattern from chair legs and foot traffic. This idea suits a guest room or office where a real tile job would cost ten times more.
Try this: stencil one corner first and check the pattern from the doorway, where guests will actually see it.
Cost: $ | Difficulty: Moderate
9. Checkerboard painted squares

A checkerboard floor gives a basement game room or laundry room instant character with nothing but tape and two paint colors. Lay out a grid with a chalk line, tape every other square, and roll the first color. Once it dries, tape the remaining squares and roll the second color. A classic black and white grid suits a game corner, while soft gray and cream reads quieter in a family room. Keep squares large, at least 12 inches, since small squares turn busy in a big room. Seal the whole floor once both colors cure so the tape lines stay crisp.
Try this: snap the chalk grid from the room center outward so the border squares stay even on both sides.
Cost: $ | Difficulty: Moderate
10. Painted faux rug border

A painted border on the slab defines a seating area without buying a rug that traps basement damp. Paint the whole floor one quiet color, then tape a large rectangle where the chairs and sofa will sit, and paint the inside a second tone or a simple border stripe. The rectangle anchors the furniture grouping and makes the room read as arranged rather than leftover. A rug border also stays put, never bunches, and mops clean after muddy shoes. Keep the border at least 6 inches wider than the furniture on every side so chair legs stay inside the line.
Try this: tape the rectangle first and sit in the chairs before painting, since moving it later costs a full recoat.
Cost: $ | Difficulty: Easy
11. Geometric tape pattern in two stain colors
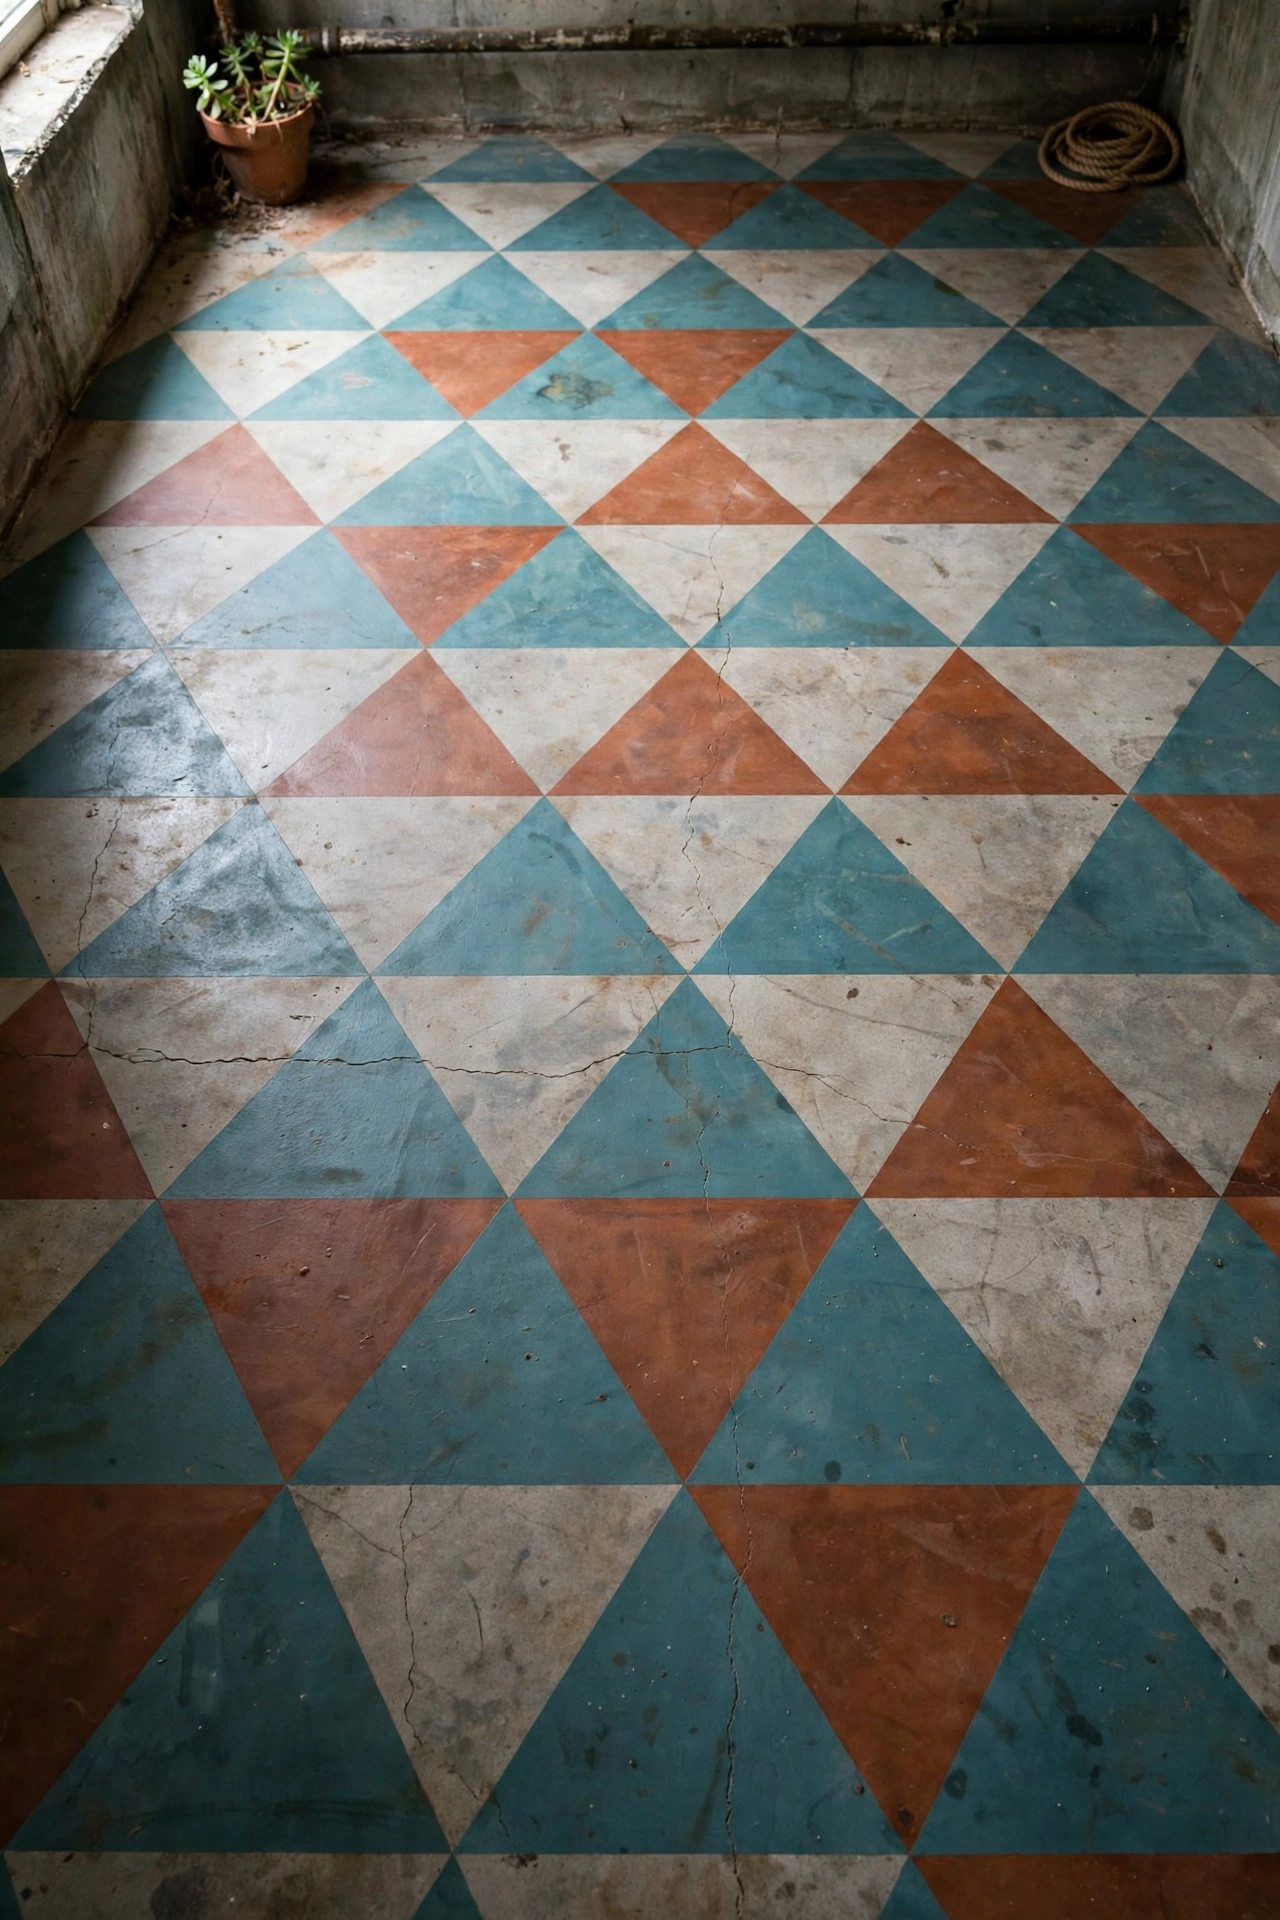
Tape shapes give a stained floor a modern pattern without a stencil. Lay painter’s tape in triangles, diamonds, or oversized chevrons across a section of the floor, stain the exposed concrete one color, let it dry, then re-tape and stain the remaining shapes a second color. The tape edge keeps each shape crisp, and the stain still shows the concrete grain inside every shape. This pattern works best as one feature zone, such as a bar wall or an entry strip, rather than the whole floor, where it can turn loud. Seal twice so the tape lines stay sharp under traffic.
Try this: sketch the pattern on paper first and count the tape rolls, since a big grid eats tape fast.
Cost: $$ | Difficulty: Moderate
12. Polished and stained combo
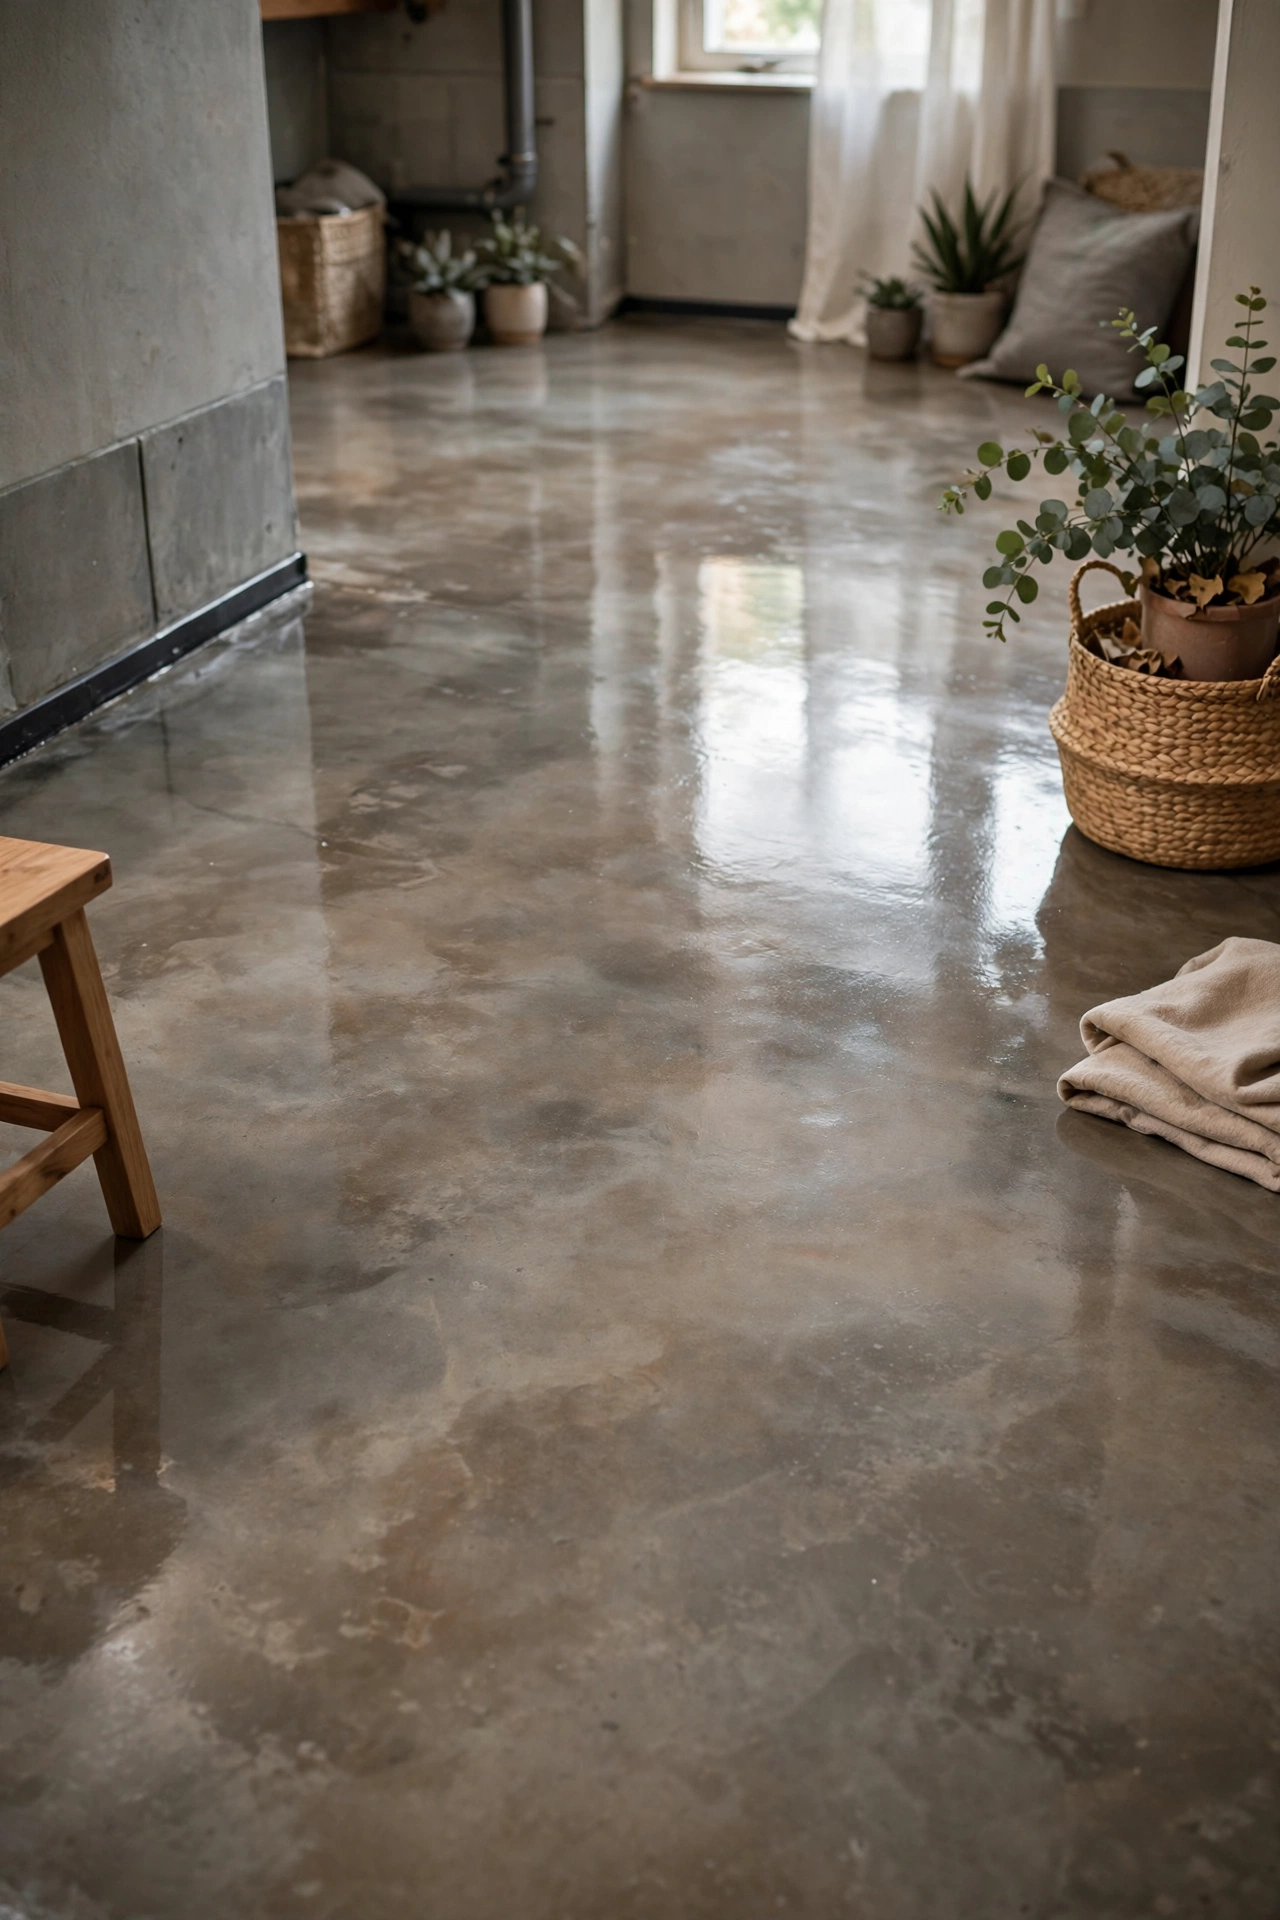
Grinding the slab smooth, then staining it, gives the most refined concrete floor in this guide. A rented grinder with progressively finer pads takes the slab from rough gray to a smooth, satin surface, and the stain then settles into an even, deep tone that paint cannot copy. The polished surface wipes clean, resists dust, and reflects light well in a low basement. Renting the grinder and buying the pads costs more than paint, and the work is dusty and slow, so seal the room off from the rest of the house. Finish with a penetrating sealer, then a thin topical coat for sheen.
Try this: grind a test patch near a wall first to check how your slab responds before renting for the whole room.
Cost: $$$ | Difficulty: Hard
13. Pale wash stain
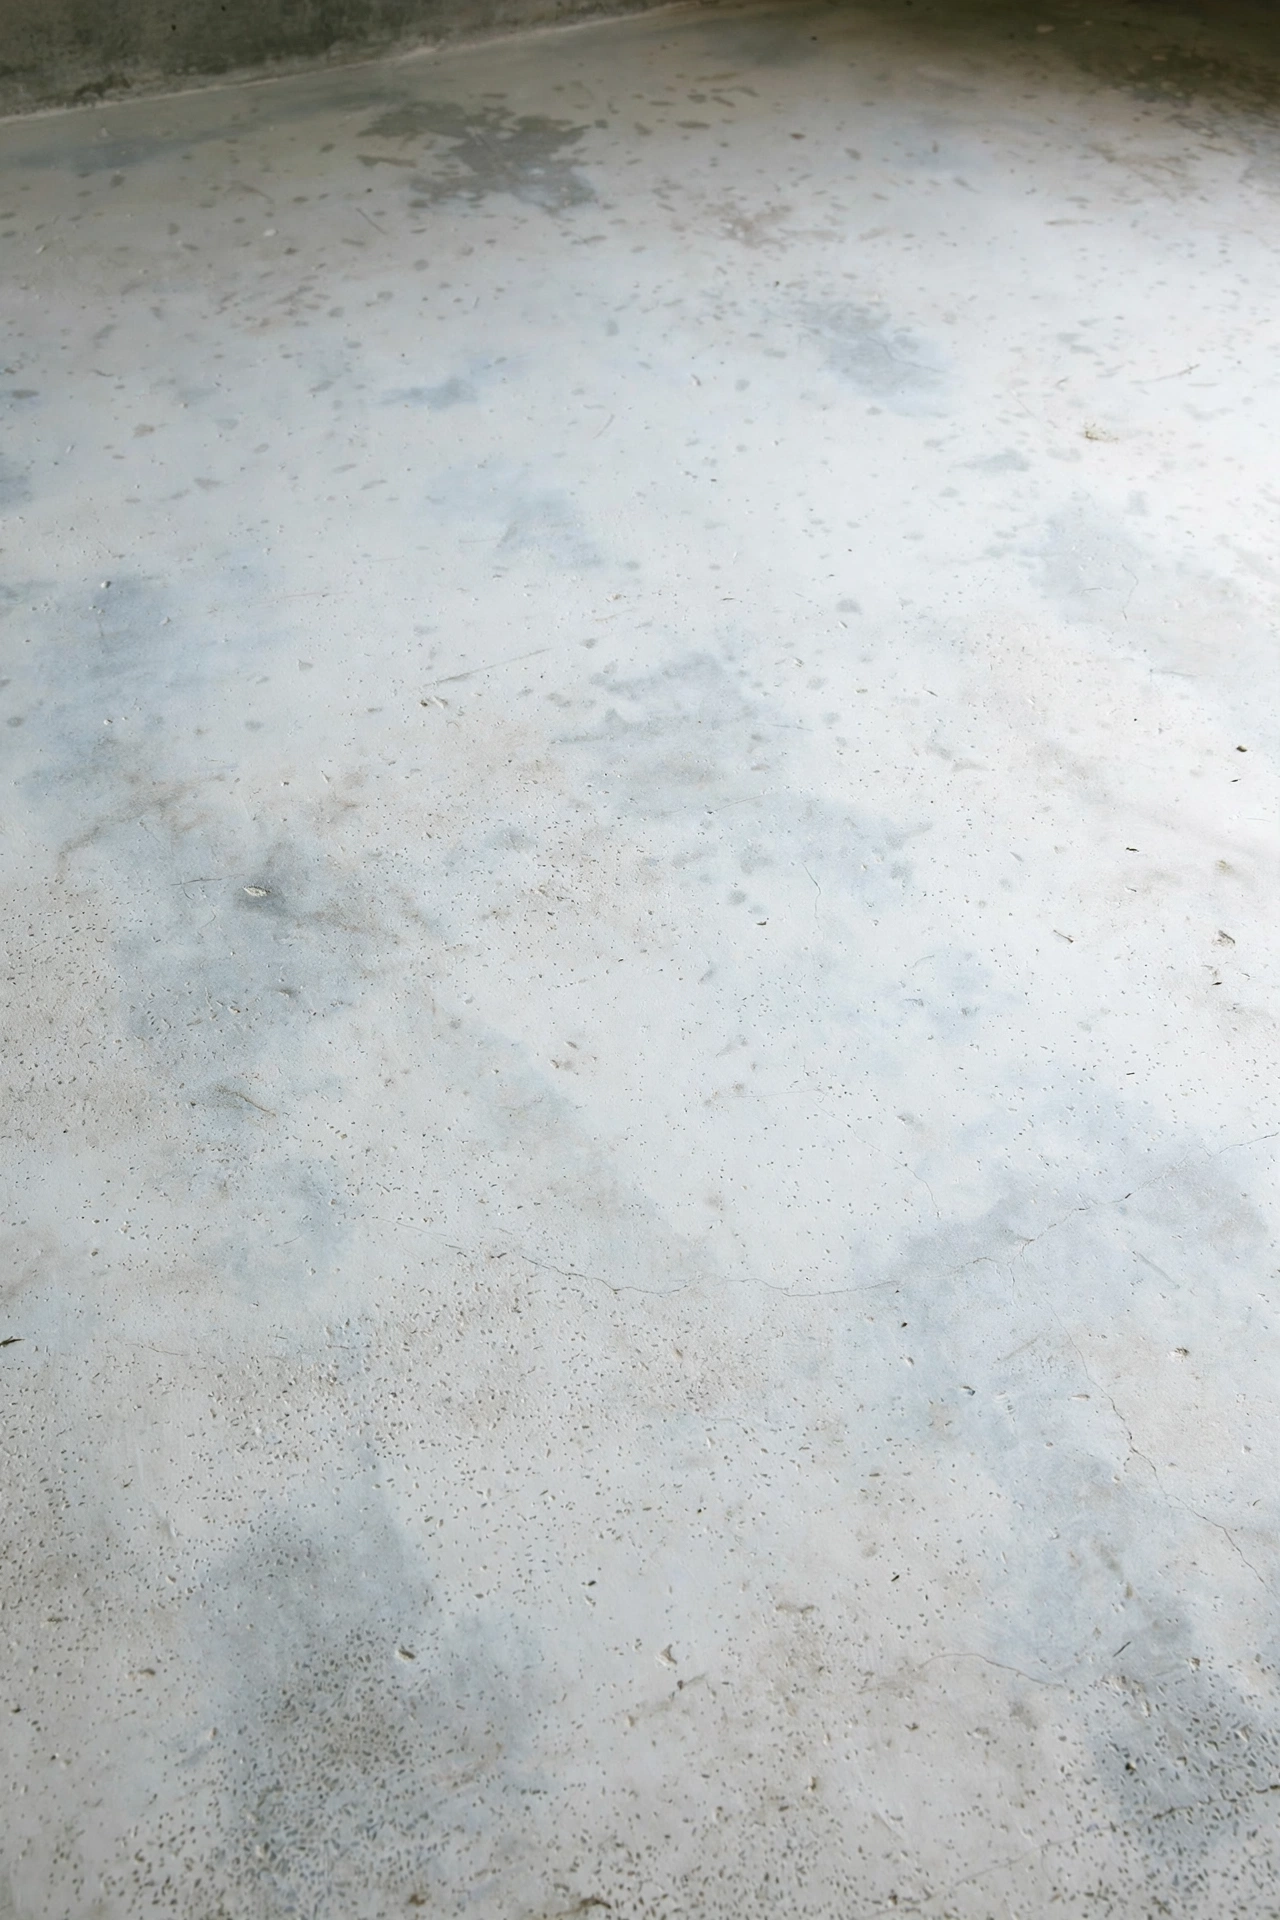
A pale wash stain tints the slab just enough to kill the raw gray without hiding the concrete itself. Thin the stain well past the label ratio, roll one light coat, and let the natural mottling, trowel marks, and small flaws show through as texture. The result suits a calm, minimal basement where the floor should sit quiet under wood furniture and linen curtains. One coat also means one round of masking and cleanup, and the cost stays low. Seal with a matte topcoat to keep the pale tone from scuffing gray under chair legs.
Try this: test the thinned mix on one slab edge first, since thin stain dries lighter than it looks wet.
Cost: $ | Difficulty: Easy
14. Full-broadcast terrazzo flakes
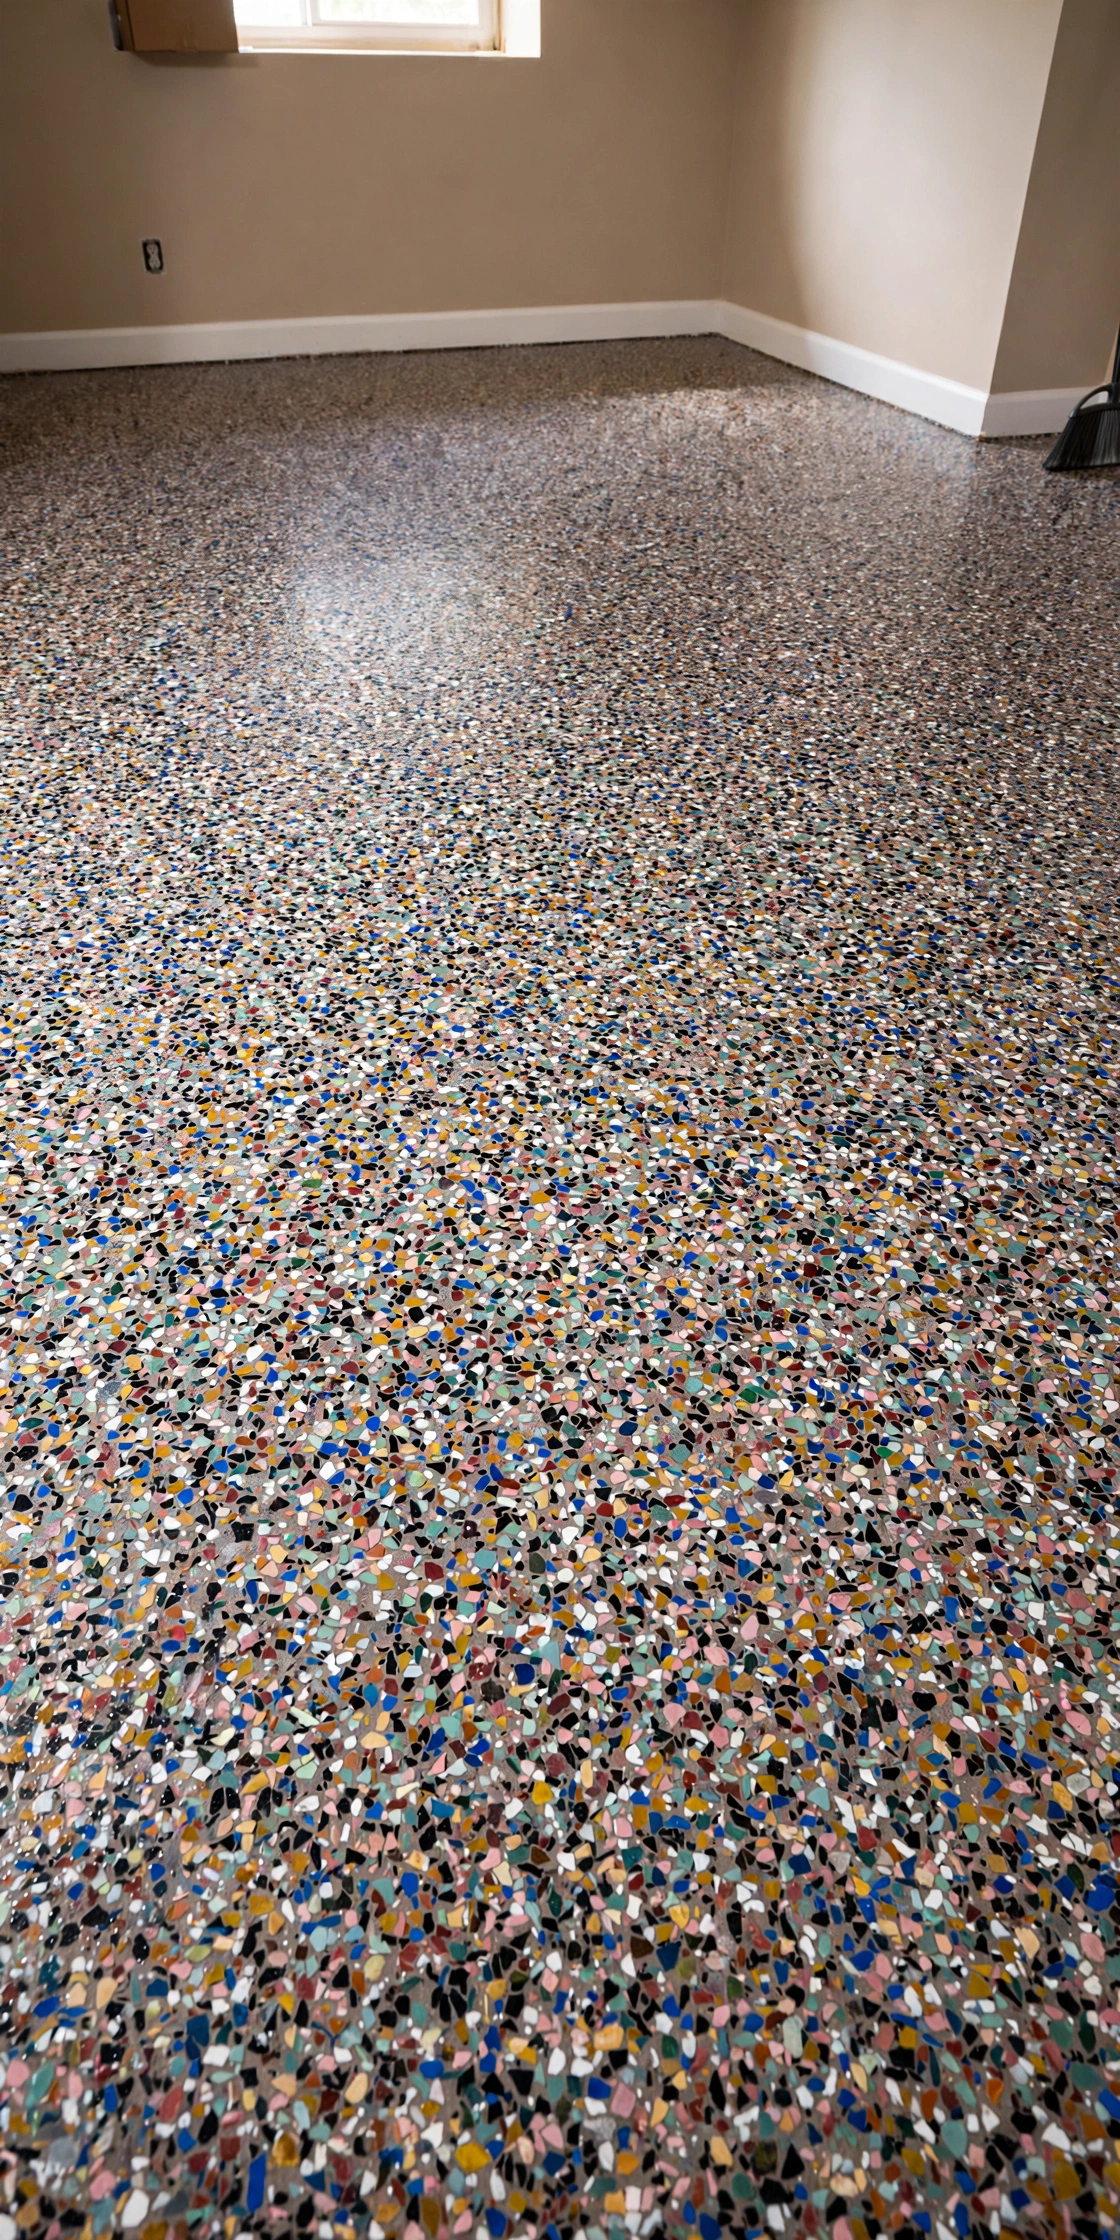
A full broadcast of flakes into epoxy reads like terrazzo at a fraction of the price. Cover the wet base coat completely with flakes in three or four tones, let it cure, scrape off the loose chips, and seal with two clear coats. The dense speckle hides every patch, crack repair, and old stain on the slab, and the surface feels smooth once sealed. This finish suits a playroom or workshop where the floor takes constant traffic and the odd dropped tool. Flake coverage is the whole job, so measure the room and buy flakes by the square foot, not by guess.
Try this: broadcast flakes from a standing position and work backward toward the exit so you never step on wet epoxy.
Cost: $$$ | Difficulty: Moderate
15. Sealed natural gray
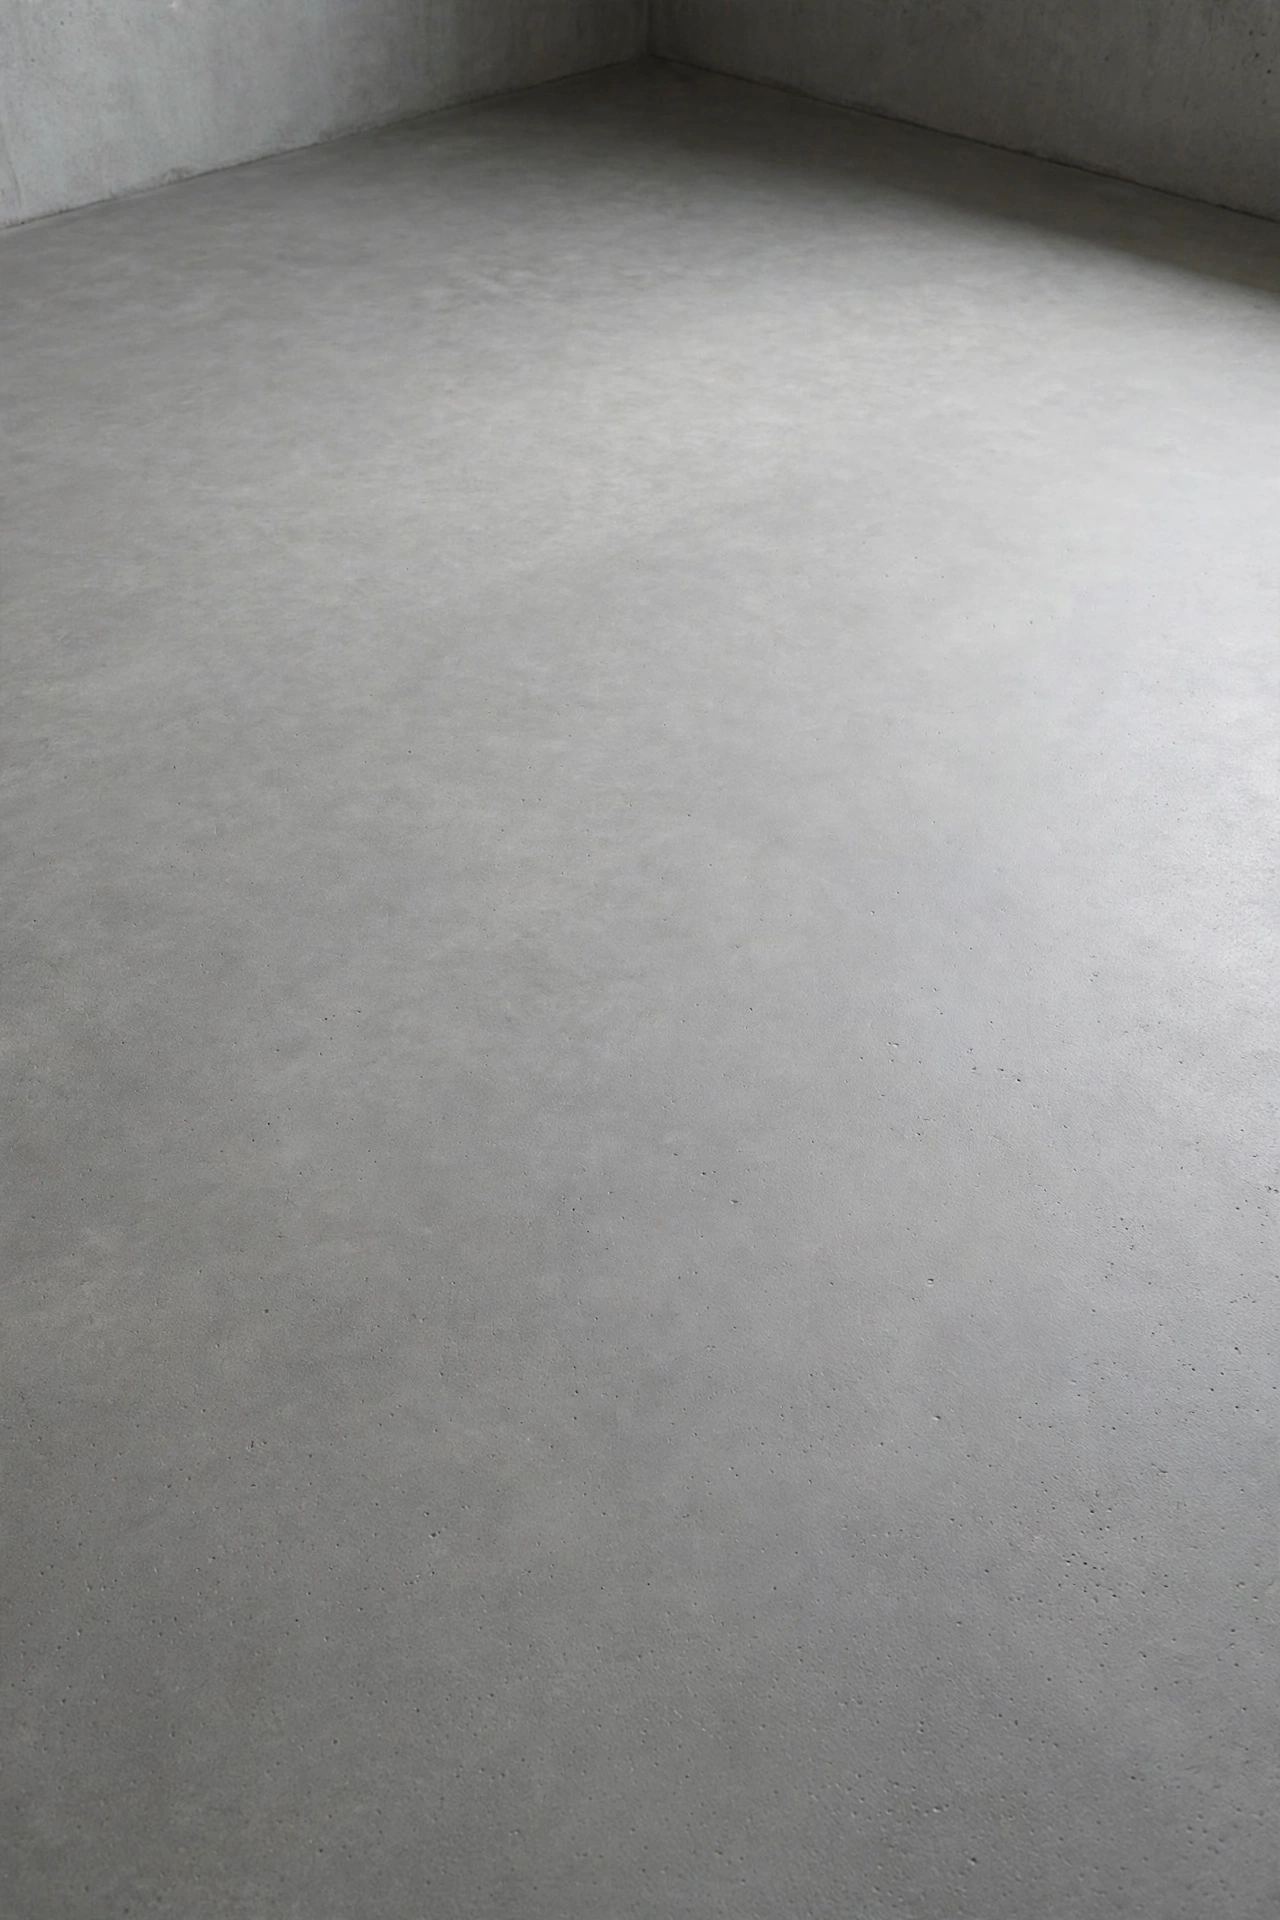
Sometimes the best finish is no color at all. Clean the slab, patch the cracks, grind down the worst high spots, and seal the bare concrete with a clear matte sealer. The floor keeps its honest gray tone, stops dusting, and wipes clean with a damp mop. This choice costs the least, finishes in a day, and leaves every future option open, since a sealed slab can still take stain or paint later after a light grind. It suits a storage room, a workshop, or a basement where the budget needs to go to walls and lights first.
Try this: mop the sealed test patch and check the sheen at night before sealing the whole room.
Cost: $ | Difficulty: Easy
Compare: cost and difficulty at a glance
Cost key: $ means $1 to $10, $$ means $11 to $99, $$$ means $100 to $999, $$$$ means $1,000 and up.
| Idea | Cost | Difficulty | Best for |
|---|---|---|---|
| Warm brown acid stain, marbled | $$ | Moderate | Stone-like character in a lounge |
| Two-tone stain zones | $$ | Moderate | Defining zones without walls |
| Soft gray water-based stain | $ | Easy | First staining project |
| Charcoal and white concrete dye, marbled | $$ | Moderate | Bold, fast-drying color |
| Light gray epoxy paint | $$ | Moderate | Brightening a dark basement |
| Epoxy with decorative flakes | $$ | Moderate | Hiding flaws with grip |
| Metallic epoxy swirl | $$$ | Hard | Dramatic lounge or bar floor |
| Stenciled tile pattern over paint | $ | Moderate | Faux tile on a small budget |
| Checkerboard painted squares | $ | Moderate | Game room or laundry room |
| Painted faux rug border | $ | Easy | Anchoring a seating group |
| Geometric tape pattern in two stain colors | $$ | Moderate | Modern feature zone |
| Polished and stained combo | $$$ | Hard | Most refined concrete finish |
| Pale wash stain | $ | Easy | Quiet, minimal rooms |
| Full-broadcast terrazzo flakes | $$$ | Moderate | High-traffic playroom or workshop |
| Sealed natural gray | $ | Easy | Lowest cost, fastest finish |
Mistakes to avoid
- Painting over dust, oil, or old sealer without prep, which breaks adhesion and peels in sheets.
- Skipping the moisture test, then watching the coating bubble within weeks.
- Using wall paint on a floor, where foot traffic wears through it in months.
- Sealing a damp slab and trapping moisture under the finish.
- Skipping anti-slip additive on a glossy topcoat near a laundry sink or exterior door.
- Moving furniture back before full cure, which leaves dents and pulled-up coating.
Safety notes for concrete basement floors
Test painted surfaces for lead before sanding or scraping in a pre-1978 home, and follow lead-safe work rules for any prep that disturbs old paint. The EPA Renovation, Repair and Painting program sets out the rules for firms and homeowners working on pre-1978 paint.
Open windows and run a fan during epoxy and acid stain work, wear a respirator rated for the product, and keep kids and pets out until the floor cures fully. Hire a licensed electrician for new outlets or hardwired lights, and keep cords out of walkways and away from water. Anchor tall shelves into studs with hardware rated above the load, and the CPSC Anchor It! guide covers anchoring basics for homes with kids. Never block a smoke detector or an egress window, and keep small screws and clips away from toddlers during install.
Related reading
For a basement kitchen under a finished floor, see our basement kitchen ideas for low ceilings, small windows, and real cooking.
For a TV room that shares the same low-ceiling problem, see our basement TV room ideas for dark corners and real movie nights.
For the ceiling above your new floor, see our ways to make an exposed basement ceiling look intentional for an all-black spray coat, wood slats, and mixed zones.
For ceiling options ranked by cost, see our budget friendly basement ceiling ideas for a sprayed flat color, secondhand grids, and renter-friendly fabric.
For concrete finishes outside, see our creative raised stamped concrete patio ideas for sloped yards.
Frequently asked questions
Can I paint over a previously sealed concrete floor?
Only after the old sealer is gone. Paint and stain need open pores to bond, so a sealed slab must be ground or chemically stripped first. Test with a water drop: if water beads, the sealer is still there. If it soaks in within a minute, the slab is ready for prep and coating.
How do I test a basement floor for moisture before staining?
Tape an 18-inch square of clear plastic tightly to the slab, seal all four edges, and leave it for 24 hours. Condensation under the plastic or a darkened patch means moisture is moving through the slab. Fix the water source first, or use a moisture-mitigating primer made for damp slabs, and give the floor extra drying time.
Is acid stain or water-based stain better for a basement?
Acid stain gives variegated, stone-like tones that shift across the floor, but the final color depends on your slab and needs a test patch. Water-based stain gives a more even, predictable color and suits a first project. Both need a sealer on top, and both fail on a damp slab, so run the moisture test before either one.
How slippery is a sealed concrete basement floor?
A glossy sealer can turn slick when wet, especially near a laundry sink or an exterior door. Mix anti-slip additive into the final topcoat, or choose a matte or satin sealer instead of high gloss. Flake finishes add grip on their own, since the chips break up the smooth surface.
How long before I can move furniture back?
Light foot traffic is usually fine in 24 to 72 hours for epoxy, but heavy furniture needs three to seven days, and full chemical cure can take up to 30 days. Paint and stain cure faster, often within a few days. Follow the maker label for your product, and use felt pads under furniture legs to protect the fresh finish.
Final thoughts
Start with the moisture test, pick the finish that matches how hard the room works, and seal whatever you lay down. A basement floor does not need carpet or tile to feel finished, and one careful weekend with paint, stain, or epoxy can turn the grayest slab in the house into a floor worth showing.