


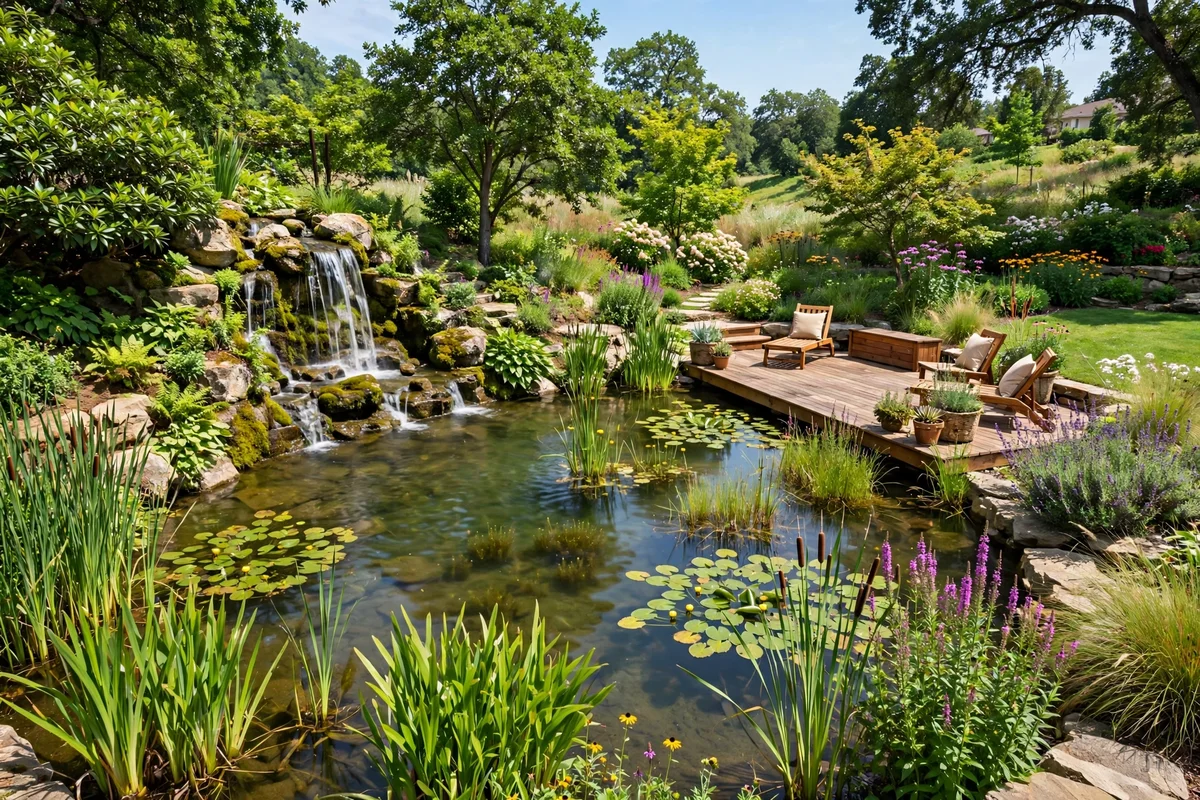
I wanted to swim without the chlorine sting and the chemical bills. A neighbor’s natural pool, clear water, dragonflies, no red eyes, convinced me it was possible without a $60,000 contractor.
A freshwater DIY pool uses plants, gravel, and a pump instead of chlorine to keep water clean. These 20 ideas cover the full range: $200 starter setups, weekend digs, conversions of old pools, and the plant filters that make the whole system work. Every idea includes honest costs and what can go wrong.
Quick takeaways
- A natural pool has two zones: a deep swim zone and a shallow plant zone that filters the water.
- The plant (regeneration) zone should be roughly equal in size to the swim zone for clear water.
- Start small: a stock tank or trough pool teaches you the whole system for under $500.
- Call 811 before any digging, fence the pool to code, and never leave children unattended near water.
1. The stock tank starter pool

A galvanized stock tank is the cheapest way into freshwater swimming. A 8-foot round tank holds enough water for cooling off, and a small pond pump keeps it circulating so it stays clear. Disguise the metal sides with bamboo screening or stone edging, and add a few potted aquatic plants around the rim for the natural look. It is not a swim pond, but it teaches you the whole maintenance rhythm, skimming, topping up, pump care, for almost no money.
Try this: run the pump 24 hours a day; stagnant water turns green within days in summer heat.
Cost: $$$. Difficulty: easy.
2. The two-zone natural swim pond

This is the real thing: a dug pond split into a deep swim zone and a shallow regeneration zone filled with gravel and aquatic plants. The plants and beneficial bacteria in the gravel absorb nutrients that would otherwise feed algae, and a pump circulates water between the zones continuously. Plan the regeneration zone at roughly the same size as the swim area. Excavation is the big job; everything after that is liner, gravel, plants, and plumbing.
Try this: mark both zones with spray paint and live with the outline for a week before you dig.
Cost: $$$$. Difficulty: hard.
3. Convert an old chlorine pool

Already have a conventional pool you are tired of chlorinating? Conversion is a documented path: stop adding chemicals, drain and scrub the surfaces to remove residue, then build a shallow planted regeneration zone along one side with a retaining wall and gravel bed. A bio-pump replaces the sand filter. The shell and plumbing you already own become the swim zone. Expect a few weeks of cloudy water while the ecosystem balances.
Try this: test the water weekly during conversion and add plants before you expect to need them.
Cost: $$$$. Difficulty: moderate.
4. The trough plunge pool
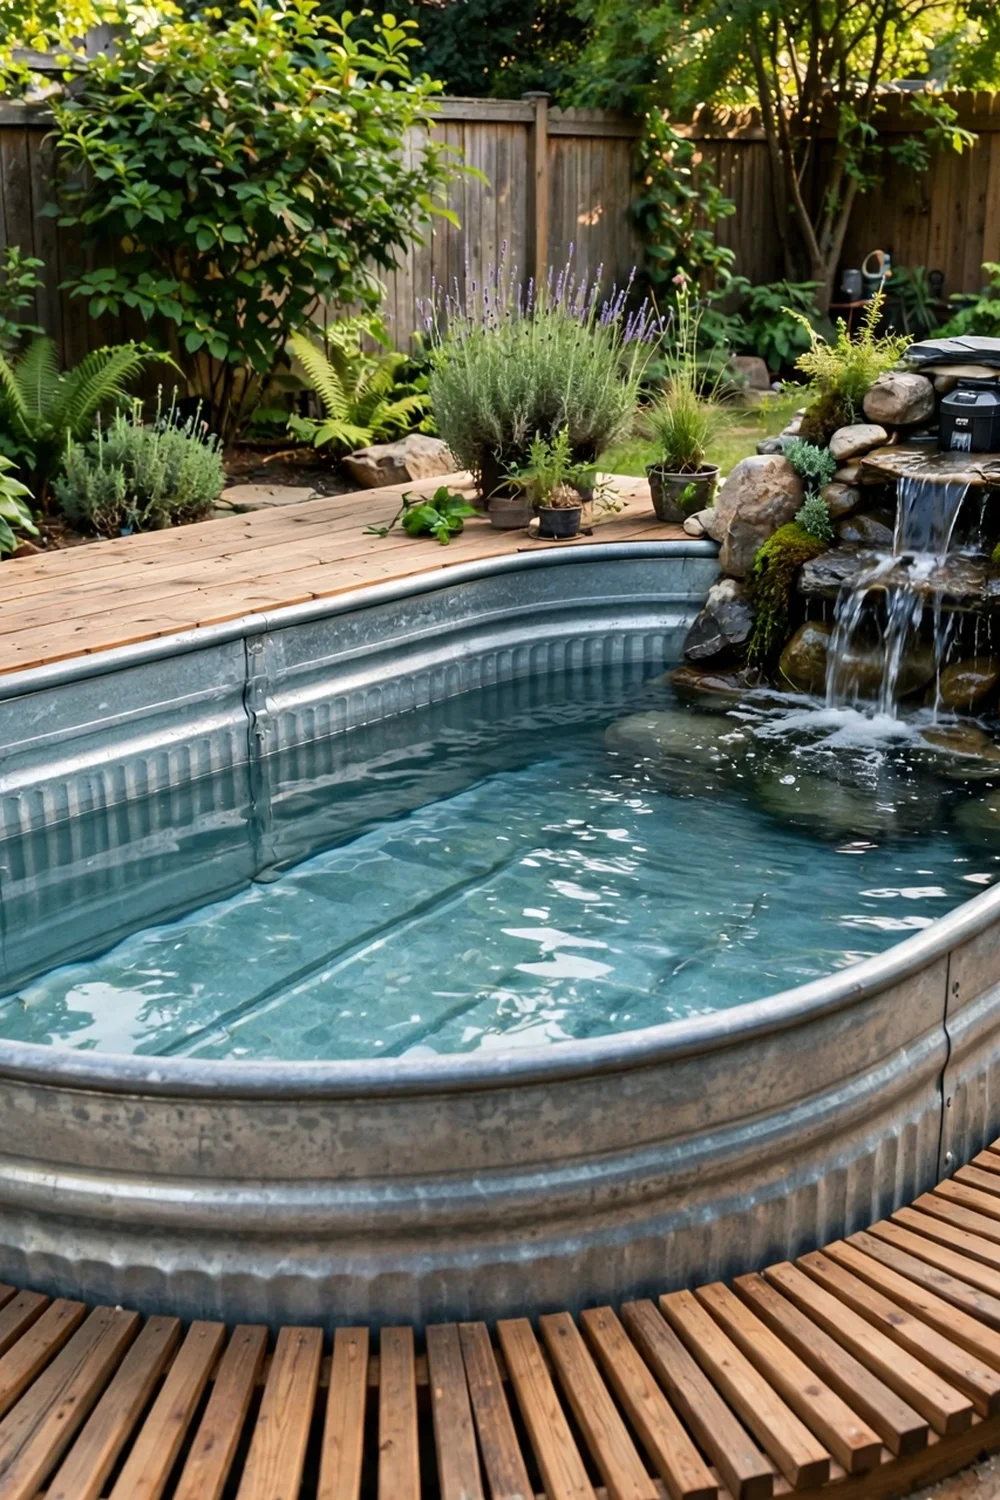
A step up from the stock tank: a 10-foot oval trough gives room to actually float, and a wooden surround makes it look built-in rather than improvised. Add a small pond filter with a waterfall spillway and you get circulation plus the sound of moving water. Trough pools heat up fast in sun, so position with afternoon shade or add a shade sail. Drain and refresh the water monthly in heavy use.
Try this: paint the outside (never the inside) a dark color to absorb heat in spring and fall.
Cost: $$$. Difficulty: easy.
5. The budget pallet-frame pond pool

For a wading-depth natural pool on a tiny budget, a frame of sturdy pallets lined with EPDM pond liner works. Keep it 2 to 3 feet deep, brace the corners well, and hide the pallets behind reed screening or stacked stone. This is a splash-and-cool-off pool, not a swimming pool, and the liner is the single item worth buying new and thick (45 mil EPDM). Underlay with old carpet or geotextile to protect it from punctures.
Try this: double the liner at the corners where stress concentrates.
Cost: $$$. Difficulty: moderate.
6. The regeneration zone plant filter
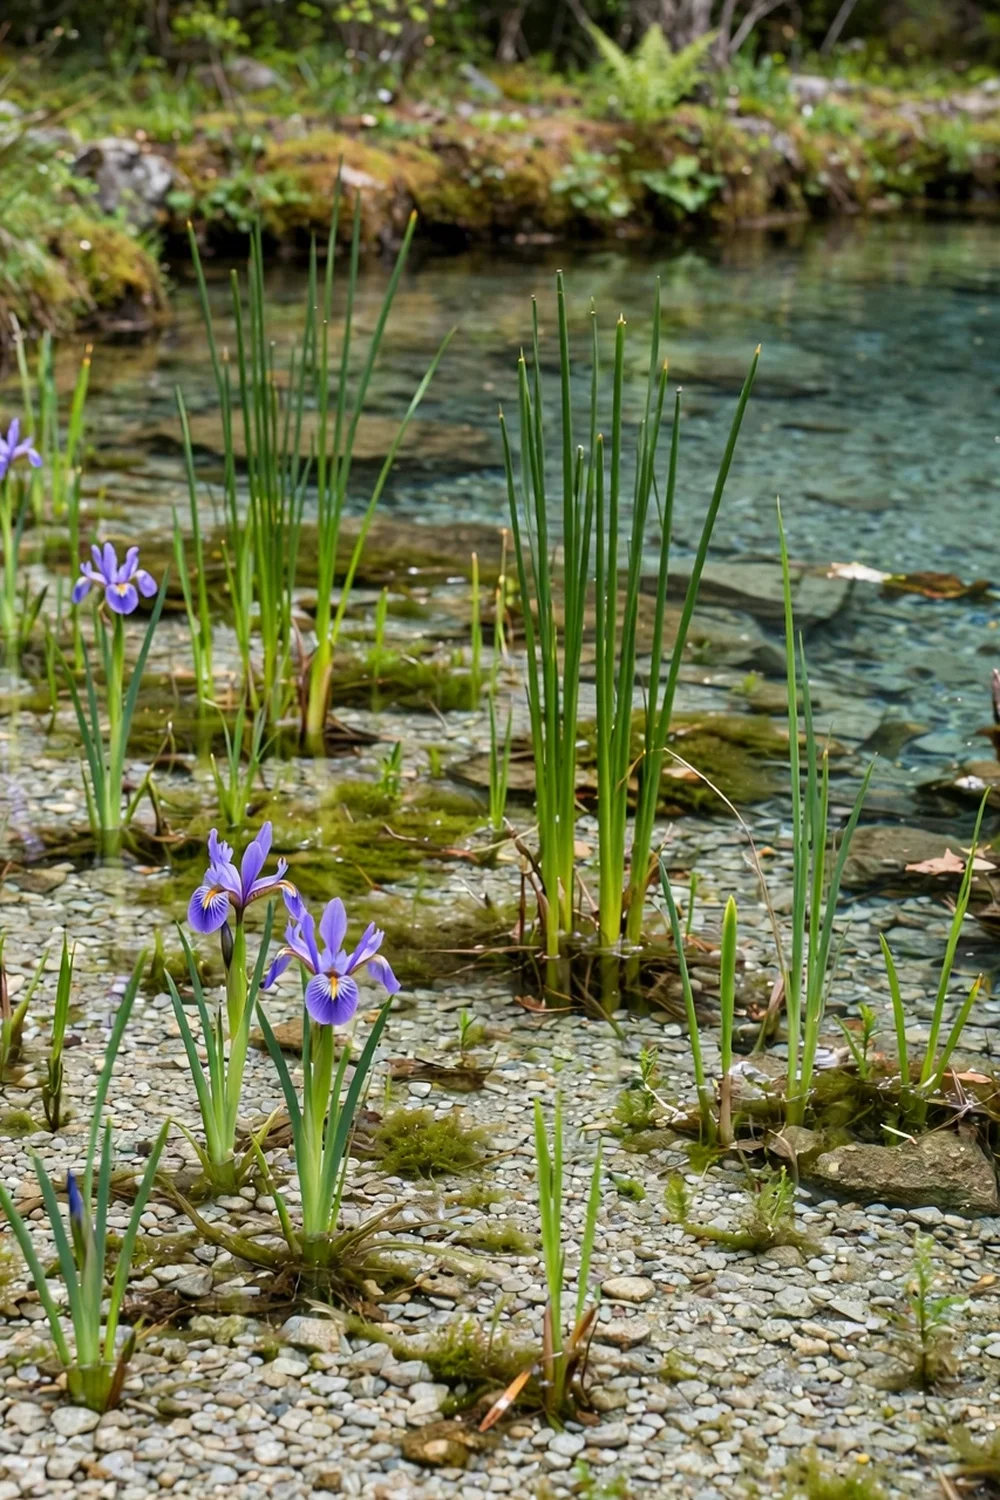
The plant filter is the engine of every freshwater pool. A shallow zone (12 to 20 inches deep) filled with washed gravel hosts water iris, rushes, marsh marigold, water mint, and pickerelweed, whose roots feed on the nutrients algae would otherwise use. Water flows slowly through the gravel, and beneficial bacteria do the rest. This zone is not for swimming; rope it off or edge it with stone so swimmers stay in the deep part.
Try this: plant densely from day one; sparse planting is the top cause of green water in year one.
Cost: $$$. Difficulty: moderate.
7. Solar-powered circulation setup
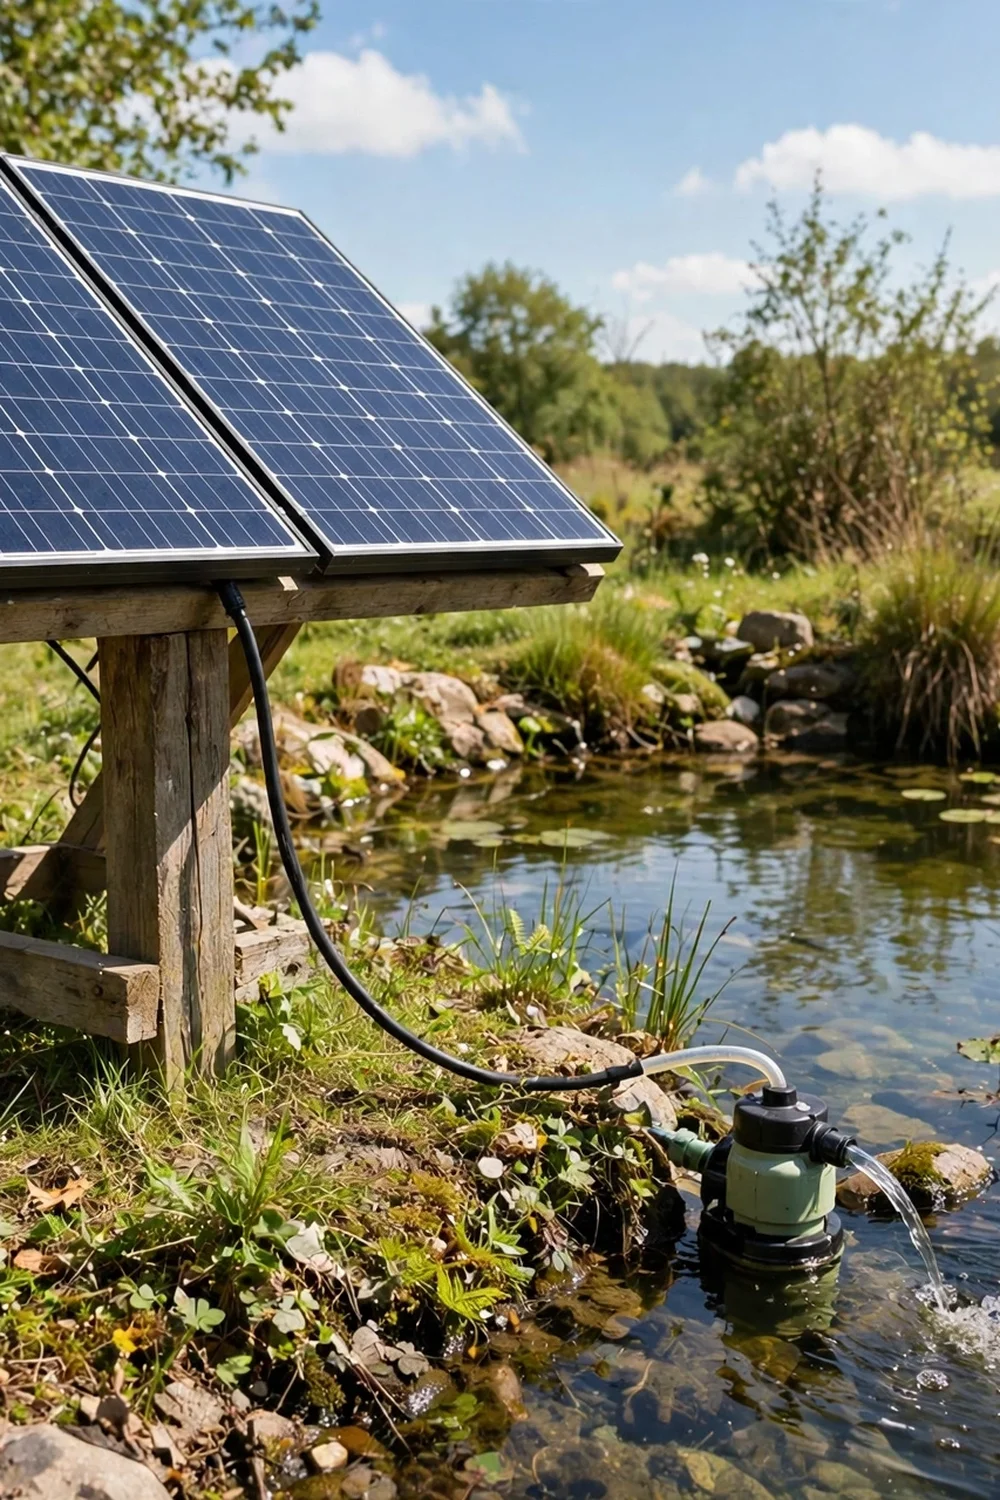
Circulation is non-negotiable, but the power bill is optional. A solar panel kit driving a 12-volt pond pump moves enough water for small to medium pools during daylight hours, which is when algae pressure is highest. Size the pump to turn over the pool volume every 4 to 6 hours. Keep a mains-powered backup or battery for cloudy stretches; two still days can undo a week of clear water.
Try this: mount panels facing true south and tilt them to your latitude for maximum output.
Cost: $$$. Difficulty: moderate.
8. The DIY wooden deck surround
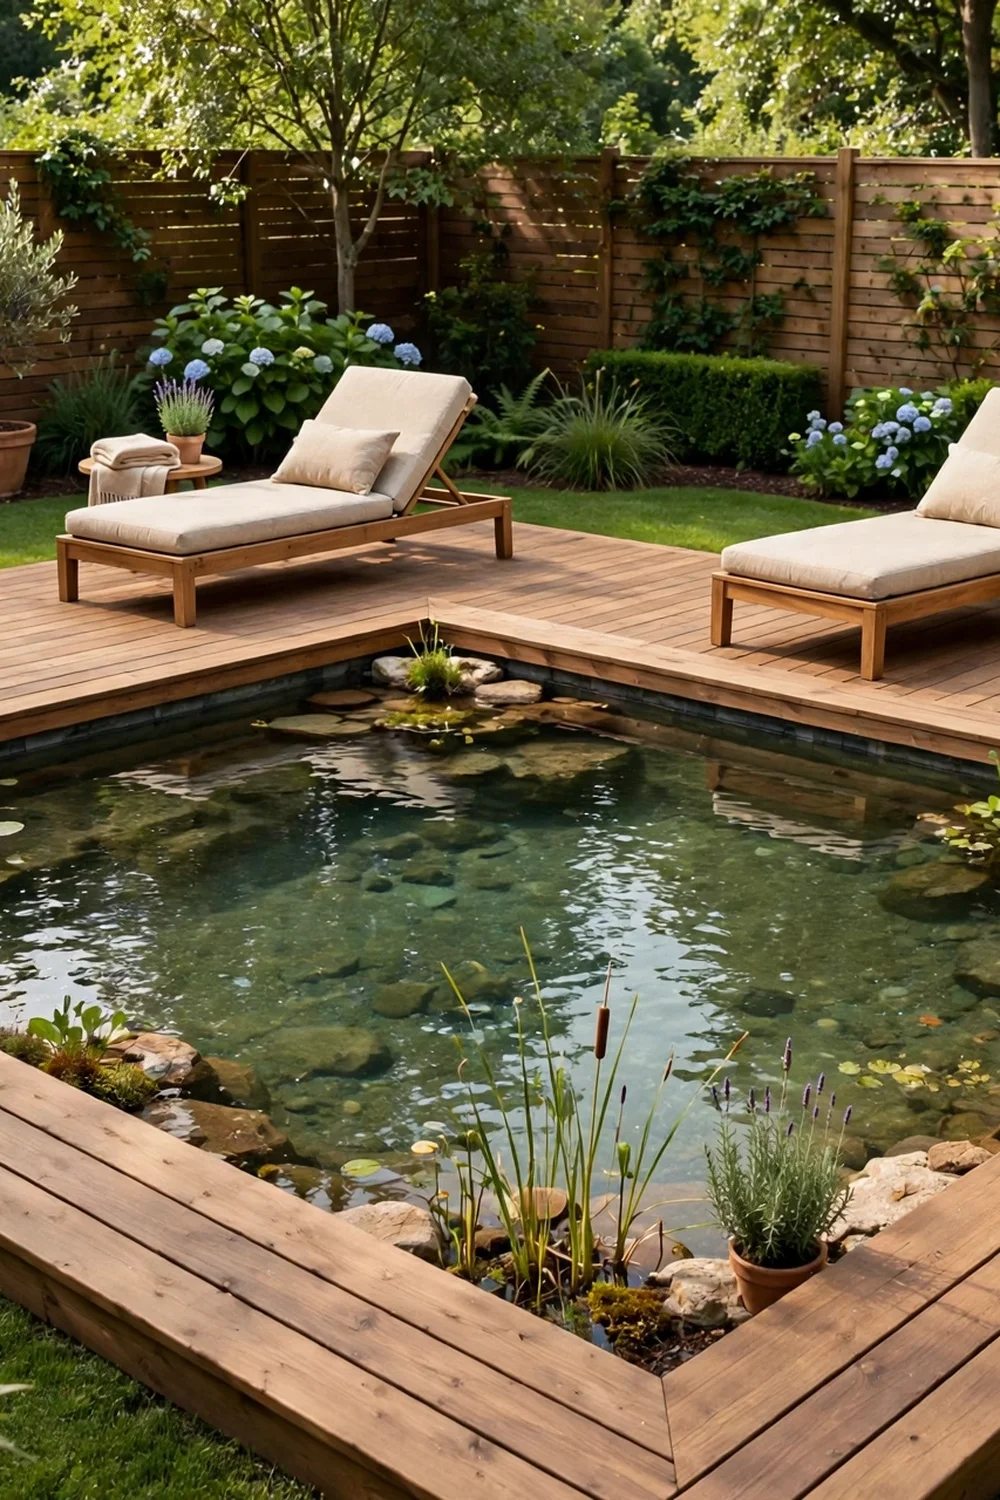
A simple pressure-treated or cedar deck around the pool hides liner edges, gives you somewhere to sit, and keeps grass clippings out of the water. Build it 12 to 18 inches above the water line with a small gap for the liner to tuck under. Leave access hatches over the pump and skimmer; you will thank yourself every maintenance day. Stain the deck, not the parts touching the liner, and let boards acclimate a week before building.
Try this: run deck boards parallel to the pool edge for the cleanest look around curves.
Cost: $$$$. Difficulty: moderate.
9. The gravel beach entry

A zero-depth beach entry, where rounded gravel slopes gently into the water, is the most natural way into a pool and the safest for kids and older swimmers. Build the slope at no steeper than 1 foot of depth per 4 feet of run, and use smooth washed river rock so bare feet stay comfortable. The shallow warm water at the edge also becomes a favorite spot for frogs and dragonflies, which is part of the charm.
Try this: compact the gravel in layers as you build so the slope does not shift underfoot.
Cost: $$$. Difficulty: moderate.
10. The stone waterfall feature

A small waterfall does triple duty: it aerates the water (oxygen suppresses algae), masks pump noise, and looks like the pool grew there. Stack flat stones over a hidden spillway box fed by the circulation pump, and let the water fall 12 to 18 inches into the pool. Keep the flow modest; a roaring falls in a small pool splashes water (and nutrients) out. Test the stack dry before you mortar anything.
Try this: aim the falls into the regeneration zone so aerated water feeds the plant filter first.
Cost: $$$. Difficulty: moderate.
11. Bamboo privacy screening
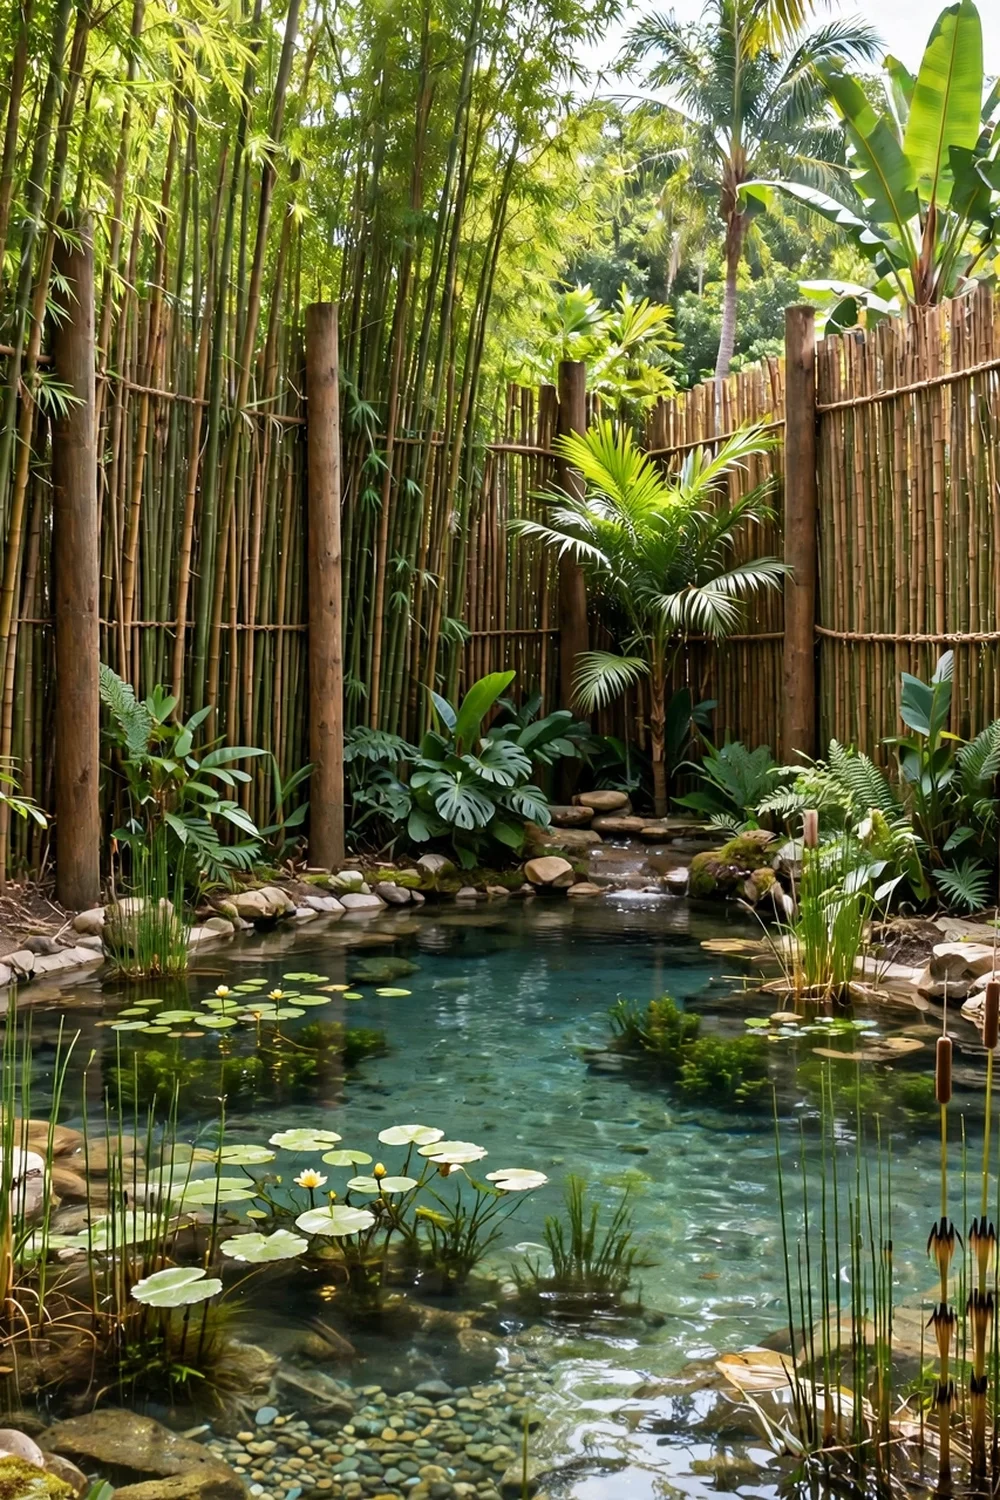
A natural pool invites lingering, and lingering wants privacy. Rolled bamboo screening on posts is the fastest fix: it goes up in a weekend, weathers to a soft gray, and sways gently instead of looming like a fence. Set posts in concrete and leave a 2-inch gap at the bottom so the bamboo does not sit in wet soil. For a living screen, clumping (not running) bamboo in containers works without the invasion risk.
Try this: never plant running bamboo in the ground near a pool liner; the rhizomes can puncture it.
Cost: $$$. Difficulty: easy.
12. The rain garden overflow combo

Every pool overflows in heavy rain. Instead of fighting it, dig a shallow rain garden downhill from the pool planted with natives like blue flag iris and Joe Pye weed. The garden catches overflow and splash-out, filters it through soil and roots, and turns a drainage problem into a second habitat. Size it at about 10 percent of the pool’s surface area and 6 inches deep. Your pool stays cleaner and the yard handles storms better.
Try this: direct the skimmer overflow pipe straight into the rain garden bed.
Cost: $$$. Difficulty: easy.
13. Solar night lighting ring
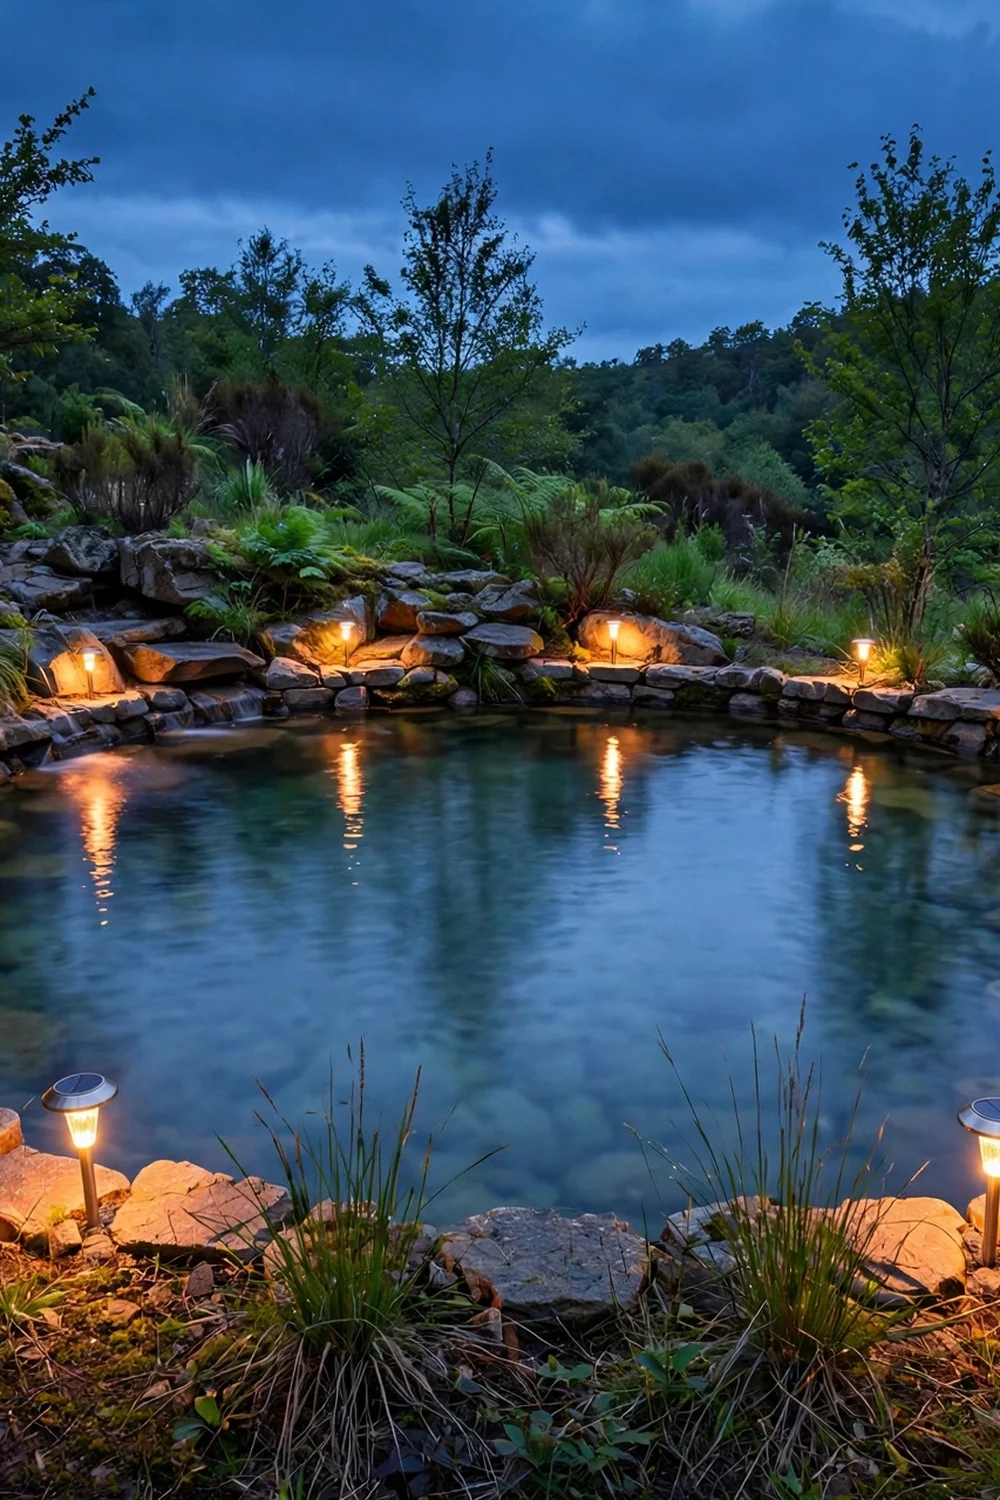
Solar path lights around the pool edge make evening swims possible and keep the edge visible after dark, which matters for safety. Space them 3 to 4 feet apart just outside the coping, and choose warm white (2700K) so the water glows instead of glaring. Submersible solar float lights add magic for parties. Lights also extend the hours you actually use the pool, which improves the cost-per-swim math a lot.
Try this: add one motion-sensor light at the gate so the entry is never dark.
Cost: $$$. Difficulty: easy.
14. The wooden jetty platform

A short wooden jetty reaching over the swim zone gives you a diving-in spot, a place to dangle feet, and the classic pond photograph. Build it from pressure-treated lumber on posts set beside (never through) the liner, extending 4 to 6 feet over the water. Keep the deck 18 inches above the surface; higher invites jumping injuries in water that is shallower than it looks. Add a simple bench at the end and it becomes the yard’s favorite seat.
Try this: post a “no diving” rule on the jetty; natural pools are rarely deep enough for safe diving.
Cost: $$$. Difficulty: moderate.
15. The DIY surface skimmer

Leaves are the enemy: every leaf that sinks feeds the algae you are trying to starve. A pond skimmer box set at the waterline pulls surface water (and floating debris) into a basket you empty weekly. Position it downwind so the breeze pushes leaves toward it, and plumb it into the pump intake. For small pools, a floating solar skimmer robot does the same job with no plumbing at all.
Try this: empty the skimmer basket weekly; a full basket starves the pump and clouds the water.
Cost: $$$. Difficulty: moderate.
16. Bog filter planter boxes

No room for a full regeneration zone? Bog filter boxes do the same job in miniature. Wooden or stock-tank planters filled with gravel and bog plants (cattail, rushes, water mint) sit beside the pool with water pumped up through the gravel and overflowing back. Two 4-foot boxes filter a small plunge pool surprisingly well. They are also the easiest filter to build first and expand later.
Try this: use 3/4-inch washed gravel, not pea gravel, so water flows freely through the boxes.
Cost: $$$. Difficulty: easy.
17. The cedar soaking tub
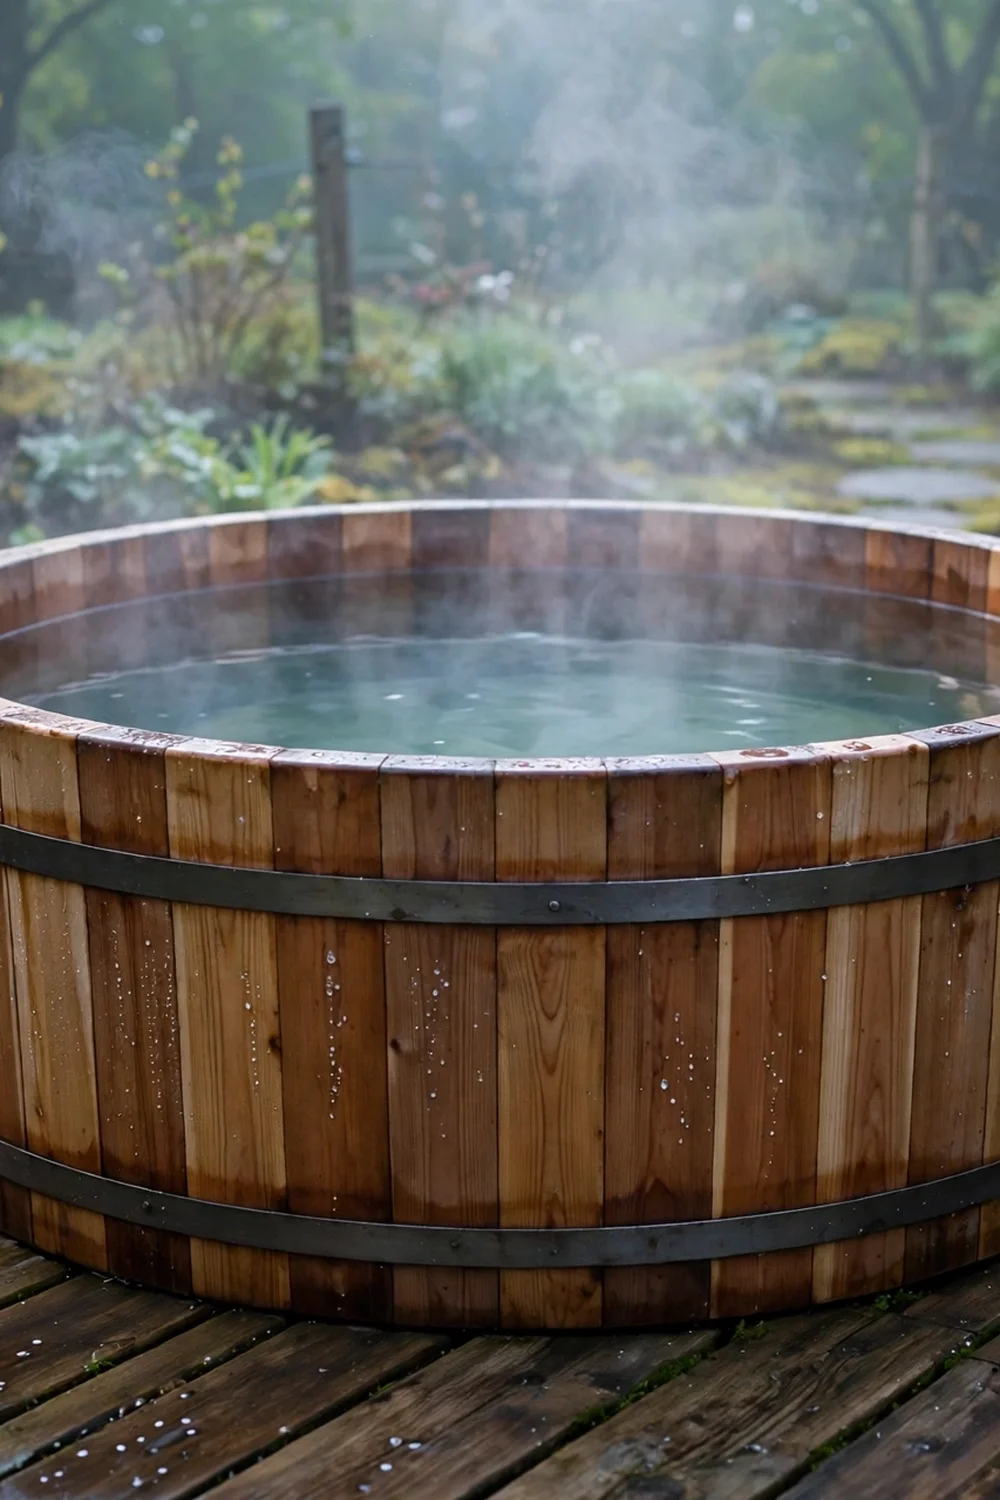
A round cedar soaking tub is the deep-soak version of a freshwater pool: 4 feet across, 4 feet deep, filled with plain water and a small circulating filter. No chemicals, no heater needed in summer, and the cedar smells wonderful. Change or filter the water weekly and scrub the wood monthly to prevent biofilm. It seats two adults comfortably and uses a fraction of the water of a hot tub.
Try this: cover the tub when not in use; it keeps debris out and water warm.
Cost: $$$$. Difficulty: easy.
18. The fenced wading cove

If kids use the pool, build them their own shallow cove: 18 inches deep, separated from the deep zone by a low wall, and enclosed by a 4-foot fence with a self-closing, self-latching gate. This is not optional decoration; it is the layer of protection that lets adults relax. The cove warms fast in sun, which kids prefer anyway. Never rely on the cove alone; active supervision is still the rule.
Try this: add a pool alarm on the gate; the $50 device is the cheapest safety upgrade there is.
Cost: $$$. Difficulty: moderate.
19. The tanning ledge shelf

A tanning ledge, a shelf 6 to 10 inches deep inside the swim zone, is where everyone ends up: lounge chairs sit in inches of water, kids splash safely, and dogs learn to swim. Build it as a lined shelf along one side during excavation, with a textured surface so it is not slippery. It adds maybe 10 percent to the dig cost and doubles how the pool gets used.
Try this: broom-finish any concrete on the ledge for grip under bare feet.
Cost: $$$. Difficulty: moderate.
20. The timber-frame above-ground pool

No digging, no permits for excavation: a timber-frame pool uses stacked landscape timbers or a kit frame to hold an EPDM liner above ground, 3 to 4 feet deep. Wrap the outside in cedar or paint it, add a small deck with steps, and run a bog filter box beside it for the freshwater system. It goes up in a long weekend, comes down if you move, and avoids every buried-utility worry of a dug pool.
Try this: level the base obsessively; 1 inch of tilt shows as 3 inches of waterline difference.
Cost: $$$$. Difficulty: moderate.
How to plan a freshwater pool that stays clear
Clear water comes from balance, not chemicals. Size the regeneration zone generously (half the total area is the rule of thumb), plant it densely from day one, and run the pump continuously. Skim leaves before they sink, because every sunken leaf is algae food. Test pH monthly and keep it between 6.8 and 7.4; most natural pools settle there on their own once the plants establish.
Check local rules before you dig or build. Many towns regulate pool fencing, setbacks, and maximum water depth, and some require permits even for above-ground pools. A quick call to your building department saves expensive rework. For an evening hangout spot beside the pool, 20 Bonfire Pit Ideas for Cozy Backyard Nights pairs perfectly with late swims.
And when you want a quiet corner to dry off in, 25 Beautiful Garden Nook Seating Ideas has poolside-worthy seating options.
Mistakes that turn a natural pool green
The number one mistake is an undersized plant zone. A token strip of plants cannot filter a full pool, and no amount of pumping fixes it. The second is letting leaves accumulate; a $30 leaf net used weekly beats any filter upgrade. The third is impatience in the first season: new ponds go through a green phase while bacteria colonies establish, usually 4 to 8 weeks. Adding more plants and waiting beats draining and refilling, which restarts the clock.
Freshwater pool safety notes
- Drowning prevention first. Drowning is fast and silent. Fence pools to local code (usually 4 feet minimum with self-closing gates), add alarms, and never leave children unattended. The American Red Cross water safety page lists the layers of protection every pool needs.
- No diving. Natural and DIY pools are rarely deep or clear enough for safe diving. Post the rule and enforce it.
- Electrical safety. All pumps and lighting near water must be on GFCI-protected circuits. Hire a licensed electrician for any new outdoor wiring.
- Call before you dig. Excavation can hit buried utilities. Contact your local 811 service at least 2 business days before digging; start at Call 811.
- Water quality. Test pH and clarity regularly. If water stays murky or smells off, stay out until you find the cause.
Frequently asked questions
How does a freshwater pool stay clean without chlorine?
Aquatic plants and gravel in the regeneration zone absorb the nutrients algae need, while beneficial bacteria break down organic matter. A pump circulates water continuously between the swim zone and the plant zone. The system mimics a natural pond ecosystem.
How much does a DIY natural pool cost?
A stock tank starter runs $150 to $400. A small dug two-zone swim pond typically costs $3,000 to $12,000 in DIY materials (liner, gravel, plants, pump), and converting an existing chlorine pool runs $2,000 to $6,000. Timber-frame above-ground builds land between $800 and $2,500.
Do natural pools attract mosquitoes?
Moving water does not breed mosquitoes; they need still water to lay eggs. Continuous pump circulation plus dragonflies and frogs that eat larvae keep mosquitoes down. Stagnant corners or an idle pump are what cause problems.
Can you swim in a natural pool right after building it?
You can, but expect a green phase of 4 to 8 weeks while the ecosystem establishes. Most builders swim through it; the water is safe, just cloudy. Heavy planting from day one shortens the phase considerably.
Do I need a permit for a DIY natural pool?
Often yes. Many municipalities regulate pool depth, fencing, and setbacks, and some require permits even for above-ground pools. Check with your local building department before digging or buying materials.
Is a natural pool safe for kids?
It can be, with the same layers of protection any pool needs: 4-foot fencing with self-closing gates, alarms, a shallow wading cove, and active adult supervision. Never leave children unattended near any body of water.
Final thoughts
Start with the stock tank, learn the water, and build bigger when you are ready. Freshwater swimming is simpler than the pool industry wants you to believe.


