


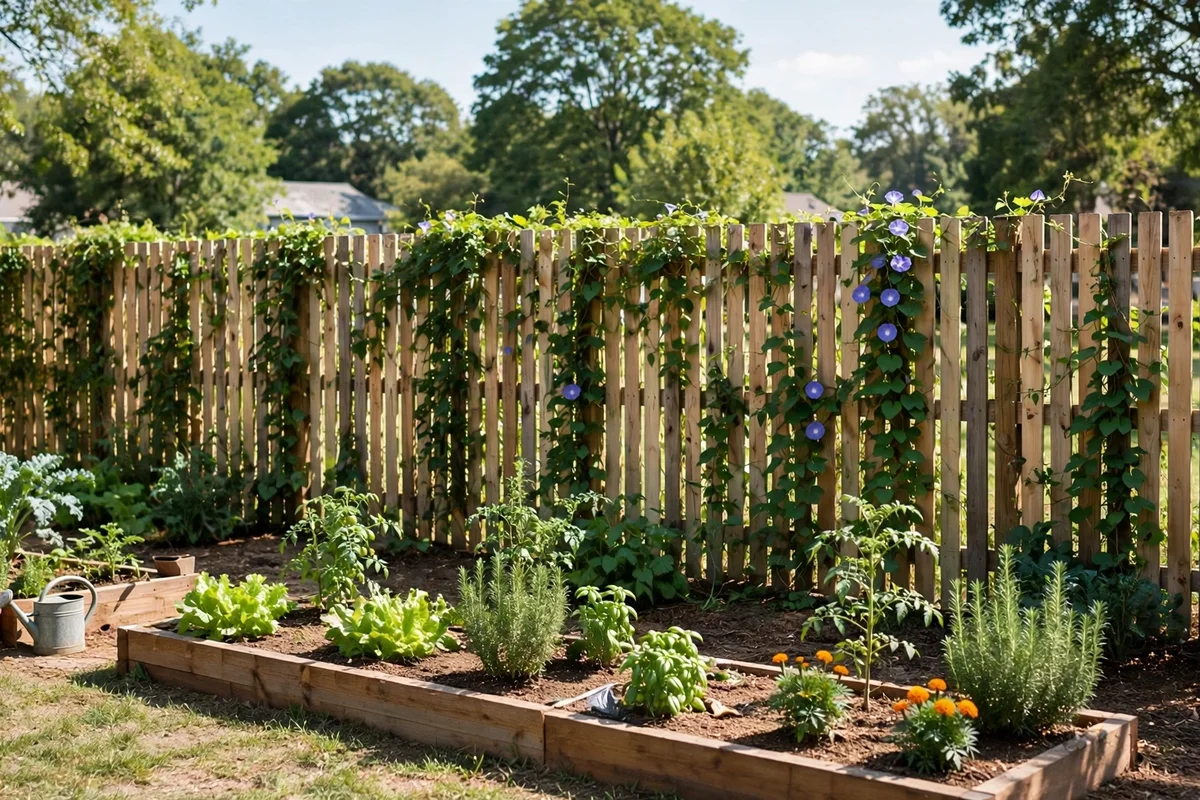
A bare yard with no fence can feel like a stage. Neighbors, foot traffic, and the house behind you all get a front-row seat, and enjoying your own backyard gets harder than it should be.
These 15 cheap privacy fence ideas solve that without a contractor-sized bill. Every option here costs a fraction of a professionally installed wood or vinyl fence, and most are realistic weekend DIY projects. I screened one side of my own yard with bamboo rolls three summers ago, and it is still the best money I have spent on the garden.
Quick takeaways
- The cheapest solid fences are pallet wood, bamboo rolls, and privacy screen fabric, often under $8 per linear foot DIY.
- Attach screens to an existing chain-link fence to skip posts and concrete entirely.
- Living hedges cost the least per foot over time but need 2 to 4 years to fill in.
- Always check local height limits and HOA rules before you build.
- Call 811 before you dig a single post hole. It is free and it is the law in most places.
1. Pallet privacy fence
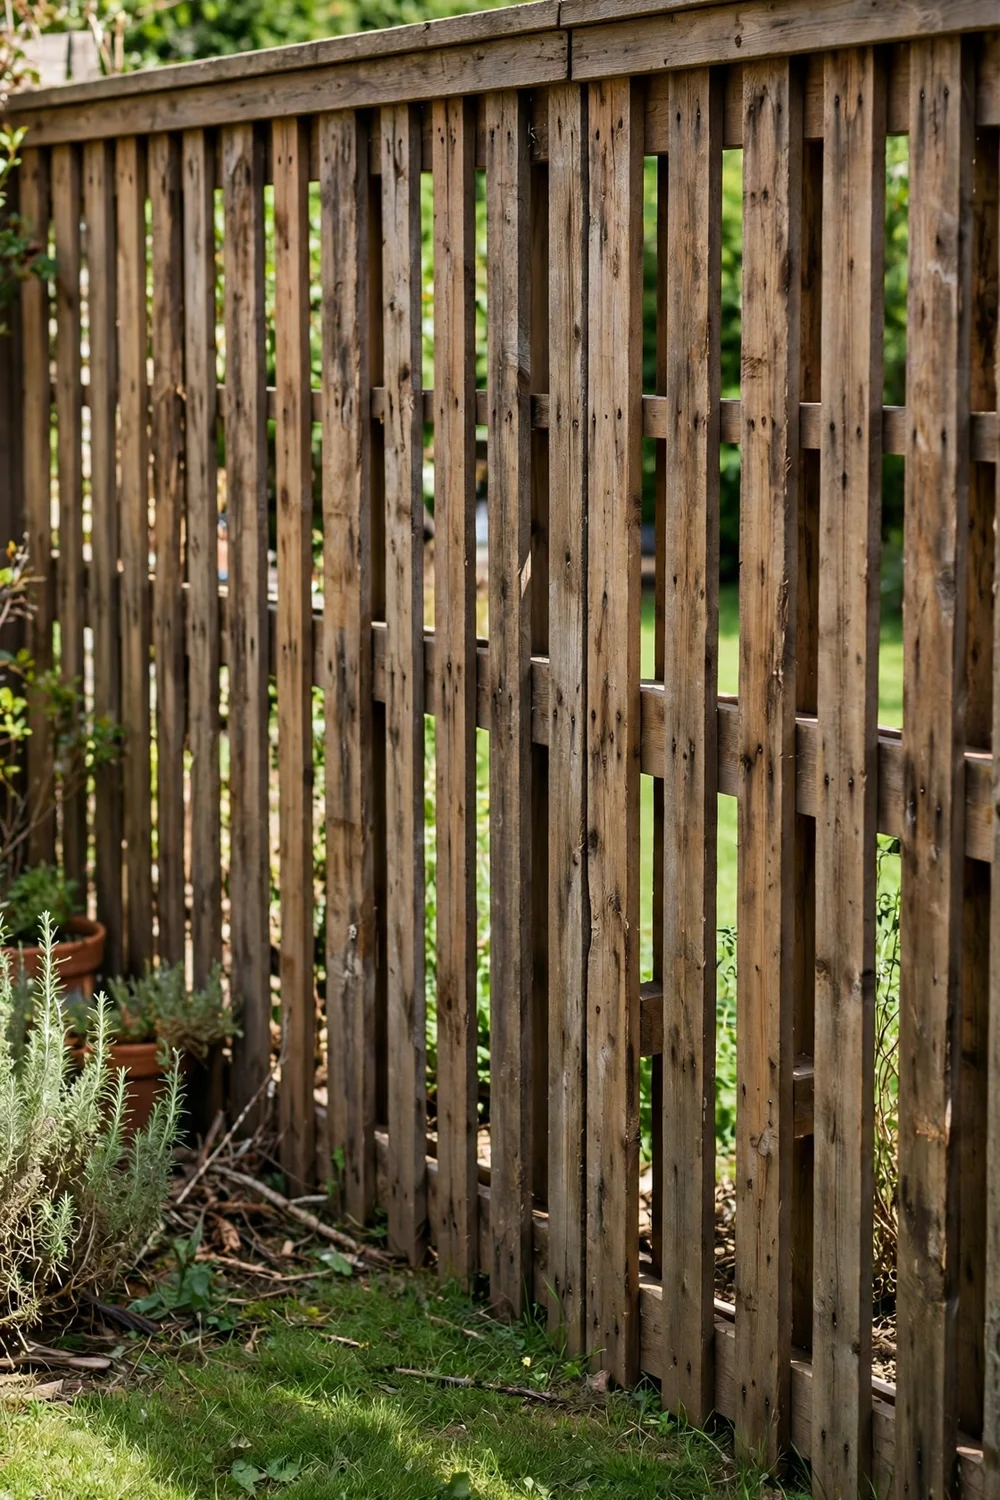
Wooden pallets are basically ready-made fence panels. Stand them upright in a row, anchor each to a sturdy post set in the ground, and screw them together so the run acts as one wall. Many businesses give pallets away free, which drops the material cost close to zero. Sand rough spots, skip any pallets marked MB (chemically treated), and seal the wood with exterior stain so the fence survives more than a couple of seasons.
Cost: $· Skill: beginner · Time: one weekend
Try this: cap the top of each pallet with a flat board. It sheds rain, hides uneven tops, and makes the fence look built on purpose.
2. Bamboo roll screen
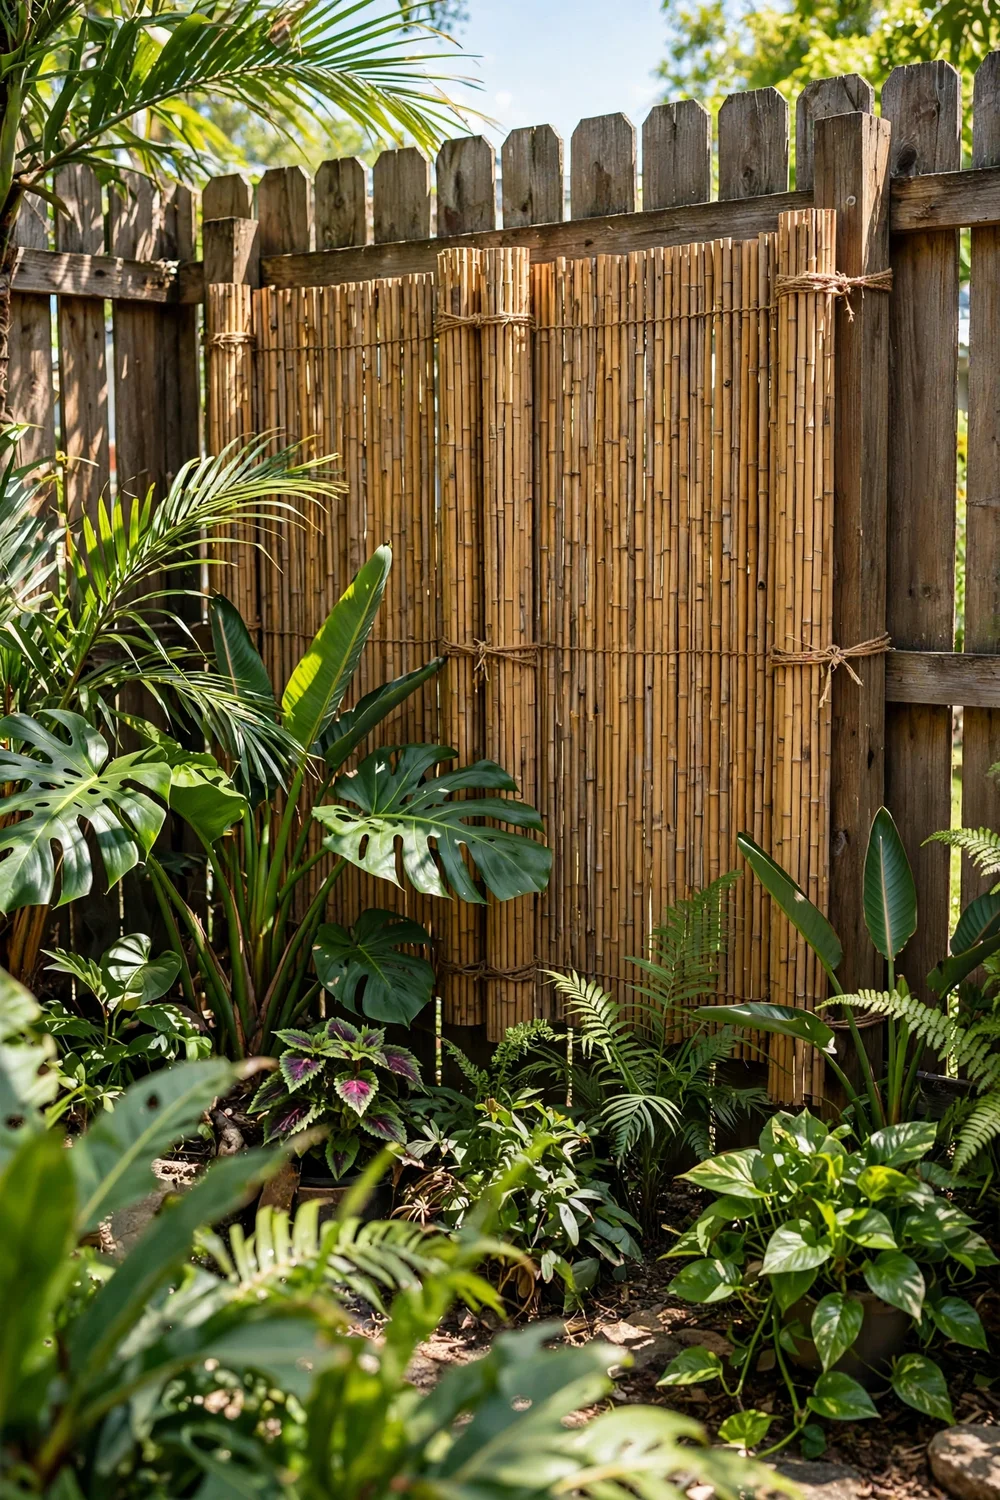
Rolled bamboo fencing unrolls against an existing fence or a simple post frame and ties on with wire in an afternoon. A 16-foot roll usually costs $30 to $80, which makes this one of the fastest privacy fixes per dollar. The natural look suits cottage and tropical gardens. Expect 3 to 5 years of life outdoors, longer if you brush on a clear exterior sealant once a year and keep the bottom edge off wet soil.
Cost: $· Skill: beginner · Time: 2-3 hours
Try this: double up two layers with the poles offset. The overlap blocks sightlines completely and the screen looks thicker.
3. Reed fencing panels
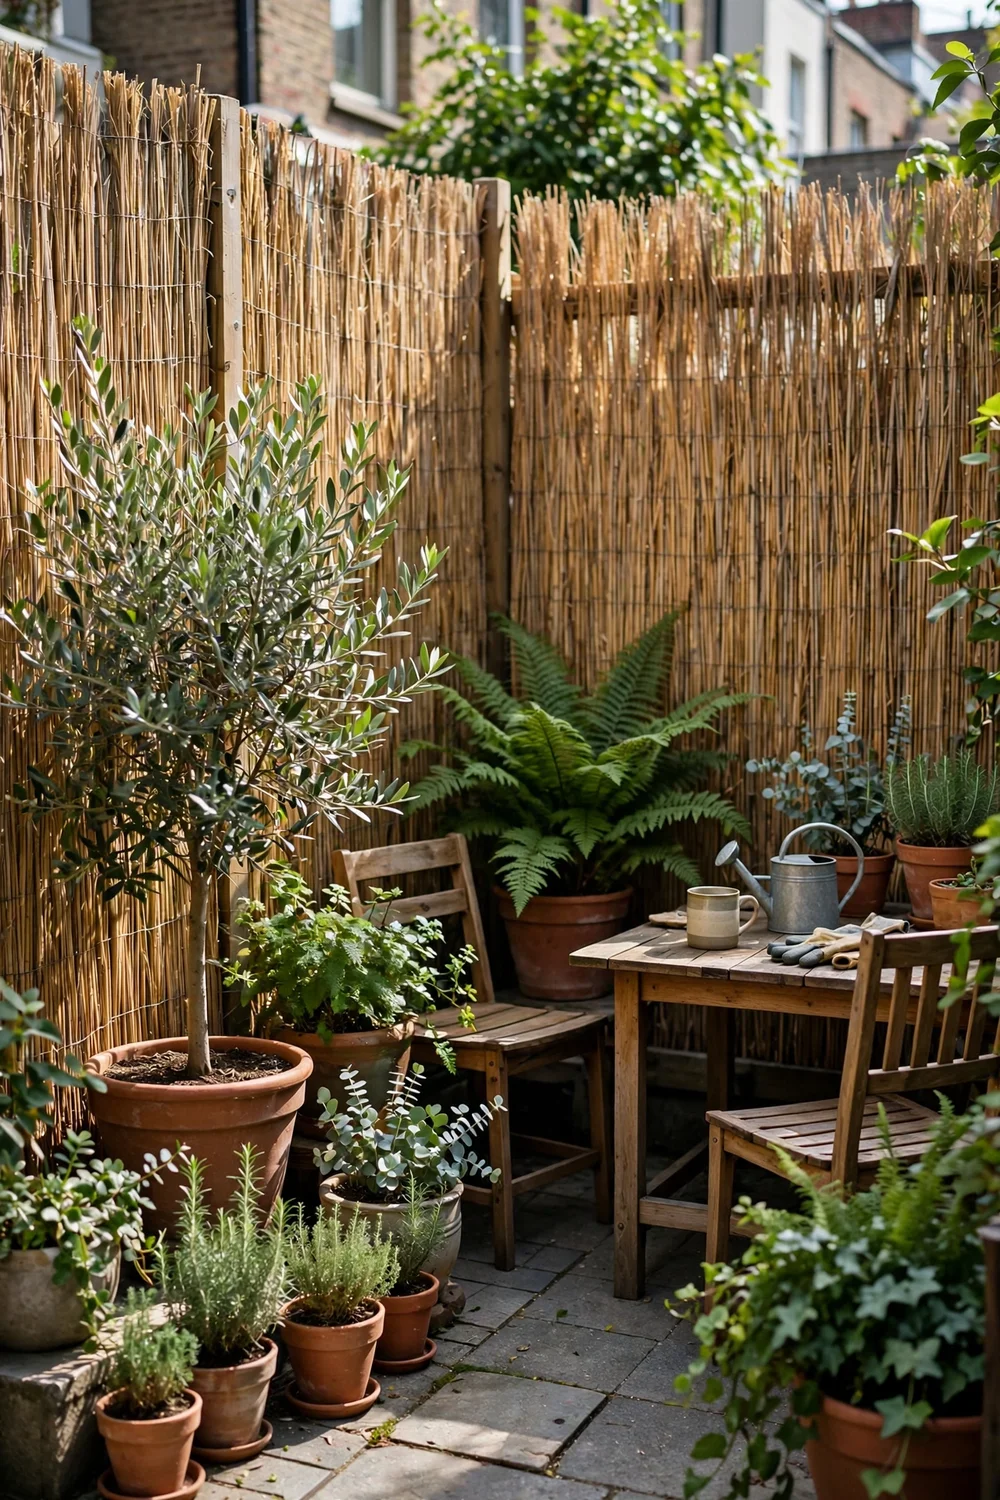
Reed panels work like bamboo rolls but with a finer, softer texture that suits small patios and balconies. They attach with zip ties or wire to posts, railings, or an old fence, and they roll up for winter storage if you rent. Reed is one of the least expensive screening materials sold at home stores. Keep it a few inches off the ground so the bottom does not sit in puddles and rot early.
Cost: $· Skill: beginner · Time: 1-2 hours
Try this: use reed on the neighbor-facing side only, and leave the prettier sides open to your own plantings.
4. Lattice panels on posts
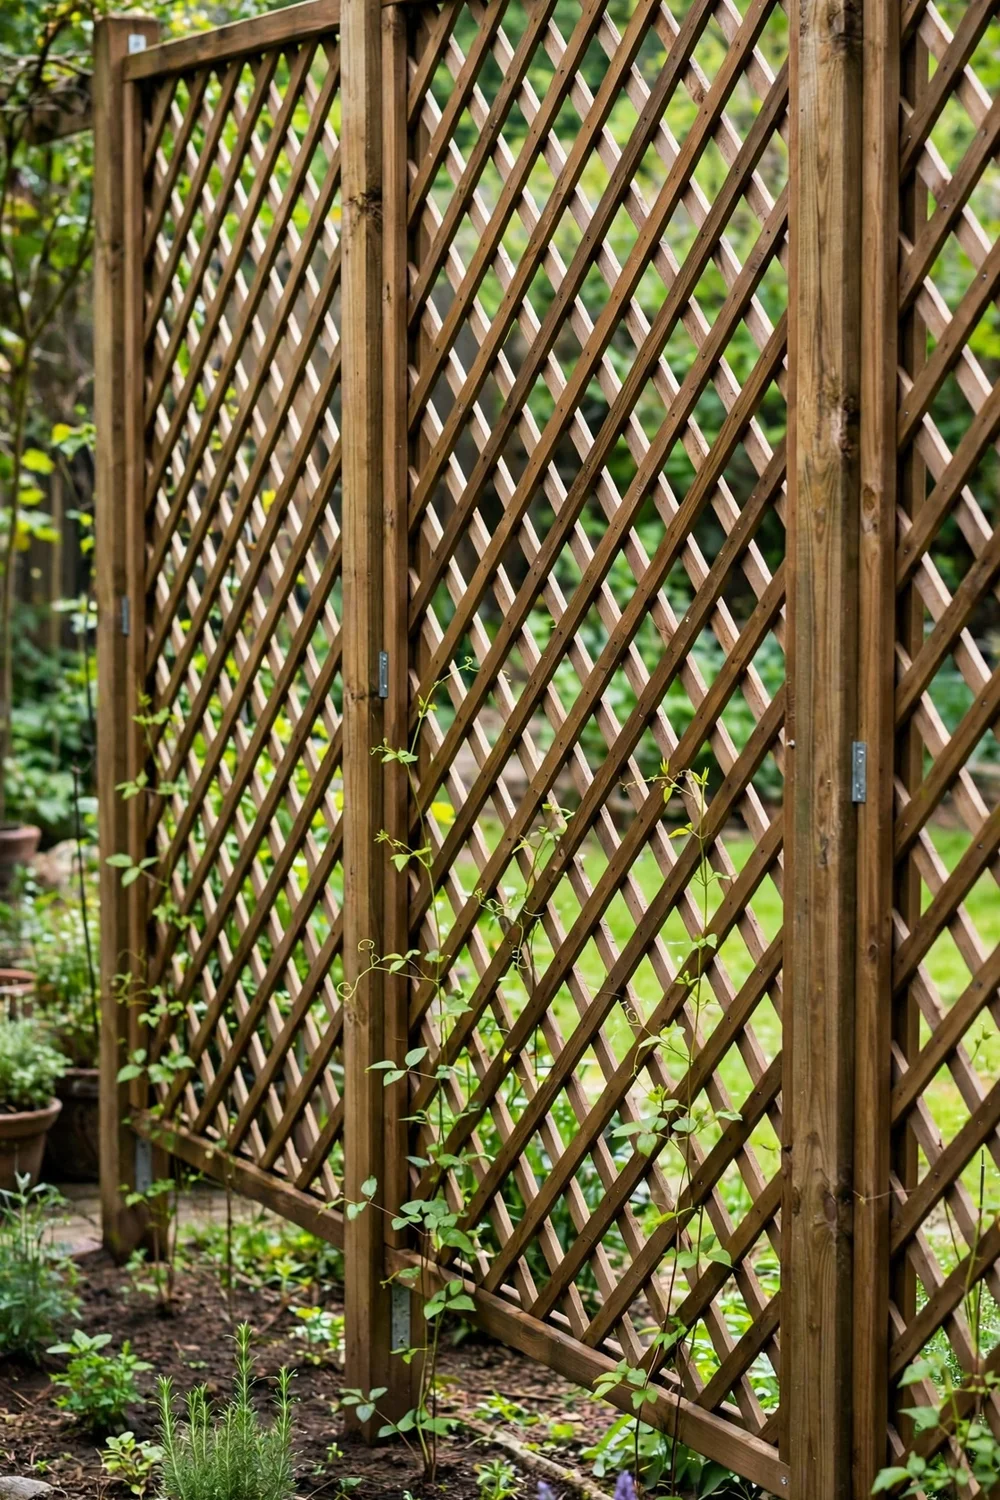
Pressure-treated lattice panels cost under $30 for an 8-foot section and build a light, airy screen fast. Set 4×4 posts in concrete or packed gravel, then screw the lattice to horizontal rails between them. The open weave alone gives partial privacy, and it becomes nearly solid once you add climbing plants. Because lattice is not very stiff, keep spans to 8 feet or less and add a mid rail on tall runs so nothing sags.
Cost: $· Skill: beginner · Time: one weekend
Try this: frame each lattice panel with 1×3 trim boards. The frame stops warping and makes the whole fence look finished.
5. Living arborvitae hedge
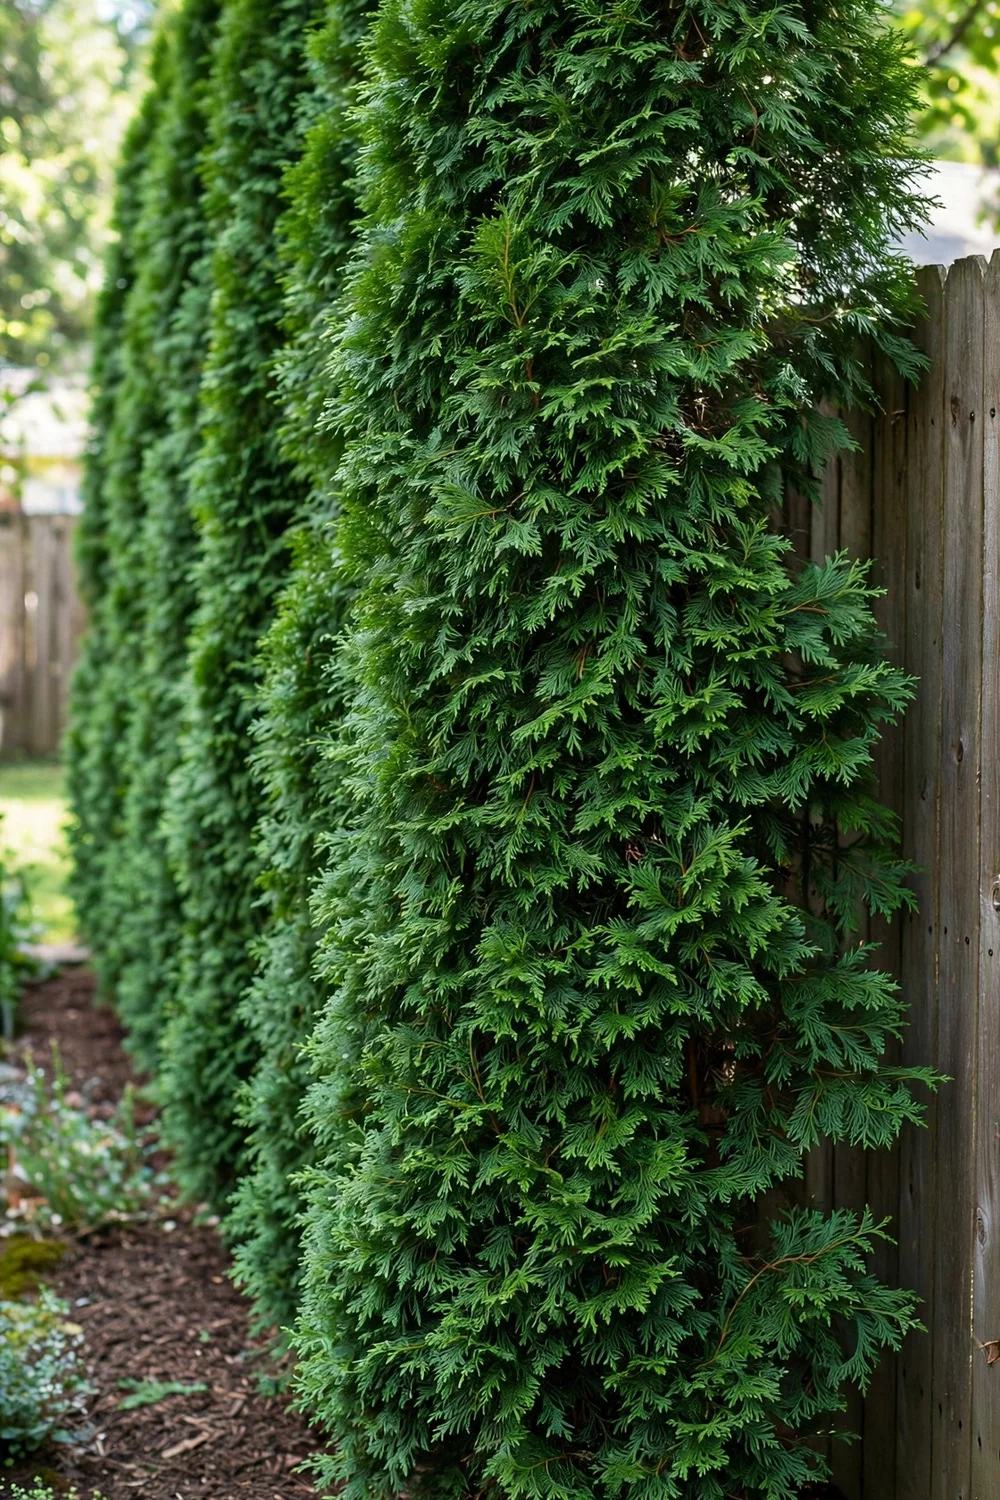
A row of arborvitae is the cheapest permanent privacy per foot once it fills in. Buy small nursery plants for $20 to $50 each instead of mature specimens, and space them 3 to 4 feet apart so the foliage knits together. Emerald Green stays narrow enough for small lots. Water deeply the first two summers, and do not shear the tops until the hedge reaches the height you want, since arborvitae will not regrow from bare wood.
Cost: $· Skill: beginner · Time: one day to plant, 2-4 years to fill
Try this: plant a staggered double row for faster coverage, and mulch the strip to cut watering and weeding.
6. Privacy screen fabric on chain link
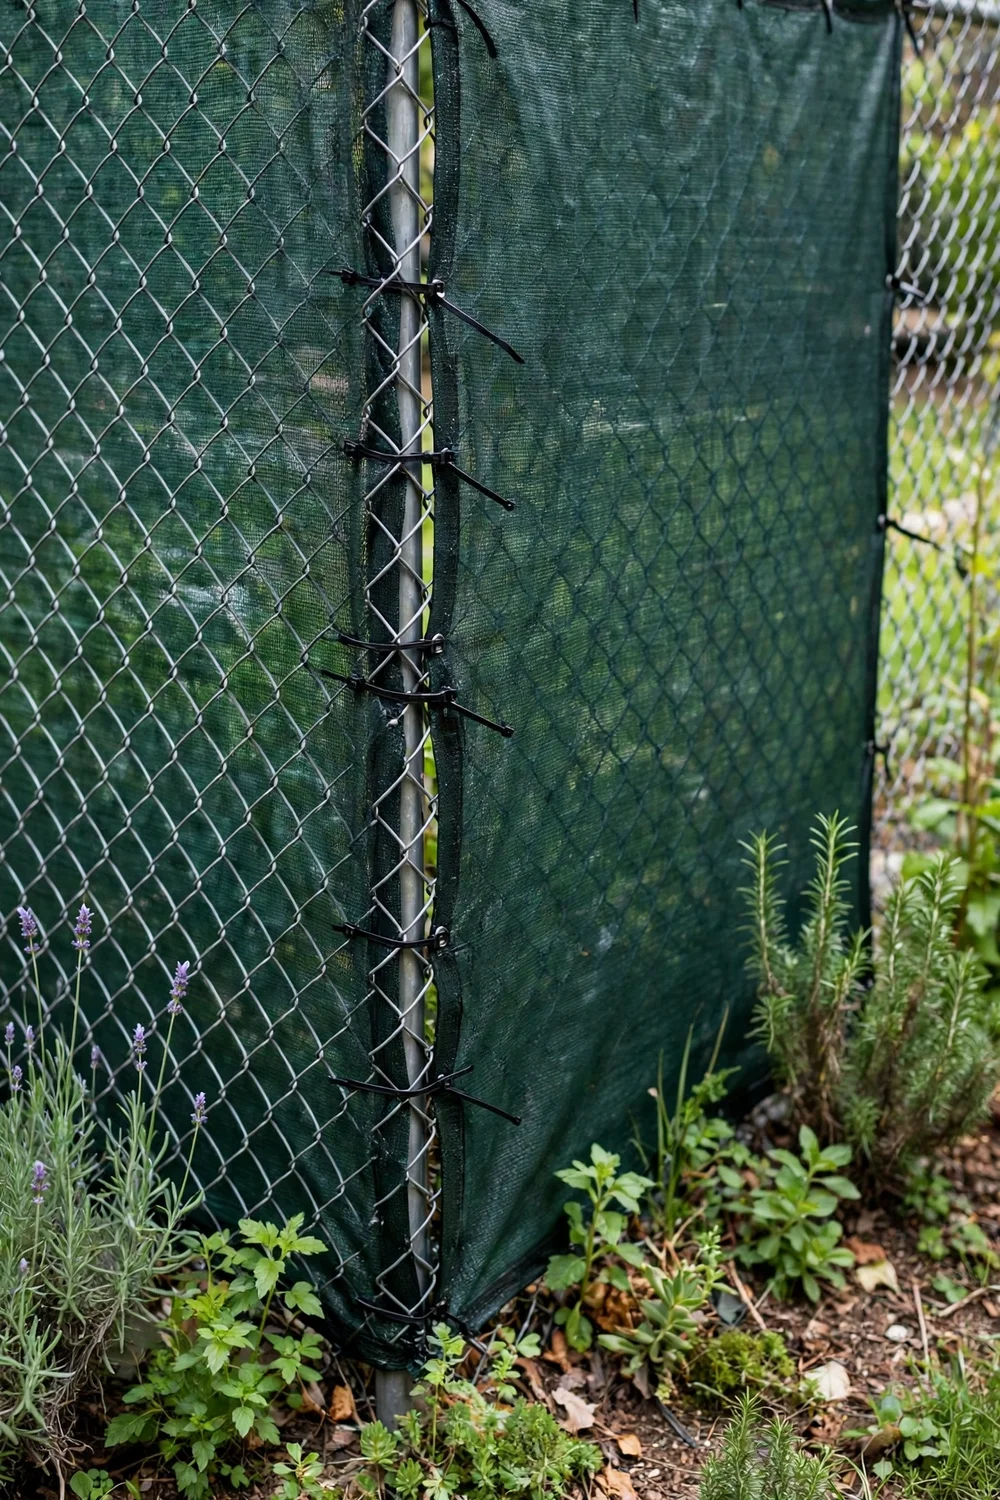
If you already have a chain-link fence, woven privacy fabric is the cheapest upgrade you can make. A 50-foot roll runs $25 to $60 and attaches with zip ties in an hour. It blocks 80 to 90 percent of visibility and cuts wind too. Choose a fabric with brass grommets and UV treatment so it survives a few seasons. In high-wind areas, leave a small gap at the bottom so gusts pass under instead of tearing the mesh.
Cost: $· Skill: beginner · Time: 1 hour
Try this: pick dark green or black fabric. It fades into the background better than bright colors.
7. Chain link with vinyl slats
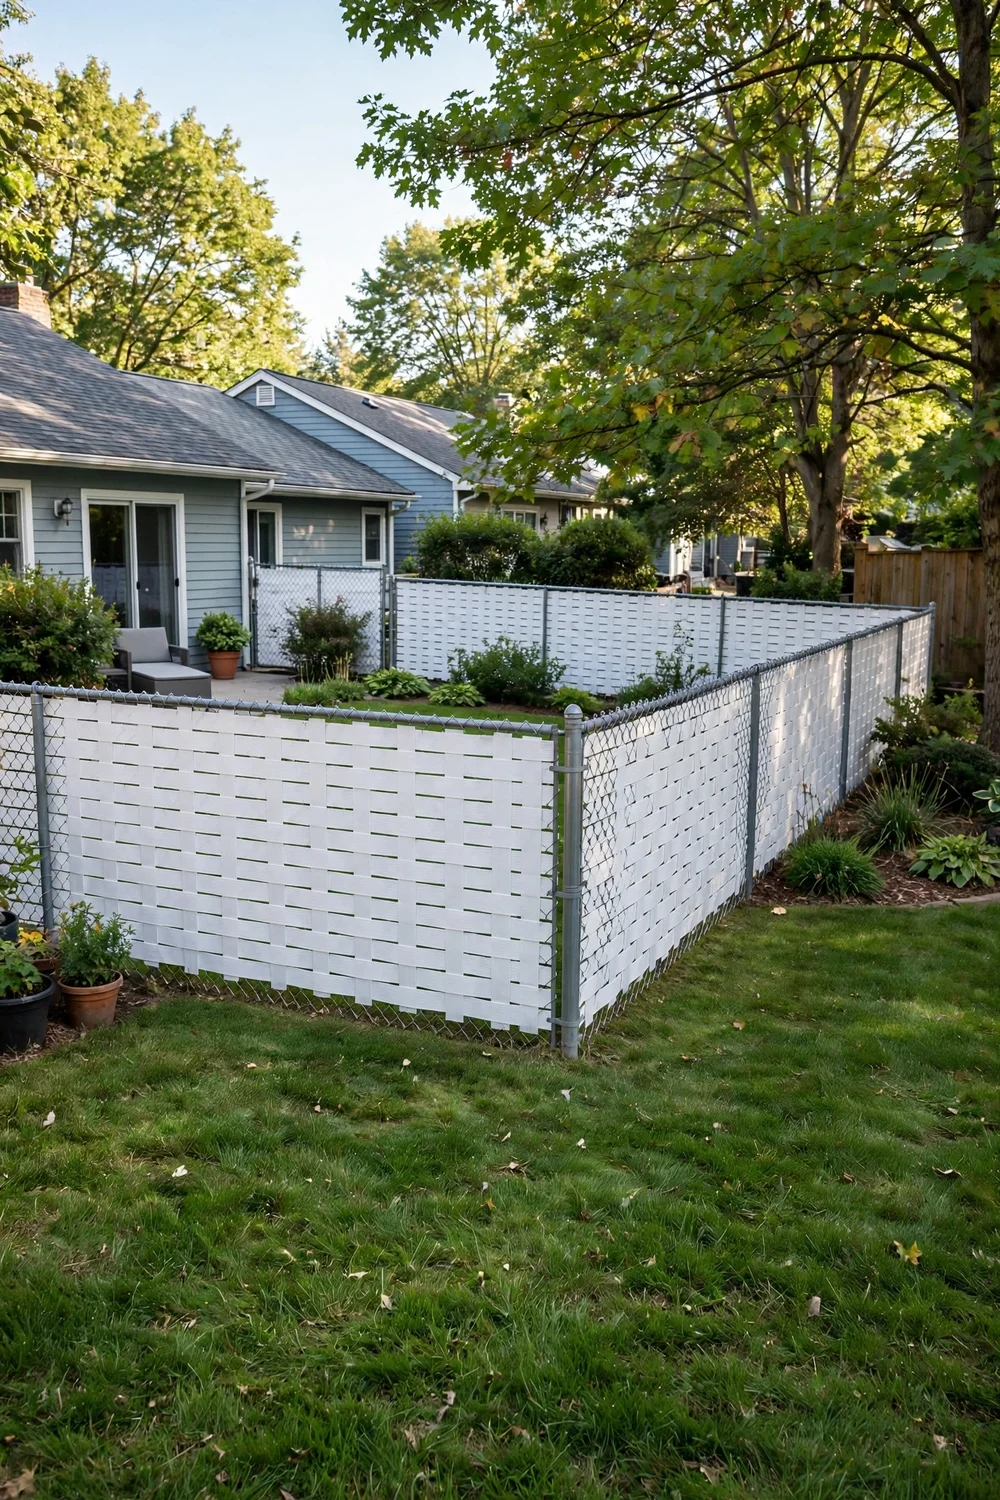
Vinyl privacy slats weave through chain-link mesh and turn an open fence into a solid wall. They cost more than fabric but last far longer and never need repainting. Weave them vertically for the classic look, or diagonally for a pattern that still blocks views. Buy slats made for your exact mesh size so they lock in and do not rattle loose in wind. This is a good rental-friendly fix where you cannot replace the fence itself.
Cost: $· Skill: beginner · Time: 2-4 hours
Try this: mix two slat colors in a simple stripe or checkerboard for a custom look at no extra cost.
8. Reclaimed wood fence
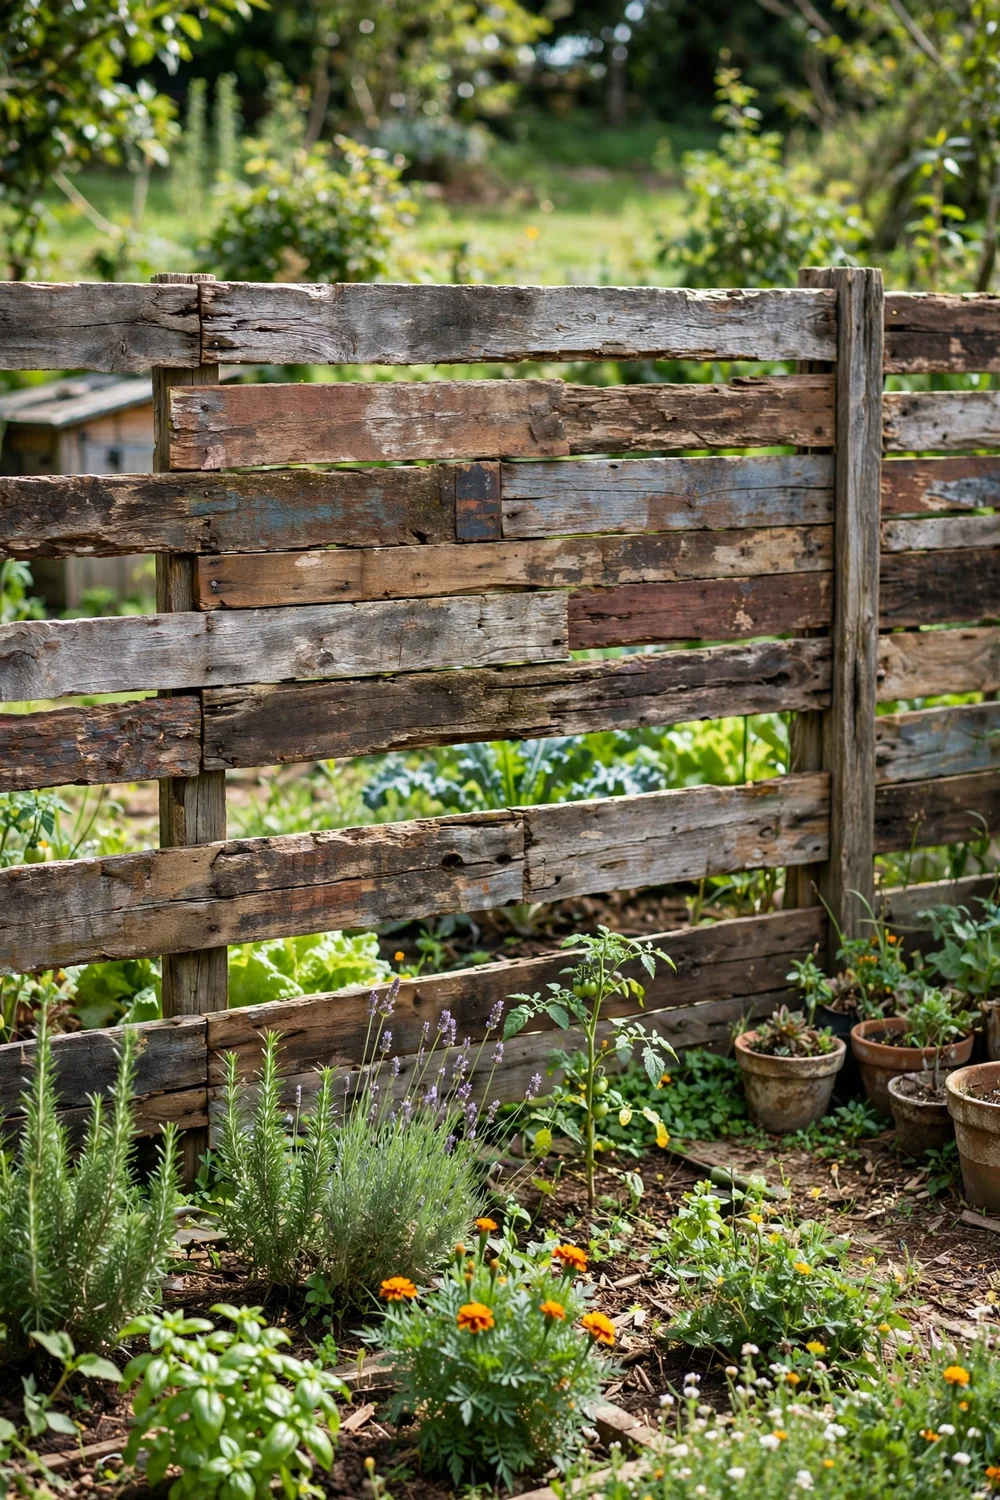
Salvaged lumber from demolition sites, old decks, and marketplace listings builds a fence with real character for very little money. Pull nails, cut out rotted ends, and plane or sand the faces you will see. Mixed widths and tones look intentional if you keep the top line level and the gaps even. Seal everything with exterior stain, since reclaimed wood has already spent years weathering and needs the protection.
Cost: $· Skill: intermediate · Time: 2 weekends
Try this: ask local contractors about teardown lumber before it hits the dumpster. Timing is everything with salvage.
9. Horizontal slat fence
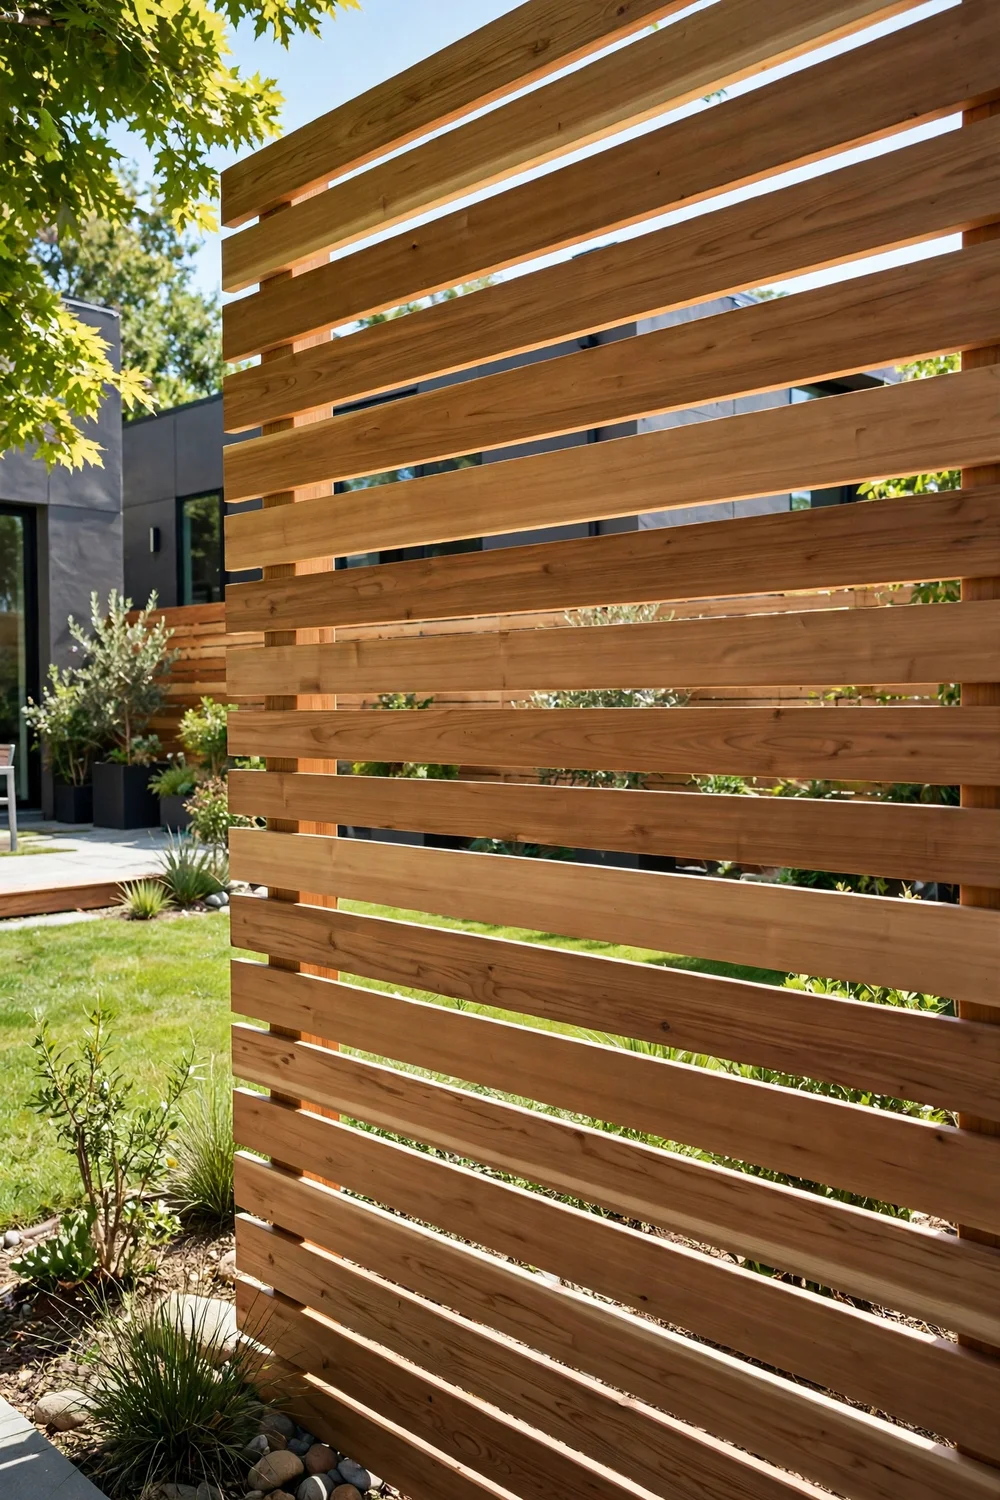
Horizontal boards give a clean, modern look and use less lumber than a traditional vertical board fence when you leave small gaps. Cedar is the classic pick because it resists rot and insects without chemical treatment. Keep the gaps consistent with a spacer block as you work, since uneven spacing is the giveaway of a rushed job. A horizontal run also makes a small yard feel wider, which is a useful side effect.
Cost: $· Skill: intermediate · Time: one weekend
Try this: stain the fence before assembly. Coating all four sides of each board adds years to its life.
10. Vertical board fence
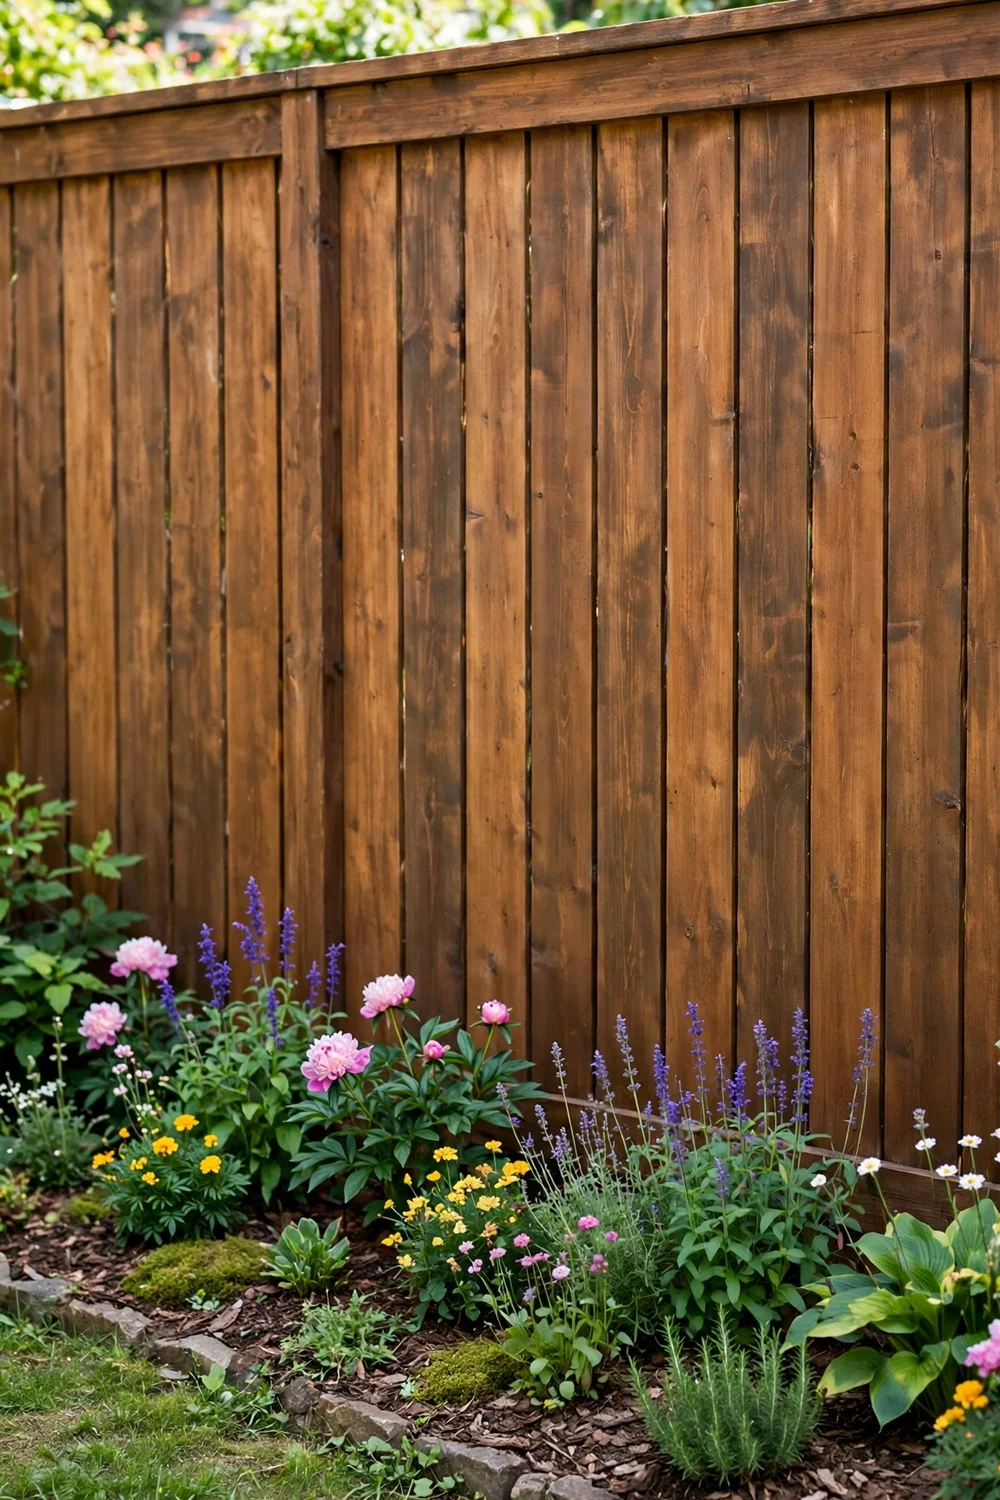
The classic vertical board fence is still the best value in a permanent wood fence. Pressure-treated pine pickets are widely available and cheap, and the build is a straightforward weekend project for anyone comfortable with a level and a drill. Overlap the boards slightly or use board-on-board spacing so the fence stays private as the wood shrinks and swells with the seasons. Restain every 2 to 3 years to keep it solid.
Cost: $· Skill: intermediate · Time: one weekend
Try this: set posts 6 feet apart instead of 8. The shorter span stays straighter and handles wind better.
11. Willow screening rolls
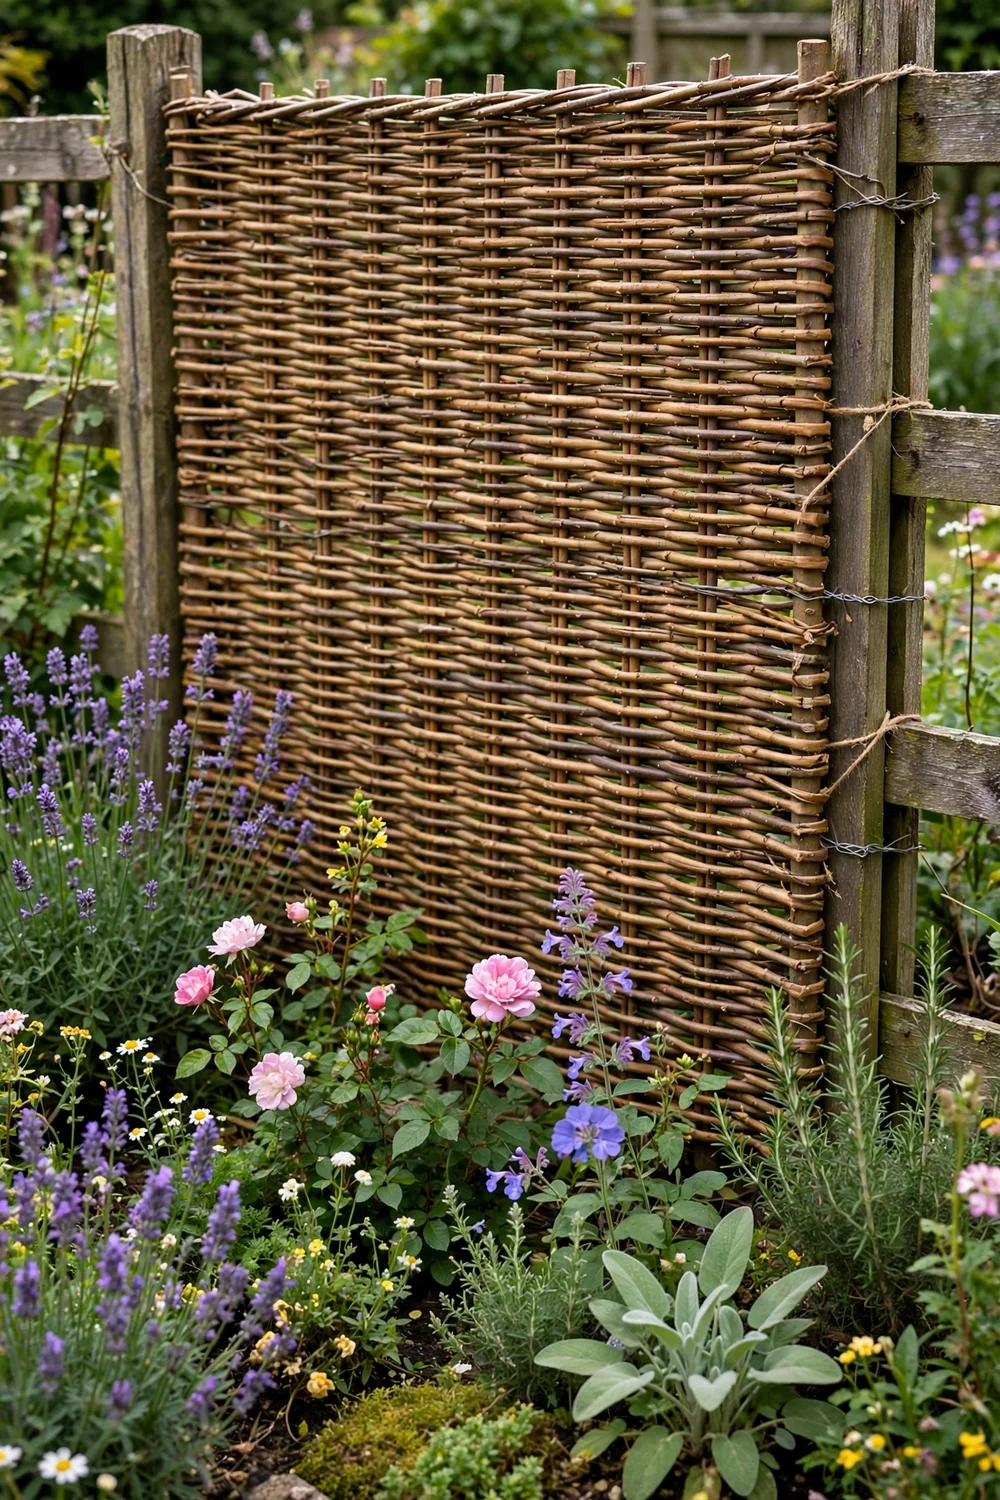
Woven willow screening has a hand-crafted texture that suits cottage and natural-style gardens. It comes in rolls like bamboo but reads warmer and more rustic. Wire it to posts or an existing fence, and trim the top edge straight for a tidy finish. Willow lasts 4 to 6 years outdoors with basic care. It is also one of the lightest screening options, so it works on fences that cannot carry much extra weight.
Cost: $· Skill: beginner · Time: 2-3 hours
Try this: back the willow with a dark landscape fabric layer. It hides gaps and stops weeds poking through.
12. Tall planter privacy wall
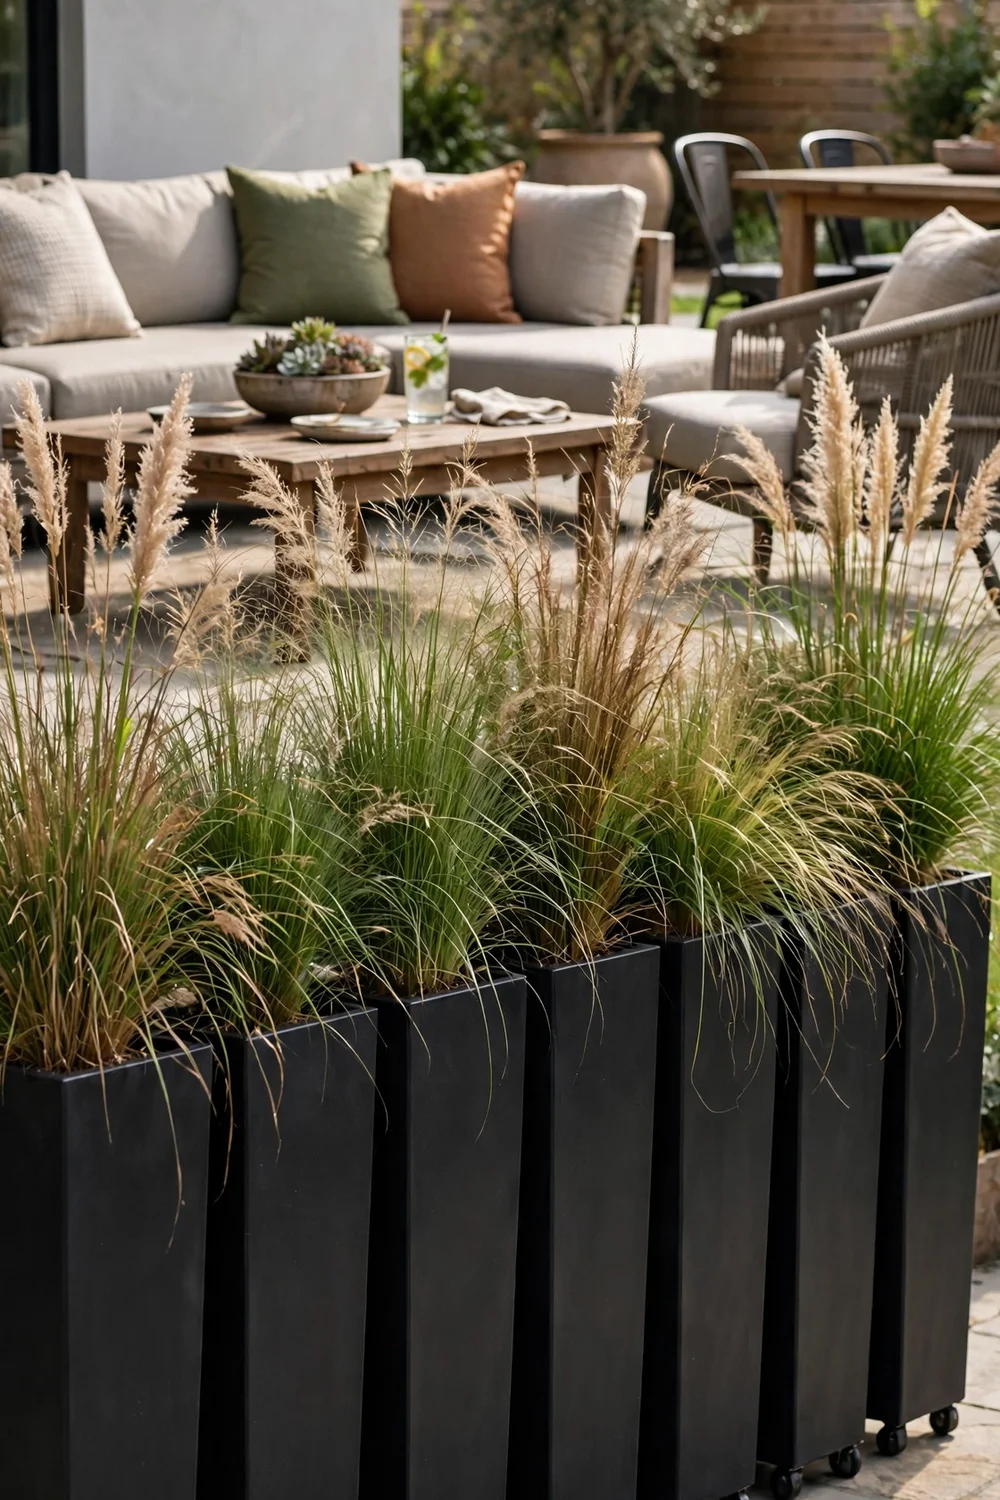
A row of large planters filled with tall grasses or small trees builds a movable privacy wall for patios and rentals. Feather reed grass and fountain grass grow fast, need little care, and give you screening the first season. Use the biggest pots you can manage, since root space decides how tall the plants get. This option costs more per foot than a fence, but you can take it with you when you move.
Cost: $$· Skill: beginner · Time: half a day
Try this: choose clumping grasses, not running bamboo. Running bamboo escapes pots and becomes a neighborhood problem.
13. Trellis with climbing vines
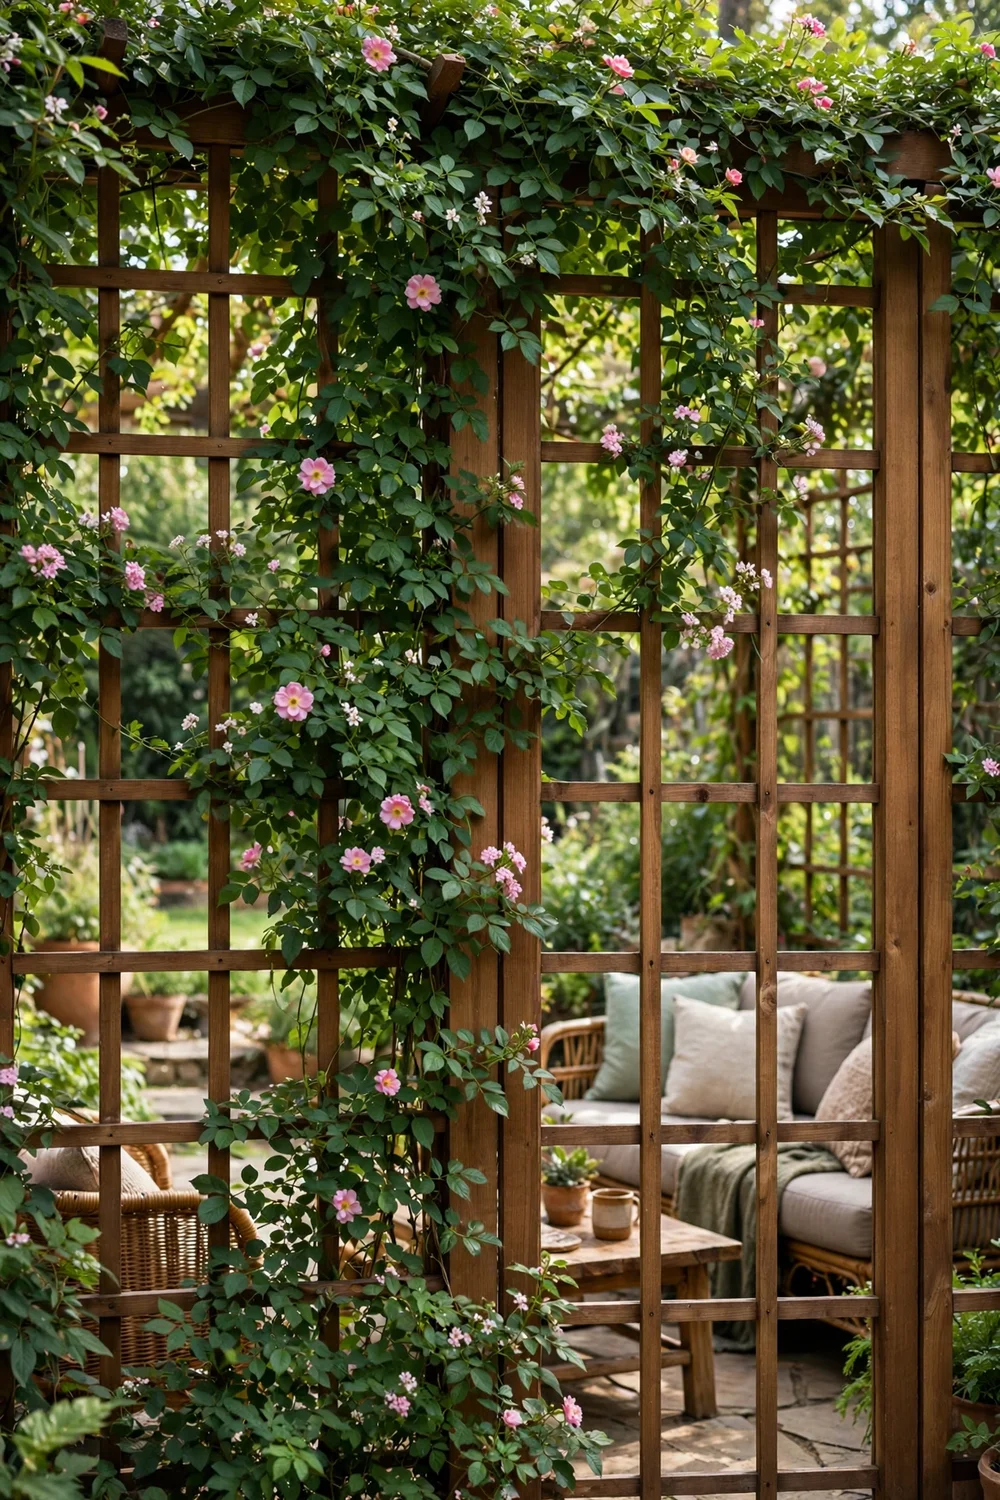
A trellis wall covered in vines gives you privacy plus flowers and fragrance. Build or buy simple lattice panels, set them where you need screening, and plant a fast climber at the base. Clematis, jasmine, and honeysuckle all cover a 6-foot panel in one to two seasons. This is the prettiest cheap screen on the list, and it only gets better with age. Just keep the vines trimmed off gutters and rooflines.
Cost: $· Skill: beginner · Time: one day, one season to fill
Try this: pair an evergreen vine with a flowering one so the screen holds through winter.
14. Corrugated metal panels
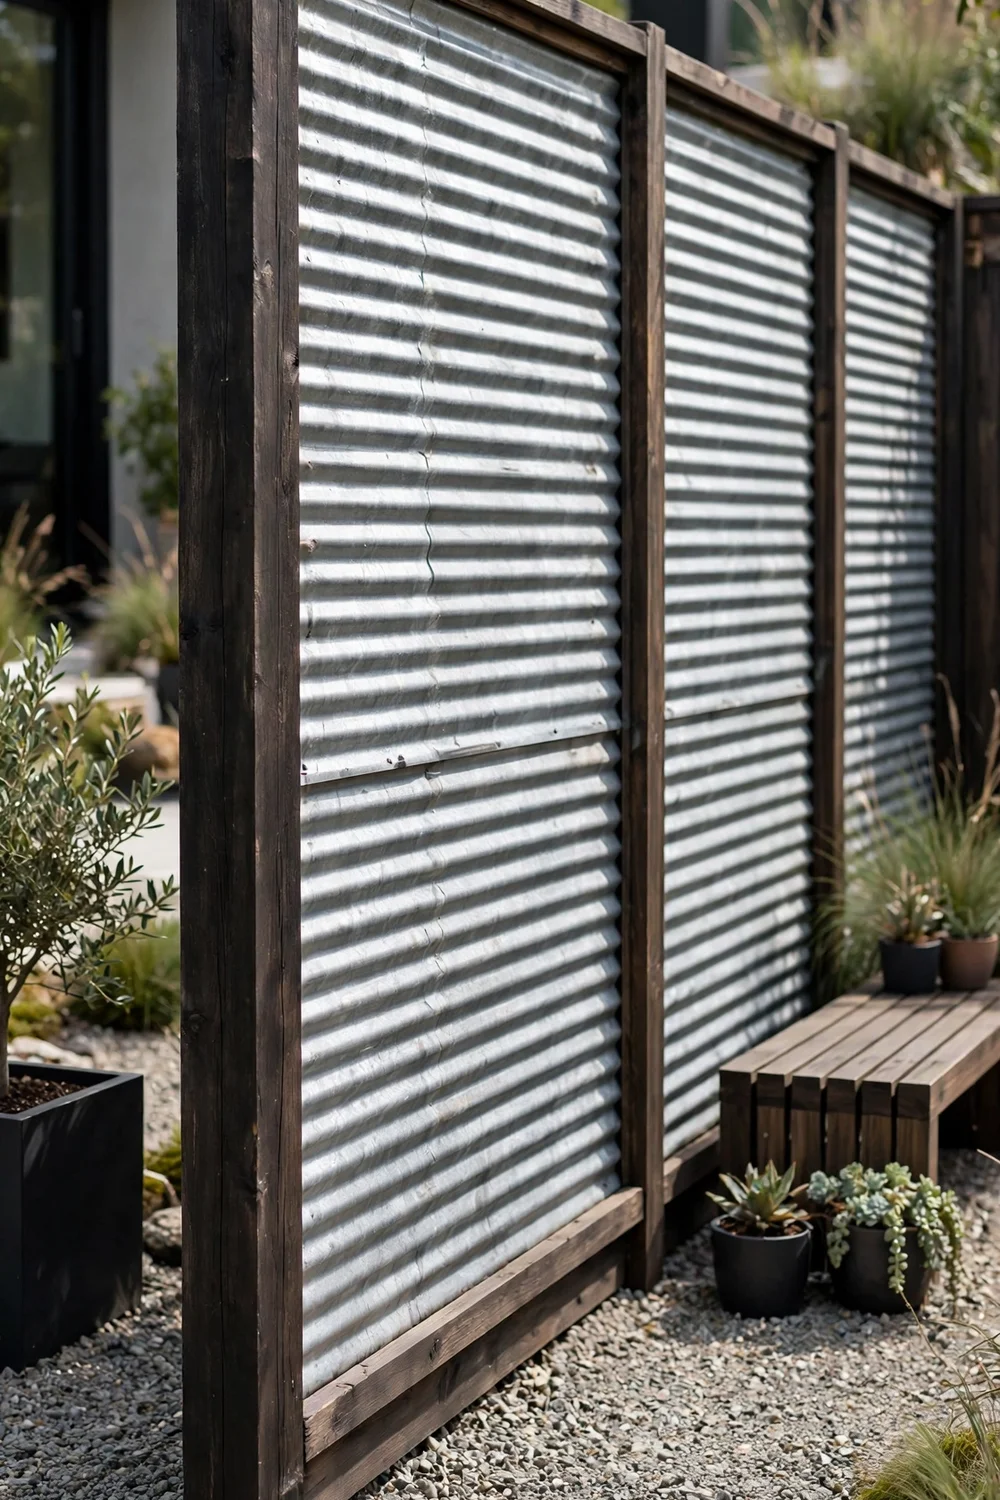
Corrugated metal roofing panels make a sharp, modern fence when framed with wood posts and rails. The panels are cheap, rigid, and last decades without paint. Wear gloves and eye protection when cutting, and file the cut edges smooth. Set the panels inside a wood frame rather than screwing them bare to posts, which looks better and stops the edges from flexing in wind. Check local rules first, since some neighborhoods restrict metal fencing.
Cost: $· Skill: intermediate · Time: one weekend
Try this: run the corrugations horizontally for a look that matches modern horizontal wood fences.
15. Salvaged door and shutter screen
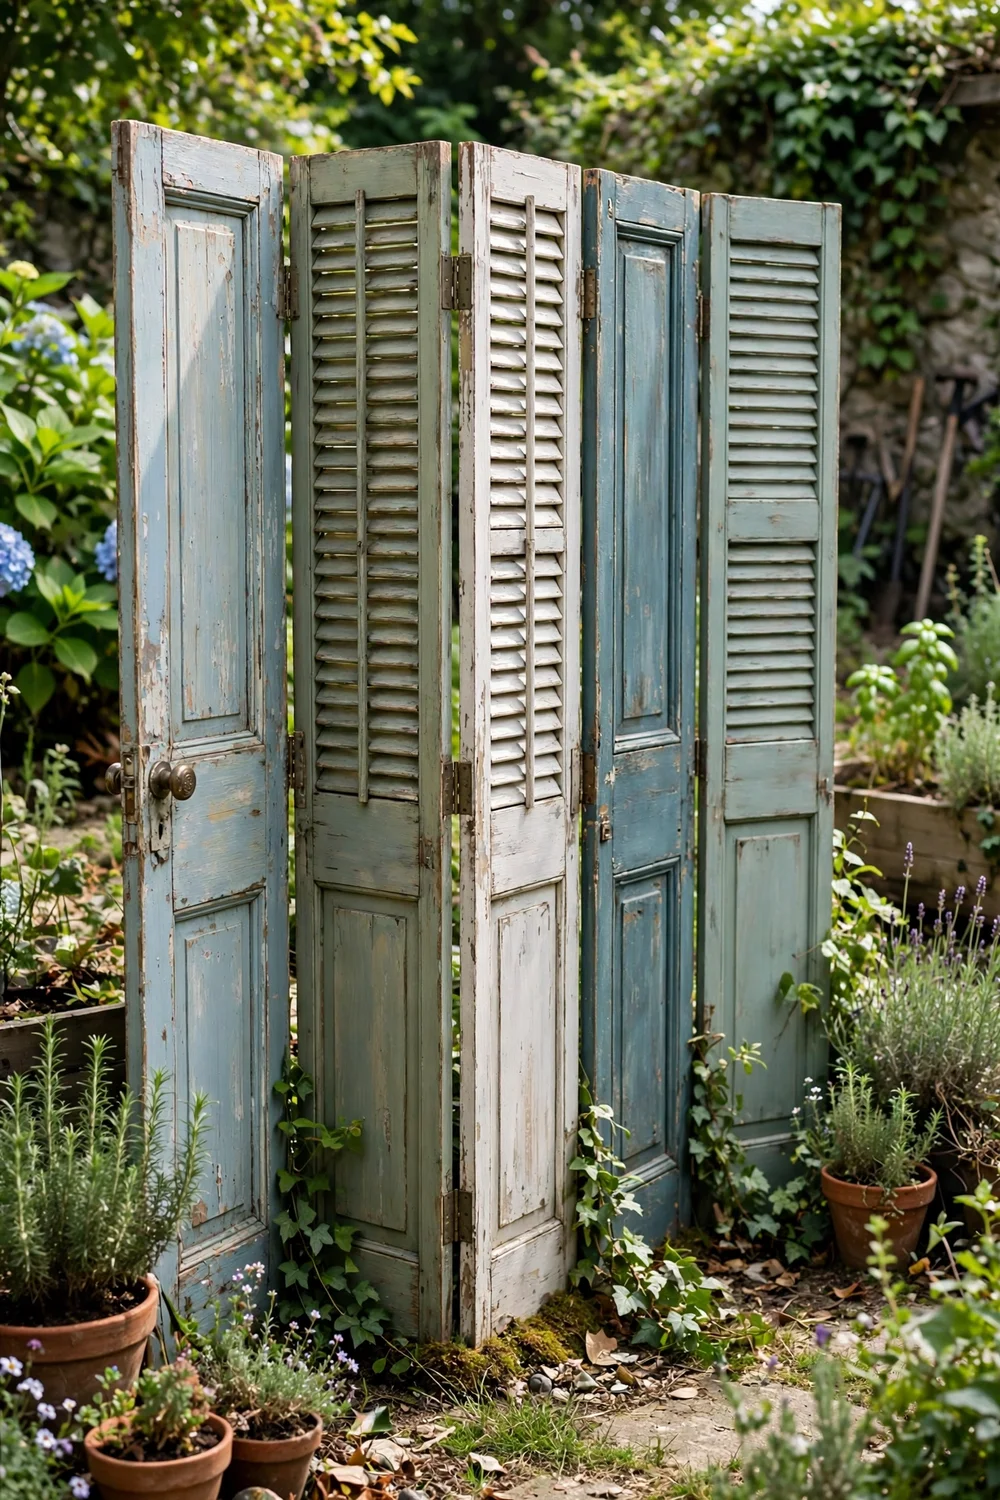
Old doors, shutters, and window frames hinge together into a folding screen that blocks a specific sightline, like a neighbor’s window or a utility box. This is privacy exactly where you need it instead of a full fence line. Sand, prime, and paint everything one color so mismatched pieces read as a set. Anchor the end panels to posts so wind cannot topple the whole thing. Flea markets and salvage shops are the best hunting grounds.
Cost: $$· Skill: beginner · Time: one afternoon
Try this: add small casters to the end panels so you can fold the screen flat against the house in storms.
Fence options at a glance
How to plan your fence line
Walk the boundary with a tape measure and sketch it on paper before buying anything. Mark where you actually need privacy, because screening one side often costs a third of fencing the whole yard. Check your city or county rules for maximum fence height (6 feet is common in back yards, 4 in front) and ask your HOA if you have one. Talk to the neighbors whose line you share. Splitting the cost of a shared fence is normal, and a heads-up avoids disputes later.
Mistakes that cost you later
The expensive mistakes are all in the ground. Posts set too shallow lean within two years, so bury at least a third of the post or 2 feet minimum, whichever is deeper. Skipping the call to 811 before digging can mean hitting a gas or electric line, which is dangerous and costly. And buying the cheapest untreated lumber for ground contact guarantees an early rebuild. Pressure-treated posts with above-ground-rated boards is the budget build that actually lasts.
Fence safety notes
Digging is the risky part of any fence project. Call 811 at least a few days before you dig so utility companies can mark buried lines, and hand-dig carefully near any marks. Wear gloves and eye protection when cutting metal panels or pulling nails from reclaimed wood, and wash your hands after handling pressure-treated lumber. Keep fence lines clear of overhead power lines, and never attach a fence to a utility pole.
For a sturdier take on metal fencing, see these privacy metal fence ideas for post and panel details. If a trellis screen caught your eye, these recycled garden trellis ideas show how to build supports from salvaged materials. Pallet builders should also browse these DIY wooden pallet projects for more ways to use free lumber. And if your fence line needs a path alongside it, these walkway landscaping ideas pair well with any new boundary.
Before you dig post holes, protect your utility lines by following the Call 811 process. For living-fence planting guidance, Oregon State University Extension explains how to plant and care for arborvitae hedges, including spacing and pruning.
Frequently asked questions
What is the cheapest privacy fence?
Privacy screen fabric on an existing chain-link fence is the cheapest at $1 to $3 per linear foot. If you are starting from nothing, a pallet fence at $2 to $6 per linear foot is the lowest-cost solid barrier you can build yourself. Bamboo and reed rolls fall in the middle and install the fastest.
How much does a cheap privacy fence cost per foot?
DIY budget options run $1 to $15 per linear foot depending on the material, while a professionally installed wood privacy fence typically costs $25 to $50 per foot. For a 100-foot run, that is the difference between a few hundred dollars DIY and several thousand installed. Doing the labor yourself is the single biggest saver.
How tall can my privacy fence be?
Most cities allow 6 feet in back yards and 4 feet or less in front yards, but rules vary widely. Some HOAs cap heights lower or restrict materials. Check your municipal code and HOA covenants before you buy materials, since rebuilding a too-tall fence is an expensive lesson.
Do I need a permit to build a fence?
Many areas do not require a permit for fences under 6 feet, but plenty do, and corner lots often have extra sight-line rules. A quick call to your local building or zoning office gives you a clear answer. Keep any written approval with your project papers in case a neighbor asks later.
How long does a pallet fence last?
A pallet fence typically lasts 3 to 5 years outdoors. You can stretch that by using heat-treated pallets, sealing all surfaces with exterior stain, keeping wood off wet soil, and capping the tops against rain. When boards fail, they are easy to swap one pallet at a time.
How far apart should I plant a living privacy hedge?
For arborvitae, space plants 3 to 4 feet apart so the foliage knits into a solid screen. Smaller nursery plants cost much less than mature ones and catch up within a few seasons. Water deeply the first two years, and avoid cutting back to bare wood, since arborvitae does not regrow from old stems.
A cheap privacy fence is one of the highest-value projects in a backyard. Pick the option that matches your budget and timeline, call 811 before you dig, and build it to last. Even a simple screen changes how the whole yard feels. Start with the side that bothers you most and go from there.
For a greener privacy option, see these trellis ideas for privacy.
Keep the inspiration going with 20 Rabbit Proof Fence Ideas That Actually Keep Bunnies Out.


