


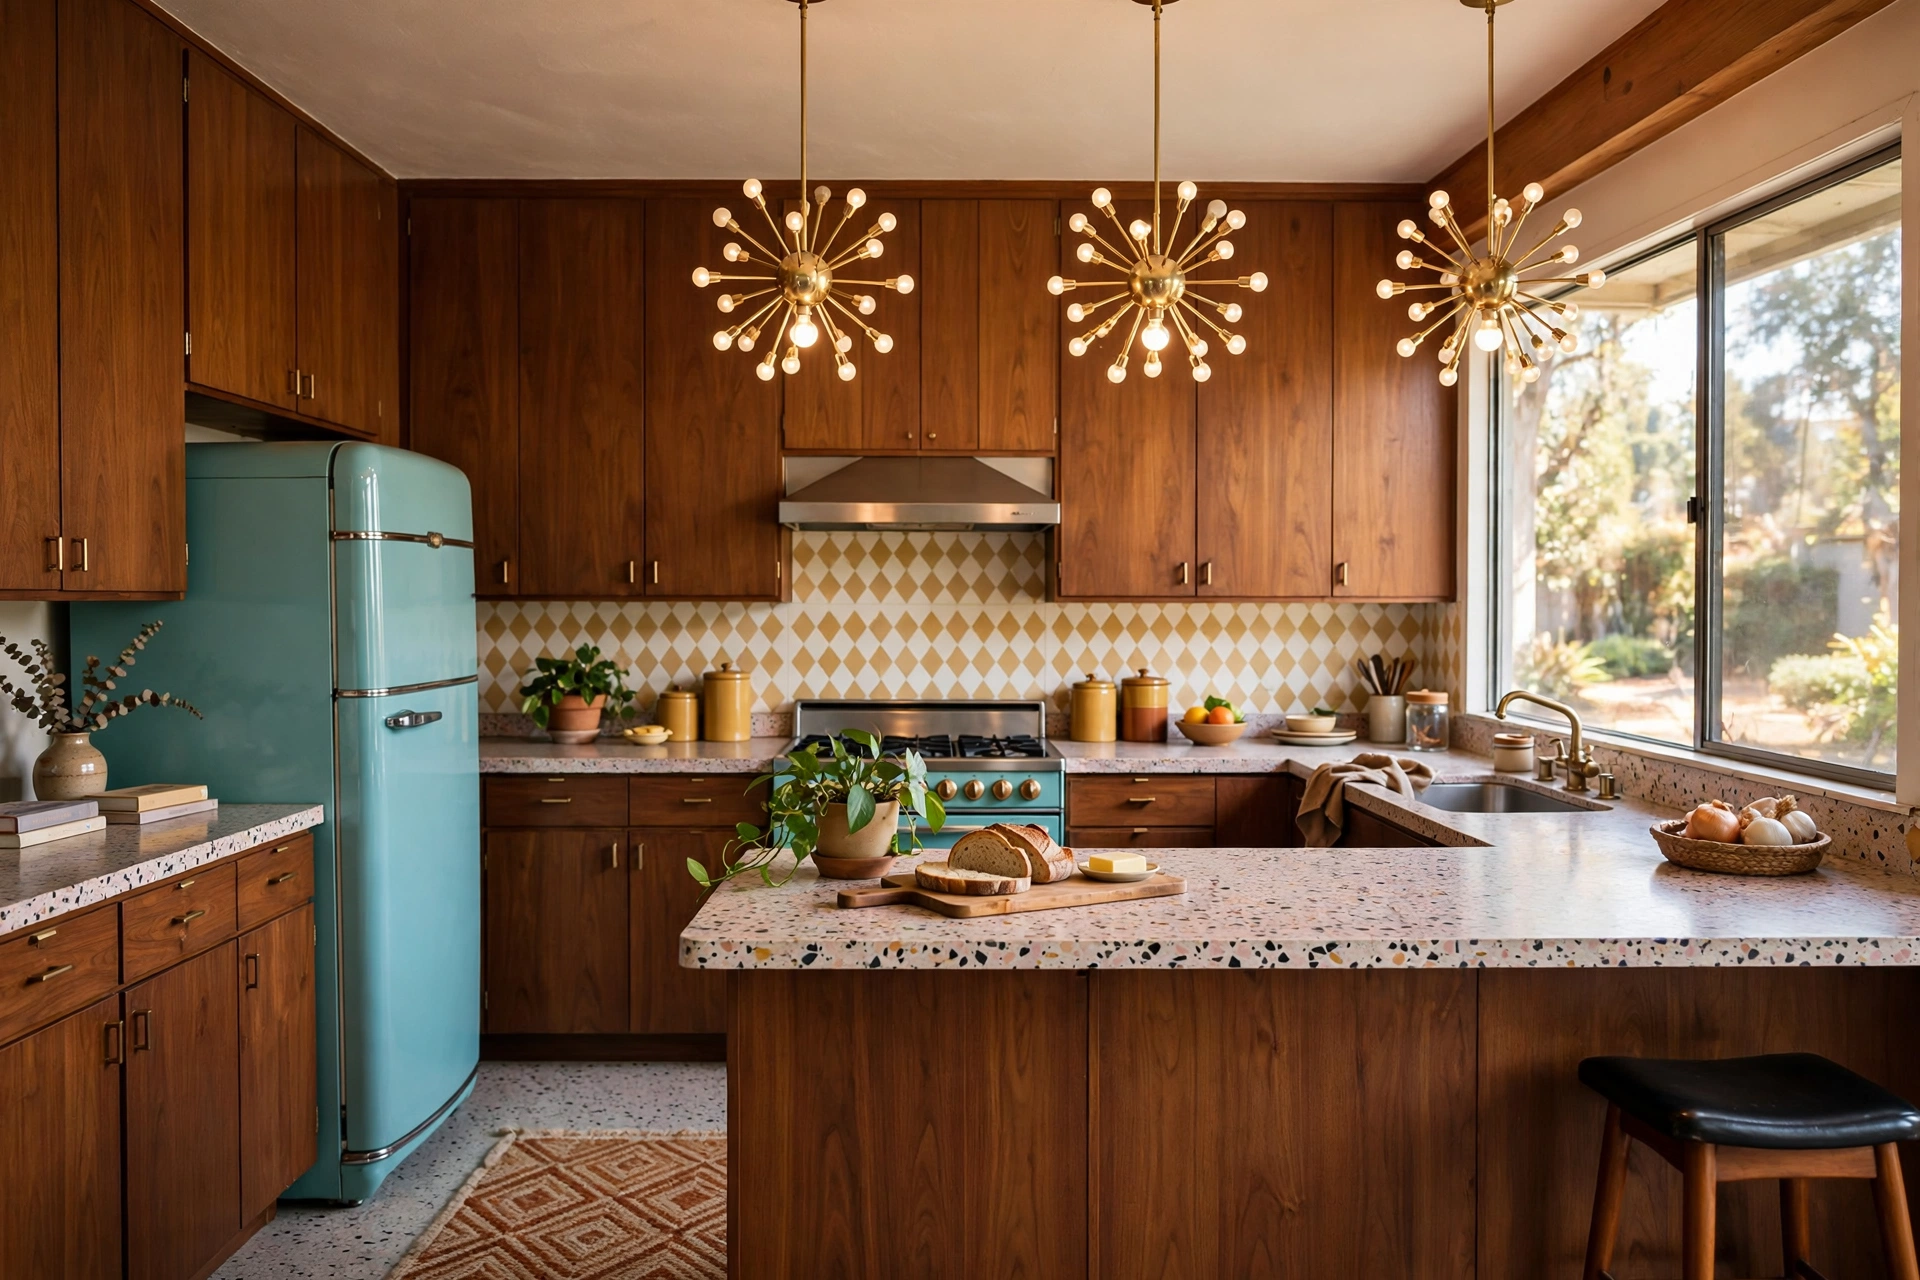
Mid century modern kitchens look easy, and that is exactly why they go wrong. A few walnut cabinets and a sputnik pendant do not make the style, and a room full of retro pieces with no plan feels like a costume instead of a kitchen. The search starts simple: warm wood, clean lines, a little color. Then the choices pile up, and every sample looks right in the store and wrong at home.
This guide gives you 29 mid century modern kitchen design ideas that work as one style system, from cabinets and counters to lighting, seating, and color. Each idea names a real material, size, or price range, plus a cost and difficulty label, so you can pick the pieces that fit your room and your budget. It suits homeowners planning a remodel and renters who want the look without touching the cabinets for good. My own kitchen had plain builder-grade cabinets and a humming fluorescent box, and swapping just the pulls and pendants changed how the room felt at breakfast.
Quick takeaways
- Flat-front wood cabinets, one retro color, and one strong light fixture carry most of the style.
- Walnut, teak, terrazzo, and butcher block are the core materials, and they mix well together.
- Keep strong color to one or two spots, or the room turns loud fast.
- Pendant height, stool space, and island walkways matter as much as the finishes.
- Paint, pulls, lighting, and peel-and-stick tile give renters the look without a remodel.
1. Flat-front walnut cabinets with tapered legs and a floating toe-kick

Walnut flat-front doors set the tone for the whole room. The grain runs horizontal, the finish stays matte, and the doors sit flush with no raised panels or extra trim. A recessed toe-kick makes the base cabinets read like furniture instead of boxes, and short tapered legs under the island base push that effect further. Keep the rest of the room quiet so the wood does the work: cream walls, a plain counter, and one metal finish repeated on pulls and faucet. Order door samples first, since walnut shifts from chocolate brown to warm honey under different light.
Try this: Start with one run of base cabinets in walnut before you commit the whole kitchen.
Cost: $$$$ | Difficulty: Hard
2. Teak veneer cabinets in a matte finish

Teak veneer gives you the golden brown grain of the 1950s and 60s without the price of solid teak boards. The veneer goes over stable plywood boxes, so doors stay flat through steam and seasonal humidity shifts. A matte lacquer finish keeps the grain visible and hides fingerprints better than gloss. Pair teak with cream laminate counters and matte black pulls for a calm, period-correct look. If your budget is tight, use teak veneer on the island and the tall pantry wall only, and paint the perimeter cabinets cream.
Try this: Ask for a full-door sample, not a chip, so you can see how the grain runs.
Cost: $$$ | Difficulty: Hard
3. Olive green flat-front cabinets with brass pulls

Olive green lands right in the mid century palette without shouting. It reads as a neutral next to walnut shelves and brass pulls, and it warms up white tile and cream counters. Flat fronts keep the color from feeling heavy, and slim brass bar pulls add a thin line of shine. Paint existing cabinets if the boxes are solid, and spend the savings on a new faucet and pulls. Keep walls cream and the floor light, since olive darkens a room with little daylight.
Try this: Paint one door first and live with it for a week before you paint the set.
Cost: $$$ | Difficulty: Moderate
4. Reeded glass upper cabinets

Reeded glass breaks up a wall of solid doors while still hiding everyday clutter. The vertical ribs blur dishes into soft shapes, so the cabinets read light without demanding perfect shelf styling. Use reeded glass on two or three uppers near the sink or range, and keep the rest solid. Slim wood or brass frames hold the period look. This works well in small kitchens, where full glass doors can feel busy and solid doors can feel like a wall.
Try this: Put reeded glass on uppers you open daily, so the texture earns its keep.
Cost: $$ | Difficulty: Moderate
5. Speckled terrazzo counters in cream, rust, and black

Terrazzo counters carry the mid century look in one surface: stone chips in cream, rust, and black set in a pale base. The speckle hides crumbs and small stains better than a plain white counter, and it pairs with walnut, teak, and painted cabinets alike. Seal the surface on install and reseal once a year, since cement-based terrazzo stains if spills sit. A honed finish feels closer to the period than high gloss, and an eased edge keeps the profile simple.
Try this: Pick a chip size you like up close, since you will see it every day.
Cost: $$$$ | Difficulty: Hard
6. Butcher block island on tapered legs

A butcher block island on tapered legs reads like a table, not a cabinet run, and that is the mid century trick. The wood top warms up stone or laminate perimeter counters, and the open leg base keeps a small kitchen from feeling boxed in. Oil the top every few months and sand out knife marks once a year. Leave 42 inches of walkway on the working sides and 36 inches where no one cooks, so stools and drawers never fight for space.
Try this: Test the island height with your tallest stool before you fix the legs.
Cost: $$$ | Difficulty: Moderate
7. Breakfast bar with molded plywood stools

A breakfast bar turns one side of the island or peninsula into the room’s casual seat. Molded plywood stools with a simple steel or wood base tuck under the overhang, and their curved seats stay comfortable for a quick meal. Keep the overhang 12 to 15 inches deep so knees fit, and leave 24 inches of width per stool. A walnut or teak bar top ties the seating to the cabinets without matching them exactly.
Try this: Buy one stool first and sit on it at the real counter height.
Cost: $$ | Difficulty: Moderate
8. Built-in banquette with vinyl cushions and under-seat storage

A banquette built into a corner saves the space a table and four chairs would eat. The bench wraps two sides, the table stays small and round or rectangular, and the seats lift for storage of table linens and board games. Vinyl cushions wipe clean after spills and hold the retro diner note without looking like a costume. Add a cushion thickness of 4 inches so the seat stays comfortable through long meals.
Try this: Measure your tallest diner seated, then set the table height 12 inches above the seat.
Cost: $$$ | Difficulty: Hard
9. Retro fridge in mint or cream

A retro fridge in mint or cream gives you the 1950s note in one purchase, with no remodel. Rounded corners, chrome handles, and a single bold color do the work, and modern versions run on current compressors with standard energy ratings. Check the width, depth with handles, and door swing before you order, since retro models run deeper than flat-front fridges. Keep the rest of the kitchen quiet so the fridge stays the one loud piece.
Try this: Look for an Energy Star rated model so the retro look does not raise your power bill.
Cost: $$$ | Difficulty: Easy
10. Wall oven tower at eye level plus a separate cooktop

Mid century kitchens often split cooking into a wall oven tower and a separate cooktop, and the split still works. The oven sits at eye level, so no one bends to lift a heavy roast, and the cooktop frees counter space on either side for prep. Stack the tower with a microwave or a warming drawer if the budget allows, and keep landing space of at least 15 inches beside the oven door. A licensed electrician should handle the new circuits.
Try this: Stand at the oven height in the showroom and lift a Dutch oven before you buy.
Cost: $$$$ | Difficulty: Hard
11. Geometric hexagon tile backsplash

Hexagon tiles give the backsplash a graphic pattern without a loud color. Small hexagons in cream, sage, or soft gray read as texture from across the room and as pattern up close. Run the tile from counter to upper cabinets, and carry it behind open shelves to the ceiling if you want the wall to feel taller. Use a grout color close to the tile so the pattern stays soft, or a darker grout if you want each hexagon to stand out.
Try this: Lay out one square foot on the floor first to check the pattern repeat.
Cost: $$ | Difficulty: Moderate
12. Zellige tile backsplash in sage green

Zellige tiles bring handmade variation to a mid century kitchen: each glazed tile shifts slightly in tone, so the wall catches light differently through the day. Sage green keeps the look calm next to walnut and brass, and the glossy glaze wipes clean after cooking. Seal the grout, since the uneven tile edges leave wider grout lines than flat ceramic. Order 10 percent extra for cuts and for tiles you reject on color.
Try this: Mix tiles from several boxes as you set them, so no one shade pools in a corner.
Cost: $$ | Difficulty: Moderate
13. Sputnik pendant over the island

A sputnik pendant turns the island light into the room’s centerpiece. Thin brass arms reach out from a center globe, and each tip holds a small bulb, so the fixture reads like a starburst from every angle. Hang one large sputnik over a long island or two small ones over a short run, with the bottom of the fixture 30 to 36 inches above the counter. Put it on a dimmer, since bare bulbs glare at full power over a work surface.
Try this: Tape the fixture outline on the ceiling first to check the scale against the island.
Cost: $$ | Difficulty: Easy
14. Globe pendants in a row over the peninsula

Opal glass globe pendants give even light across a peninsula without visual noise. Three globes in a row, spaced 24 to 30 inches apart, light the work surface and the seating side at once. Brass or matte black cords and caps tie the pendants to the faucet and pulls. Hang them 30 to 36 inches above the counter so sightlines across the room stay open, and use warm white bulbs to keep the wood tones golden.
Try this: Hold a globe at the planned height at night to check glare from the seats.
Cost: $$ | Difficulty: Easy
15. Saucer pendants over the breakfast bar

Saucer pendants spread light wide over a breakfast bar, which suits the long, low shape of bar seating. The shallow metal or opal glass shade throws light down on plates and out across the room, and the flat profile stays out of sightlines. Space two saucers 30 inches apart over a six-foot bar, and hang them 30 to 34 inches above the bar top. Matte white or mustard shades both sit well in a mid century palette.
Try this: Pick a shade with a white interior so the light stays warm, not tinted.
Cost: $$ | Difficulty: Easy
16. Mustard lower cabinets with white uppers

Mustard lowers give the kitchen its retro color hit while white uppers keep the room light. The split works because the strong color sits below eye level, where it grounds the room, and the white above reflects daylight. Use flat fronts on both runs and one pull style throughout, so the two colors read as a plan rather than a patch. Cream walls and a wood floor stop the mustard from turning brassy under warm bulbs.
Try this: Paint the lowers first, then decide if the uppers need paint at all.
Cost: $$$ | Difficulty: Moderate
17. Avocado green cabinets with wood counters

Avocado green reads softer than it sounds once it sits next to wood counters and cream tile. The muted yellow-green was a mid century staple, and it pairs with walnut shelves, brass pulls, and white dishes without a clash. Use it on all the cabinets for a full period room, or on the island only for a smaller dose. Keep the backsplash plain, since avocado plus a busy pattern turns the room loud fast.
Try this: Pair avocado with warm wood, not gray, so the green stays soft.
Cost: $$$ | Difficulty: Moderate
18. Burnt orange bar stools and small appliances

Burnt orange works best as an accent, not a wall of color. Two or three bar stools in burnt orange vinyl or molded plastic, plus a kettle or stand mixer in the same family, give the kitchen its retro pop while walnut and cream hold the room steady. Vinyl wipes clean and survives daily use better than fabric at a counter. Keep the orange in one shade family so the stools and appliances read as a set.
Try this: Buy the stools first, then match the small appliance to their exact shade.
Cost: $ | Difficulty: Easy
19. Teal tile backsplash

Teal tile gives the backsplash a deep color that still sits calmly next to walnut and cream. Glossy rectangular tiles laid in a running bond catch light and make a small kitchen feel taller, while matte teal reads quieter in a large room. Carry the tile to the underside of the uppers and finish with a slim metal edge trim. Keep counters plain so the teal stays the room’s one strong color.
Try this: Hold the tile next to your cabinet wood in daylight before you order the full run.
Cost: $$ | Difficulty: Moderate
20. Cork flooring

Cork floors fit mid century kitchens twice over: the material is warm underfoot, quiet, and true to the period. Planks or tiles in a natural honey tone hide crumbs better than dark wood, and cork gives slightly underfoot, which helps during long prep sessions. Seal the surface well, since cork stains if water sits in seams, and wipe spills fast near the sink and dishwasher. Use a floating click floor if you want a weekend install without glue.
Try this: Order a sample plank and spill water on it to check how the seal holds.
Cost: $$ | Difficulty: Moderate
21. Checkerboard vinyl floor in cream and charcoal

A checkerboard floor in cream and charcoal brings instant retro rhythm to a mid century kitchen. Large 12-inch squares keep the pattern calm in a small room, while peel-and-stick tiles make it a weekend job over a smooth subfloor. Lay the pattern from the room’s center so the cuts land evenly at the edges. Seal the seams in wet zones near the sink, and use a matte finish so the floor does not glare under pendants.
Try this: Dry-lay one row across the room to check where the pattern falls at the door.
Cost: $ | Difficulty: Easy
22. Exposed brick wall behind the range

An exposed brick wall behind the range adds texture that flat tile cannot match. Real brick needs a heat-safe seal and a washable finish near cooking splatter, while thin brick veneer gives the same look with less weight and depth. Keep the brick to one wall so the room does not feel heavy, and pair it with plain cabinets and a simple hood. Check the wall for dust and loose mortar before you seal it.
Try this: Seal a test patch first, since sealers darken brick more than most people expect.
Cost: $$ | Difficulty: Moderate
23. Breeze block screen between kitchen and dining

A breeze block screen divides the kitchen from the dining area without closing the rooms off. The pierced concrete blocks pass light and air, and their geometric pattern is pure mid century. Build the screen as a half wall topped with a wood cap, which doubles as a serving ledge, or run it full height beside a doorway. Anchor the screen to the floor and the adjoining wall, and keep the blocks out of wet zones.
Try this: Stack a few blocks dry first to check the pattern and the light it passes.
Cost: $$$ | Difficulty: Hard
24. Round pedestal table with molded chairs

A round pedestal table fits a kitchen corner or a small dining nook better than a rectangular table, since no legs block chairs. A walnut or white laminate top on a single pedestal base seats four without crowding, and molded plywood or plastic chairs slide under the edge when not in use. Size the table at 42 to 48 inches across for four people, and leave 36 inches of pull-out space behind each chair.
Try this: Sit four people at the floor model before you buy, elbow room matters more than the catalog size.
Cost: $$ | Difficulty: Easy
25. Appliance garage with a tambour door

An appliance garage hides the toaster, coffee maker, and blender behind a tambour door that rolls up and out of sight. The garage sits on the counter under an upper cabinet, so small appliances stay plugged in and ready without cluttering the work surface. Match the tambour slats to the cabinet wood, and leave an outlet inside the garage plus a vent gap at the back for heat. Measure your tallest appliance before you set the garage height.
Try this: List every appliance you use weekly, then size the garage to the tallest one.
Cost: $$ | Difficulty: Moderate
26. Warm LED strips under the upper cabinets

Warm LED strips under the upper cabinets change how a mid century kitchen works at night. The strips wash the counter with even light, so prep stays safe after dark, and the warm tone keeps walnut and brass looking golden instead of gray. Stick the strips to the front lip of the cabinet so the light falls on the counter, not on the backsplash. Put them on a dimmer or a separate switch from the pendants.
Try this: Buy a 2700K strip first, since cooler whites flatten wood tones.
Cost: $ | Difficulty: Easy
27. Framed atomic-age art above the banquette

One framed atomic-age print above the banquette gives the kitchen its art moment without a gallery wall. Look for starbursts, boomerangs, or simple geometric shapes in mustard, teal, and charcoal on cream paper, and frame it in slim walnut or black wood. Hang the center of the print at eye level from the seat, about 58 to 60 inches from the floor, so it reads from the table and from the doorway.
Try this: Cut a paper template the size of the frame and tape it up for a day first.
Cost: $ | Difficulty: Easy
28. Cane-back counter stools at the island

Cane-back counter stools add woven texture to an island without the weight of solid wood backs. The open weave keeps sightlines through the room, and the light frame suits a mid century palette of walnut, cream, and brass. Check the seat height against your counter: 24-inch stools suit a 36-inch counter, and 26-inch stools suit a 42-inch bar. Add felt pads on the feet, since cane stools get dragged across hard floors daily.
Try this: Sit on the stool for ten minutes before you buy a set, cane seats vary in give.
Cost: $$ | Difficulty: Easy
29. Renter refresh with contact paper, pulls, and peel-and-stick tile

Renters can still get the mid century look without touching the cabinets for good. Wood-grain contact paper over flat cabinet fronts, slim new pulls on the existing holes, and peel-and-stick tile over the backsplash change the room in a weekend, and all three reverse at move-out. Clean and dry every surface first, since adhesive fails on grease. Keep the landlord’s rules in writing, and save the old pulls in a bag for move-out day.
Try this: Wrap one door first and check the edges after a week of steam and heat.
Cost: $ | Difficulty: Easy
How to choose the right mid century look for your kitchen
Start with the pieces you cannot change cheaply. If the cabinets are solid and the layout works, paint or reface them and spend the savings on counters and lighting. If the layout fights you every day, fix the layout first, since no finish saves a kitchen with no landing space beside the range.
Pick one wood, one retro color, and one metal, then repeat them. Walnut plus mustard plus brass is a full palette on its own. Adding teal tile, orange stools, and chrome pulls on top of that turns the room into a sample board. Small kitchens do best with light uppers, one strong lower color, and open or glass fronts to break up the wall.
Order samples and live with them for a week. Wood shifts under your bulbs, tile shifts under daylight, and paint shifts against your floor. A sample door, a tile square, and a fabric swatch on the real counter tell you more than any photo.
Mid century modern kitchen ideas at a glance
| Idea | Cost | Difficulty | Best for |
|---|---|---|---|
| Flat-front walnut cabinets | $$$$ | Hard | Full remodels |
| Teak veneer cabinets | $$$ | Hard | Period-correct remodels |
| Olive green flat-front cabinets | $$$ | Moderate | Paint refreshes |
| Reeded glass uppers | $$ | Moderate | Small kitchens |
| Speckled terrazzo counters | $$$$ | Hard | Full remodels |
| Butcher block island on legs | $$$ | Moderate | Small kitchens |
| Breakfast bar with molded stools | $$ | Moderate | Casual seating |
| Built-in banquette | $$$ | Hard | Corner nooks |
| Retro fridge in mint or cream | $$$ | Easy | No-remodel updates |
| Wall oven tower plus cooktop | $$$$ | Hard | Serious cooks |
| Hexagon tile backsplash | $$ | Moderate | Graphic pattern lovers |
| Zellige tile backsplash in sage | $$ | Moderate | Handmade texture |
| Sputnik pendant over island | $$ | Easy | Statement lighting |
| Globe pendants over peninsula | $$ | Easy | Even task light |
| Saucer pendants over bar | $$ | Easy | Bar seating |
| Mustard lowers, white uppers | $$$ | Moderate | Bold color on a budget |
| Avocado green cabinets | $$$ | Moderate | Full period rooms |
| Burnt orange stools and appliances | $ | Easy | Accent color |
| Teal tile backsplash | $$ | Moderate | Deep color accents |
| Cork flooring | $$ | Moderate | Comfort underfoot |
| Checkerboard vinyl floor | $ | Easy | Weekend projects |
| Brick wall behind range | $$ | Moderate | Texture lovers |
| Breeze block screen | $$$ | Hard | Open-plan rooms |
| Round pedestal table | $$ | Easy | Small dining nooks |
| Appliance garage, tambour door | $$ | Moderate | Clear counters |
| Warm LED strips under cabinets | $ | Easy | Night prep light |
| Atomic-age art above banquette | $ | Easy | One art moment |
| Cane-back counter stools | $$ | Easy | Island seating |
| Renter refresh, contact paper | $ | Easy | Rentals |
Common mistakes to avoid
Using four retro colors at once is the fastest way to lose the style. One strong color plus warm wood and cream reads mid century. Four strong colors read as a theme party.
Pairing flat-front cabinets with ornate cup pulls or raised-panel doors fights the whole look. Flat fronts need slim, straight hardware or none at all. Gloss on every surface is another trap: glossy cabinets, glossy tile, and glossy counters together glare under pendants, so keep at least one large surface matte.
Skipping clearances causes daily friction. Islands need 42 inches on working sides, stools need 24 inches of width each, and pendant bottoms belong 30 to 36 inches above the counter. Open shelving on every wall is a last mistake to skip: grease and dust settle on open shelves fast, so keep open shelves to one or two runs and close the rest.
Safety notes for a kitchen remodel
Hire a licensed plumber for pipe moves and a licensed electrician for new circuits, oven towers, and fixtures near the sink. GFCI protection belongs on every counter outlet near water, and the range hood should vent outdoors, not into the attic. Anchor tall pantry units and freestanding ranges with anti-tip brackets into studs, since a climbing child or a heavy oven door can pull them forward. Homes built before 1978 need a lead-paint check before sanding or scraping paint, and range work should follow the EPA Renovation, Repair and Painting program rules. Choose matte or slip-resistant flooring near the sink and dishwasher, and keep a clear landing zone beside the range and oven.
For anchoring guidance, see the CPSC Anchor It guidance. For lead-paint rules in older homes, see the EPA Renovation, Repair and Painting program. For efficient appliance choices, see Energy Star.
More kitchen and home ideas
If you want the same warm retro style at the front door, start here: perfect mid century modern foyer ideas.
For the same style in a smaller wet room, see these: mid century modern bathroom renovation ideas.
If you want general kitchen planning before you commit to a style, read these: inspiring kitchen design ideas.
For a bolder take on wood cabinets with black accents, look at these: modern black and wood kitchen ideas.
If walnut is the material you love most, these ideas go deeper on it: creative walnut kitchens design ideas.
Frequently asked questions
What defines a mid century modern kitchen?
A mid century modern kitchen uses flat-front cabinets in warm wood like walnut or teak, clean lines with little trim, and one or two retro colors such as mustard, avocado, or teal. Terrazzo, butcher block, geometric tile, and statement lighting like sputnik or globe pendants complete the style. The room stays uncluttered, with open layouts and simple hardware.
Can I get the look without replacing my cabinets?
Yes, if the cabinet boxes are solid. Paint flat fronts in olive, mustard, or avocado, swap the pulls for slim brass or matte black bars, and add a sputnik or globe pendant. Peel-and-stick tile and a checkerboard vinyl floor change the room further without touching the boxes. Renters can use wood-grain contact paper and peel-and-stick tile, both of which reverse at move-out.
What colors work best in a mid century modern kitchen?
Mustard yellow, avocado green, burnt orange, teal, and sage green are the core retro colors, and they work best one or two at a time. Pair a strong color with warm wood and cream walls so the room stays calm. Keep counters and backsplashes plain when the cabinets carry the color, or the room turns loud.
Is terrazzo hard to maintain?
Terrazzo needs sealing on install and resealing about once a year, since cement-based terrazzo stains if spills sit. Day to day, it wipes clean like stone, and its speckle hides crumbs better than a plain white counter. A honed finish shows fewer marks than high gloss, and prompt wiping handles most spills.
How do I keep a mid century kitchen from looking like a costume?
Limit retro pieces to a few strong moves and keep the rest quiet. One wood, one retro color, and one metal, repeated through the room, read as a style rather than a set. Mix one or two true vintage pieces with new cabinets and modern appliances, so the kitchen works for daily cooking and not just for photos.
Final thoughts
Pick the three moves that change your kitchen most, usually cabinets or paint, one light fixture, and one color, and let the rest of the room stay quiet. Mid century style rewards restraint more than a full set of retro pieces, and a kitchen planned this way still works hard on ordinary weekdays.


