



Halloween is three days away, the house looks completely ordinary, and the party store shelves are picked clean. The good news: indoor Halloween decor is mostly about placement, not purchases. A few bags of paper bats, some cheesecloth, and warm low lighting can take a normal home full spooky in one evening.
These 20 last minute indoor Halloween decor ideas skip the dining table entirely and focus on walls, windows, doors, shelves, and lighting instead. Each one takes under 30 minutes, most cost less than $10, and none of them need a craft degree. Work room by room and stop when it feels done.
Quick takeaways
- Lighting changes everything: dim, warm light makes even simple decor look spooky.
- One strong moment per room beats a little clutter in every corner.
- Paper bats, cheesecloth, and stretch webs are the three fastest high-impact supplies.
- Keep walkways clear and use LED candles near fabric, webs, and dried materials.
- Almost every idea here is renter-safe and comes down without a trace.
1. Paper bat wall swarm
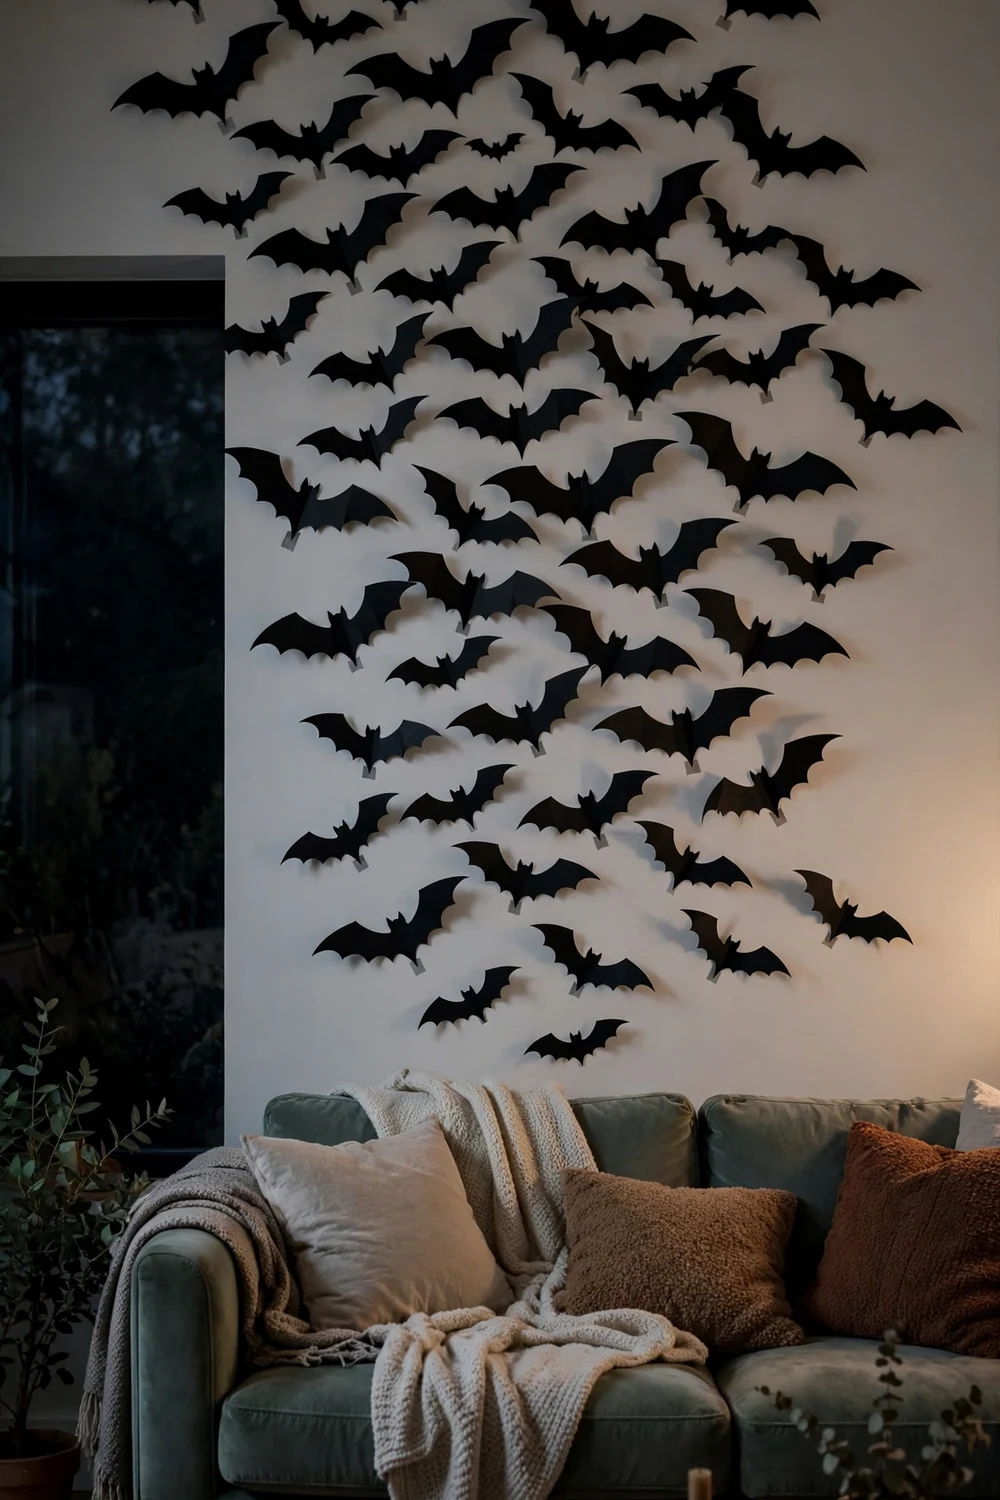
Cut 20 to 30 bat shapes from black construction paper and tape them to one wall so they sweep upward like a flock taking flight. Painter’s tape holds them on painted walls without damage, and folding each bat slightly down the middle gives the wings dimension. Concentrate them in one corner and let them thin out as they rise. This is the single highest-impact indoor Halloween trick for the money.
Try this: vary the bat sizes from two inches to six inches so the swarm looks natural. Cost: $. Difficulty: easy, 25 minutes.
2. Cheesecloth furniture drapes
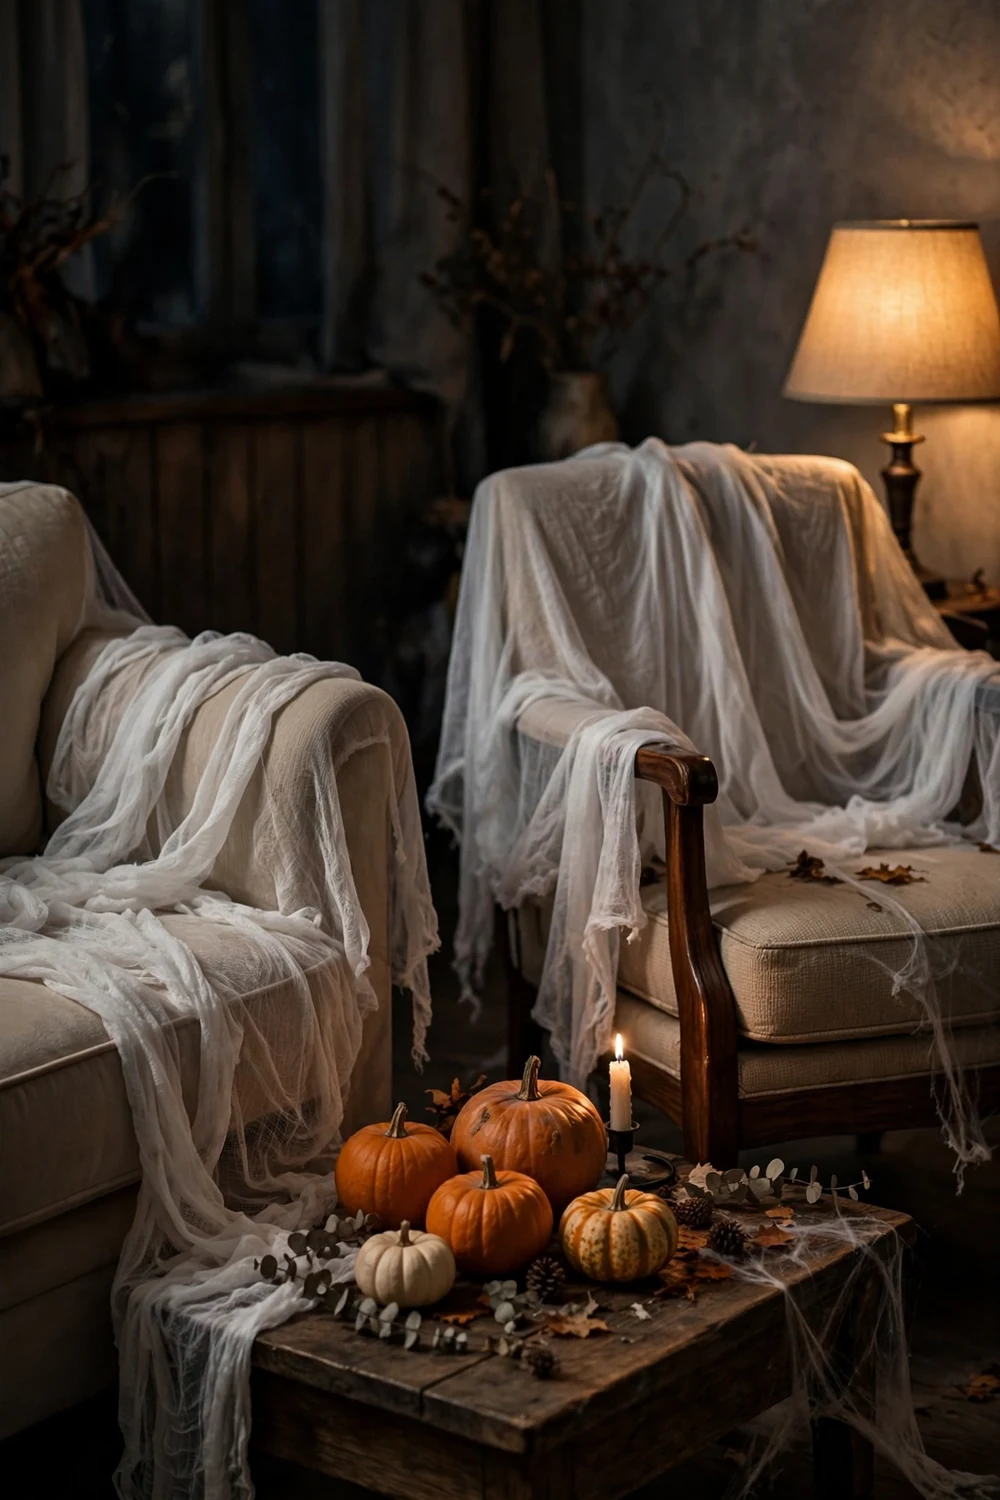
Throw white cheesecloth loosely over the arms of your sofa and chairs so it hangs like dusty shrouds in an abandoned house. Do not smooth it. The wrinkles and gaps are the whole effect. A three-yard package covers two chairs and a sofa arm, and it lifts right off on November 1. Pair it with dim lamps and the room reads haunted without moving a single piece of furniture.
Try this: let one corner of cloth trail onto the floor for an extra abandoned feel. Cost: $. Difficulty: easy, 10 minutes.
3. Corner stretch spider webs
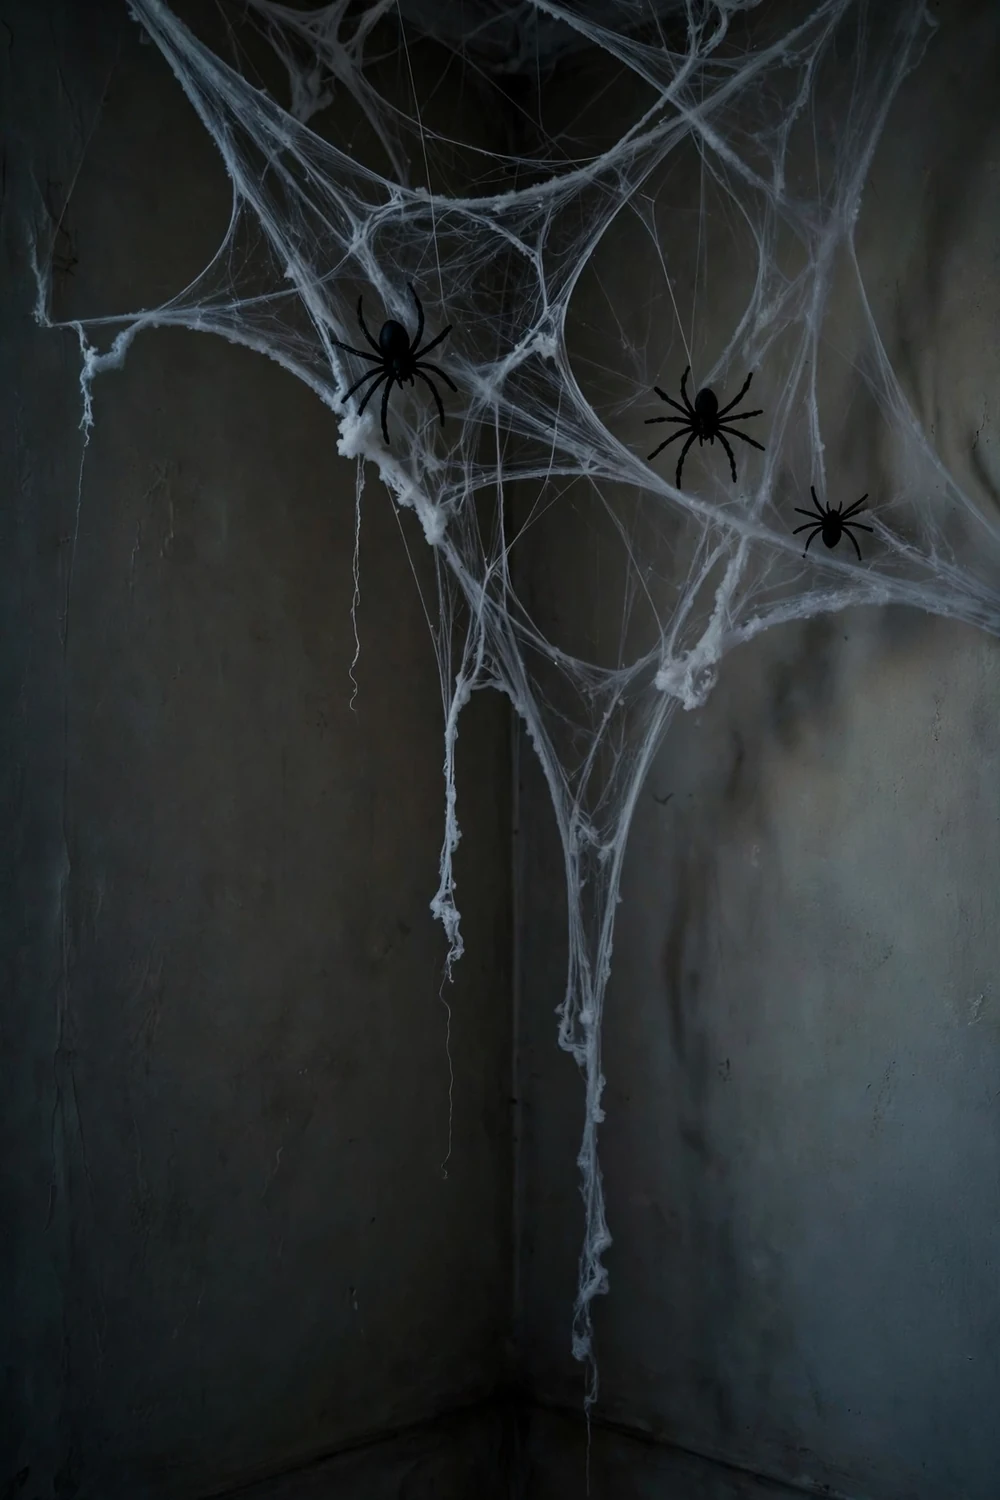
Pull stretchy web material thin across the corners where your walls meet the ceiling and anchor it with small pieces of painter’s tape. The secret is pulling it thinner than you think, in small sections, so it looks like real webbing instead of cotton clumps. Add three or four plastic spiders and one ceiling corner becomes the spookiest spot in the house. One bag covers four to six corners.
Try this: stretch the web over a picture frame corner too, so it looks like the web grew there. Cost: $. Difficulty: easy, 15 minutes.
4. Mason jar lanterns
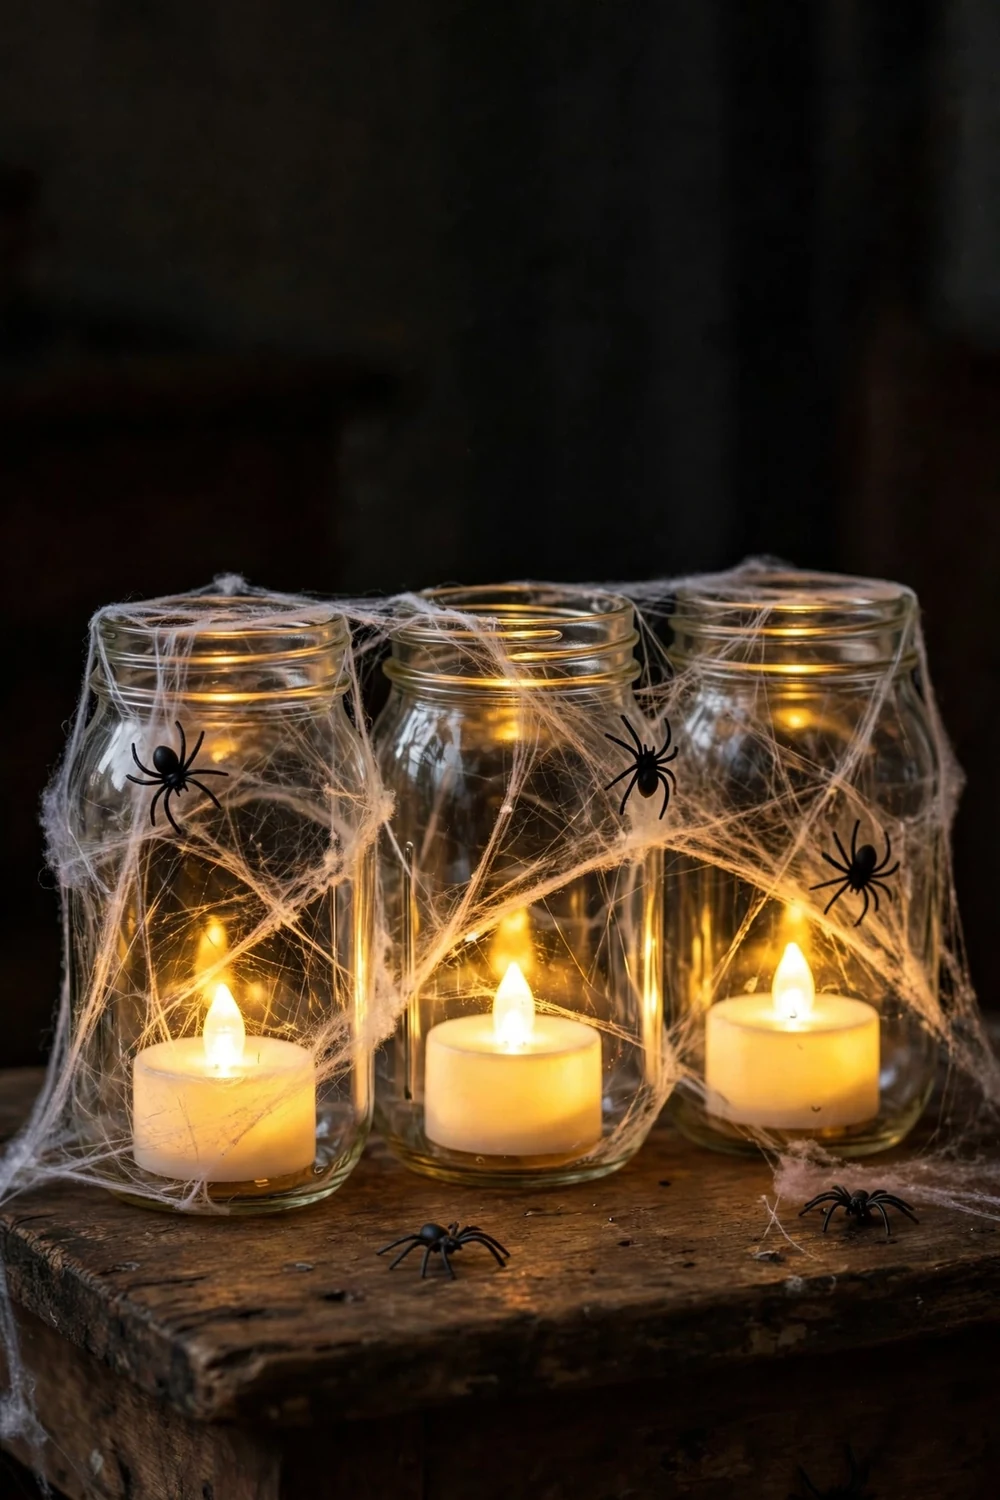
Drop an LED tea light into each mason jar, wrap a wisp of fake web around the outside, and tuck a plastic spider on the rim. Line three jars down a console, a bookshelf, or a bathroom counter. The glass magnifies the glow and the jars read as old apothecary pieces. Use jars you already own and this costs almost nothing.
Try this: smear a thin layer of orange tissue paper inside one jar for an amber glow. Cost: $. Difficulty: easy, 15 minutes.
5. Cupcake liner string lights
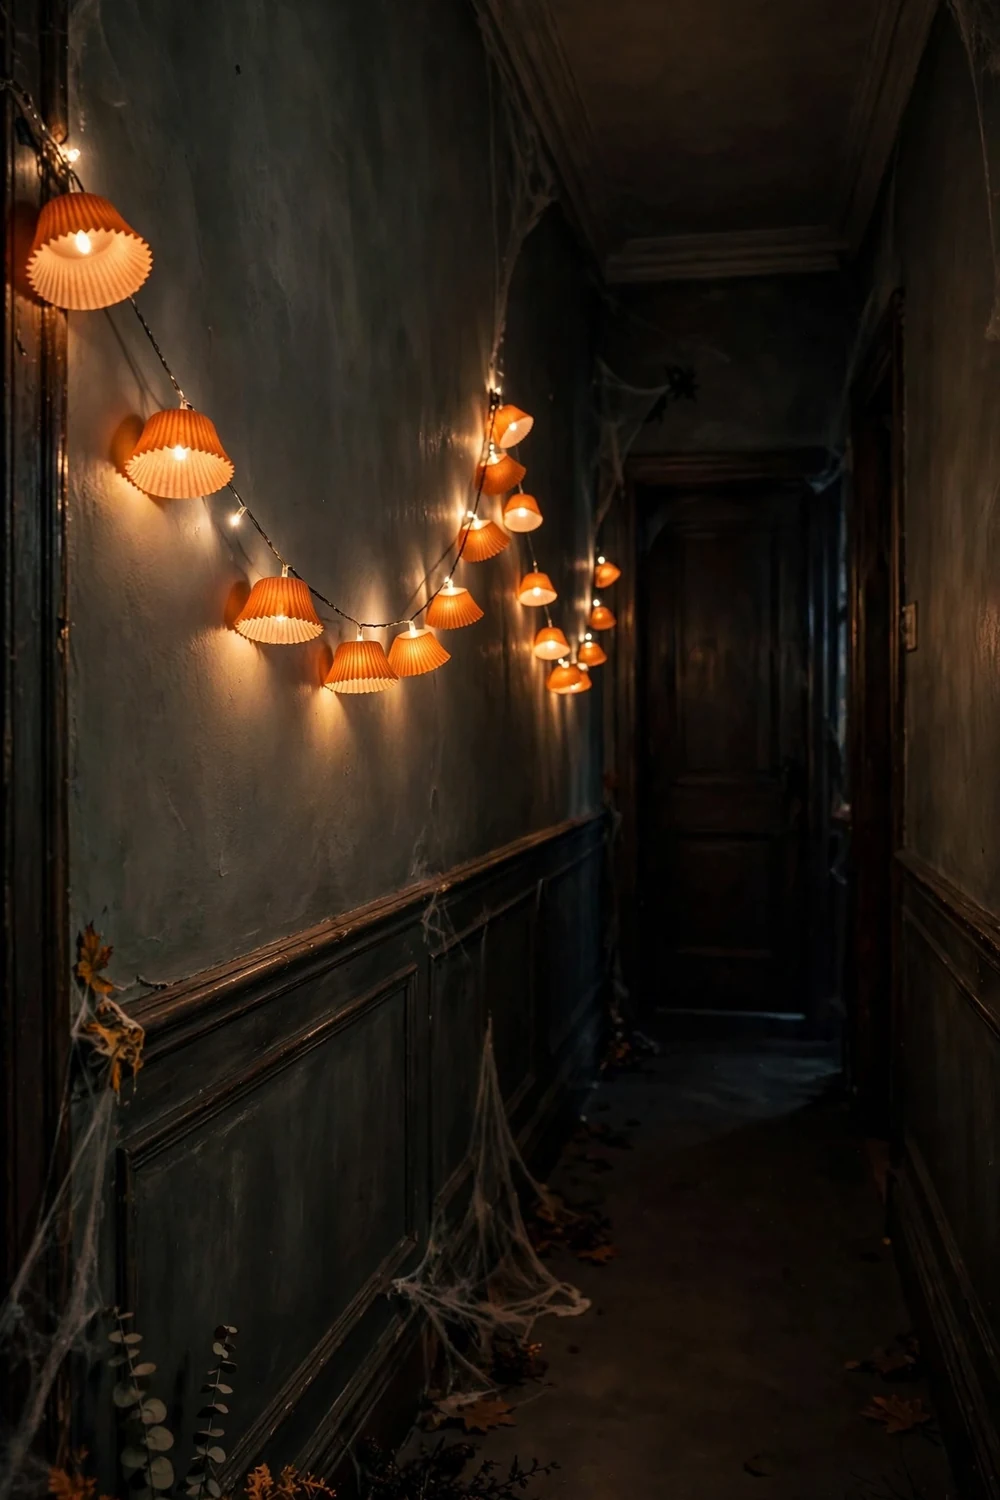
Poke each bulb of a warm white string light through the bottom of an orange or black cupcake liner so the liners become little shades. Drape the finished strand along a hallway, a bookshelf, or a window frame. The liners diffuse the light into a soft Halloween glow and hide the modern look of the bulbs. A 50-light strand and a pack of liners take 20 minutes to assemble.
Try this: alternate orange and black liners for a striped candy effect. Cost: $. Difficulty: easy, 20 minutes.
6. Window silhouette clings
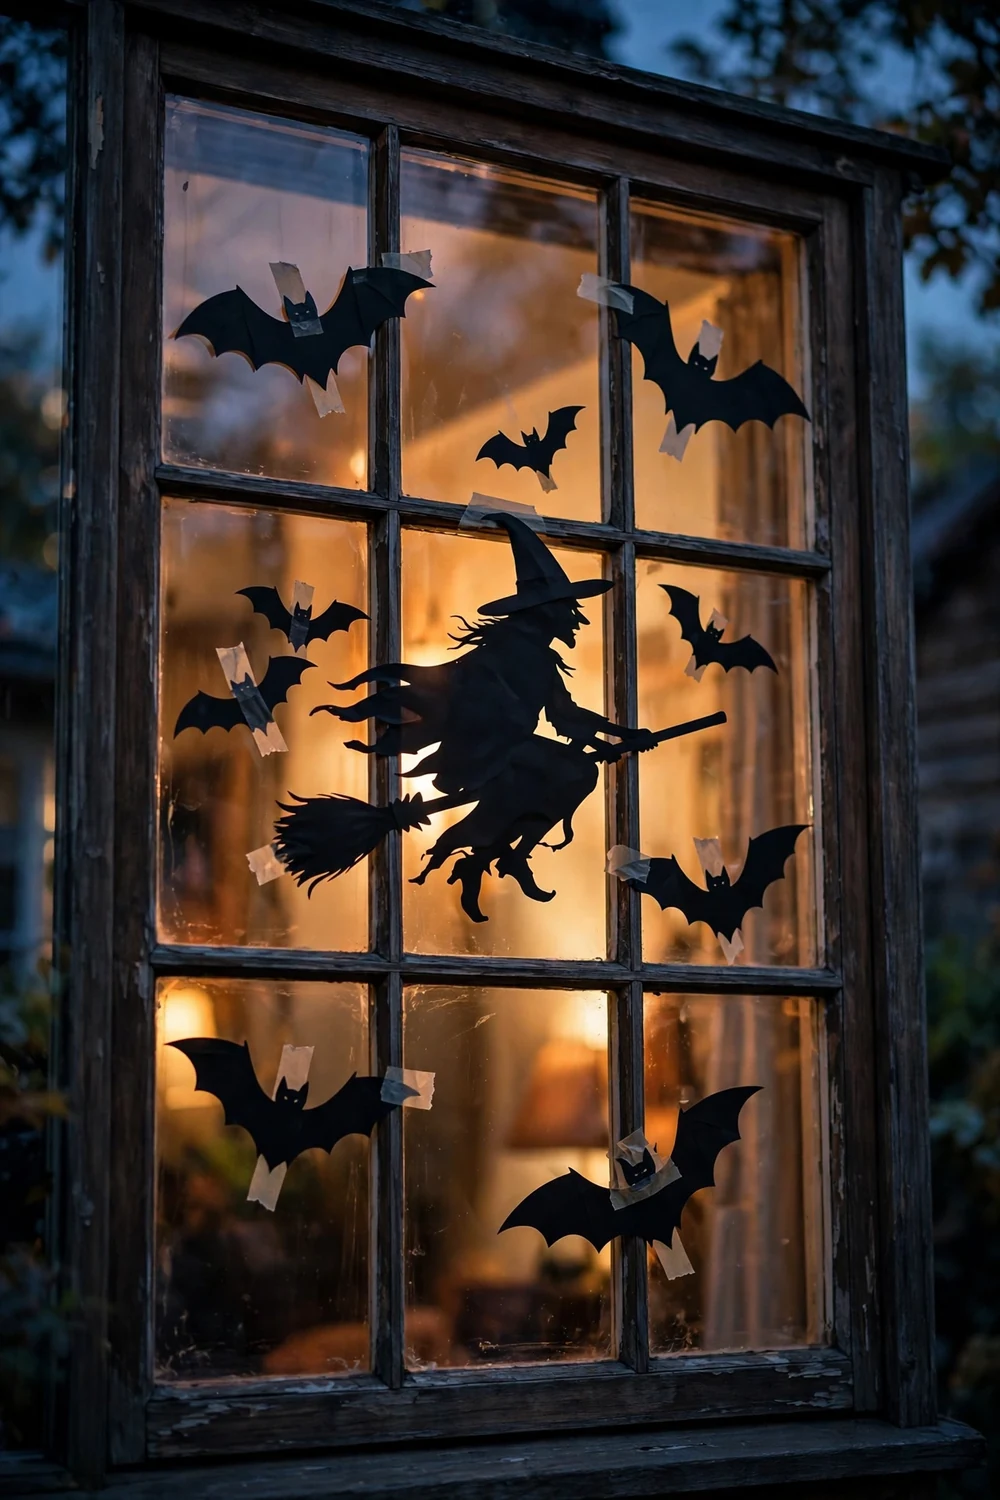
Tape black paper silhouettes of bats, witches, and cats to the inside of your front windows so they glow against the evening light. From the street they look like a professional display, and from inside they frame the dark glass with spooky shapes. Static-cling Halloween decals work even faster and peel off cleanly. Cover two windows and the whole front of the house feels decorated.
Try this: put the largest silhouette slightly off-center so the arrangement looks designed. Cost: $$. Difficulty: easy, 20 minutes.
7. Warm low-light swap

Turn off the overheads, switch every lamp to its lowest warm setting, and let candles and string lights carry the room. Low warm light flatters every decoration you add and hides the ones that look cheap in daylight. If your bulbs are daylight white, swap in warm amber bulbs for October. This one change makes a bigger difference than any single decoration.
Try this: leave one dark corner unlit so the room has real shadows to play with. Cost: $. Difficulty: easy, 10 minutes.
8. Ghost garland doorways

Cut white cheesecloth or an old sheet into strips, tie them along a length of string, and add two black button eyes to each bundle to make a row of floating ghosts. Hang the garland across a doorway or along a hallway at head height so guests brush past the ghosts. The movement when someone walks through sells the effect better than anything static.
Try this: vary the strip lengths so the ghosts hang at different heights. Cost: $. Difficulty: easy, 25 minutes.
9. Magnetic spider climb
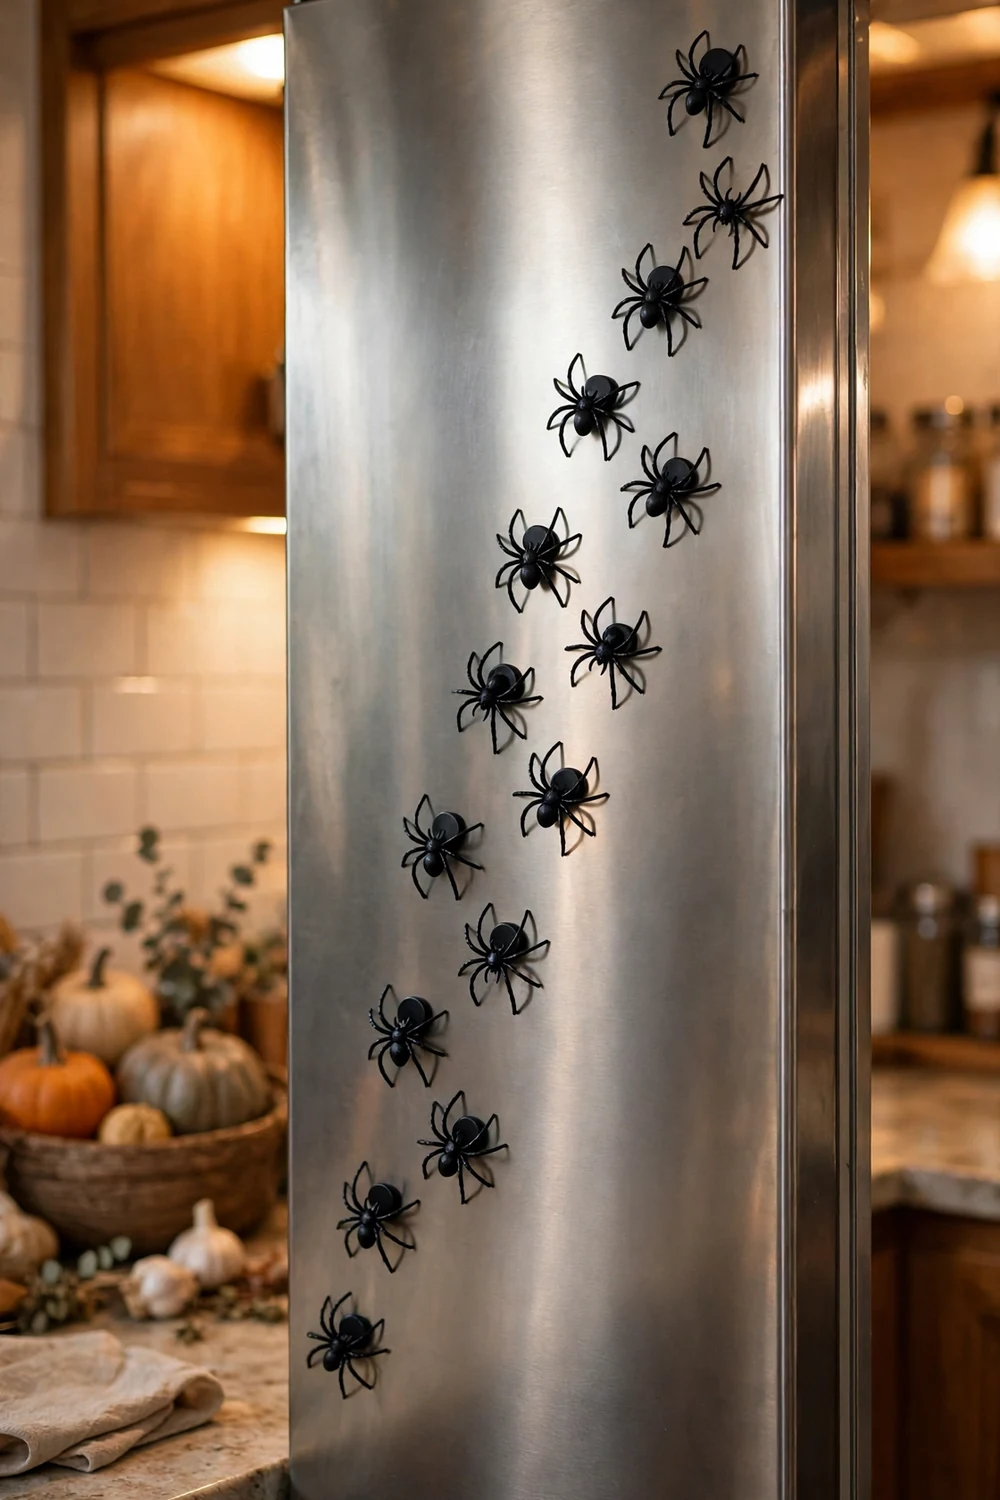
Glue small magnets to the backs of plastic spiders and stick them to the fridge, a metal door frame, or a magnetic knife strip so they look like they are climbing. Guests always do a double take. The spiders come off cleanly, store in a bag for next year, and this works on any metal surface in the kitchen, laundry room, or entryway.
Try this: trail the spiders in a diagonal line so they read as a marching column. Cost: $. Difficulty: easy, 10 minutes.
10. Painted no-carve pumpkins
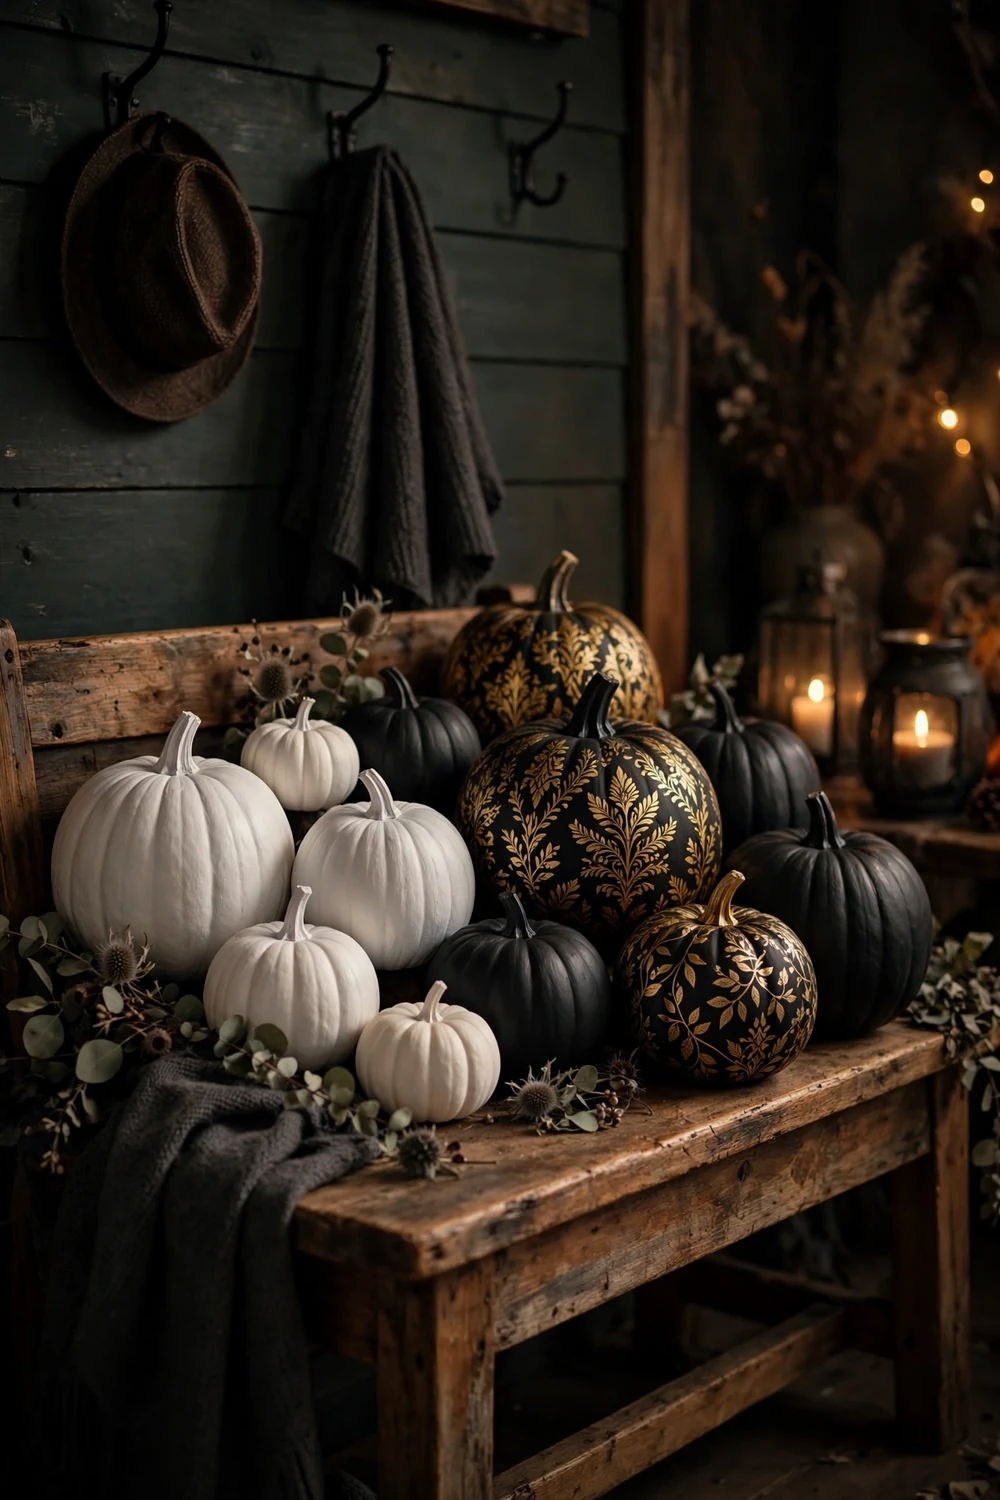
Skip the carving mess and paint pumpkins instead. Matte black, chalky white, and metallic gold acrylic paint turn grocery store pumpkins into decor that matches your house, and painted pumpkins last weeks instead of days. Paint simple bands, dots, or half-dip the bottom in gold. Cluster them on the entryway bench, the hearth, or stair landings.
Try this: paint pumpkins the same color as your walls for a tone-on-tone designer look. Cost: $$. Difficulty: easy, 30 minutes plus drying.
11. Witch crash landing
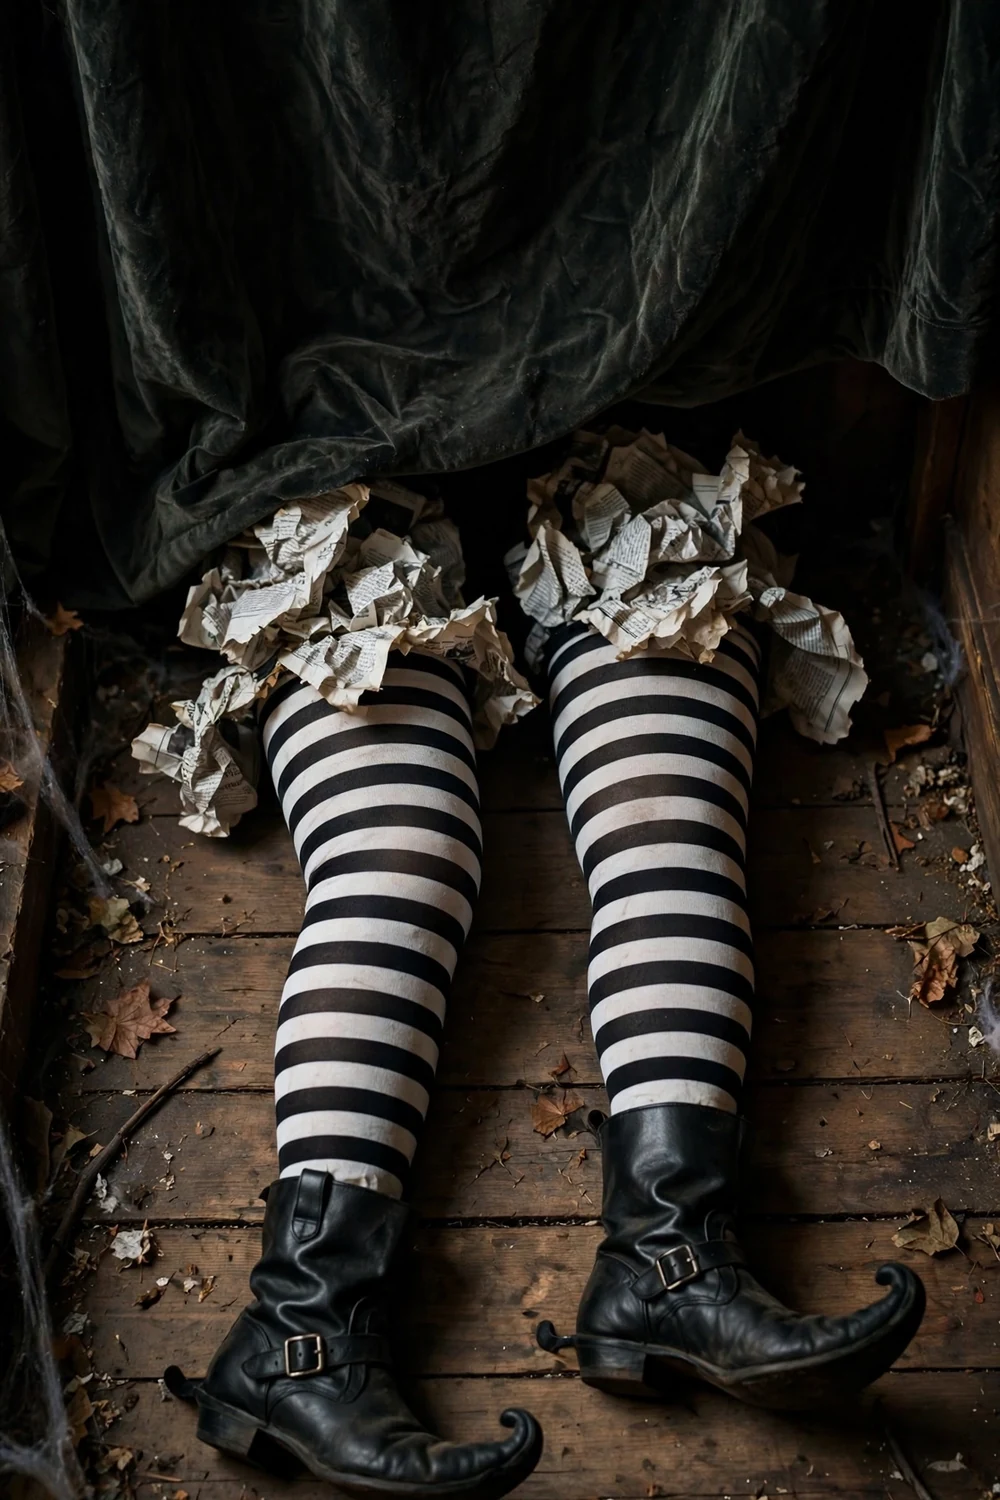
Stuff a pair of striped tights with newspaper, add witch boots or black shoes, and tuck the legs under a curtain, behind a chair, or beneath the sofa so it looks like a witch crash-landed in your living room. This classic gag never fails to make guests laugh, and it costs nothing if you already own striped tights. Angle the legs so they stick out into the walkway where people will spot them.
Try this: add a cone hat on the floor nearby to complete the story. Cost: $. Difficulty: easy, 10 minutes.
12. Spooky chandelier update
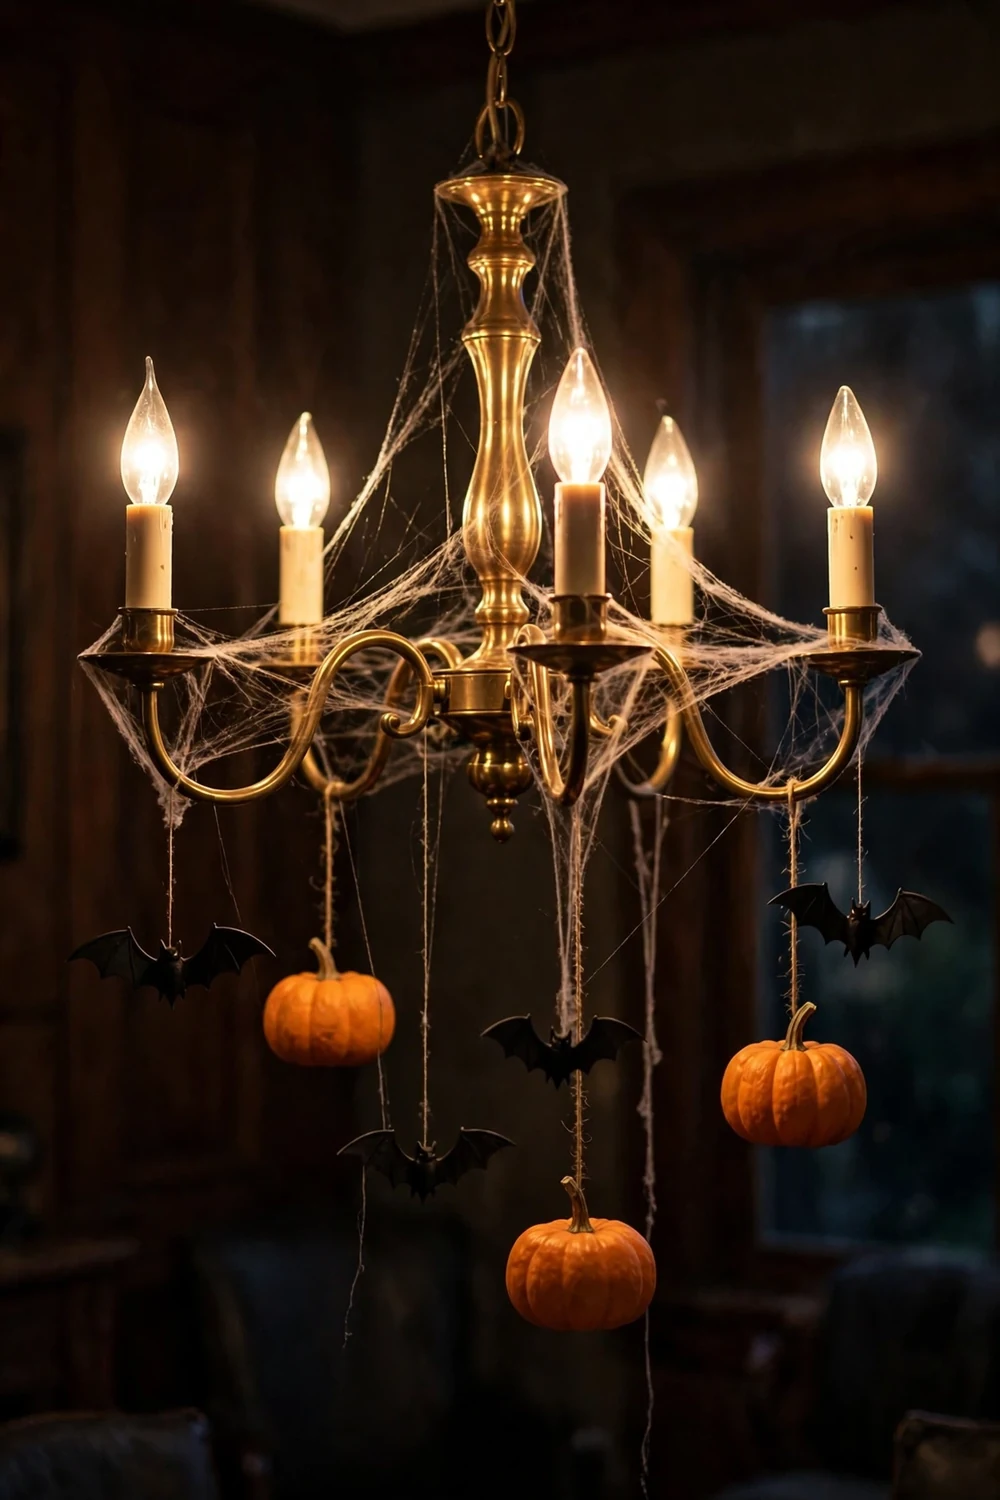
Hang plastic bats, mini pumpkins, and wisps of cobweb from your existing chandelier with thin string or zip ties. You do not need a new fixture. The decorations catch the light and cast moving shadows on the ceiling, which is half the effect. Keep everything clear of the bulbs themselves so nothing overheats, and use LED bulbs if you have them.
Try this: hang the pieces at different lengths so they move independently in the air current. Cost: $. Difficulty: easy, 20 minutes.
13. Ghostly welcome sign
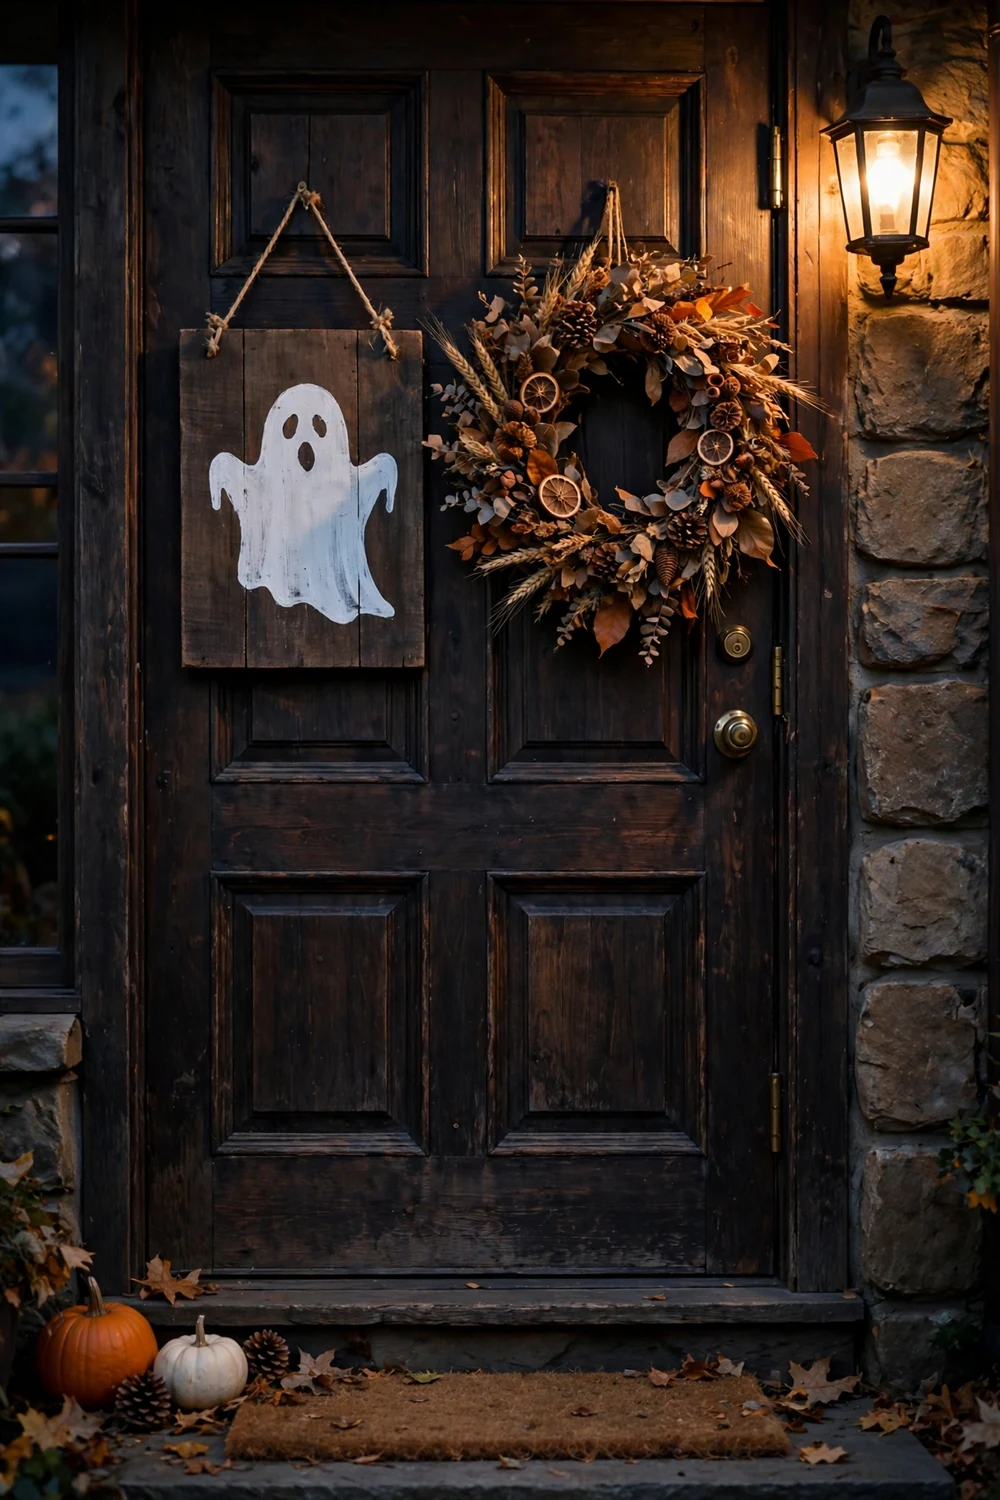
Hang a rustic wooden sign painted with a simple ghost silhouette on your front door or entryway wall, paired with a plain fall wreath. One painted board reads friendlier than a store-bought screaming decoration and takes 20 minutes with craft paint. Lean it on the entryway console if you would rather not hang anything.
Try this: dry-brush white paint over a dark stained board for a weathered look. Cost: $. Difficulty: easy, 25 minutes.
14. Black lace lampshades
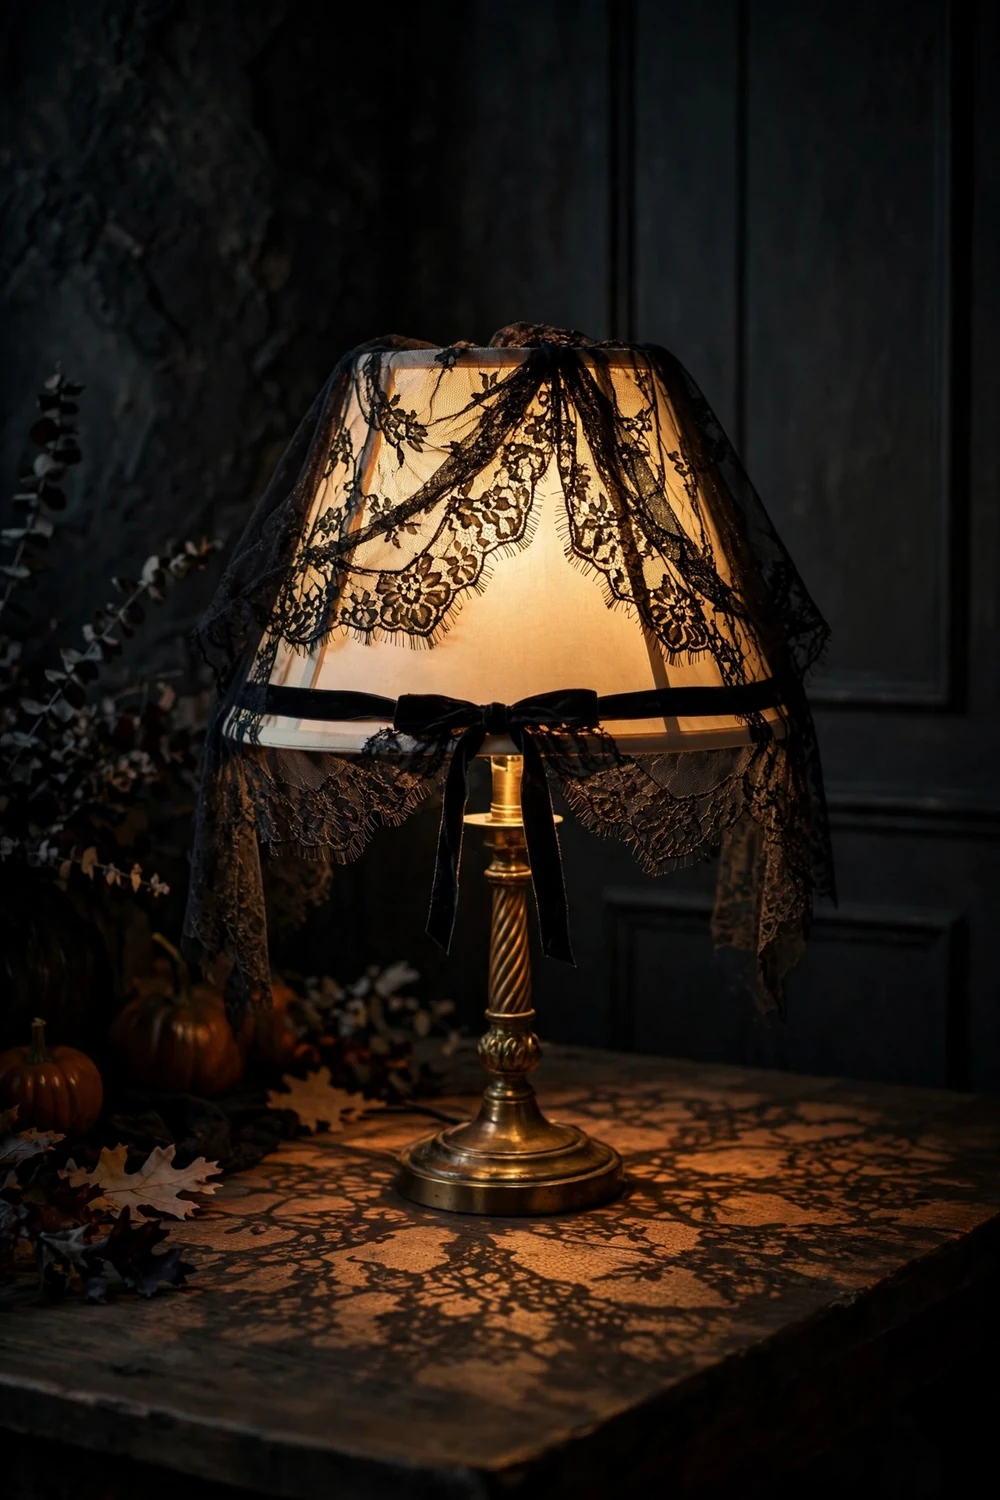
Drape black lace or a lace curtain panel over your existing lampshades and secure it with a ribbon tied around the base. The lace patterns the light and turns an ordinary lamp into a gothic fixture. Use LED bulbs so the shade stays cool, and keep the fabric clear of hot halogen bulbs. This works on floor lamps too for a whole-room effect.
Try this: double the lace layer on one lamp for deeper patterned shadows. Cost: $. Difficulty: easy, 10 minutes.
15. Entryway console vignette
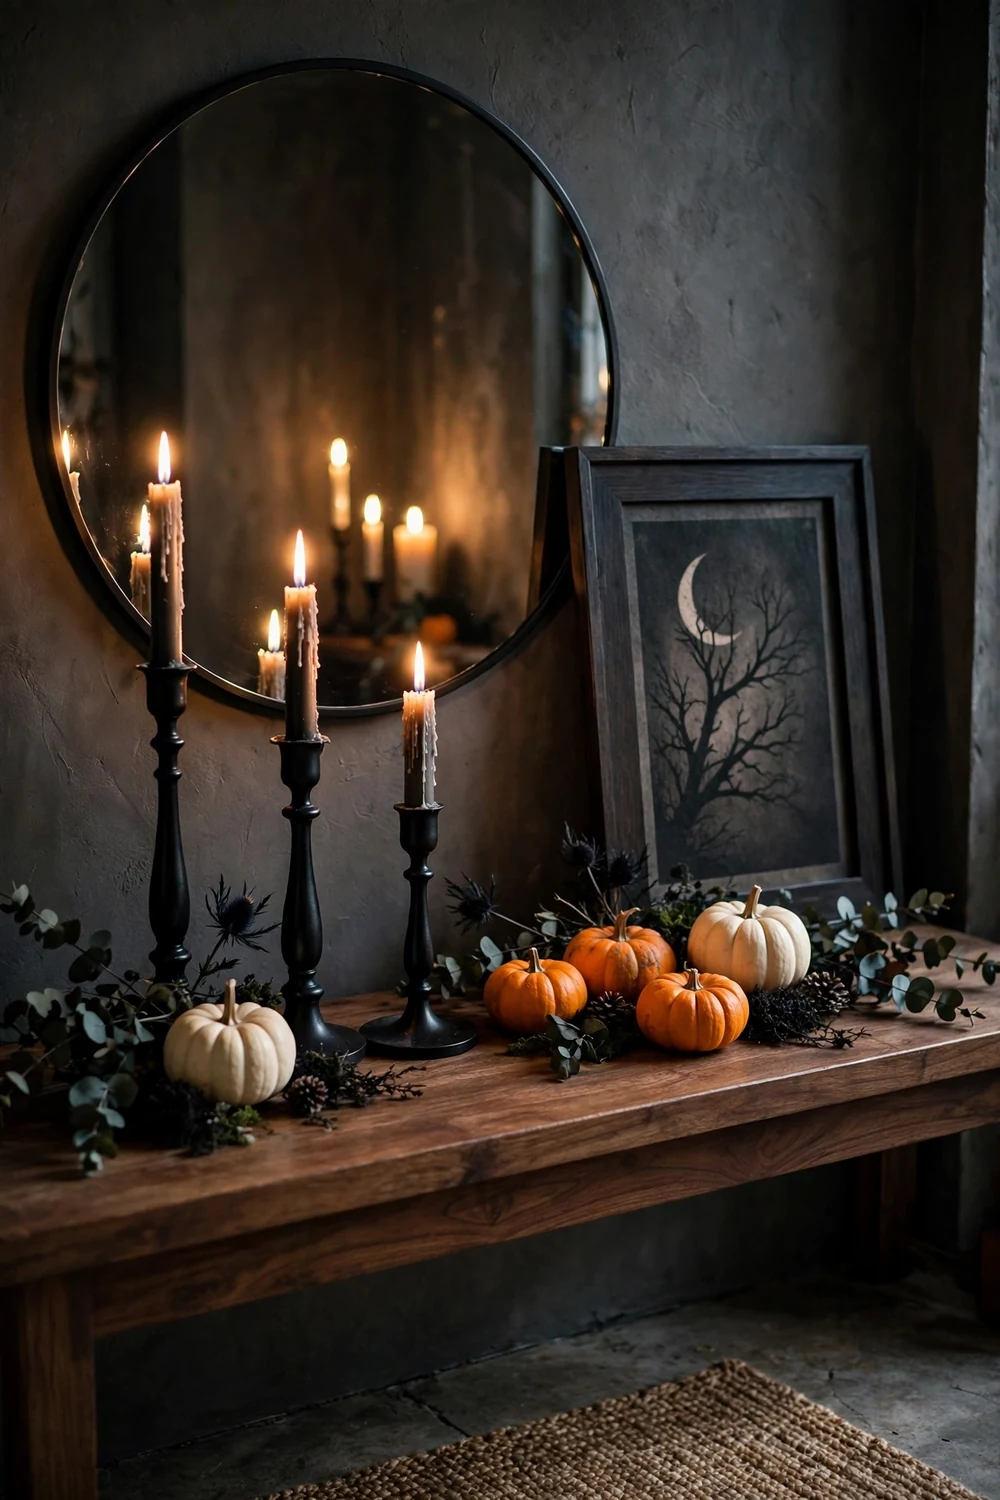
Style your entryway console as the first thing guests see: black candlesticks of different heights, two or three small pumpkins, and one dark framed print leaning against the wall. The console is small enough to finish in minutes and it sets the tone before anyone reaches the living room. A mirror behind the arrangement doubles the candlelight.
Try this: put the tallest candlestick at one end and step the heights down across the console. Cost: $$. Difficulty: easy, 15 minutes.
16. Floating ghost balloons
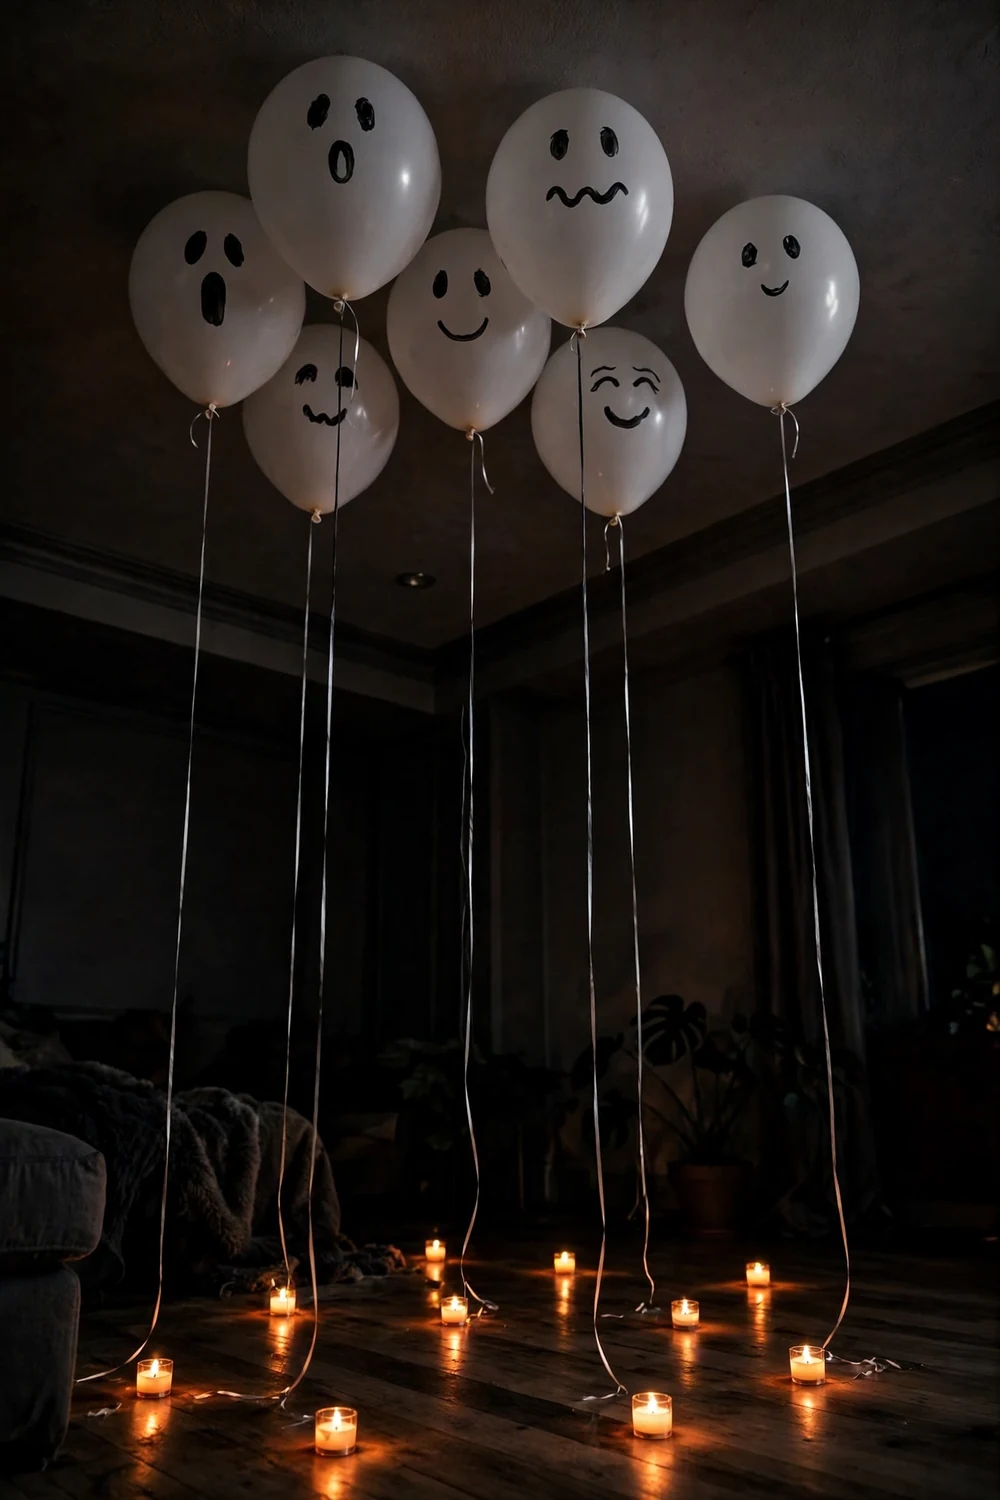
Draw simple ghost faces on white balloons with a black marker, fill them with helium, and let them float near the ceiling on long strings. Set LED tea lights on the floor beneath them so the ghosts glow from below. Kids love this one, and a dozen balloons fill an entire living room ceiling for a few dollars. Anchor the strings to furniture so the ghosts drift instead of escaping.
Try this: draw each ghost face differently so they look like a little crowd. Cost: $. Difficulty: easy, 20 minutes.
17. Chalkboard countdown
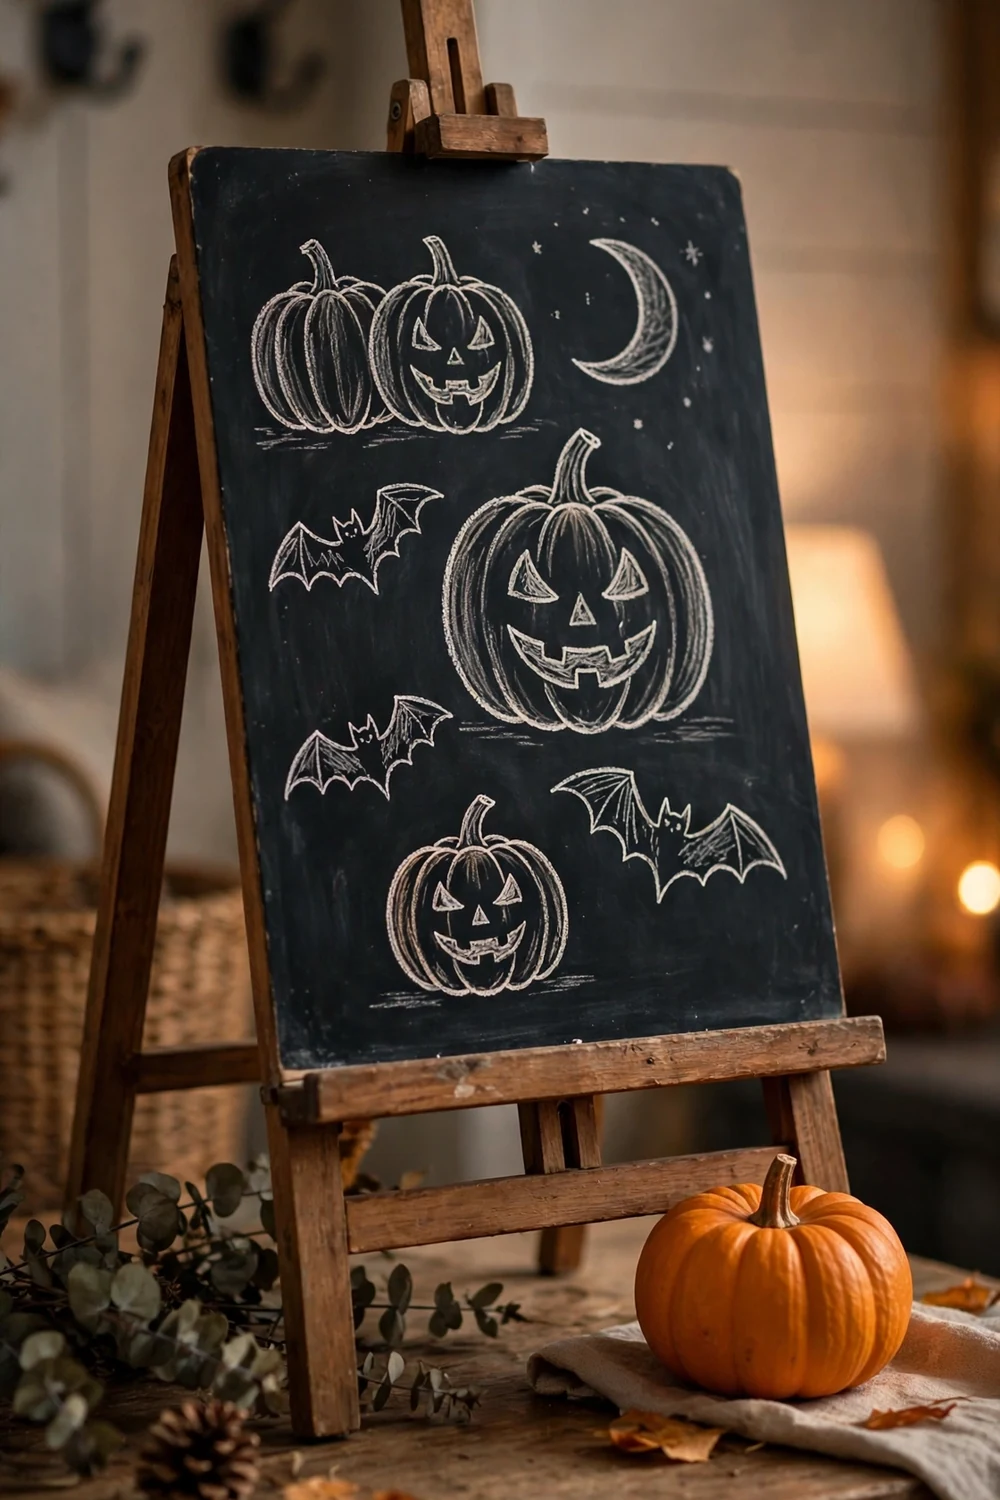
Set a small chalkboard easel on the entryway table or kitchen counter and draw pumpkins, bats, and a countdown of days until Halloween. The drawing takes ten minutes, guests notice it immediately, and you can update the countdown daily. A white chalk marker on a dark board shows up best. Lean a mini pumpkin against the easel base to anchor it.
Try this: sketch the design lightly in regular chalk first, then trace over it with the marker. Cost: $. Difficulty: easy, 15 minutes.
18. Spooky print frame swap
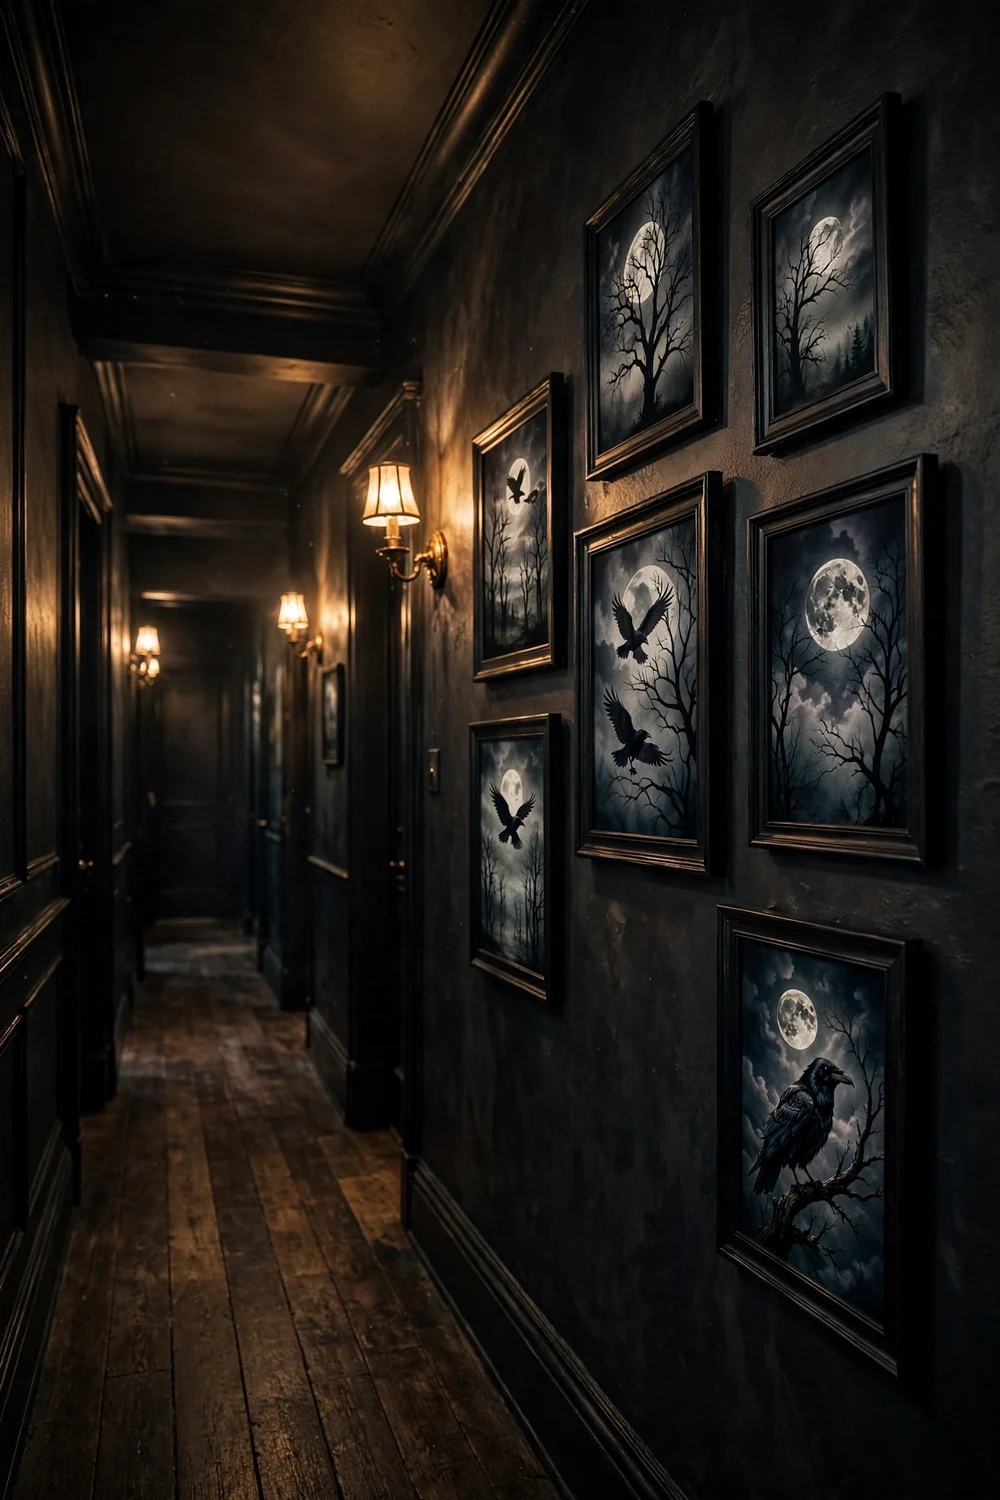
Print free spooky art, ravens, moons, haunted houses, vintage witch illustrations, and slip the prints into frames you already have on the walls. Swapping art instead of adding decor keeps rooms feeling styled rather than cluttered. Print in black and white for a cohesive gallery look, and store your regular prints behind them to swap back in November.
Try this: print everything the same size so the frames look like a planned collection. Cost: $. Difficulty: easy, 20 minutes.
19. Staircase bat garland
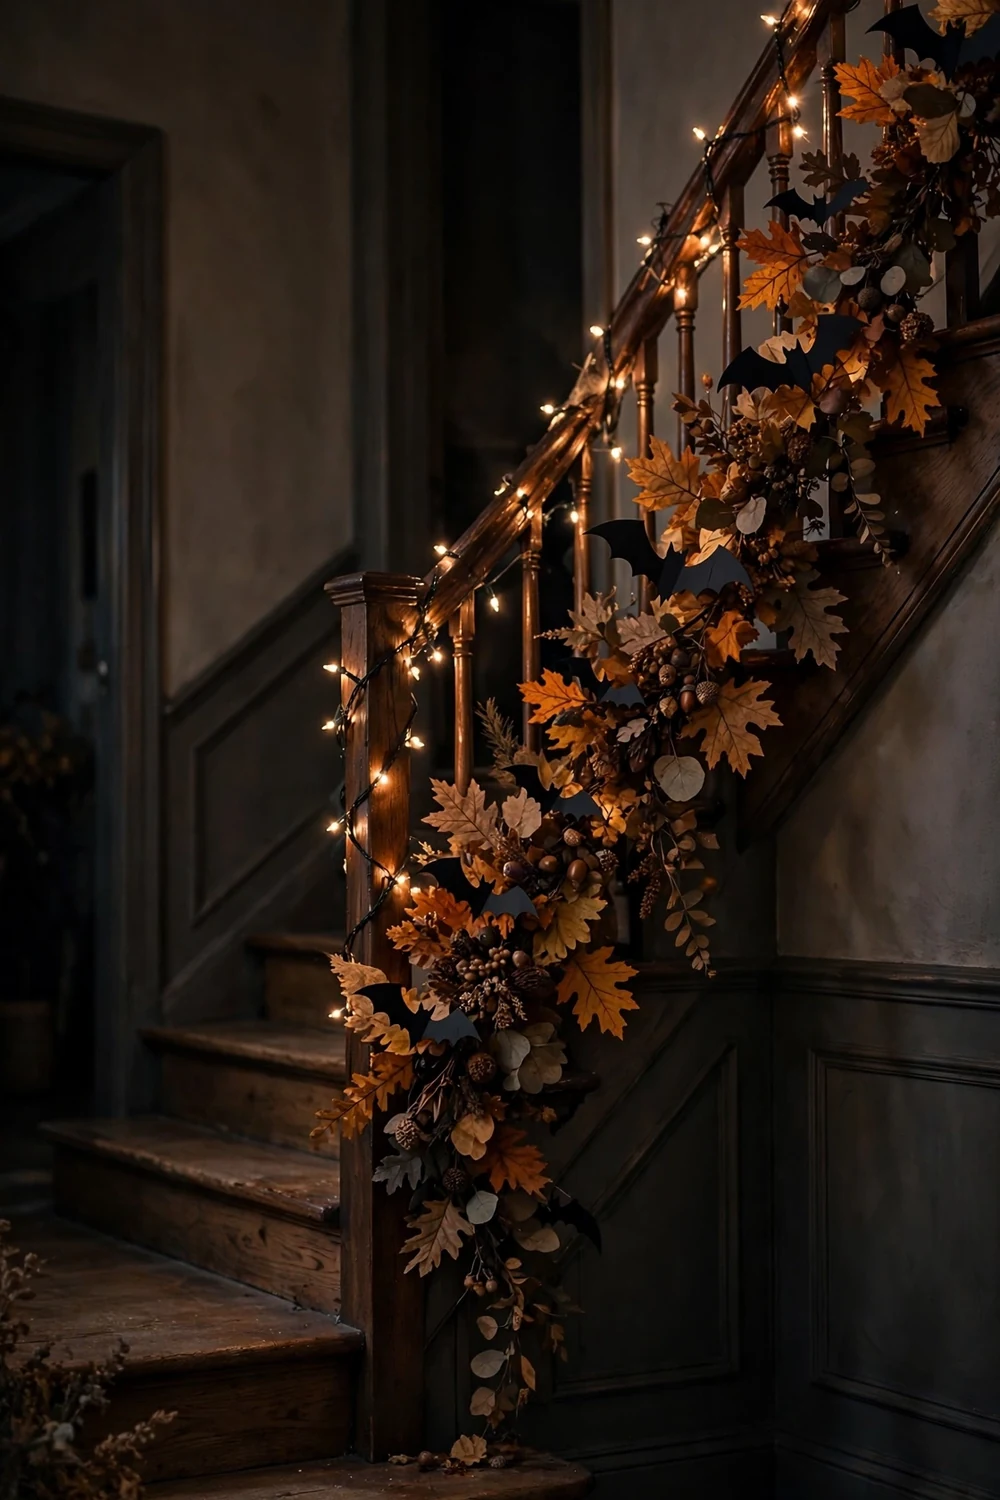
Wrap a warm white string light strand around your staircase railing, then tuck paper bats and a few sprigs of faux fall leaves along it. The staircase is usually the first thing guests see upstairs, and a lit garland turns it into a moment. Secure the strand with ribbon ties instead of tape so the railing finish stays safe.
Try this: cluster the bats in groups of three with gaps between, like they are resting along the rail. Cost: $$. Difficulty: easy, 25 minutes.
20. Bathroom spooky swap
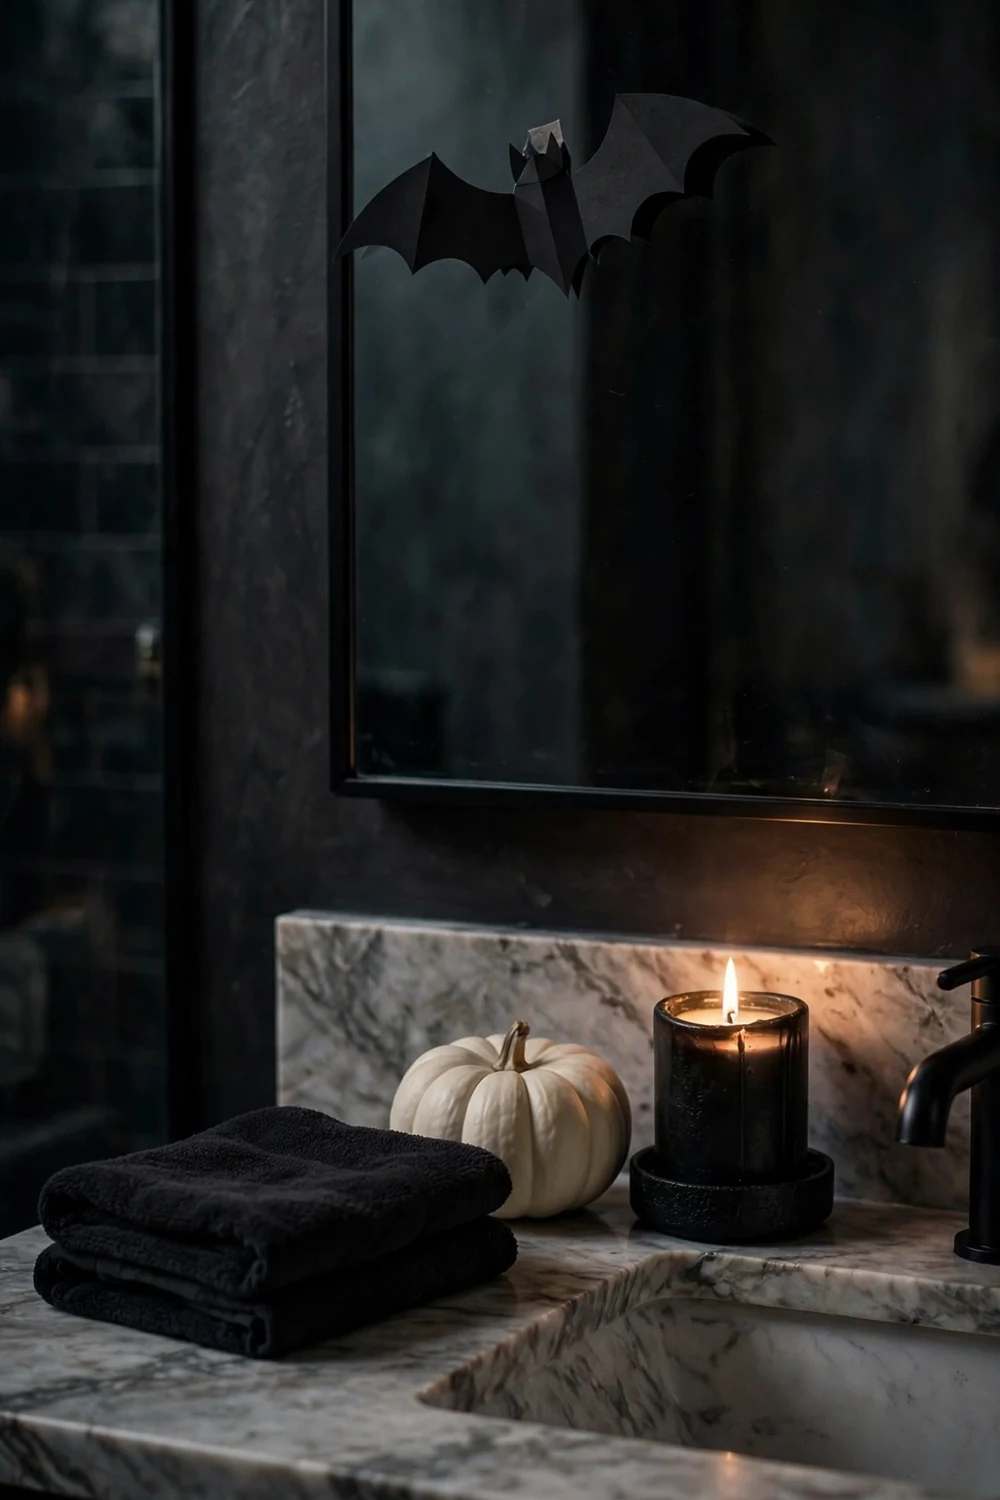
Swap the bathroom hand towel for a black one, add a black candle and a mini pumpkin to the vanity, and hang one paper bat on the mirror. Guests always visit the bathroom, so this tiny styling moment gets noticed far more than its effort deserves. Keep the candle LED if the room is small and the towel hangs nearby.
Try this: fold the black towel in thirds so the color reads as a deliberate stripe. Cost: $. Difficulty: easy, 10 minutes.
The 20-minute whole-house Halloween formula
Pick one strong moment per room and stop there. Entryway: the console vignette or the chalkboard. Living room: the bat swarm or cheesecloth drapes plus low lighting. Kitchen: magnetic spiders and a pumpkin cluster. Bathroom: the towel swap. Hallway: cupcake liner lights. Five rooms, five moments, and the whole house feels decorated in about 20 minutes of actual work.
Indoor Halloween safety basics
Most last minute decor is paper, fabric, and dried material, which means flames need extra respect. Keep real candles at least 12 inches from webs, cheesecloth, garlands, and lampshade covers, and never leave them burning in an empty room. The NFPA Halloween safety page covers the essentials, and their candle safety guidance is worth a read before you light anything near fabric. Keep walkways and stairs clear of cords, balloons strings, and floor-level decor so nobody trips in the dim light.
For outdoor ideas to match, see 20 Balcony Decorations for Halloween. If you want fall mantel styling that lasts past October, browse 25 Fall Mantel Decorating Ideas for a Cozy Home.
Frequently asked questions
How can I decorate indoors for Halloween at the last minute?
Focus on lighting first, then add one strong moment per room: paper bats on a wall, cheesecloth drapes, or a lit garland. Paper, cheesecloth, and string lights are the fastest supplies and most ideas take under 30 minutes.
What is the cheapest way to decorate for Halloween indoors?
Black construction paper bats, white cheesecloth, and warm low lighting cost under $10 total and transform a living room. Painted pumpkins and printed art in existing frames are the next cheapest wins.
How do I make Halloween decor look classy instead of tacky?
Limit your palette to black, white, and one accent color, and lean on lighting rather than novelty items. Matte finishes, real candles or good LED flicker, and restrained placement read as design instead of clutter.
Are LED candles safe around fake spider webs and cheesecloth?
Yes, LED candles stay cool and are the safest choice near webs, cheesecloth, paper bats, and dried materials. Keep real flame candles at least 12 inches from anything flammable and never leave them unattended.
How do I decorate for Halloween in a rental without damage?
Use painter’s tape, static-cling window decals, magnetic spiders, and freestanding pieces like jar lanterns and pumpkin clusters. Everything in this list except a few tape spots comes down without a trace.
When should I take indoor Halloween decor down?
Most people take it down the first weekend of November. Painted pumpkins, black candles, and neutral fall pieces can stay through Thanksgiving if you remove the bats, webs, and ghosts.
Last minute indoor Halloween decor is about where you put things, not what you buy. Dim the lights, pick one moment per room, and let paper bats and candlelight do the talking. The house will feel spooky by tonight, and taking it all down takes even less time.


