


A blank wall above the sideboard can sit empty for months while a stack of pretty plates hides in a cupboard. You already own the decor. The hard part is trusting that plates belong on the wall and knowing how to hang them so they stay put. I kept my grandmother’s floral plates boxed for two years before I finally hung three of them in our hallway, and now they are the first thing guests ask about.
This guide covers 20 ways to hang plates on the wall, from even grids and stairwell cascades to renter friendly adhesive walls and shadow boxes for heirlooms. Each idea names the plates, the hanging method, and the wall it suits, with a cost and difficulty label so you can pick one that fits your weekend and your budget.
Quick takeaways
- Start with paper templates taped to the wall before you drill a single hole.
- Keep 2 to 4 inches between plates and center the arrangement at eye level, about 57 to 60 inches from the floor.
- Match the hanger to the plate weight: adhesive discs for light plates, wire hangers with anchors for heavy platters.
- One repeated color or pattern holds a mixed collection together.
- Renters can build a full plate wall with adhesive discs and picture hanging strips and remove it without damage.
1. Even grid of blue and white transferware

Nine blue and white transferware plates in a three by three grid give a dining room wall instant order. Use plates between 8 and 10 inches, all in the same blue tone, so the grid reads as one piece rather than nine separate plates. A level and a tape measure matter more here than creativity, since a grid shows every crooked nail. Hang the center plate first at eye level, then work outward in rows. Wire hangers with padded clips grip the rims without scratching the glaze.
Try this: cut nine paper circles, tape them up, and live with the grid for a day before you hang anything.
Cost: $$. Difficulty: easy.
2. Salon style mixed cluster above the sideboard
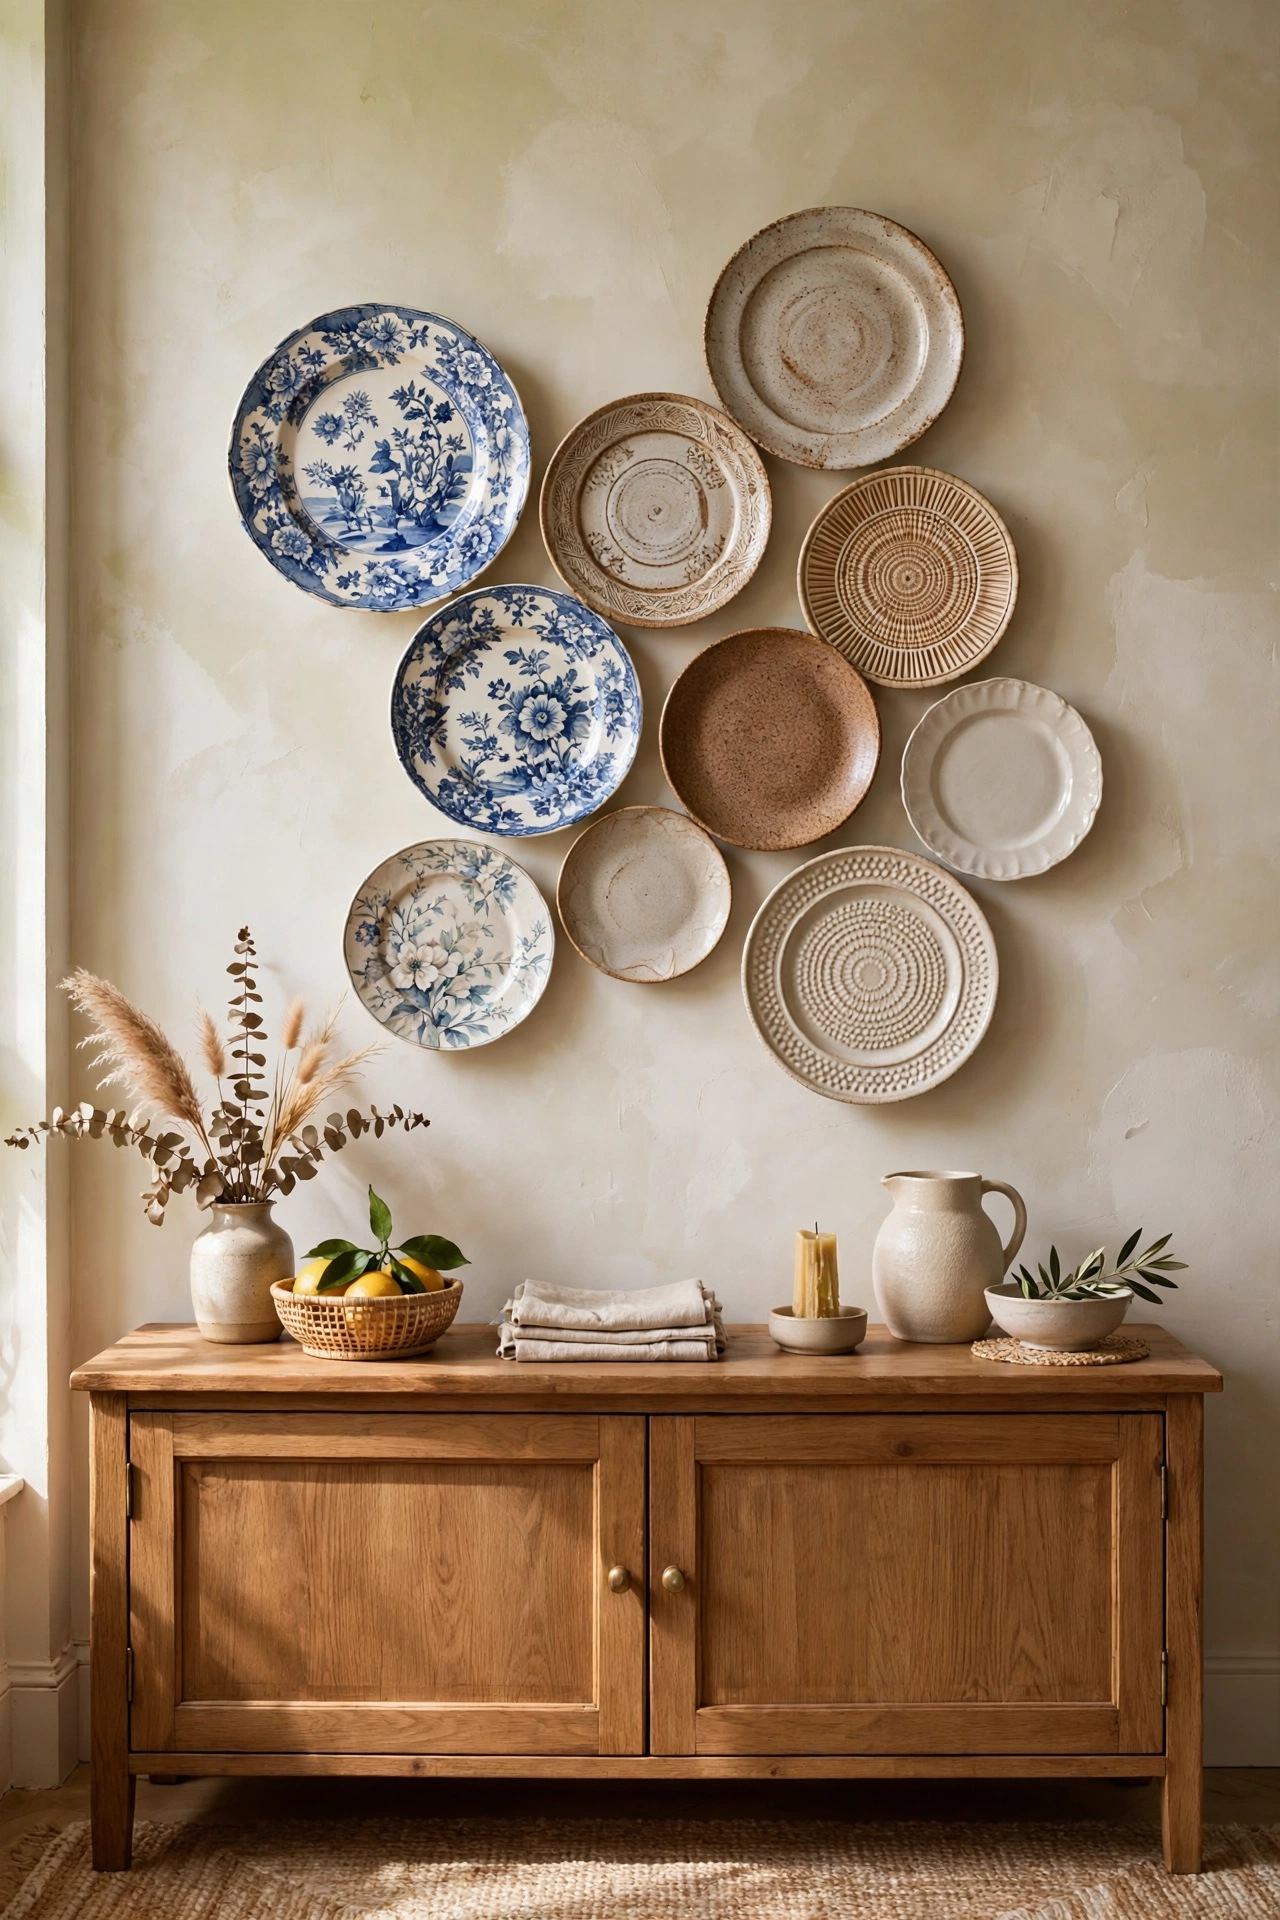
A loose cluster of 11 to 15 plates in mixed sizes fills the wide wall above a sideboard without looking stiff. Start with the largest platter slightly off center, then build outward with dinner plates, salad plates, and saucers, keeping 2 to 3 inches between rims. One shared thread, such as floral patterns or a cream background, keeps the mix calm. Anchor the arrangement to the sideboard width, not the whole wall, so it feels grounded.
Try this: lay the whole cluster on the floor first, photograph it, then transfer the layout to the wall one plate at a time.
Cost: $$. Difficulty: easy.
3. Simple row of three matching plates

Three matching plates in a straight horizontal row suit a narrow wall or a small console table where a big cluster would crowd the space. Pick plates of the same pattern and size, usually 9 or 10 inches, and space them 3 inches apart. Center the middle plate on the furniture below, then place the other two at equal distances. This is the fastest plate wall you can hang, often under an hour including measuring.
Try this: use a strip of painter’s tape as a level line across the wall, mark your three nail points on the tape, then hang and peel the tape away.
Cost: $. Difficulty: easy.
4. Plates framing a round mirror
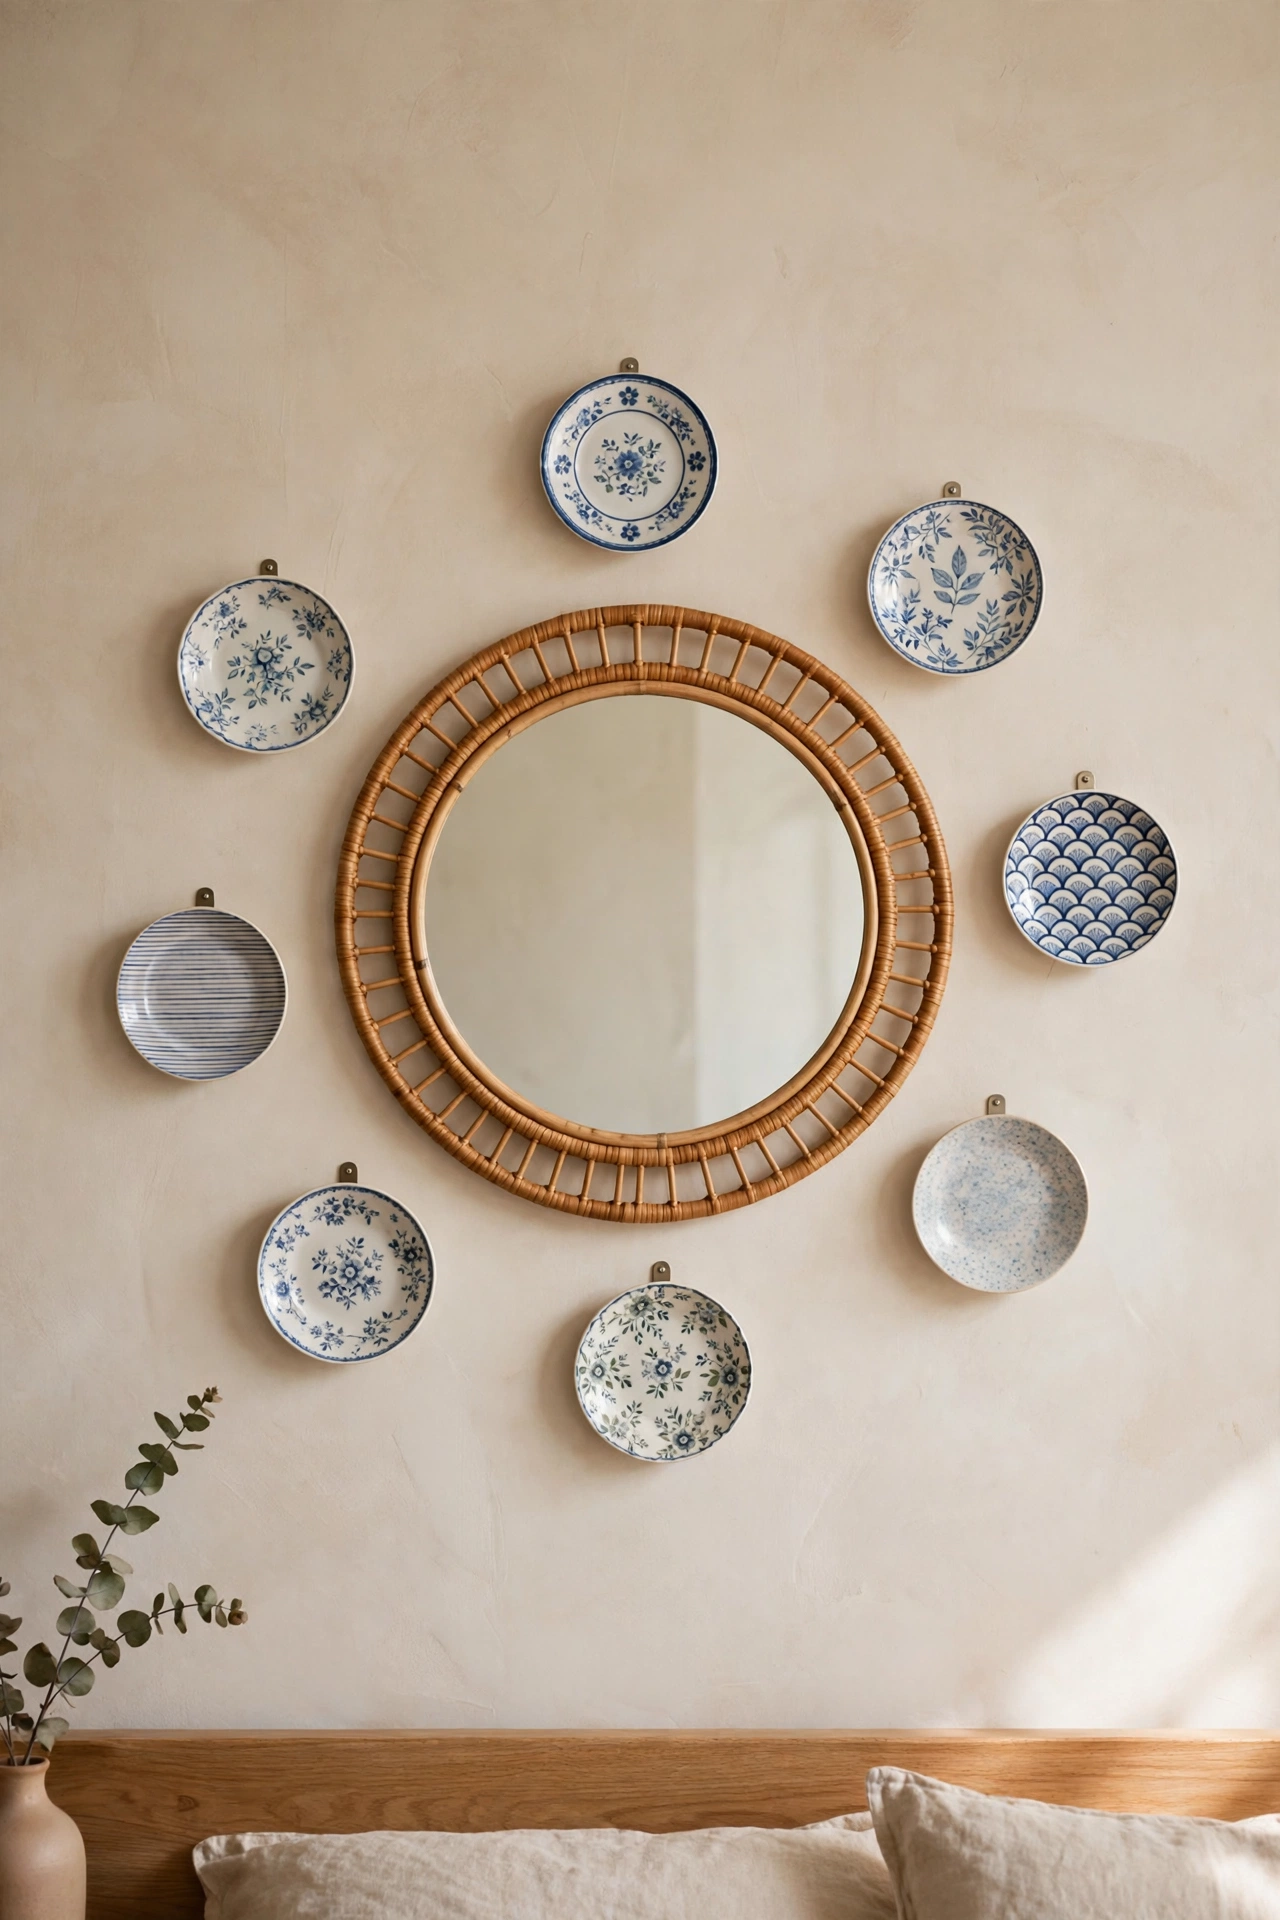
Three plates on each side of a round mirror turn a plain mirror into a finished composition. Symmetry does the work here, so use a matching set of six small plates, 6 to 7 inches each, and mirror their positions exactly. Hang the mirror first, centered at eye level, then place plates at equal distances on both sides. This arrangement suits bedrooms and entryways where the wall is too narrow for a wide cluster.
Try this: fold a paper template of the mirror in half to mark matching left and right plate positions before drilling.
Cost: $. Difficulty: easy.
5. Stairwell cascade following the slope

A stairwell wall begs for a diagonal arrangement, and plates follow the slope better than framed art. Hang 9 to 12 plates in a rising line that mirrors the angle of the stairs, starting low near the bottom step and climbing toward the landing. Mix sizes so the eye travels upward, with larger plates at the bottom and smaller ones near the top. Keep the center of the cascade about 60 inches above each step it passes.
Try this: stand on the landing and check the line from above, since a cascade looks different from the top than from the bottom.
Cost: $$. Difficulty: moderate.
6. Kitchen plate rail with everyday stoneware
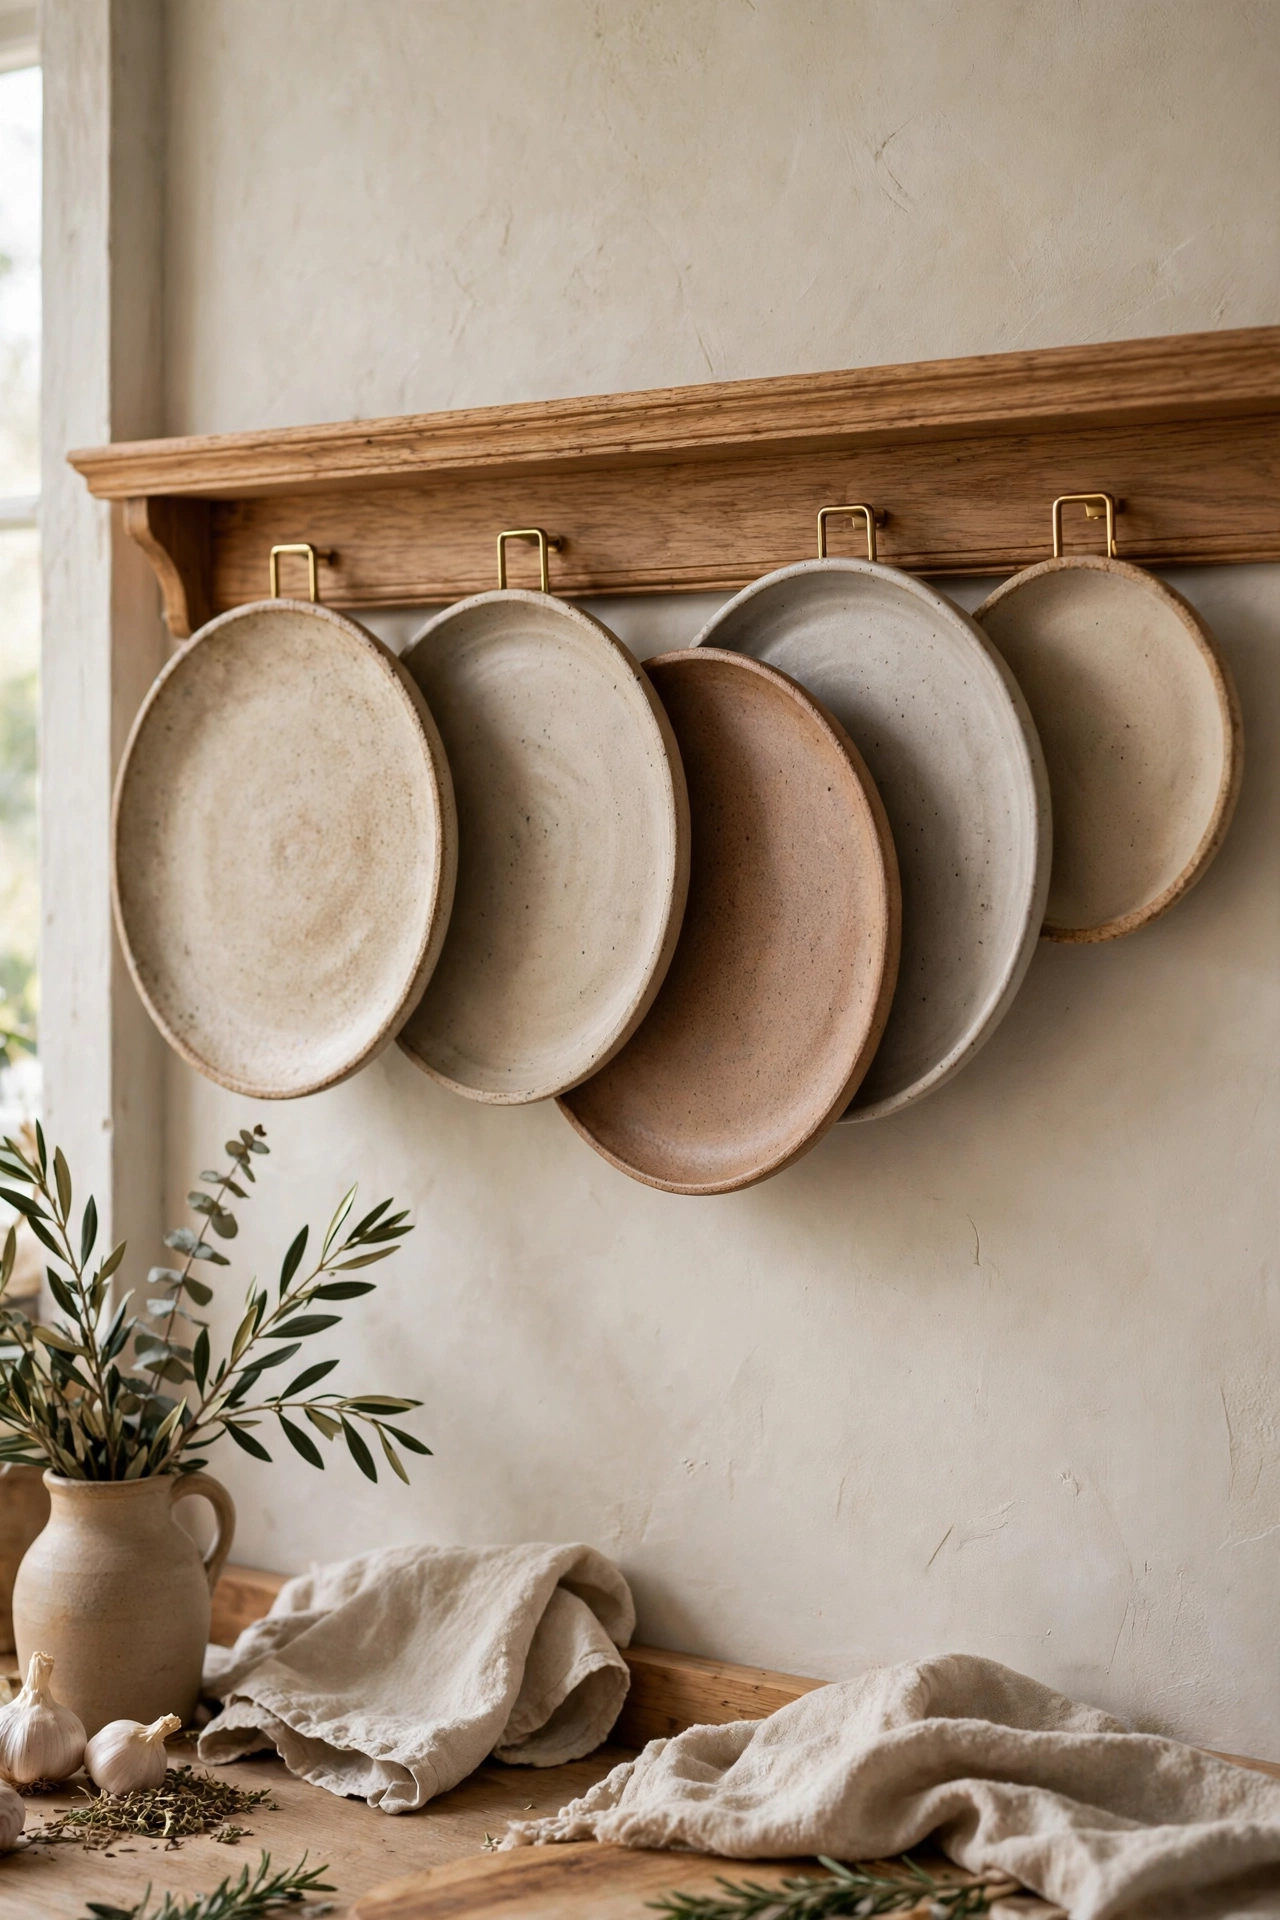
A wooden plate rail with a front groove holds everyday stoneware where you can grab it and admire it at the same time. Mount the rail at eye level along a free stretch of kitchen wall, about 36 to 48 inches long, and lean dinner plates and platters against it with the patterns facing out. This works best with sturdy stoneware rather than thin heirloom china, since plates on a rail get handled often. Anchor the rail into studs, because a full rail of stoneware weighs more than it looks.
Try this: leave one empty slot on the rail so you can rotate in a seasonal plate without rearranging the whole row.
Cost: $$. Difficulty: moderate.
7. Vintage floral plates in a breakfast nook

A breakfast nook wall suits a small cluster of vintage floral plates in soft pinks, greens, and cream. Five to seven plates, mostly 8 inches with one larger platter, fill the wall above a built in bench without competing with the window light. Thrift stores and estate sales are the usual source, so expect to build the set over a few weekends rather than in one shopping trip. Check each plate for chips and crazing before hanging, and keep the most fragile piece away from the bench edge where elbows pass.
Try this: sort thrifted plates by background color first, then by pattern, and hang only the ones that share a background.
Cost: $. Difficulty: easy.
8. Wicker chargers and rattan plates in a coastal entry

Woven chargers and rattan plates bring texture to an entry wall where ceramic plates might feel too formal. Hang five to seven woven pieces in a loose oval, mixing natural rattan with one or two painted chargers for contrast. Woven pieces weigh almost nothing, so small nails or adhesive hooks hold them with no anchors needed. This arrangement suits coastal and relaxed rooms, and it survives bumping better than ceramic when bags and coats pass by.
Try this: spray one charger in a soft white to break up a wall of all natural tones.
Cost: $. Difficulty: easy.
9. Monochrome white ironstone on a sage wall

All white ironstone plates on a sage green wall prove that a plate wall does not need color to make an impact. The shapes do the work: rounds, ovals, scalloped edges, and one rectangular platter, all in white, hung in a loose grid. A dark or mid tone wall color matters here, since white plates vanish against white paint. Collect ironstone and creamware in mixed shapes, keeping the finish matte or lightly glazed for a soft look.
Try this: include one platter turned vertically to break the round rhythm without breaking the color rule.
Cost: $$. Difficulty: easy.
10. Travel souvenir plates in a hallway timeline

Souvenir plates from trips make a hallway timeline that guests actually stop to read. Hang them in trip order down a long hallway, one plate per trip, with small brass labels or a handwritten date card beside the earliest ones. Keep plates small, 6 to 8 inches, so the timeline fits without crowding the walkway. The charm here is personal history, so mismatched patterns are a feature, not a flaw.
Try this: leave two empty hooks at the end of the timeline for the next trip, which turns the wall into an ongoing collection.
Cost: $. Difficulty: easy.
11. Oversized platter as a dining room anchor

One oversized platter, 16 to 20 inches across, anchors a dining room wall better than a dozen small plates. Center it above the table at eye level, with nothing else on the wall, and let the pattern carry the room. A platter this size needs a wire hanger rated for its weight plus a wall anchor into a stud, never a lone adhesive hook. This idea suits rooms where the table already holds plenty of pattern and the wall needs one calm focal point.
Try this: hold the platter up against the wall with a friend spotting from the table before you mark the nail point.
Cost: $. Difficulty: easy.
12. Plates layered over patterned wallpaper
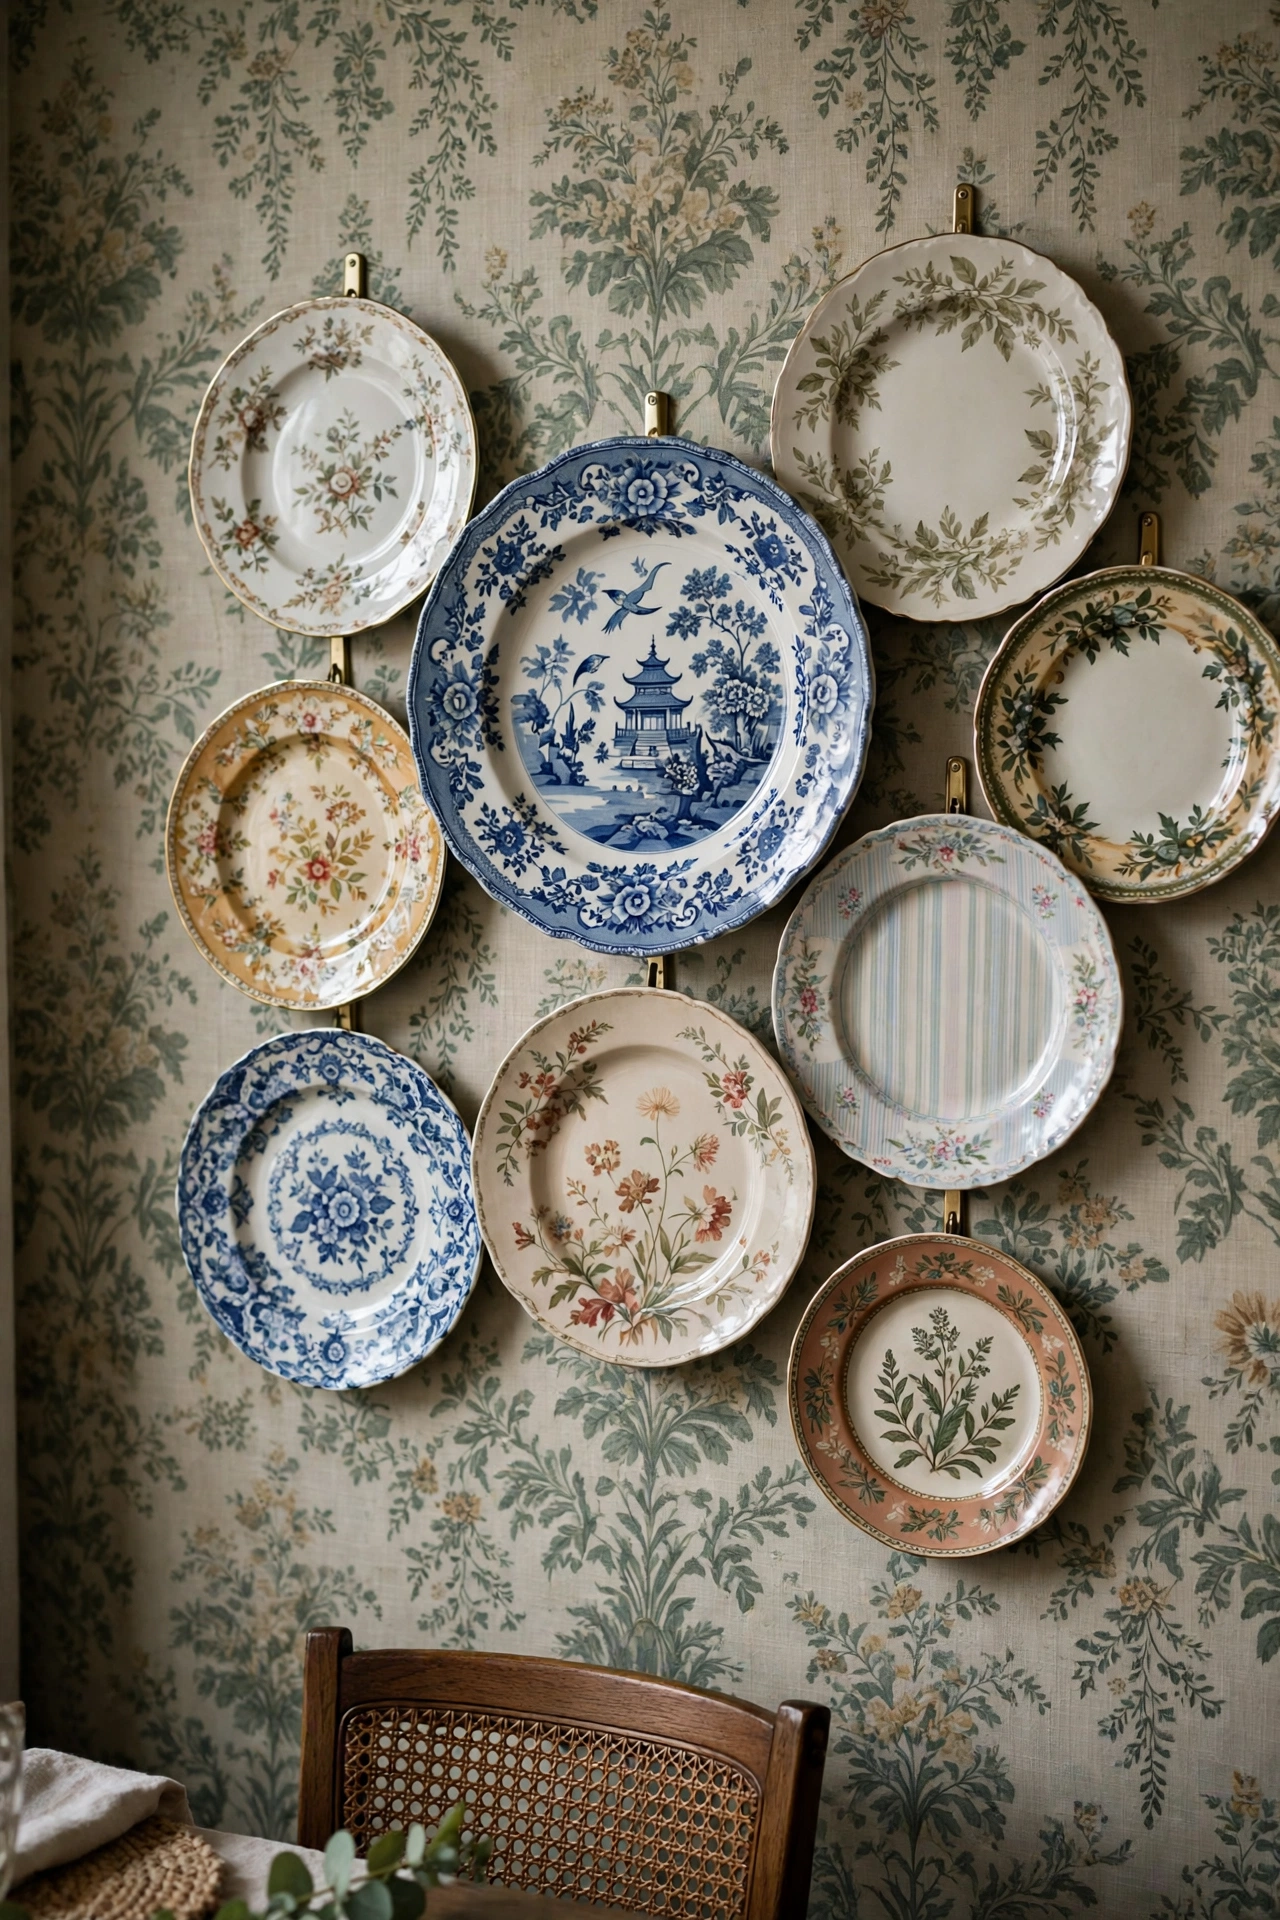
Plates over patterned wallpaper sound busy, but they work when the plates stay simple. Choose solid color plates, cream, sage, or dusty blue, and hang five to seven of them over a small scale wallpaper print so the plates read as calm shapes against the pattern. Keep the arrangement loose and off center, since a rigid grid fights with the wallpaper repeat. This idea suits dining rooms and powder rooms where the wallpaper is already the star and the plates add depth.
Try this: test one plate against the wallpaper for a day, since some prints swallow pale plates whole.
Cost: $. Difficulty: easy.
13. Corner wrap around two adjoining walls

Wrapping a plate arrangement around a corner turns an awkward junction into a deliberate feature. Hang plates on both walls meeting at the corner, with the densest cluster right at the joint and the arrangement thinning out on each side. This works well in dining rooms and entryways where one wall alone feels too narrow. Use plates in one color family so the eye follows the wrap instead of stopping at the corner edge.
Try this: place the largest plate exactly on the corner line, half of its visual weight on each wall, to anchor the wrap.
Cost: $$. Difficulty: moderate.
14. Hand painted plates by local makers above a desk
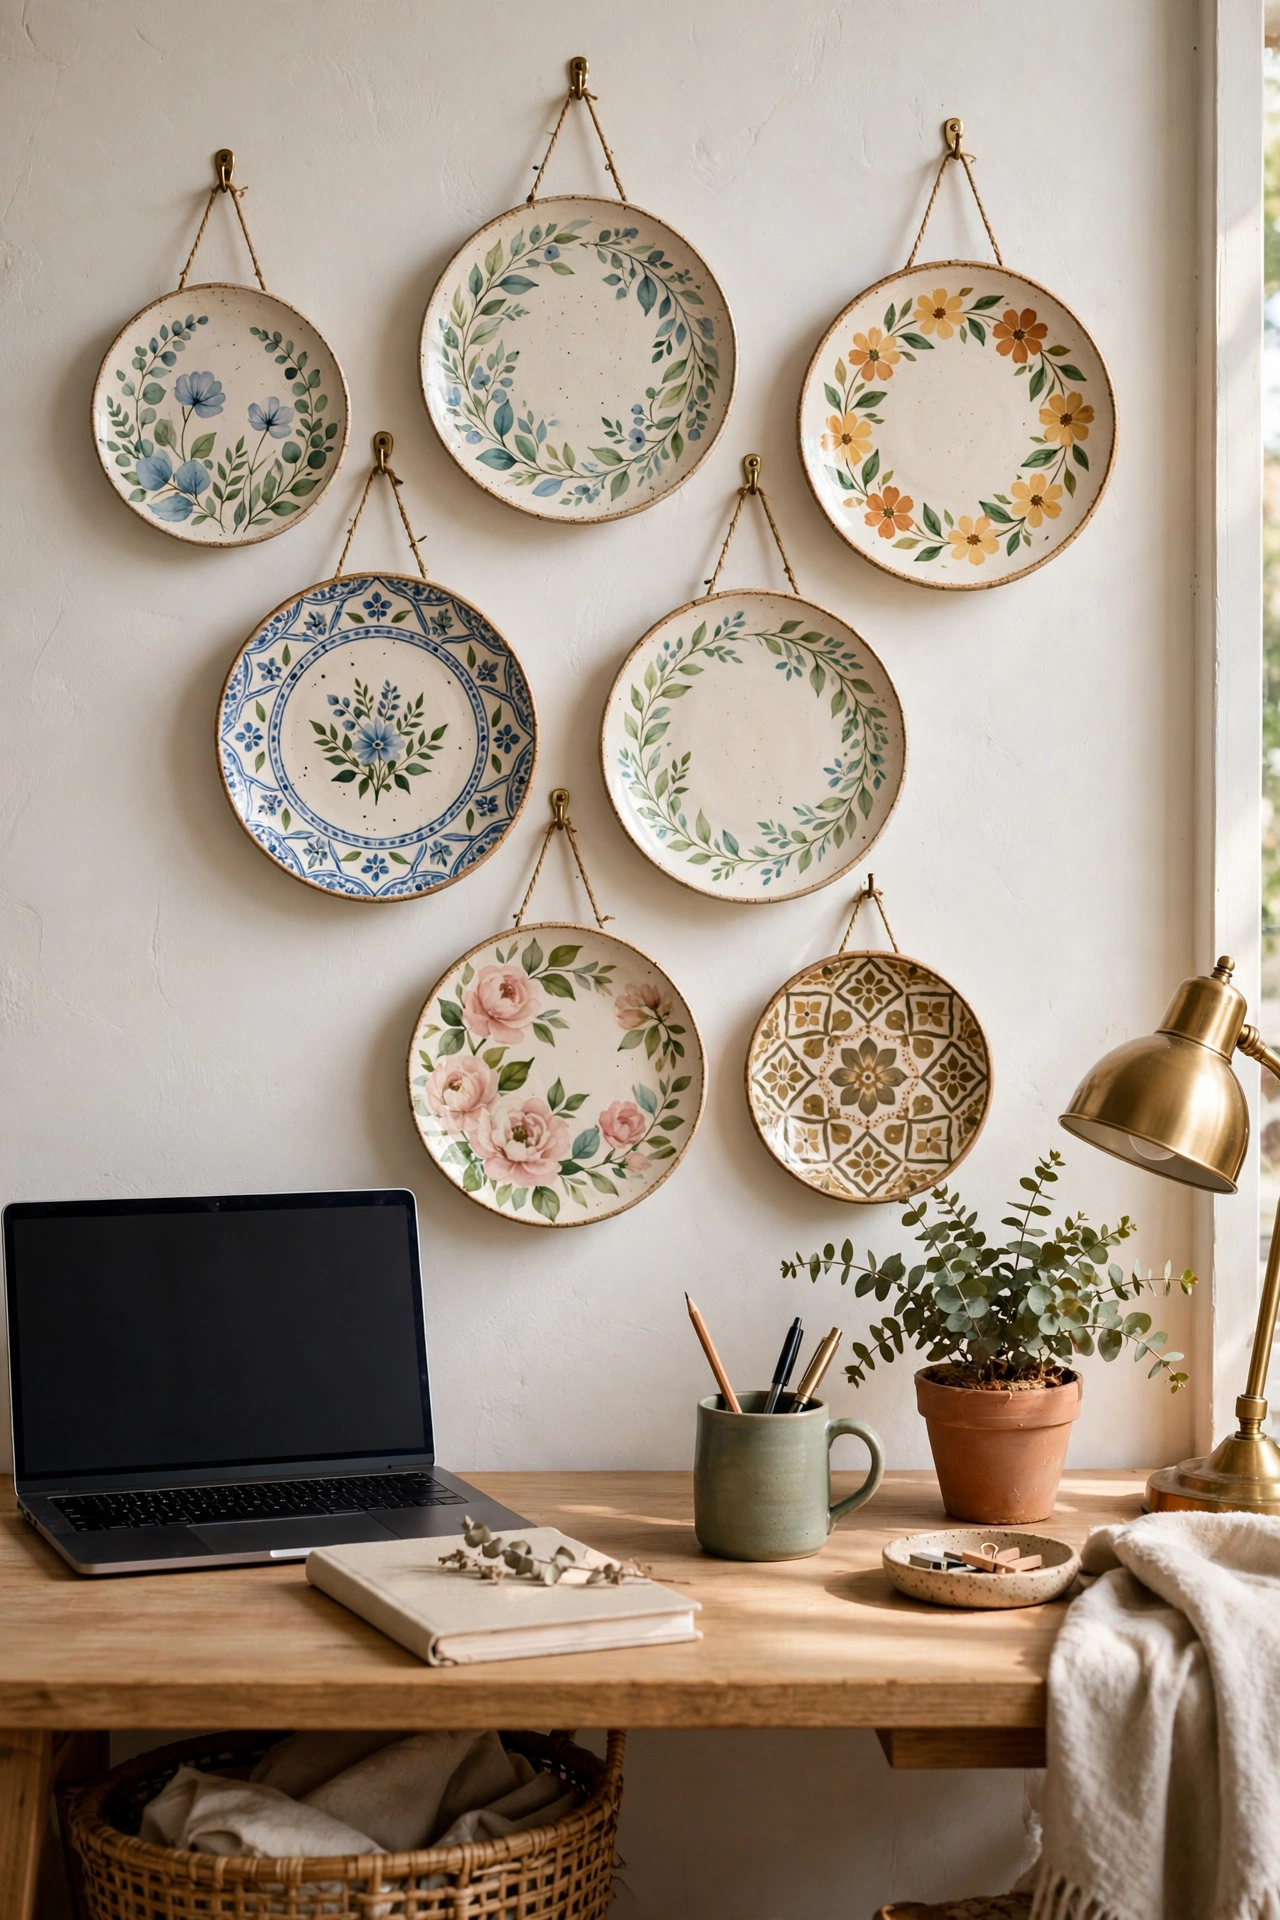
Hand painted plates from local makers give a home office wall a personal gallery that no mass produced print can match. Hang four to six plates above a desk in a loose row, mixing one bold statement plate with quieter companions in the same glaze family. Buying from makers costs more than thrifting, so start with two or three plates and add one per season. Keep plates above the desk surface, not behind a monitor, so they stay visible during the workday.
Try this: ask the maker for the plate’s story and keep a small card with it, since guests will ask.
Cost: $$$. Difficulty: easy.
15. Renter adhesive disc wall with no holes

Renters can hang a full plate wall without a single nail by using water activated adhesive discs paired with picture hanging strips. Wet the disc, press it to the back of each plate, let it cure for 24 hours, then stick the plate to the wall with a strip rated for its weight. This method suits light to medium plates, up to about 2 pounds each, on smooth painted drywall. Test one plate for a full day before hanging the rest, and keep plates away from steamy spots near the stove where adhesive weakens.
Try this: photograph the paper template layout before you stick anything, so you can rebuild it after a move.
Cost: $. Difficulty: easy.
16. Plates mixed with baskets and a small mirror
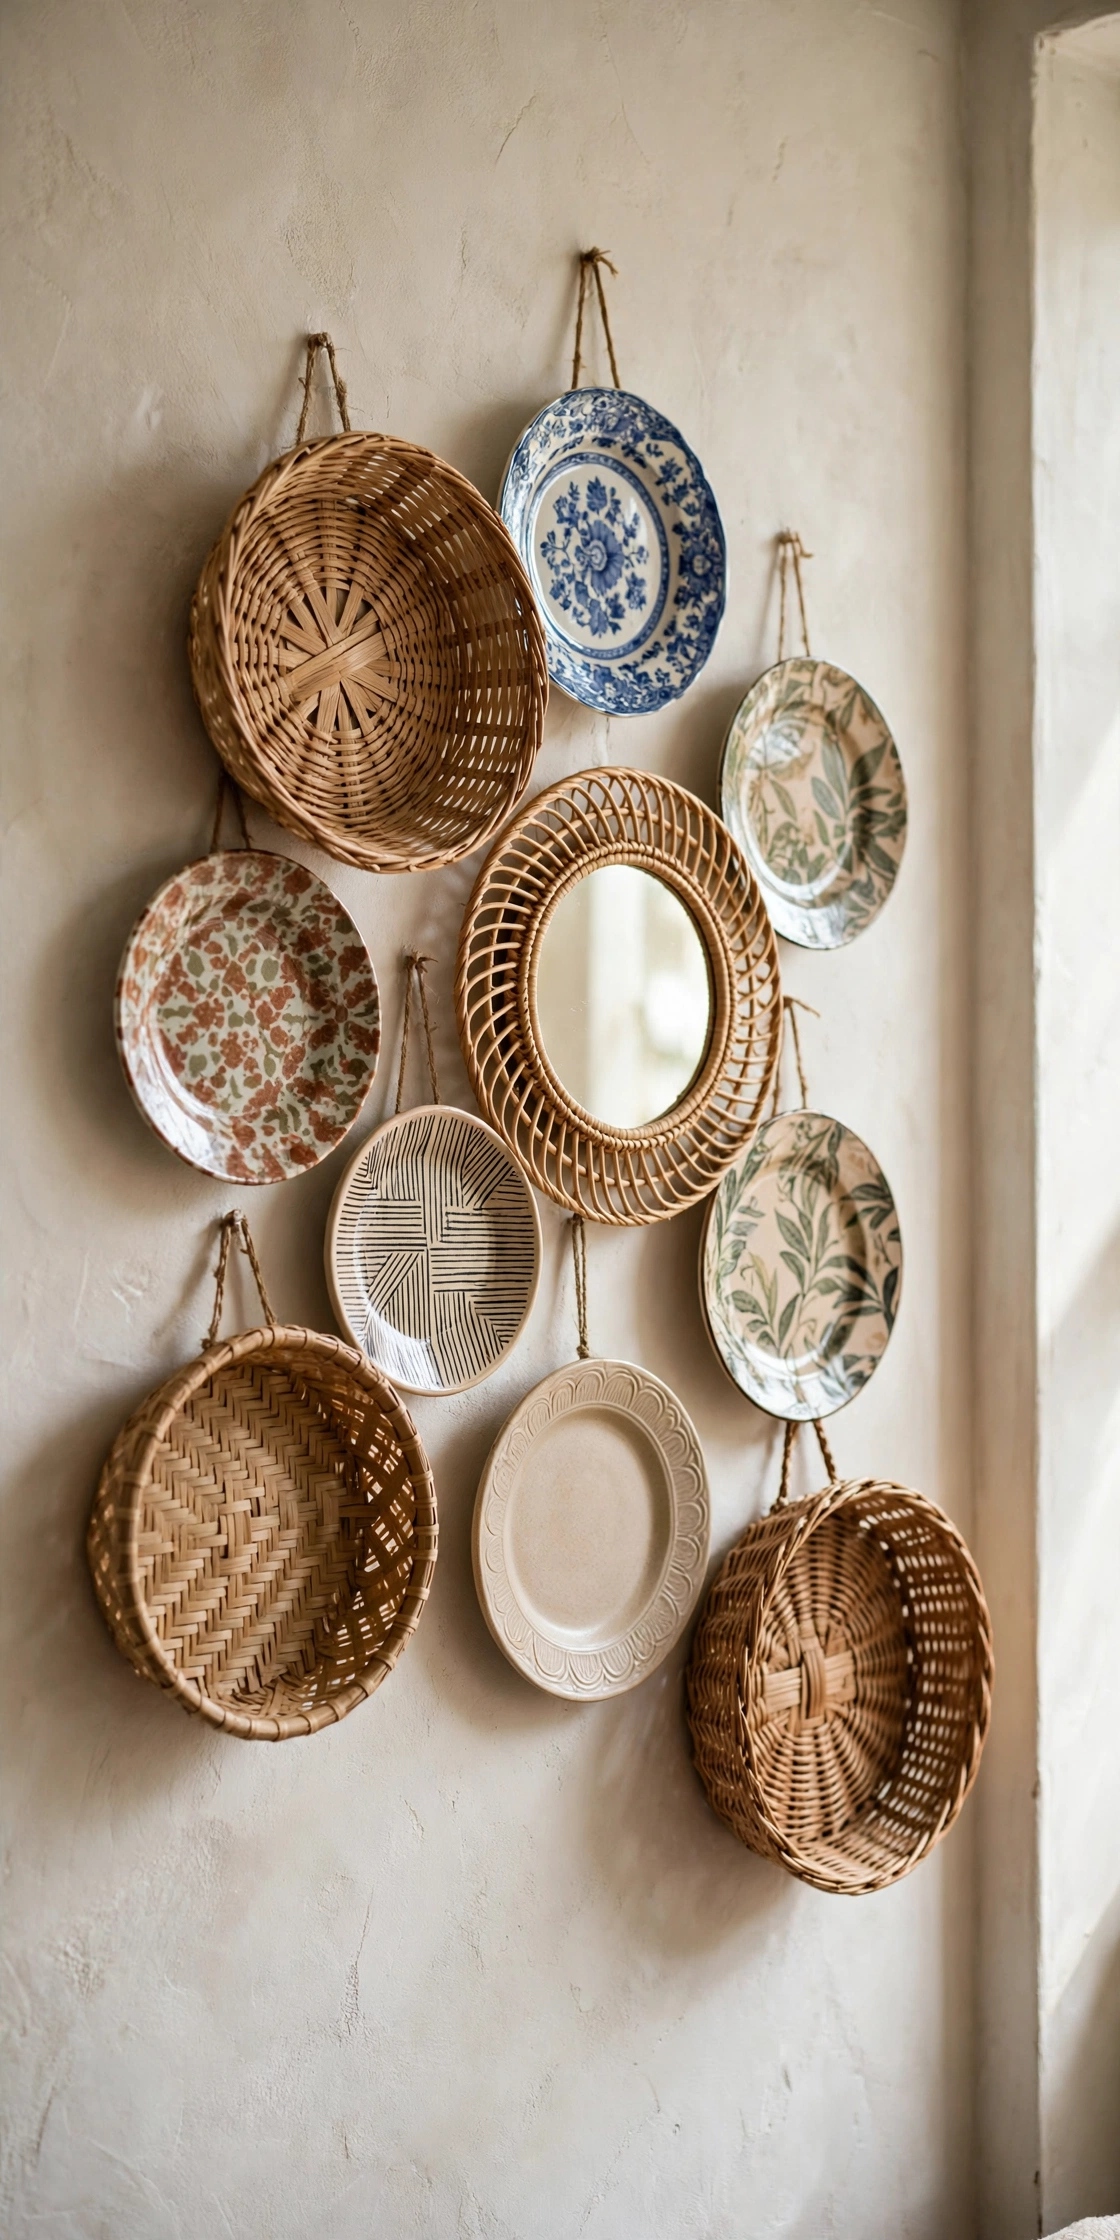
Mixing plates with woven baskets and one small mirror gives a living room wall texture that plates alone cannot deliver. Hang seven to nine pieces total, roughly two thirds plates and one third baskets, with the mirror placed slightly off center to break the round rhythm. Keep one repeated tone, such as warm wood or cream, running through plates, baskets, and the mirror frame. This arrangement suits boho and relaxed rooms where a strict plate grid would feel too formal.
Try this: hang the mirror first, then build plates and baskets around it, since the mirror sets the visual center.
Cost: $$. Difficulty: easy.
17. Seasonal swap wall with two plate sets

A seasonal swap wall uses the same hooks twice a year, so the wall changes without new holes. Hang spring florals from March through August, then swap in earth tone and harvest plates for autumn and winter, keeping the same layout and hanger positions. This works best with wire hangers, since plates lift off and on easily, while adhesive discs make swapping slow. Store the off season set in felt plate sleeves in a labeled box so nothing chips between swaps.
Try this: photograph each season’s layout and tape the photo inside the storage box lid for a fast reset.
Cost: $$. Difficulty: easy.
18. Framed plates in shallow shadow boxes for heirlooms
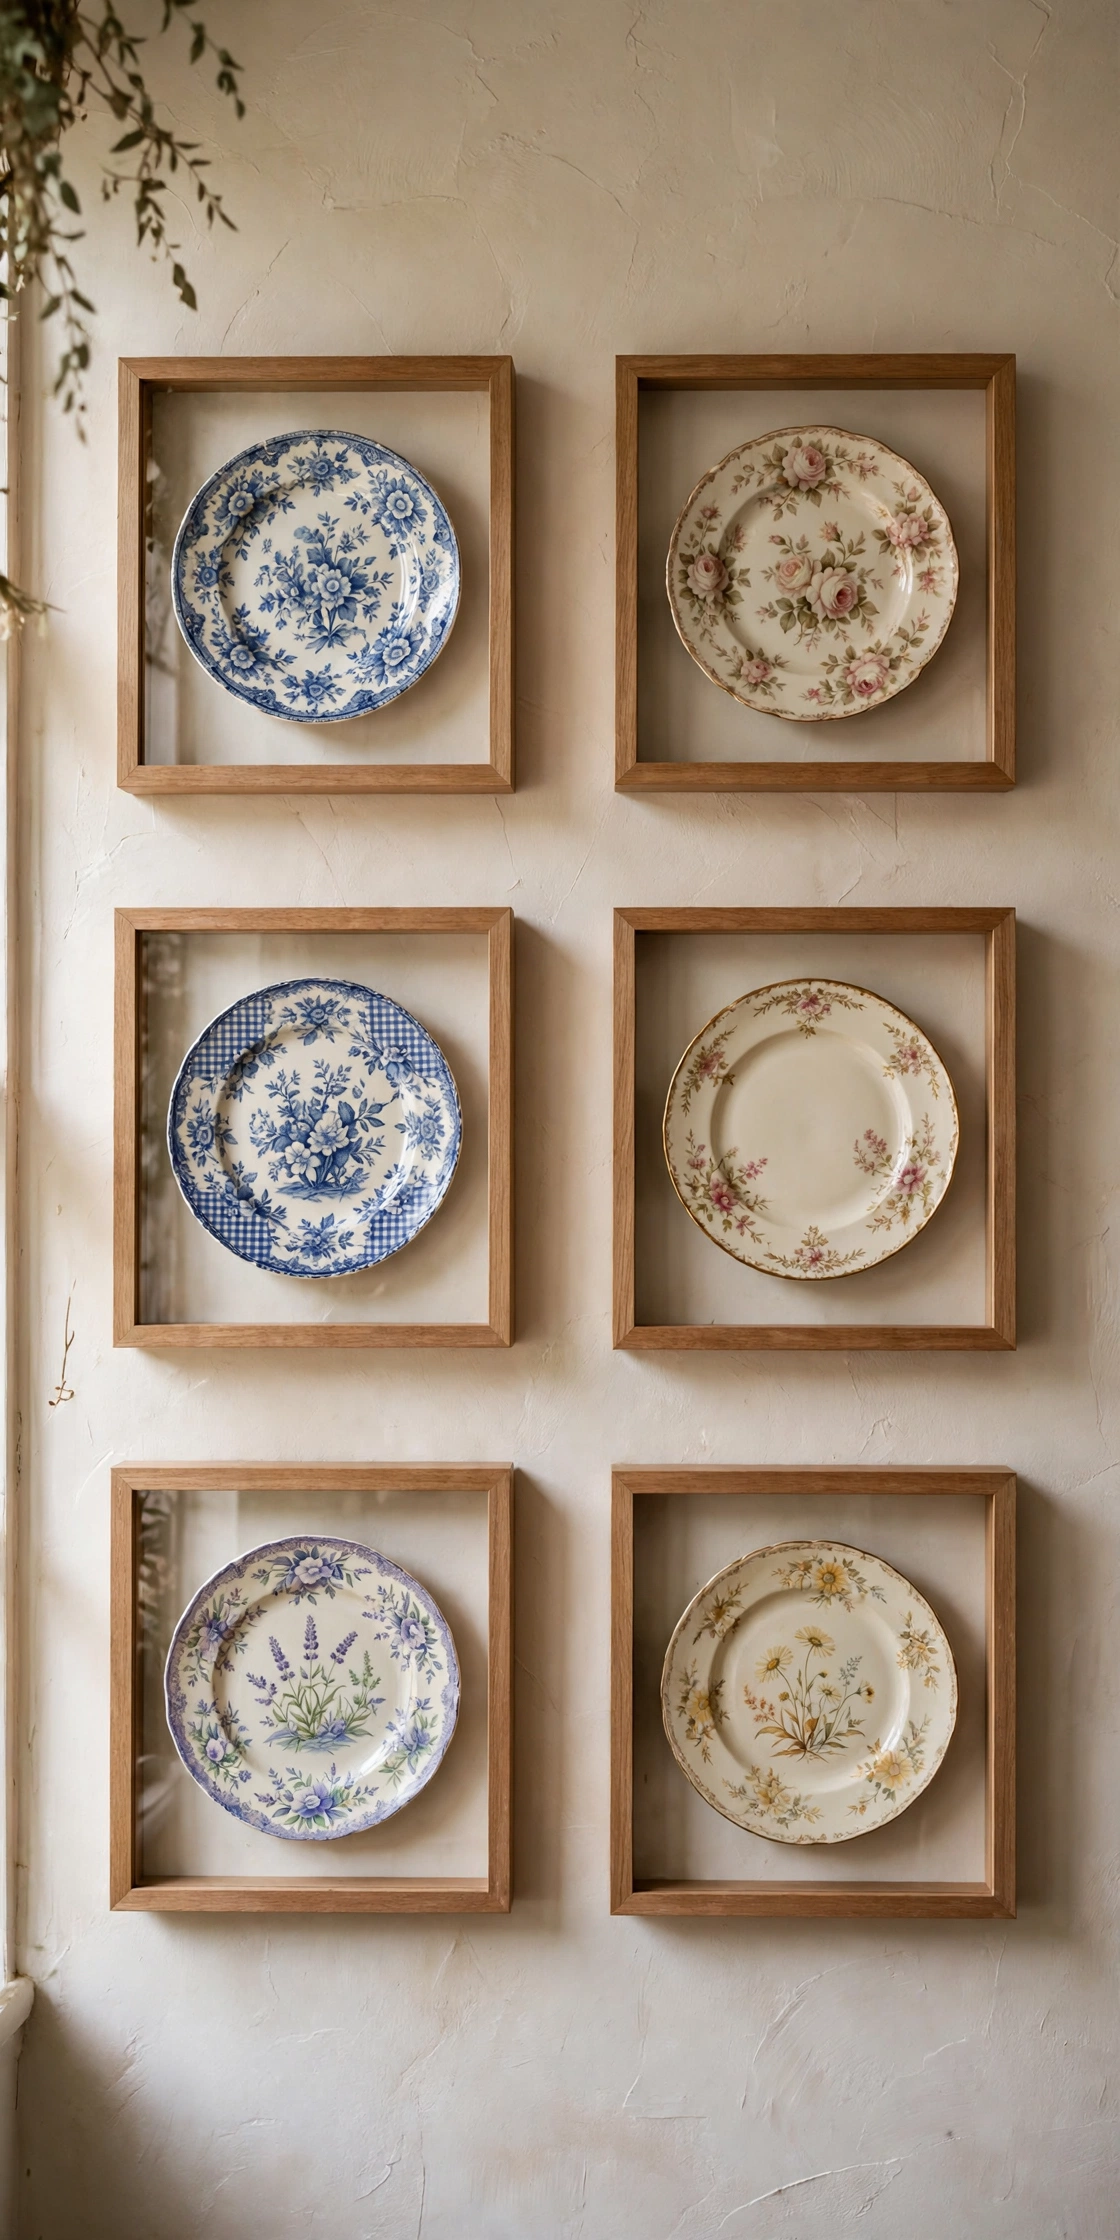
Heirloom plates deserve shadow boxes, which protect the glaze from dust, sunlight, and curious hands while still showing the pattern. Mount each plate inside a shallow box frame, 2 to 3 inches deep, with a fabric or linen backing that matches the room. Hang boxes in a row of three or a small grid, keeping them out of direct sun so old glazes do not fade. This method costs more than open hanging, but it is the right call for plates with family history or real value.
Try this: add a small typed label inside one box with the plate’s origin, so the story stays with the piece.
Cost: $$$. Difficulty: moderate.
19. Narrow vertical column for a sliver wall
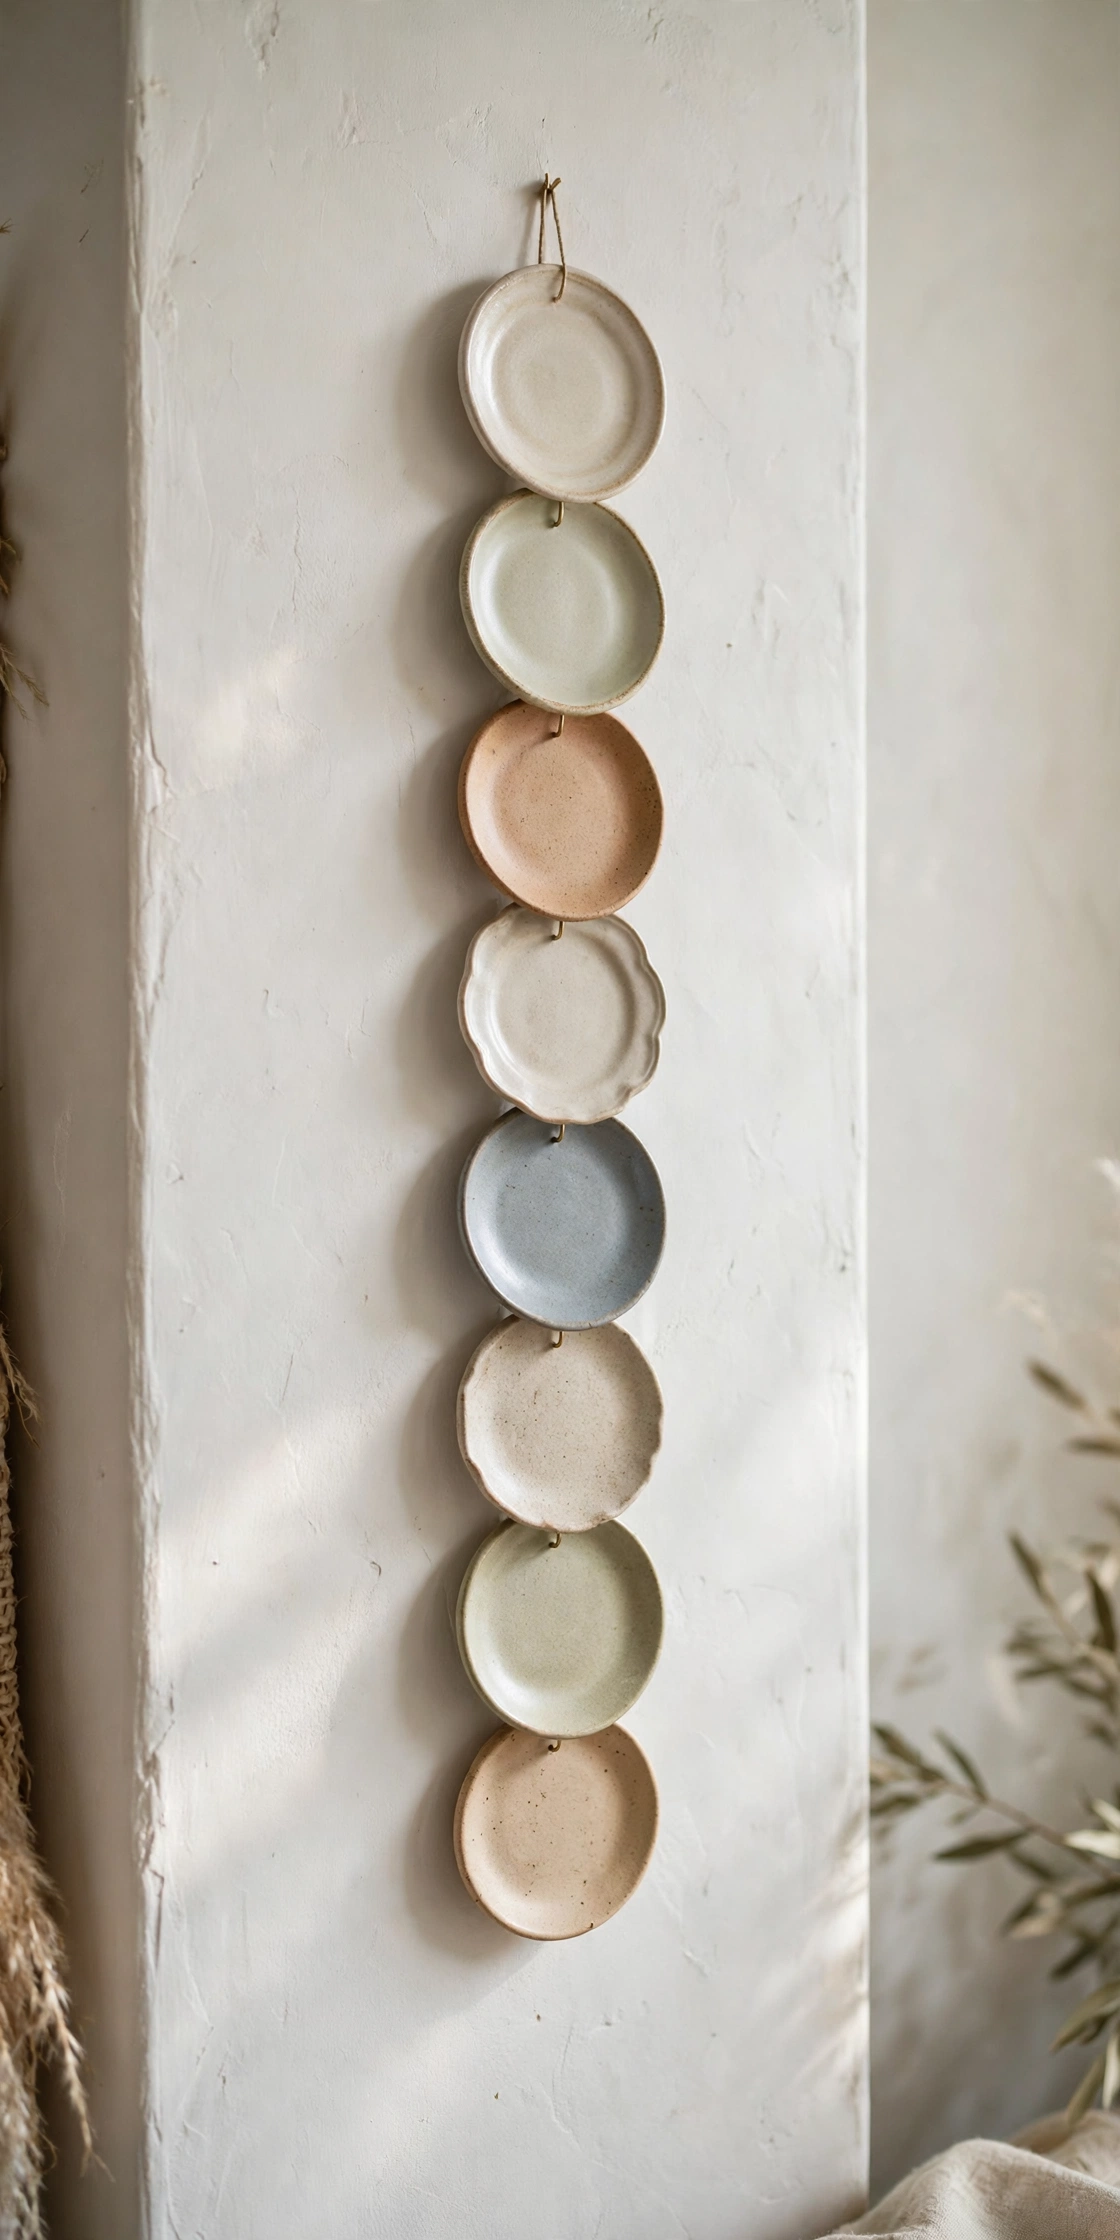
A sliver wall between a door and a window, often just 12 to 18 inches wide, fits a vertical column of four to six small plates. Stack plates in a straight line from about 48 inches to 72 inches high, using plates 6 inches or smaller so the column stays narrow. One pattern family keeps the column calm, while a single accent plate near the middle adds interest. This idea rescues walls that are too narrow for art and too visible to leave blank.
Try this: use a vertical strip of painter’s tape as your center line, and hang each plate on it before removing the tape.
Cost: $. Difficulty: easy.
20. Arch of plates over a doorway

An arch of plates over a doorway frames the passage and draws the eye upward in a hallway or dining room entry. Hang 9 to 11 plates in a wide arc that follows the door trim, starting at about 12 inches above the trim on each side and peaking near the ceiling line. Keep plates small, 6 to 8 inches, so the arch feels light, and keep the spacing even so the curve reads cleanly. This idea suits homes with generous ceiling height, since a low ceiling makes the arch feel cramped.
Try this: mark the arc with a string pinned at the center point, then place paper circles along the string line before hanging.
Cost: $$. Difficulty: moderate.
How to choose the right plate wall for your home
Start with the wall, not the plates. A wide wall above a sideboard takes a salon cluster, a narrow sliver wall takes a vertical column, and a stairwell takes a cascade. Then count your plates: three to five plates suit a row or a small cluster, while nine or more justify a grid or a full salon wall. Check the weight next, since heavy platters need studs and anchors while light plates can hang on adhesive discs. Finally, pick one rule and hold it through the whole wall, one color family, one pattern type, or one plate shape, since a single rule is what turns a random pile of plates into a display that looks planned.
Hanging plates compared
| Idea | Cost | Difficulty | Best for |
|---|---|---|---|
| Even grid of blue and white transferware | $$ | Easy | Dining room walls |
| Salon style mixed cluster above the sideboard | $$ | Easy | Wide walls above furniture |
| Simple row of three matching plates | $ | Easy | Narrow walls and consoles |
| Plates framing a round mirror | $ | Easy | Bedrooms and entries |
| Stairwell cascade following the slope | $$ | Moderate | Stairwell walls |
| Kitchen plate rail with everyday stoneware | $$ | Moderate | Kitchens with open wall space |
| Vintage floral plates in a breakfast nook | $ | Easy | Breakfast nooks |
| Wicker chargers and rattan plates in a coastal entry | $ | Easy | Entries and coastal rooms |
| Monochrome white ironstone on a sage wall | $$ | Easy | Colored walls that need contrast |
| Travel souvenir plates in a hallway timeline | $ | Easy | Long hallways |
| Oversized platter as a dining room anchor | $ | Easy | Dining rooms needing one focal point |
| Plates layered over patterned wallpaper | $ | Easy | Wallpapered dining rooms and powder rooms |
| Corner wrap around two adjoining walls | $$ | Moderate | Awkward corners |
| Hand painted plates by local makers above a desk | $$$ | Easy | Home offices |
| Renter adhesive disc wall with no holes | $ | Easy | Rental apartments |
| Plates mixed with baskets and a small mirror | $$ | Easy | Relaxed living rooms |
| Seasonal swap wall with two plate sets | $$ | Easy | Collectors who like change |
| Framed plates in shallow shadow boxes for heirlooms | $$$ | Moderate | Heirloom and valuable plates |
| Narrow vertical column for a sliver wall | $ | Easy | Sliver walls between doors and windows |
| Arch of plates over a doorway | $$ | Moderate | Hallways with high ceilings |
Cost key: $ means $1 to $10, $$ means $11 to $99, $$$ means $100 to $999, $$$$ means $1,000 and up. Costs cover hangers, rails, frames, and plates bought for the project, not plates you already own.
Common mistakes to avoid
Skipping the paper template step is the most common mistake, since one afternoon of taped paper saves a wall full of wrong holes that need filling. Hanging plates too high is the second, so keep the center of the arrangement at eye level unless the plates sit above furniture. Mixing too many colors without a shared thread is the third, since five unrelated patterns read as clutter rather than collection. Using adhesive hangers on heavy platters is the fourth, and it ends with a broken plate. Hanging precious plates over beds, busy doorways, or within reach of swinging doors is the fifth, since one bump can end a family heirloom.
Safety notes
Anchor heavy plates, platters, plate rails, and shadow boxes into studs with hardware rated above the load, and use wall anchors rated for the plate weight on drywall. Keep plates away from door swing paths and high traffic bump zones, and never hang heavy or heirloom plates directly above a bed or a crib. For homes built before 1978, test for lead paint and follow lead safe rules before sanding or drilling into painted walls; the EPA Renovation, Repair and Painting program explains the requirements. Hire a licensed electrician for new outlets or hardwired picture lights near a plate wall, and keep cords clipped along baseboards away from walkways. The CPSC Anchor It guidance covers anchoring heavy wall items into studs. Keep small plate hanging hardware, loose hooks, and wire clips away from small children.
More home and wall ideas
If you want the full wall decor picture before you commit to plates, start with our general catalog. For a full tour of wall options from paint to pegboard, see 25 Best Decorative Wall Ideas to Liven Up Your Home.
If your plate wall will share a room with wood trim, the trim sets the frame for everything else. For tailored trim patterns that pair well with plate displays, see 27 Elegant Wood Trim Accent Wall Ideas for a Classic, Tailored Room.
If the plate wall is going in a bedroom, the rest of the room’s walls need a plan too. For a wall by wall bedroom system sized to the furniture below, see 13 Ideas To Decorate Your Bedroom Walls for a Room That Feels Finished.
If your plates live in the kitchen, the kitchen itself deserves the same collected feel. For a vintage kitchen built from aged finds and patina, see 27 Vintage Cottage Kitchen Ideas for a Kitchen That Feels Collected Over Time.
If hanging plates sparks a bigger kitchen project, a plate rail or display ledge makes a natural first build. For hands on kitchen builds and makeovers, see 15 Farmhouse Kitchen DIY Ideas for a Warm, Hardworking Kitchen.
Frequently asked questions
How do I hang plates without damaging the wall?
Use water activated adhesive discs paired with picture hanging strips for light to medium plates on smooth painted drywall. Wet the disc, press it to the back of the plate, let it cure for 24 hours, then stick it to the wall. To remove it, soak the disc off with warm water and pull the strip tab down slowly. For heavy plates, skip adhesive and use a wire hanger with a wall anchor instead.
What is the best spacing between plates?
Leave 2 to 4 inches between plate rims for most arrangements. Tighter spacing, around 2 inches, suits grids and small clusters, while 3 to 4 inches suits loose salon walls where each plate needs breathing room. Keep the spacing consistent across the whole wall, since uneven gaps are what make a display look accidental.
Can I hang heavy platters safely?
Yes, with the right hardware. Use a wire spring hanger rated for the platter’s weight, a wall anchor rated above that weight, and a stud wherever possible. Never hang a platter over 2 pounds on adhesive alone, and never hang a heavy platter above a bed, a crib, or a doorway where a fall could hurt someone.
Will adhesive hangers hold in a humid kitchen?
Adhesive discs can weaken in steam and grease, so keep adhesive hung plates away from the wall directly beside the stove. In humid kitchens, wire hangers with screws and anchors are the safer choice. If you do use adhesive, clean the plate back with alcohol first, let the disc cure a full 24 hours, and test one plate for a day before hanging the rest.
How many plates do I need for a full wall?
A small wall or nook needs 3 to 7 plates, a standard wall above a sideboard needs 9 to 15, and a full salon wall needs 15 or more. Start with the plates you own, lay them on the floor in the planned arrangement, and count the gaps before you buy more. Three plates in a row already count as a finished display on a narrow wall.
Final thoughts
Start with the plates you already own, tape up paper templates, and hang one small arrangement this weekend. A plate wall grows best one find at a time, and the wall you finish first will tell you exactly what the next one needs.


