


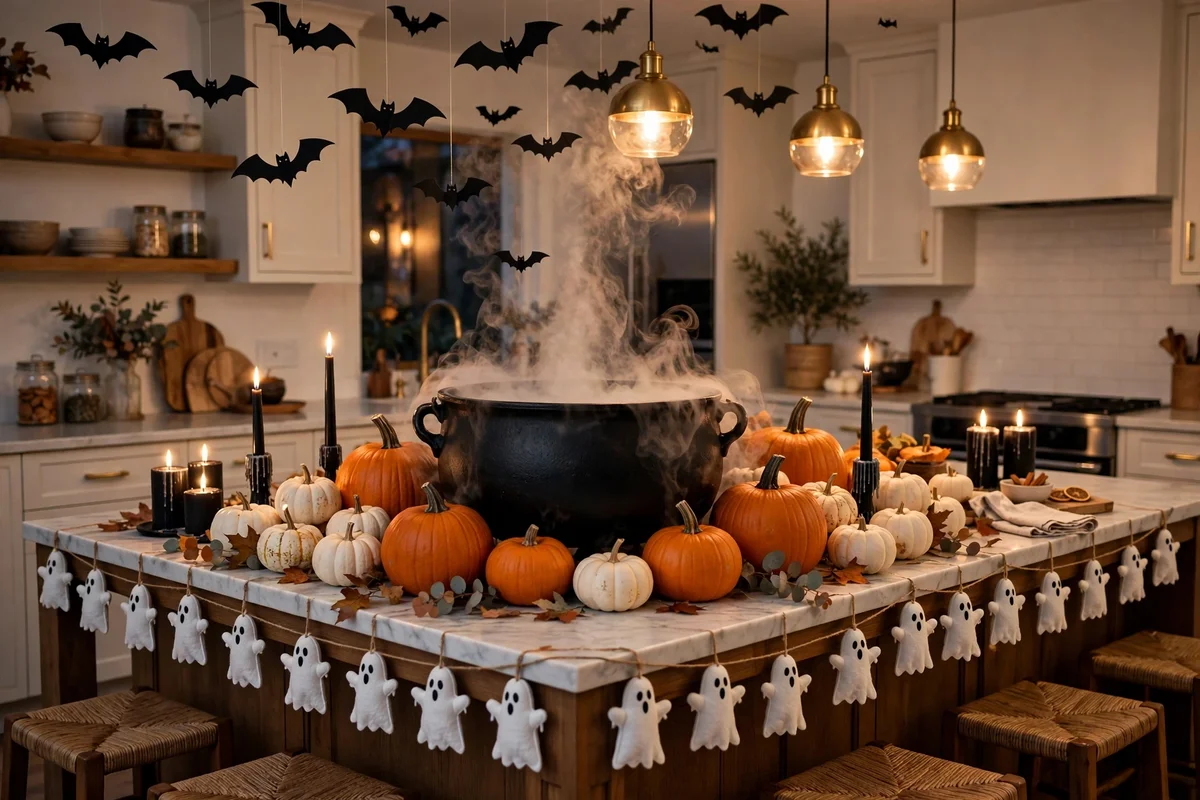
The kitchen island is where everyone ends up during a Halloween party, which makes it the worst possible surface to waste. Guests drop their drinks there, kids circle it for candy, and every photo gets taken in front of it. A bare island in October reads like a missed chance, while an overdone one turns meal prep into an obstacle course.
This guide gives you 20 Halloween kitchen island decor ideas that keep the island working as a kitchen while making it the best-looking spot in the house. Each one includes a real cost, a difficulty label, and a tip that saves you a redo. Most cost under $25 and take less than an hour.
- One strong centerpiece beats ten small trinkets scattered across the island.
- Keep decorations on one end or one runner so half the island stays usable for cooking.
- Battery candles are safer than real flames around food, kids, and dried decor.
- Most island ideas cost under $25 and reuse pumpkins, jars, and candles you already own.
- Protect the countertop with a runner or tray before setting down anything damp or dyed.
1. Cauldron with black branches
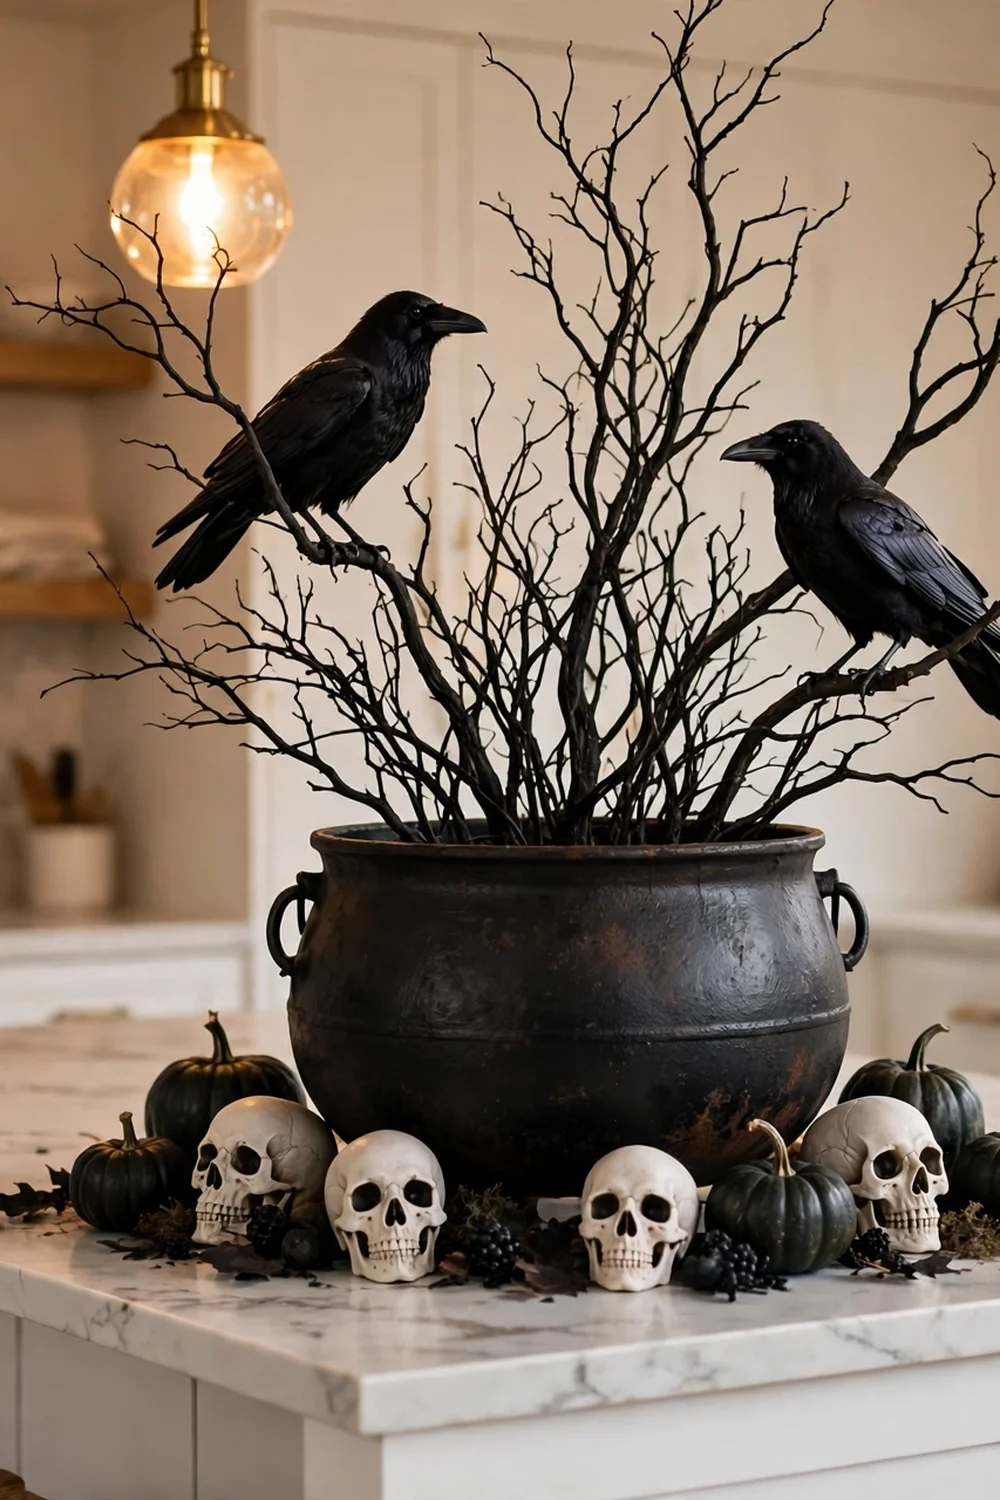
Set a wide black cauldron in the middle of the island and fill it with tall, bare branches spray-painted matte black. Perch two crow figures on the branches and tuck small skulls and dark mini pumpkins around the base. The height draws the eye up, so the island reads as decorated from across the room without eating much surface space. A 12-inch cauldron leaves room on both sides for a cutting board or a snack bowl. Dollar stores carry the crows and skulls every October.
Try this: Wedge a brick of floral foam inside the cauldron first so the branches stay upright when someone bumps the island.
Cost: $$| Difficulty: Easy | Time: 20 minutes
2. Skull and deep red roses
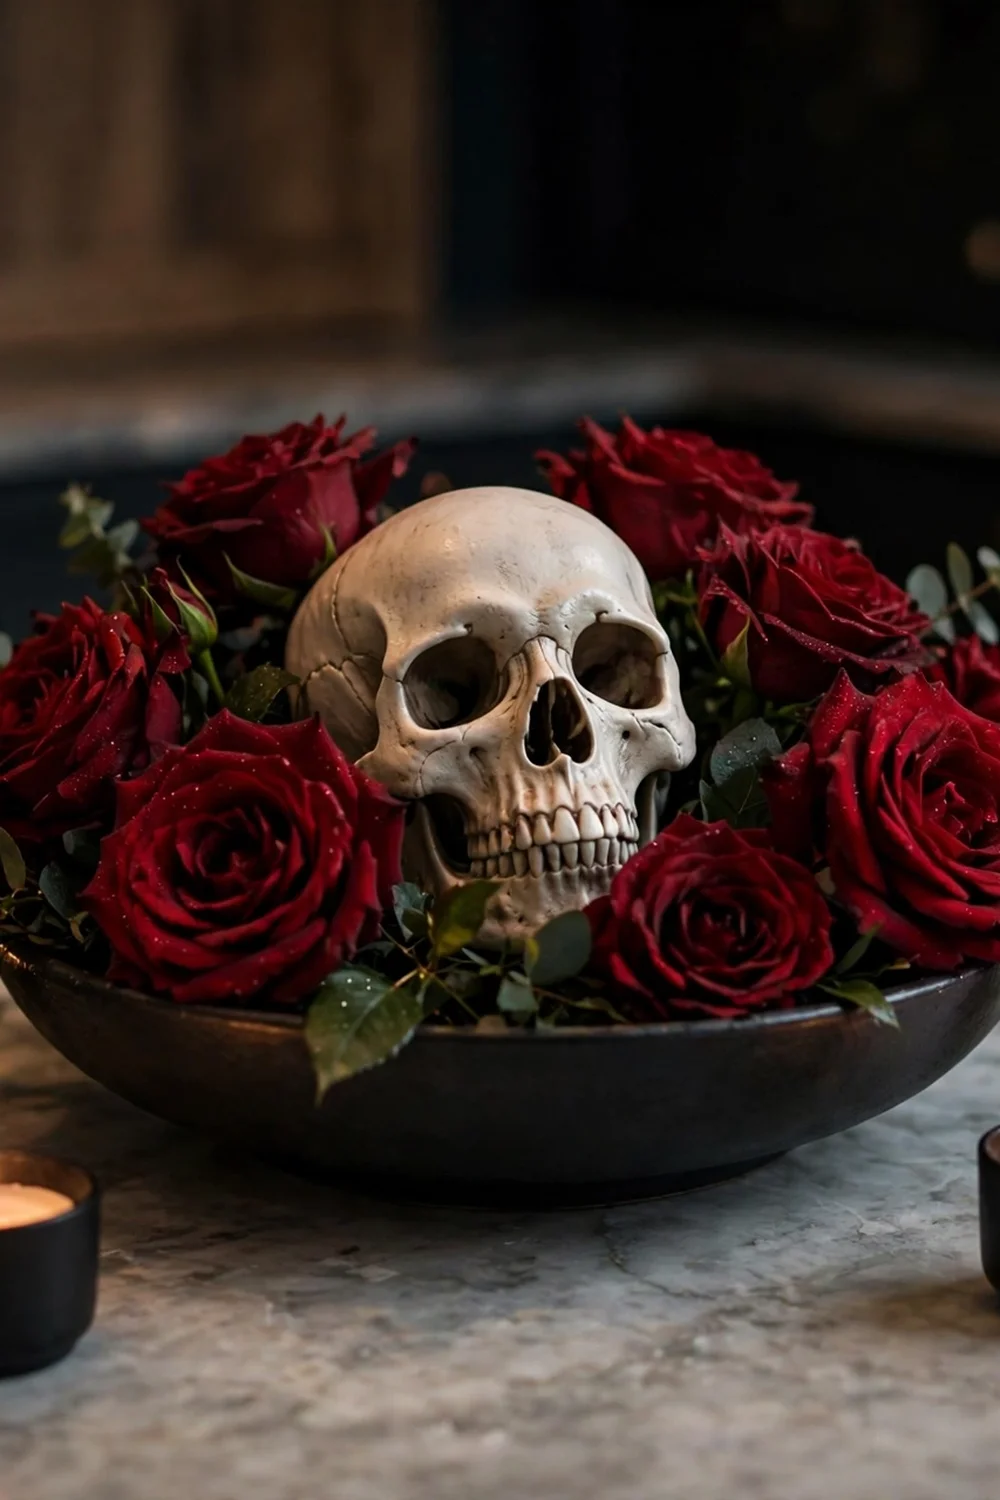
Nest a decorative skull among deep red roses in a low black bowl for a look that reads gothic instead of gory. Faux roses work better here because real ones wilt fast near kitchen heat and need water that can spill. Use a bowl no taller than 6 inches so sightlines across the island stay open. Black taper candles on either side finish the scene. This one suits a dinner party better than a kids’ party, since the skulls skew grown-up.
Try this: Tuck a string of warm fairy lights under the roses so the petals glow after dark.
Cost: $$| Difficulty: Easy | Time: 15 minutes
3. Horror-movie runner scene
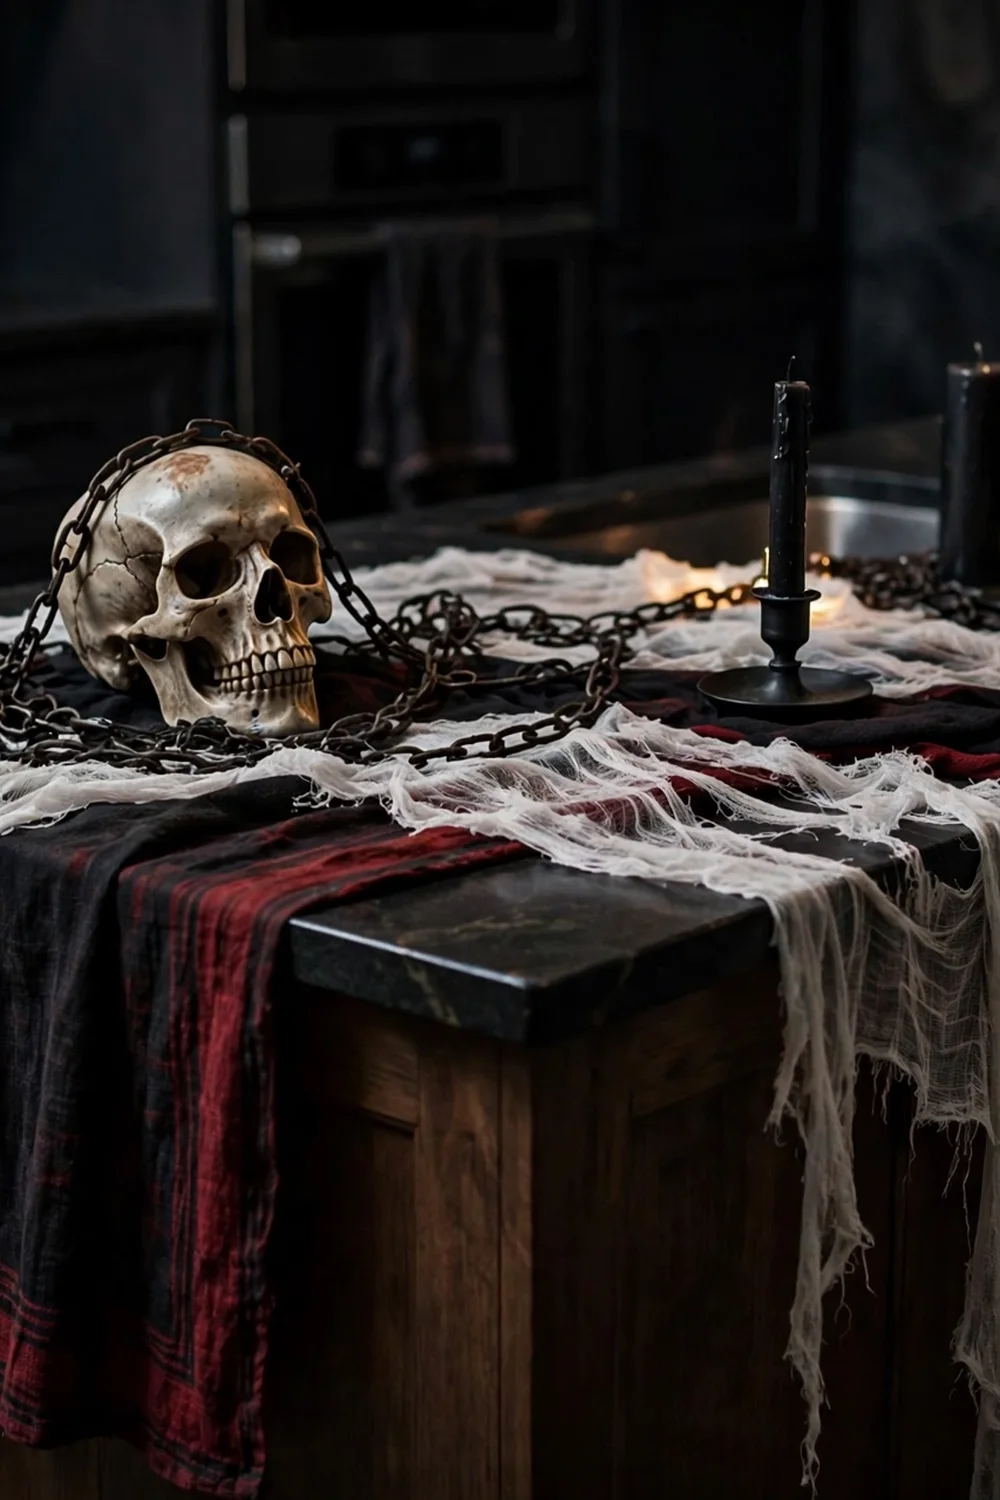
Lay a black or dark red runner down the center of the island and build one dramatic scene on it: a skull, a length of faux chain, torn cheesecloth, and black candles in sturdy holders. Keep every prop under 10 inches tall so guests can still see and talk across the island. Plastic severed-hand props tucked near a serving board push the horror feel further for a party night, then come off in seconds for normal days. Washable fake blood on a tray adds film-set drama without staining the stone.
Try this: Keep all props on the runner itself so you can roll the whole scene up in one motion.
Cost: $$| Difficulty: Easy | Time: 25 minutes
4. Full-island skeleton grazing board

Cover the entire island in brown kraft paper and lay out a Halloween grazing spread around a 3-foot skeleton placed in the center. Arrange cheeses, meats, crackers, fruit, and dips around the skeleton, then fill gaps with pretzels, popcorn, candy, and cookies. Mini cauldrons, skeleton hands, and plastic spiders tucked between the food make a regular charcuterie board read as Halloween. Keep anything moist on boards or parchment rather than directly on the kraft paper. This feeds a crowd with almost no cooking.
Try this: Place the skeleton first and build the food around it, not the other way around.
Cost: $$| Difficulty: Medium | Time: 45 minutes
5. Witch’s brew coffee bar

Turn one end of the island into a coffee bar with jars labeled “Witch’s Brew” and “Potion No. 9,” a tiny cauldron holding sugar packets, and two Halloween mugs. Printable labels cost nothing and peel off in November. Keep the setup to a 2-foot section so the coffee maker stays usable every morning. A small chalkboard with the “menu” makes guests smile and costs about $5. This works all month because it is functional decor, not just a display.
Try this: Use removable vinyl labels instead of paper so condensation does not turn them to mush.
Cost: $$| Difficulty: Easy | Time: 20 minutes
6. Giant spider overhead

Hang one oversized faux spider from the ceiling on clear fishing line so it dangles above the island. A single big prop beats a dozen small ones for impact, and it uses zero counter space. Pair it with a few small pumpkins and black candles on the island below to anchor the scene. Hang it 6 to 7 feet up so tall guests do not walk into it. The fishing line makes it look like the spider is floating, which startles people in the best way.
Try this: Use a removable ceiling hook rated for the spider’s weight so it survives a whole month.
Cost: $$| Difficulty: Easy | Time: 10 minutes
7. Tiered tray Halloween stack

A two- or three-tier tray corrals Halloween clutter into one tidy footprint on the island. Load it with mini pumpkins, small skulls, a dish of candy corn, and black candles. The vertical design gives you three levels of decor in about 10 inches of counter space. Wood or metal trays both work; metal reads spookier. When you need the counter, you lift one tray instead of twenty objects. If you love layered looks, see these stunning tiered trays for fall decor for more stacking ideas that carry into November.
Try this: Put the tallest items on the bottom tier and the smallest on top for the best sightlines.
Cost: $$| Difficulty: Easy | Time: 15 minutes
8. Mini jack-o’-lanterns with LED tea lights

Carve or paint faces on mini pumpkins and drop a flickering LED tea light inside each one. Line five or six down the center of the island for a glowing runway effect after dark. Real mini pumpkins last about two weeks indoors, so buy them mid-October if you want them fresh for the 31st. Foam pumpkins last for years and never rot, which makes them the better buy if you decorate early. LED lights stay cool, so there is no fire worry near paper napkins or dried garlands.
Try this: Set the tea lights on a timer plug so the pumpkins glow every evening without you remembering.
Cost: $$| Difficulty: Easy | Time: 30 minutes
9. Skeleton chef utensil holder
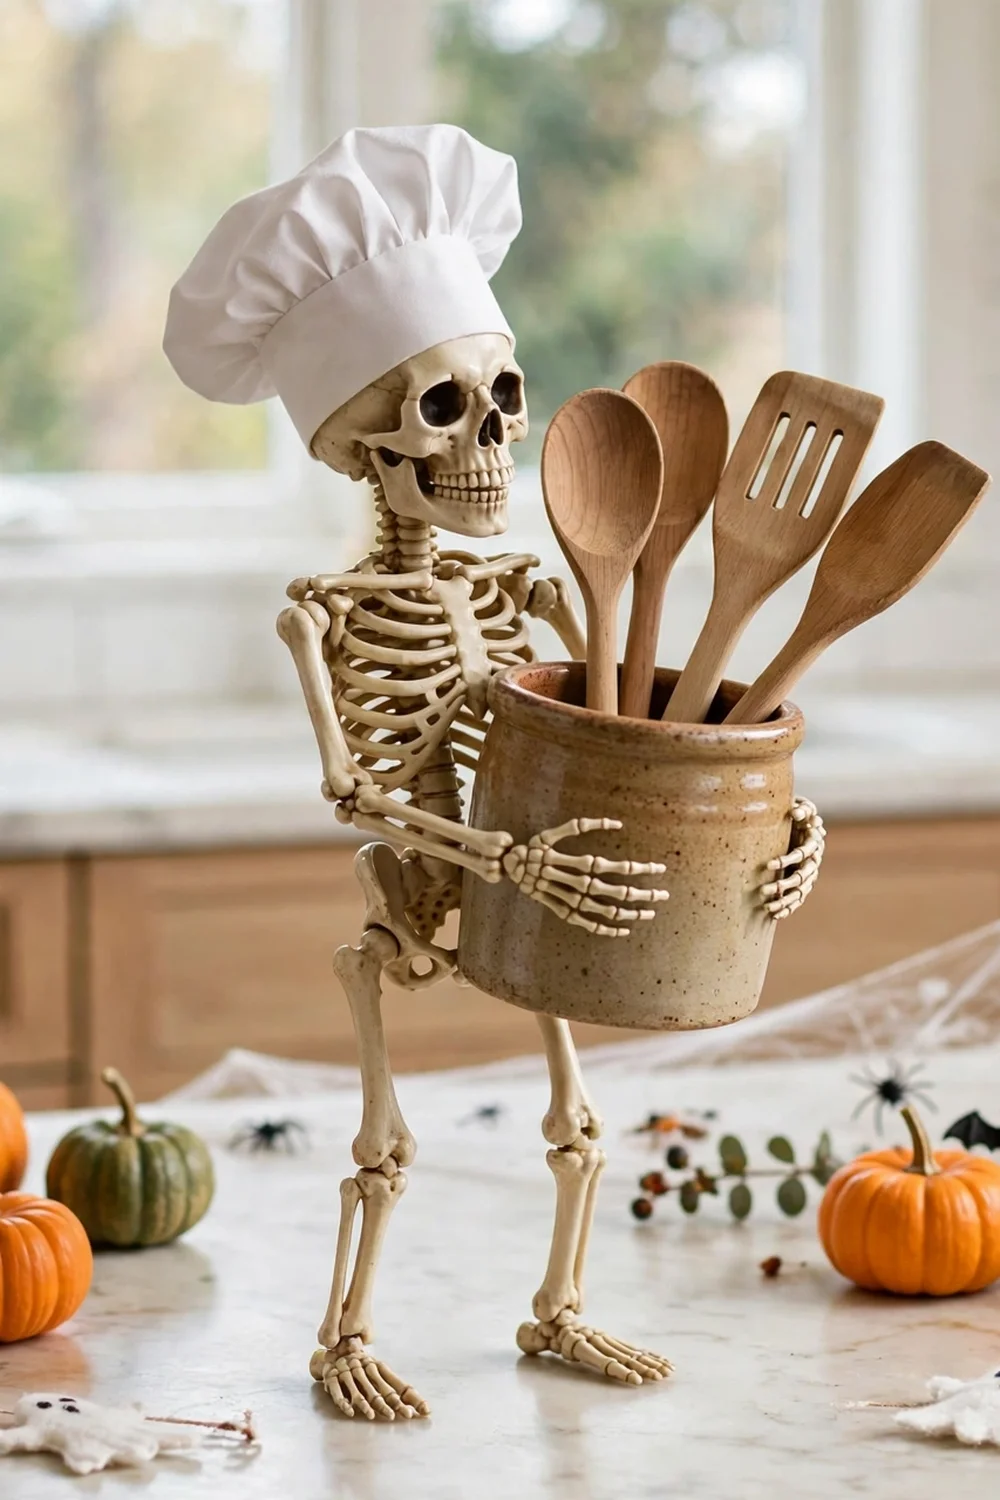
Seat a small skeleton in a chef’s hat behind a crock of wooden spoons and spatulas. It is funny, it is functional, and it uses items already on your counter. A 12-inch posable skeleton costs about $8 and bends into a leaning pose over the utensil crock. Add a mini pumpkin at its feet and a dish towel with a Halloween print nearby. Kids love this one because the skeleton looks like it is helping cook. Keep the skeleton clear of the stove side of the island.
Try this: Pose the skeleton’s arm so it looks like it is stirring an empty pot.
Cost: $$| Difficulty: Easy | Time: 10 minutes
10. Apothecary jars with spooky labels

Fill vintage-style glass jars with dried beans, colored water, or faux herbs and add labels reading “Eye of Newt” or “Dragon’s Breath.” Group three jars of different heights on a small tray at one end of the island. The tray matters because it lets you move the whole display when you need counter space. Use food coloring in water for the liquids, and seal the jars if toddlers visit. Printable apothecary labels are free online and take five minutes to cut out.
Try this: Backlight the jars with a small LED puck light to make the liquids glow.
Cost: $$| Difficulty: Easy | Time: 25 minutes
11. Black taper candles and white pumpkins

Alternate black taper candles in brass holders with small white pumpkins down the center of the island. The black-and-white palette looks chic rather than cartoonish, and it matches kitchens that already skew modern. Use LED taper candles so the display can stay up all month with zero fire risk. A black runner underneath ties the line together and protects the counter from wax drips. Space the candles at least 6 inches from the pumpkins so the arrangement reads as a rhythm, not a crowd.
Try this: Mix candle heights by 2 to 3 inches for a skyline effect down the island.
Cost: $$| Difficulty: Easy | Time: 15 minutes
12. Mummy-wrapped pumpkins
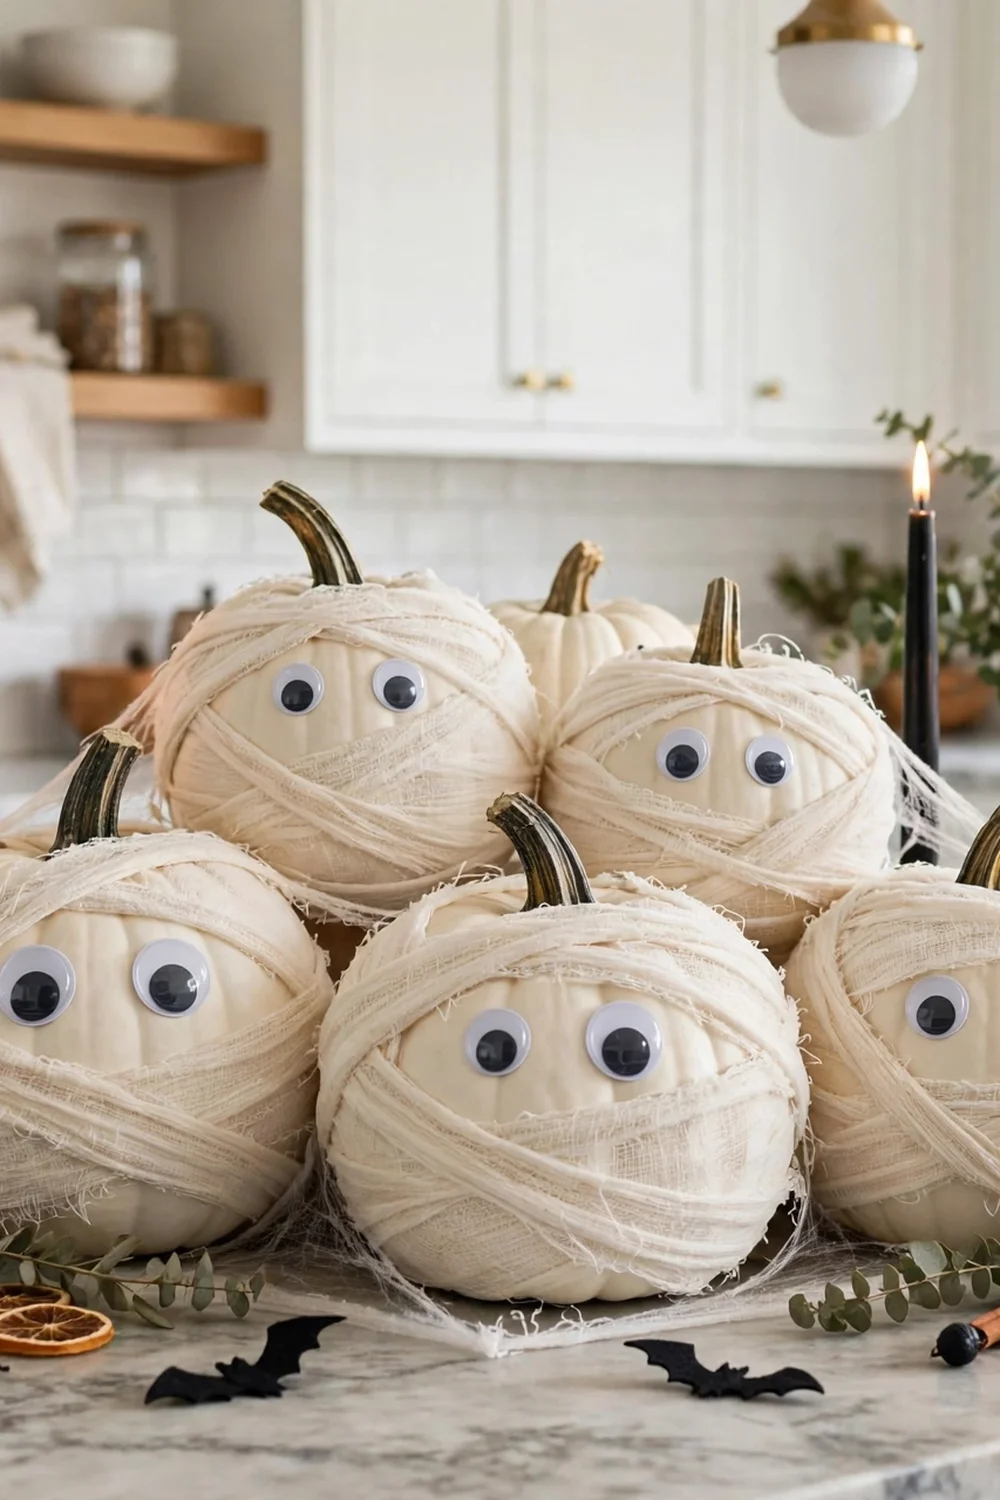
Wrap white pumpkins in white gauze and stick on googly eyes to make a family of mummies. Cluster three to five on a tray at one end of the island. This is the best kid-friendly option on this list because nothing is scary, sharp, or breakable. Let kids do the wrapping themselves; the messier the gauze, the better the mummies look. Hot glue the eyes on so they survive curious little hands. Pair with a bowl of wrapped candy for a trick-or-treat-ready corner.
Try this: Use medical gauze from the dollar store; it wraps tighter than craft gauze.
Cost: $$| Difficulty: Easy | Time: 20 minutes
13. Witch hat candy station
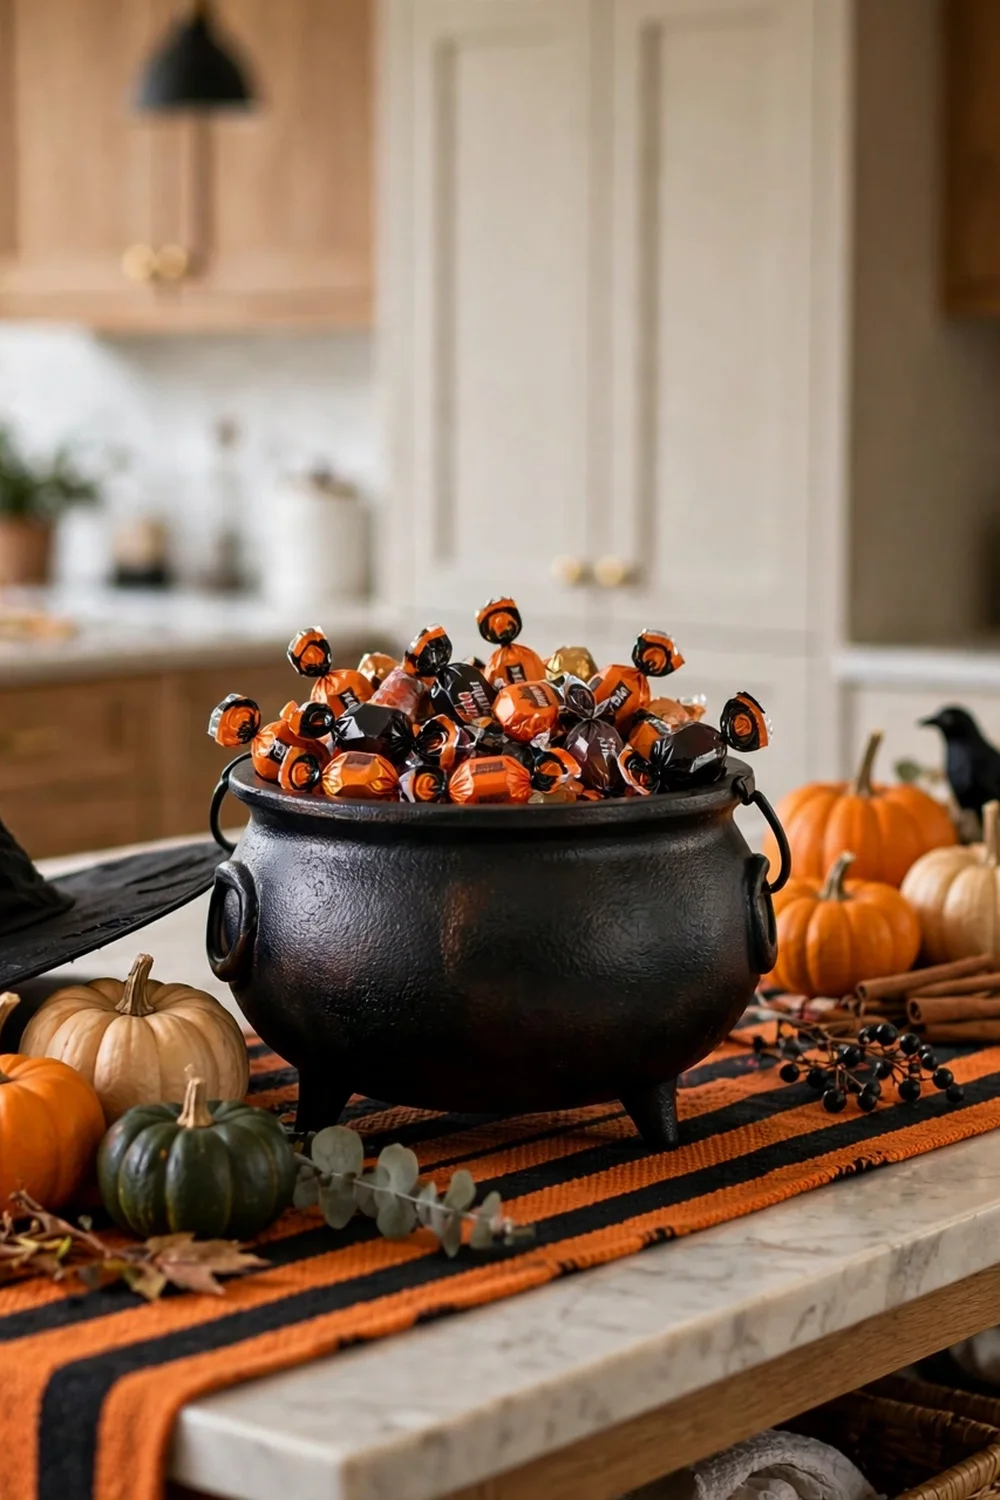
Set a witch hat on a stand or a paper-mache cone at one end of the island and place a cauldron bowl of wrapped candy in front of it. An orange-and-black striped runner underneath signals “candy lives here” to every kid who walks in. Keep the candy in a bowl with a lid if you have a dog that counter-surfs. Chocolate is toxic to dogs, so a lidded cauldron is not just tidy, it is safer. Refill the bowl weekly through October and it doubles as your trick-or-treat stash.
Try this: Tape the hat to a candlestick base so it stands upright instead of flopping.
Cost: $$| Difficulty: Easy | Time: 10 minutes
14. Potion bottle drink station

Line up glass beakers and bottles filled with orange, purple, and green drinks for a mad-scientist beverage station. Label each one with its “potion” name and add paper straws in black and orange. A little dry ice in a separate bowl (never in the drinks) gives you fog without any risk. Keep this on the end of the island farthest from the stove, and use plastic beakers if kids will serve themselves. Batch one big punch recipe so refills take seconds during a party.
Try this: Freeze gummy eyeballs into ice cubes for a gross-out garnish kids love.
Cost: $$| Difficulty: Medium | Time: 30 minutes
15. Paper bat swarm on pendant lights

Cut black bats from cardstock in three sizes and tape them to the pendant light cords above the island so they look like they are flying upward. This decorates the island without touching the counter at all, which makes it ideal for small kitchens. Five or six bats per cord is plenty; more than that reads as clutter. Use painter’s tape on the cords so nothing sticky stays behind. Take them down by early November before the tape adhesive sets.
Try this: Fold each bat slightly down the middle so the wings catch the light and look 3D.
Cost: $| Difficulty: Easy | Time: 20 minutes
16. Ghost garland on the island edge
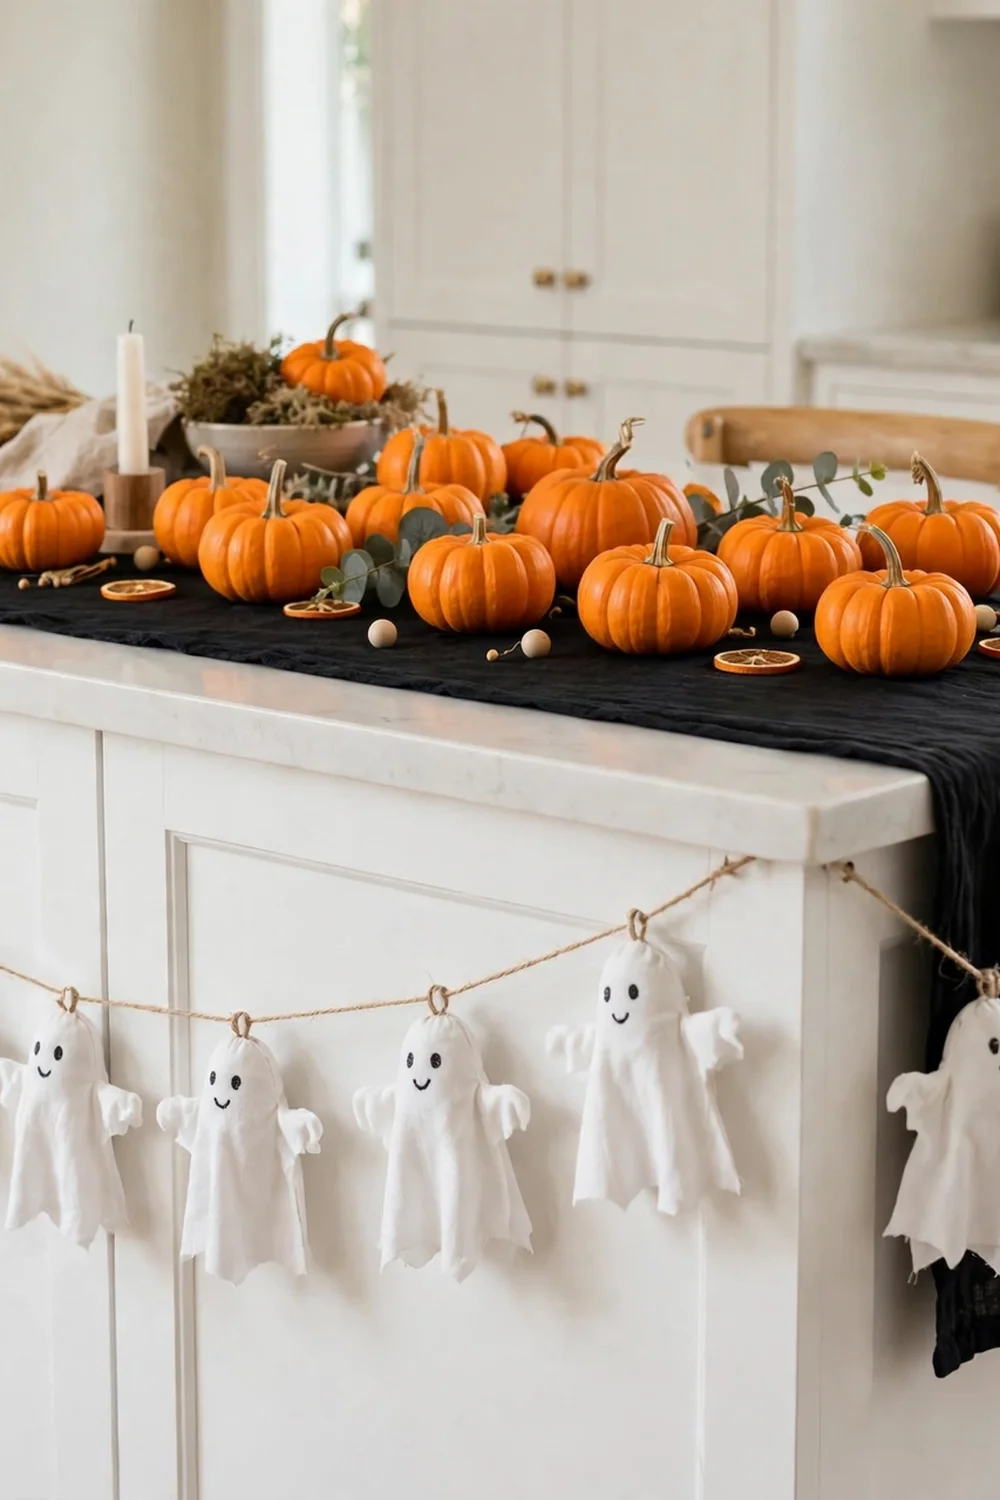
Drape a garland of white fabric ghosts along the front edge of the island where everyone can see it from the living room. Cheesecloth ghosts over foam balls cost almost nothing and take 20 minutes to string. Hang the garland with removable hooks on the island’s side panel so the top stays completely clear for cooking. This is a good pick for open-plan kitchens because it decorates the island’s “public” face. Pair it with orange pumpkins on top for the classic color contrast.
Try this: Weave a battery string light through the garland for a soft glow at night.
Cost: $| Difficulty: Easy | Time: 20 minutes
17. Orange and black striped runner with mini gourds
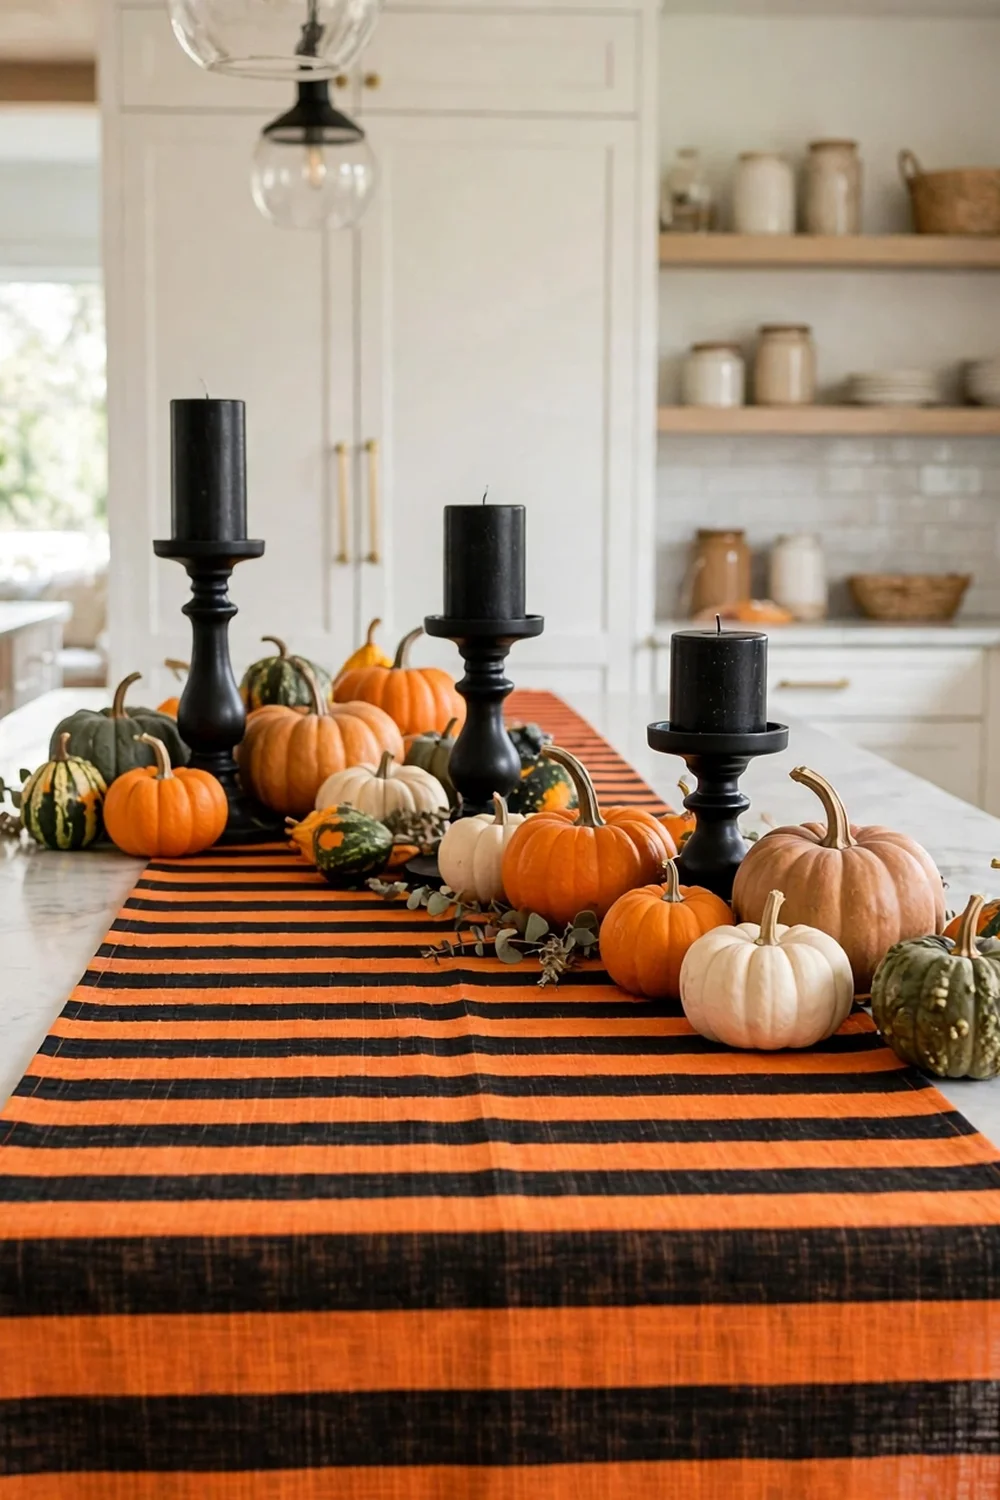
Run an orange-and-black striped runner down the island and dot it with mini gourds in green, orange, and white. This is the simplest idea on the list and it still reads as Halloween from across the room. Choose a washable runner because October means pumpkin guts and candy fingerprints. Odd numbers of gourds look better than even ones, so use five or seven. Swap the gourds for pinecones in November and the runner works for Thanksgiving too.
Try this: Anchor the runner with museum putty at each end so it does not slide when kids lean on it.
Cost: $$| Difficulty: Easy | Time: 10 minutes
18. Candy corn jar trio

Fill three glass jars with candy corn layered in its orange, yellow, and white bands and line them up on a small tray. It is pure color-blocked Halloween with zero carving and zero craft skill needed. Use jars with lids so the candy stays fresh and little hands have to ask. One large bag of candy corn fills three quart jars with plenty left for snacking. Set the tray near the island’s end so guests can grab a handful on their way past.
Try this: Pour each color separately with a funnel for crisp, even bands.
Cost: $$| Difficulty: Easy | Time: 10 minutes
19. Floating LED candles from the ceiling
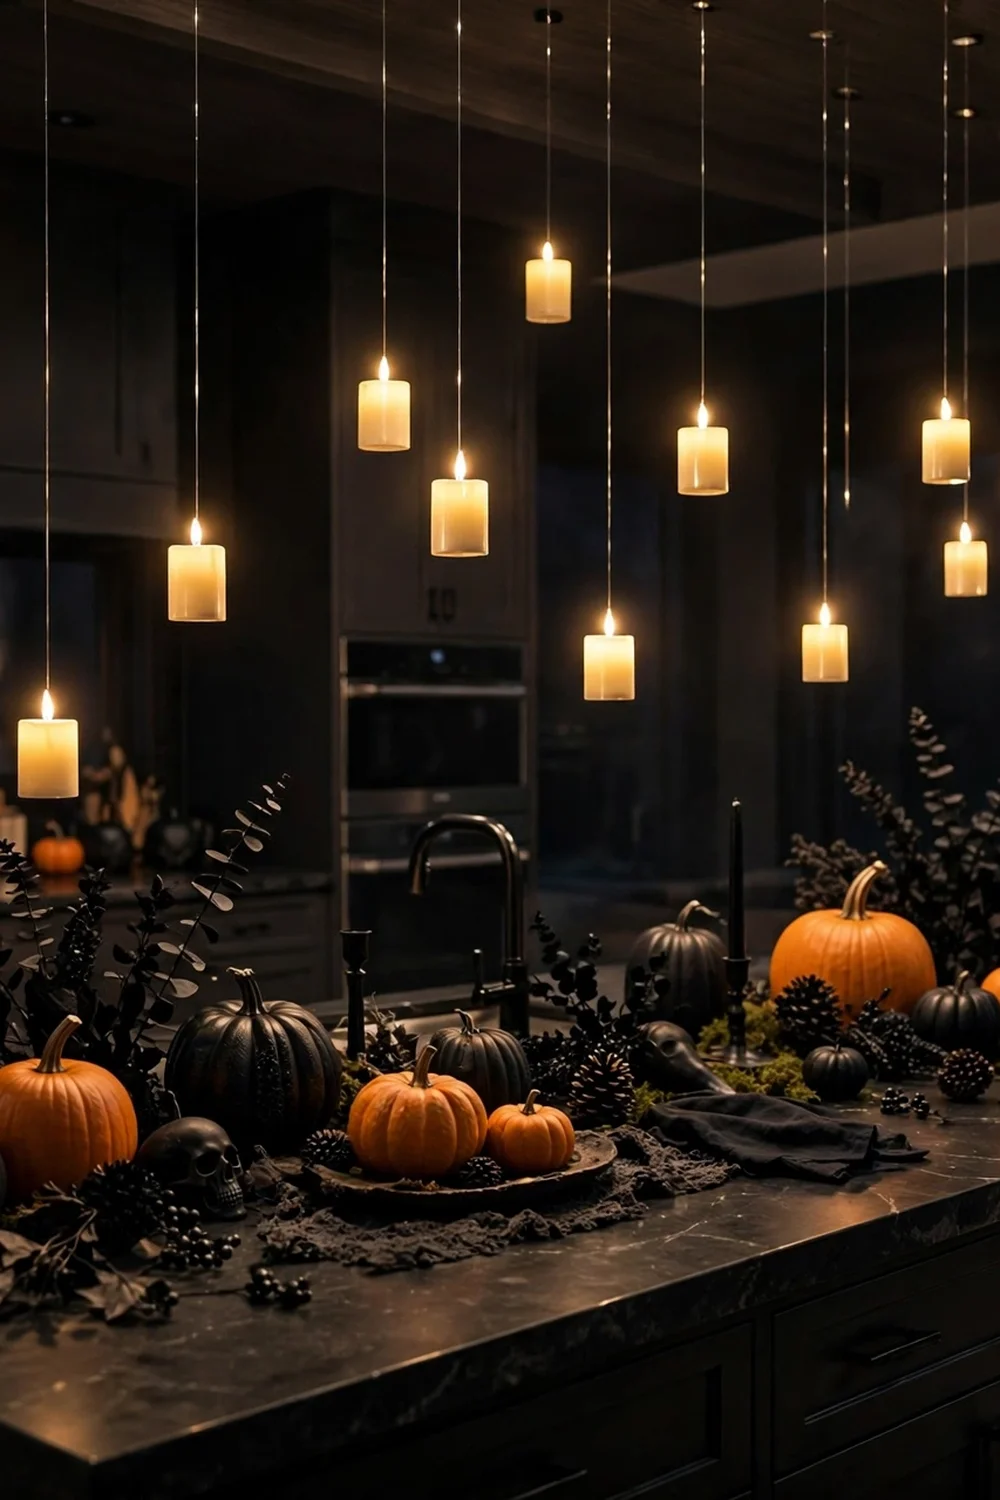
Hang LED candles at different heights from the ceiling on clear fishing line above the island for a floating-candle effect. Battery candles with a built-in timer turn themselves on every evening, so the magic happens without you lifting a finger. Keep them at least 2 feet above the tallest person’s head and away from pendant lights. Five to seven candles make the effect; fewer than that looks accidental. This is the showstopper photo spot of any Halloween kitchen.
Try this: Use candles with a flicker mode rather than steady glow for a more convincing flame look.
Cost: $$| Difficulty: Medium | Time: 30 minutes
20. Harvest mums and black lanterns

Pair orange chrysanthemums in simple pots with black metal lanterns and a few pumpkins for a harvest look with a Halloween edge. This suits anyone who finds skulls and spiders a step too far. Mums from the garden center cost about $5 each in October and last for weeks indoors. Put a plastic saucer under each pot to protect the counter from water rings. Battery candles inside the lanterns give you evening glow with no flame. When Halloween ends, the mums carry straight into Thanksgiving.
Try this: Choose bronze or deep-red mums instead of bright orange for a moodier palette.
Cost: $$| Difficulty: Easy | Time: 15 minutes
Halloween island decor at a glance
Not sure where to start? Match your time and budget to a style below, then pick one idea from that row.
How to style a Halloween island without losing counter space
Pick one zone for decor and defend the rest. The easiest system is the half-and-half rule: decorate one half of the island and keep the other half clear for chopping, homework, and mail. A runner down the middle makes the boundary visible so decor does not creep.
Build upward instead of outward. Tiered trays, tall branches, and hanging pieces give you presence without footprint. Anything flat and sprawling, like scattered confetti or loose faux leaves, costs you workspace and takes ten minutes to clear before dinner. Corral small items on trays so the whole display lifts off in one move. If your island seats people daily, keep every prop under 12 inches tall at the seating end so nobody has to peer around a skull to talk.
Halloween kitchen island safety: candles, food, and little hands
Real candles and kitchens mix badly in October. Battery-operated LED candles give you the flicker without the flame, which matters when dried cheesecloth, paper bats, and faux cobwebs sit inches away. The U.S. Consumer Product Safety Commission reminds decorators to keep anything flammable away from open flames and to never leave burning candles unattended; their Halloween safety tips cover candles, costumes, and trick-or-treat hazards in one place, and the U.S. Fire Administration’s candle fire safety page recommends flameless candles and keeping real ones at least 12 inches from anything that burns.
Keep food safety in mind for grazing boards and candy stations. Anything moist should sit on a board or parchment, not directly on kraft paper or the counter. Chocolate and candy go in lidded containers if you have a dog, since chocolate is toxic to pets. Small props like plastic spiders and googly eyes are choking hazards for toddlers, so keep those on high shelves or the far end of the island. Wipe the counter with a food-safe cleaner before any food touches it after a month of decor sitting there.
Frequently asked questions
How early should I decorate my kitchen island for Halloween?
Late September to the first week of October is the sweet spot. That gives you a full month to enjoy it. If you use real mini pumpkins, buy them around mid-October because they last about two weeks indoors. Foam pumpkins and faux decor can go up as early as you like.
How do I keep Halloween decor from getting in the way of cooking?
Use the half-and-half rule: decorate one end of the island and keep the other clear. Put small items on trays so the whole display lifts off in one motion. Overhead decor like bats on pendant lights uses no counter space at all.
Are real candles safe on a kitchen island at Halloween?
They add risk around dried decor, paper props, and food. Battery LED candles look convincing and stay cool, so they are the safer pick for a kitchen. If you do burn real candles, keep them in sturdy holders, away from anything flammable, and never leave the room while they are lit.
How do I protect my countertop from Halloween decor stains?
Lay a runner or tray under anything damp, dyed, or waxy. Pumpkin juice stains marble and light quartz, and candle dye can bleed into porous stone. A washable runner costs under $15 and saves a refinishing bill.
What is the cheapest way to decorate a kitchen island for Halloween?
Paper bats on the pendant lights cost under $5 and change the whole room. After that, a striped runner with mini gourds runs about $12 to $20. Most ideas on this list stay under $25, and jars, trays, and candles get reused every year.
Can I decorate a small kitchen island for Halloween?
Yes, go vertical. One tiered tray, a hanging spider, or bats on the pendant lights decorates a small island without losing prep space. Skip sprawling scenes and pick one idea with a small footprint. For more small-space strategies, see these fall entry table decor ideas, which use the same one-zone approach on narrow surfaces.
Your kitchen island is the hardest-working surface in the house, and Halloween is the one month it gets to show off. I set up the cauldron-and-branches centerpiece on ours last October and it stayed up for weeks because it never got in the way of dinner. Pick one idea, give it twenty minutes this weekend, and your island will be the backdrop of every Halloween photo your family takes.
If you enjoyed this, you’ll love our 18 Halloween Kitchen Decor Ideas.


