



A tiered tray is the easiest fall decoration you will ever style. It takes up one square foot of counter, costs less than a wreath to fill, and you can restyle it three times between September and Thanksgiving without buying anything new.
This guide gives you 25 fall tiered tray ideas for every style, from rustic farmhouse to modern neutral, each with a photo, exact pieces to buy, and cost. Pick the one that matches your kitchen and start with what you already own.
Quick takeaways
- Keep 60 percent air and 40 percent decor so the tray breathes.
- Repeat one color across all tiers for a pulled-together look.
- Vary heights: tall in back, medium in middle, small in front.
- Use battery candles near dried botanicals, never real flames.
- Most trays cost $8 to $40 to fill if you shop dollar and craft stores.
1. Mini Pumpkin Patch Tiers

Cluster mini pumpkins in white, orange, and pale green across all three tiers, tucking preserved moss between them to hide the tray surface. The moss costs about $4 a bag at craft stores and makes even a $12 tray look professionally styled. Mix sizes: use 2-inch minis up top and slightly larger ones below so the eye travels down naturally.
Try this: wedge a few faux fall leaves upright between pumpkins for height without buying anything tall. Cost: $$. Difficulty: Easy.
2. Hello Fall Sign Centerpiece

Anchor the middle tier with a 4×6 wooden “Hello Fall” sign, then build around it with a wood bead garland and three mini pumpkins. Signs like this sell for $3 to $8 at dollar and craft stores, and the bead garland drapes over the edge to soften the tray’s hard lines. Keep the sign slightly off-center; dead-center placement makes the whole tray look stiff.
Try this: lean the sign against a small stack of faux books instead of laying it flat. Cost: $$. Difficulty: Easy.
3. Cinnamon Stick and Candle Glow

Tie cinnamon sticks into three small bundles with twine and stand them in a short amber glass jar on the top tier. Add a battery-operated candle beside it, never a real flame near dried botanicals. The cinnamon scent reads as fall even before anyone sees the tray, and the whole setup costs under $20 if you already own the tray. Swap the candle for a mini pumpkin in homes with curious toddlers.
Try this: tuck dried orange slices around the jar base for color contrast. Cost: $$. Difficulty: Easy.
4. Wheat and Eucalyptus Stems
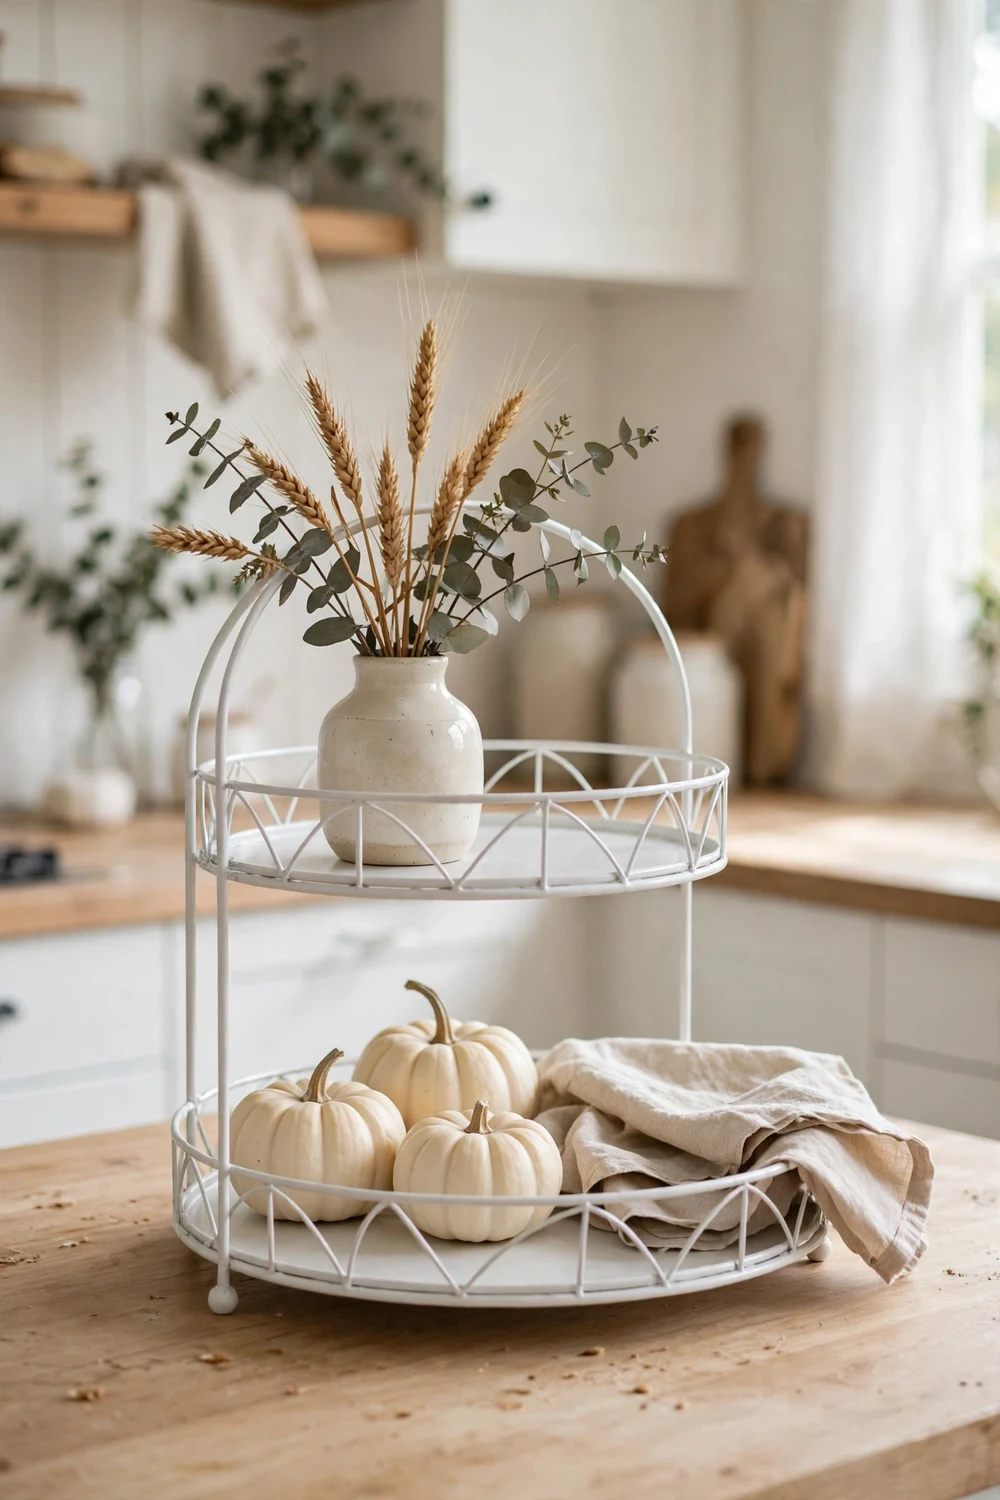
Skip the orange overload and go tonal: dried wheat stems and eucalyptus sprigs in a small ceramic vase, paired with white mini pumpkins and a folded linen cloth. Dried stems cost $5 to $10 a bunch and last for years, so this is the tray you can rebuild every fall without rebuying. The wheat adds about 10 inches of height, which solves the flat look most beginner trays have.
Try this: cut stems to three different heights for a natural, unstyled feel. Cost: $$. Difficulty: Easy.
5. Galvanized Metal and Pinecones

A galvanized two-tier tray brings a cool industrial edge that warm fall textures balance out. Coil jute twine on the bottom tier, add pinecones, wood slices, and one red apple for a single color pop. The metal tray itself runs $18 to $30, but everything on it can come from your yard or a $5 bag of pinecones. This version survives kids and pets because nothing on it breaks easily.
Try this: tie a mustard-yellow ribbon on the tray handle to warm up the metal. Cost: $$. Difficulty: Easy.
6. Gingham Ribbon and Plaid Touches

Fabric is the fastest way to make a tray feel like fall. Weave a 2-inch orange gingham ribbon through the tiers and tuck a folded plaid napkin under a small bowl of faux acorns. Ribbon costs about $3 a spool, and you can reuse it on gifts or a wreath after the season. The pattern does the heavy lifting here, so keep the pumpkins simple and let the fabric carry the color.
Try this: tie the ribbon ends into a loose bow on the tray handle. Cost: $$. Difficulty: Easy.
7. All-White Ceramic Pumpkins

For a calm, modern fall look, skip orange entirely. White ceramic pumpkins in three sizes, small glass candle holders, and dried baby’s breath give you autumn without the visual noise. Ceramic pumpkins run $4 to $12 each depending on size, and they work from September straight through Thanksgiving. This palette suits gray, beige, and white kitchens that orange would fight with.
Try this: add one sprig of dried wheat for a whisper of gold. Cost: $$. Difficulty: Easy.
8. Acorn and Berry Fillers

Small loose fillers are what separate a styled tray from a few pumpkins on a stand. Fill two small bowls, one with acorns and one with faux red berries, then scatter mini gourds in the gaps. A bag of faux acorns costs around $6 and fills more space than you’d expect. Berries add the red that fall displays need; without them, everything blurs into brown.
Try this: pour the acorns directly onto the tray around the bowls for an abundant look. Cost: $$. Difficulty: Easy.
9. Mini Chalkboard Quote
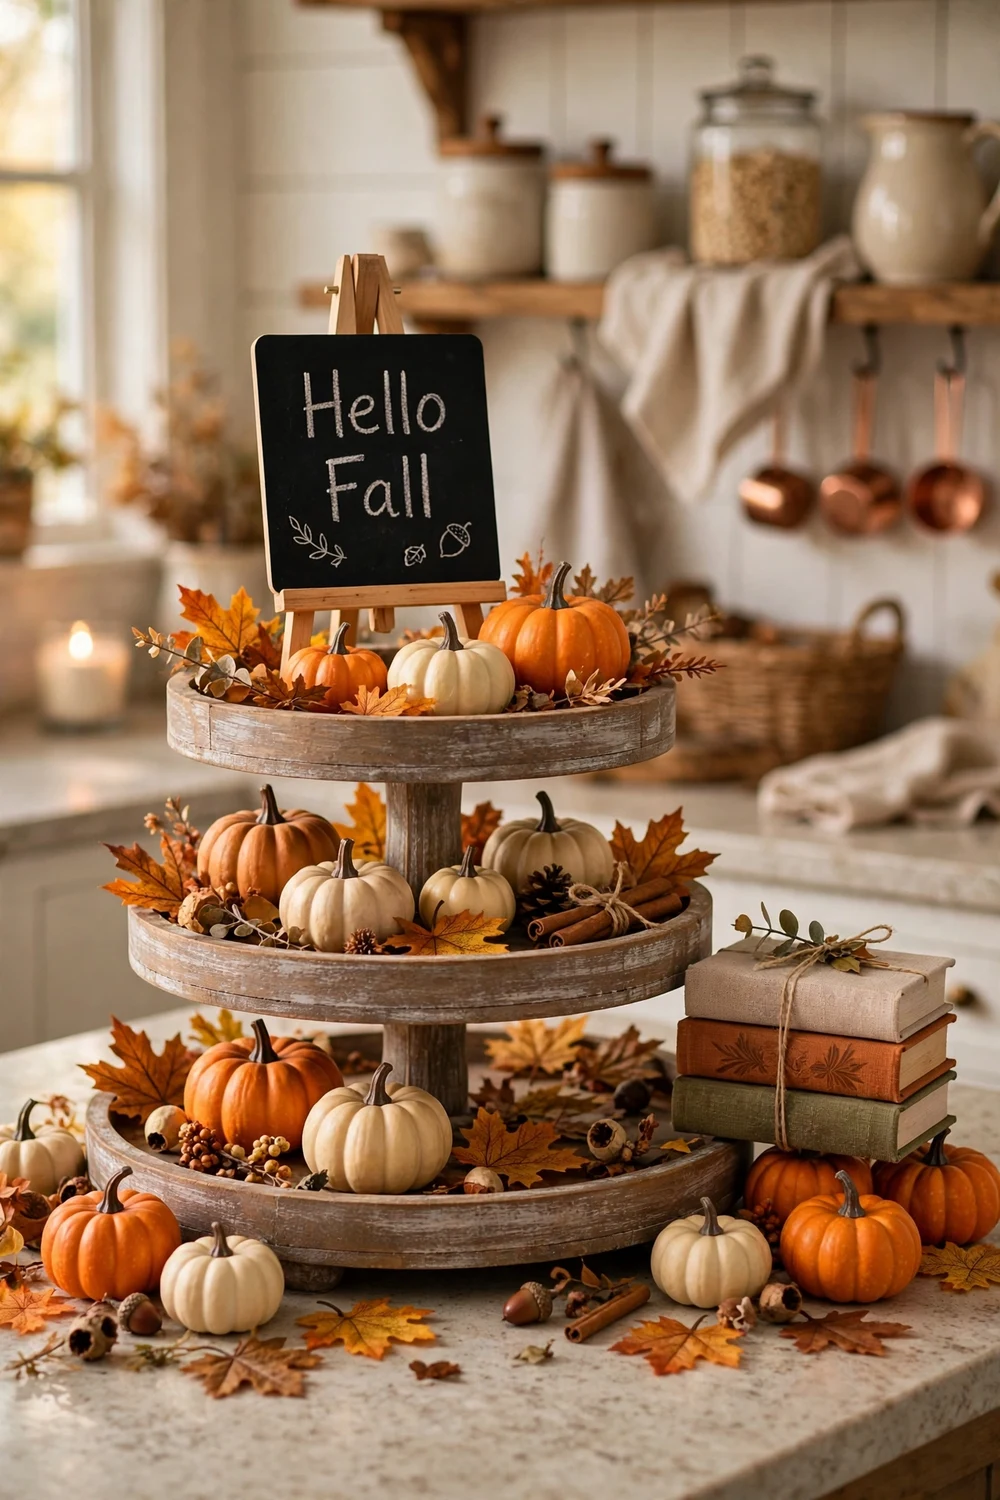
A 5×7 mini chalkboard on an easel back gives you a changeable focal point for about $5. Write “gather” or “hello pumpkin” in chalk marker, which wipes off with a damp cloth when you want a new word. Prop it on the middle tier leaning against a stack of faux books so it doesn’t slide. Chalkboards suit farmhouse and cottage kitchens better than sleek modern ones.
Try this: draw a simple pumpkin doodle in the corner instead of more words. Cost: $$. Difficulty: Easy.
10. Copper Mug and Hydrangeas

One metallic piece lifts the whole tray. Set a copper mug, the Moscow-mule kind, on the top tier and fill it with dried hydrangea heads in dusty rose and cream. Copper mugs cost $8 to $15, and dried hydrangeas hold their shape for years. The metal catches lamplight in the evening, which is when a tray on a kitchen island gets noticed most.
Try this: echo the copper with a small brass candlestick on the bottom tier. Cost: $$. Difficulty: Easy.
11. Draped Fall Leaf Garland

Let a 6-foot faux leaf garland spill over two edges of the tray instead of coiling it neatly inside. The drape breaks the tray’s boxy shape and makes it look styled rather than arranged. Garlands cost $8 to $15, and one garland dresses a tray plus a mantel or shelf. Choose maple-leaf styles in mixed reds and oranges; single-color garlands look flat from across the room.
Try this: weave a battery string light through the garland for evening glow. Cost: $$. Difficulty: Easy.
12. Mini Hay Bales and Scarecrow

Lean into harvest playfulness with two mini hay bales, a 6-inch scarecrow figurine, and tiny pumpkins scattered like they rolled off a wagon. Mini hay bales come in 3-packs for about $6 at craft stores. This theme delights kids, so it’s the right pick for a family kitchen island, but keep the scarecrow’s small parts away from toddlers who still mouth everything.
Try this: add a tiny galvanized bucket of faux apples beside the bales. Cost: $$. Difficulty: Easy.
13. Apple Harvest Theme

Apples deserve their own tray. Pile faux red and green apples in a shallow bowl on the bottom tier, stand an apple-cider-scented candle (battery, not flame) on top, and tuck cinnamon sticks around the base. Faux apples cost about $8 a bag and look convincing at tray scale. The red-green-gold palette reads as early fall, which stretches this tray’s season from September into October.
Try this: add a small wooden apple crate label-style tag, blank or with a simple painted apple. Cost: $$. Difficulty: Easy.
14. Neutral Beige and Cream

A beige-on-cream tray fits modern and minimalist homes where orange feels loud. Use stone or concrete-look pumpkins, dried pampas grass, and a cream knit pumpkin for texture without color. Neutral pieces cost a bit more, around $6 to $15 each, but they never clash with your existing decor. Keep one warm wood element, like a bead garland, so the tray doesn’t feel cold.
Try this: add a single sprig of dried lavender for a whisper of purple. Cost: $$. Difficulty: Easy.
15. Burlap and Pinecone Rustic
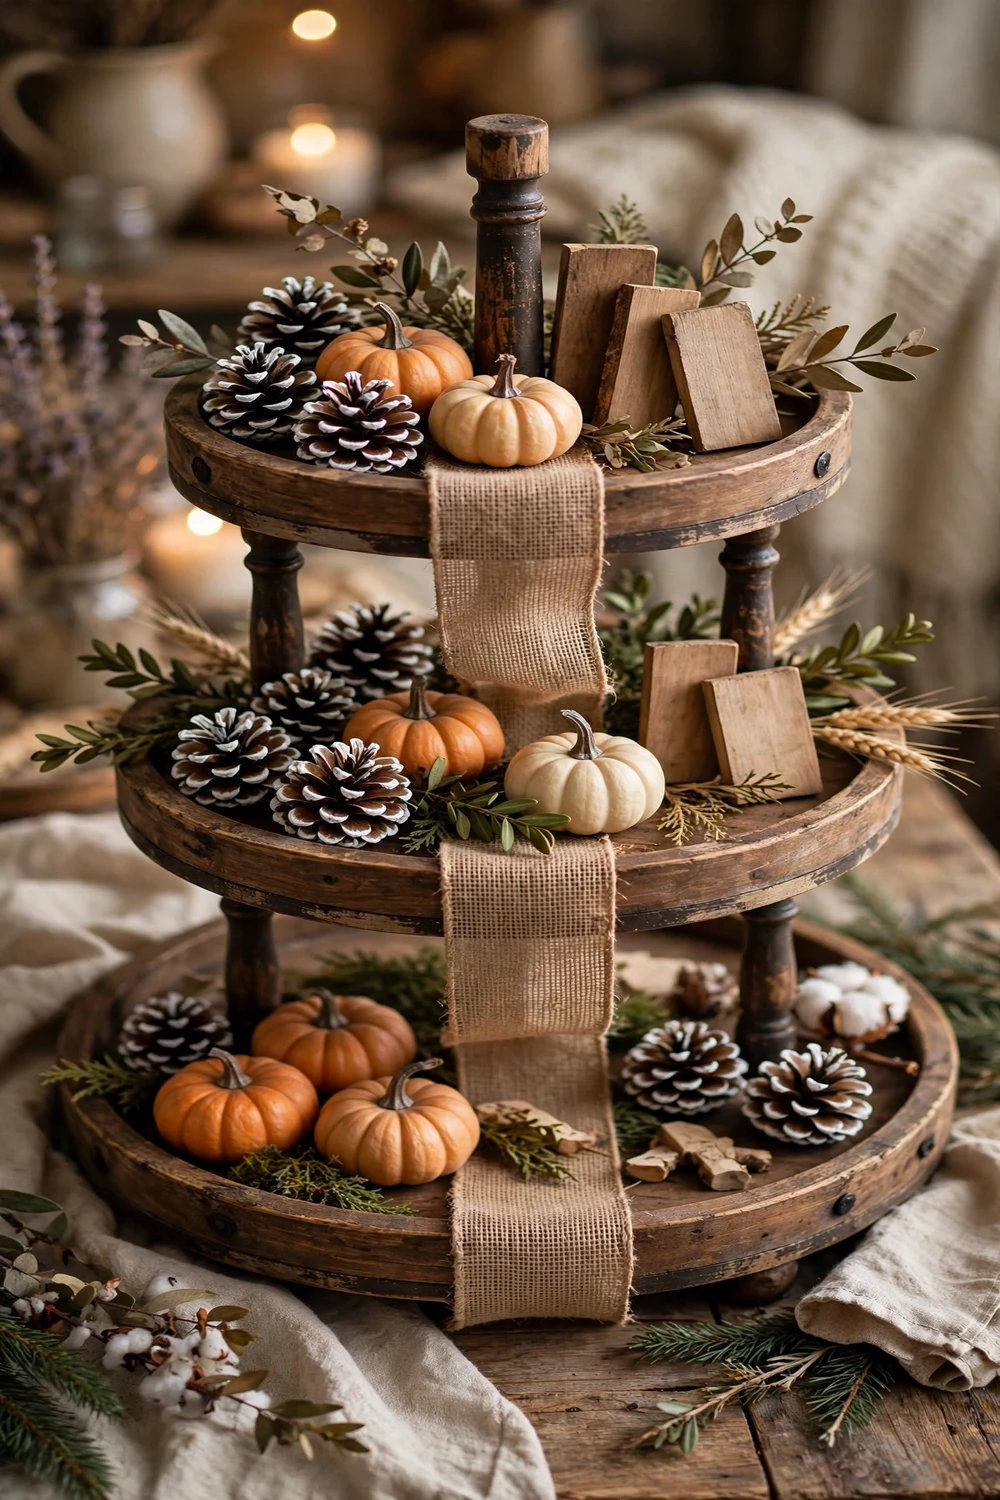
Run a 4-inch burlap ribbon down the center pole of the tray, letting the ends puddle on the bottom tier, then layer pinecones and two small wooden signs over it. Burlap ribbon costs $4 a roll and instantly says farmhouse. Pinecones are free if you collect them, just bake at 200°F for 30 minutes first to kill any hitchhiking bugs. This is the lowest-cost full tray on the list.
Try this: dab the pinecone tips with white craft paint for a frosted look. Cost: $$. Difficulty: Easy.
16. Woven Fairy Lights

A 10-foot battery fairy light strand, about $8, woven loosely through the tiers turns the tray into an evening focal point. Tuck the battery pack behind a pumpkin on the bottom tier so it stays hidden. Warm white lights suit fall better than cool white, which reads as Christmas. This trick works on any tray style on this list, so consider it an upgrade rather than a separate theme.
Try this: set the lights on a timer so they glow at dusk without you remembering. Cost: $$. Difficulty: Easy.
17. Mini Wreath Lean

Lean a 6-inch grapevine wreath against the top tier’s center pole, slightly tilted, and let mini pumpkins crowd its base. The wreath costs $3 to $6 and adds a perfect circle that contrasts with all the tray’s straight lines. Grapevine takes hot glue well, so you can stick a few faux berries right onto it. Replace the wreath with a pine one in December and the tray carries into winter.
Try this: hang a tiny wooden tag from the wreath with twine. Cost: $$. Difficulty: Easy.
18. Draped Wood Bead Garland

Wood bead garlands are the tiered tray’s best friend: a 40-inch strand costs around $7 and drapes across all three tiers in one continuous line, tying the whole display together. Let it spill from the top tier down to the table for movement. Natural wood suits every palette here, while stained dark beads work better on white or neutral trays. One garland is enough; two starts looking like spaghetti.
Try this: loop the garland twice around the center pole before draping. Cost: $$. Difficulty: Easy.
19. Dried Orange Slices

Dried orange slices bring a stained-glass glow when light hits them. Make your own by baking orange slices at 200°F for 2 to 3 hours, or buy a bag for about $8. Tuck them upright between pumpkins so they catch the light, and pair with cinnamon sticks for the classic mulling-spice look. They last for years stored dry, so this is a make-once decoration.
Try this: thread slices on twine for a mini garland across the top tier. Cost: $$. Difficulty: Easy.
20. Woodland Creature Figurines

Give the tray a story with two small woodland figurines, an owl and a squirrel work best, nestled in moss with acorns scattered around them. Figurines run $5 to $12 each at craft stores. Keep them to two; a whole forest crowds a tray fast. This theme photographs beautifully for Pinterest because the figurines give the eye a character to land on.
Try this: face the figurines slightly toward each other like they’re chatting. Cost: $$. Difficulty: Easy.
21. Cozy Reading Nook Stack

Stack three mini faux books on the bottom tier, drape a scrap of plaid fabric over them, and top with a single small pumpkin. Faux book stacks cost $8 to $15, or wrap real small boxes in kraft paper and stamp a title on the spine. This theme suits a living room or bedroom tray where the cozy-reading message fits. Keep the books small; full-size books overwhelm a tray.
Try this: add a tiny pair of reading glasses from the dollar store for charm. Cost: $$. Difficulty: Easy.
22. Sunflower Pop

Three faux sunflower stems in a small mason jar give the tray its height and its happiest color in one move. Sunflower bunches cost $5 to $10, and the yellow plays beautifully against orange pumpkins and brown burlap. Trim the stems short so the blooms sit just above the top tier; leggy sunflowers flop over and look messy. This is the cheeriest tray on the list.
Try this: tuck one sunflower head flat on the bottom tier like it fell there. Cost: $$. Difficulty: Easy.
23. Gold Metallic Touches

Spray-paint three mini pumpkins metallic gold, about $6 for the paint if you don’t own it, and pair them with a brass candlestick and amber glass votive. Metallics read as dressed-up fall, right for a dining room or entry console. Keep the gold to three pieces max; more turns the tray brassy. The painted pumpkins store well and come back out every year.
Try this: add one deep burgundy faux dahlia for contrast. Cost: $$. Difficulty: Easy.
24. Thanksgiving Harvest Table

Transition the tray to late November with a small turkey figurine, a “grateful” wood sign, and a cornucopia-style spill of faux fruit from a mini horn or basket. Turkey figurines run $8 to $15 after Halloween when fall decor goes on clearance, which is exactly when you need this theme. Swap the earlier pumpkins for deeper tones: burgundy, bronze, and brown.
Try this: add name cards for Thanksgiving dinner guests around the base. Cost: $$. Difficulty: Easy.
25. Fall Coffee Bar Tray

Make the tray work for its space: two fall mugs, a small jar of pumpkin spice, a tiny bowl of coffee beans, and a mini pumpkin on top. Everything gets used, so nothing is just dusting duty. Mugs with fall designs cost $5 to $10 each, and the coffee beans add a real scent that beats any candle. This is the best tray for a kitchen counter because it earns its footprint daily.
Try this: add a small chalkboard with the week’s coffee menu. Cost: $$. Difficulty: Easy.
How to style a tiered tray for fall
Start with the tray itself: two tiers suit small counters, three tiers suit islands and consoles. Place the largest item first, usually a sign, candle, or vase, on the middle tier where the eye lands. Then add medium pieces around it and fill gaps with small loose items like acorns, berries, or moss.
Work in a triangle: tall items in back, medium in the middle, small in front. Step back after every three pieces and check from across the room, since trays are viewed from a distance more than up close. If two items touch and look crowded, remove one; empty space is part of the design. Handmade touches photograph especially well, so browse these fall leaf craft ideas for DIY pieces to feature on your tray.
Mistakes to avoid
The most common mistake is overcrowding. A tray packed edge to edge with no breathing room looks like storage, not decor. Aim for that 60/40 air-to-decor ratio and leave at least one visible patch of tray surface on each tier.
Second, watch the candle situation. Dried wheat, leaves, and potpourri are all flammable, so real flames have no place on a fall tray. Battery candles and fairy lights give the same glow with zero risk. The National Fire Protection Association’s candle safety tips explain why open flames and flammable decor don’t mix. Third, don’t mix more than three colors or the tray turns chaotic; pick a palette and repeat it.
Where to put your fall tiered tray
The kitchen island or counter corner is the classic spot, where the tray doubles as a seasonal focal point you see all day. Entry tables and living room consoles are next best, since guests notice them immediately. For a full guide to styling that entryway for the season, see these charming farmhouse fall entry table decor ideas.
Smaller two-tier trays fit bathroom counters, nightstands, and bookshelves. Dining tables can handle a large three-tier tray as a centerpiece if you keep it low enough for conversation across it. If you’re decorating the porch too, these Dollar Tree fall wreaths for the front door pair perfectly with an indoor tray in matching colors.
Frequently asked questions
What do you put on a tiered tray for fall?
The classic formula is pumpkins, greenery, a sign, a candle, and fillers. Start with 3 to 5 anchor pieces like mini pumpkins, a wood sign, and a candle, then fill gaps with acorns, berries, moss, or pinecones. Stick to one color palette so the mix looks intentional.
How do you keep a tiered tray from looking cluttered?
Follow the 60/40 rule: 60 percent empty space, 40 percent decor. Place large items first, then medium, then small, and step back to check from across the room. If the tray looks busy, remove one item rather than rearranging; less almost always looks better.
Can I use real candles on a fall tiered tray?
It is safer not to. Dried leaves, wheat, potpourri, and moss are flammable, and a tray concentrates them around the flame. Use battery-operated candles or fairy lights instead; they give the same warm glow. Keep any heat source away from dried botanicals as a general rule.
Where should I place a fall tiered tray?
Kitchen islands and counters are the most popular spots, followed by entry tables and living room consoles. Use a two-tier tray for small surfaces like nightstands and bathroom counters, and a three-tier tray for islands and dining tables. Keep dining table trays low so they don’t block conversation.
How do I store tiered tray decor after fall?
Sort pieces by type into labeled bins: one for pumpkins and gourds, one for signs, one for botanicals. Wrap ceramic and glass pieces in tissue. Dried botanicals like wheat and eucalyptus last for years if kept dry, so store them flat in a box rather than crushing them into a bag.
Is a tiered tray safe around kids and pets?
It can be if you choose sturdy pieces. Use felt or wood pumpkins instead of ceramic, skip small items a toddler could swallow, and use battery candles only. Place the tray out of reach of very young children, and avoid real dried corn or nuts if your dog counter-surfs.
Conclusion
Pick one idea from this list that matches your home, gather what you already own, and fill the gaps with a single craft-store trip. Your fall tiered tray will be done before the cider finishes simmering.
For the kitchen specifically, see these fall kitchen decor ideas organized by zone, from tiered trays to coffee bars.


