


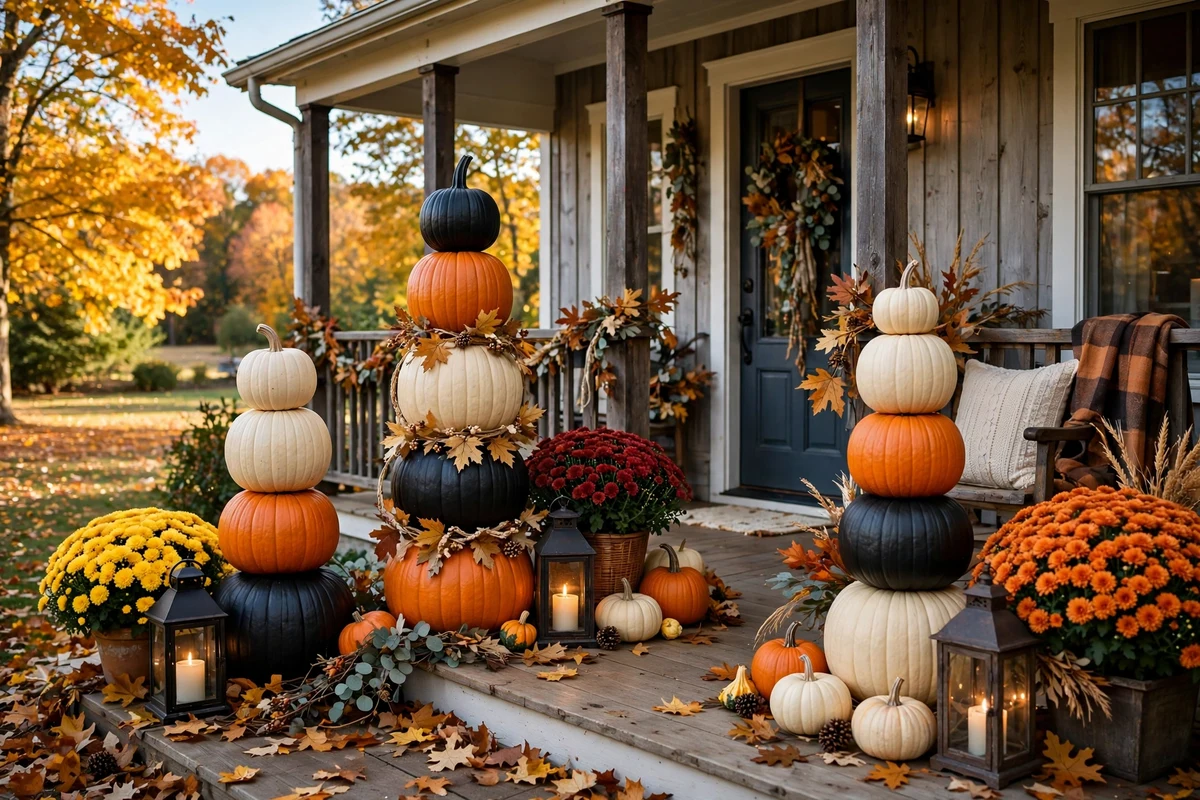
Dollar Tree’s $5 stackable pumpkins sell out every fall, and the plain orange plastic can look a little flat on its own. You want porch decor that looks like it came from a boutique, but the budget says dollar store.
I grabbed my first set last September and painted them during one naptime. This guide has 20 stackable pumpkin ideas, from chalk-painted farmhouse towers to a Halloween black cat, and most cost under $10 in extra supplies. You can buy the sets at Dollar Tree early in the season, since stores sell out fast. Beginners can finish every project here in an afternoon.
Quick takeaways
- The $5 sets stack three pumpkins into a 24-inch tower. Check in the store that the pieces click together.
- Chalk or acrylic paint covers the shiny plastic best. A light sanding or primer coat helps it stick.
- Hot glue holds foam pumpkins together. Skip E6000 on foam, since it can melt the surface.
- Most projects need $5 to $10 in supplies and take under an hour, plus drying time.
- Battery fairy lights and a clear sealant spray make towers ready for a covered porch.
1. MacKenzie-style check tower
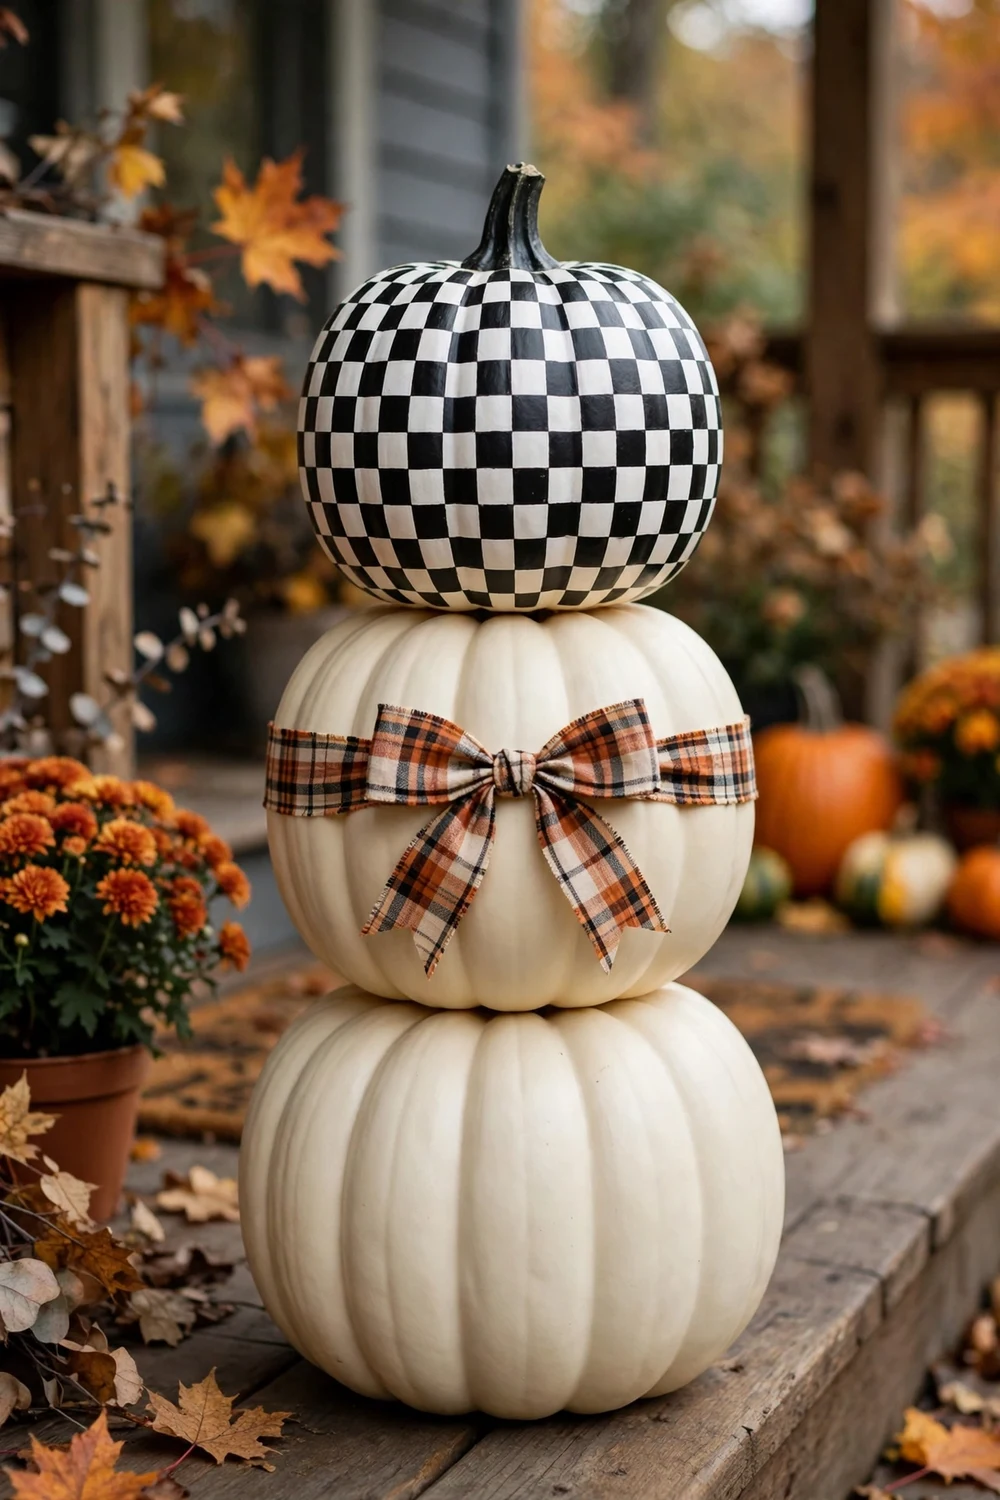
Painters tape turns the plain orange set into the look everyone pins. Tape off the top pumpkin and paint bold black and white checks with acrylic paint, then paint the middle and bottom pumpkins a soft cream. A plaid bow tied around the middle pumpkin finishes the boutique feel. Let each coat dry fully before taping over it, or the checks will bleed. This one photographs well on a neutral porch, and guests always ask where it came from.
Try this: Sketch the check grid lightly in pencil first so the squares stay even.
Cost: $$| Difficulty: Medium | Time: 2 hours
2. Pink and gold stripe tower
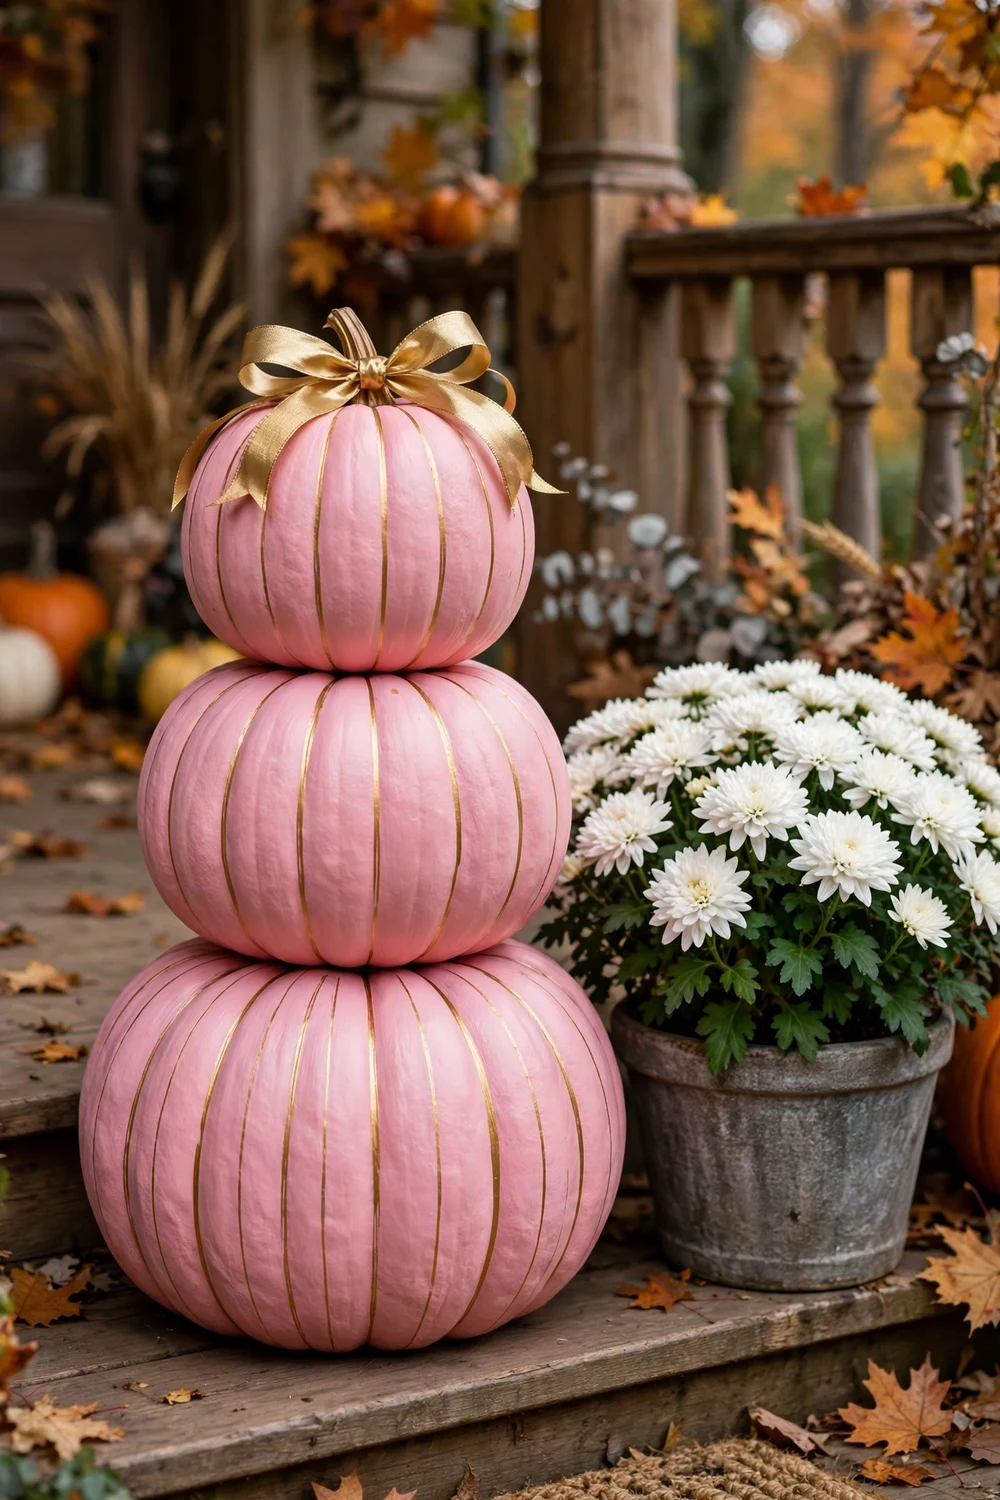
Skip the orange entirely and go pink. Tape off every third segment of the middle pumpkin, then paint the taped sections light pink and the open sections hot pink. Pull the tape and paint thin gold stripes in the gaps. Cover the top and bottom pumpkins with a thin base of chalk paint in blush pink. A gold ribbon bow on top ties it together. This tower suits a pink fall theme and looks sweet next to white mums in a planter.
Try this: Use 24-karat style gold craft paint for the stripes, since cheap gold can look brassy.
Cost: $| Difficulty: Medium | Time: 90 minutes
3. Cream chalk-paint farmhouse tower
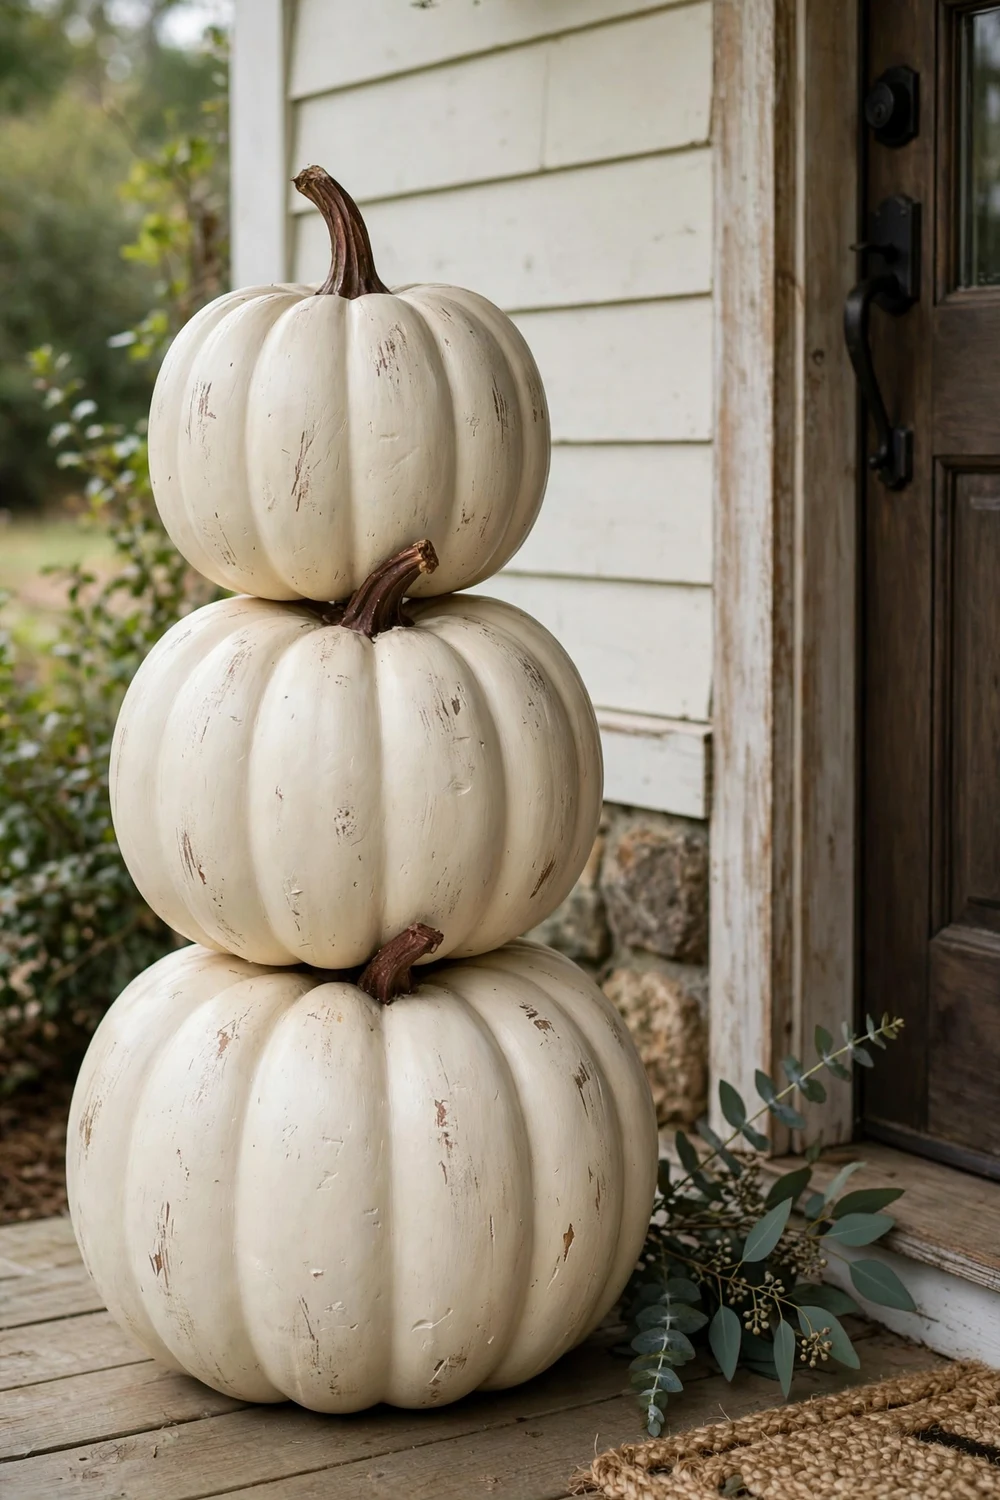
One color is sometimes all you need. Brush two coats of cream chalk paint over all three pumpkins, letting the first coat dry for an hour. Paint the stems a deep brown and distress the edges lightly with sandpaper for a worn farmhouse feel. This tower blends with white, beige, or gray porches without shouting. It also works indoors on a console table, where the matte finish catches lamplight softly.
Try this: Add a sprig of faux eucalyptus tucked between two pumpkins for a little green contrast.
Cost: $| Difficulty: Easy | Time: 45 minutes
4. Matte black and gold stem tower
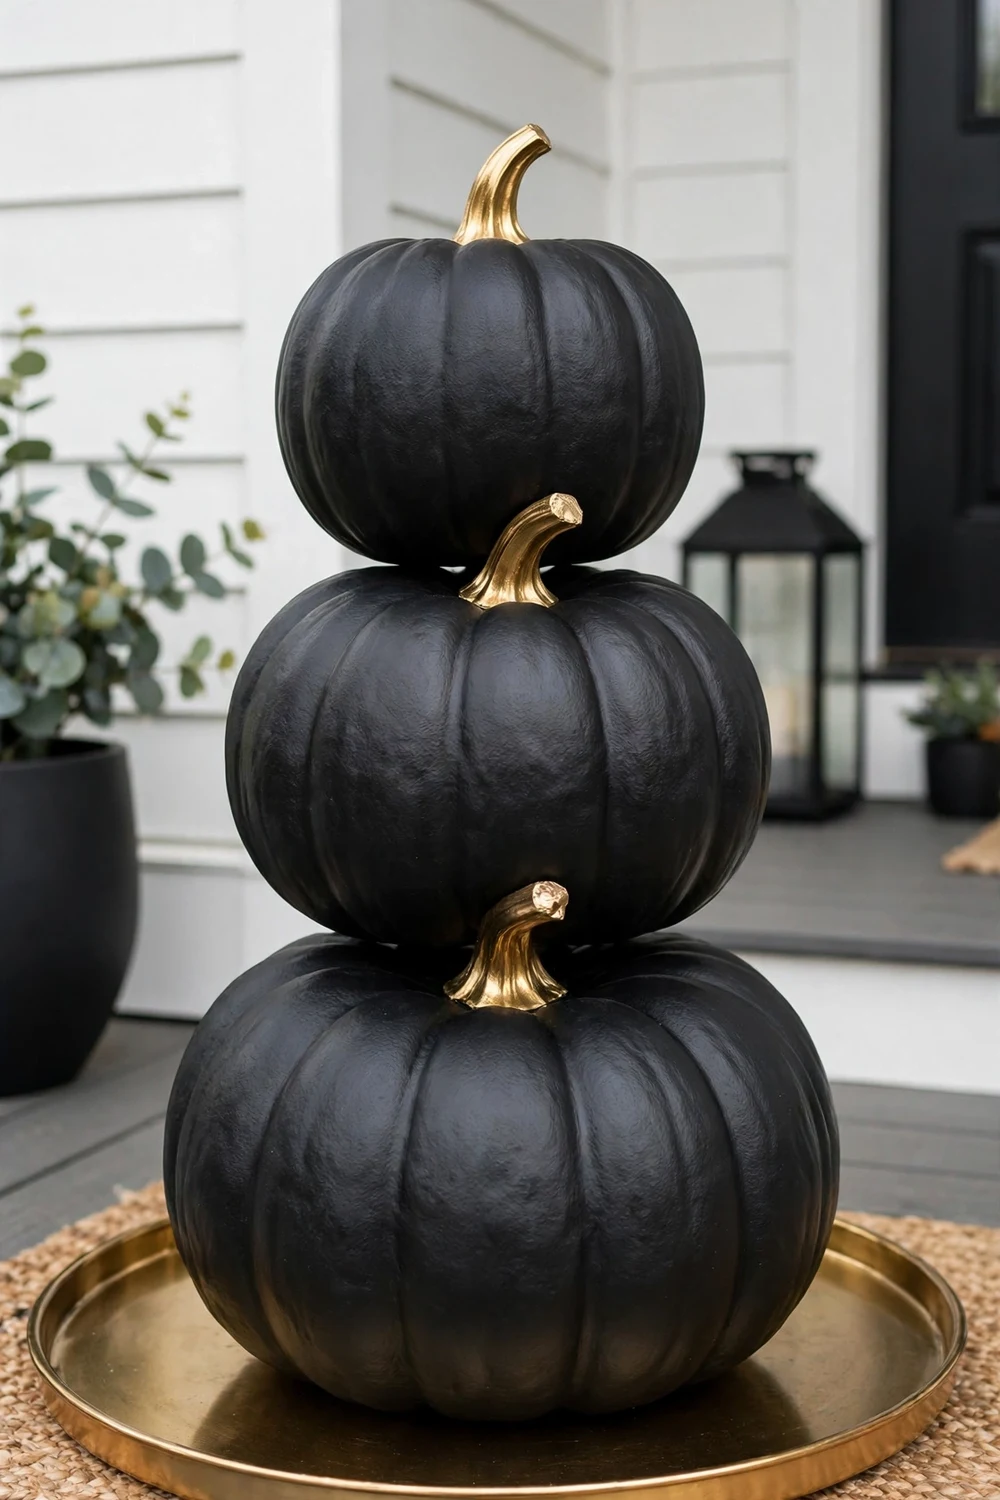
Black pumpkins read modern, not spooky, when you pair them with gold. Spray or brush all three pumpkins with matte black acrylic, then paint each stem metallic gold. Keep the finish flat so the gold pops. This tower looks sharp against white siding or a gray door, and it carries straight into Halloween without any changes. Two thin coats cover better than one thick coat, which can drip in the grooves.
Try this: Set the tower on a round gold tray to catch the eye from the street.
Cost: $| Difficulty: Easy | Time: 1 hour
5. Buffalo check plaid tower
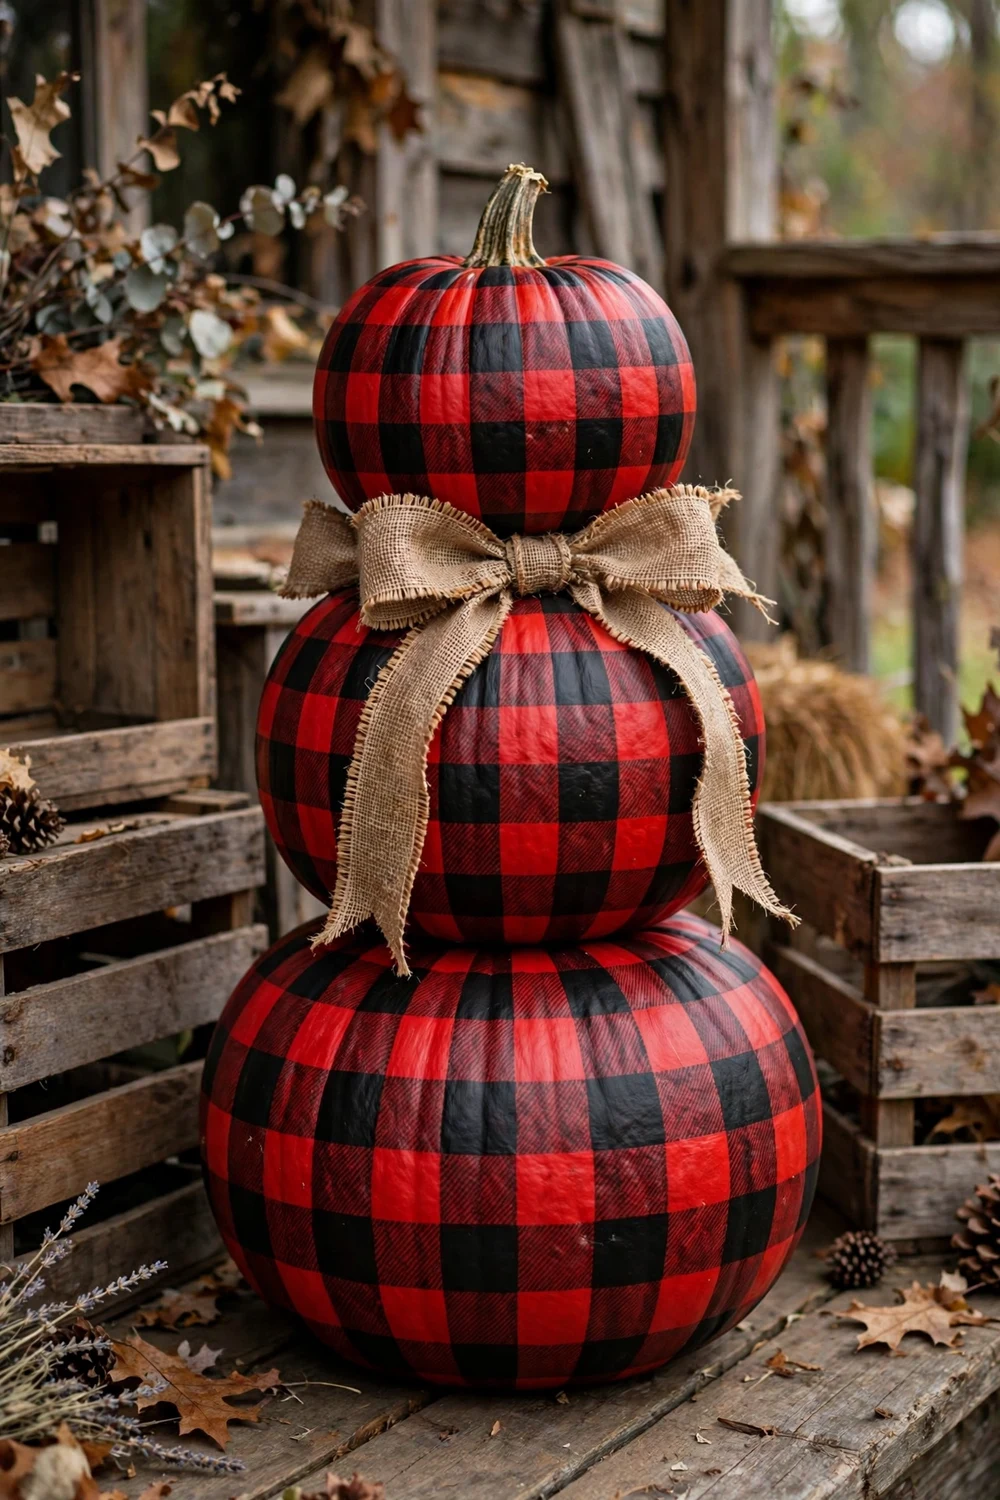
Buffalo check gives instant cabin charm. Paint the whole tower white first. Once dry, tape a grid and fill alternating squares with red and black, then add a second pass of red over the black squares at half strength to get the woven look. It sounds fussy, but the grid keeps it simple. This tower pairs with plaid throws and wooden crates on a rustic porch. A burlap bow keeps the country feel.
Try this: Practice the check pattern on paper first to get the square size right.
Cost: $$| Difficulty: Medium | Time: 2 hours
6. Sage green muted tower
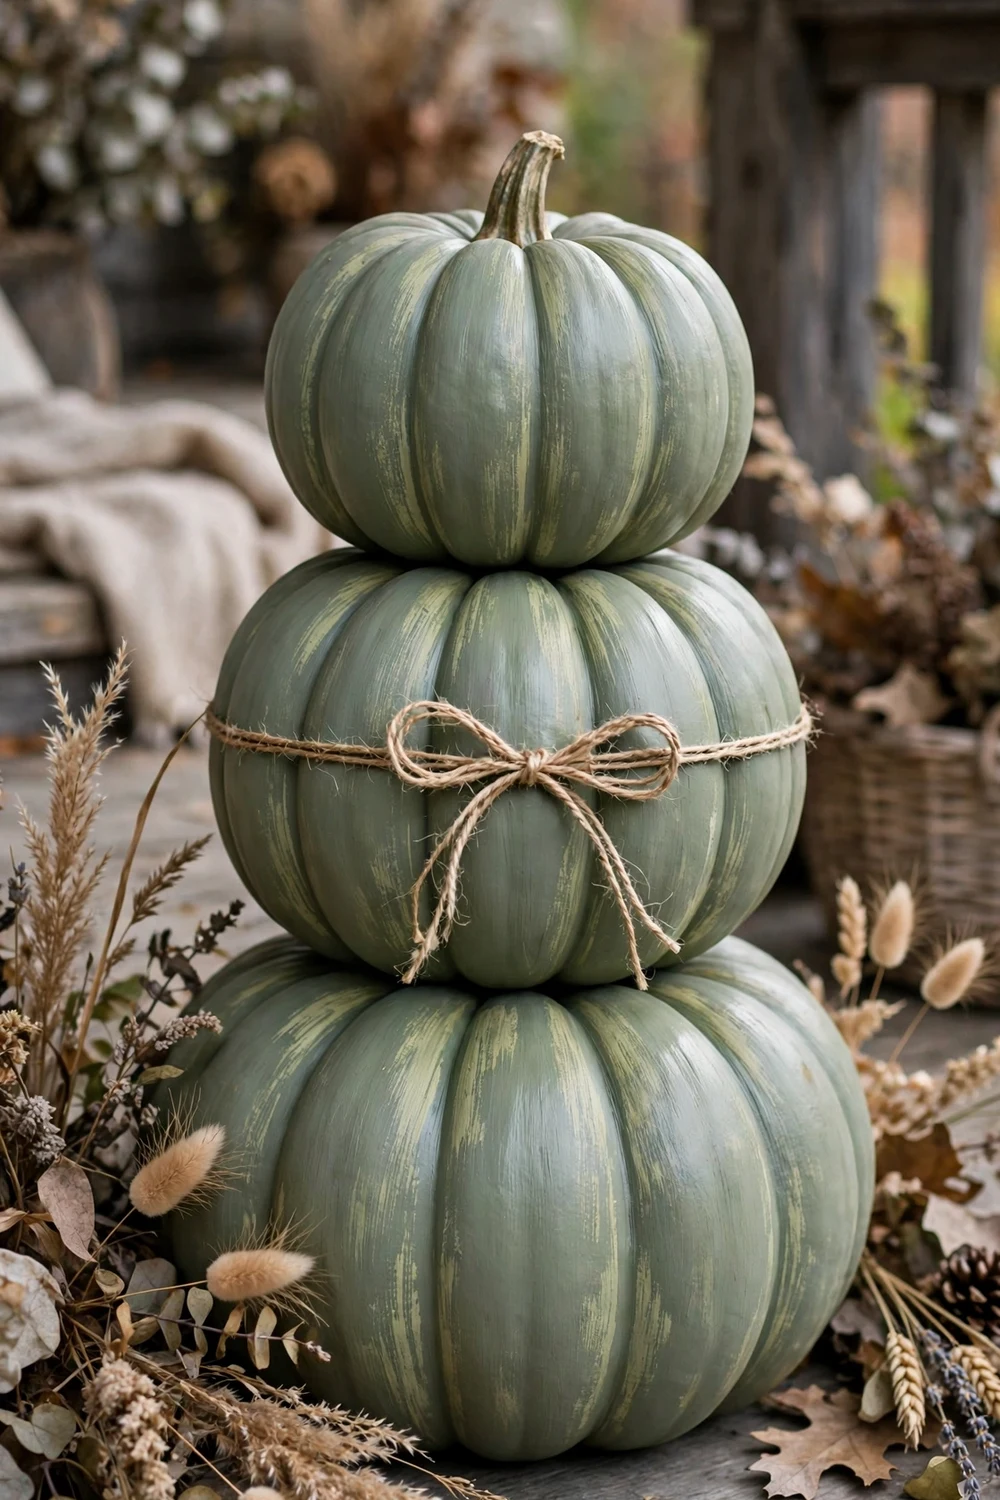
Sage green feels calm and current. Paint all three pumpkins in a muted sage, then dry-brush a slightly lighter green on the raised ribs for depth. Tie natural twine around the middle pumpkin instead of ribbon. This color sits well with dried grasses and neutral wreaths, and it does not scream Halloween, so it works from September through Thanksgiving. The dry-brush step takes five minutes and adds a lot.
Try this: Mix a drop of gray into green craft paint if you cannot find a sage shade.
Cost: $| Difficulty: Easy | Time: 40 minutes
7. Terracotta faux-clay tower
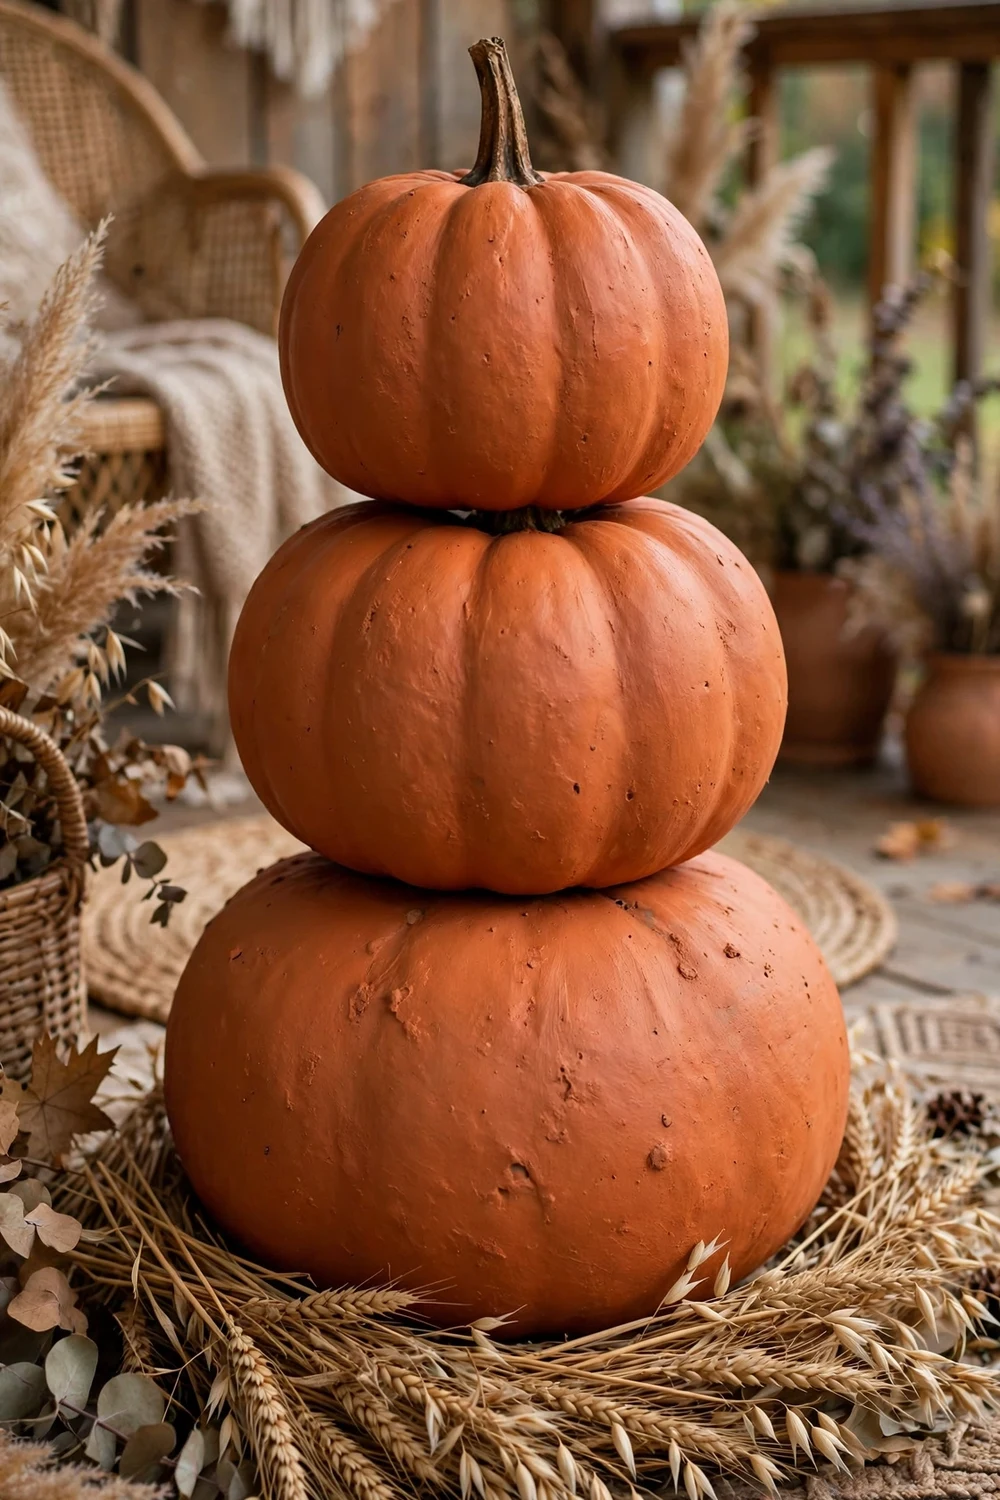
Terracotta paint makes plastic look like handmade clay. Brush on a terracotta shade with a matte finish, then stipple the surface lightly with a dry brush to mimic clay texture. Leave the stems dark brown. Tuck dried wheat or pampas stems around the base for a harvest feel. This tower suits boho and Mediterranean-style porches, and the earthy color hides dust better than black or white.
Try this: Add a pinch of baking soda to the paint for extra texture, a trick clay-look painters use.
Cost: $| Difficulty: Easy | Time: 50 minutes
8. White pumpkin ghost stack
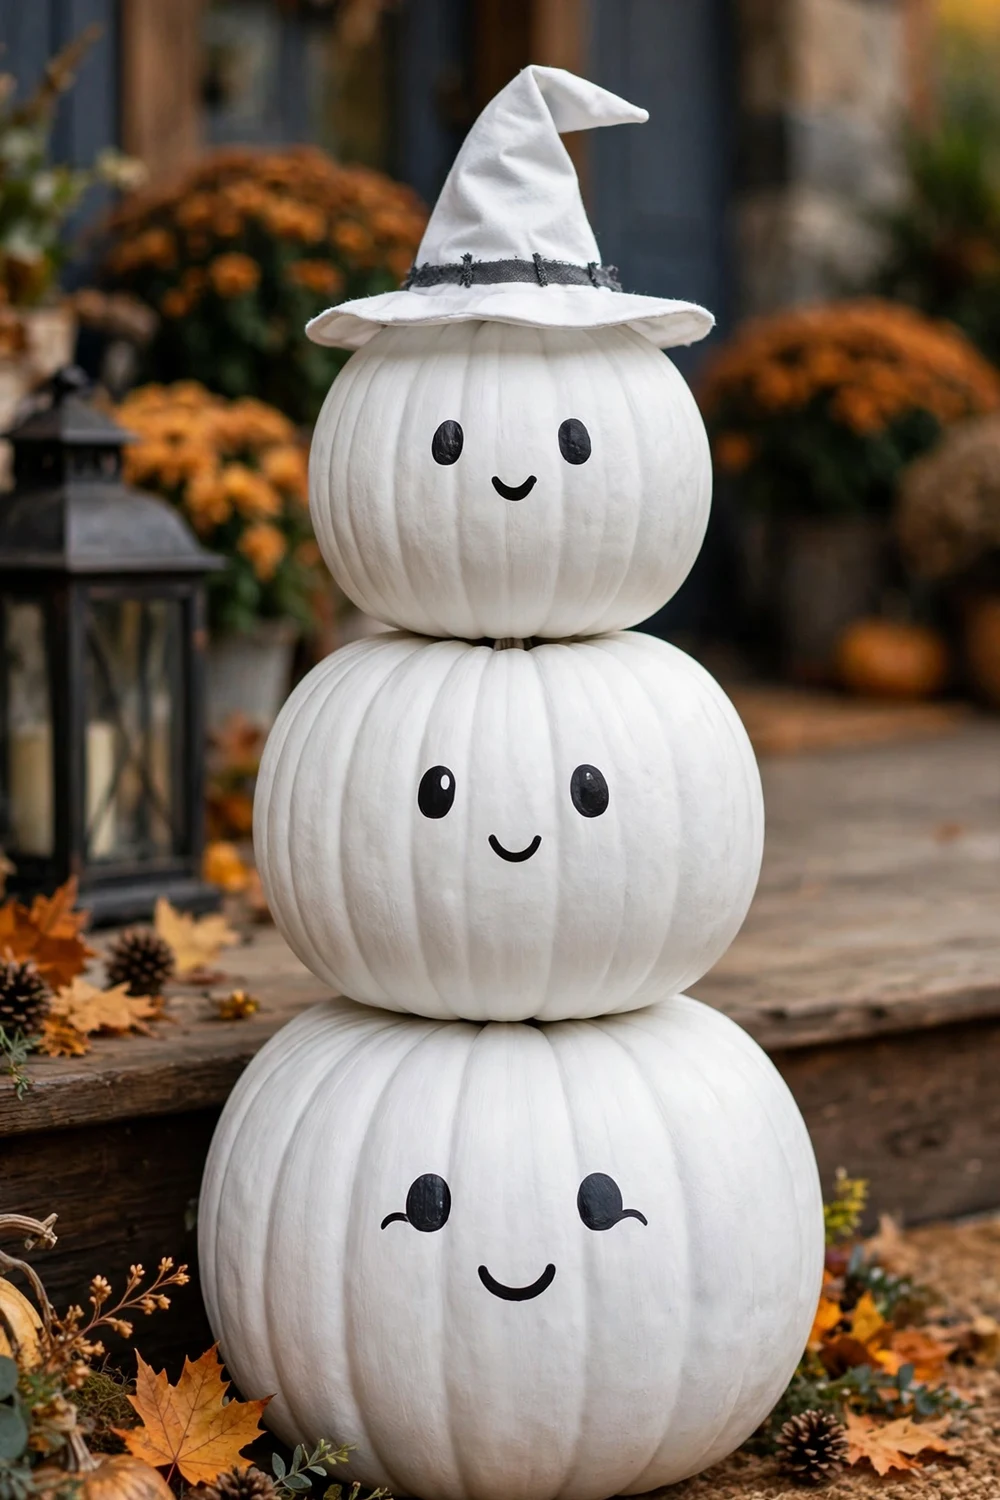
Halloween does not have to be scary. Paint all three pumpkins white and add simple ghost faces with a black paint pen: two oval eyes and a round mouth on each. Stack them and top with a little white witch hat from the craft aisle. This friendly ghost tower is a hit with toddlers and looks cute by day and night. Hot glue the pieces together so wind does not topple your ghost family. Keep the glue gun away from small hands while you work.
Try this: Add rosy cheeks with pink chalk for extra cuteness.
Cost: $| Difficulty: Easy | Time: 45 minutes
9. Black cat stacked pumpkins
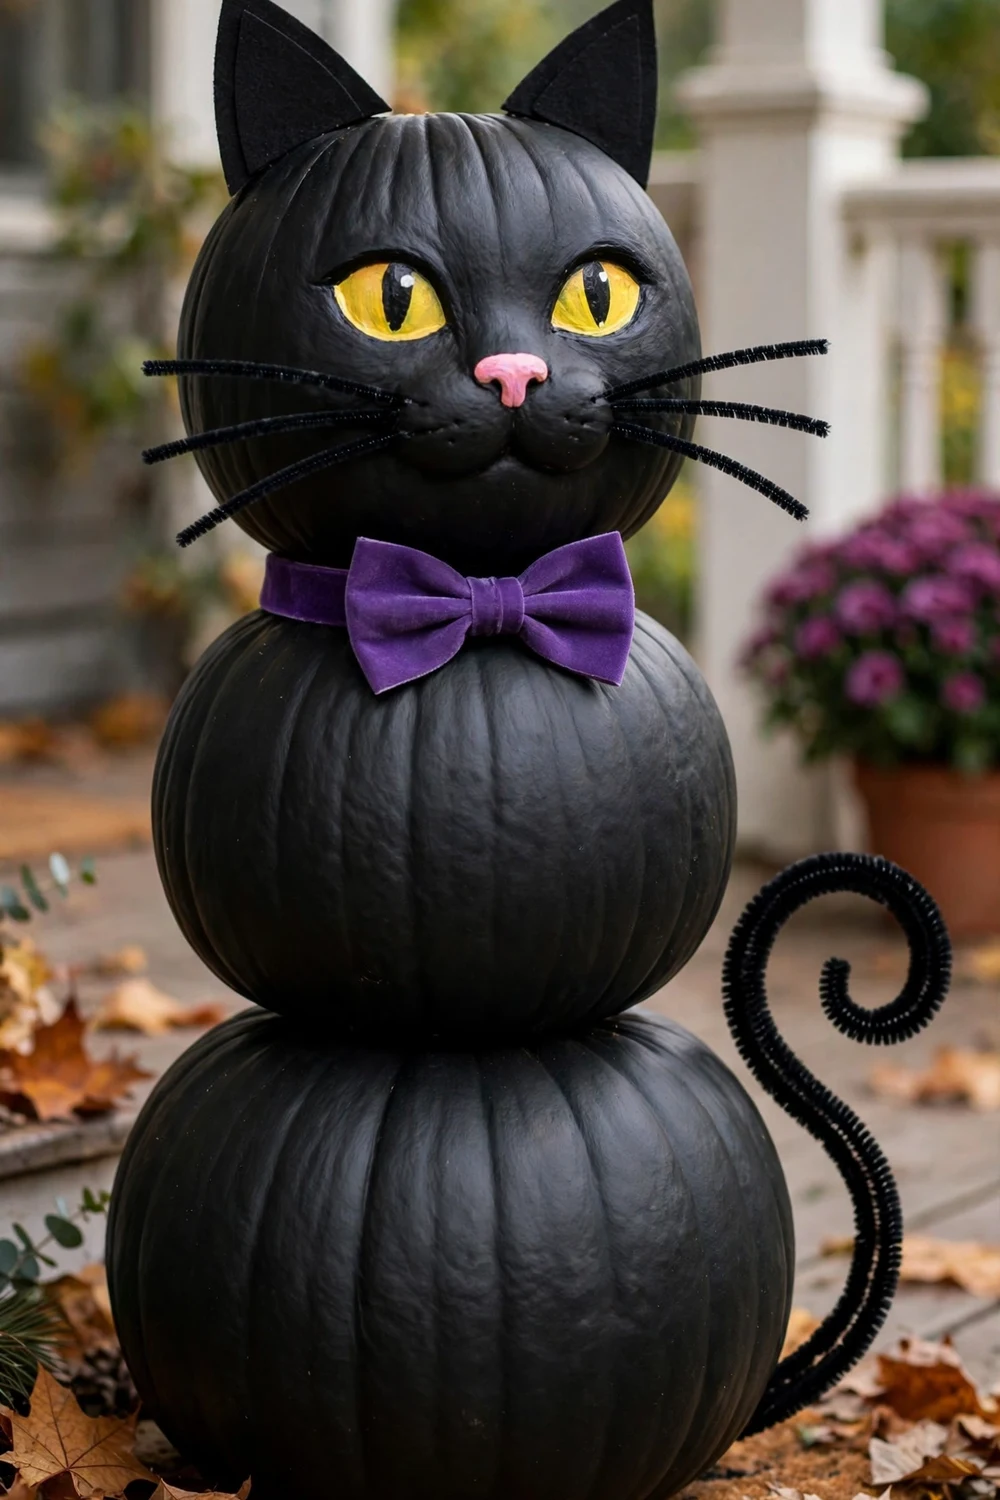
Turn the tower into a black cat with a few add-ons. Paint the pumpkins solid black, then cut triangle ears from black craft foam and hot glue them to the top pumpkin. Paint on yellow eyes and a pink nose, and add pipe-cleaner whiskers. A curved black tail made from a chenille stem glues to the bottom pumpkin. This project takes one afternoon and becomes a Halloween keepsake kids ask for every year. Use battery tea lights nearby instead of real candles.
Try this: Give the cat a purple collar bow for a pop of color.
Cost: $| Difficulty: Easy | Time: 1 hour
10. Scarecrow yard figure
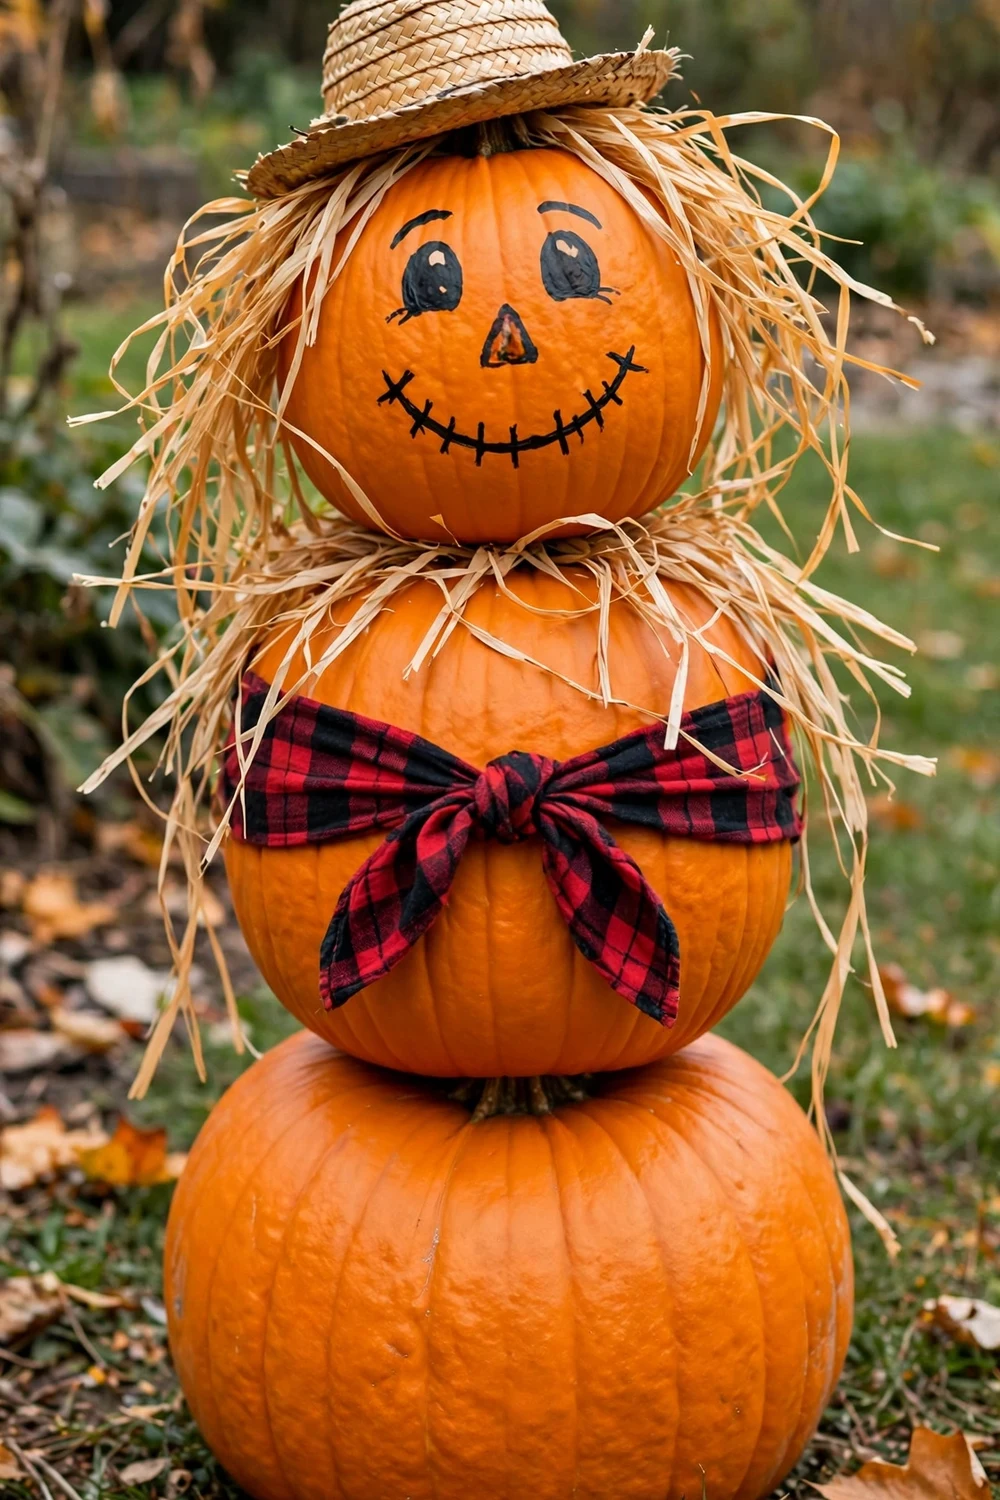
Three pumpkins stack into a perfect scarecrow body. Paint a friendly scarecrow face on the smallest top pumpkin: triangle nose, stitched smile, rosy cheeks. Hot glue a mini straw hat on top and tuck raffia hair under the brim. Glue the tower to a wooden dowel pushed into the ground so it stands in the yard. Add a small plaid shirt scrap around the middle pumpkin for the classic look. Spray with clear sealant to protect the paint from rain.
Try this: Bring it onto a covered porch during heavy storms, even with sealant.
Cost: $$| Difficulty: Easy | Time: 1 hour
11. Fairy-light glow tower
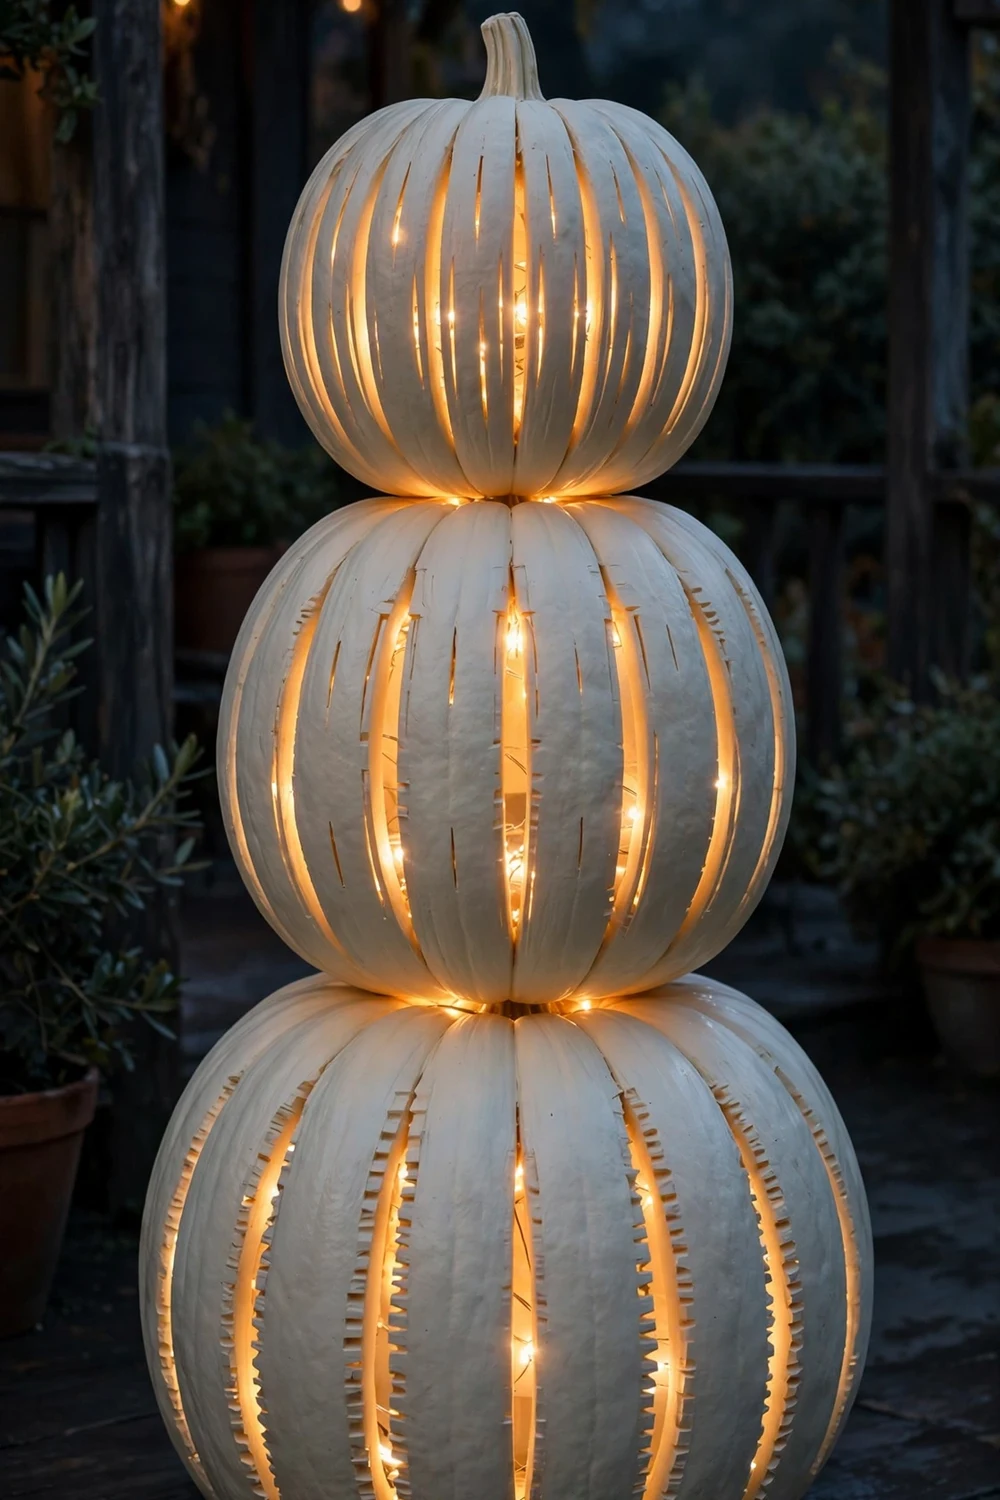
Light makes the tower magical after dark. Paint the pumpkins in a light color like cream or pale orange so light shines through the thin plastic. Coil a strand of battery fairy lights inside the stack before joining the pieces, with the battery pack tucked in the bottom pumpkin. The glow through the grooves looks like candlelight without any flame. For outdoor use, follow basic holiday electrical safety tips and keep connections dry.
Try this: Use a timer battery pack so the lights switch on at dusk by themselves.
Cost: $$| Difficulty: Easy | Time: 30 minutes
12. Chalkboard message pumpkin
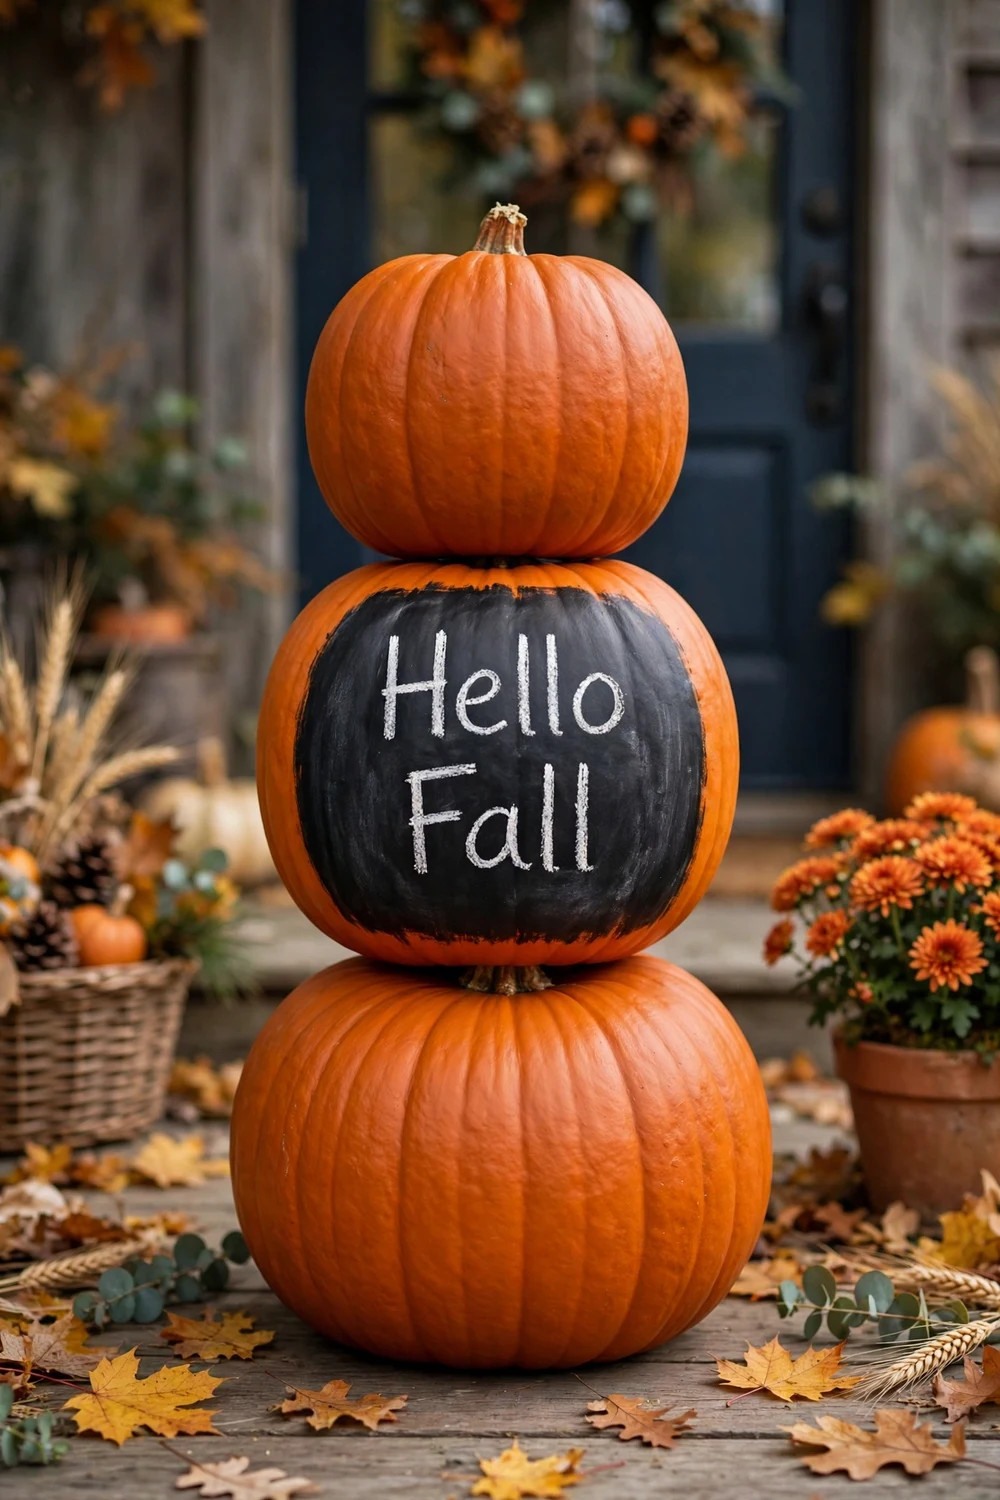
Paint the middle pumpkin with chalkboard paint and you get a tower you can rewrite all season. Paint the top and bottom pumpkins a solid fall color, then give the middle one two coats of chalkboard paint. Write “Hello Fall,” your family name, or a Thanksgiving countdown in chalk markers. Wipe it clean with a damp cloth and start over whenever you want. Kids love being in charge of the message. Seal the other pumpkins with clear spray so chalk dust wipes off easily.
Try this: Condition the chalkboard surface by rubbing chalk over it once, then erasing, before your first message.
Cost: $| Difficulty: Easy | Time: 45 minutes
13. Decoupage floral napkin tower
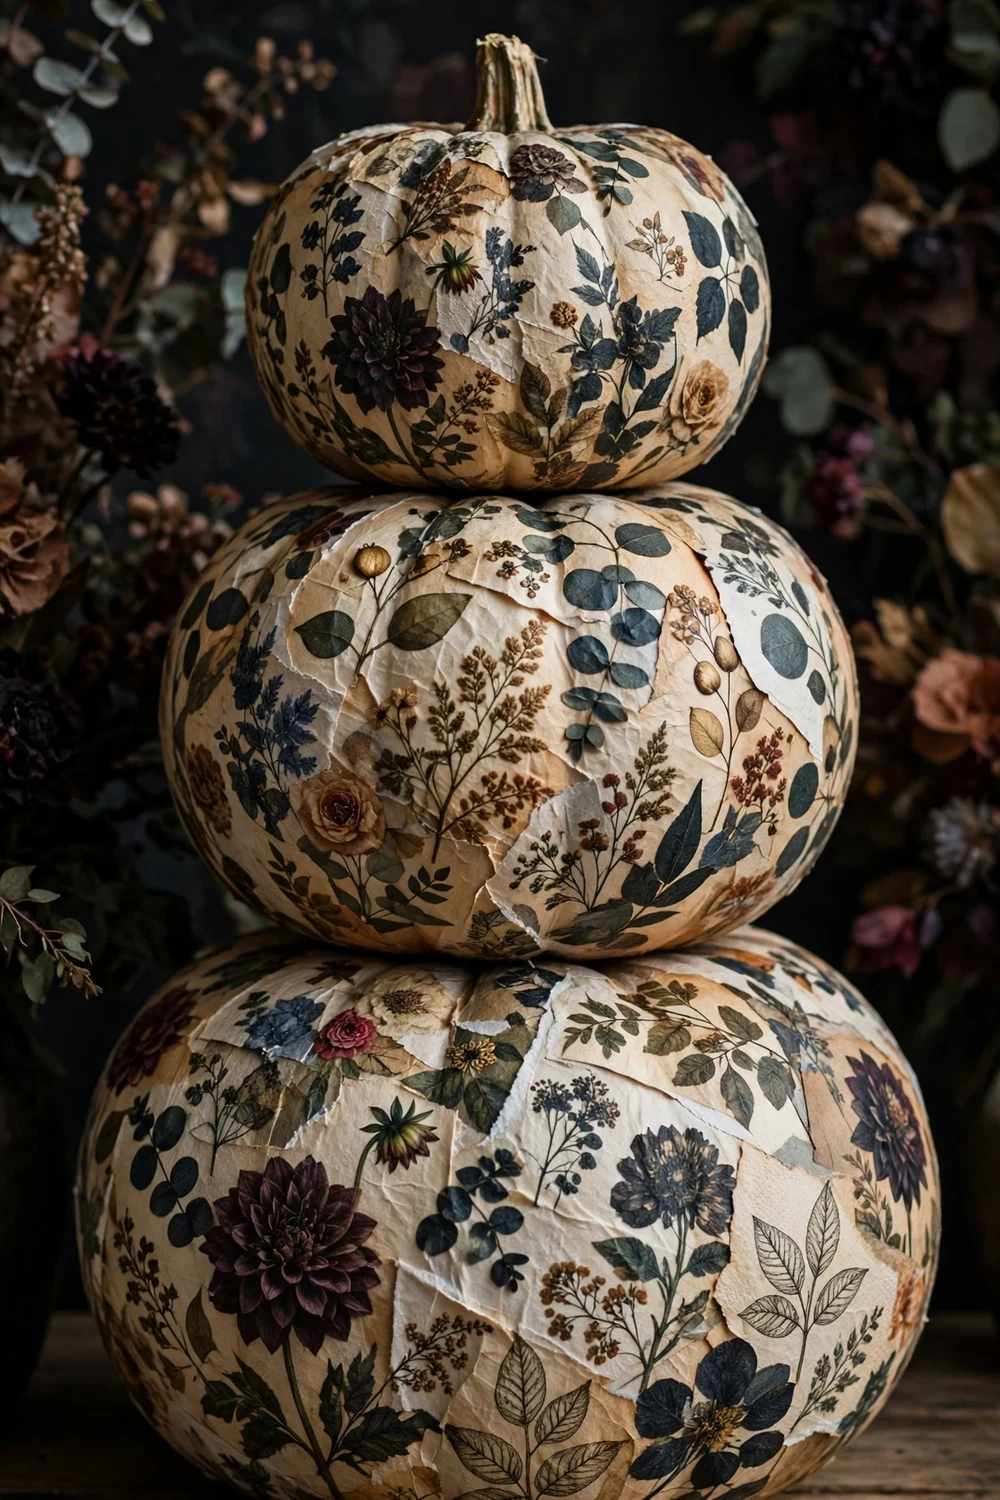
Pretty paper napkins become a no-paint makeover. Peel fall floral napkins down to the printed layer and tear them into pieces. Brush decoupage medium onto a pumpkin, lay the napkin pieces on, and brush another coat over the top. Overlap the pieces slightly for full coverage. The result looks like hand-painted china from a few feet away. This is a good rainy-day craft since there is no spray paint involved. Let it cure overnight before stacking.
Try this: Choose napkins with a dark background so the tower reads rich, not busy.
Cost: $| Difficulty: Medium | Time: 90 minutes
14. Moss and twig woodland tower
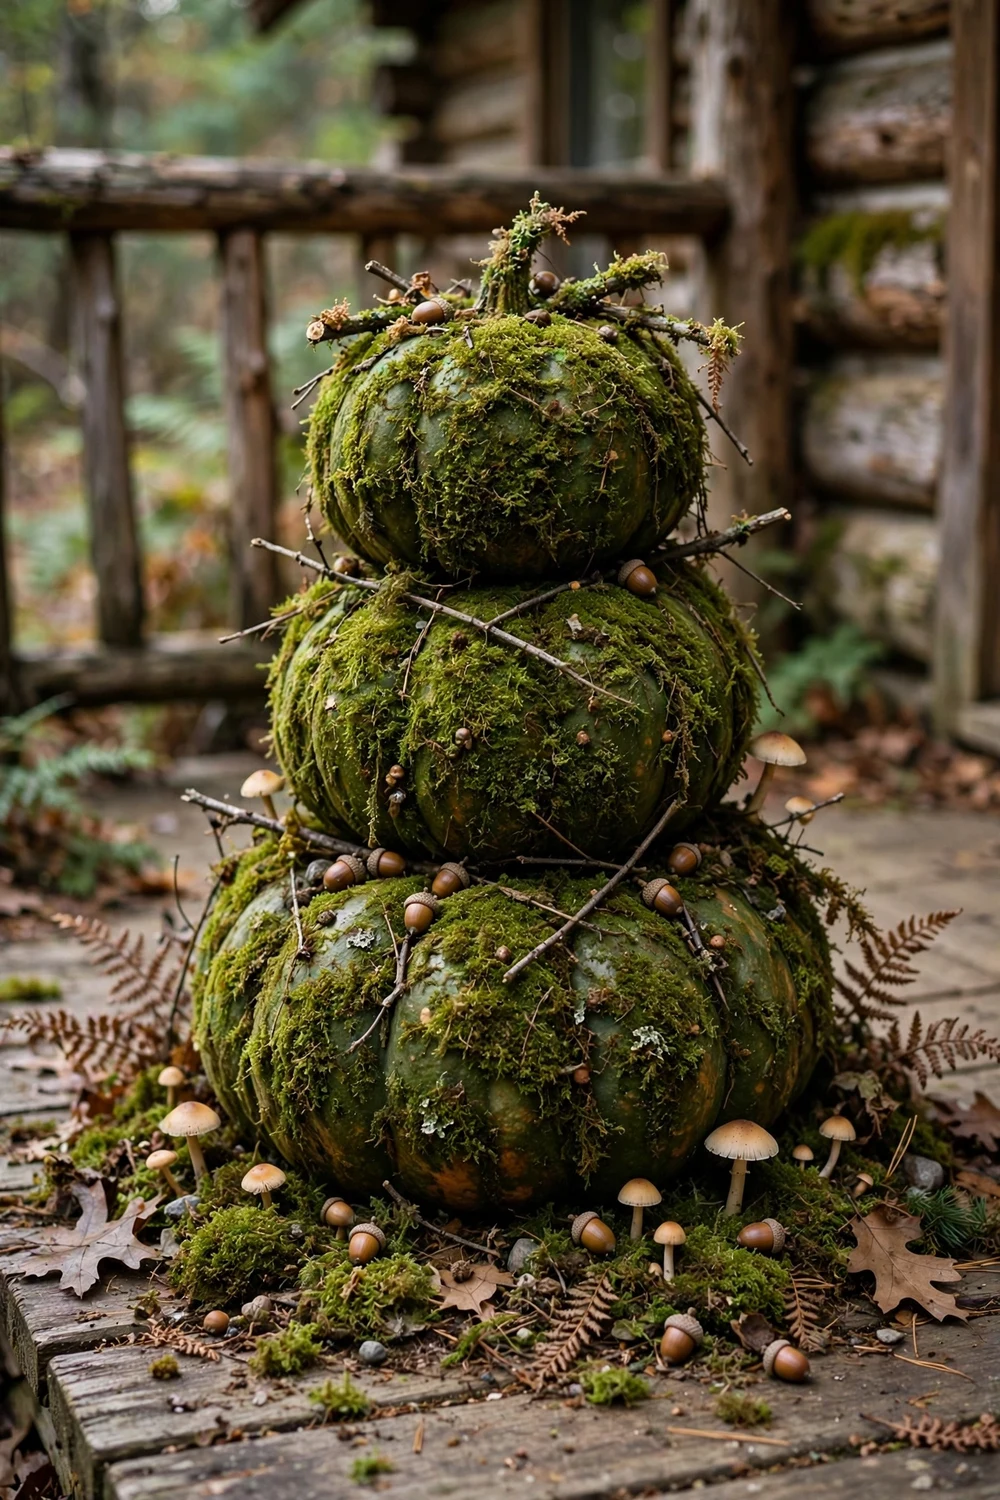
Cover the tower in preserved moss for a forest-floor look. Hot glue sheet moss onto each pumpkin in patches, then press in small twigs, acorns, and faux mushrooms. Leave some pumpkin showing between moss patches so the shape still reads. This tower fits a cabin or rustic porch and needs no paint at all. Work in sections so the glue does not cool before the moss sticks. Keep it on a covered porch, since preserved moss fades in direct sun.
Try this: Add a tiny faux owl or fox on top for woodland personality.
Cost: $$| Difficulty: Medium | Time: 90 minutes
15. Copper metallic tower
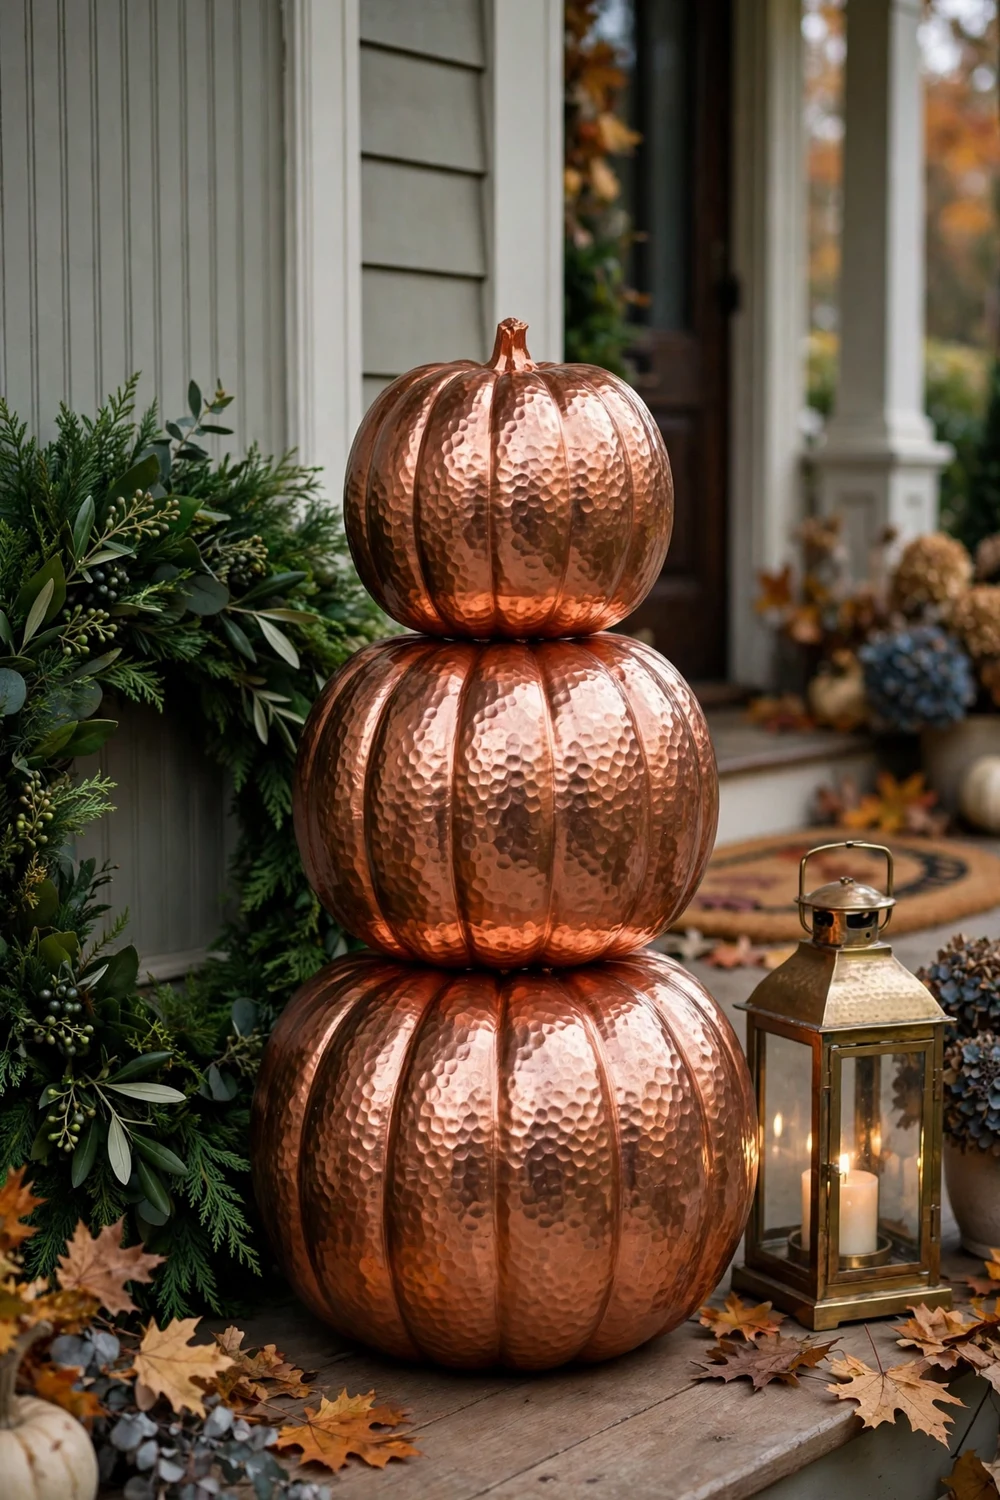
Copper paint reads expensive. Spray all three pumpkins with metallic copper spray paint in light, even coats, turning the pieces as you go. Two light coats beat one heavy coat and avoid drips in the grooves. The hammered-finish sprays add texture that hides the plastic look. This tower pairs with deep green wreaths and brass lanterns for a pulled-together entry. Spray outdoors or in a ventilated garage, and wear a mask.
Try this: Lightly sand the pumpkins with fine sandpaper first so the metallic paint grips.
Cost: $| Difficulty: Easy | Time: 40 minutes
16. Ombre orange-to-cream tower
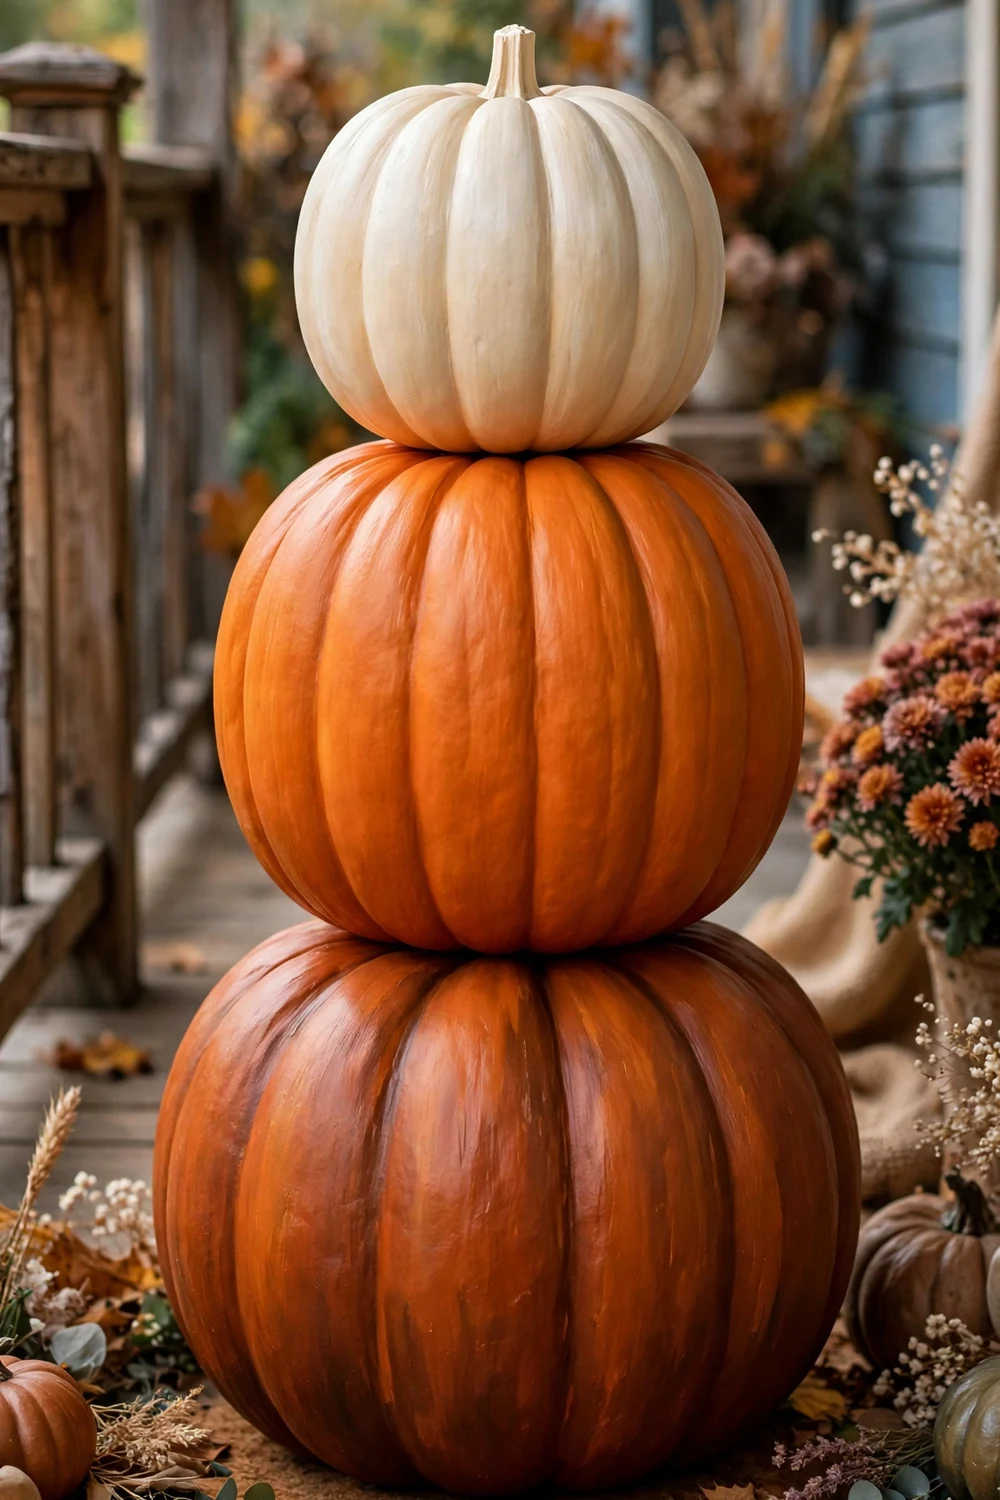
Ombre keeps the classic orange but makes it artful. Paint the bottom pumpkin deep burnt orange, the middle one a medium pumpkin shade, and the top one cream. Blend where the colors meet by dry-brushing the lighter shade over the edge of the darker one. The gradient draws the eye up the tower and looks intentional. This works with the pumpkins’ original orange as the middle shade if you only want to buy two paint colors.
Try this: Photograph the tower in daylight to check the blend before the paint fully dries.
Cost: $| Difficulty: Medium | Time: 1 hour
17. Polka dot candy tower
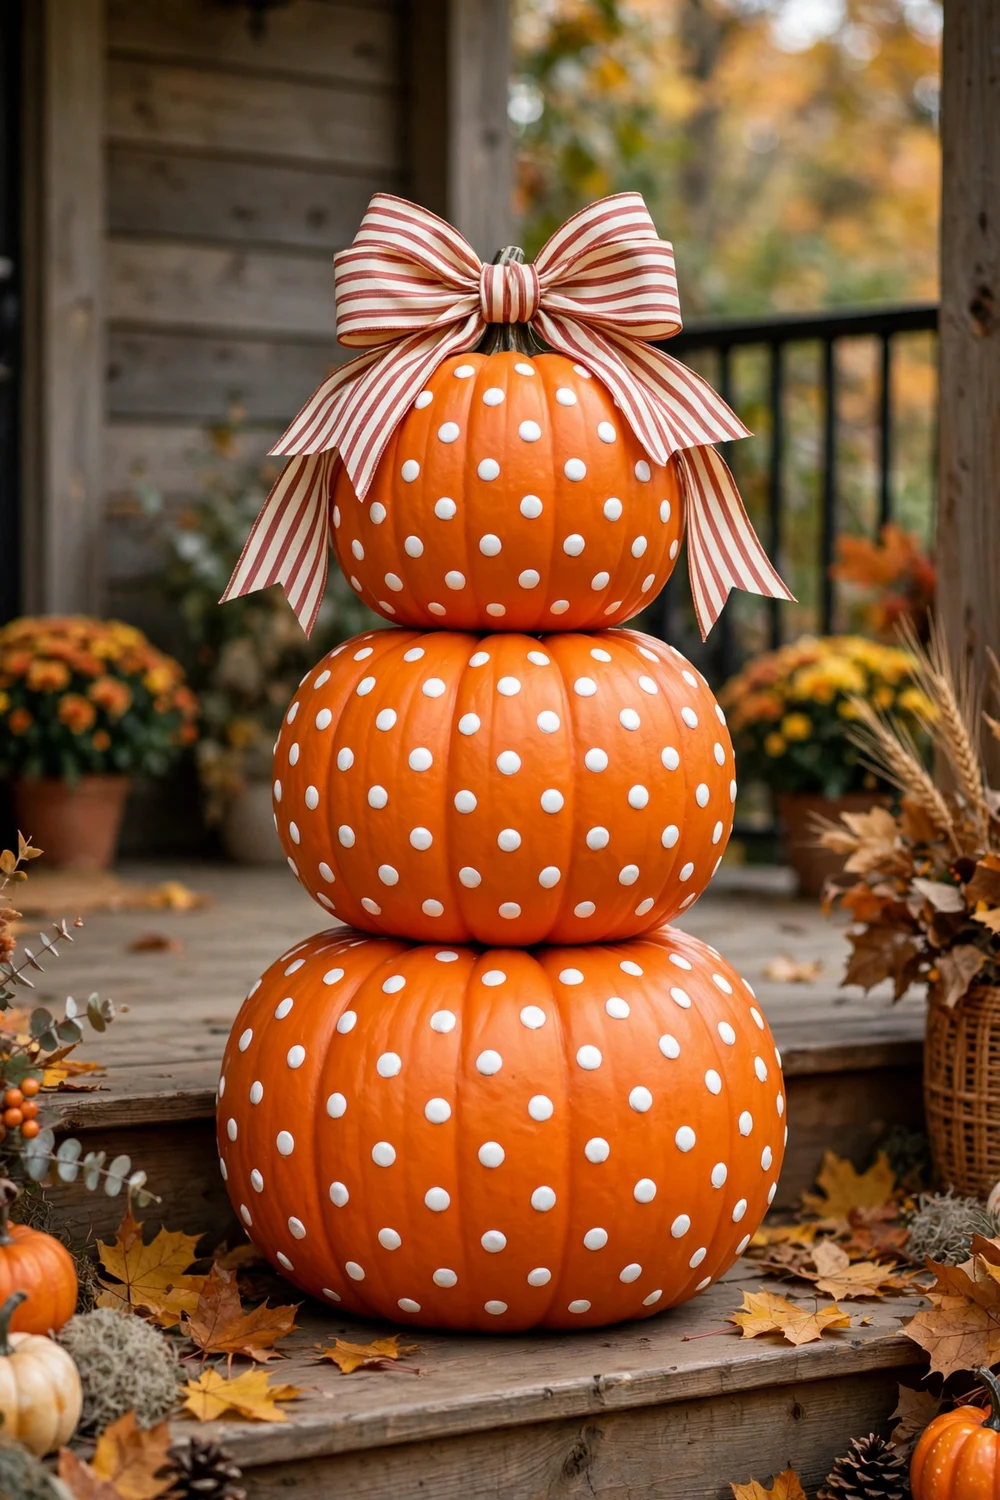
Polka dots are the fastest pattern here. Keep the pumpkins orange or paint them white, then stamp dots with the end of a pencil eraser dipped in craft paint. White dots on orange feel like candy corn season; black dots on white feel graphic and modern. A striped bow on top finishes it in seconds. This is the best pick for crafting with kids, since dots need no steady hand. Space them evenly by eye rather than measuring.
Try this: Vary the dot sizes for a playful confetti effect.
Cost: $| Difficulty: Easy | Time: 30 minutes
18. Pumpkin vase stack
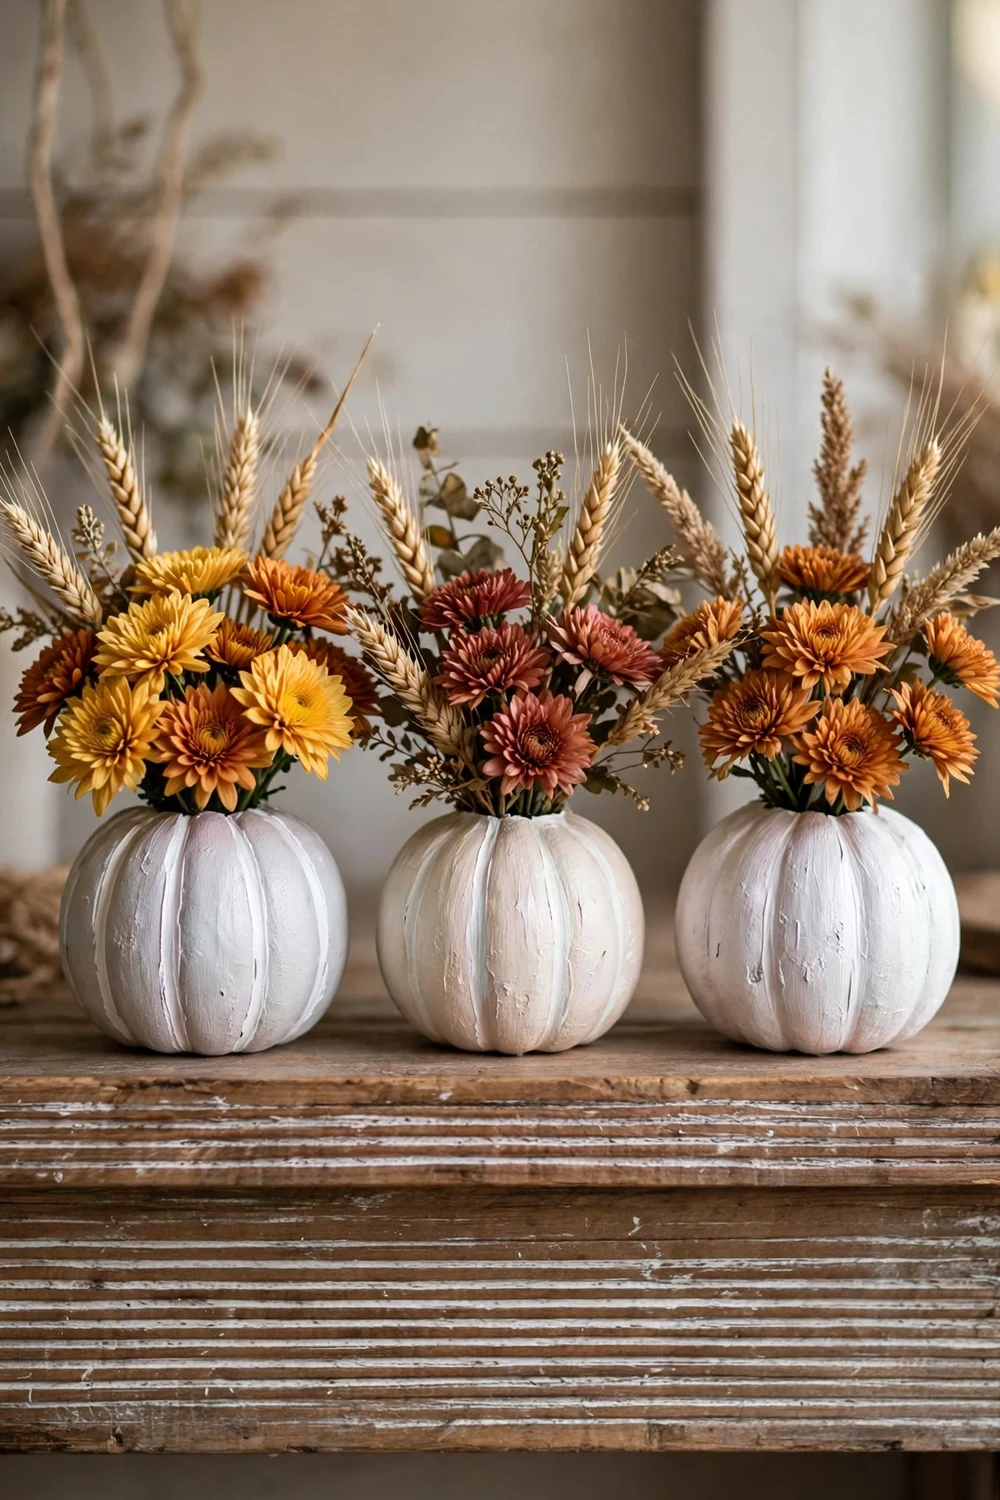
Unstack the set and use each pumpkin as a vase. Cut an opening in the top of each pumpkin, paint them to match your room, and drop in a small jar of water with fresh flowers or a bundle of faux stems. Highlight the grooves with a dry brush of white paint so the pumpkin shape shows. Line up all three on a mantel or entry table for a connected look. This trick also works for holding wrapped candy or pinecones.
Try this: Use silk mums and wheat so the arrangement lasts all season with no watering.
Cost: $| Difficulty: Easy | Time: 40 minutes
19. Tray-top display stand
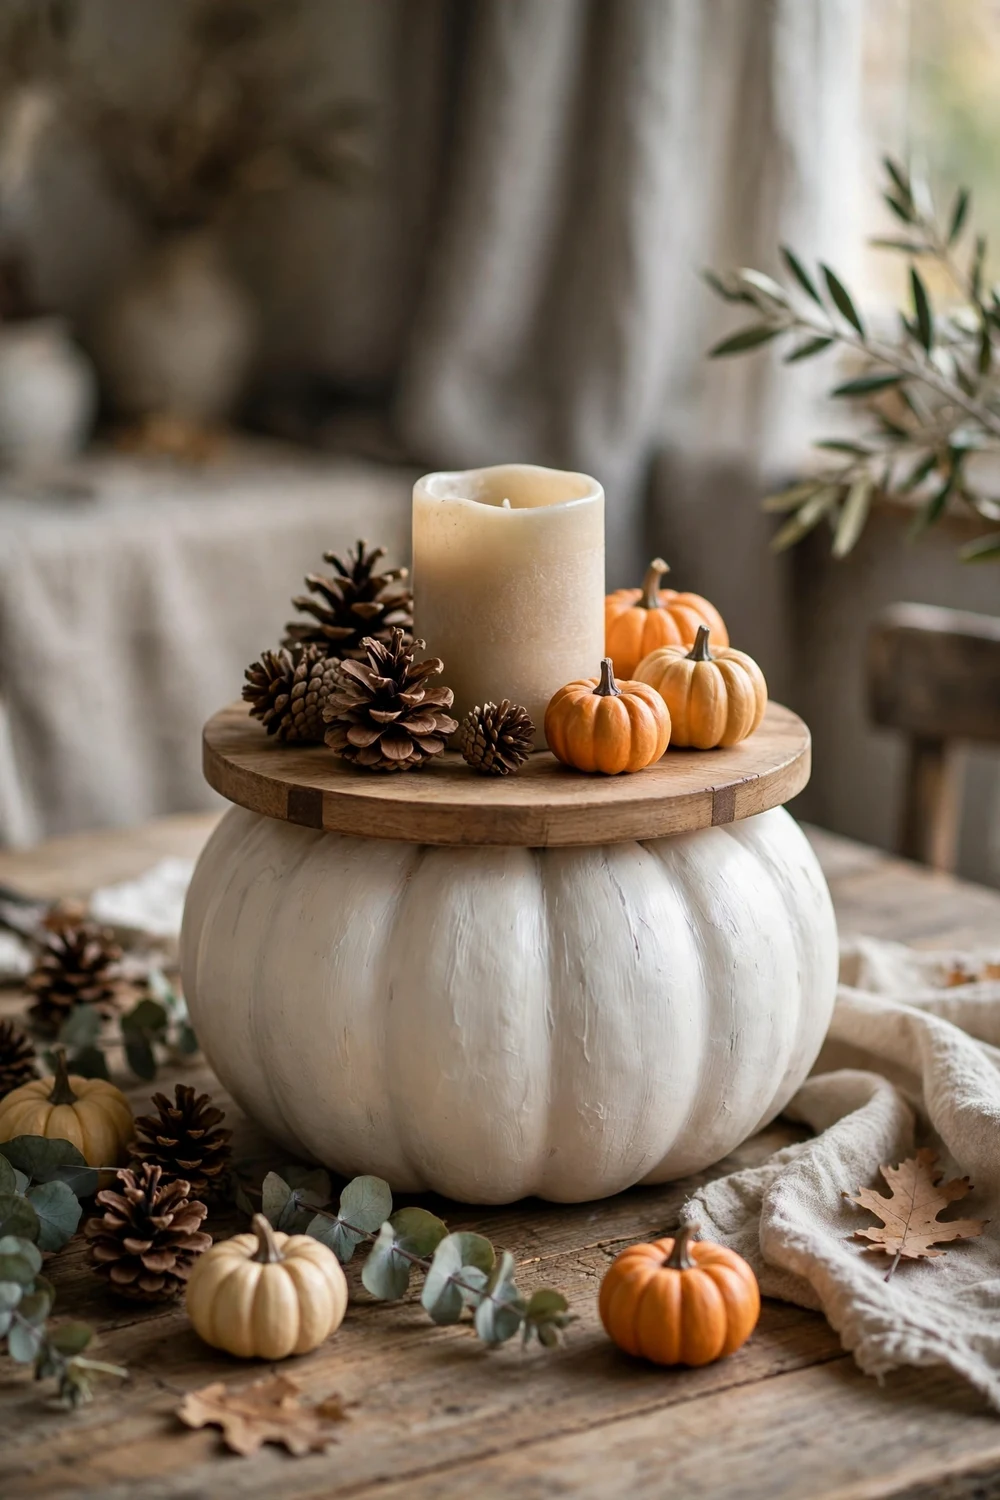
One pumpkin becomes a pedestal. Paint a single pumpkin to match your decor, then hot glue a lightweight round wood tray or charger plate on top. The tray should be slightly wider than the pumpkin. Style it with a candle, pinecones, and mini pumpkins for an instant fall vignette. This works on dining tables, coffee tables, and bathroom counters. Keep real candles away from the plastic pumpkin and use flameless ones instead.
Try this: Swap the tray styling for Christmas greenery in December to reuse the stand.
Cost: $| Difficulty: Easy | Time: 30 minutes
20. Mini pumpkin planter picks
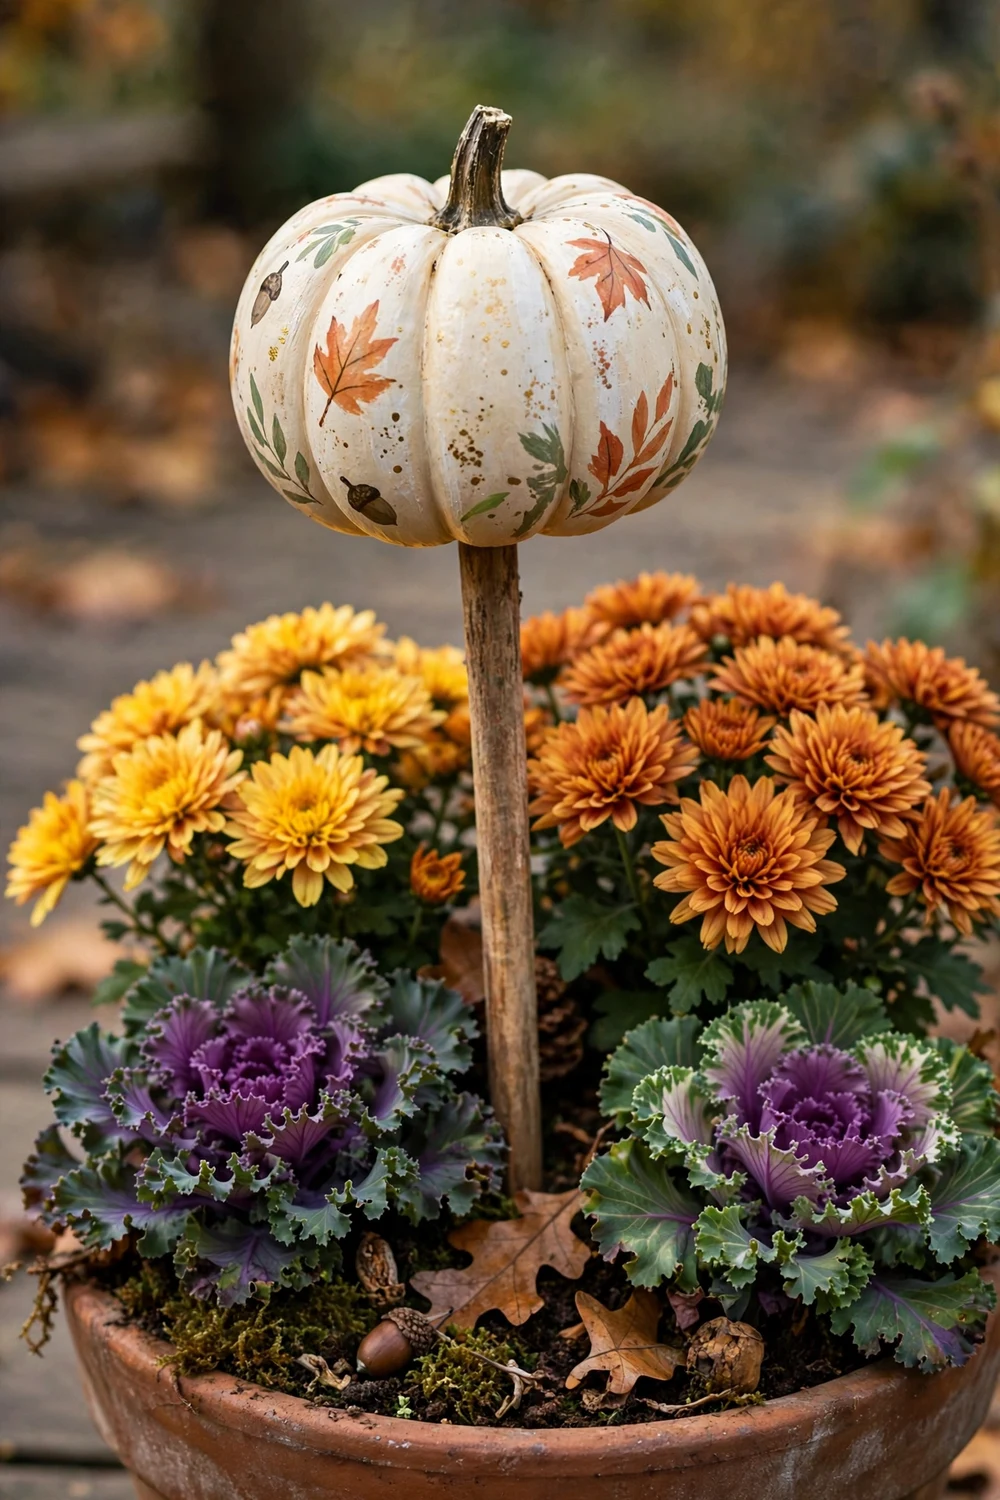
Put the smallest pumpkin on a stick and stake it into planters. Paint the mini pumpkin, push a wooden dowel through its center from the bottom, and secure it with hot glue. Leave about 8 inches of dowel showing to push into a pot of mums or ornamental kale. This adds height to flat planters and ties them to your pumpkin tower nearby. Make a few in different colors for a collected look. Bring them in before the first hard freeze.
Try this: Wrap the dowel in brown floral tape so it blends with stems.
Cost: $| Difficulty: Easy | Time: 25 minutes
Which paint should you use?
Pick your paint based on the finish you want and how much patience you have. This quick comparison covers the four finishes used above.
Keep the fall look going
If your porch needs more than pumpkins, these fall porch planter ideas pair well with a pumpkin tower and fill out the rest of the entry.
To carry the look indoors, try these fall farmhouse fireplace decor ideas for the mantel, using the same cream and wood tones.
Love the pink tower above? These pink fall decor ideas keep that soft blush look going through the whole house.
Frequently asked questions
What are Dollar Tree stackable pumpkins?
They are sets of three plastic pumpkins that click together into a 24-inch tower, sold in Dollar Tree’s Fall and Harvest section for $5. Some versions come with a woodland animal topper like a fox or squirrel. Stock sells out fast, so buy early in the season.
What paint works best on Dollar Tree pumpkins?
Chalk paint and acrylic craft paint both stick well to the plastic. Lightly sanding the surface or adding a primer coat helps any paint grip better. Spray paint works for metallics and base coats, but use it outdoors or in a ventilated space.
Can stackable pumpkins stay outside?
Yes, on a covered porch they hold up fine through fall. For open yards, spray the finished tower with a clear outdoor sealant and bring it in during heavy rain. Battery lights inside are safer than real candles.
How do you keep the tower from falling over?
Hot glue the pieces together at the joints for a sturdy bond. For yard displays, push a wooden dowel through the center into the ground. On windy porches, set the tower inside a heavy planter or urn.
Can kids help with these crafts?
Yes, painting and polka dots are great for kids. Keep children away from the hot glue gun, since the glue and the gun tip get hot enough to burn. Let an adult handle all gluing and cutting.
One $5 set of stackable pumpkins can become a farmhouse tower, a Halloween cat, or a glowing porch light, and none of it needs more than an afternoon. Pick the idea that matches your porch, grab your paint, and start with the top pumpkin.


