


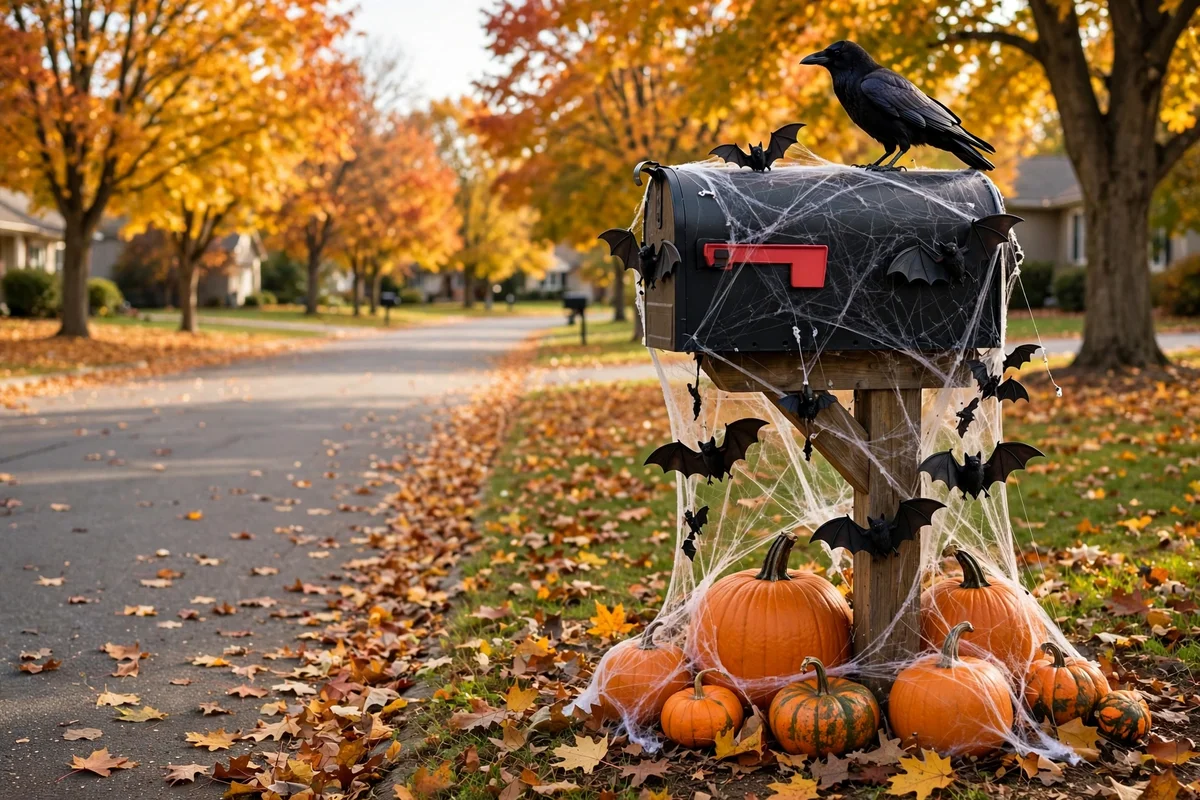
Your mailbox is the first Halloween decoration most people see, and it is the one almost everyone skips. Neighbors drive past it twice a day, trick-or-treaters judge your whole house by it, and the mail carrier sees it up close every single morning. A plain metal box in a yard full of ghosts looks like you gave up at the curb.
These 18 Halloween mailbox decorations fix that in under an hour, most for less than $15. Every idea keeps the address visible and the mail slot working, because a cute mailbox that blocks deliveries is not worth it. Pick one, spend a Saturday morning, and your curb becomes part of the haunt.
- The mailbox sets the tone for your whole yard, so match it to your larger Halloween theme.
- Magnetic and removable decor beats paint if you rent or want a fast November cleanup.
- Keep the house number, flag, and mail slot clear and usable at all times.
- LED lights only outdoors: no real flames near a wooden post or dried leaves.
- Most mailbox ideas cost under $15 and survive October weather with one weatherproofing step.
1. Magnetic bat swarm

Stick flat magnetic bats in different sizes across the metal mailbox so they look like a swarm landing on it. Magnets hold through wind and rain, cost about $6 for a pack of 24, and peel off in seconds on November 1st. This only works on steel mailboxes, so test one magnet before you buy the pack. Angle the bats in one direction, like they are all flying the same way, for a cleaner look. Add three or four on the post for continuity.
Try this: Put the largest bat near the front and shrink the sizes toward the back for a sense of motion.
Cost: $| Difficulty: Easy | Time: 10 minutes
2. Cobweb drape with spiders
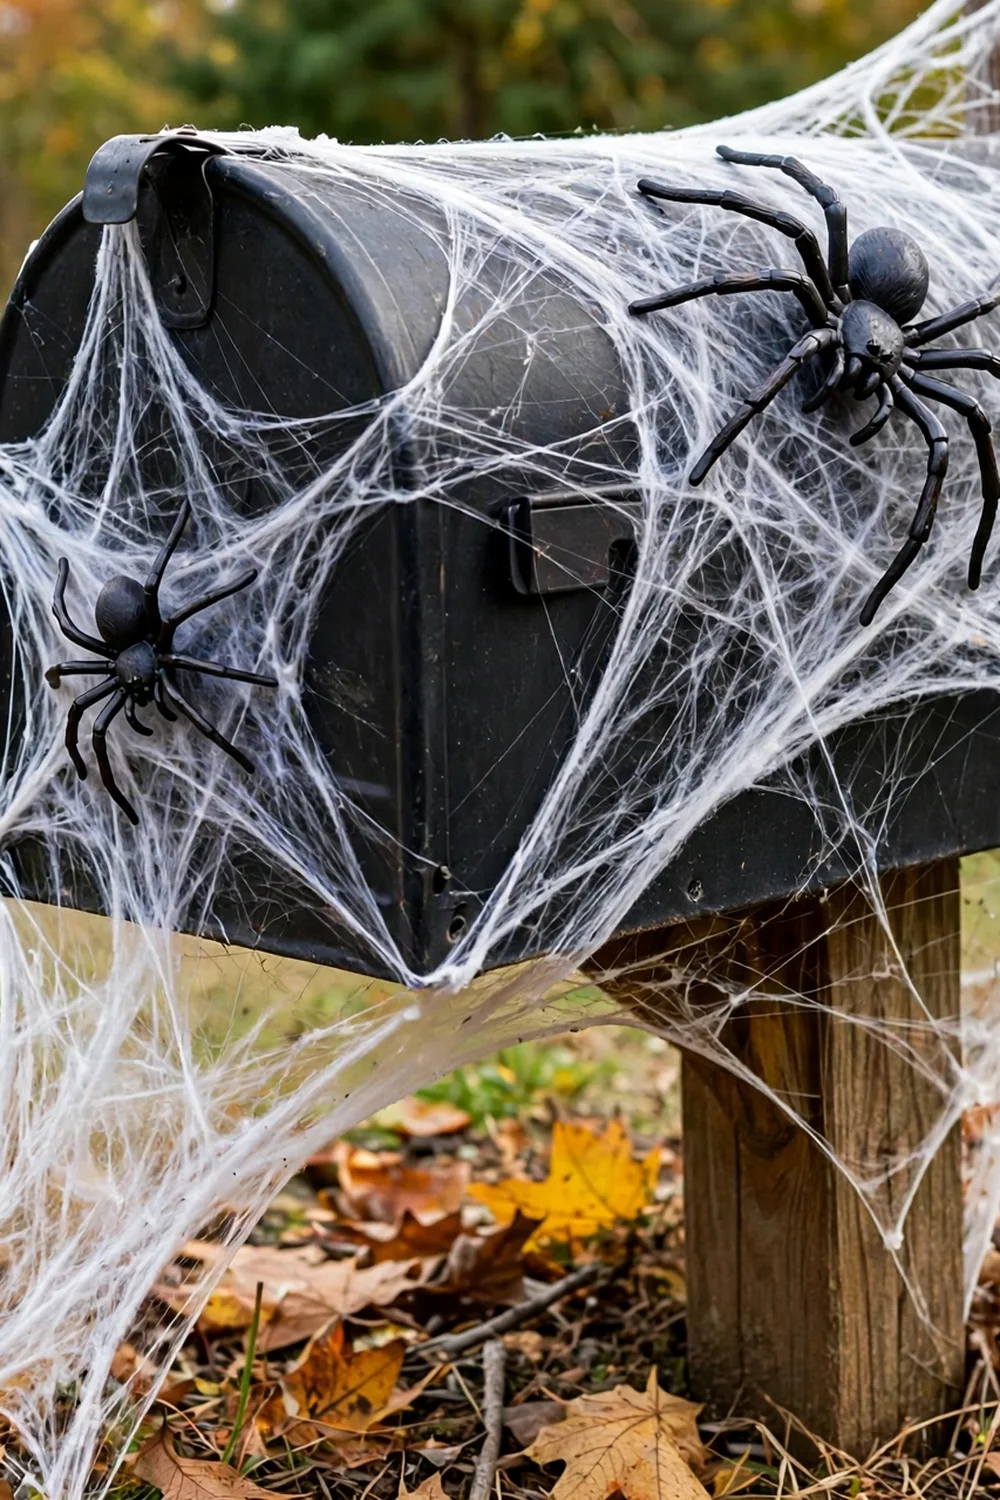
Stretch white faux cobweb over the top and sides of the mailbox and tuck in plastic spiders of mixed sizes. Pull the webbing thin so it looks like real web instead of cotton batting; a little goes a long way. One $3 bag covers the mailbox and the post with webbing to spare. Anchor the web under the mailbox lip so wind does not carry it into the street. This pairs with almost every other idea on this list.
Try this: Mist the webbing lightly with water after stretching it so it clings tighter to the metal.
Cost: $| Difficulty: Easy | Time: 15 minutes
3. Mini pumpkin stack at the base
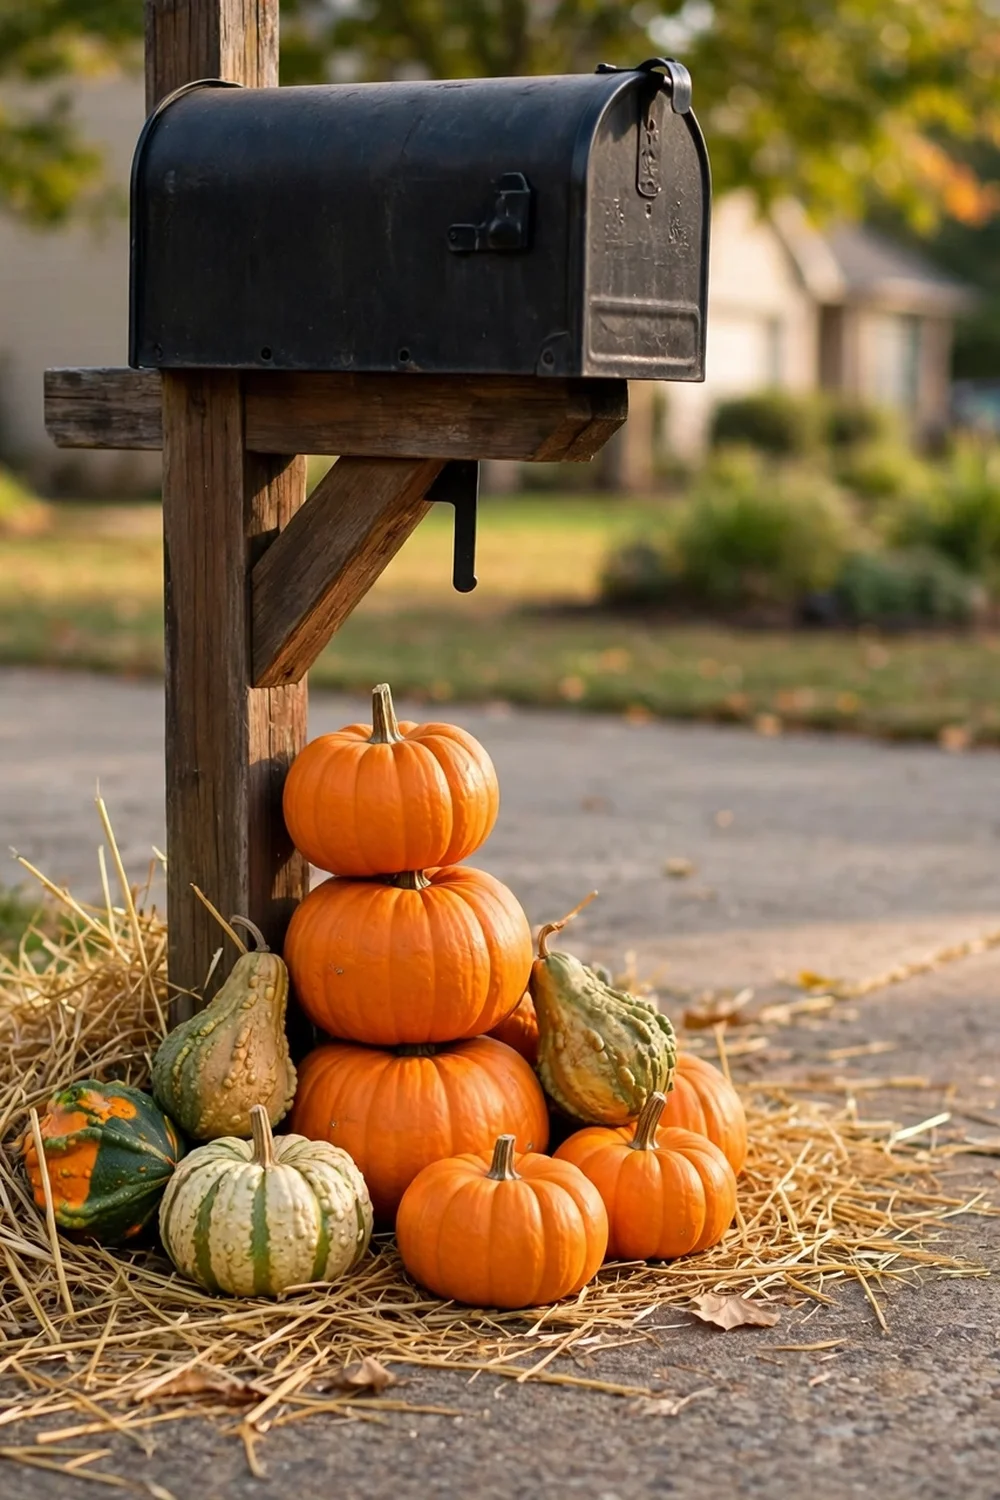
Pile mini pumpkins and gourds around the base of the mailbox post for instant curb appeal. Real minis cost about $1 each in October and last all month outdoors. Foam pumpkins cost more upfront but come back out every year, which wins on a multi-year view. Stack three in a small pyramid and scatter five or six loose ones. A bale of straw behind them fills the bed for about $8 and makes the whole thing look intentional.
Try this: Spray real pumpkins with a clear matte sealer to slow rot in rainy Octobers.
Cost: $$| Difficulty: Easy | Time: 15 minutes
4. Skeleton hand from the mail slot

Wedge a plastic skeleton hand so it sticks out of the mail slot like it is reaching for the mail. It is the funniest $4 you will spend on Halloween decor, and the mail carrier will remember your house. Make sure the hand sits to one side so letters and packages still slide in; test it with a magazine before the carrier arrives. A little museum putty inside the slot keeps the hand from sliding out in wind.
Try this: Curl the fingers around a fake “letter” for extra storytelling.
Cost: $| Difficulty: Easy | Time: 5 minutes
5. “Boo Mail” flag swap

Replace the red mail flag with a handmade “Boo Mail” flag cut from orange craft foam or painted wood. Trace the original flag so the new one fits the same bracket and still flips up and down. Keep the flag functional and red-toned enough that the carrier recognizes it; neon orange reads fine at a glance. This is a 20-minute craft that kids can help paint. Seal it with outdoor varnish so October rain does not bleed the letters.
Try this: Attach the new flag with the original screw so you can swap the red one back in November.
Cost: $| Difficulty: Easy | Time: 20 minutes
6. Orange paint with black stripes
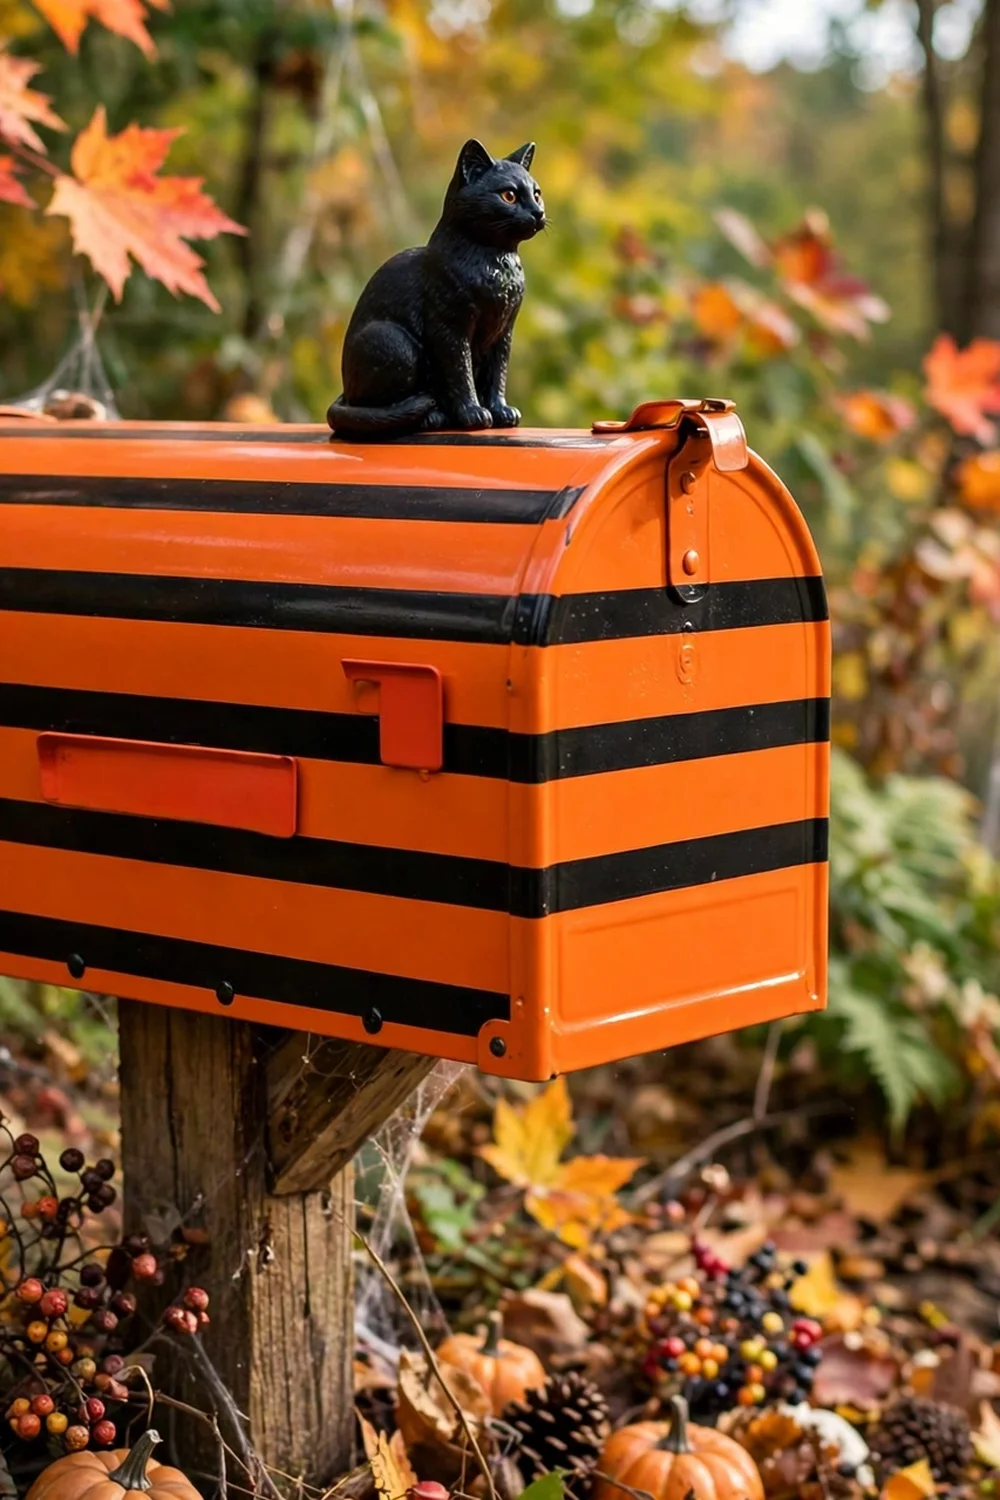
Paint the whole mailbox bright orange and add black stripes for a jack-o’-lantern-striped look that lasts all month. Use exterior spray paint rated for metal and tape crisp lines with painter’s tape. Two light coats beat one heavy coat for avoiding drips. This is a commitment, so only do it if you are happy repainting or keeping the look. Check with your HOA first; some have mailbox color rules with real fines attached.
Try this: Remove the mailbox from the post and paint it in the garage to avoid overspray on the post.
Cost: $$| Difficulty: Medium | Time: 1 hour plus drying
7. Gauze ghost wrap
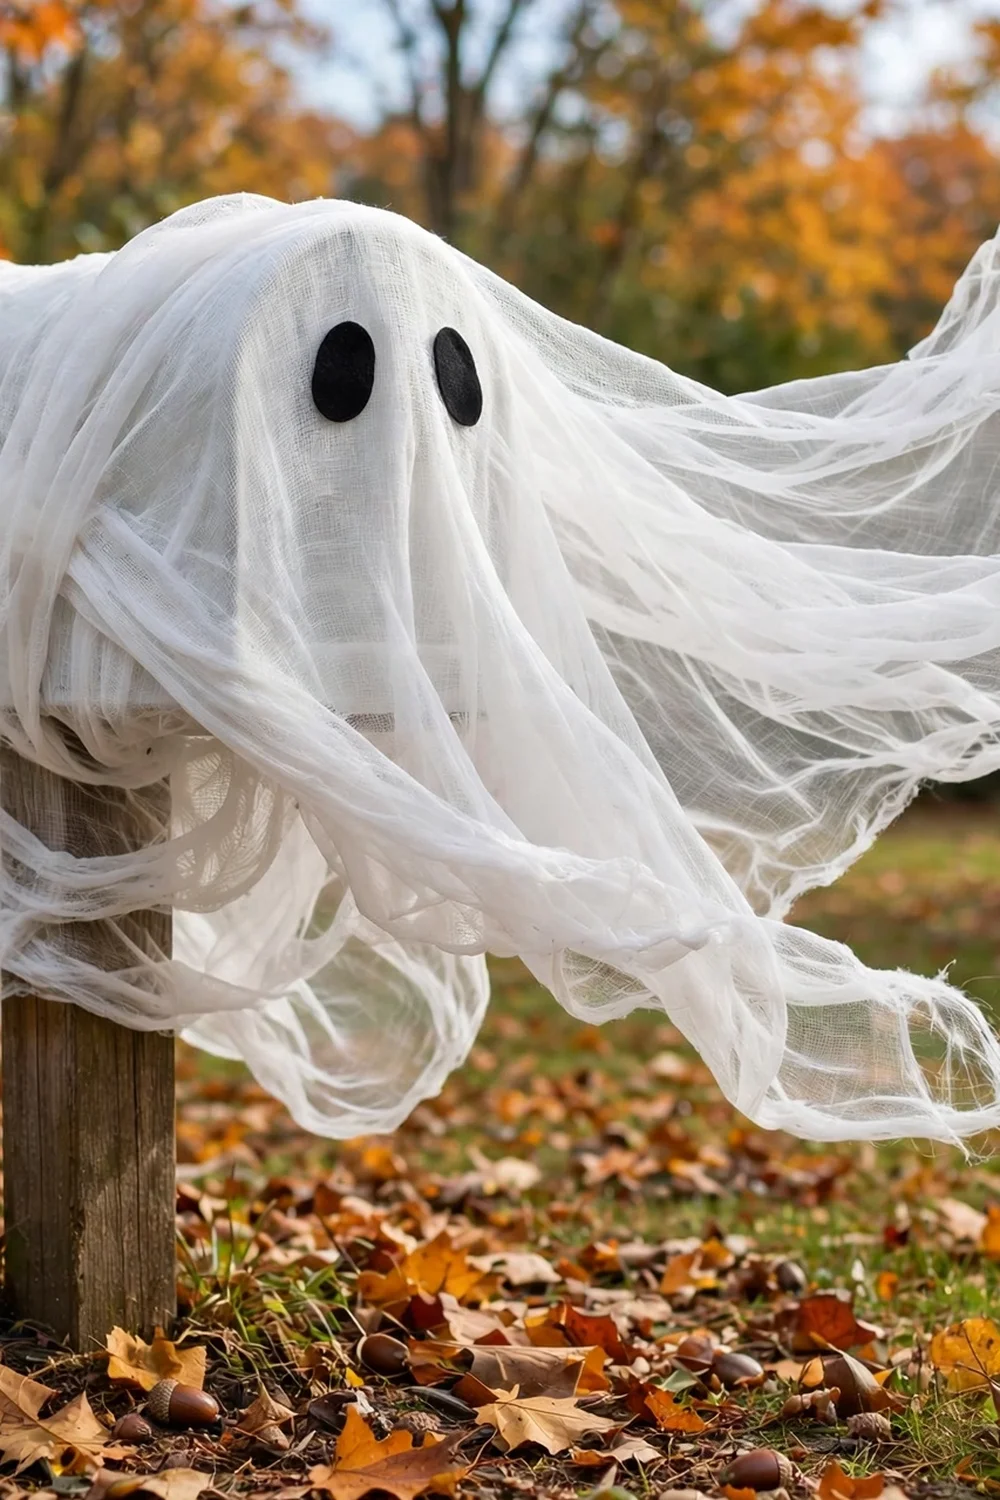
Drape white gauze over the entire mailbox and add two black oval eyes to turn the box into a floating ghost. Cheesecloth from the fabric store costs a few dollars and tears into perfect ghostly strips. Secure the gauze under the mailbox with twine so it billows without blowing away. Cut the eye ovals from black felt and stick them on with double-sided tape. This reads clearly from a moving car, which is exactly what curb decor needs to do.
Try this: Leave the mail slot uncovered or cut a slit so deliveries never stop.
Cost: $| Difficulty: Easy | Time: 15 minutes
8. Crow perched on top

Set a black crow figure on top of the mailbox, half-hidden in cobweb, like it is guarding the mail. A life-size crow decoy costs about $10 at Halloween and looks convincingly real from the sidewalk. Wire its feet to a small flat stone so it does not become a projectile in the first storm. One crow is eerie; three crows is a murder, so keep it to one or two. Pair it with bare branches stuck in the ground behind the post.
Try this: Tilt the crow’s head slightly downward for a watchful, judging pose.
Cost: $$| Difficulty: Easy | Time: 10 minutes
9. Hand-painted haunted house scene
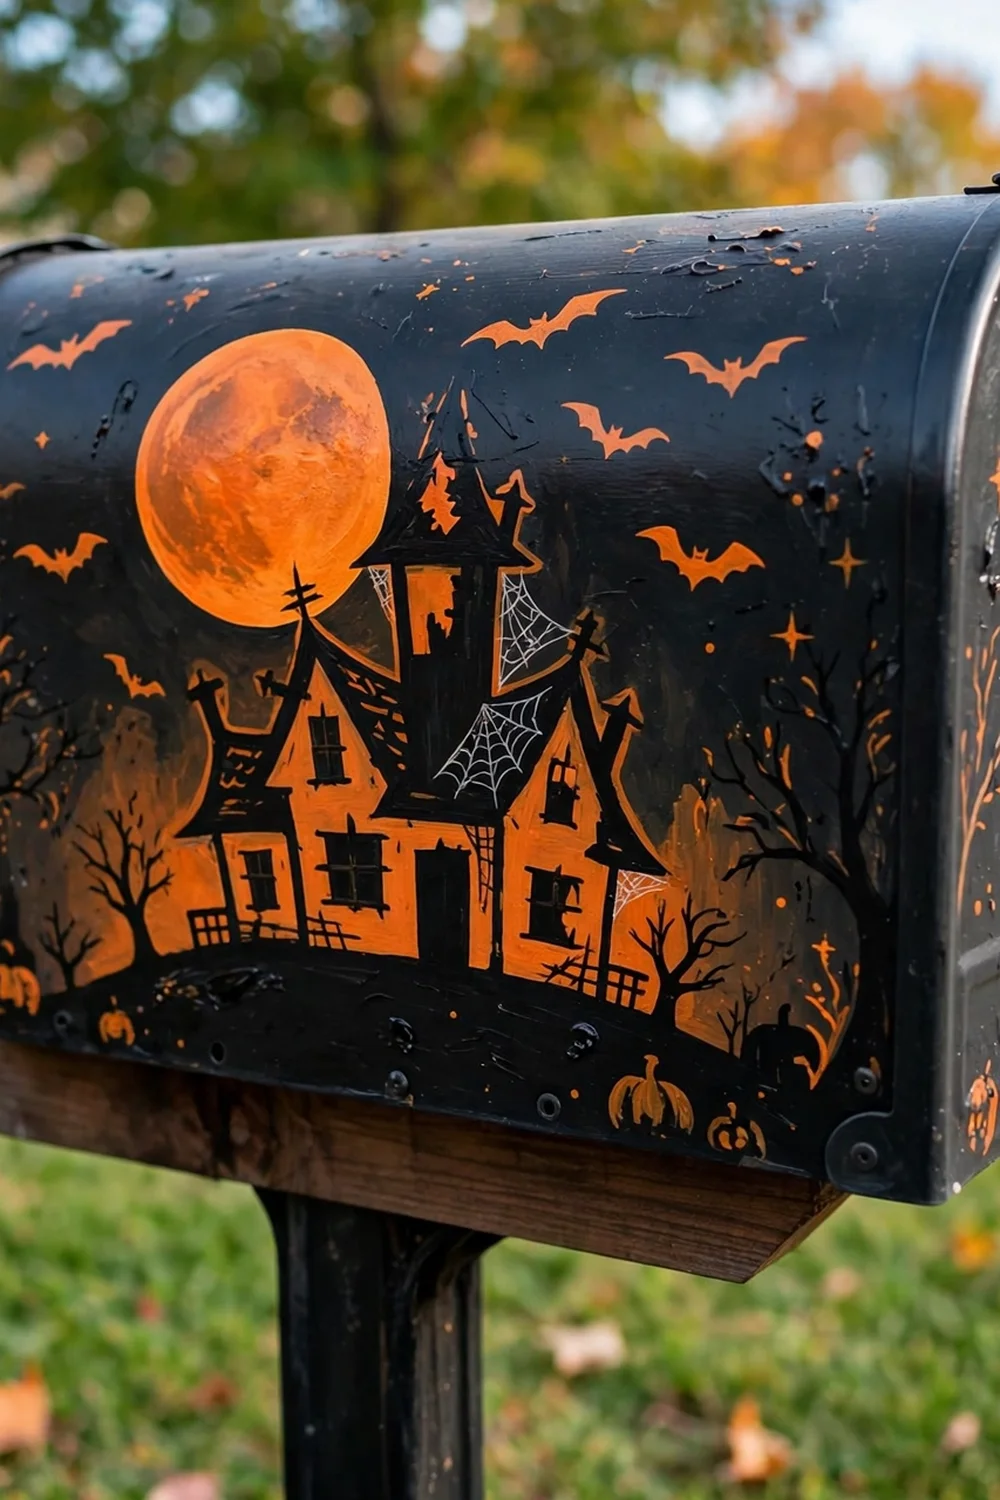
Paint a haunted house silhouette with bats and a full moon right on the mailbox doors. Acrylic craft paint works on metal if you prime first, and the whole scene takes one careful afternoon. Sketch the design in chalk before you commit paint to it. Orange background with a black house reads best from the street. Seal with two coats of clear outdoor sealer. Like the full repaint, this is for owners, not renters, and worth an HOA check.
Try this: Paint only the two side doors and leave the front and back plain for a less-is-more effect.
Cost: $$| Difficulty: Medium | Time: 2 hours
10. Mini skeleton on top

Seat a 12-inch posable skeleton on top of the mailbox in a waving pose to greet everyone who walks by. These skeletons cost about $8 and bend into any position, which makes them the hardest-working Halloween prop per dollar. Zip-tie one ankle to the mailbox so it survives wind and curious raccoons. A tiny witch hat on its head doubles the charm. Swap the pose weekly through October to keep neighbors smiling.
Try this: Pose it leaning against the flag like it is waiting for the mail.
Cost: $$| Difficulty: Easy | Time: 10 minutes
11. LED string lights on the post

Wrap the mailbox post in warm orange LED string lights for curb appeal that works after dark. Battery-operated strands cost about $8 and need no outdoor outlet. Spiral the lights from the ground to the box, spacing the wraps about 4 inches apart. Set them on a timer so they glow from dusk to about 10 p.m. without you thinking about it. Orange reads as Halloween; purple reads as haunted. Pick one color and commit.
Try this: Tuck the battery pack into a zip-top bag wired behind the post to keep rain out.
Cost: $$| Difficulty: Easy | Time: 20 minutes
12. Witch hat on top

Plop a witch hat on top of the mailbox for the simplest recognizable Halloween signal there is. A basic black hat costs $3, and an orange band cut from felt dresses it up. Stuff the cone with newspaper so it holds its shape through October weather. Anchor it with fishing line tied to the mailbox so it does not sail into traffic. This works best paired with a pumpkin or two at the base so the hat does not look lonely.
Try this: Bend the hat’s tip sideways and stitch it in place for a classic crooked-witch look.
Cost: $| Difficulty: Easy | Time: 10 minutes
13. Glow-in-the-dark eyes

Stick large glow-in-the-dark googly eyes on the front of the mailbox so it stares at cars after dark. The eyes charge in daylight and glow for hours, costing about $5 for a jumbo pair. Wipe the mailbox with rubbing alcohol first so the adhesive actually sticks. Place them slightly uneven for a goofy look or dead-center for a creepy one. This is a favorite with kids and takes under five minutes.
Try this: Add a second pair on the back so the mailbox watches both directions of traffic.
Cost: $| Difficulty: Easy | Time: 5 minutes
14. Candy-corn striped post

Paint the wooden post in candy corn bands of orange, yellow, and white from bottom to top. It is cheerful, unmistakably Halloween, and visible from a block away. Use exterior paint and tape each band before painting the next; the white band goes on last because it shows every flaw. A 4×4 post needs about a pint of each color. This pairs perfectly with a plain black mailbox on top, letting the post do all the talking.
Try this: Make the white tip slightly shorter than the other bands, like a real candy corn.
Cost: $$| Difficulty: Medium | Time: 1.5 hours plus drying
15. Foam tombstone at the base

Lean a foam tombstone against the mailbox post like a tiny graveyard started at the curb. Foam stones cost $8 to $15, weigh almost nothing, and survive rain. Stake it with a wooden dowel pushed into the ground behind it so it does not tip. Keep the wording generic, like “RIP,” rather than a real name, which can read as morbid to neighbors. One stone is a wink; five stones is a yard theme, so match it to the rest of your decor.
Try this: Dry-brush the tombstone with gray craft paint to make the foam look like aged stone.
Cost: $$| Difficulty: Easy | Time: 15 minutes
16. Black feather garland

Wrap a black feather boa or feather garland around the mailbox post for a gothic, textured look. Feather garlands cost about $8 for six feet, which wraps a standard post twice. The feathers move in the breeze, which gives the mailbox life that static props lack. Secure both ends with zip ties, not tape, because tape fails on feathers. Keep it above the address numbers so they stay readable. This skews elegant rather than scary.
Try this: Tuck small plastic skulls into the feathers every foot for hidden details.
Cost: $$| Difficulty: Easy | Time: 15 minutes
17. Hanging pumpkin lantern

Hang a small pumpkin lantern from the mailbox post arm with an LED candle inside. A foam pumpkin with a pre-cut face costs about $10 and never rots. Hang it with a short chain or heavy twine from the arm that holds the mailbox. The glow marks your driveway entrance after dark, which helps trick-or-treaters find you. Use a timer candle so it lights itself at dusk. Take it in during severe storms; hanging decor catches wind.
Try this: Hang it on the street-facing side so drivers see the glow first.
Cost: $$| Difficulty: Easy | Time: 15 minutes
18. Spider egg sacs in the corners

Tuck white cotton balls stretched into sacs into the mailbox corners and webbing, then add tiny plastic spiders crawling out. It is a gross-out detail that costs almost nothing and delights kids who spot it. Stretch each cotton ball until it is thin and wispy, then press it into the web. Use six to eight sacs total; more than that looks like packing material. Keep them clear of the mail slot and the flag mechanism.
Try this: Dab the sacs with a little gray eyeshadow for a dusty, aged look.
Cost: $| Difficulty: Easy | Time: 15 minutes
Mailbox decor at a glance
Match your effort level to a row, then pick one idea from it.
Mailbox rules: keep it legal and deliverable
Decorations cannot block the mail. USPS standards require the mailbox to stay accessible, with the address number visible and the flag and door working. The USPS mailbox guidelines spell out placement and access rules worth a two-minute read before you start. Test every addition: slide a magazine through the slot, flip the flag up and down, and read your house number from the street.
Extend the look to the rest of the entry so the mailbox does not sit alone. These simple fall porch decor ideas show how to carry one theme from the curb to the front door, and fall front porch decor adds the bigger pieces that make a decorated mailbox feel like part of a plan instead of a random craft.
Halloween mailbox safety: weather, wind, and flames
Outdoor decor lives or dies by weatherproofing. Seal painted designs with outdoor varnish, bag battery packs against rain, and anchor anything light enough to blow into the street. The CPSC’s Halloween safety guidance specifically recommends battery-operated lights over candles and keeping walkways clear, both of which apply at the curb.
Never put a real flame on or near the mailbox. Wooden posts, dried leaves, and faux cobweb ignite fast, and a candle in a hanging pumpkin is a wind gust away from a problem. LED candles and string lights give you the glow with none of the risk. Check that no decor dangles into the road or blocks the sidewalk; a driver swerving around your witch hat is not the kind of attention you want.
Frequently asked questions
Is it legal to decorate my mailbox for Halloween?
Yes, as long as the mailbox stays functional. USPS rules require the carrier to reach the box easily, the address to stay visible, and the door and flag to work. Avoid anything that blocks the slot or makes the box hard to open. When in doubt, keep decorations on the post and the outside of the box.
How do I decorate a mailbox without damaging it?
Use magnets on steel boxes, removable hooks, zip ties, and double-sided outdoor tape. All of these come off cleanly in November. Skip spray adhesive and hot glue directly on the metal; both leave residue that needs chemicals to remove.
Will Halloween mailbox decorations survive rain?
Most will if you weatherproof the weak points. Seal painted surfaces, put battery packs in zip-top bags, and choose foam pumpkins over real ones in wet climates. Paper props like cardstock bats should come inside before storms. Check everything after the first heavy rain and tighten what loosened.
What is the cheapest Halloween mailbox decoration?
Stretched cobweb with plastic spiders costs about $3 and changes the whole look. Glow-in-the-dark eyes at $5 are the next best value. Both take under 15 minutes and need no tools.
How do I keep decorations from blowing away?
Anchor everything. Zip-tie props to the post, wire heavy figures to stones, and tuck webbing under the mailbox lip. Wind is the number one killer of curb decor, so build for a storm even if the forecast looks calm.
When should I take Halloween mailbox decorations down?
The weekend after Halloween is the norm. Remove anything taped or glued before adhesive bakes on in the sun. Painted makeovers can stay if you like the look, but swap the spooky flag back for the standard red one so the carrier’s signal stays clear.
The mailbox takes twenty minutes and gets seen more than any decoration inside your house. I did the magnetic bats and cobweb on ours two years ago and neighbors still mention it every October. Pick one idea from this list, keep the slot clear and the numbers visible, and your curb will be doing Halloween work long before anyone reaches your front door.


