



Store-bought candle holders cost a fortune in December, and the cheap ones all look the same. You want that warm glow on your table, but you also want something that looks like you made it with care.
I started making my own candle holders from jam jars years ago, and guests still ask about them. These 20 ideas use jars, wood, pinecones, and other simple supplies, and most take under 30 minutes. A quick safety note first: the NFPA recommends flameless candles near dried decor and in homes with kids or pets, so many ideas below use LED tea lights that look just as warm.
Quick takeaways
- Glass jars, wood slices, and pinecones make the easiest candle holder bases.
- LED tea lights give the same glow with no flame risk near dried greenery.
- Keep real flames 12 inches from anything flammable, and never leave candles burning unattended.
- Most holders cost $2 to $8 in supplies and take under 30 minutes.
- Mod Podge, twine, and spray paint handle most of the decorating work.
1. Mason jar snow holders

Brush the outside of a mason jar with Mod Podge and roll it in faux snow or coarse Epsom salt for a frosted look. Drop a tea light inside and tie twine around the rim with a sprig of pine. The light glows through the snowy coating like a lantern in a storm. Make a set of three in different heights for a mantel. Use LED tea lights if kids will be near the table, since the salt coating can flake.
Try this: Add a pinch of silver glitter to the salt for extra sparkle.
Cost: $| Difficulty: Easy | Time: 20 minutes
2. Cinnamon stick wrapped votives

Stand cinnamon sticks upright around a glass votive and tie them with ribbon. The sticks warm slightly from the candle and release a gentle spice scent. Use a tall enough votive that the flame sits well below the stick tops, or use an LED tea light to remove the risk entirely. About 12 sticks wrap a standard votive. This is the fastest idea on the list and smells like the holidays.
Try this: Add a dried orange slice tucked into the ribbon for color.
Cost: $| Difficulty: Easy | Time: 10 minutes
3. Lace-dipped votives
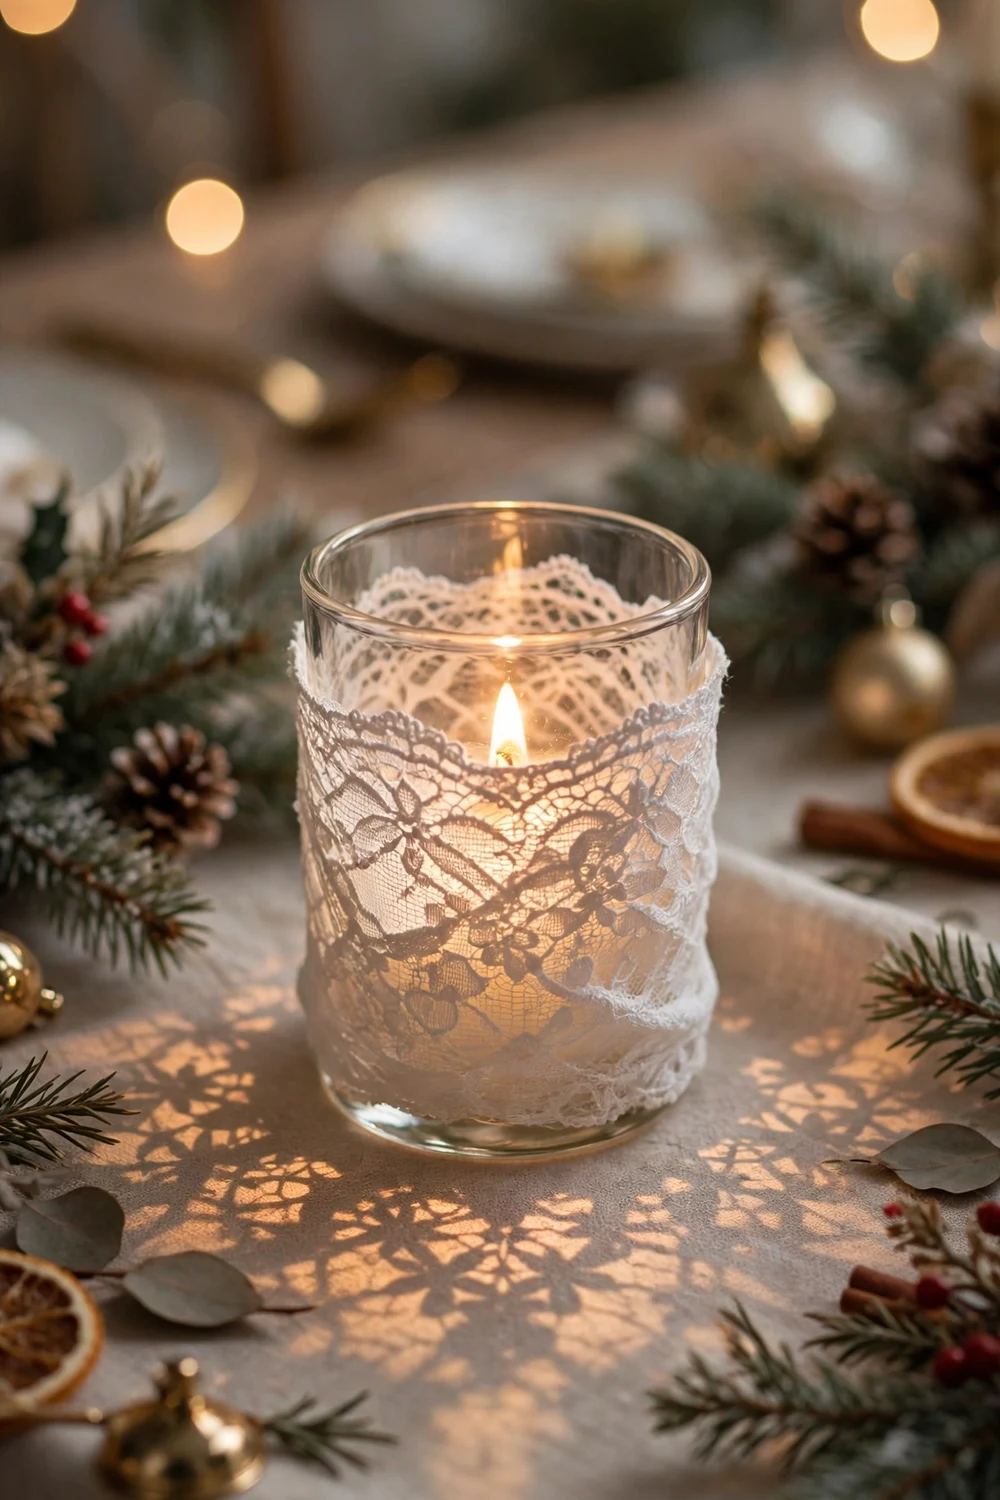
Brush craft glue on the top half of a glass votive and press a strip of lace around it. When the candle burns inside, the lace pattern glows through the glass like a paper lantern. White or cream lace suits Christmas best. Trim the lace flush with the rim so no fabric hangs near the flame, and always use a contained tea light rather than a tall taper. These look delicate on a dining table.
Try this: Dust the lace with a little white glitter before the glue dries.
Cost: $| Difficulty: Easy | Time: 15 minutes
4. Mercury glass look jars
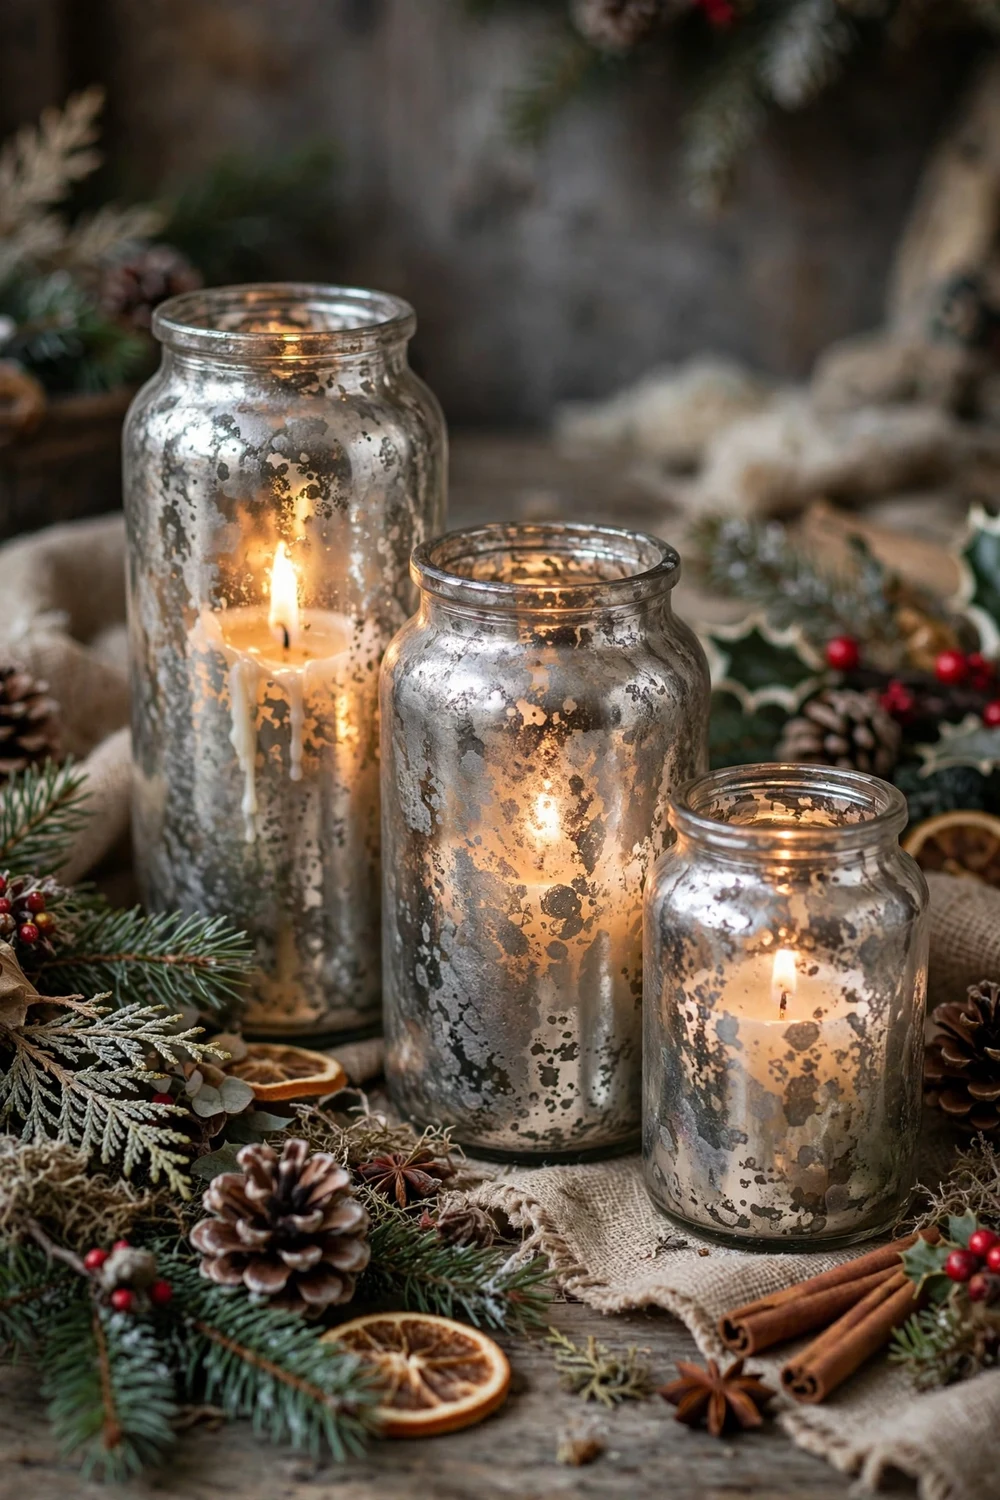
Mercury glass holders cost plenty in stores, but the look is easy to fake. Spray the inside of a clear jar with mirror-effect spray paint in light passes, then spritz water droplets before the final coat for the mottled antique finish. The candlelight reflects off the mottled surface beautifully. Work outdoors or in a ventilated garage. Let the paint cure a full day before placing a candle inside.
Try this: Use gold mirror spray for a warmer vintage tone.
Cost: $| Difficulty: Medium | Time: 30 minutes
5. Pinecone ring holders
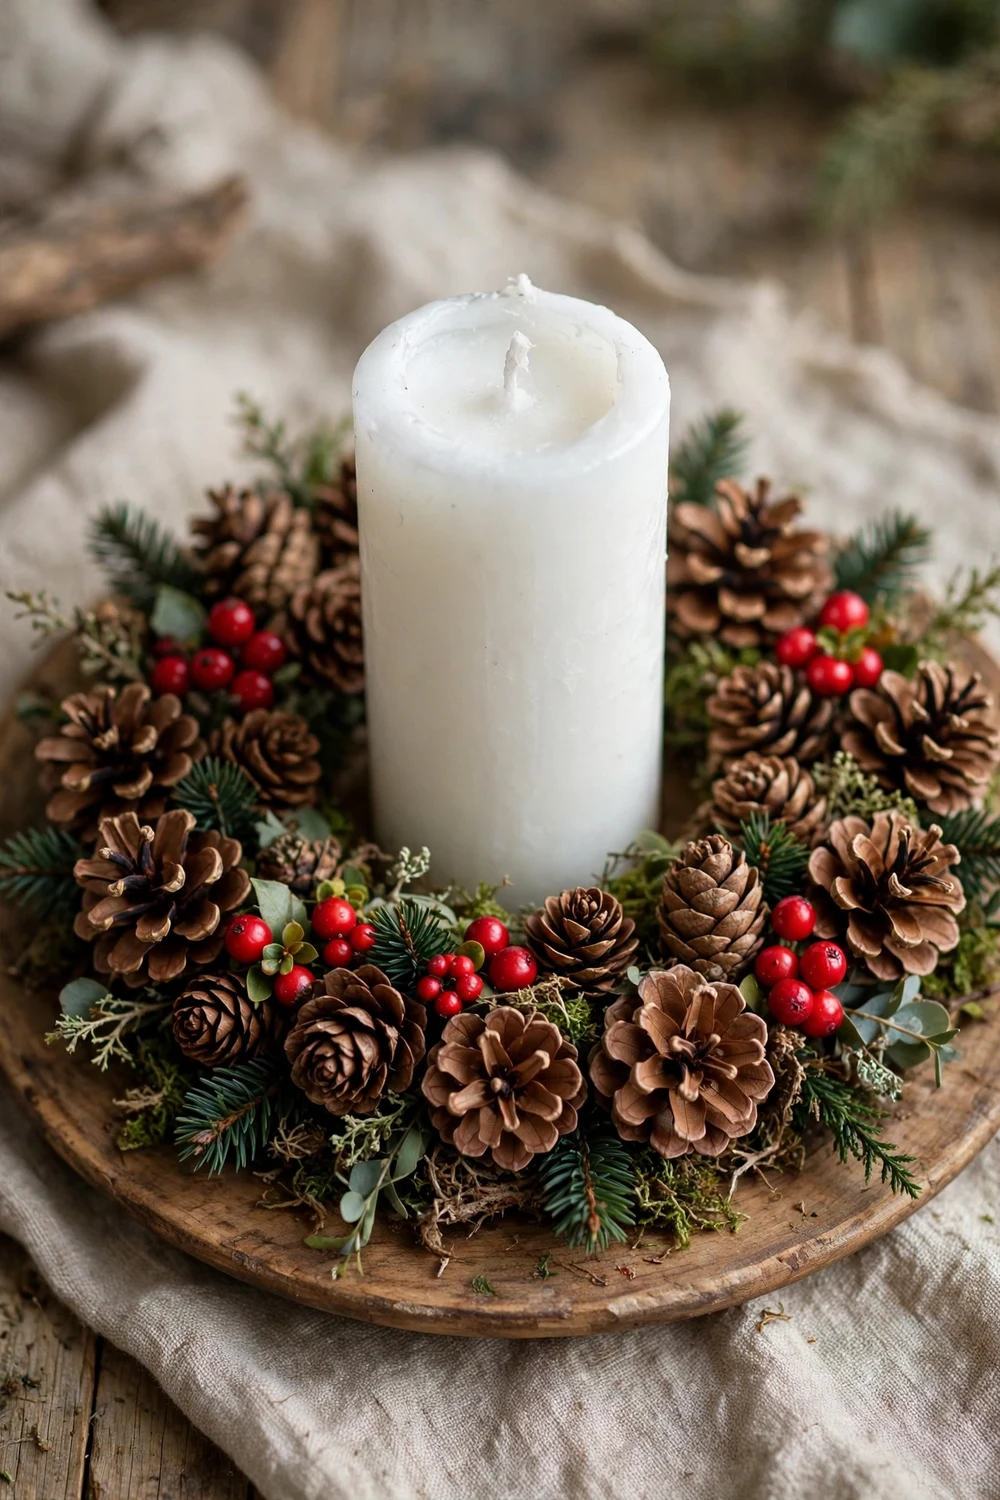
Arrange pinecones in a ring around a pillar candle on a plate or wood slice. Tuck in red berries and a little faux greenery for color. The pinecones form a natural holder that needs no glue at all. Keep the ring at least 2 inches from the flame, and never use this design with a candle that burns down low. An LED pillar removes every worry and still looks great.
Try this: Spray the pinecones lightly with faux snow for a frosted forest look.
Cost: $| Difficulty: Easy | Time: 15 minutes
6. Cranberry floating candles

Fill a wide glass bowl with water, scatter fresh cranberries and a few pine sprigs, and float a candle on top. The red berries bob around the flame and the water magnifies the glow. This makes a striking table centerpiece in five minutes. Use floating candles made for this purpose, since regular tea lights can tip. Replace the water every couple of days to keep it fresh.
Try this: Add a slice of orange to the water for extra color.
Cost: $| Difficulty: Easy | Time: 10 minutes
7. Wood slice tea light holders

Drill shallow holes in a wood slice to fit tea lights snugly. Sand the top smooth and rub in a little food-safe oil to bring out the grain. These rustic holders suit farmhouse tables and cost almost nothing if you have firewood to slice. Use a spade bit slightly wider than your tea lights. Keep real flames in metal cups so wax never touches the wood directly.
Try this: Wood-burn a snowflake on the side for a personal touch.
Cost: $| Difficulty: Medium | Time: 30 minutes
8. Copper spray painted jars

Copper paint turns dollar-store jars into boutique decor. Spray the outside of clean jars with metallic copper paint in two light coats, leaving the inside clear so the candlelight shines through the glass. The warm metal tone pairs with green garlands and brass accents. Spray outdoors and wear a mask. These look expensive grouped in threes on a console table.
Try this: Wrap the jar necks with black ribbon for contrast.
Cost: $| Difficulty: Easy | Time: 20 minutes
9. Salt-frosted hurricane holders

Coat tall hurricane glasses with spray adhesive and roll them in coarse sea salt for an icy, frosted finish. Set a pillar candle inside and the salt diffuses the light softly. The tall glass shields the flame from drafts, which makes this one of the safer designs for real candles. Still, keep them away from table edges where they could get knocked over. A set of two flanks a fireplace nicely.
Try this: Tie a sprig of cedar around the base with twine.
Cost: $| Difficulty: Easy | Time: 20 minutes
10. Twine-wrapped jar holders
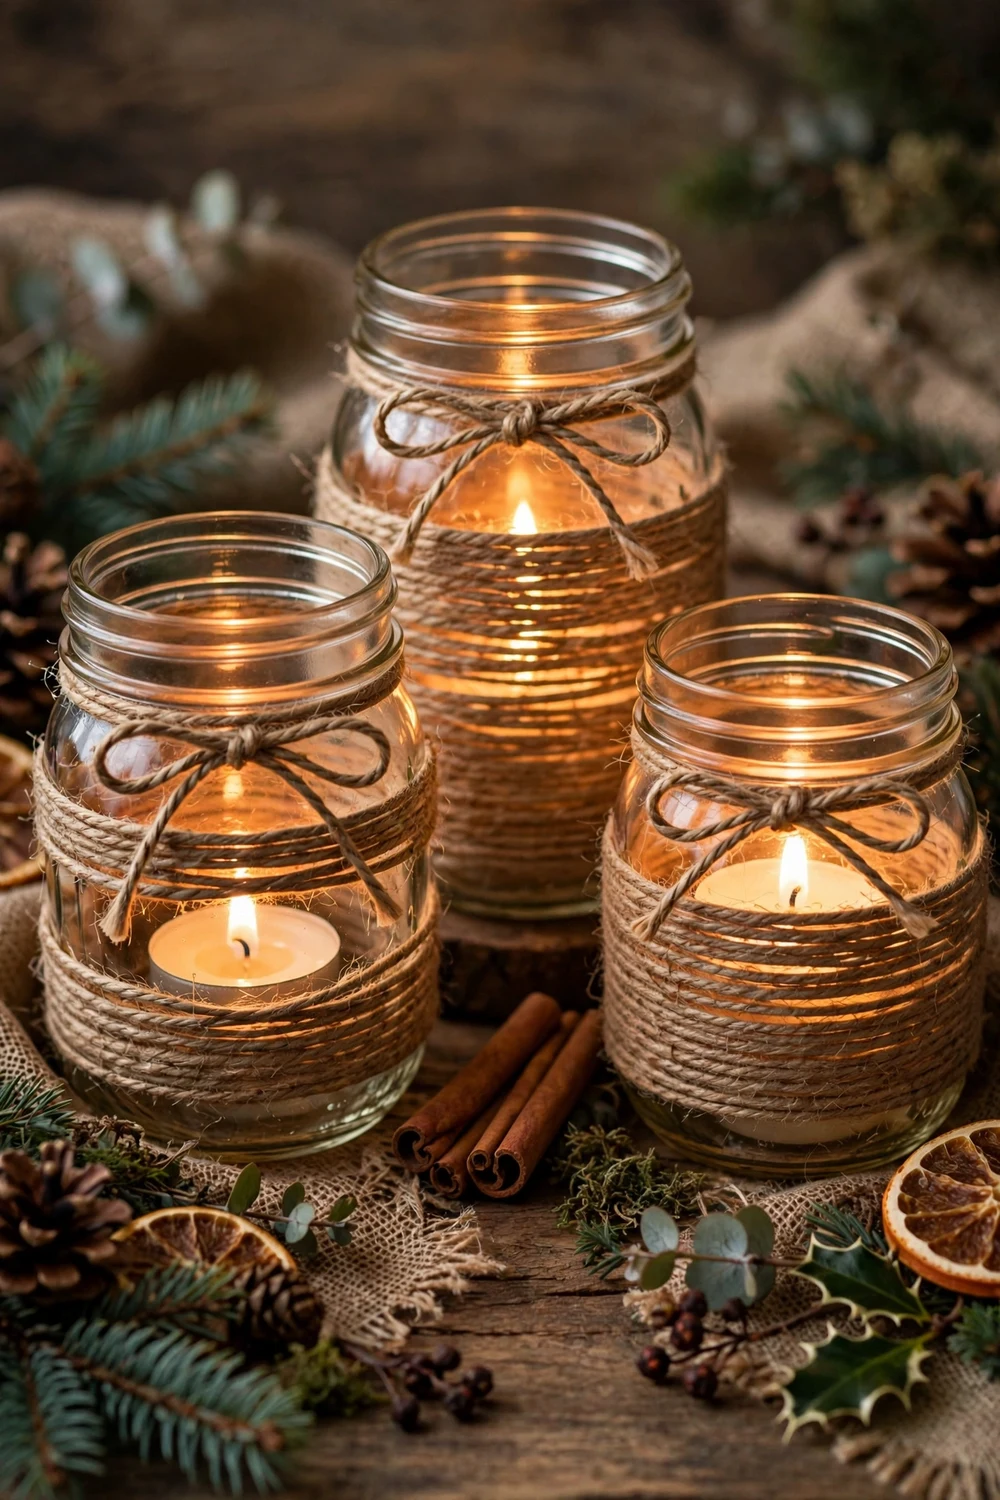
Wrap jute twine around a jar in tight rows, securing the start and end with hot glue. The twine gives a rustic texture and the candlelight peeks through the tiny gaps. Leave a clear band near the top for a cleaner look, or wrap the whole jar for full texture. This is a good project for using up partial twine balls. Pair with plaid ribbon for a cabin feel.
Try this: Wrap in a crisscross pattern instead of straight rows for variety.
Cost: $| Difficulty: Easy | Time: 25 minutes
11. Sheet music decoupage holders

Decoupage copies of vintage Christmas sheet music onto glass holders with Mod Podge. Tear the paper into pieces and overlap them around the jar, sealing with a top coat. The printed notes glow through the paper when the candle is lit. Use copies, never originals. This project suits a music lover’s table and looks thoughtful as a gift. Let the Mod Podge cure overnight before use.
Try this: Tea-stain the paper first for an aged look.
Cost: $| Difficulty: Medium | Time: 30 minutes
12. Concrete tea light holders

Mix quick-set concrete and pour it into small molds, like cut plastic bottles, with a smaller cup pressed in to form the tea light well. Once cured overnight, pop them out and sand the edges smooth. The heavy concrete base makes these the most tip-proof holders on the list. Paint them white or leave them raw gray for a modern look. Wear gloves and a dust mask when mixing concrete.
Try this: Press a sprig of pine into the wet concrete for an imprinted design.
Cost: $| Difficulty: Medium | Time: 40 minutes plus curing
13. Upside-down wine glass holders
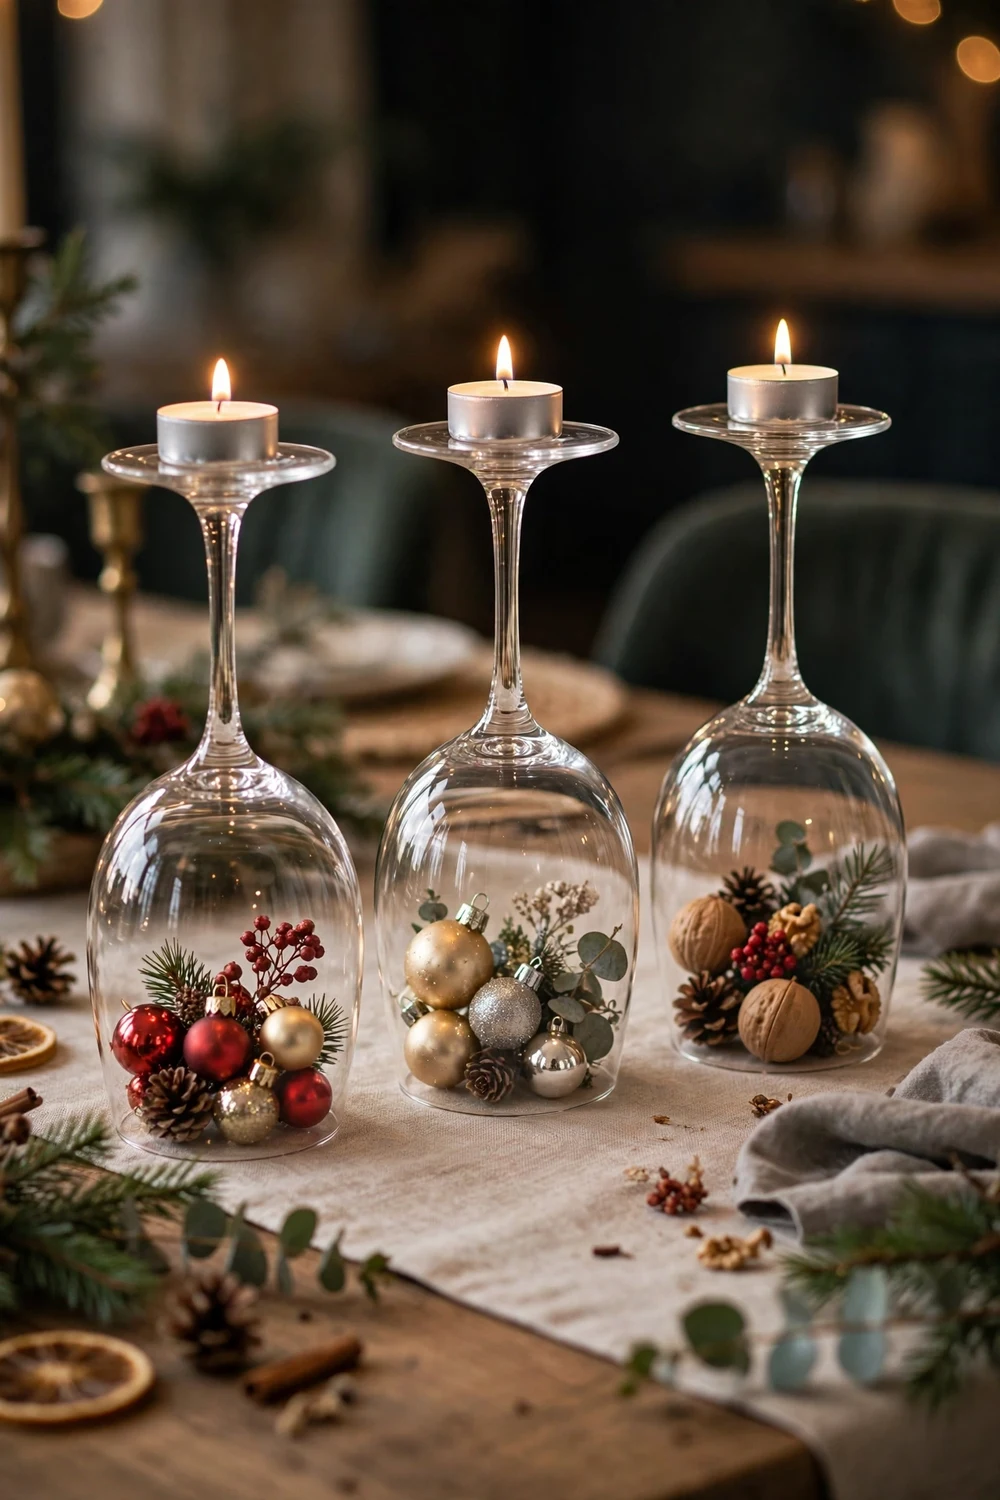
Flip a wine glass upside down over a small ornament, then set a tea light on the base, which is now the top. The ornament sits protected under the glass dome like a snow globe. Use shatterproof ornaments in case of bumps. This trick turns glasses you already own into elegant holders in seconds. Line up three in a row down a dining table for a polished look.
Try this: Add faux snow under the dome around the ornament.
Cost: $| Difficulty: Easy | Time: 5 minutes
14. Birch log tea light holders
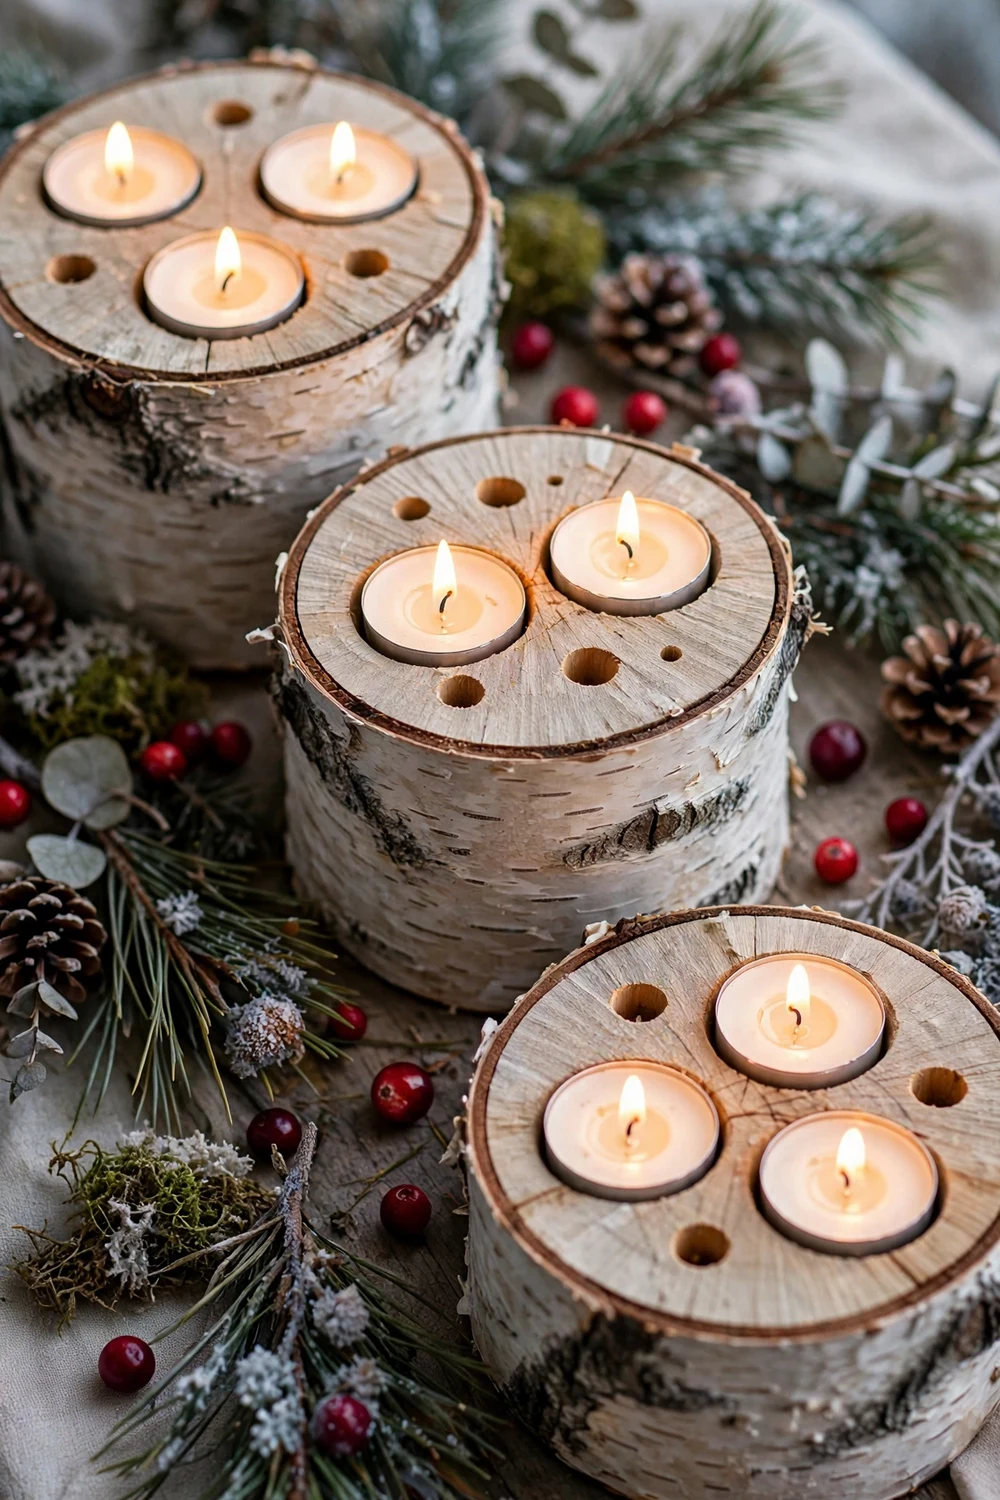
Cut birch branches into 4-inch sections and drill tea light wells in the top. The white bark with dark markings looks like a winter forest. Sand the cut tops smooth and seal with clear matte spray. These bring the outdoors in and pair with plaid and pine decor. As with wood slices, keep real flames in metal cups and never leave them burning unattended.
Try this: Cluster three logs of different heights together.
Cost: $| Difficulty: Medium | Time: 30 minutes
15. Garland wreath ring around a pillar

Shape a small faux garland into a ring and set a pillar candle in the center on a plate. The wreath becomes the holder, framing the candle with green. Keep the garland ring wide so no greenery touches the flame, and trim the candle before it burns low. This takes five minutes and looks like a proper centerpiece. An LED pillar makes it completely worry-free.
Try this: Weave tiny red berries into the ring for color.
Cost: $| Difficulty: Easy | Time: 10 minutes
16. Epsom salt snowy hurricanes
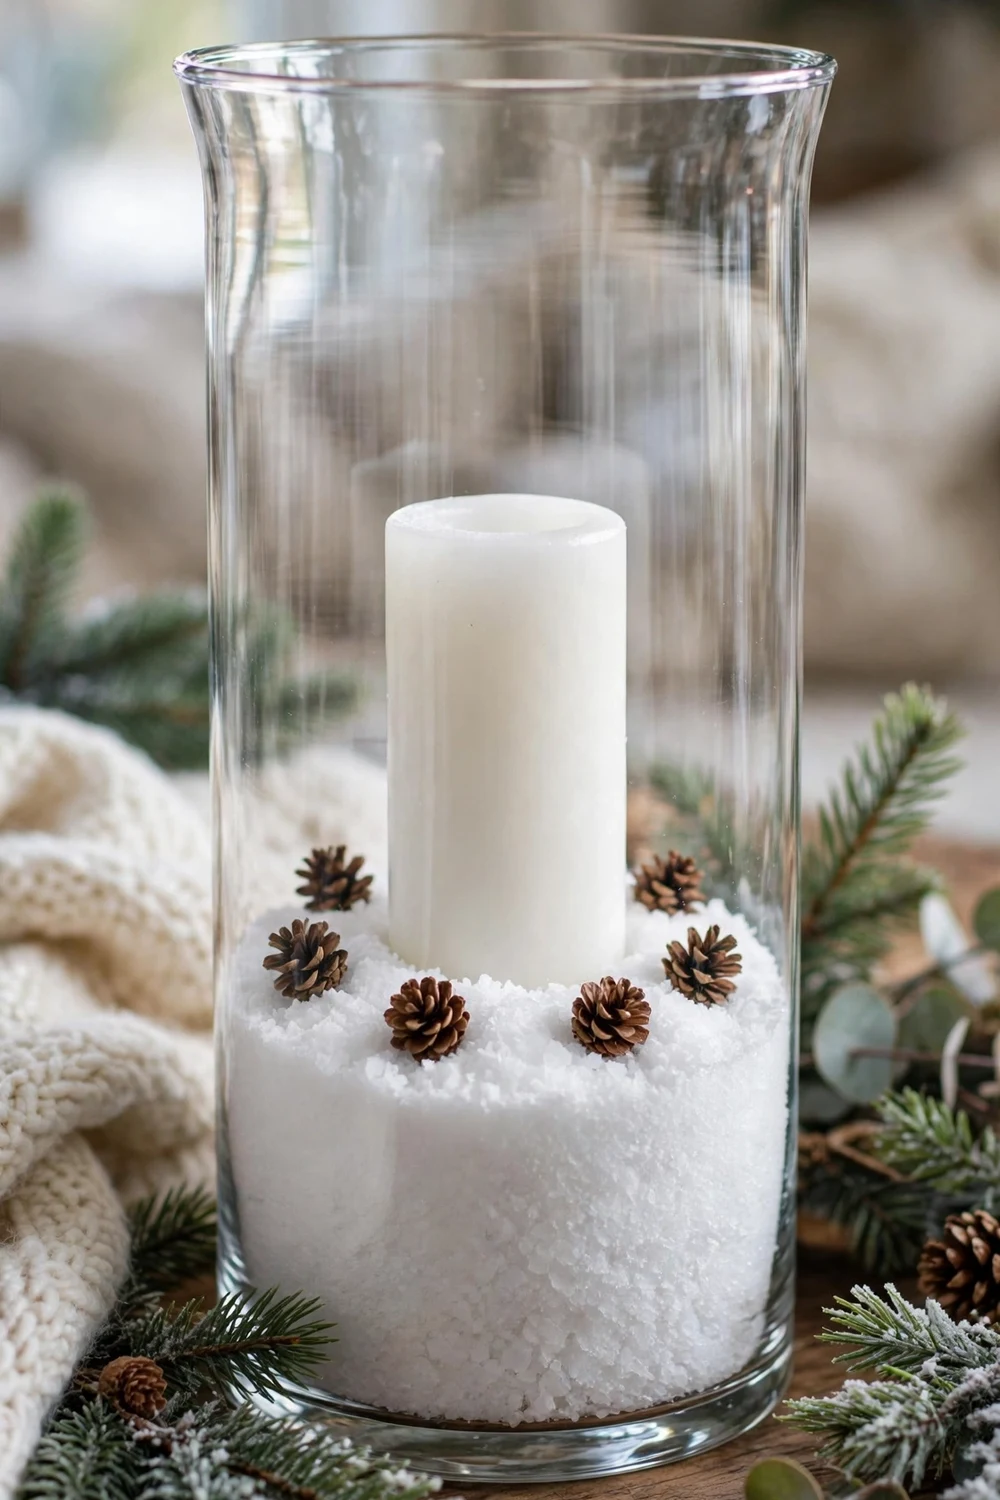
Pour two inches of Epsom salt into a hurricane glass, nestle a pillar candle in the middle, and scatter a few mini pinecones on the salt. It looks like a candle standing in fresh snow. The salt catches dripping wax and keeps the candle steady. When the season ends, the salt rinses out and the glass is ready for spring flowers. This is one of the simplest centerpieces here.
Try this: Mix a few drops of pine essential oil into the salt for scent.
Cost: $| Difficulty: Easy | Time: 10 minutes
17. Plaid ribbon wrapped pillars

Wrap a band of plaid ribbon around a pillar candle and secure it with a pin pushed into the wax, never glue near a flame. Tuck a small pine sprig under the ribbon. The ribbon should sit low on the candle, well below where the flame burns, and come off before the candle burns down to it. Check the ribbon position each time you light the candle. This dresses up plain pillars in seconds.
Try this: Use buffalo check ribbon for a bold cabin look.
Cost: $| Difficulty: Easy | Time: 5 minutes
18. Rosemary sprig tied votives
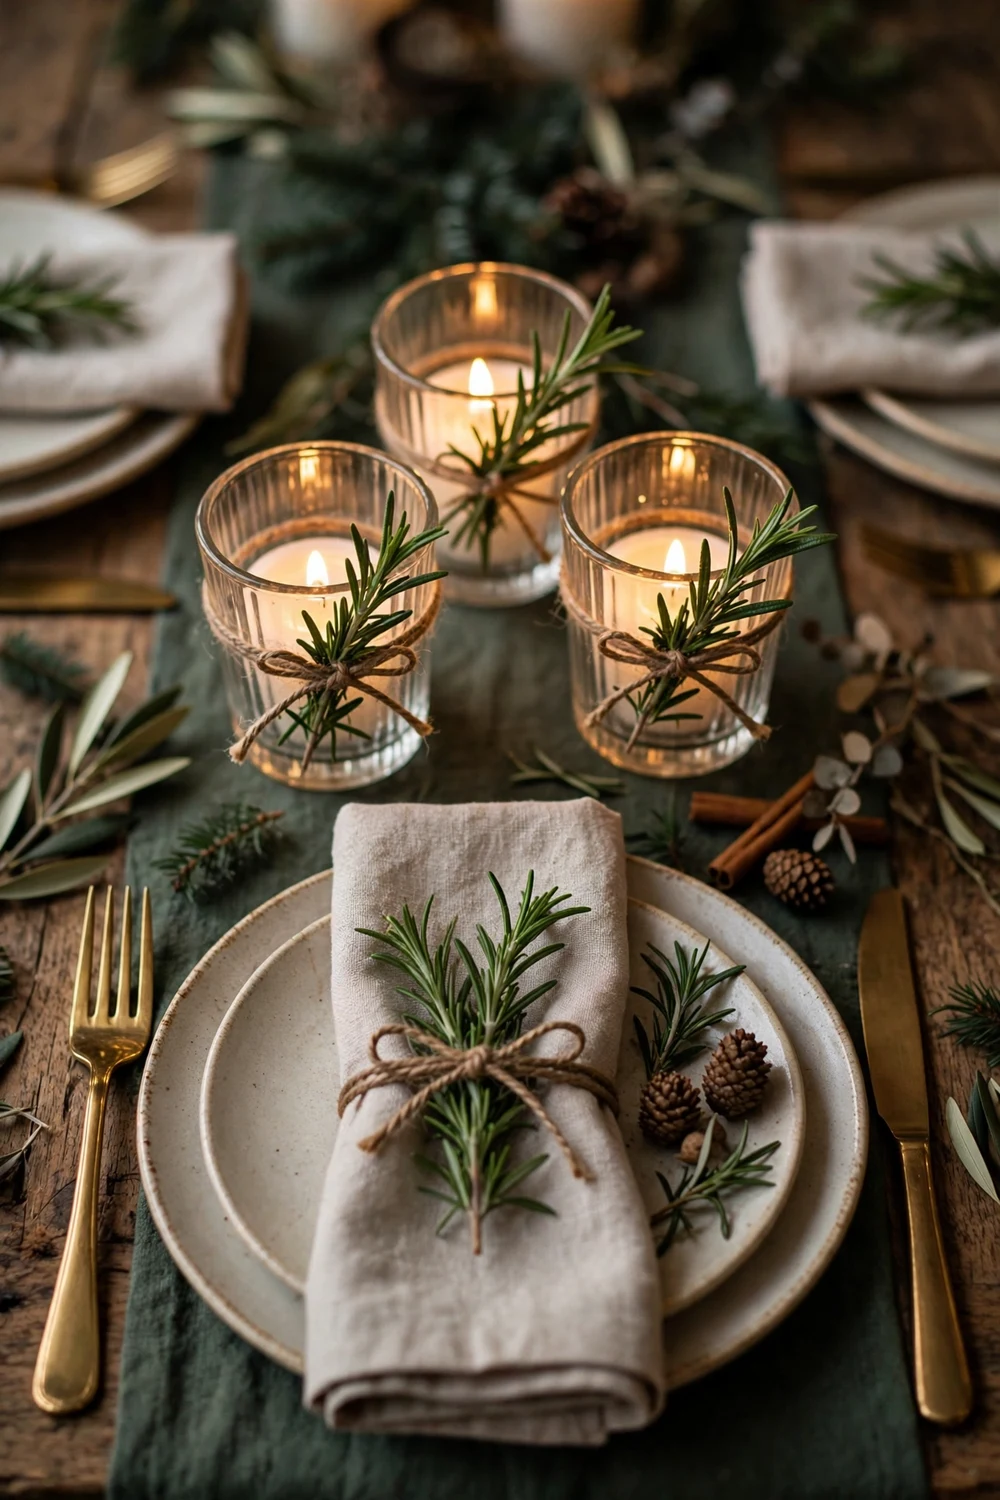
Tie a fresh rosemary sprig around a small votive with twine for a fragrant, natural holder. The rosemary scent rises gently with the candle’s warmth. Keep the sprig low on the glass, away from the flame, and replace it when it dries out, since dried herbs near flames are a risk the holiday electrical safety guidance warns about with any heat source. These double as place settings at a holiday dinner.
Try this: Add a handwritten name tag to the twine for guests.
Cost: $| Difficulty: Easy | Time: 10 minutes
19. Gold leaf rim jars
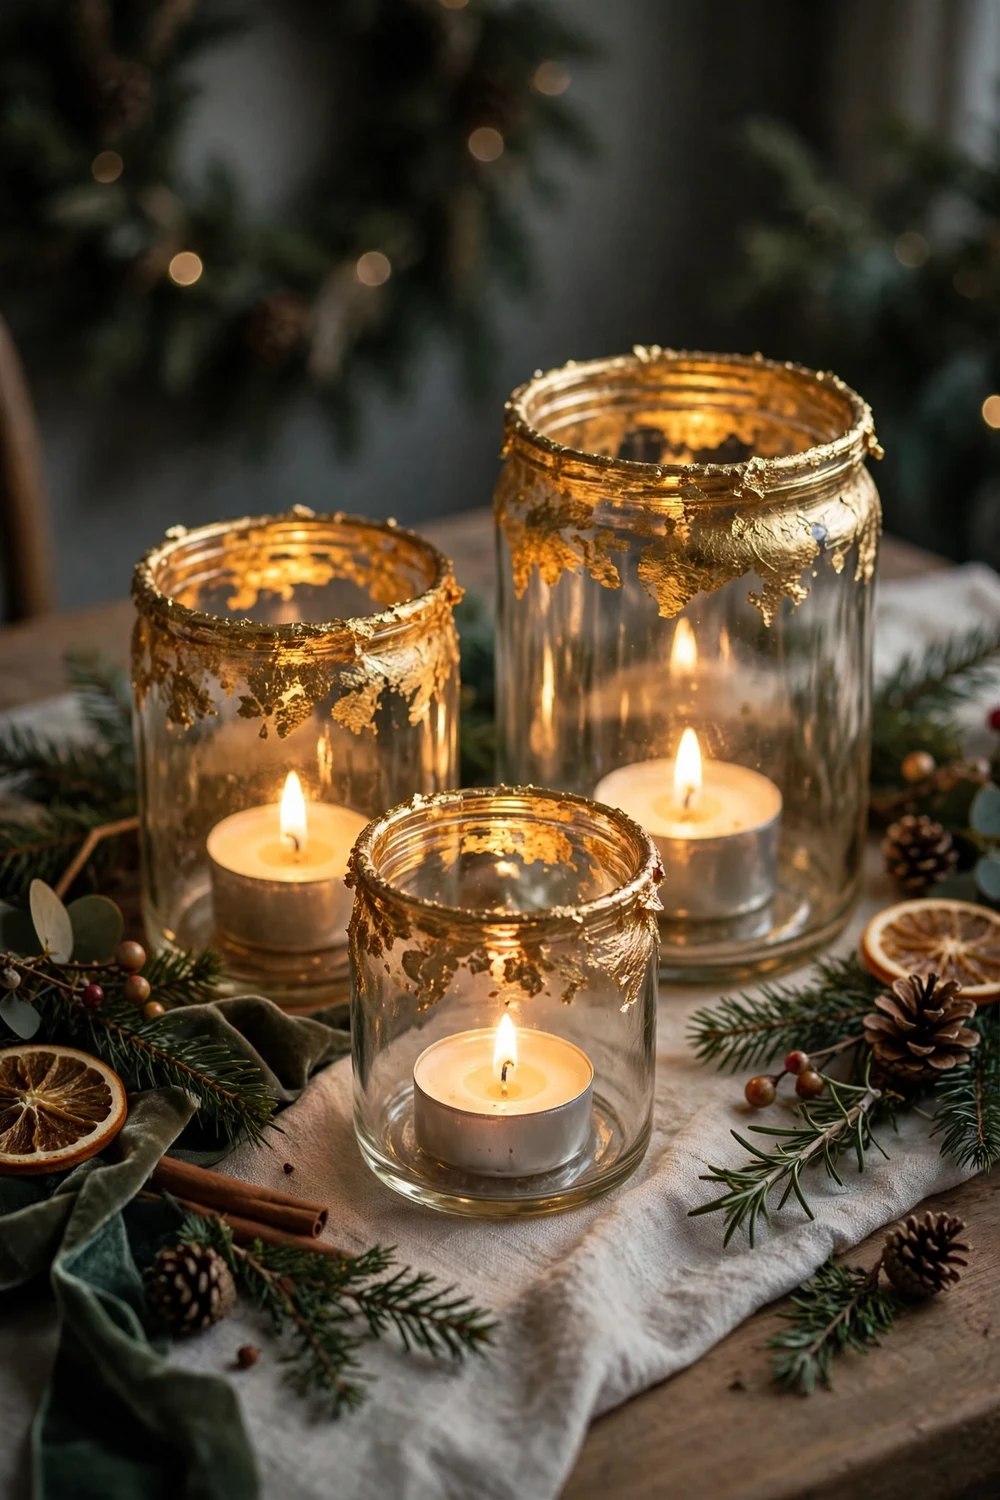
Apply gold leaf sheets to the rims of glass jars with adhesive size for an elegant gilded edge. The gold catches candlelight and looks far more expensive than it is. Work slowly, since gold leaf tears easily, and seal it with a clear top coat. These suit a dressy holiday table. A pack of gold leaf covers a dozen jars, so the per-jar cost stays low.
Try this: Gild only the bottom half of the jar for a dipped effect.
Cost: $| Difficulty: Medium | Time: 30 minutes
20. Yule log tea light holder
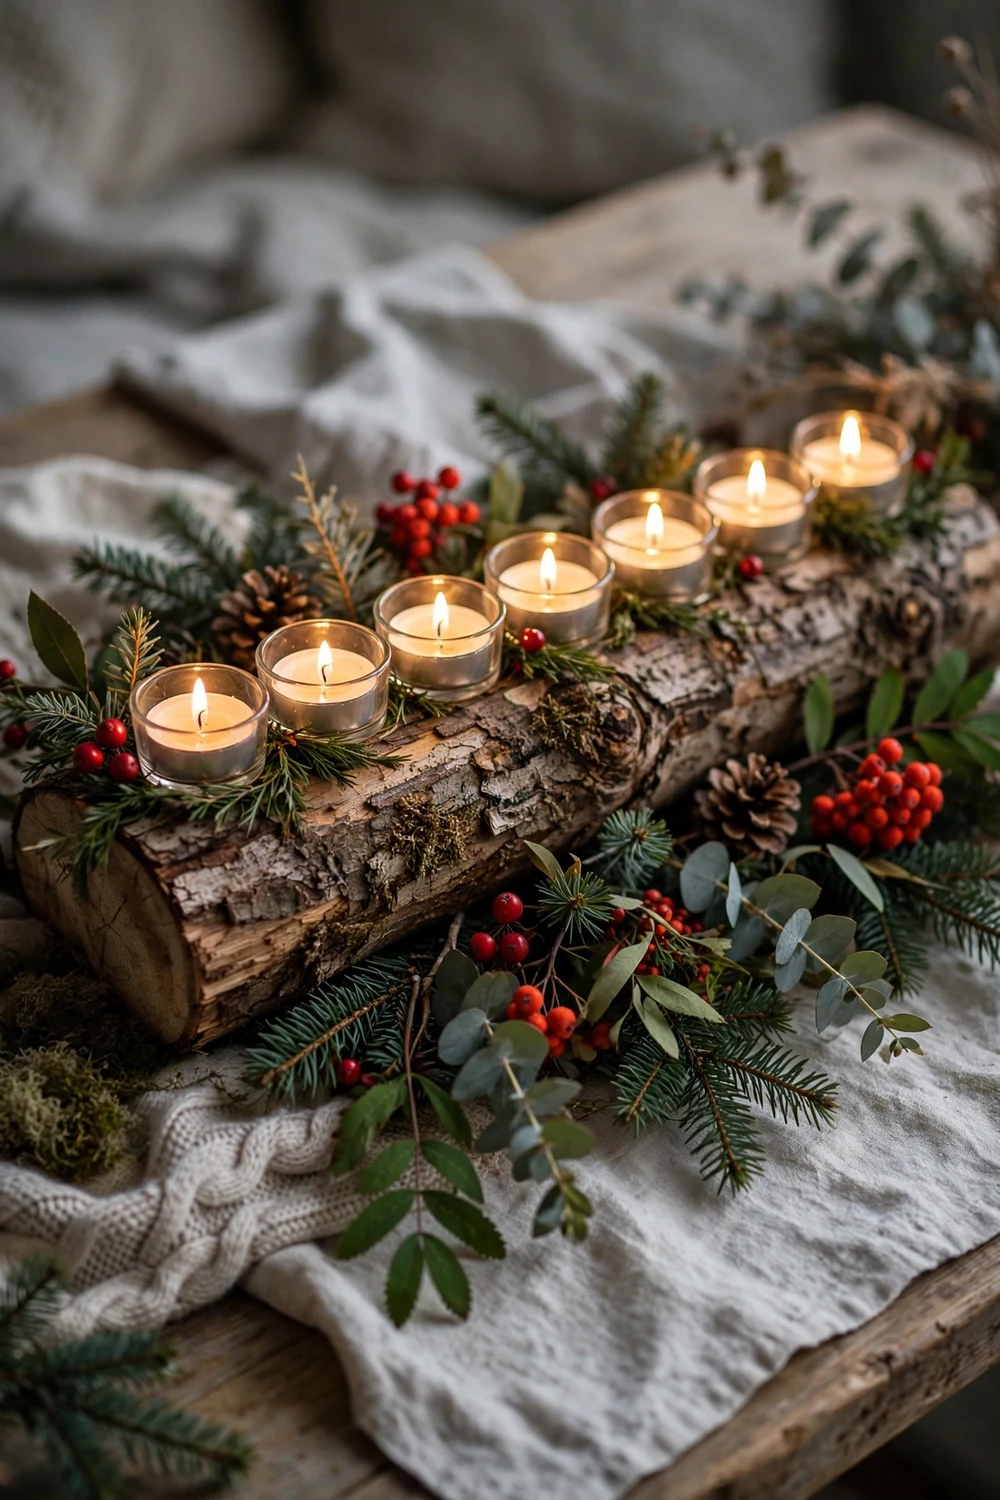
Lay a thick log or branch horizontally and drill a row of tea light wells along the top. Decorate around the base with greenery, berries, and pinecones. This Scandinavian-style holder runs down the center of a dining table and holds six or more lights. Sand it smooth and seal the bark. Use LED tea lights for a worry-free glow all evening, since a long row of real flames needs watching.
Try this: Add small brass bells along the greenery for a festive jingle.
Cost: $| Difficulty: Medium | Time: 40 minutes
Candle types compared for safety
Match the candle to the holder and the room. Real flames need more care than LEDs.
More holiday table ideas
Set your candle holders on a festive base with these flower centerpiece ideas that work from Thanksgiving through Christmas.
For the rest of the room, these affordable mantle Christmas decor ideas pair well with glowing candle holders.
Frequently asked questions
Are DIY candle holders safe?
Yes, when you match the candle to the holder. Use LED tea lights near dried greenery, fabric, or paper, and keep real flames in glass or metal containers away from anything flammable. Never leave any burning candle unattended.
Should I use real or LED candles in DIY holders?
LED candles are the safer pick for most DIY holders, especially those with dried materials, ribbon, or herbs. They look warm and realistic now, and you can leave them glowing without worry. Save real candles for sturdy glass hurricanes on clear tables.
How far should dried greenery be from a flame?
Keep dried greenery, pinecones, and fabric at least 12 inches from any open flame. Dried materials catch fire fast. If your design puts decor close to the candle, switch to an LED candle.
How do I clean wax out of jars?
Pour out the liquid wax, then place the jar in the freezer for an hour. The remaining wax shrinks and pops out. Wash with hot soapy water. Never pour wax down the drain.
Can kids help make candle holders?
Yes. Painting, wrapping twine, and arranging pinecones are all kid-friendly. Keep children away from hot glue guns, spray paint, and any step involving real flames. Let kids use LED tea lights in their finished holders.
Twenty holders, most under $8, and not one of them needs special skills. Start with the jars you already own, pick the idea that matches your table, and enjoy the glow.
More ideas you’ll love: 15 DIY Galentines Decor Ideas for a Pretty February Party, and 15 Christmas Floating Candle Centerpieces.


