


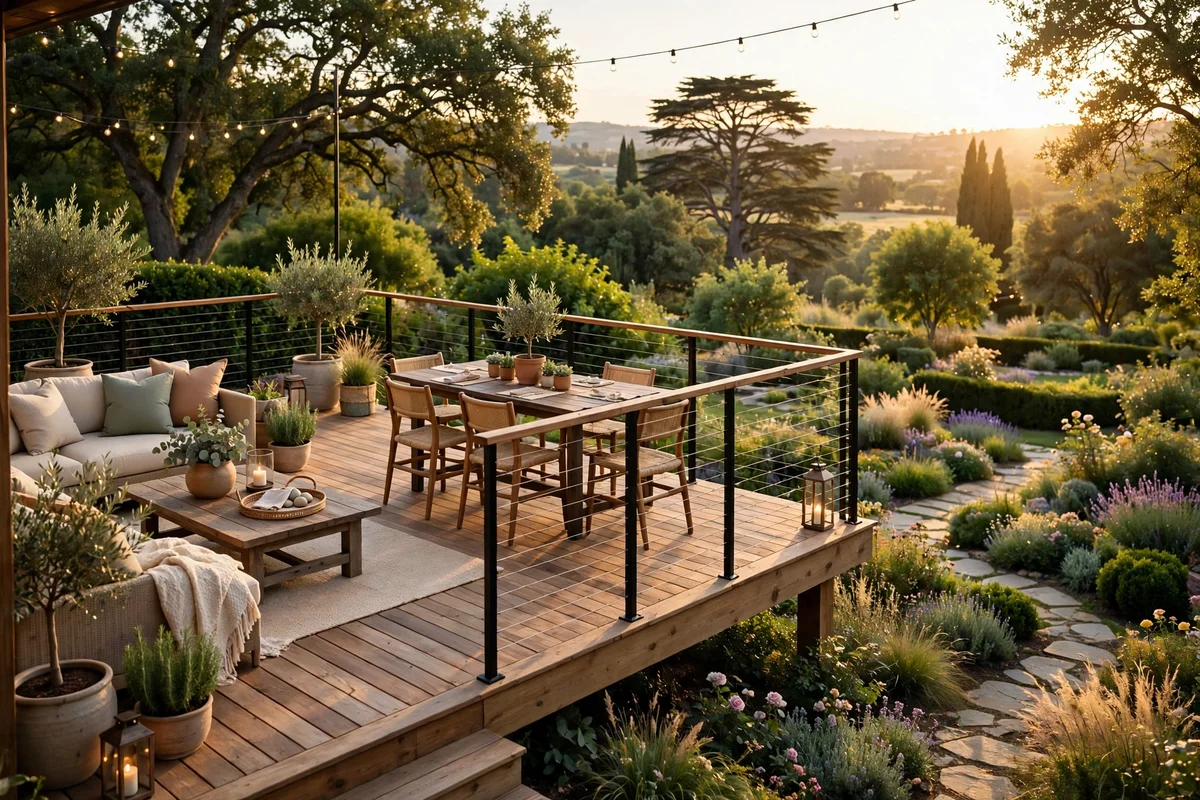
A deck railing does more work than almost anything else outside your house. It keeps people safe, frames your view, and sets the style for the whole backyard. When it looks tired, wobbly, or dated, the entire deck feels off, even if the boards are fine.
This guide rounds up 20 fence and deck railing ideas, from budget-friendly wood and wire to glass panels and cable systems. Whether you are refreshing a small patio deck or rebuilding rails along a full fence line, you will find a style that fits your budget, your tools, and your local code. Our back deck railing was the one spot I cropped out of every photo for two summers, so I know the feeling.
Quick takeaways
- Match the railing material to your climate: vinyl and aluminum shrug off rain, while cedar needs yearly sealing.
- Open designs like cable and glass keep views; lattice and hog wire add privacy on a budget.
- Most US codes require guardrails at least 36 inches high with baluster gaps under 4 inches; always check your local rules before you build.
- Structural railings and anything load-bearing belong to a licensed pro; decorative updates are fair game for DIY.
- Lighting and planters turn a plain rail into a feature for very little money.
1. Classic white vinyl rails

White vinyl rails give you a crisp, finished look without a paintbrush in sight. The PVC sleeves slide over pressure-treated posts, and pre-routed rails accept square balusters in minutes. They never need staining, and a yearly wash with soap and water keeps them bright. Expect to pay roughly $40 to $70 per linear foot installed, with most average decks finished in one to two days. Choose a system with aluminum reinforcement inside the bottom rail so long spans stay straight.
Try this: add flat solar post caps in white to match; they drop onto standard 4×4 posts with no wiring.
Cost: $$ | Difficulty: Easy
2. Horizontal cedar slats

Run 1×4 or 1×6 cedar boards horizontally between posts for a fence-like rail that reads modern and warm. Keep gaps at 3 inches or less to stay inside the 4-inch sphere rule most codes require. Cedar resists rot naturally, but plan on a clear water-repellent sealer every year or two if you want to keep the honey tone; left alone it silvers gracefully. Material cost runs about $30 to $50 per linear foot. This is one of the most DIY-friendly upgrades on this list.
Try this: stain the posts a darker shade than the slats for a two-tone look that hides scuffs.
Cost: $$ | Difficulty: Easy
3. Black aluminum balusters

Slim black aluminum balusters paired with wood posts and rails give a deck a tailored, updated feel for relatively little money. The powder-coated finish resists chipping and rust, and the thin profile opens up the view compared with chunky wood spindles. Many kits include brackets that screw into existing rails, so you can retrofit without rebuilding the frame. Budget around $50 to $80 per linear foot installed. They work with wood, composite, or vinyl top rails.
Try this: use round balusters instead of square for a slightly softer, more traditional read.
Cost: $$ | Difficulty: Easy to moderate
4. Stainless cable rails

Horizontal stainless cables nearly disappear, so the landscape becomes the star. Use 1/8-inch 316-grade stainless cable with a tensioning kit; plan on re-tensioning every year or two as the cables stretch. Posts need to be beefy, because cable puts real pull on the end posts, which is why many installers use 4×4 steel-reinforced posts at corners. Installed cost lands around $70 to $120 per linear foot. Cable rails suit scenic lots and modern homes best.
Try this: run the cables through wood posts with a slightly oversized drill bit and seal the holes to block water.
Cost: $$$ | Difficulty: Moderate
5. Frameless glass panels

Tempered glass panels deliver the clearest view of any railing on this list. Panels are typically 1/4-inch tempered glass set in slim metal shoes or held by clamps between posts. They block wind without blocking light, which extends the season on exposed decks. The trade-off is cleaning: plan on a squeegee pass every week or two, and skip them if you have hard water from nearby sprinklers. Budget roughly $100 to $200 per linear foot installed, and hire a pro for the glass setting.
Try this: add a wood drink rail on top of the glass shoe for a warm handhold that doubles as a shelf.
Cost: $$$$ | Difficulty: Pro install
6. Wrought iron scrollwork

Scrollwork iron panels bring old-house character that no other material matches. Modern versions use powder-coated steel or aluminum shaped like traditional wrought iron, which cuts both weight and price. Panels come in standard widths that fit between 4×4 posts, or you can order custom widths for odd spans. Expect about $60 to $110 per linear foot installed. Check that the panel design keeps openings under 4 inches if the deck sits more than 30 inches off the ground.
Try this: pair black iron panels with a stained wood top rail to tie them into an existing deck.
Cost: $$$ | Difficulty: Moderate
7. Composite rails with a drink rail

A drink rail is a flat, wide top rail, usually a 2×6 or a 5.5-inch composite board, that works as a shelf for cups, plates, and small planters. Build it over composite or vinyl railing systems from brands like Trex or Fiberon for a low-maintenance combo. The flat cap also gives you a comfortable handhold. Installed cost runs about $60 to $90 per linear foot. It is one of the most practical upgrades for anyone who entertains on the deck.
Try this: leave a 1-inch overhang on the inside edge so drips fall clear of the balusters.
Cost: $$$ | Difficulty: Moderate
8. Hog wire panels

Welded wire livestock panels, often called hog wire, framed in cedar or pressure-treated lumber make a sturdy farmhouse railing for very little money. The 4×4-inch grid reads airy and modern against wood, and the panels are rigid enough to span 6 to 8 feet between posts. Buy galvanized panels and frame them so no sharp cut ends are exposed. DIY cost runs about $25 to $45 per linear foot. Seal the wood frame well, since the metal and wood meet at spots that trap moisture.
Try this: paint the frame black and leave the wire galvanized for a high-contrast look.
Cost: $ | Difficulty: Easy
9. Rope baluster rails

Thick manila or synthetic rope strung between posts gives lake-house and coastal decks an easy, relaxed feel. Use 1-inch or larger rope with knots or rope clamps at each post, and choose synthetic rope if the rail faces full sun and rain, since natural fiber breaks down faster. Rope stretches and sags over time, so check with your local inspector before using it as a guardrail on an elevated deck. Cost is low, roughly $15 to $30 per linear foot.
Try this: wrap the rope ends with whipping twine and a dab of glue for a clean nautical finish.
Cost: $ | Difficulty: Easy
10. Lattice privacy screens

When the neighbors are close, lattice panels between railing posts add privacy without the cost of a full fence. Standard 2×8-foot vinyl or wood lattice drops into a simple frame; paint wood lattice to match the deck for a built-in look. Lattice also cuts wind, which makes the deck usable on breezy days. Budget about $20 to $40 per linear foot. Leave the bottom of the frame an inch off the deck boards so water drains instead of pooling.
Try this: train a clematis or jasmine up one panel for a living privacy screen by next summer.
Cost: $ | Difficulty: Easy
11. Reclaimed wood rails

Barn boards and salvaged lumber give railings a one-of-a-kind texture that new wood cannot fake. Sort your stock carefully: reject boards with soft rot, deep splits, or old lead paint, and plane the handrail smooth so nobody gets splinters. Because board widths vary, plan the layout on the ground before you cut. Cost depends on your source, often $20 to $40 per linear foot if you salvage locally. Seal all six sides of each board before install for the longest life.
Try this: use reclaimed boards for the balusters and new pressure-treated lumber for the structural rails underneath.
Cost: $ | Difficulty: Moderate
12. Metal mesh infill panels

Welded stainless wire mesh set into metal or wood frames looks sharp on contemporary decks and keeps small pets safely inside. The tight grid blocks toys and sippy cups from rolling through, which parents of toddlers appreciate. Panels cut to size with an angle grinder, then drop into routed frames; stainless holds up far better than galvanized near coasts. Expect about $45 to $75 per linear foot. It pairs especially well with black aluminum posts.
Try this: order panels slightly oversized and trim on site for a gap-free fit.
Cost: $$ | Difficulty: Moderate
13. Stone columns with wood rails

Short stone columns between wood rail sections give a deck a permanent, crafted feel. Build the columns from natural stone veneer over concrete block, or dry-stack real fieldstone if you have masonry skills. The stone bases also protect the wood posts from splashback and mower bumps. This is a bigger project, roughly $80 to $150 per linear foot, and the footings need to go below the frost line in cold climates. Cap each column with a flat stone or precast cap for a finished top.
Try this: run low-voltage lights up through one column to wash the stone with light at night.
Cost: $$$$ | Difficulty: Pro install
14. X-pattern ranch rails

The crossbuck or X pattern borrowed from ranch fencing brings instant character to farmhouse and cottage decks. Build each section from 2x4s set diagonally inside a rectangular frame, with the frame carrying the structural load. The pattern reads busy up close, so keep the stain or paint color simple and consistent. DIY cost is modest, about $25 to $40 per linear foot. Cut all the X pieces with the same jig so every section matches.
Try this: add a second horizontal rail at mid-height behind the X for extra stiffness on long spans.
Cost: $ | Difficulty: Moderate
15. Copper post caps and accents

You do not need to rebuild the rail to change its look. Solid copper post caps, at $8 to $20 each, age into a soft brown patina that flatters both stained wood and composite. For a bigger statement, clad the posts in copper flashing or add copper pipe as a handrail over wood posts. Copper is naturally rot-resistant, which is why it has been used on roofs for centuries. It is a weekend project with outsized visual payoff.
Try this: mix copper caps with black balusters for a warm-and-dark combination that suits craftsman homes.
Cost: $ | Difficulty: Easy
16. Planter box rail toppers

Shallow planter boxes that sit on or hang from the top rail turn the railing into a garden bed. Build boxes from 2×6 cedar about 6 inches deep, line them with landscape fabric, and drill drainage holes so roots never sit wet. Trailing plants like sweet potato vine and wave petunias spill over the outside, while herbs stay within reach on the inside. Cost runs $10 to $25 per linear foot plus plants. Water carefully so runoff does not stain the deck below.
Try this: plant the boxes with the same flowers as your porch pots for a pulled-together look.
Cost: $ | Difficulty: Easy
17. Built-in bench railing

A wide bench built along the rail edge gives you seating and a guardrail in one structure. Make the seat about 18 inches deep and 17 to 19 inches high, with the backrest rising to the required guardrail height above the deck. This works best on ground-level or low decks where seating does not fight the view. Budget roughly $40 to $70 per linear foot. Confirm the finished heights with your local code before you build, since benches near railings have specific rules in many areas.
Try this: hinge the seat lids to create dry storage for cushions underneath.
Cost: $$ | Difficulty: Moderate
18. Solar post cap lighting

Solar post caps charge by day and glow automatically at dusk, marking the deck perimeter with zero wiring. Good caps cost $10 to $25 each and fit standard 4×4 or 6×6 posts; look for warm white LEDs around 2700K for a cozy tone rather than harsh blue. They will not replace real task lighting, but they make steps and edges visible after dark. For wired lighting or anything near water, hire a licensed electrician and use GFCI-protected circuits.
Try this: put solar caps on every other post for a rhythm of light that still reads clearly.
Cost: $ | Difficulty: Easy
19. Curved top rails

A gently curved top rail softens a deck with rounded edges and feels great under the hand. Builders laminate thin strips of wood over a curved form, or order bent railing sections from a millwork shop for composite systems. This is a custom detail, so expect roughly $70 to $110 per linear foot and a longer lead time. It suits decks with curved boarders or rounded bump-outs, where a straight rail would look out of place.
Try this: echo the curve in a matching curved bench for a deck that feels designed, not assembled.
Cost: $$$ | Difficulty: Pro install
20. Mixed wood and steel

Warm wood handrails over slim black steel frames hit the sweet spot between rustic and industrial. The steel posts can be thinner than wood posts for the same strength, which opens the view, while the wood top stays comfortable to grip. Use exterior-rated steel with a powder-coat finish, and isolate the wood-to-metal joints with a bituminous membrane so trapped water does not rot the wood. Installed cost runs about $60 to $100 per linear foot.
Try this: match the steel color to your window frames or door hardware for a cohesive exterior.
Cost: $$$ | Difficulty: Moderate to pro
Railing materials compared
Use this quick comparison to narrow the field before you price a specific design.
How to choose the right railing
Start with your view. If you paid for a landscape, a lake, or a sunset, pick an open design like cable, glass, or slim aluminum so the railing does not undo it. If the neighbors are close, lean toward lattice, hog wire with plantings, or taller privacy sections.
Next, be honest about maintenance. Wood asks for stain or sealer on a schedule; vinyl, aluminum, and composite ask for almost nothing. If the deck itself needs attention first, these patio backyard deck designs pair well with any railing style on this list.
Finally, match the railing to the house. A farmhouse loves hog wire and X-pattern rails; a mid-century ranch suits horizontal slats; a colonial looks right in white vinyl or iron scrollwork. When in doubt, echo a material that already appears on your exterior.
Mistakes to avoid
The most expensive mistake is building first and checking code second. Measure your required guardrail height and baluster spacing before you buy materials, because an inspector can make you tear out a finished rail. The second mistake is undersized posts: cable and glass systems put real force on end and corner posts, so follow the manufacturer’s post specs exactly.
Do not forget water. Cap every post, slope flat rails slightly so water runs off, and keep the bottom of wood frames off the deck surface. If you are extending the project beyond the deck, these privacy metal fence ideas keep the fence line looking consistent with the new rails. And if a pergola is on the wish list too, here is how to build a DIY pergola in 8 steps to plan both projects together.
Railing safety and building codes
Deck railings are safety equipment, not just trim. In most US jurisdictions, the International Residential Code requires guardrails at least 36 inches high on decks more than 30 inches above the ground, with openings small enough that a 4-inch sphere cannot pass through. Railings must also resist a 200-pound concentrated load, which rules out flimsy fasteners and undersized posts.
Codes vary by state and municipality, and some areas require permits for railing replacement, so check with your local building department before you start. The InterNACHI deck inspection guide is a useful read on what inspectors look for, from ledger connections to rail strength. For manufactured systems, follow the railing manufacturer’s installation specs to the letter, since code approval depends on it.
Hire a licensed contractor for anything structural: guardrails on elevated decks, stairs, and any rail that people will lean on. Decorative updates like post caps, planter boxes, and solar lights are safe DIY territory. For wired lighting, hire a licensed electrician and use GFCI-protected circuits.
Frequently asked questions
How high does a deck railing need to be?
Most US residential codes require guardrails at least 36 inches tall measured from the deck surface, on any deck more than 30 inches above grade. Some local codes require 42 inches, so confirm with your building department.
How far apart can balusters be?
Openings must be small enough that a 4-inch-diameter sphere cannot pass through. That usually means balusters spaced about 3.5 to 4 inches apart, depending on their width.
What is the cheapest deck railing option?
Pressure-treated wood with simple 2×2 balusters is typically the cheapest code-compliant option, often $25 to $40 per linear foot DIY. Hog wire panels and rope-look rails cost similarly little but need a code check for elevated decks.
Are horizontal cable railings safe for kids?
Cables meet code when properly tensioned with gaps under 4 inches, but the horizontal lines can tempt children to climb like a ladder. Many families with small kids choose vertical balusters or mesh panels instead.
Can I install deck railing myself?
Yes for most surface-mounted and kit systems if you are comfortable with a drill and a level. Hire a licensed pro for structural guardrails on elevated decks, stairs, glass panel setting, and anything the manufacturer flags as pro-install.
How do I keep glass railing panels clean?
A squeegee with water and a splash of white vinegar handles most grime. Clean every week or two, and redirect sprinklers so hard water never dries on the panels.
Conclusion
The right railing makes a deck feel finished, safe, and fully yours. Pick the material that fits your climate and your maintenance appetite, confirm the code numbers before you build, and add one personal touch, like lighting or planters, that makes the rail feel like part of the garden. Your deck will thank you every time you step outside.


